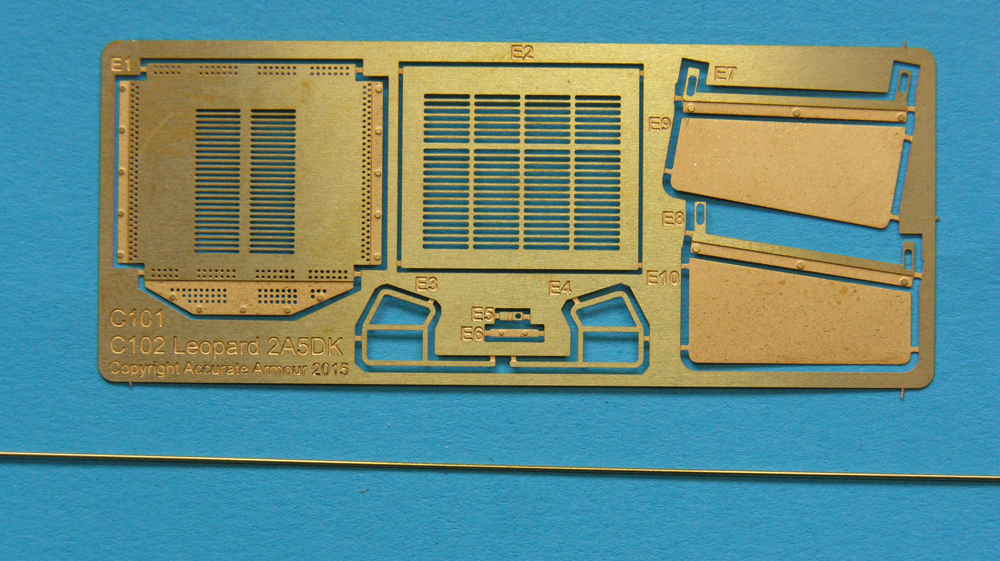
C101 (for Tamiya)
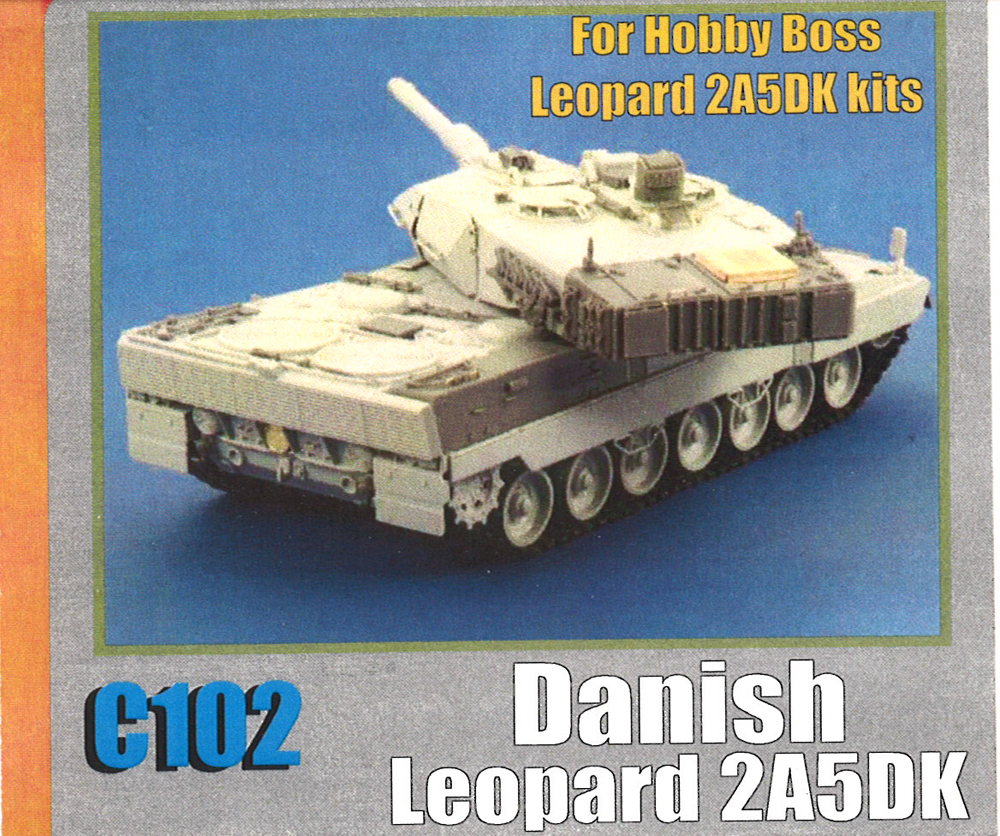
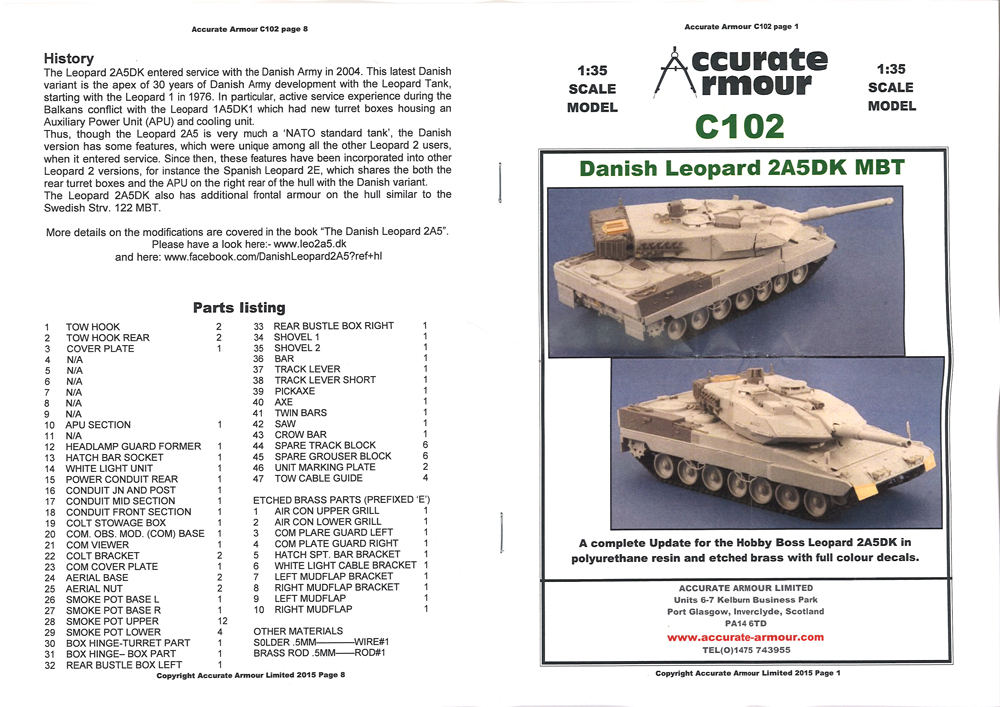
C102 (for Hobby Boss)
Scale: 1.35
Rating: 95%
Media: Resin, photo-etch, brass wire and water-slide decals
Reviewed by Michael Shackleton
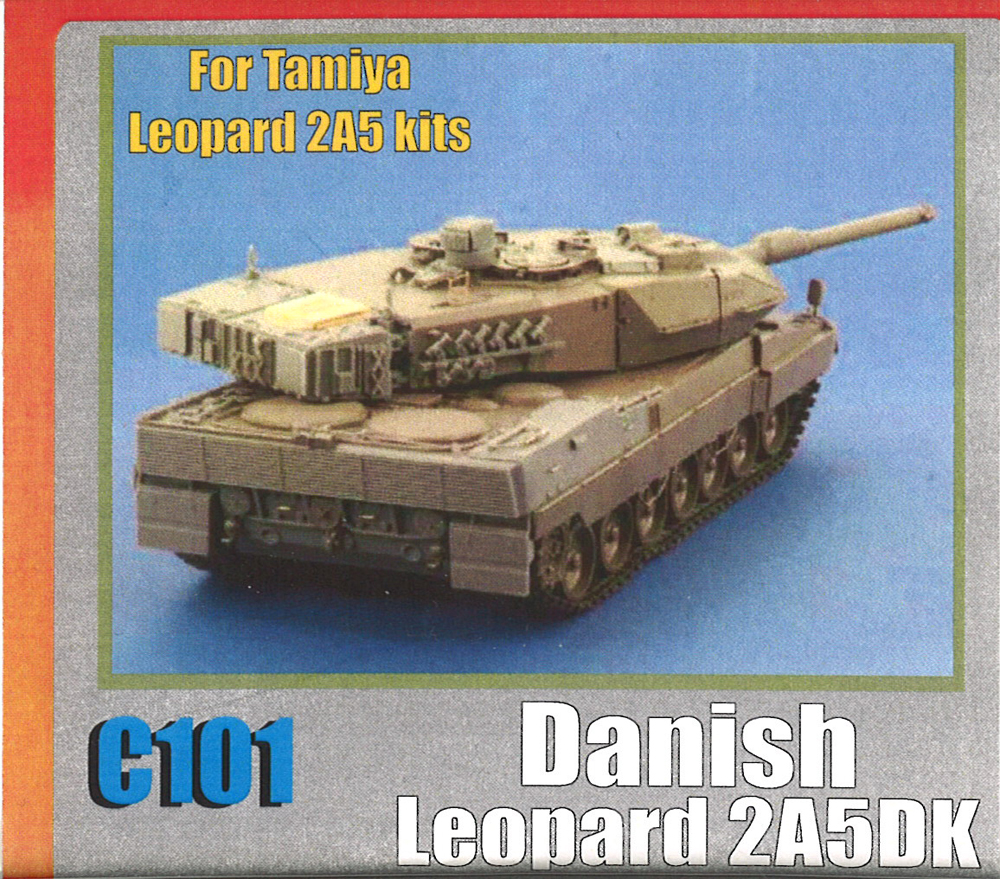
In recent times, Accurate Armour have been more well-known for their British-related subjects. This conversion therefore came as something of a surprise - a somewhat esoteric Danish version of a well-known European main battle tank.
The Danish Army ordered fifty-one second-hand Leopard 2A4s from the German Army in 1997. These would be upgraded to 2A5 standard by the manufacturers, Krauss-Maffei in Munich. Lessons learnt from operating Leopard 1A5DK and 1A5DK1 with UNPROFOR, SFOR/ IFOR and KFOR were to be incorporated into the build, plus the addition of extra protection. Major additions not available with the original 2A5 were an auxiliary power unit in the hull and an air-conditioning unit on the turret rear. The vehicle entered device in 2002. The conversion list below lists the differences.
Some of you may be asking why this conversion has been done when there is an off-the-shelf model of the Danish Leopard 2A5DK available. This particular model was released by Hobby Boss in 2007 alongside their Swedish Strv 122. These were the first of many Leopard 2s released by Hobby Boss and were eagerly anticipated. When they arrived, there was a collective sigh of disappointment. They appeared to be very poor copies of Tamiya's Leopard 2A5, which is still the standard for all Leopard 2 models. How Hobby Boss got them so wrong, if they had this standard model to work from/copy, is anyone's guess! Though they did improve with age, subsequent HB Leo 2s have all been generally poorly engineered, under-researched or just plain wrong like their hopeless Spanish Leo2E rendition. I've complained enough about HB Leo 2 kits over the years, so let's get back to the point.
Thomas Antonsen is the man who drove this project. Thomas is the author of The Danish Leopard 2A5 (reviewed by Dan Hay). He probably knows more about the subject than anyone. He approached Accurate Armour at the beginning of 2014, and AA took up the challenge to improve on the Hobby Boss kit.
Accurate Armour had the choice of either changing the incorrect components on the Hobby Boss kit which is basically a poor kit anyway, or doing a full conversion based on the excellent Tamiya Leopard 2A5 kit. They have chosen BOTH routes! Kudos to Accurate Armour.
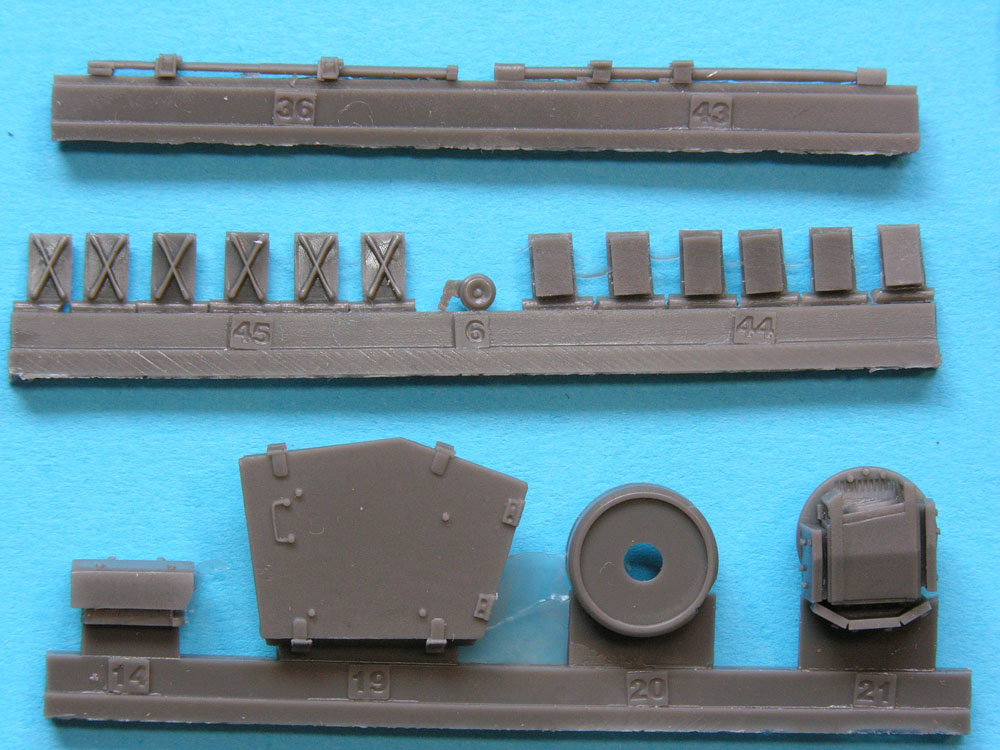
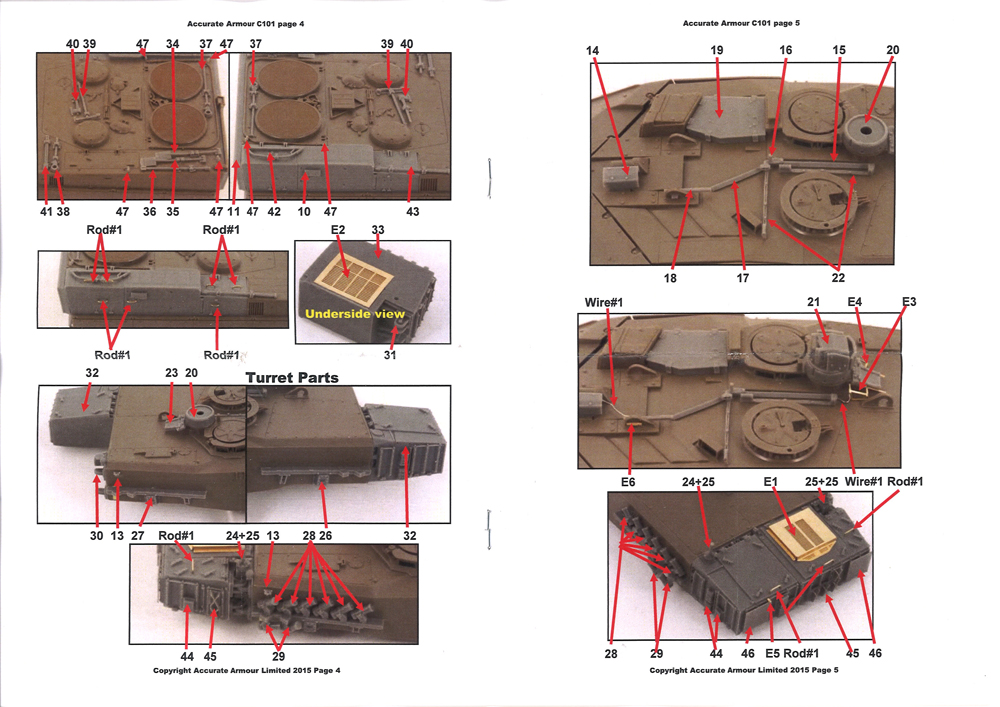
The list of parts needed to modify the basic 2A5 to the Danish version is surprisingly large. The items in brackets are NOT included in the Hobby Boss conversion as they exist in the original kit. Apart from these, the two conversions are identical:

parts common to both the Hobby Boss and Tamiya conversions
;
Tamiya specific parts
These modifications represent the 2A5DK as it entered service. Many more small modifications have since been introduced, but the parts in the conversion represent a typical 2A5DK that has been in service for the last 13 years or so. You can read about some of the mods in two of Leopard Club's Leopardfibel articles - LF15 Skirted Leopard and LF16 Desert Leopard , both built by Bernd Zaeske.


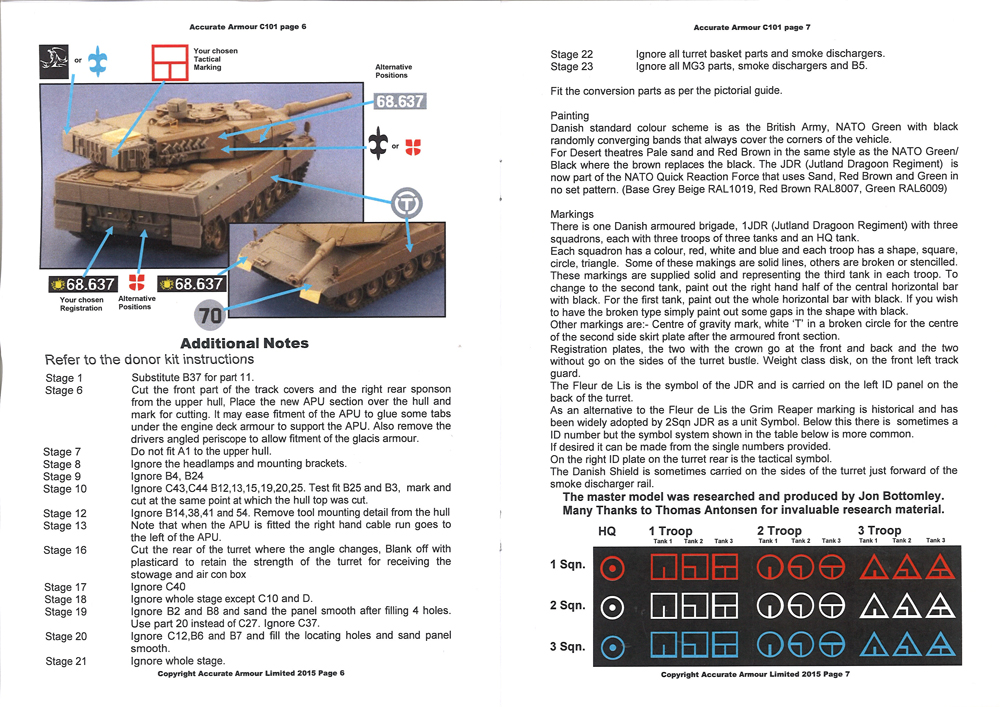
The instructions are in the form of a simple 8-page A5 booklet in colour. They take you through the basic steps with instructions of how to deal with the base kit on pages 6/7.


The Tamiya instructions

The Hobby Boss Instructions
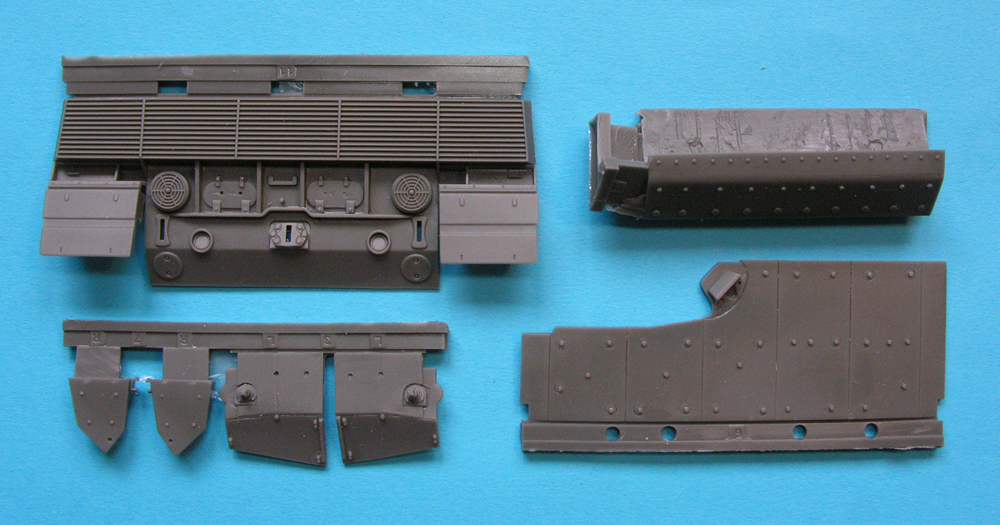
The conversion starts at the rear with the addition of a new rear plate (for Tamiya only). I am surprised this wasn't offered for the HB conversion because one of the drawbacks of the HB kits is that the rear grille only has 10 slats instead of the correct 11. It is possible to fit the Tamiya rear plate as the HB kit is basically a copy of the Tamiya kit.
We now turn our attention to the front hull where the frontal armour is added (for Tamiya only). New headlights are included which need brush guards. A resin former has been supplied so it is easy to bend the supplied brass into shape. The HB kit use flat etch for these, so this can be ditched. Photo-etch mud flaps are included which are best left until the end to avoid breakages.
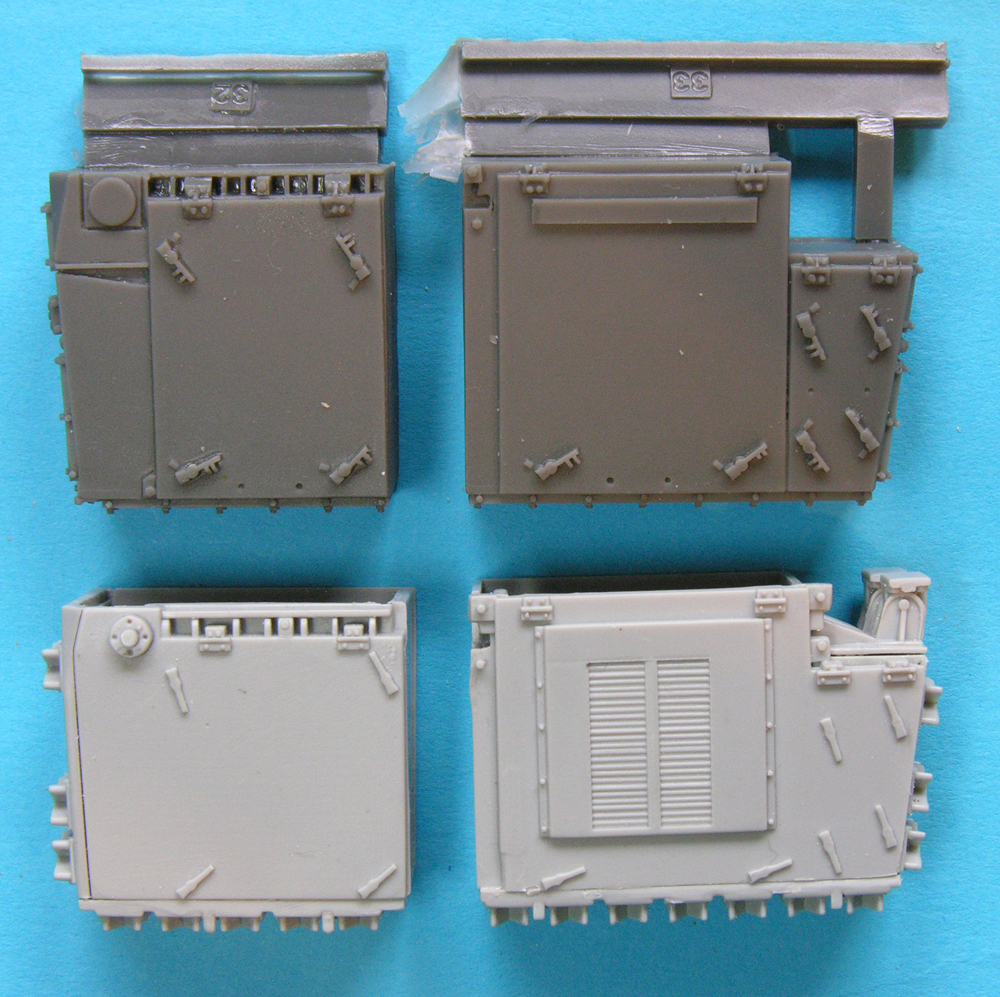
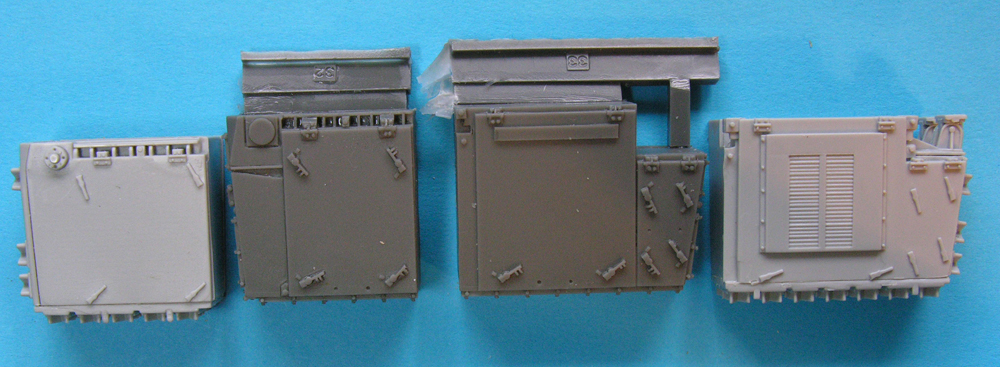
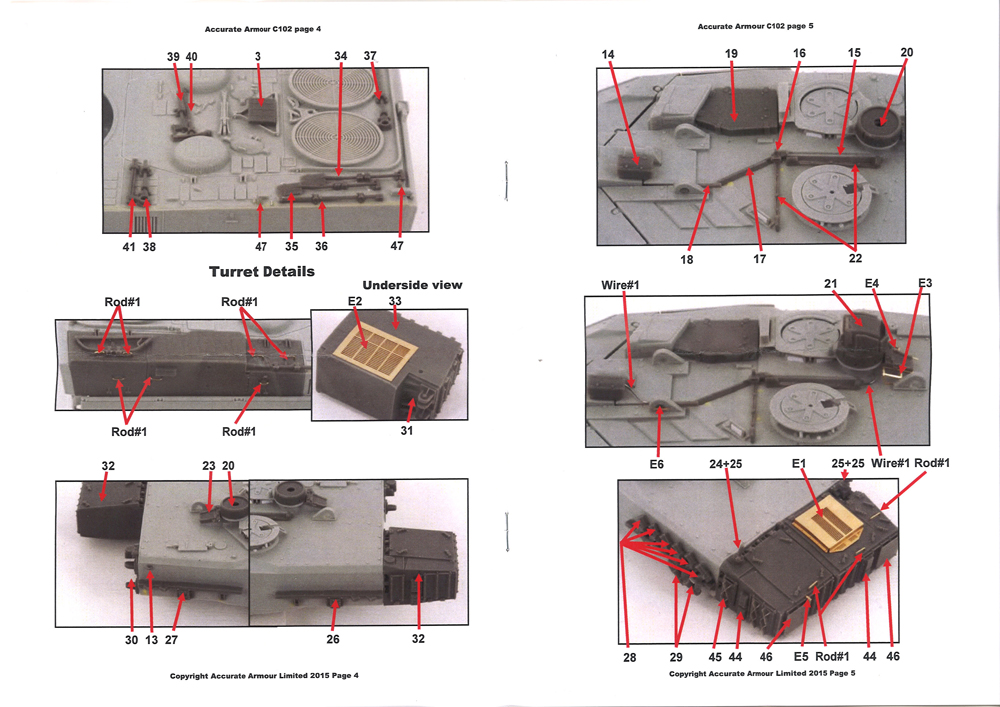
The APU can simply be glued in place on the HB kit, replacing the poor kit item. Again, here are some comparison photos - AA in green and Hb in light grey.
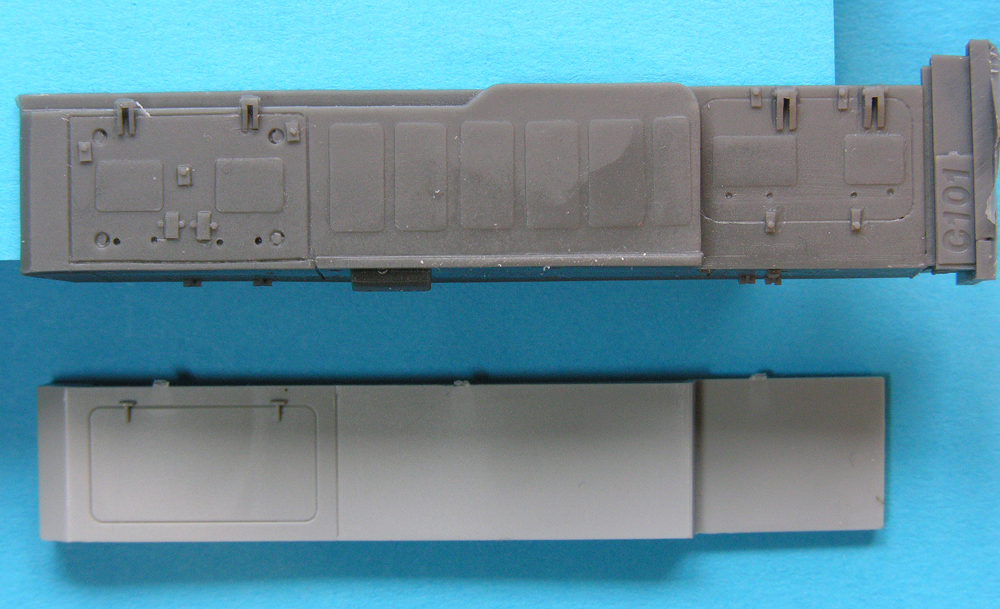
However, care and time needs to be taken to cut the Tamiya hull to fit the same unit. It is not a daunting task with only two cuts required, some careful filing to fit, and the addition of tabs inside the hull to support the new resin casting.
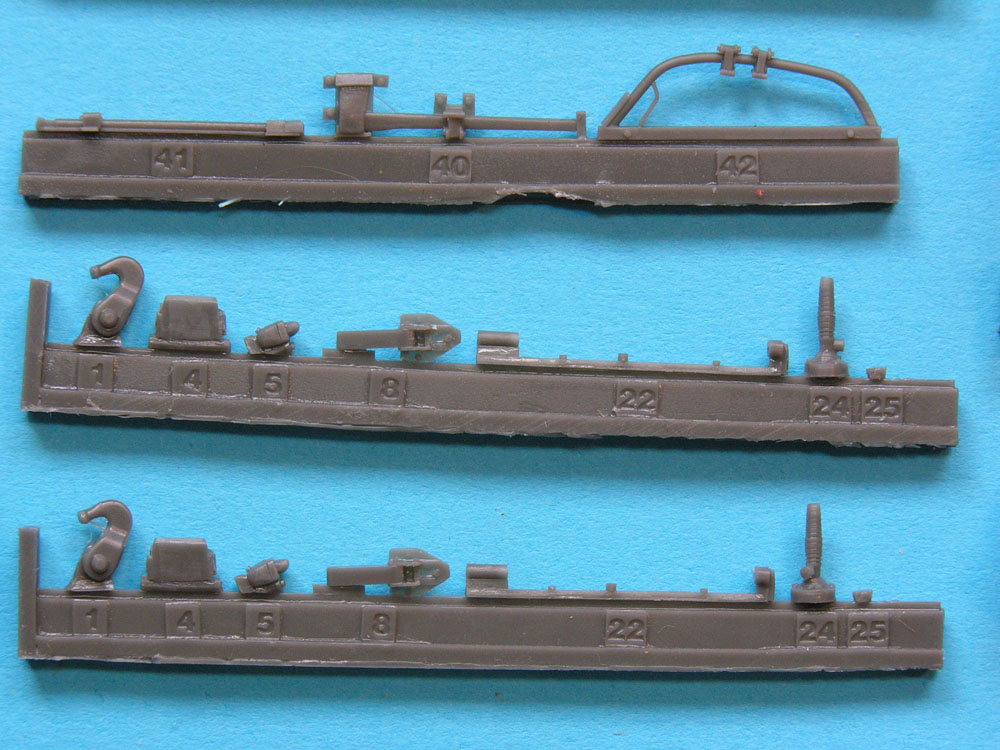
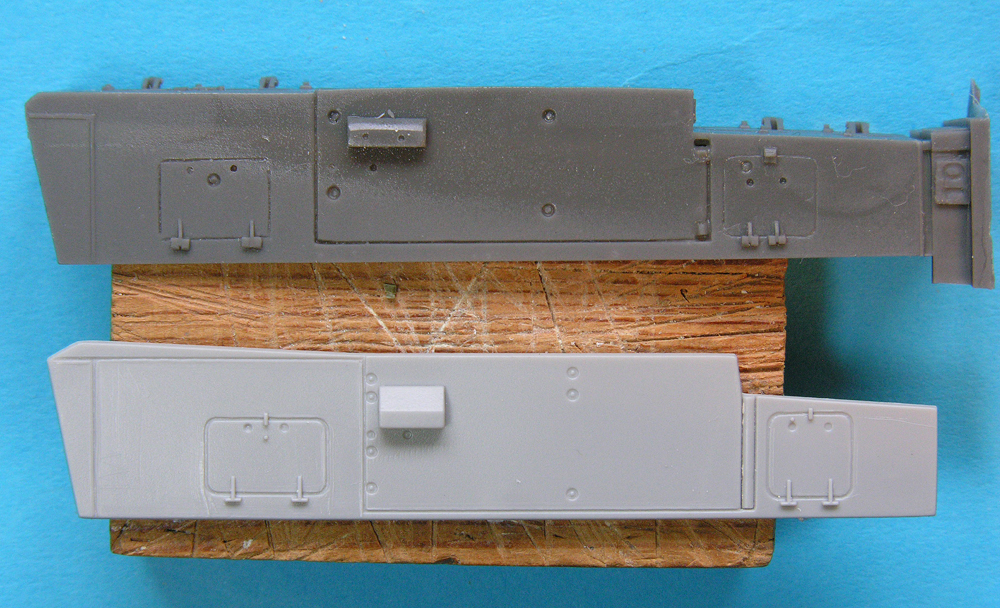
A complete new suite of tools can now be addd to the rear decking. The Danes use completely different tool clips to the familiar clips used by the Germans, and all of these have been faithfully reproduced. Any tool mountings on the existing kit decks have to be carefully removed, of course.
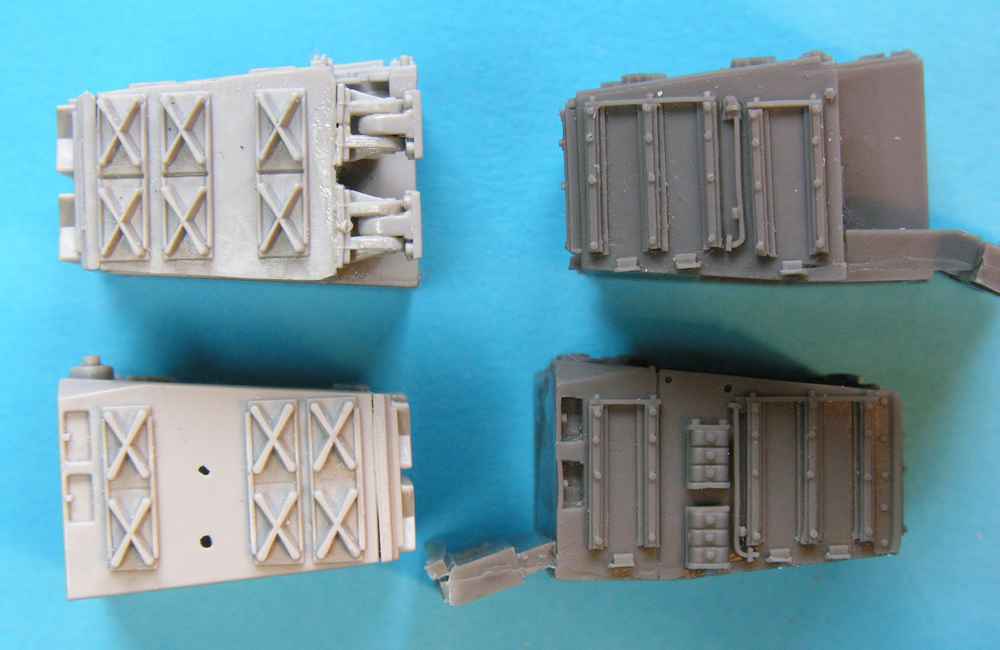
Now we turn to the turret. A little like the process with the APU, the new turret boxes can simply be replaced on the HB turret rear as they are a straight swap. However, the angled rear end of the Tamiya turret has to be cut off and a new blanking plate added, before the boxes can be added. The new boxes are dimensionally correct and they carry much better detail than the original HB items. One small drawback is that there should be a non-slip panel on the left side box ~ see photo. The same type of non-slip also has to be added to the turret roof anyway for strict accuracy, so it's best the modeller uses his favoured application for this so that they match.
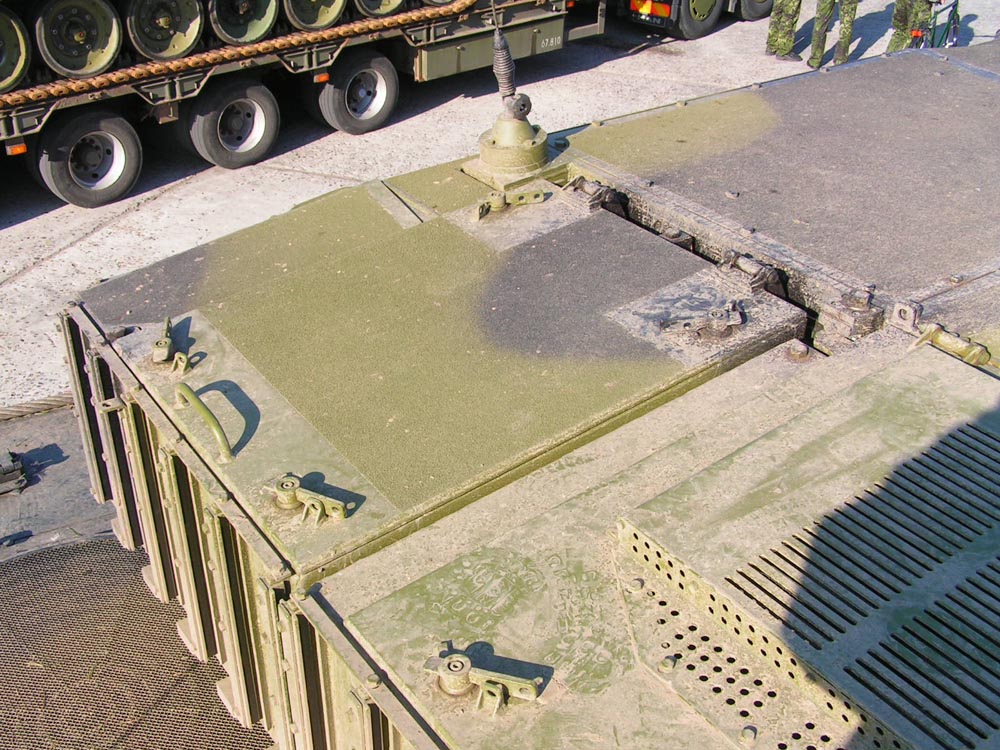
Some nice etch grilles are supplied for the top and bottom of the air con unit. Individual track pads or grousers (or a mixture) can be aded into the racks around the turret box edges.
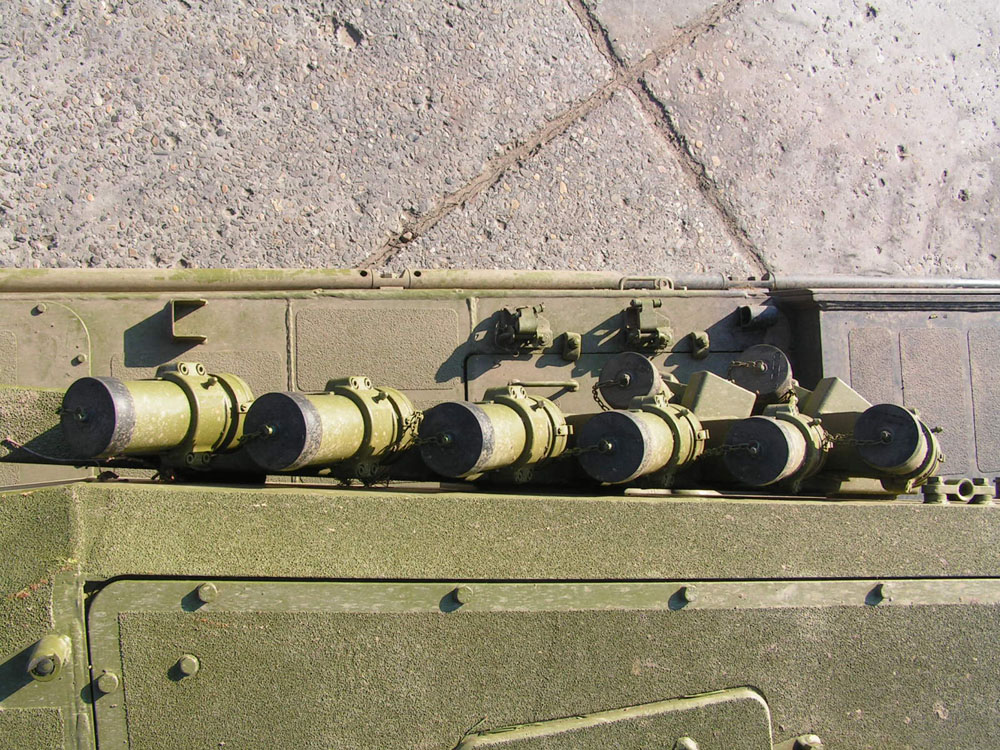
New smoke launchers are provided which sit on new rails - six on the top and two below. What isn't made totally clear in the instructions is that the Danish launchers are at slightly different angles - see the photo here. The first five all point straight ahead, the last one on top sits at about 15 degrees, and the two underneath at about 25 degrees - roughly speaking.
The final part of the conversion concerns the detailing on the turret roof where new commander's sight is added along with the searchlight and it's electrical conduit, the carbine box, two carbine mounts and the searchlight itself.
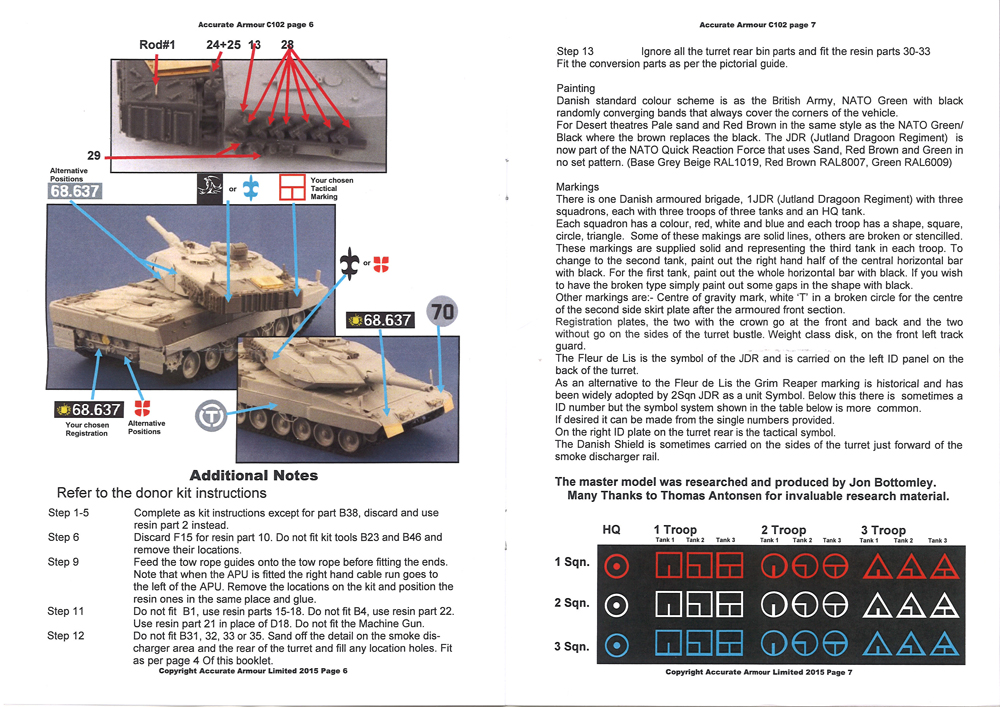
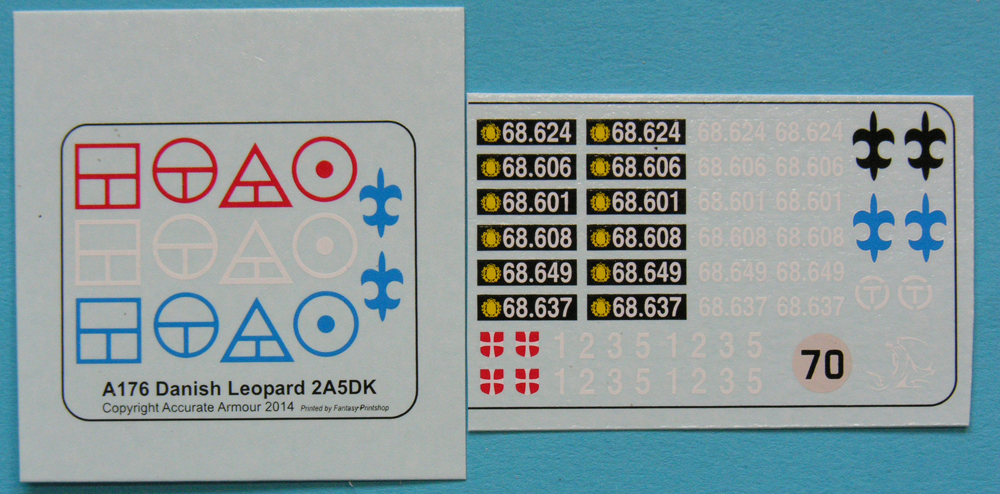
Two sheets of decals are included with serials for six individual machines plus some Fleur de Lis or Grim Reaper emblems and alternative tactical symbols which go on plates attached to the turret rear (also provided).
All Danish Leopard 2A5DKs were delivered with the same track as other nations Leo 2s. Over a long period of time, the entire fleet has now been equipped with this new Diehl 570PO track.
These tracks are now available from Leopard Workshop. The sprocket is designed to replace the Tamiya item but will equally fit the HobbyBoss kit.
What we have here is an accurate and complete conversion for either of two alternative kits. All of the parts are beautifully cast and well detailed.
The only negatives are the lack of non-slip on one of the turret boxes and lack of clarity about the angle of the smoke dischargers. Certainly, nothing major.
The Tamiya route is more of a challenge, but the base kit is far more accurate and you will end up with a much nicer rendition of the 2A5DK.
The Hobby Boss route is easier because there is no cutting of the base kit involved. However, the base kit has a number of drawbacks such as non-slip panels on the hull which are far, far too prominent, no mounting bolts on the sprockets, incorrect number of slats on the rear grille, poor fit of a lot of components, incorrect etch for the rear deck grilles, etc.
One drawback of both kits is that the road wheel tyres and idlers are too thin and neither of them have any detail of the inner faces, having horrible drums to contain polycaps instead. The good news is that replacements are available from Leopard Club.
Details of the conversions can be found on the Accurate Armour website: Tamiya C101 and Hobby Boss C102.
Photo reference for the vehicle can be found here:
© Leopard Club
![]() Contact us at leopardfibel@gmail.com
Contact us at leopardfibel@gmail.com