84504
Scale: 1:35
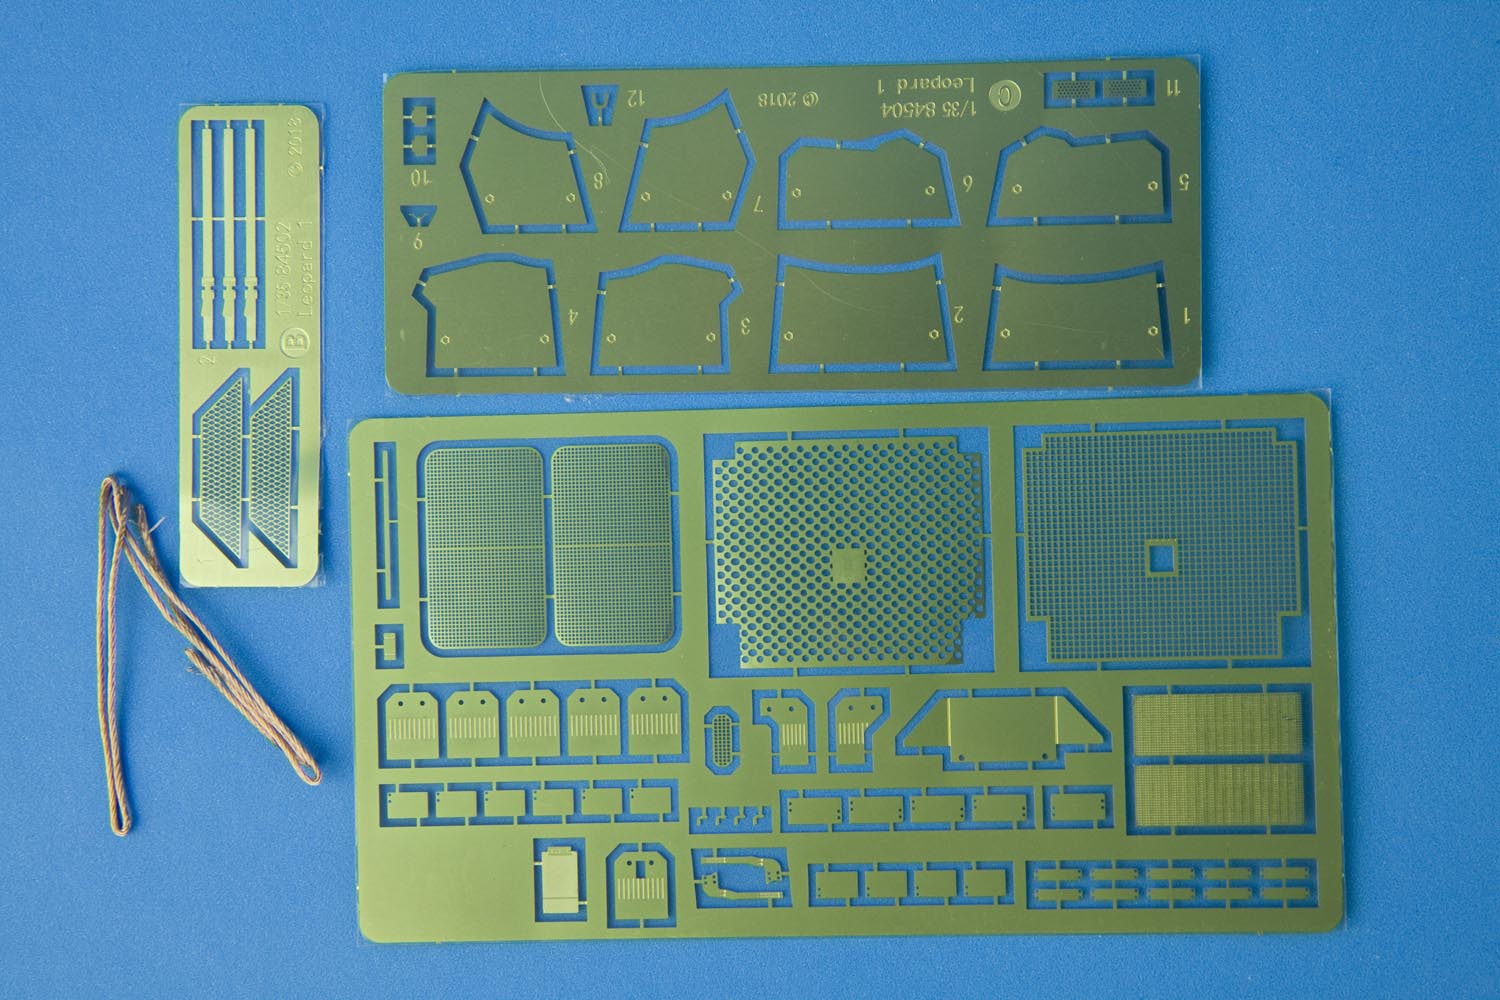
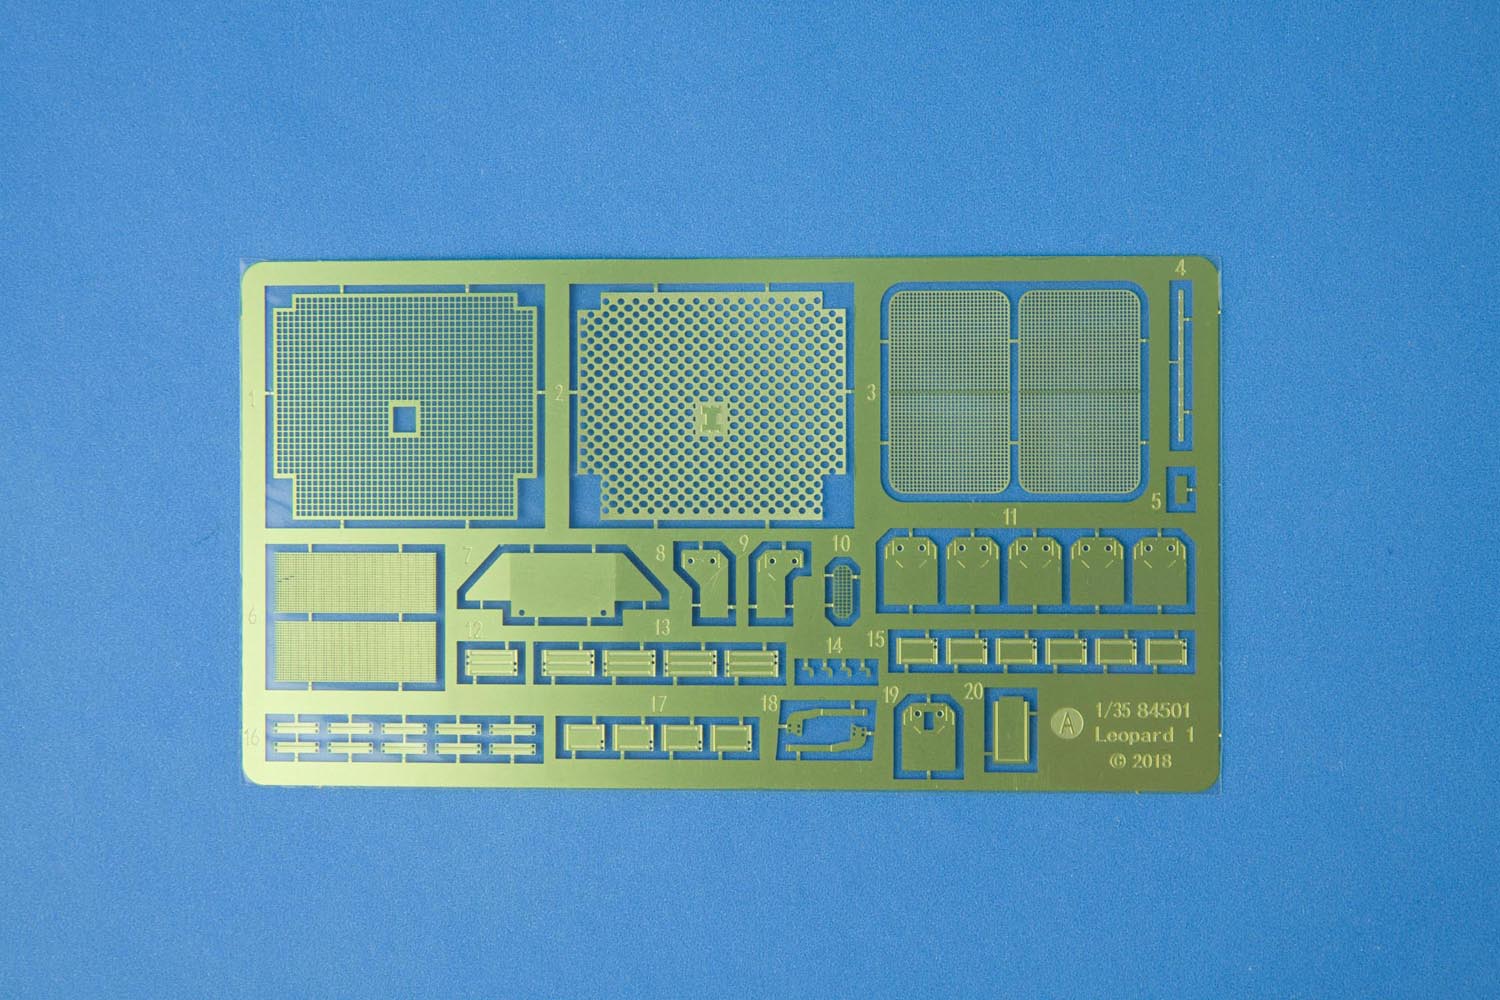
Media: injection moulded plastic (including clear parts), photo-etch brass, braided metal wire
Reviewed By: Dan Hay, all photos © Dan Hay, editorial assistance by Michael Shackleton
Review kit supplied by Dan's credit card and Lucky Model
Highs:
Lows:
Conclusion:
Highly recommended - despite a few mistakes this is one very impressive kit
This is a really good time for modelers interested in modern Canadian armoured vehicles. There was once a time where the only options available to build a Canadian Leopard 1 were the aging Italeri of Revell Leopard 1 kits mated with after market conversion kits (at that time Maple Leaf Models was the only game in town and fortunately very good). Now there are a total of three injection molded plastic C2 MEXAS kits available and a lot of different after market detail options.
Hot on the heels of the Meng C2 MEXAS, Hobby Boss have released the first of several completely new tooled Leopard 1 kits, with the C2 MEXAS being their first offering. I won't delve into the history of the C2 MEXAS and it's employment in the CF mission in Afghanistan but will instead direct readers to my the introduction of my recent review of the Meng C2 MEXAS.
I will however once again take the time to mention the assistance of the well known modeler, researcher and Canadian Military expert Anthony Sewards. Anthony served for over 26 years as a member of the Lord Strathcona's Horse (Royal Canadians) Regiment, finishing his career as a C2 crew commander and troop sergeant. Anthony contributed a lot of reference material and technical assistance to the production of this new kit as he did with the Meng C2 MEXAS. He was very generous with his vast collection of personal photographs and documents which has enabled Hobby Boss to produce several more Canadian Leopards which are on the verge of being release ready (C1 MEXAS and C2). Once again, Anthony generously provided advice and reference material which undoubtedly greatly improved the quality of this kit, the first Leopard 1 offering by Hobby Boss.
I have spent a lot of time writing this review (easily in excess of 30 hours), partly due to the complexity of this kit but also because I am very familiar with the real vehicle having shot thousands of photographs of real Canadian Leopards. I have spent a lot of time comparing kit parts to photos of the real vehicle, with a great many of these real photos having been included in this review. I'm sure I've missed both good and bad aspects of this kit but I have hopefully given the reader a good sense of what this kit has to offer.
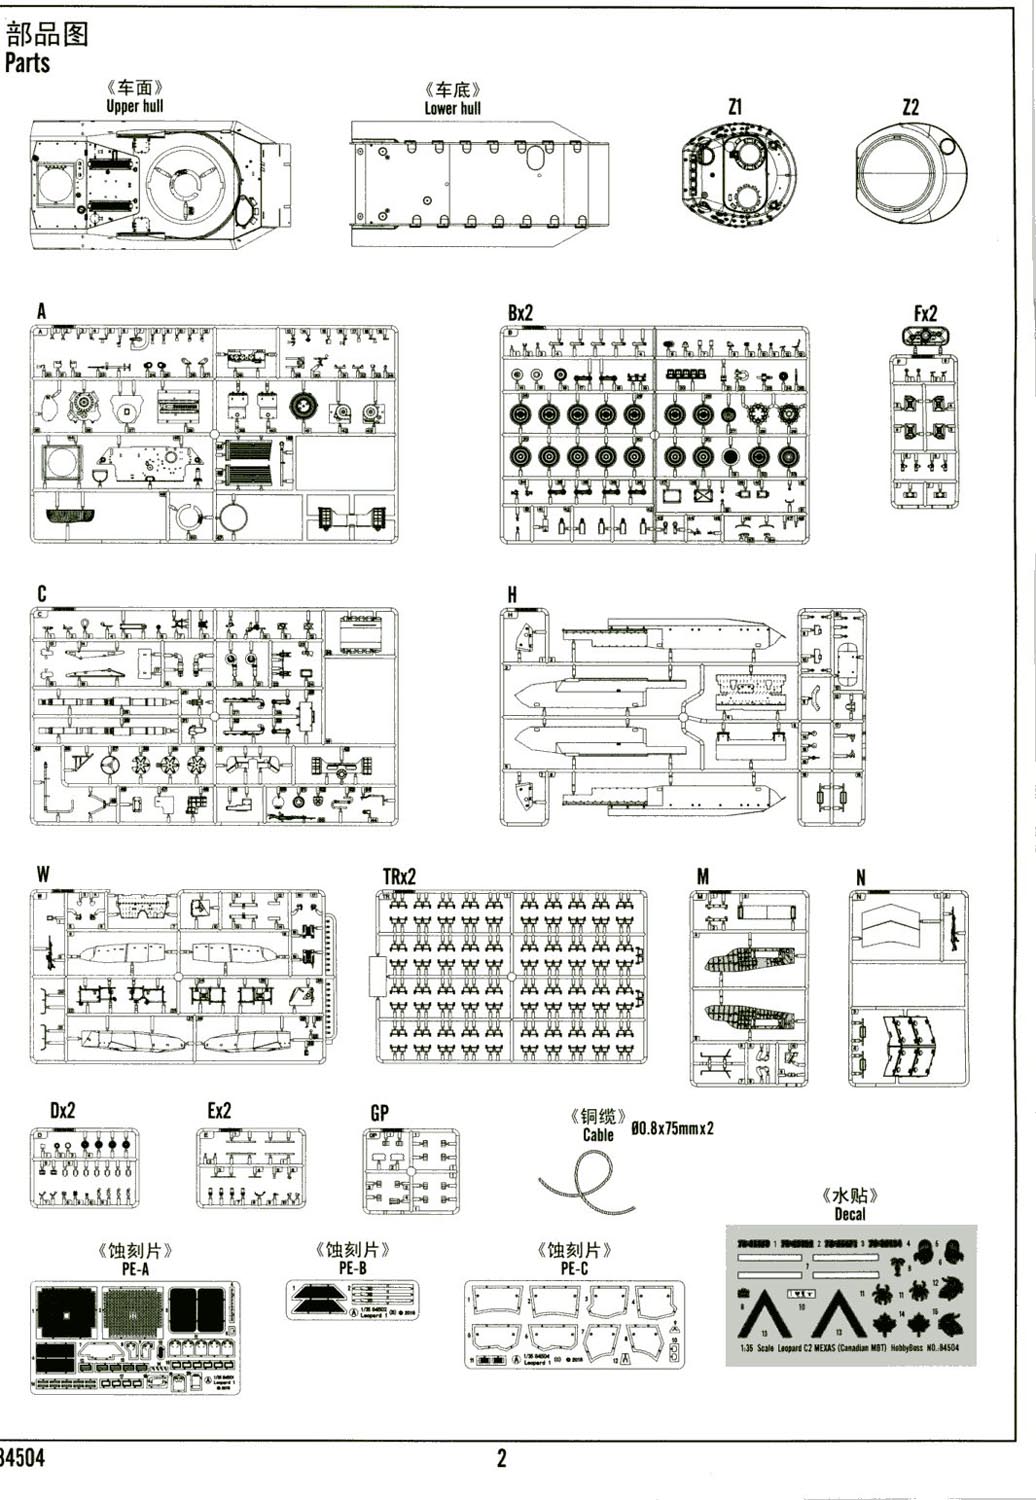
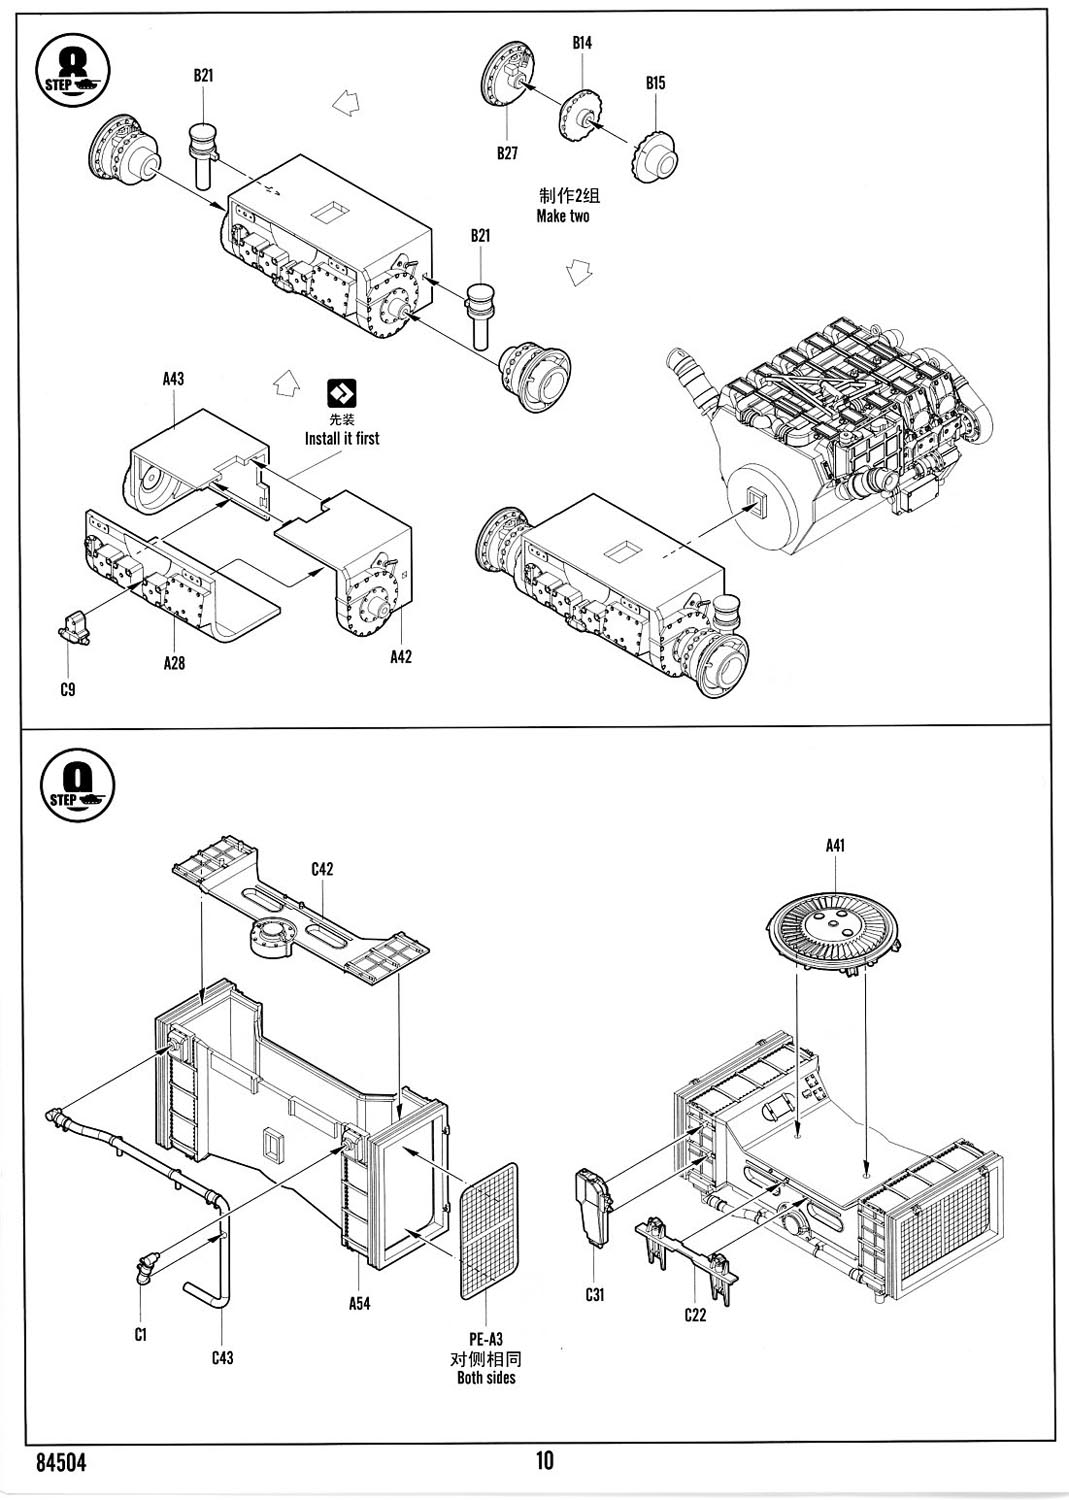
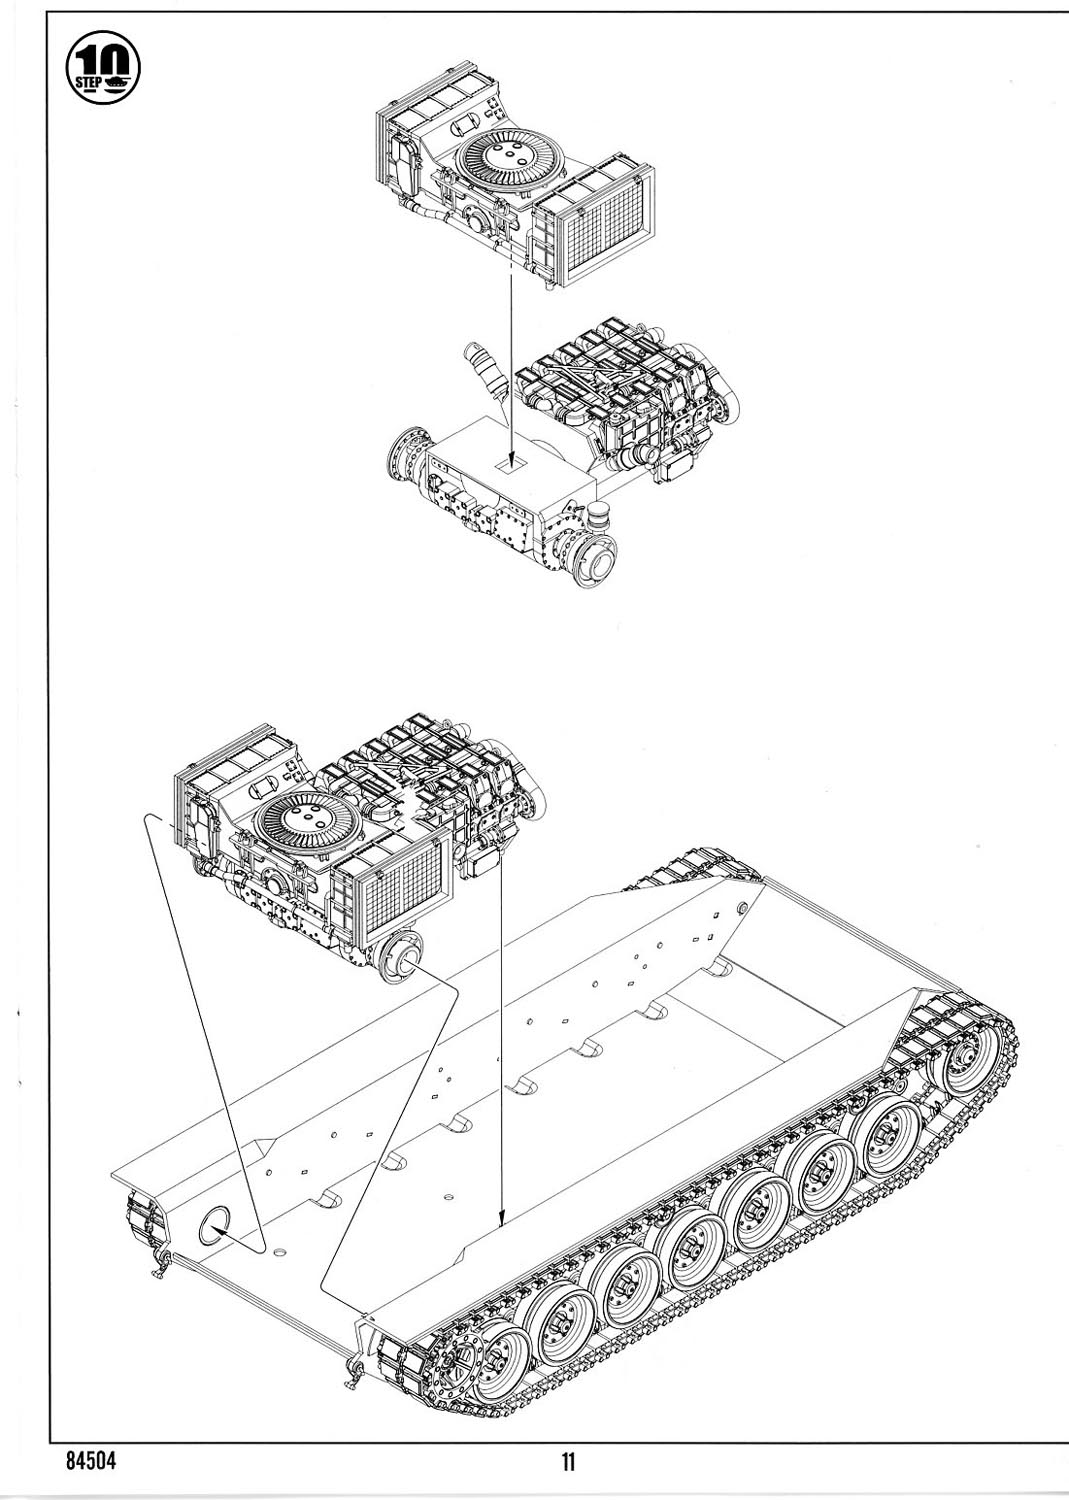
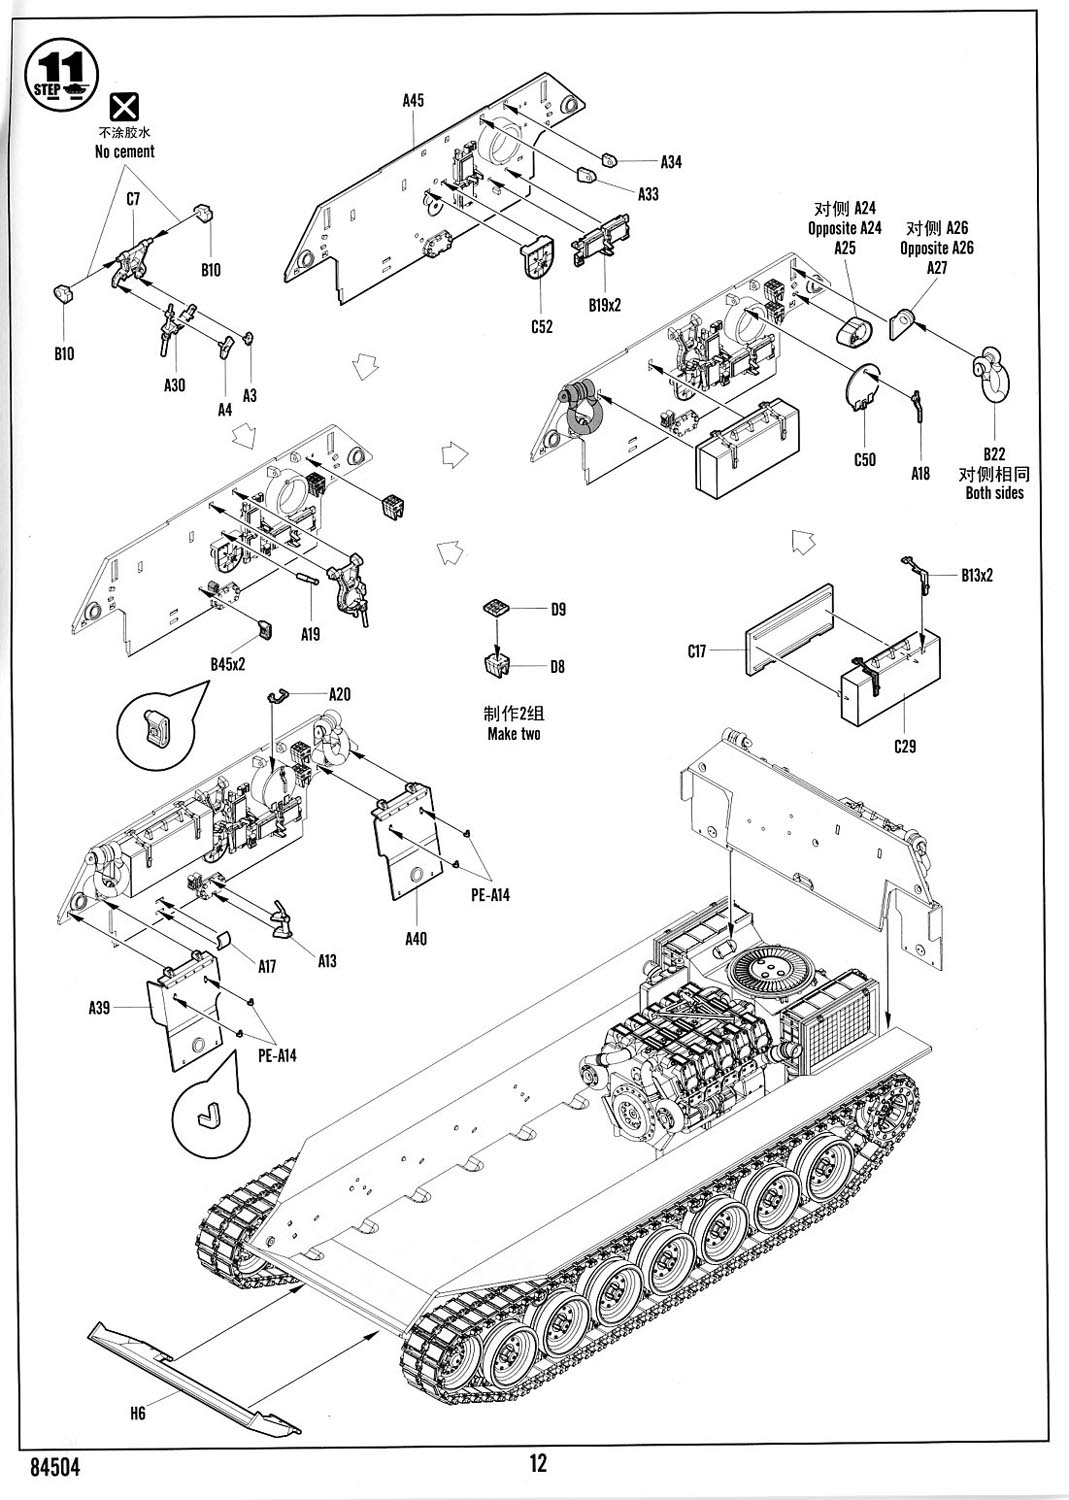
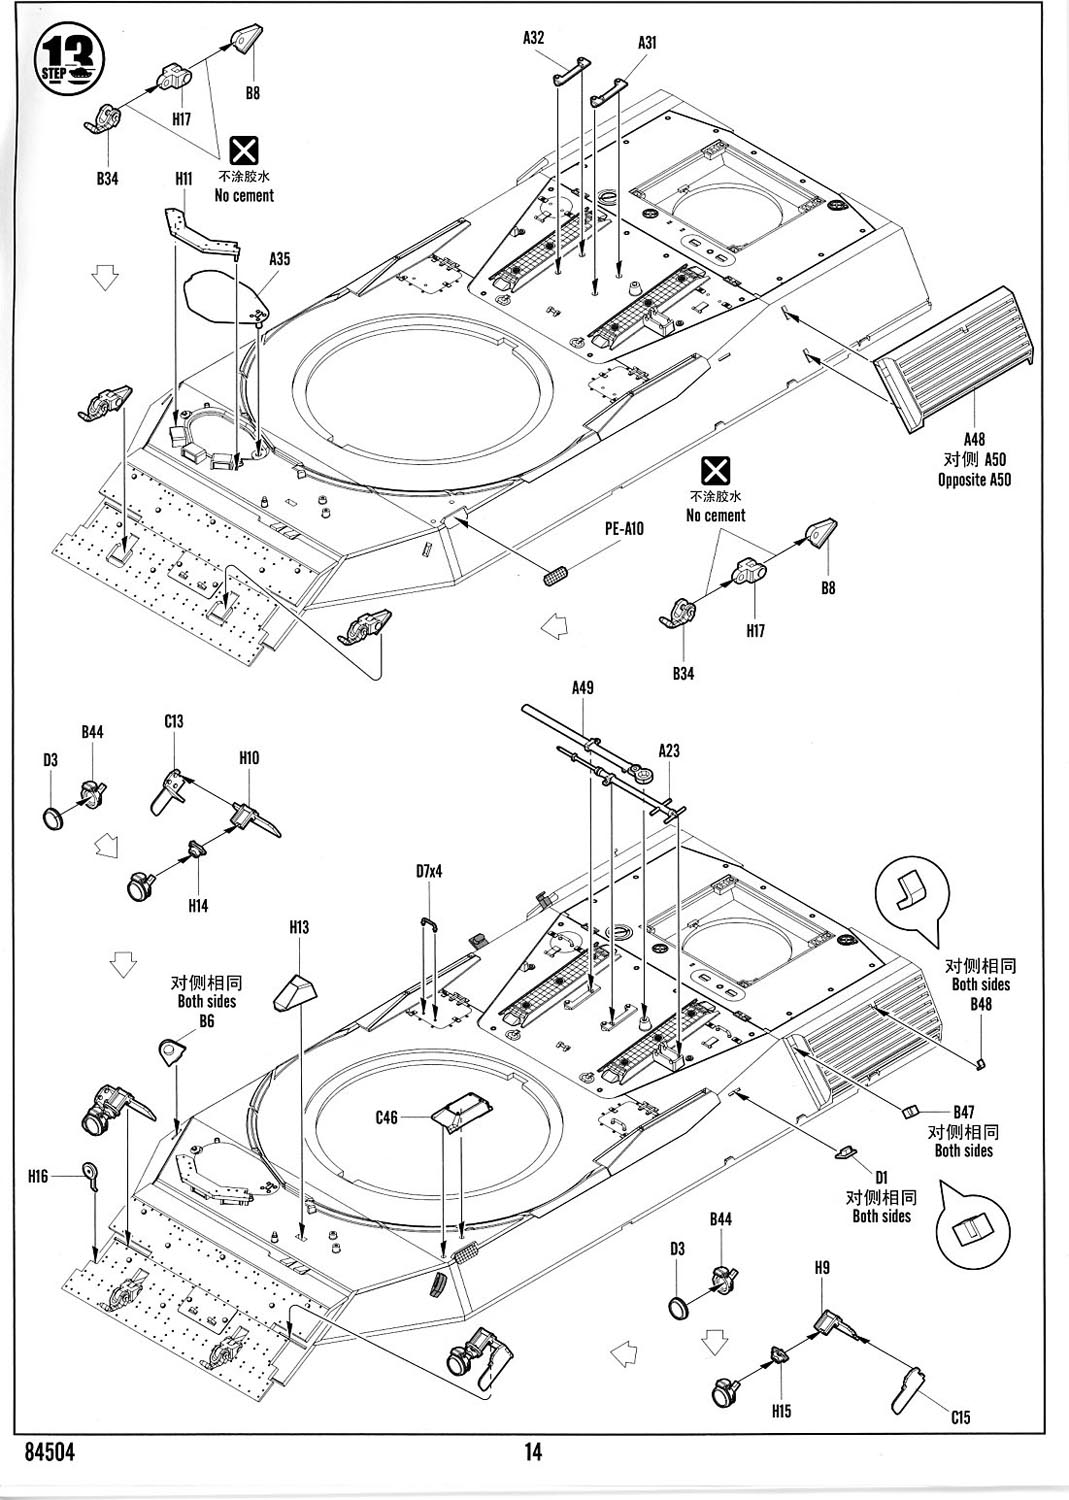
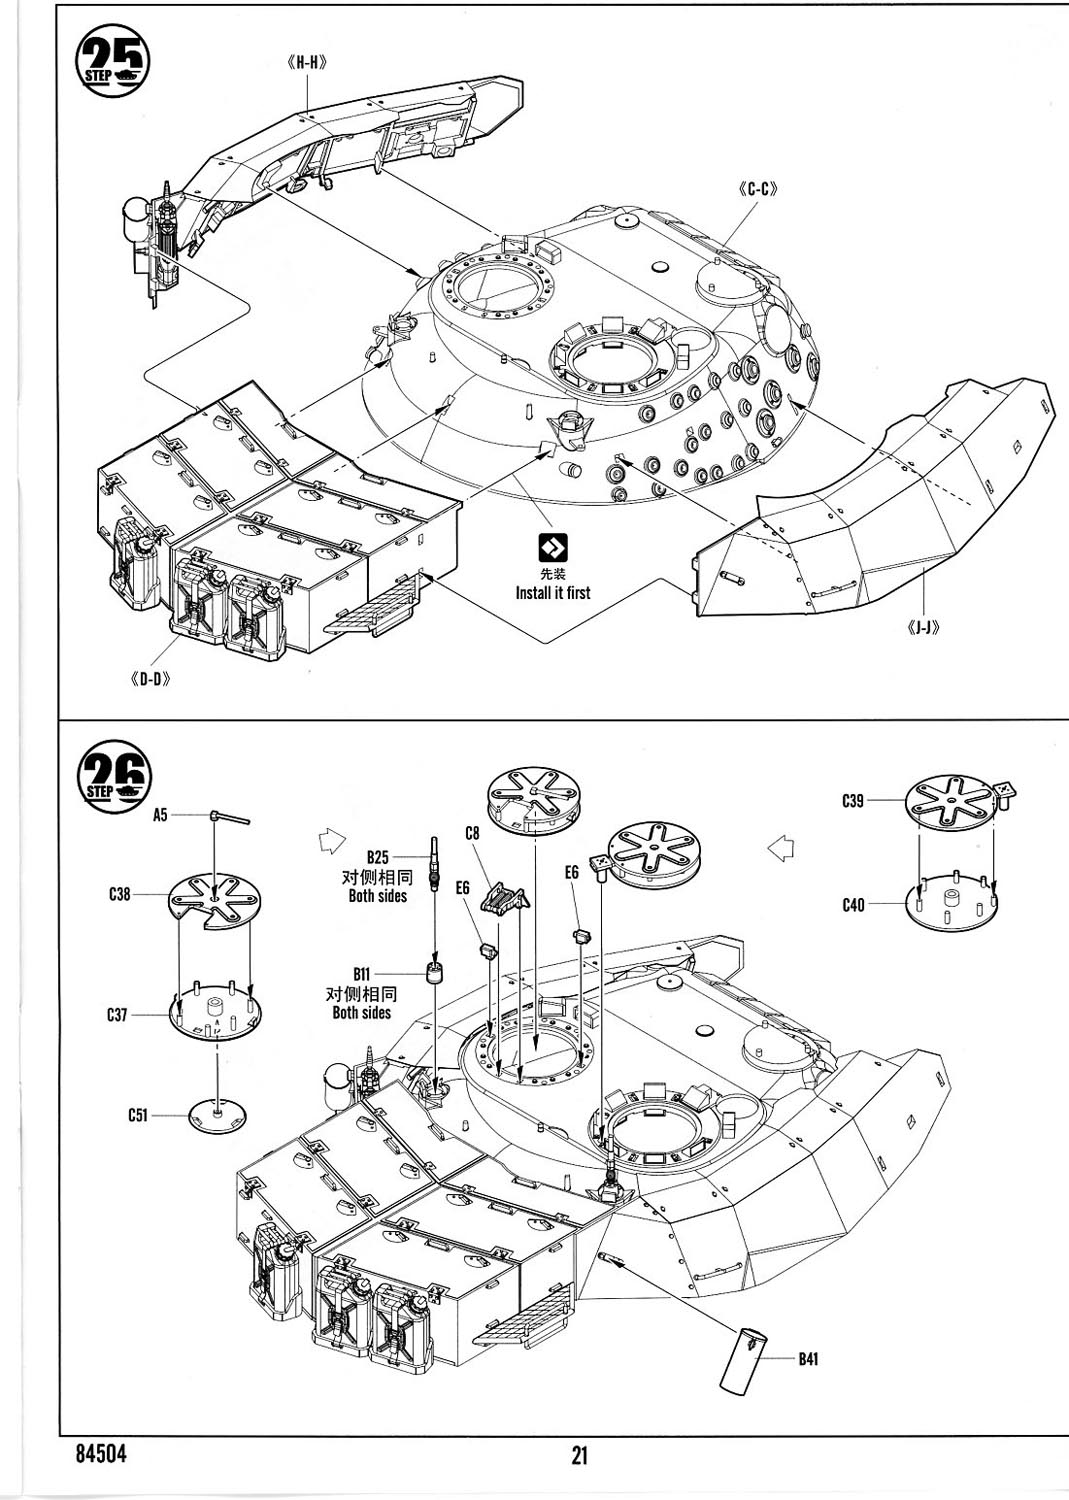
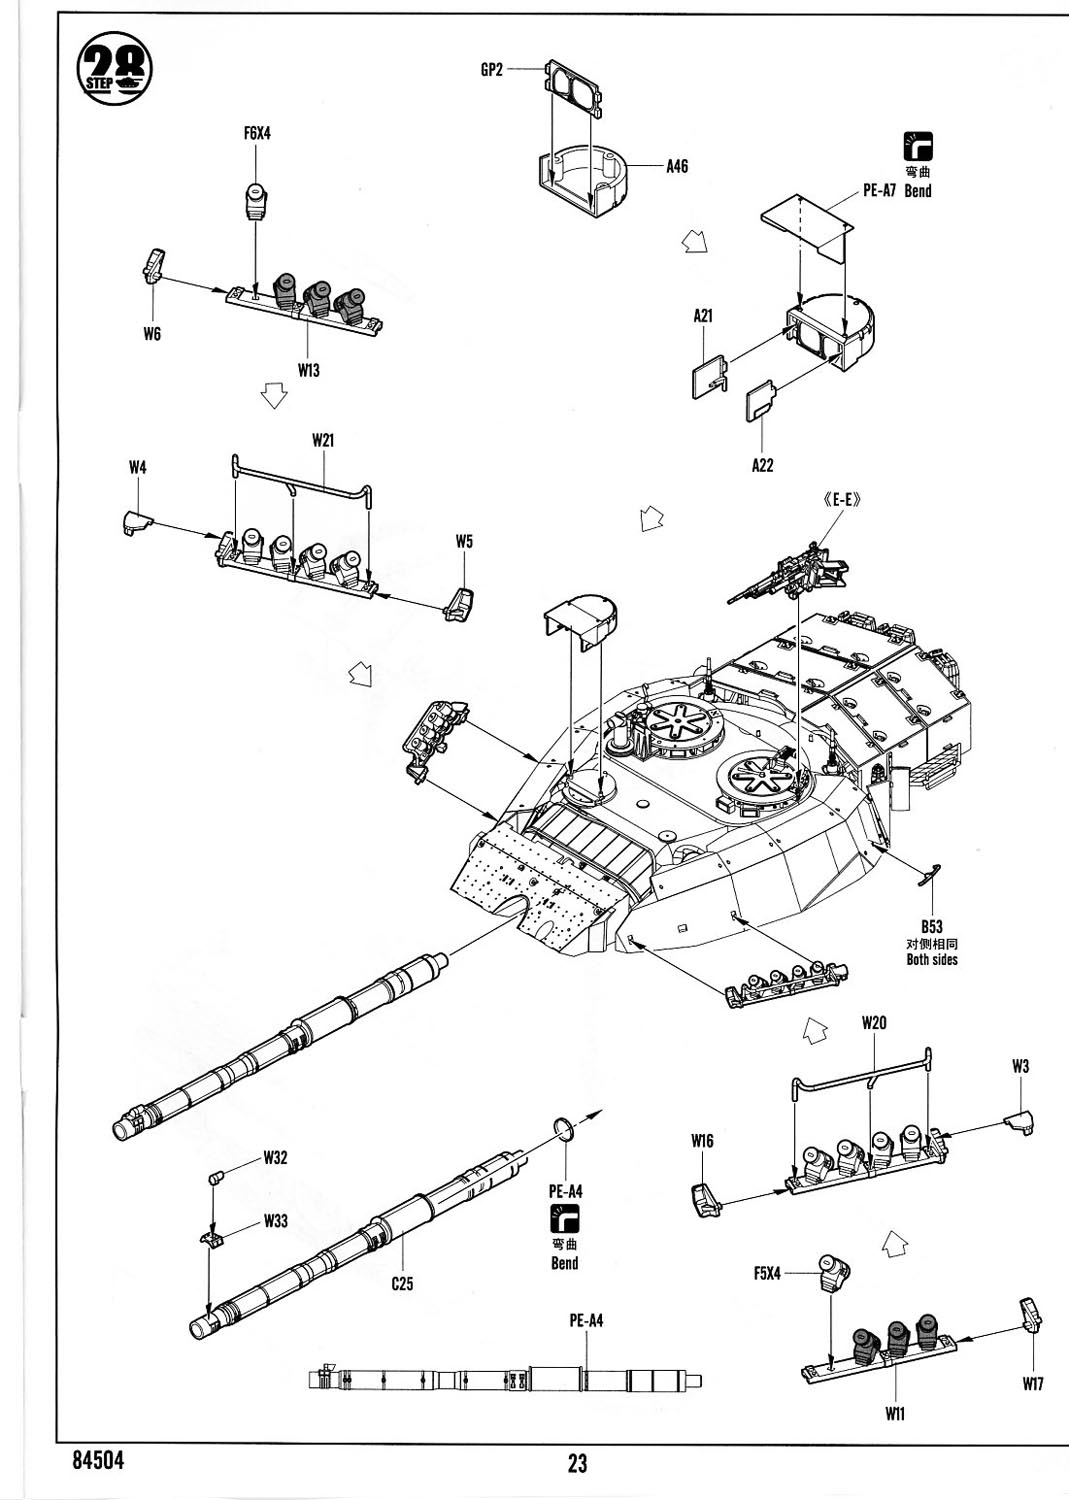
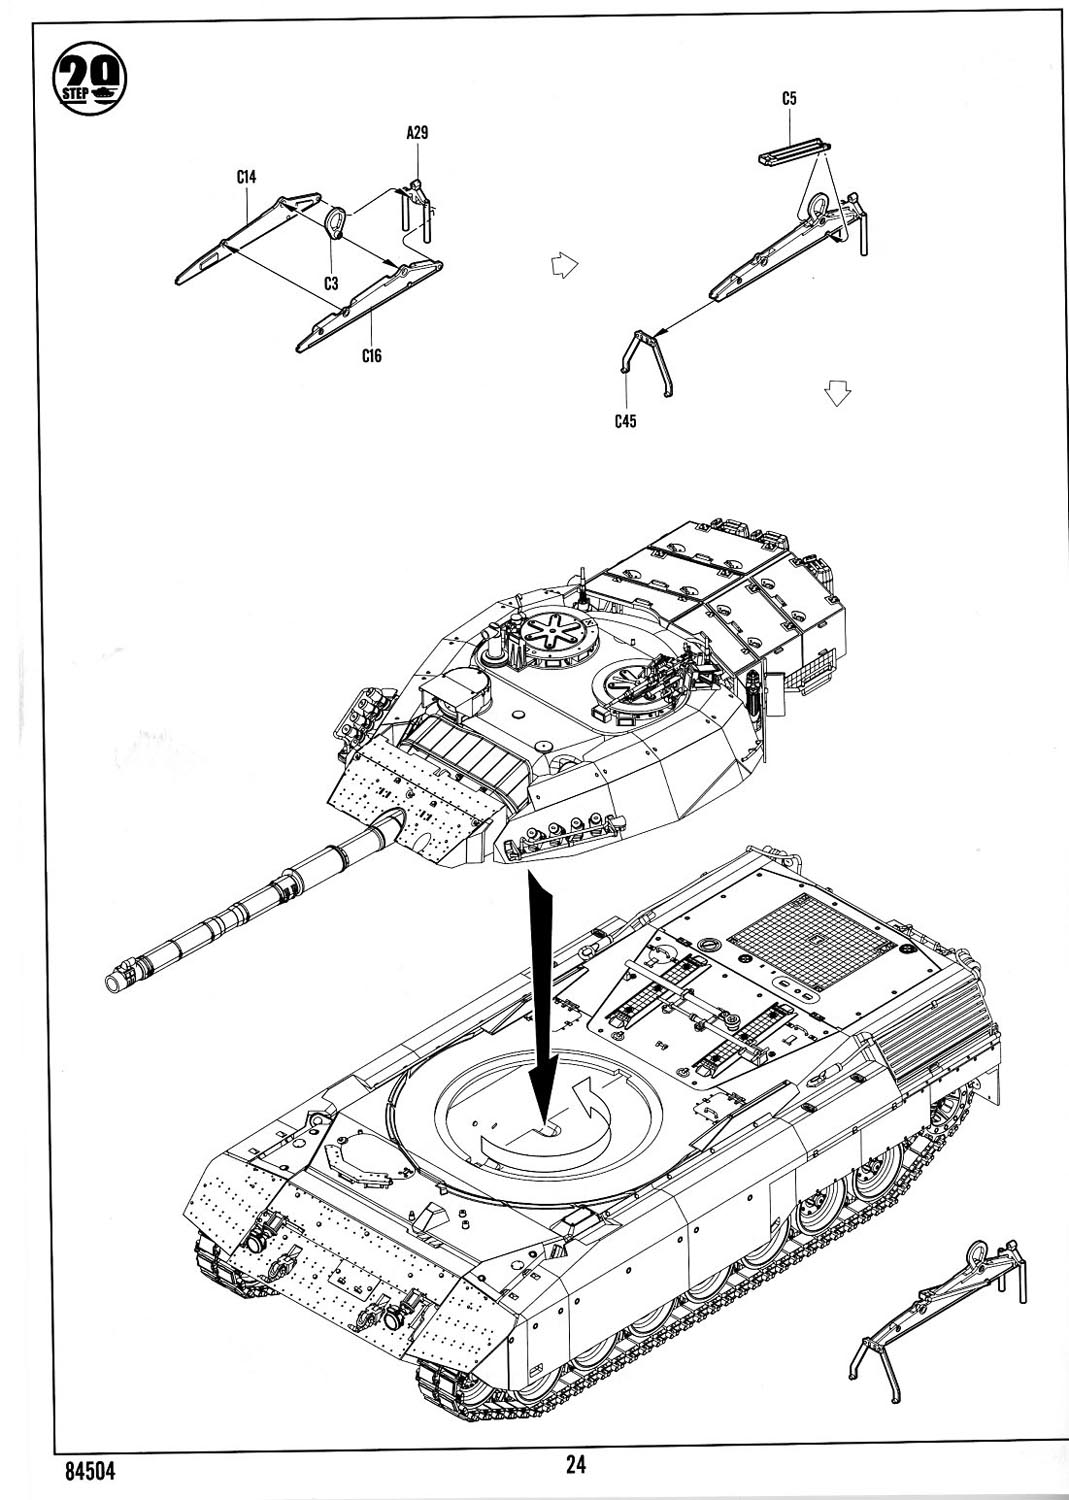
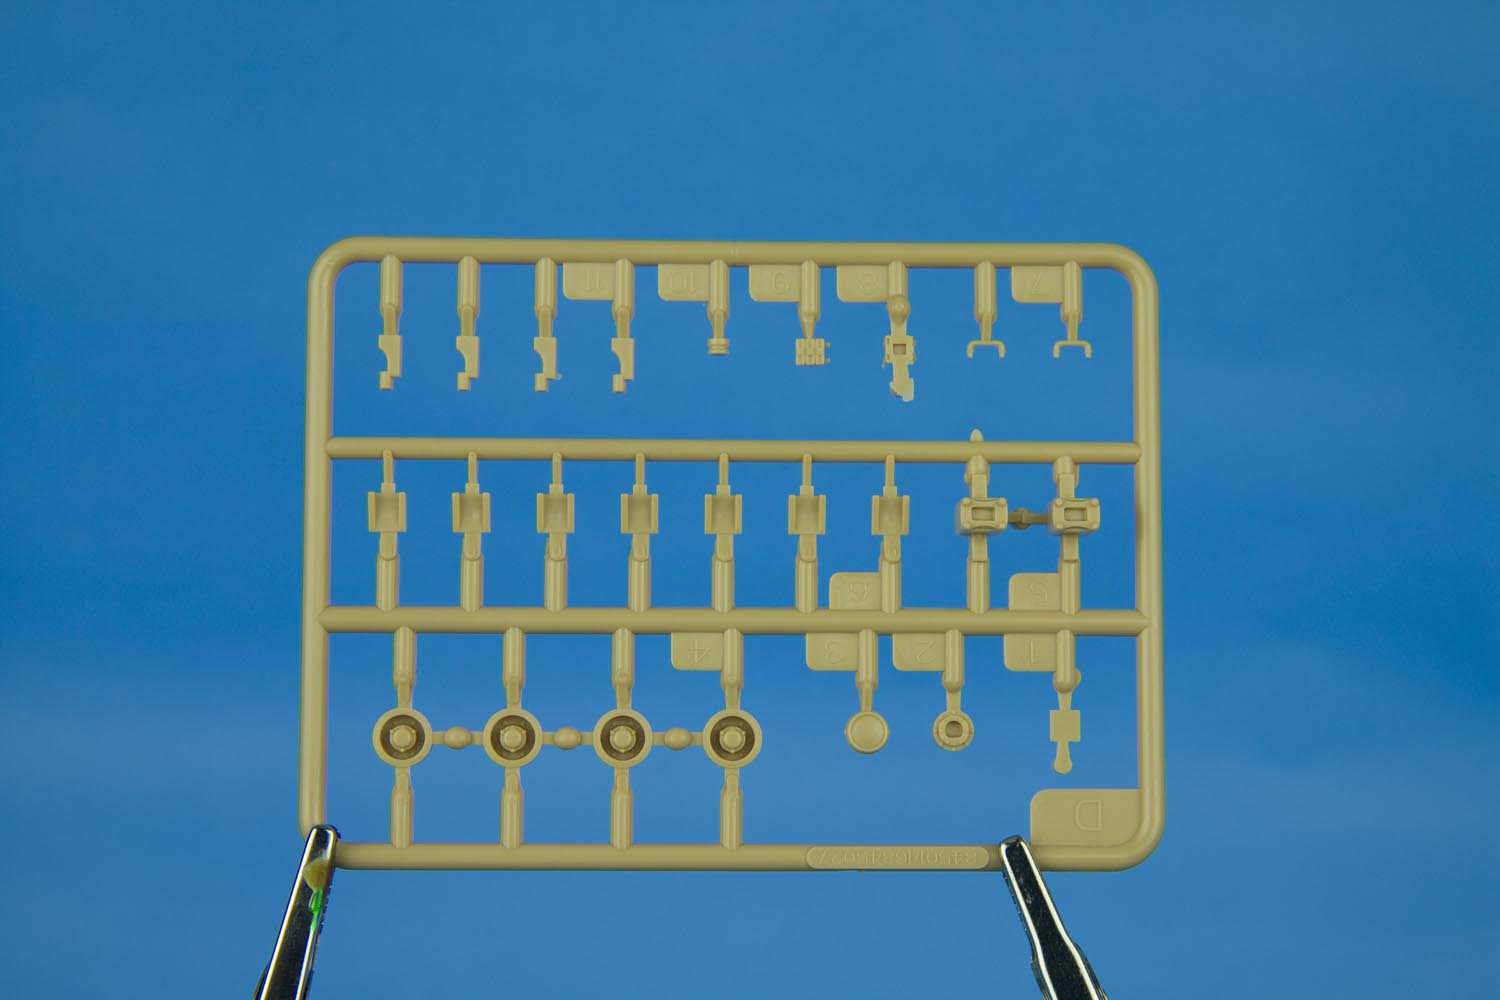
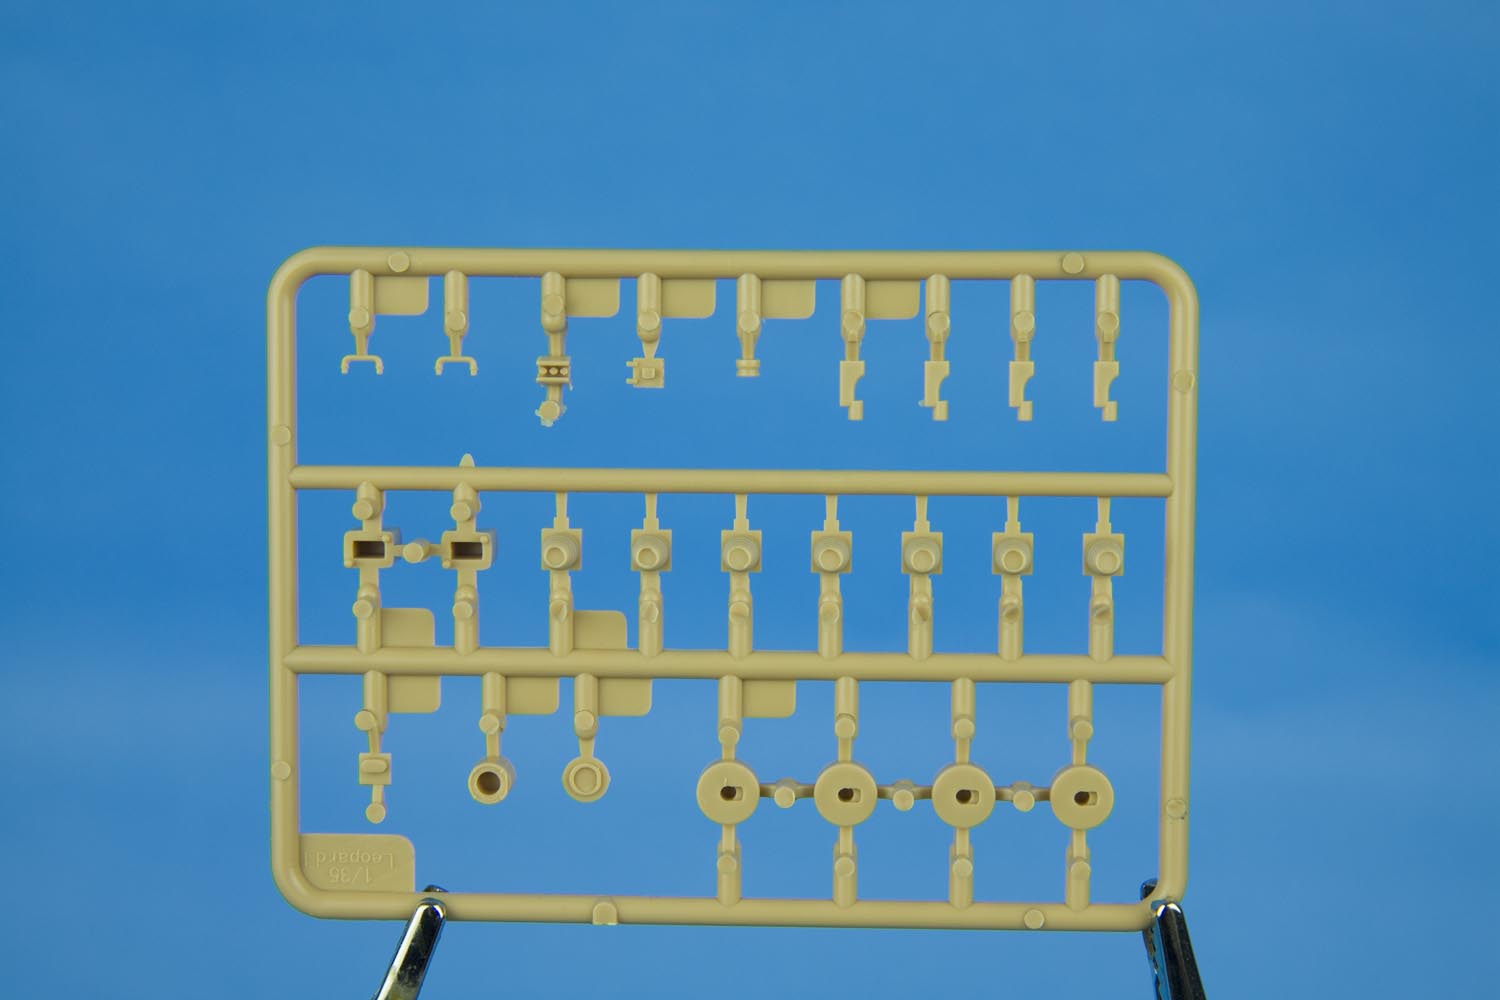
The kit contains 630 parts which includes one clear sprue and individual link tracks (not workable). Also included are 3 photo-etched frets, one length of braided copper wire and water-slide decals. I can happily state that this kit includes no vinyl poly caps! The instructions are supplied as a 24 page grey-scale booklet and a separate double sided single page of glossy marking and painting instructions.
This kit is entirely new, with a lot of effort having been lavished on some really fine details. The kit includes several firsts for Leopard kits in plastic; more on that later.


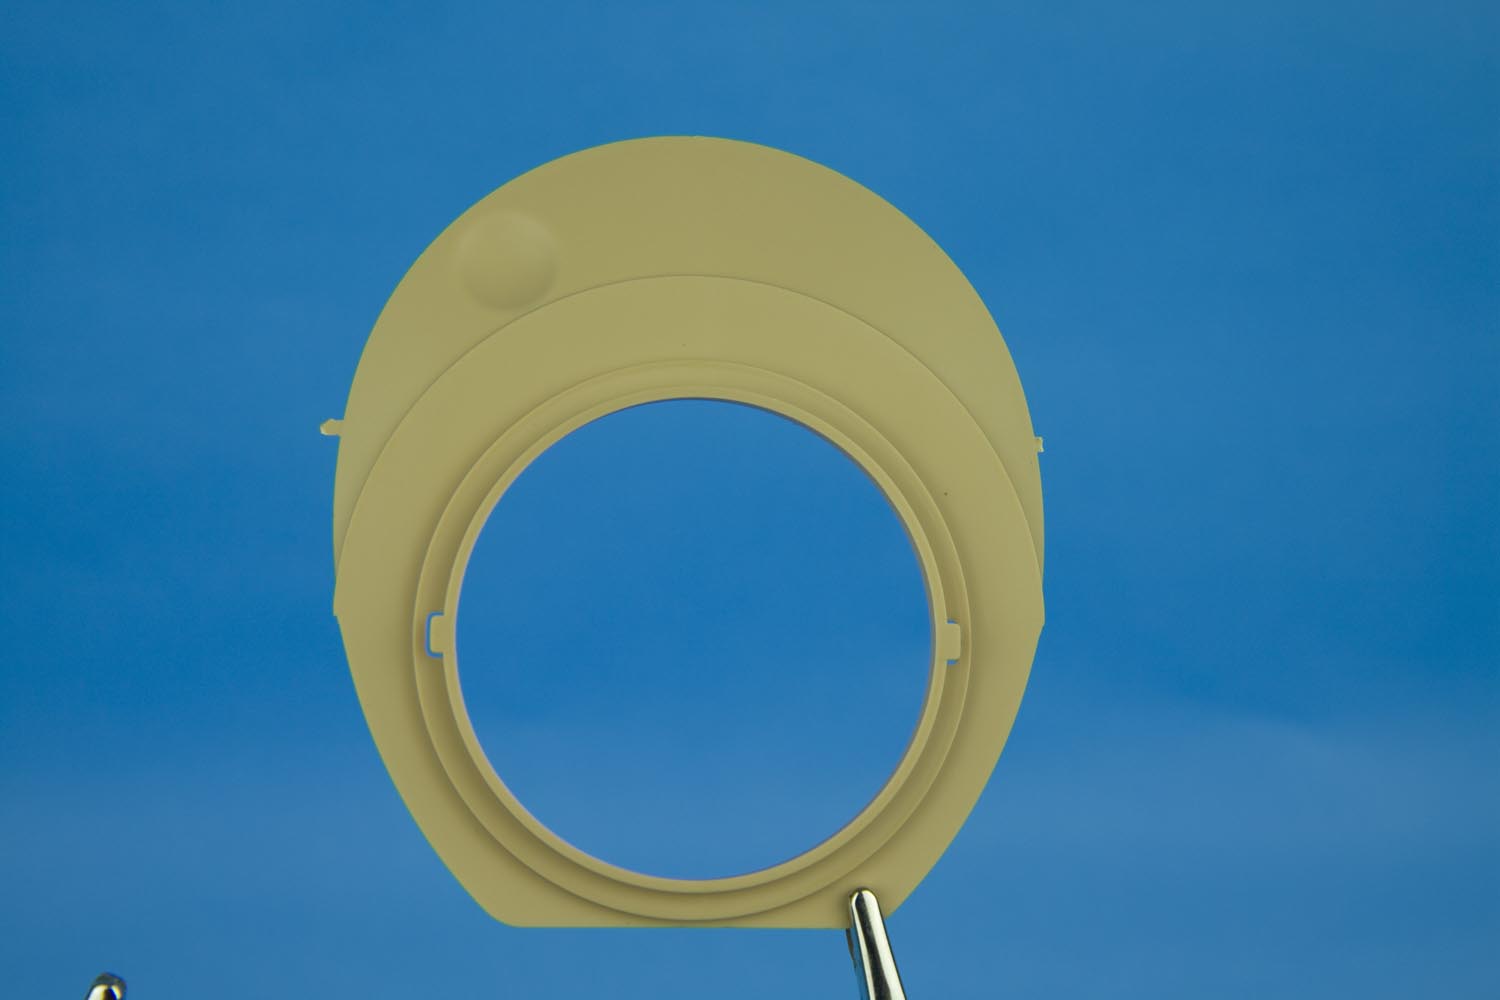
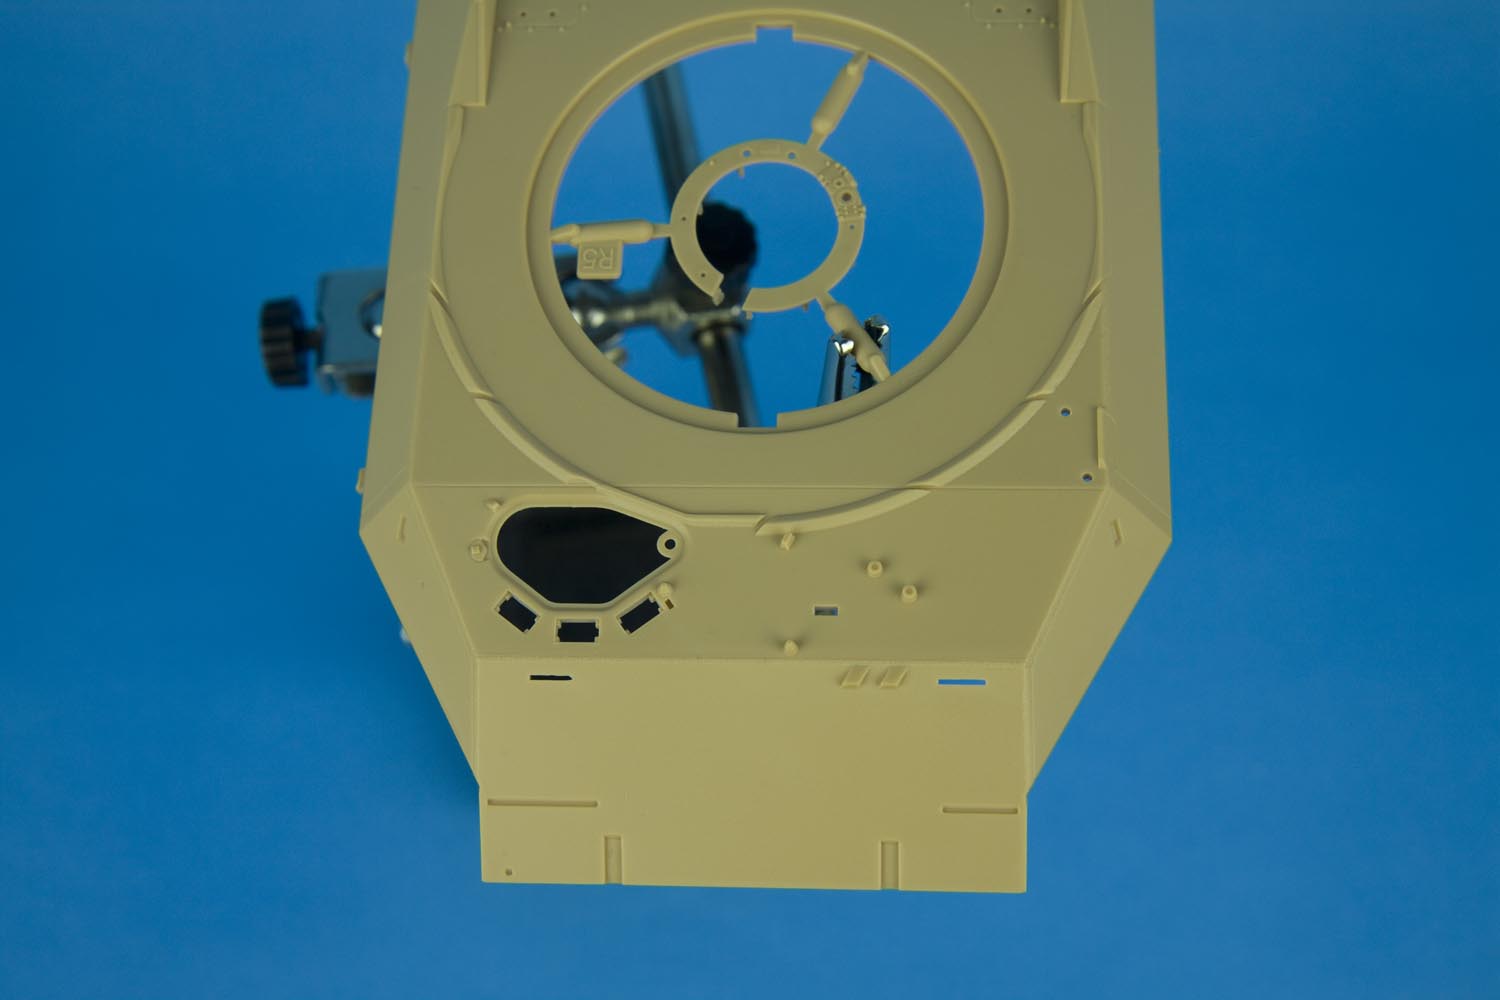
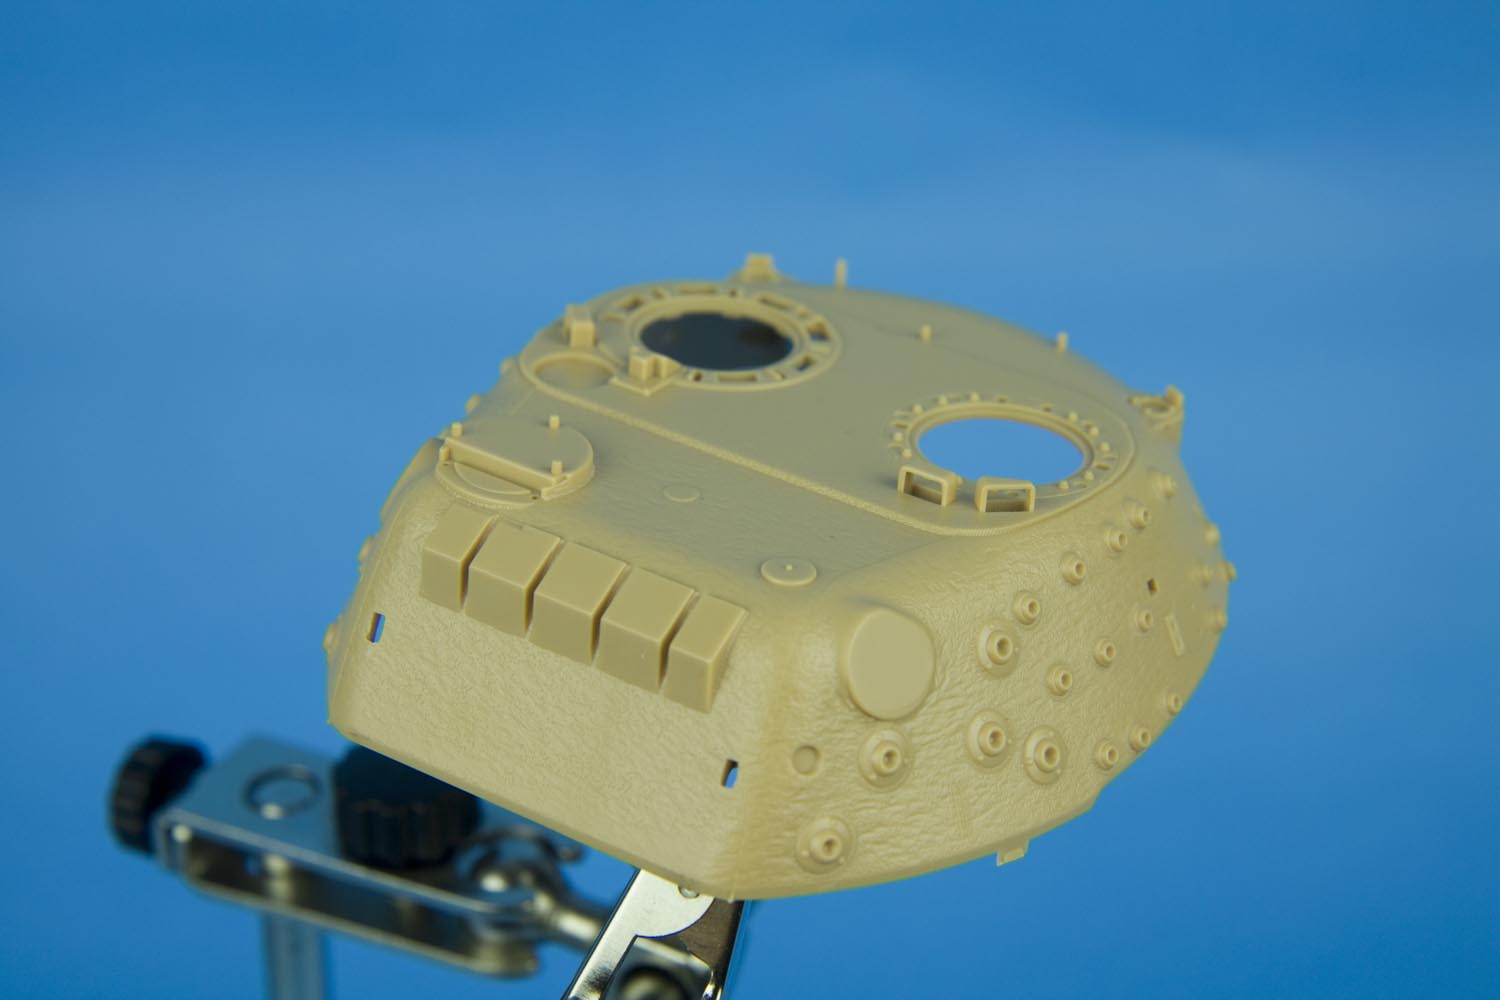
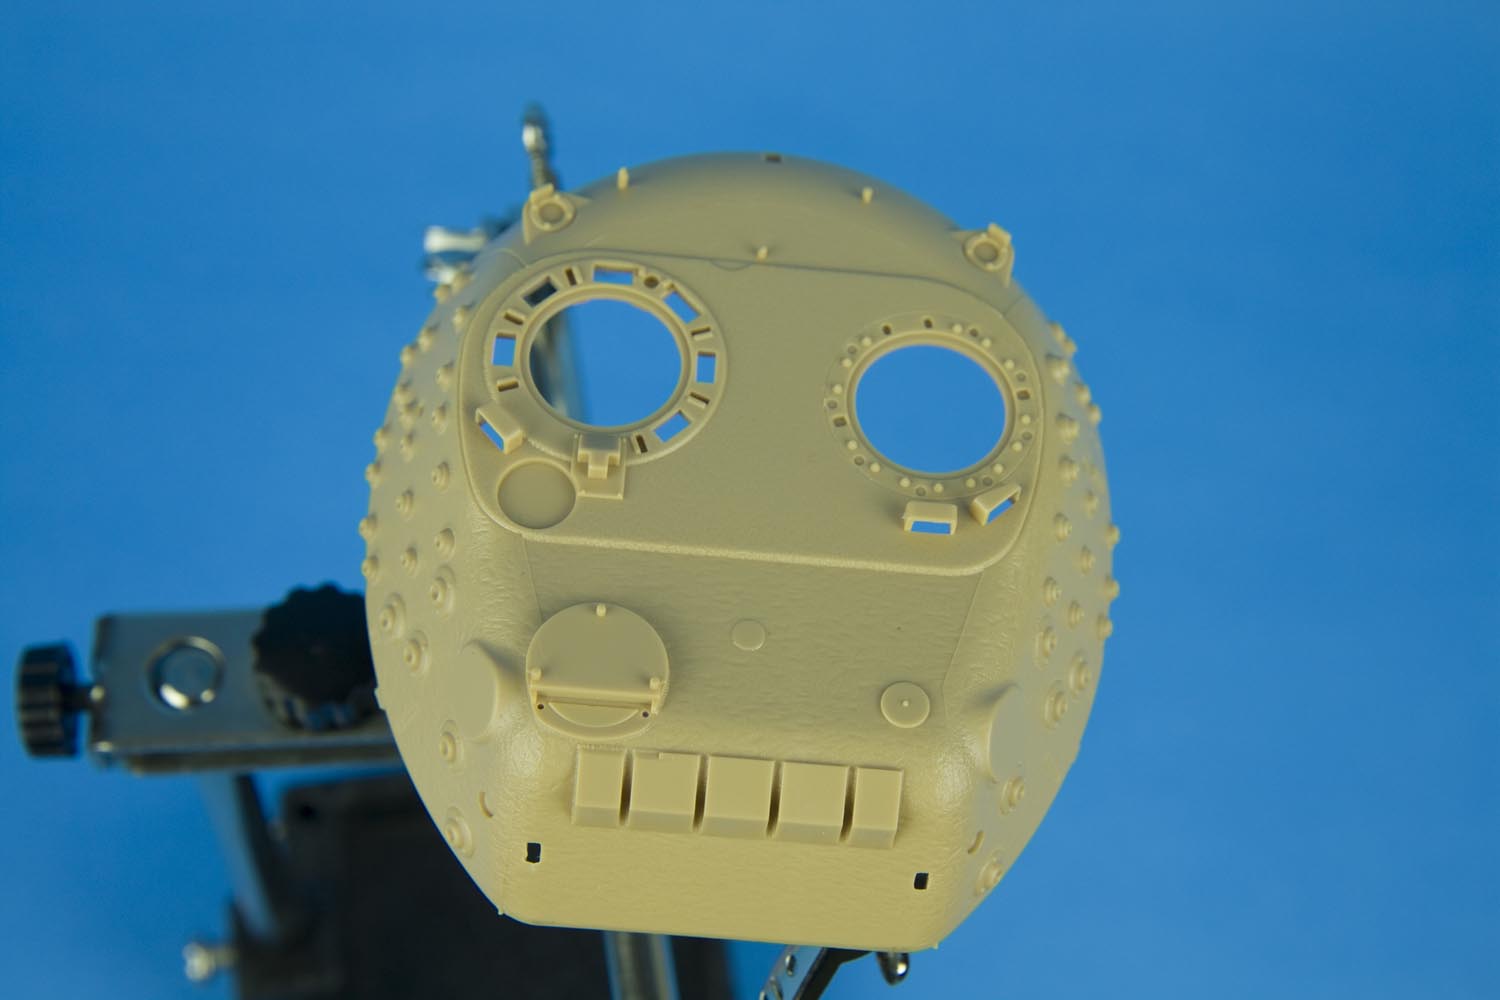
Turret top and base

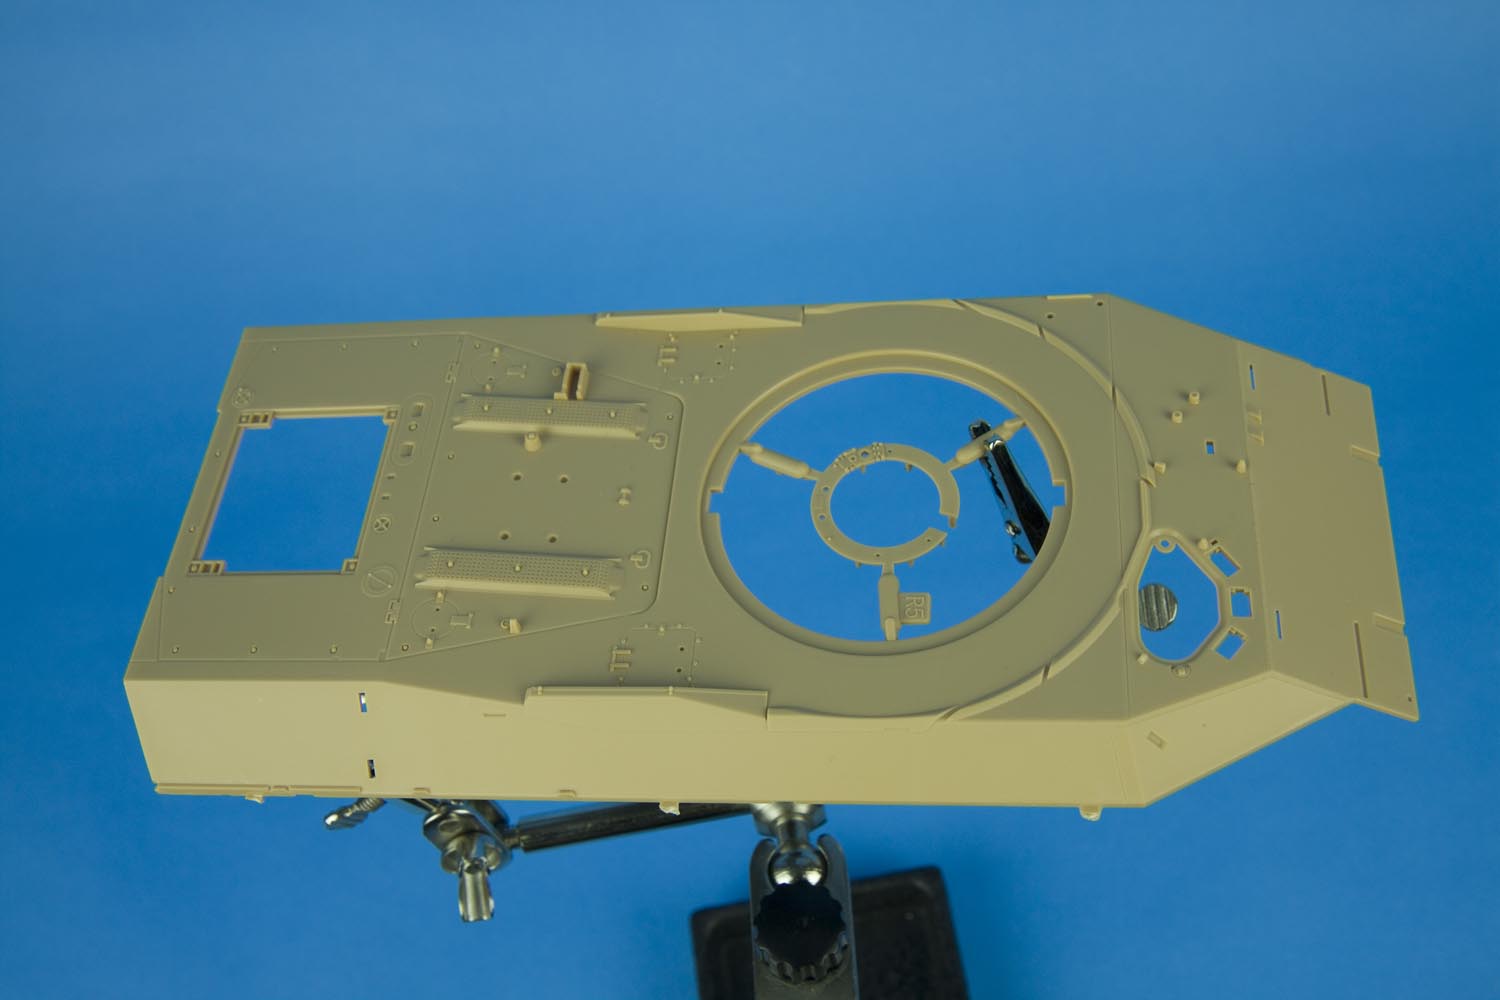
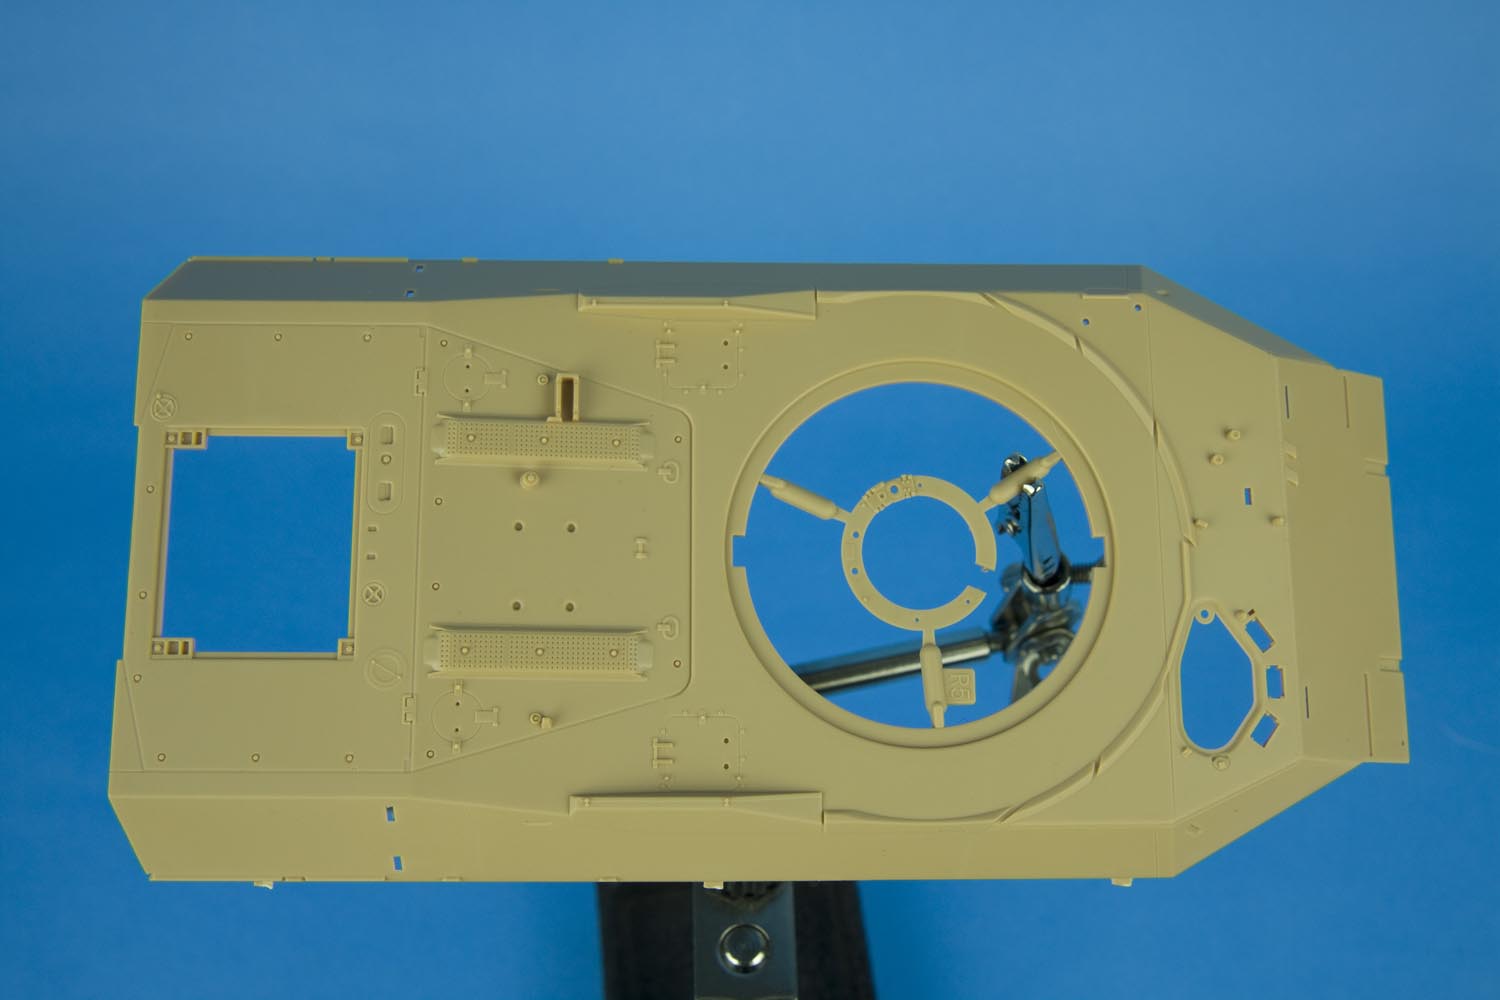
Hull top
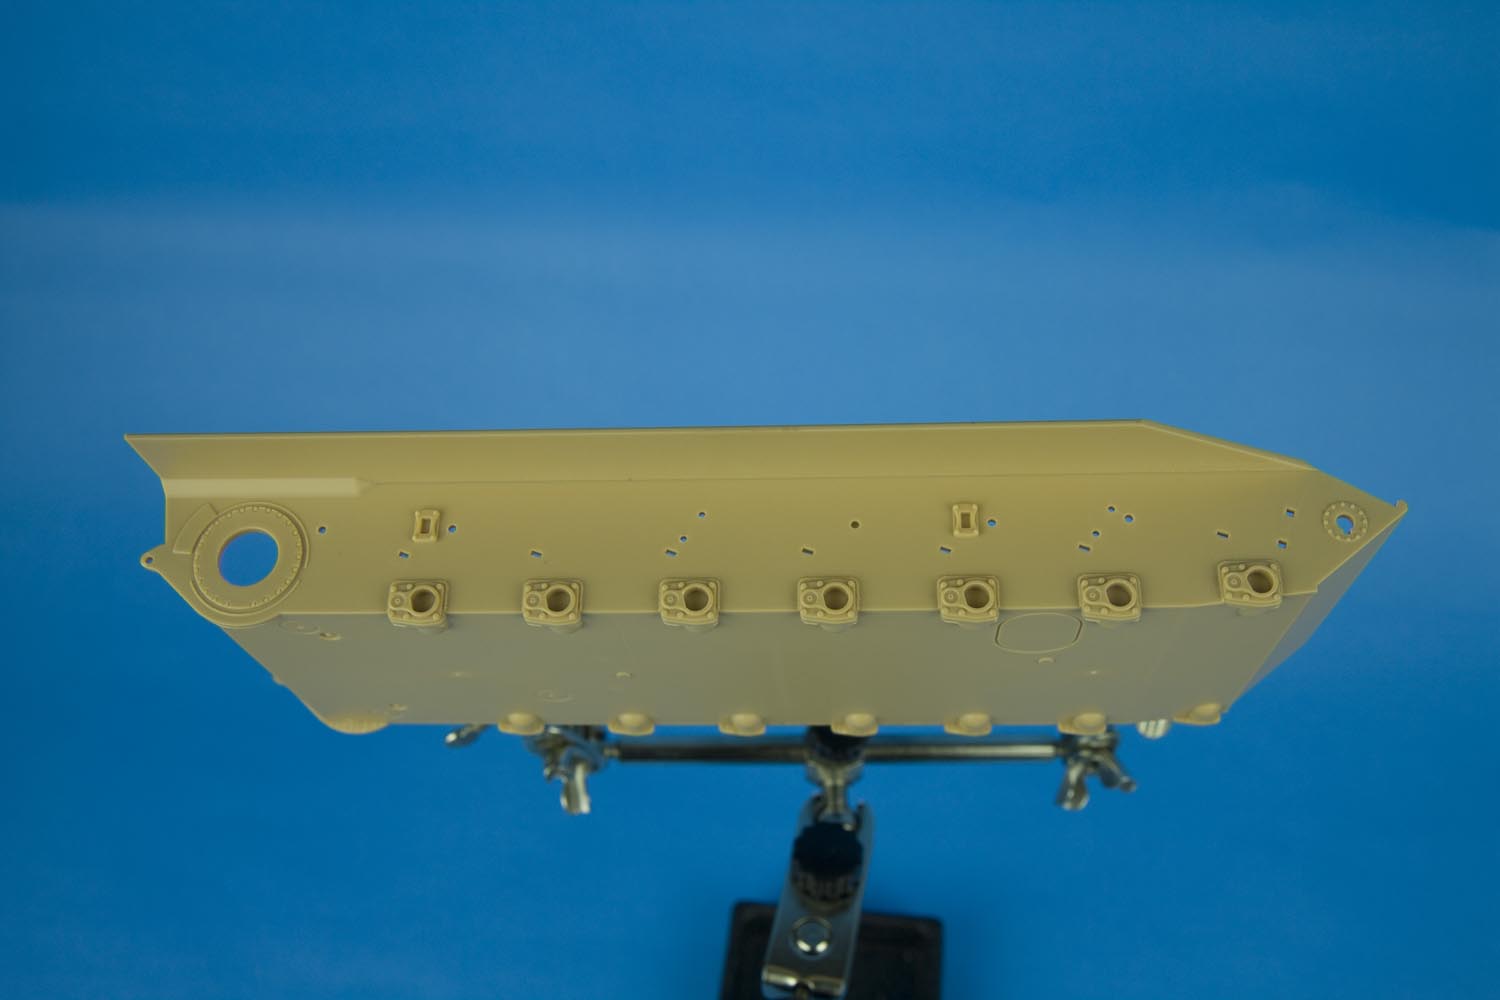
Hull bottom

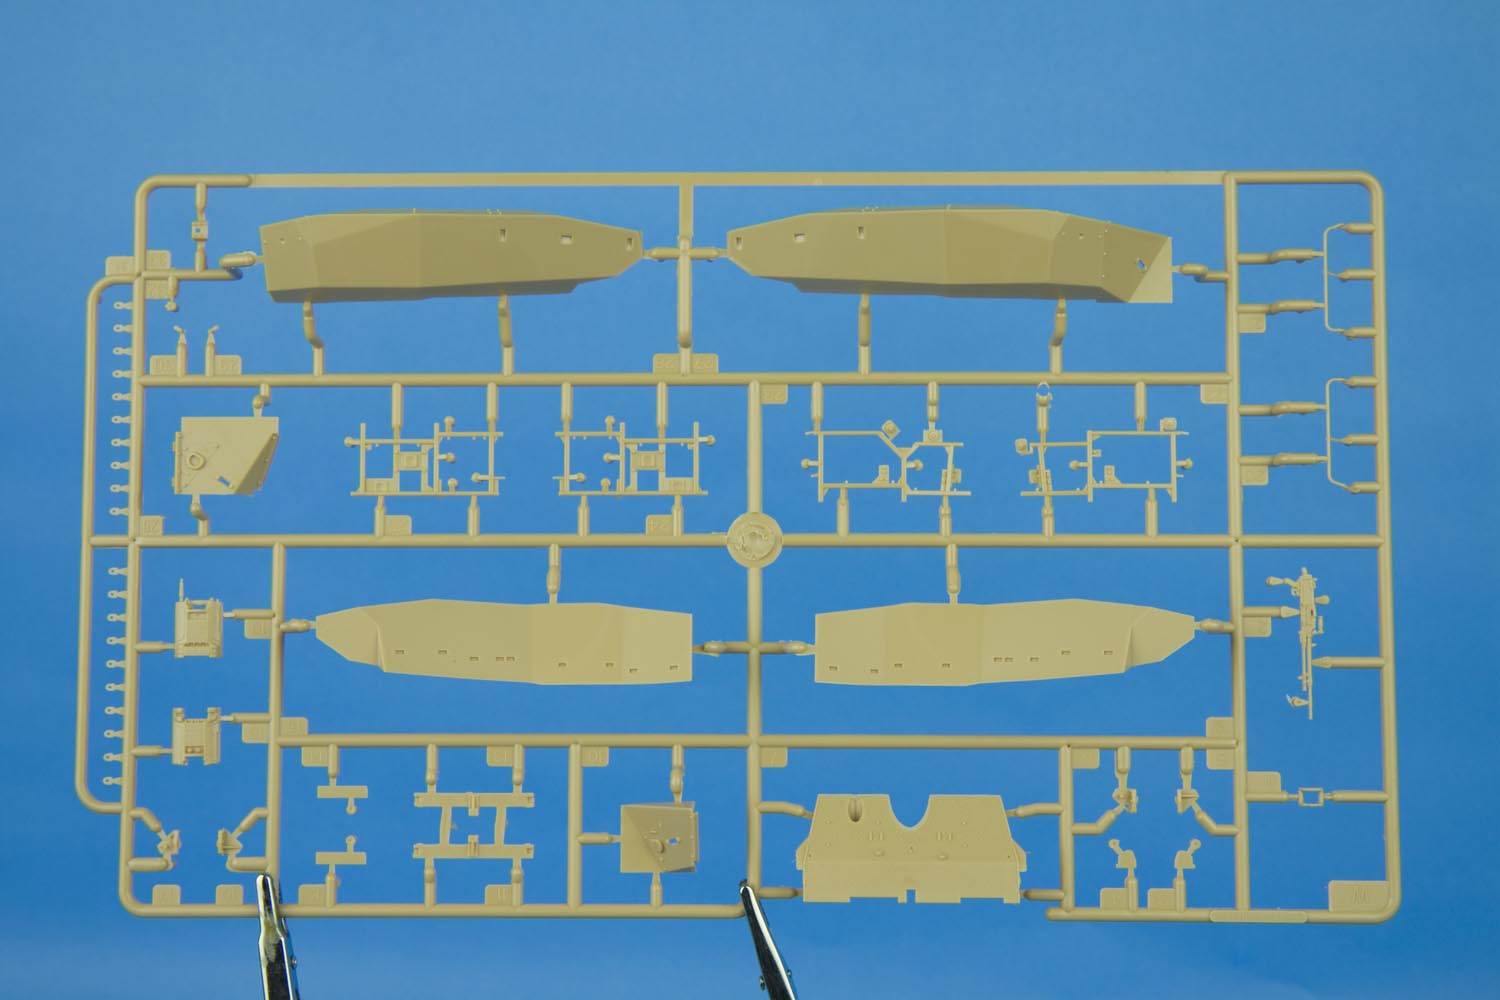
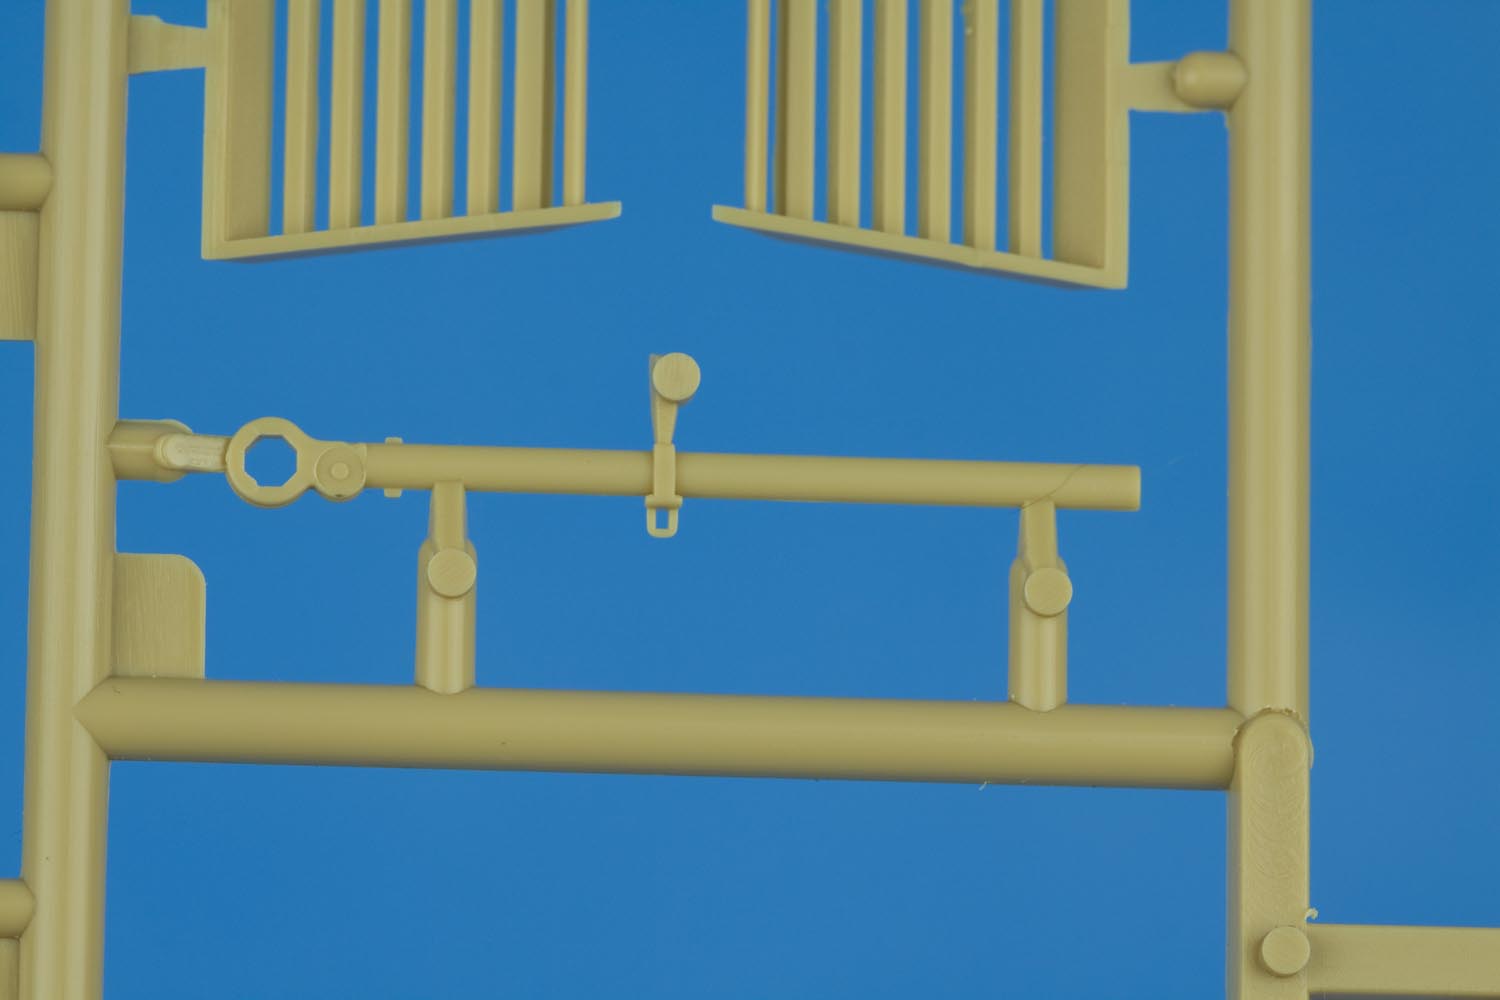
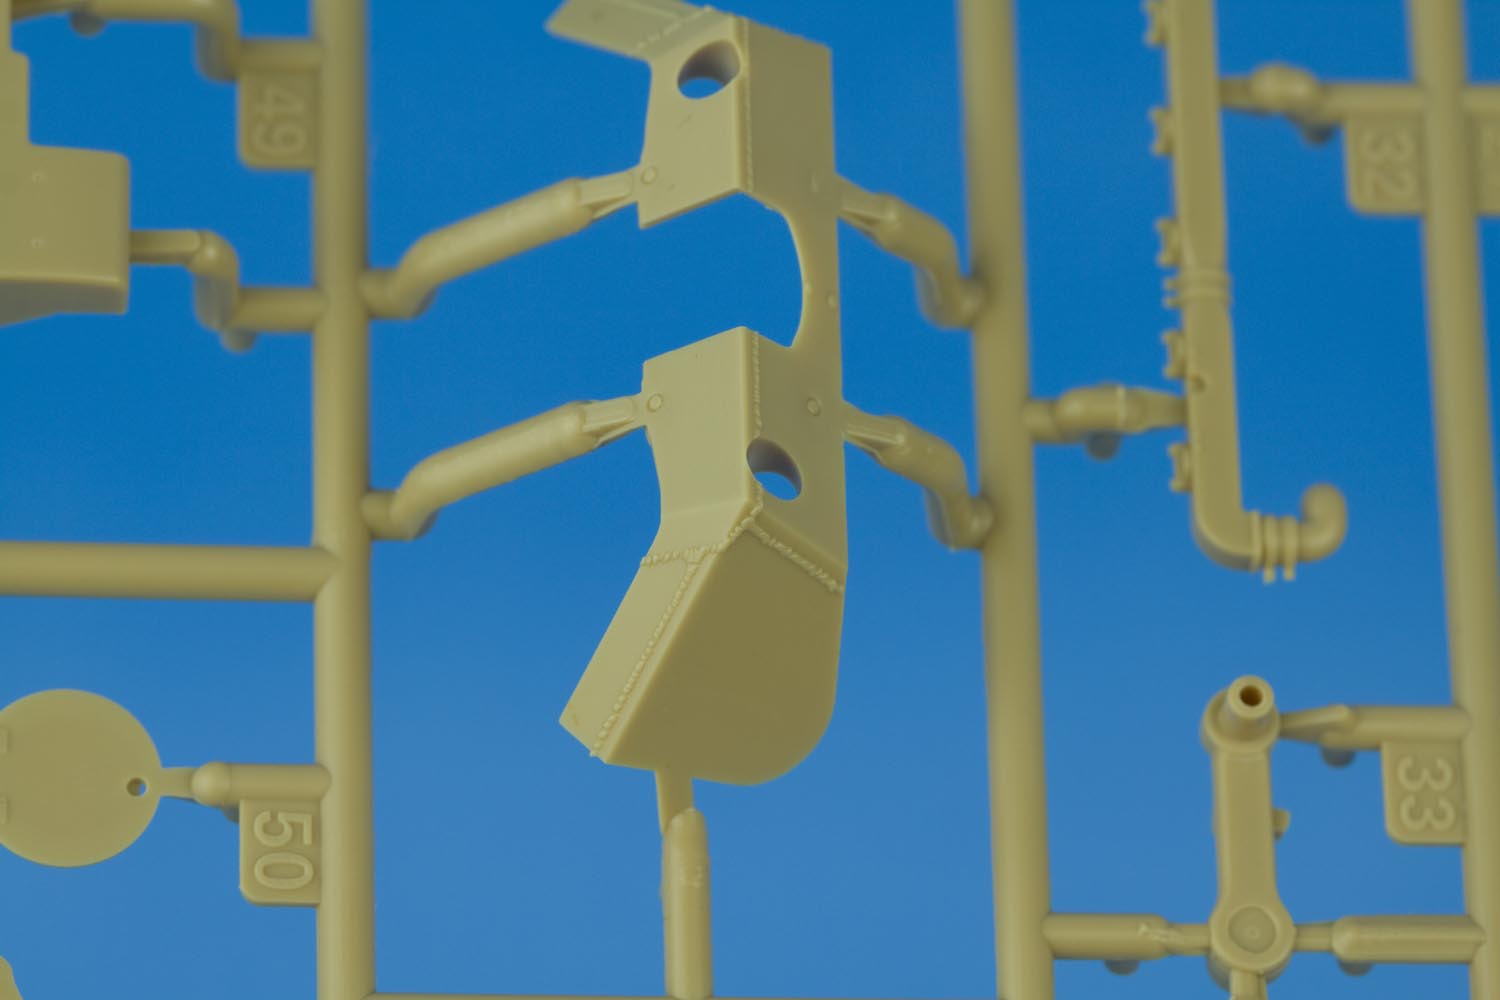
Sprue A - rear hull plate, exhaust louvers, engine parts, various detail parts

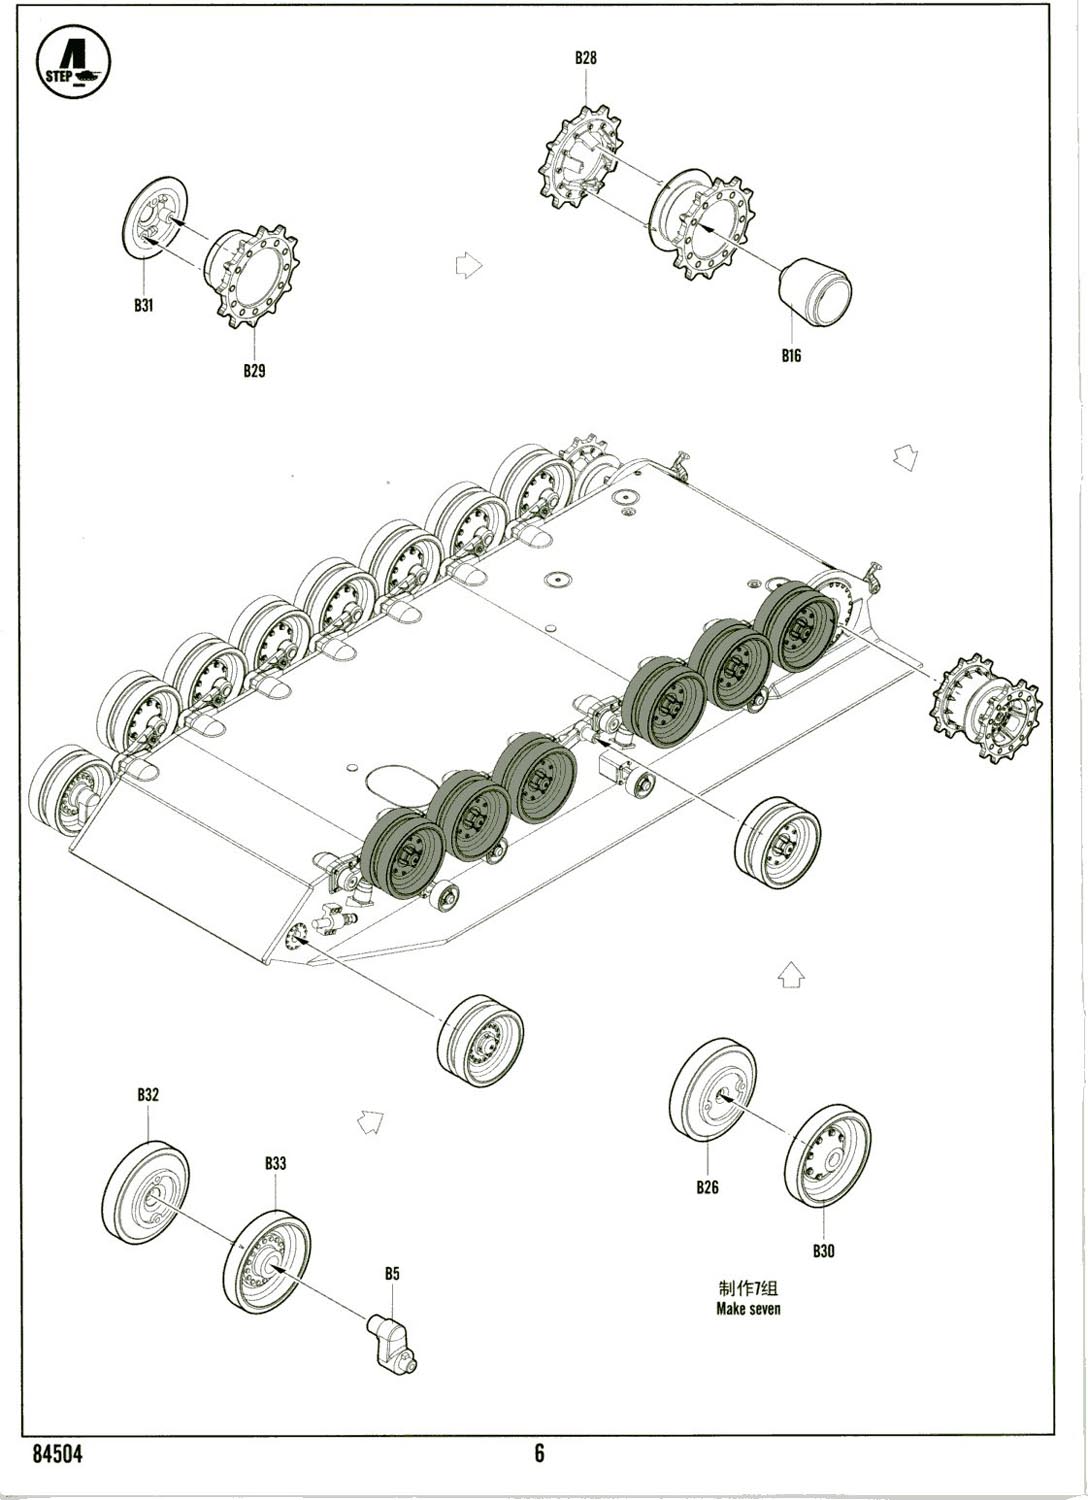
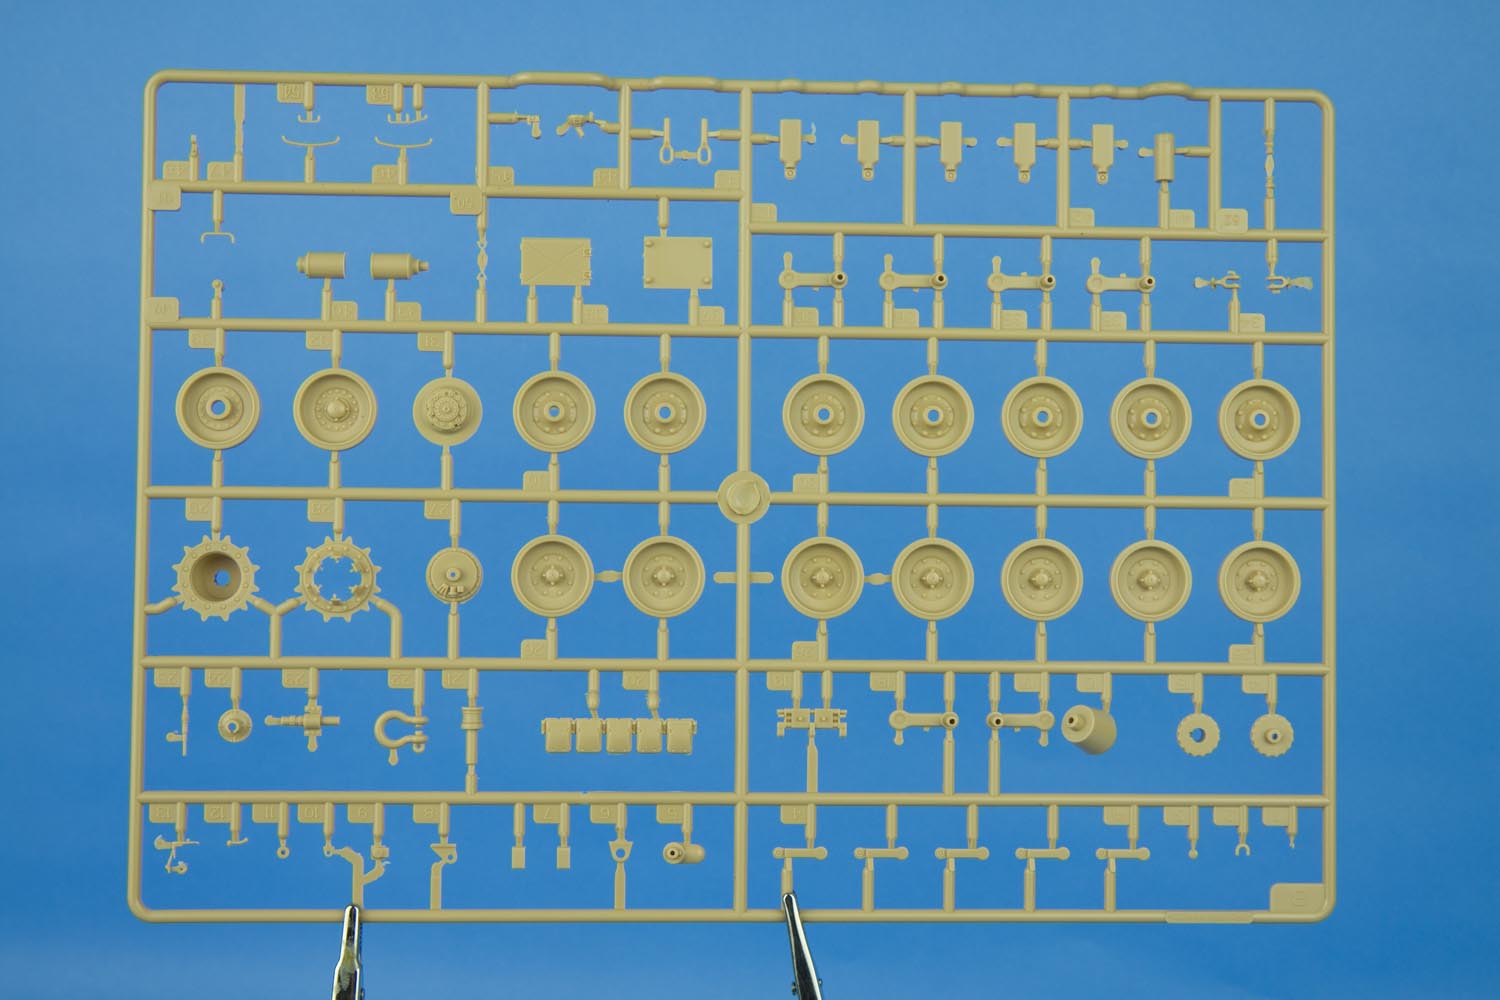
Sprue B (two included) - road and idler wheels, drive sprockets, suspension parts, engine parts, various detail parts
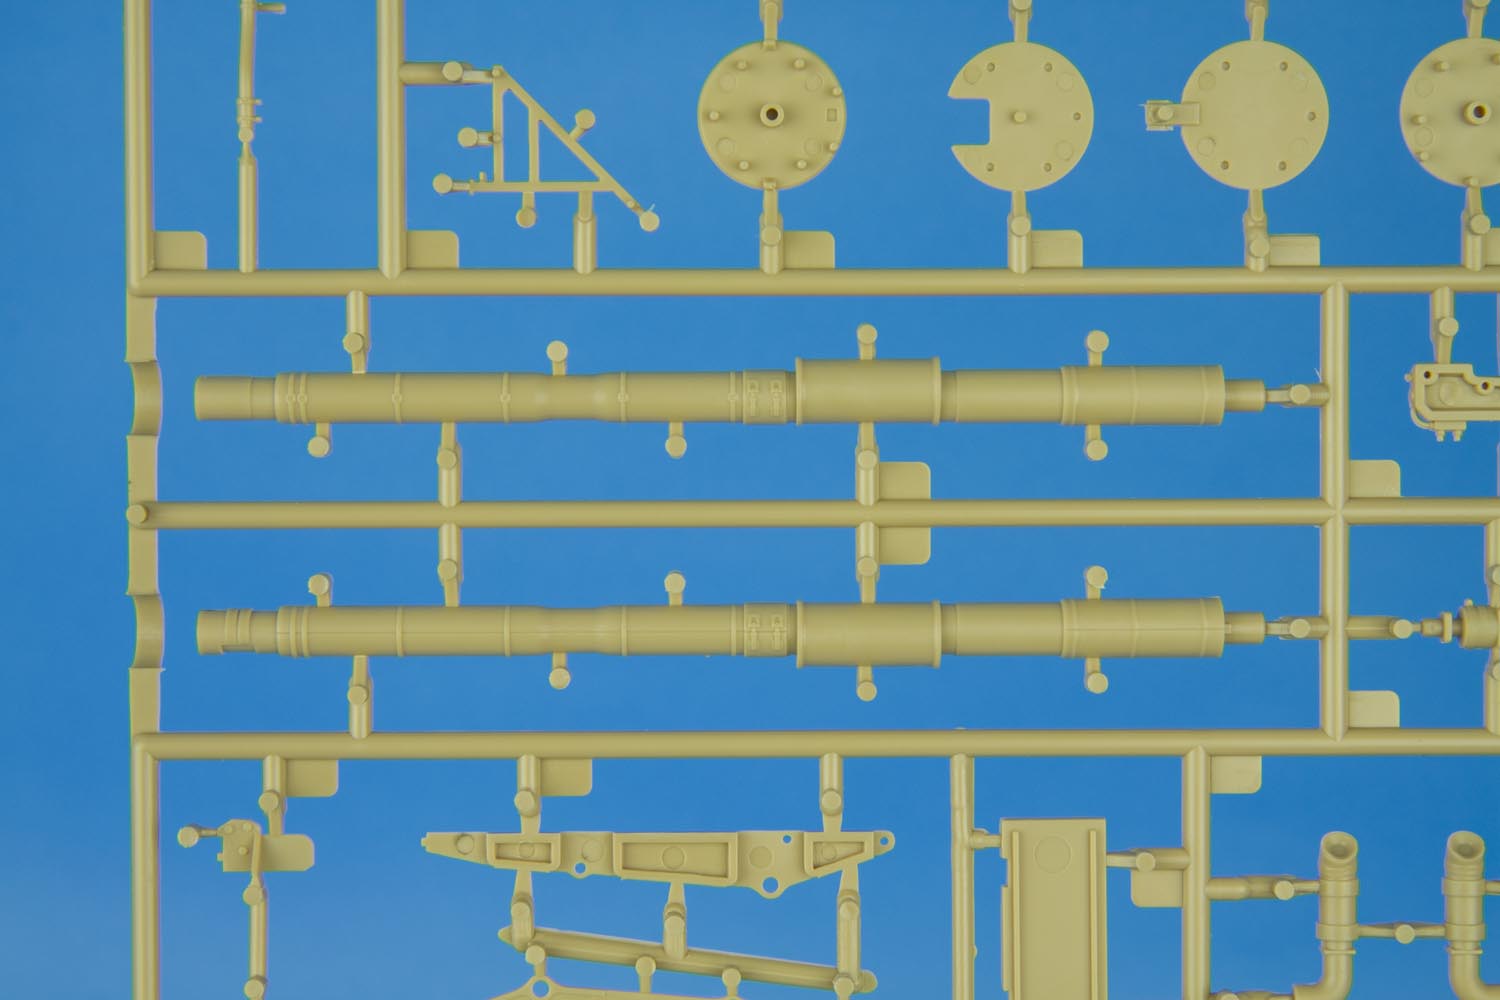
Sprue C - main gun tubes, more engine parts, turret hatches, engine lifting device parts,
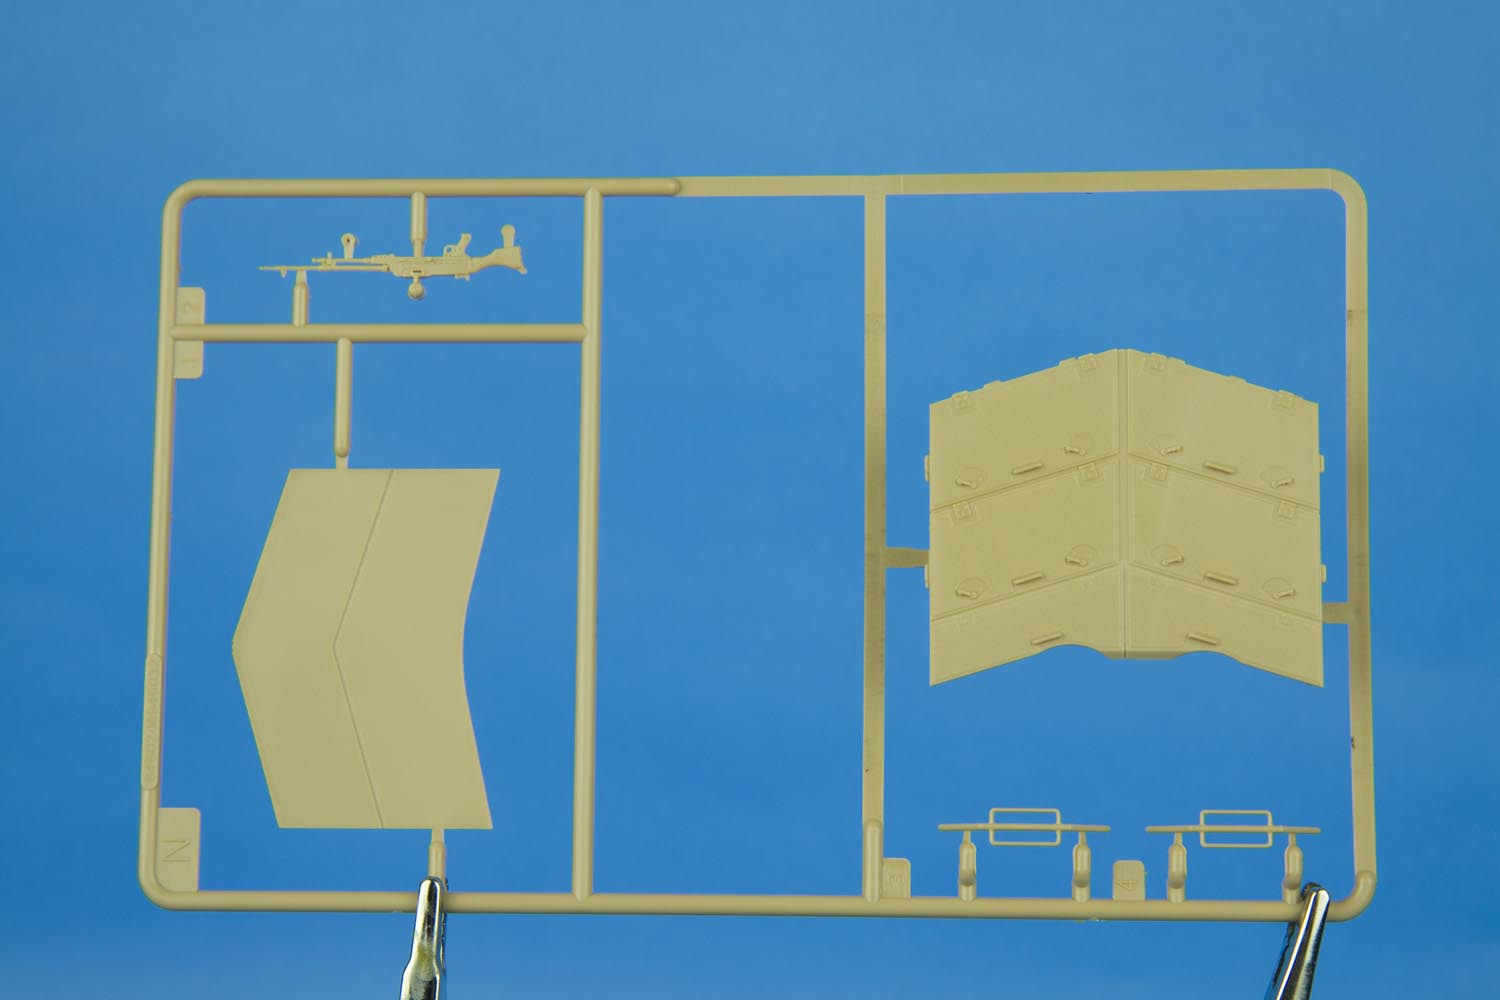
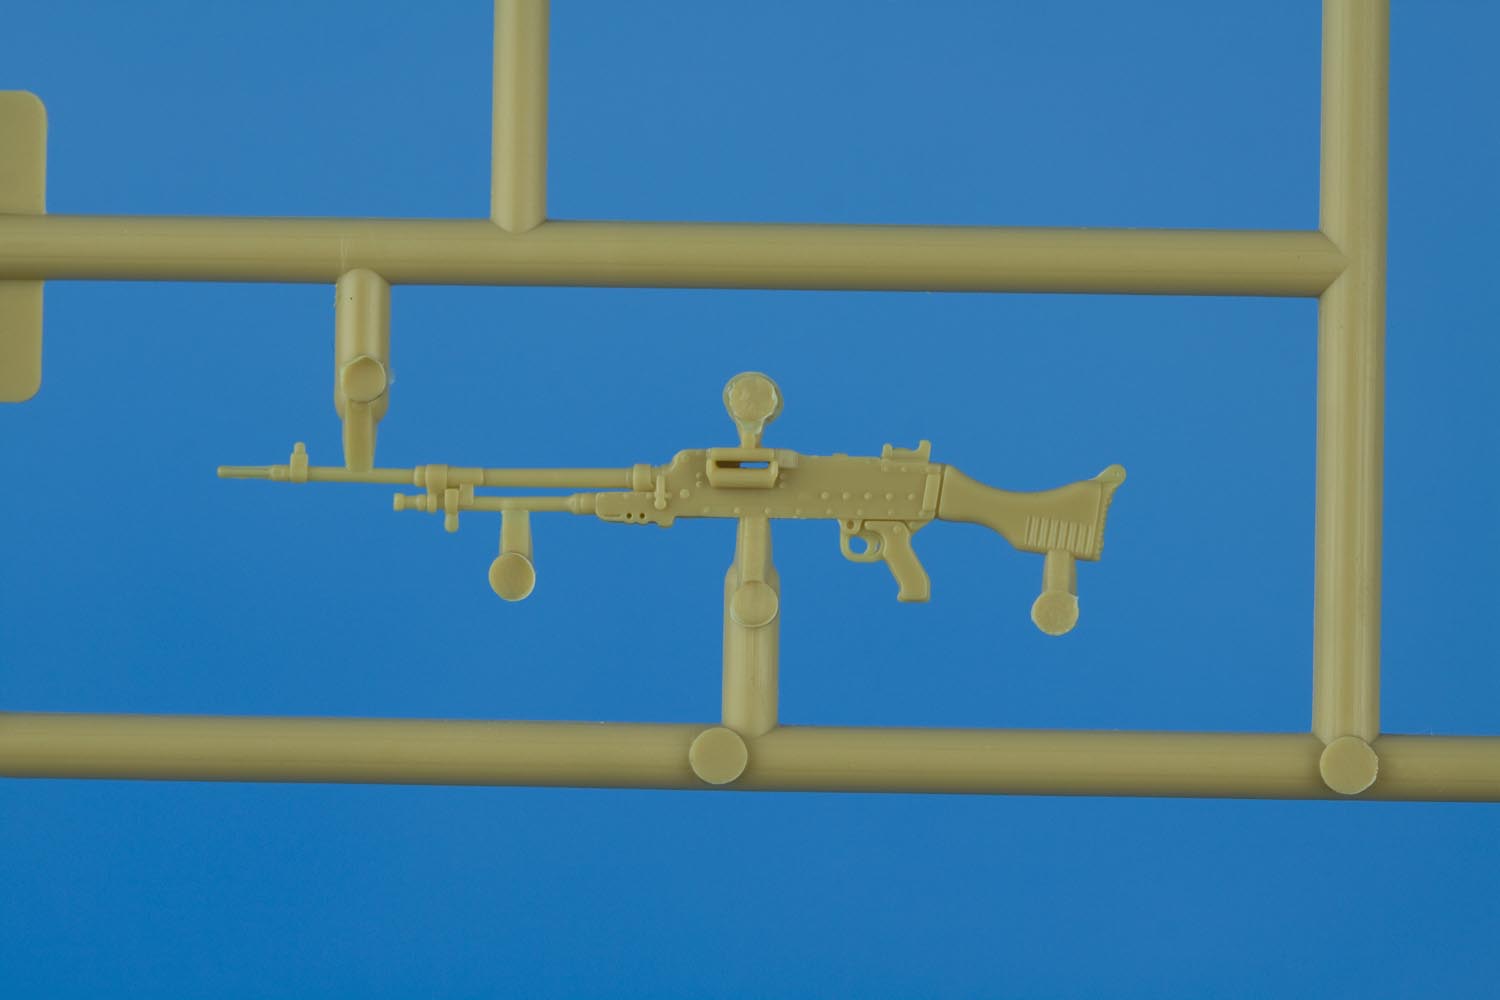
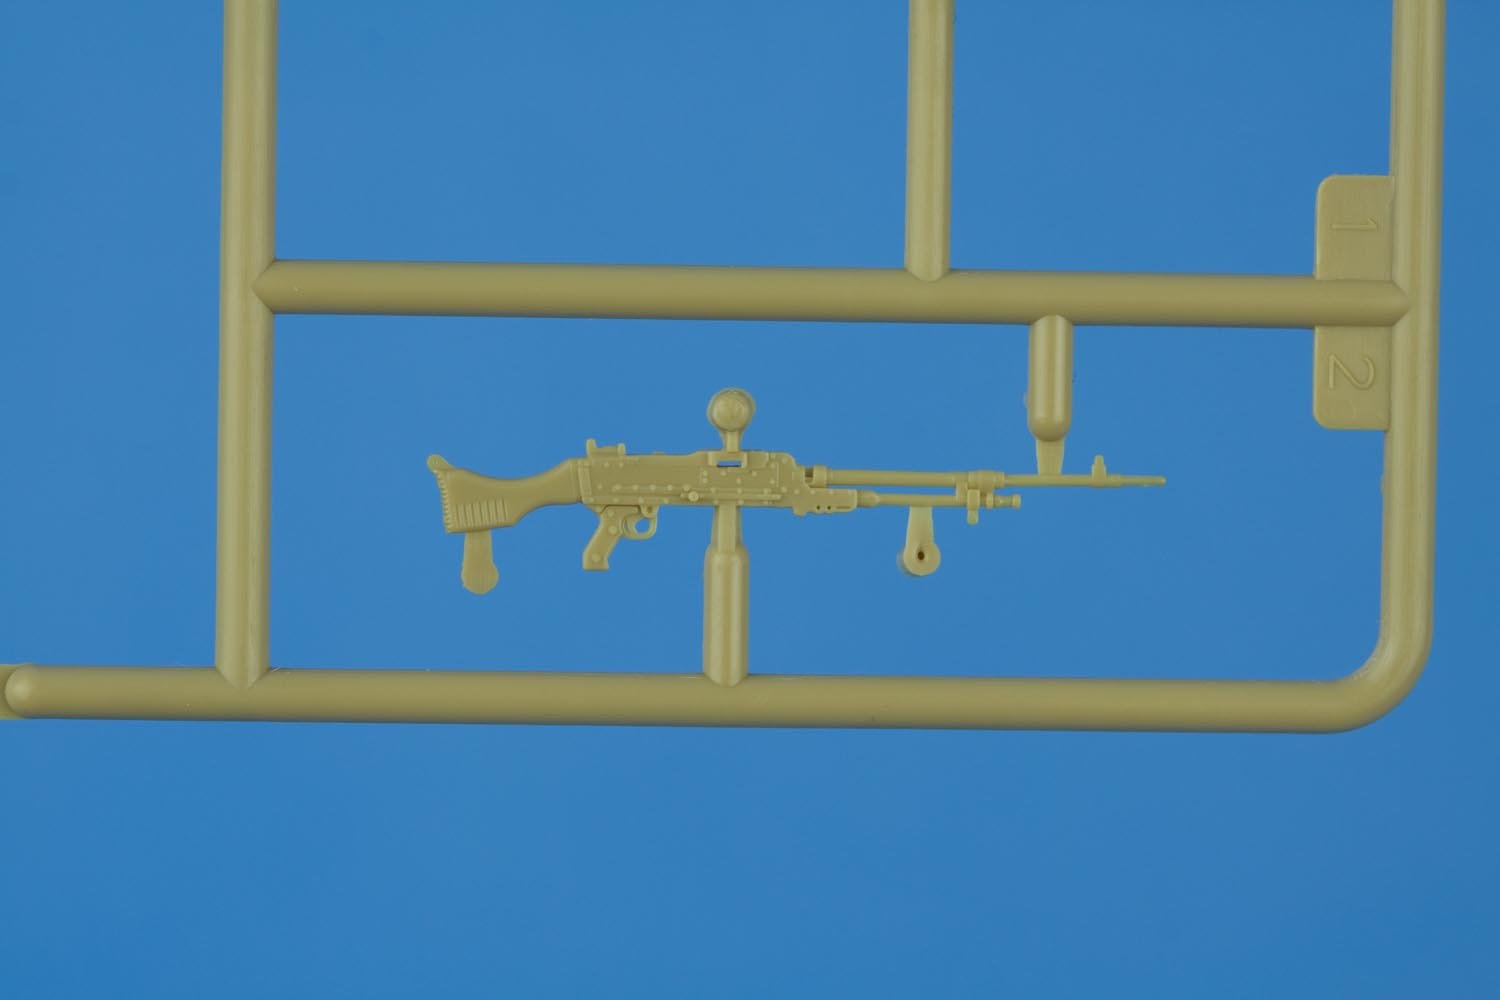
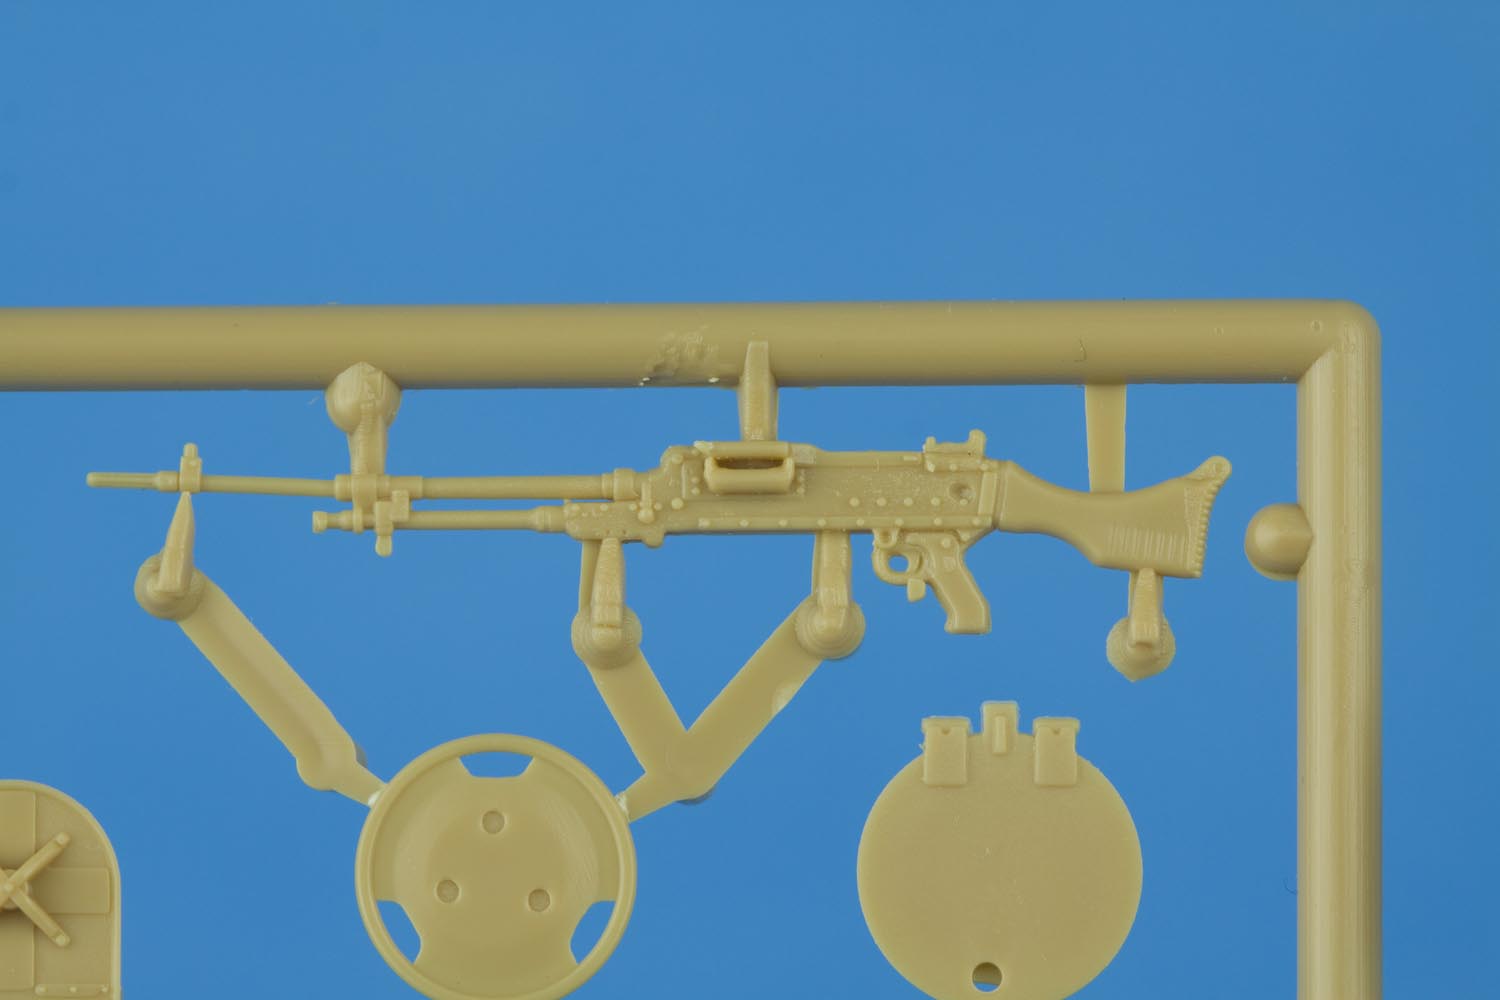
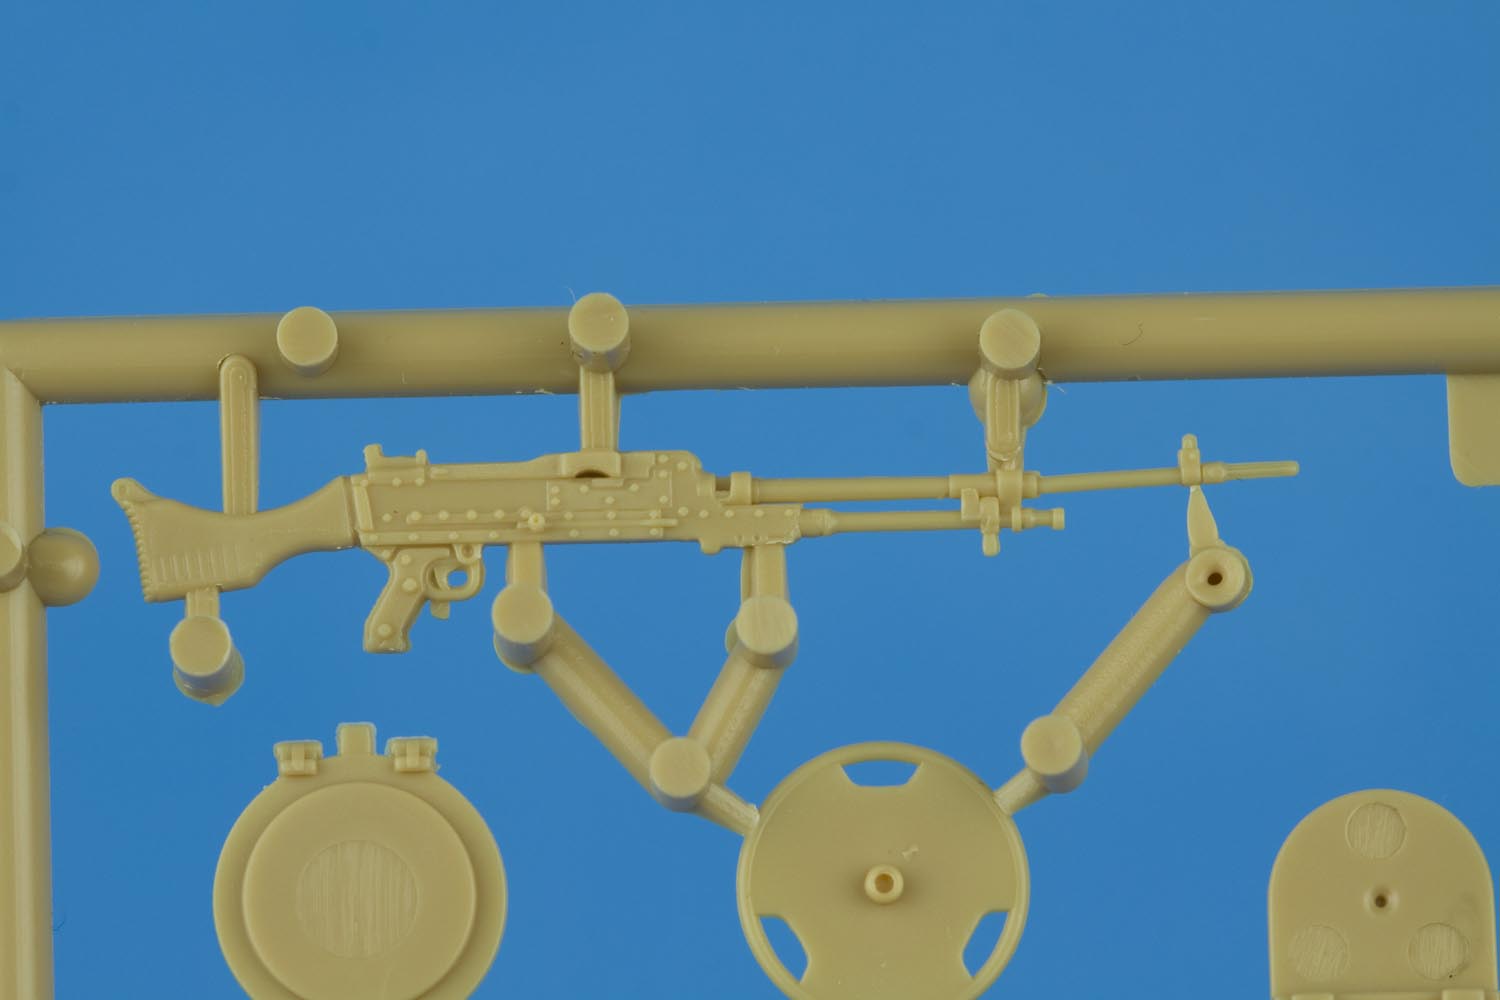
C6 GPMG infantry type (one of three included with this kit) and mount, various detail parts
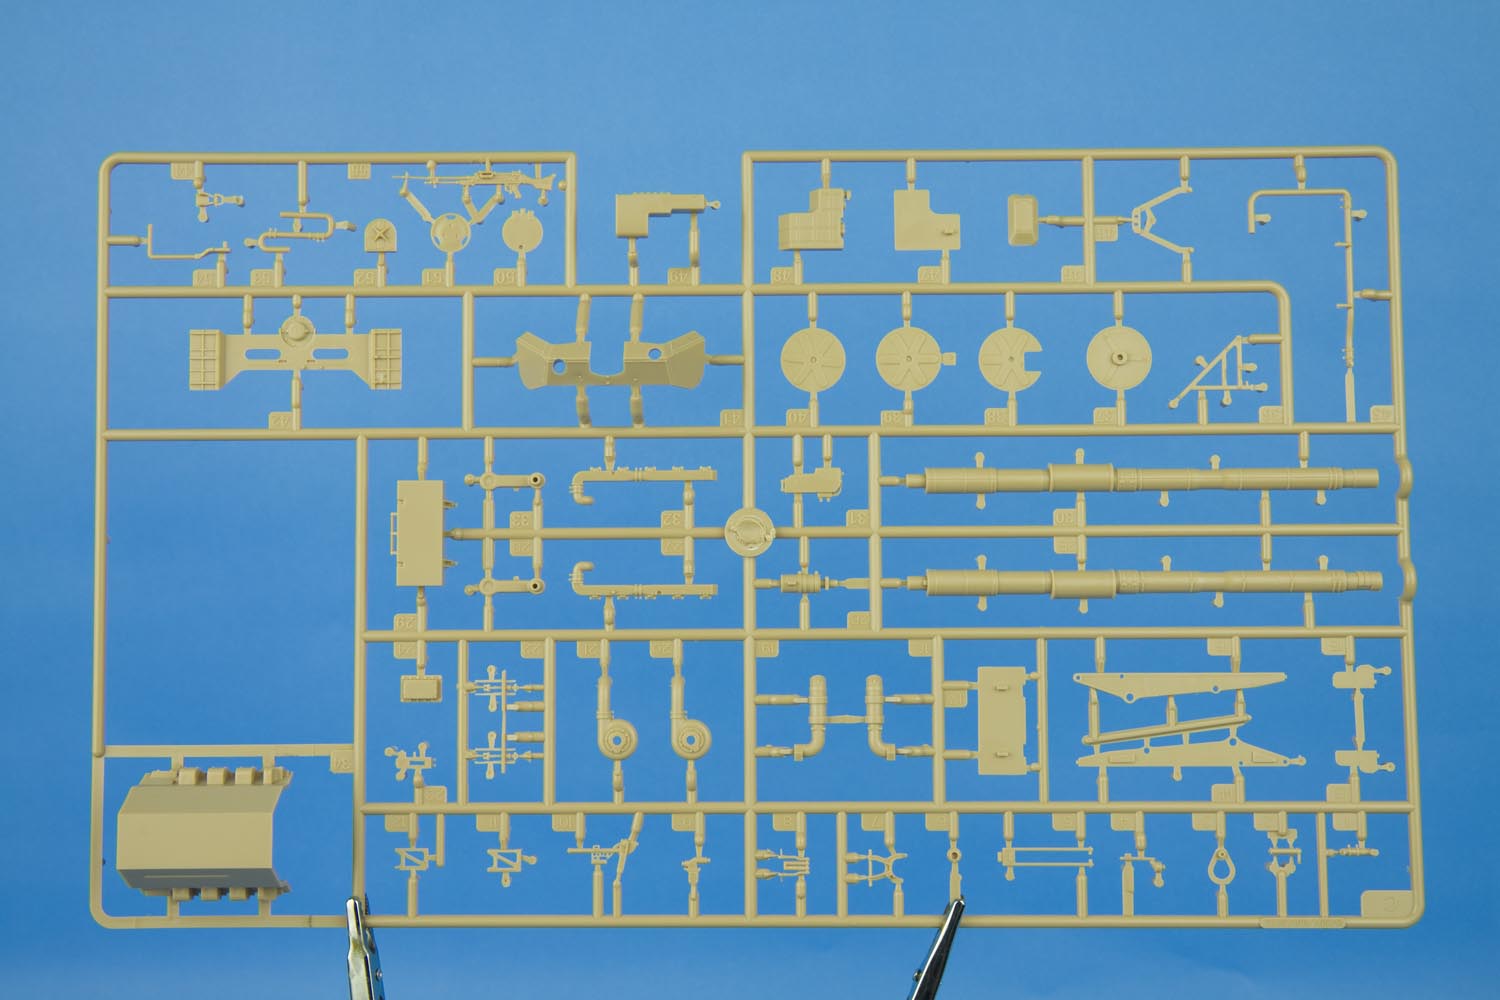
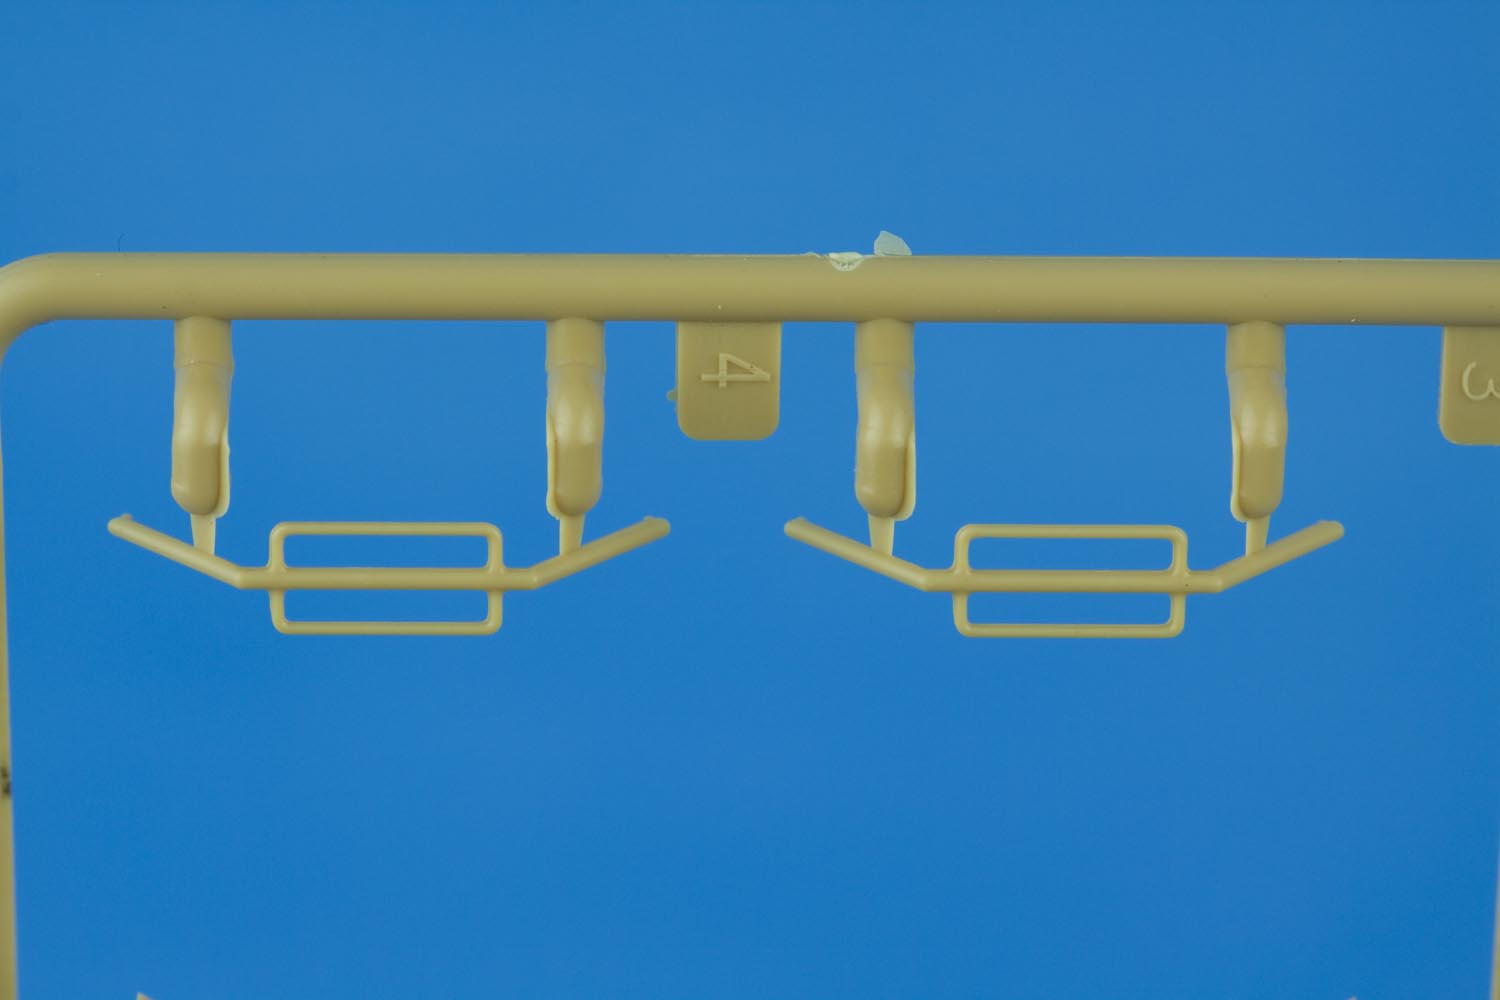
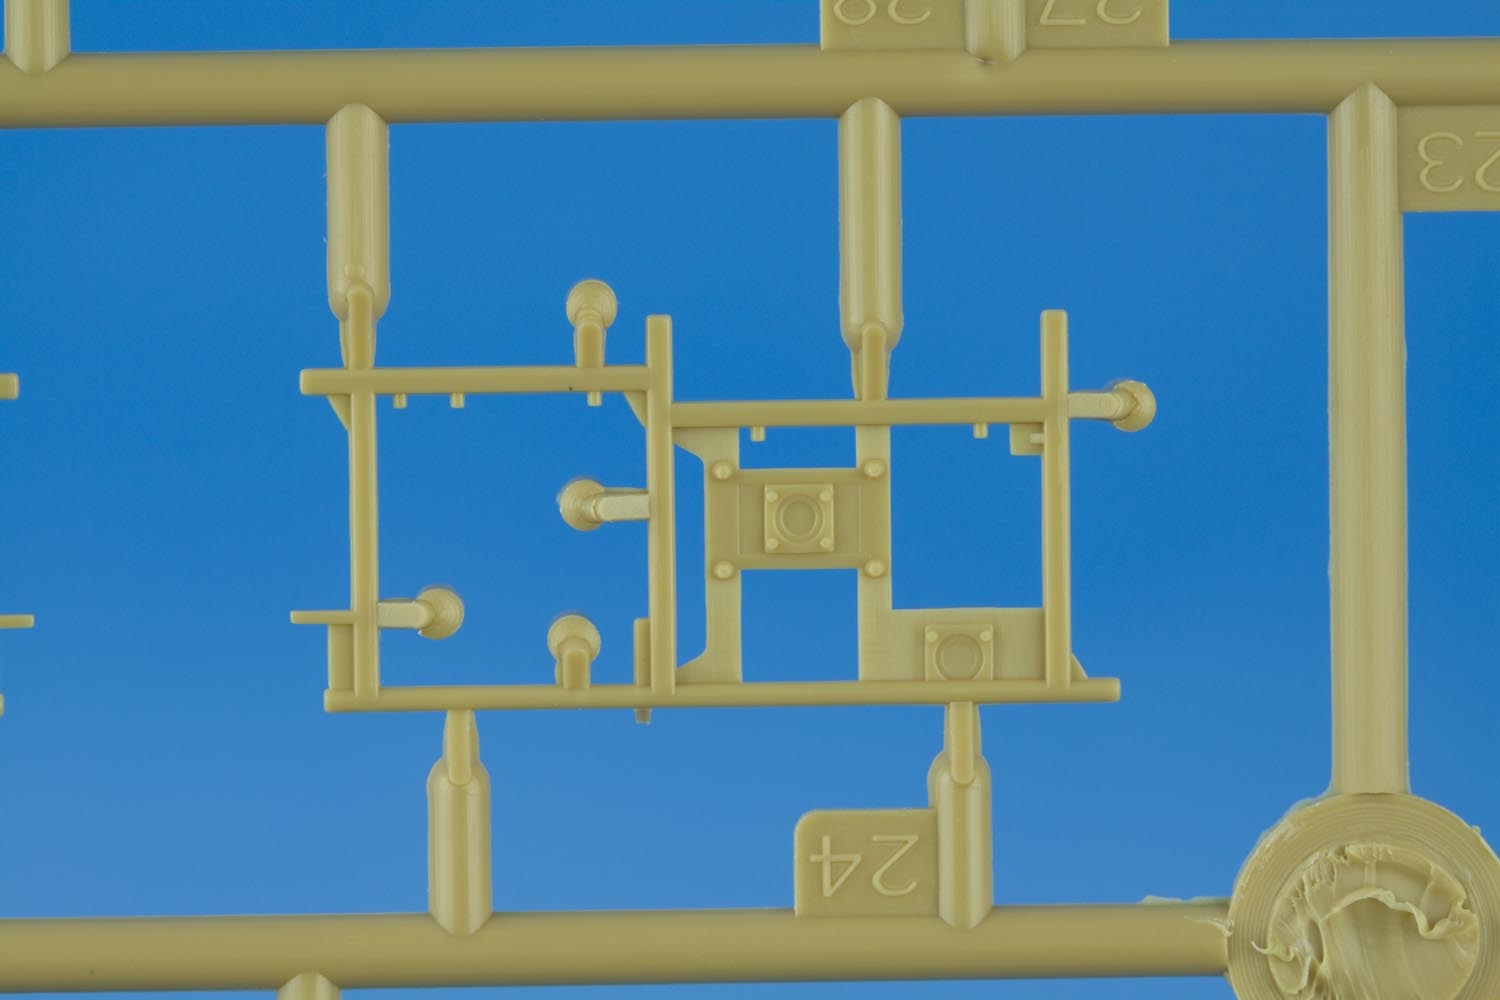
Sprue D (two included) - return rollers, return roller mounts, bump stop springs
Sprue E (two included) - smoke dischargers, various detail parts
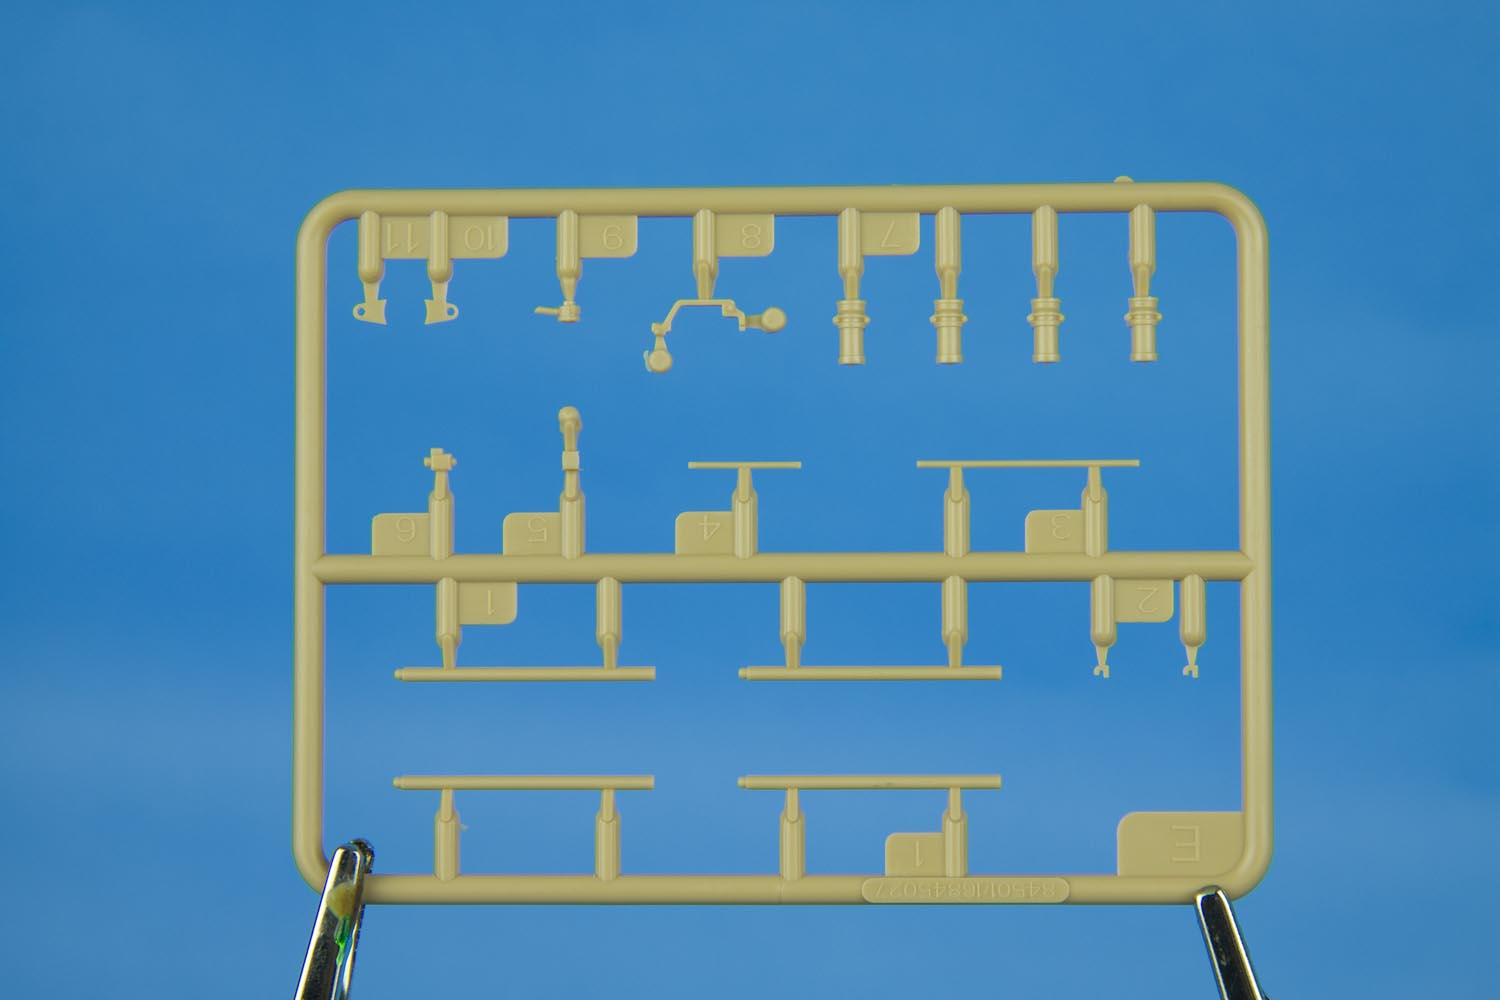
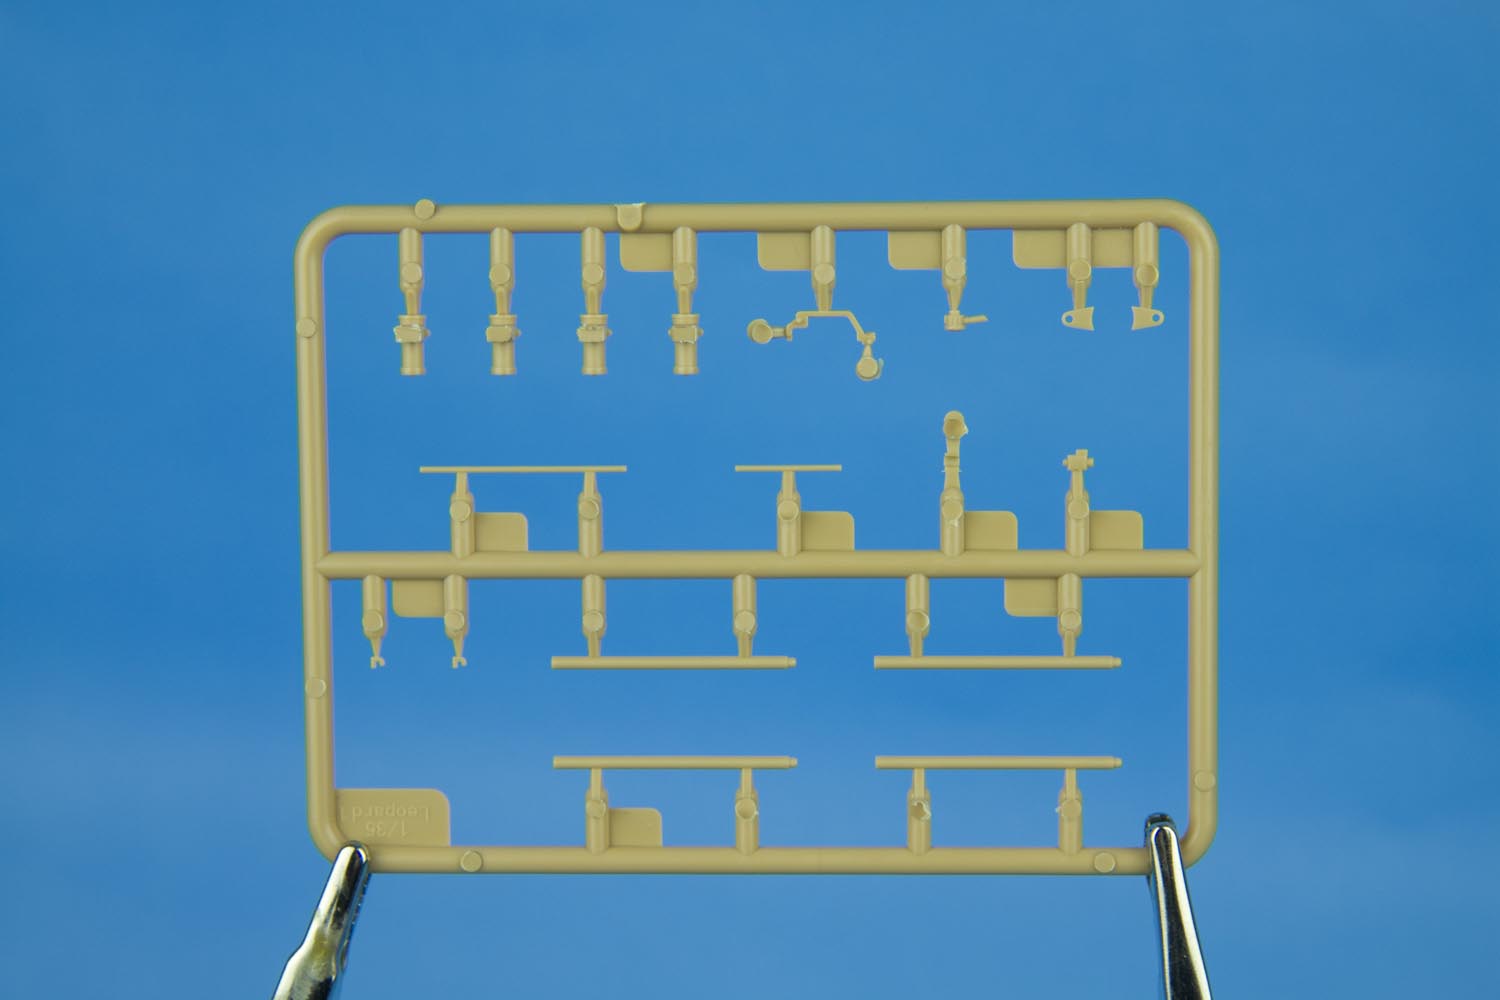
Sprue F (two included) - main gun mantlet, POL cans and brackets, more smoke dischargers
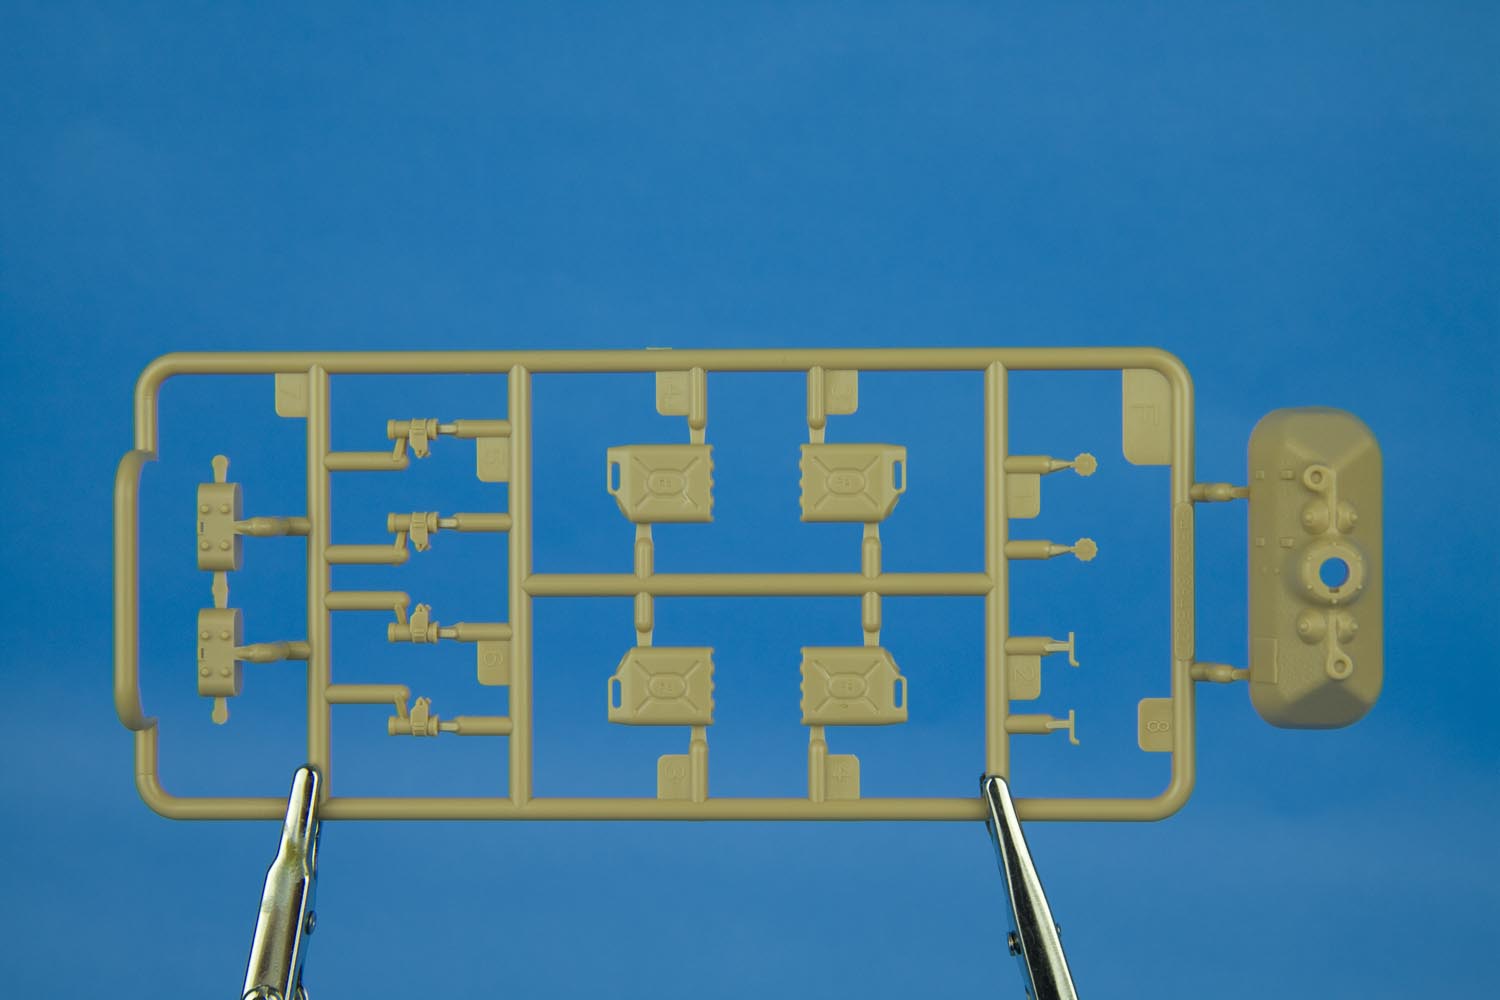
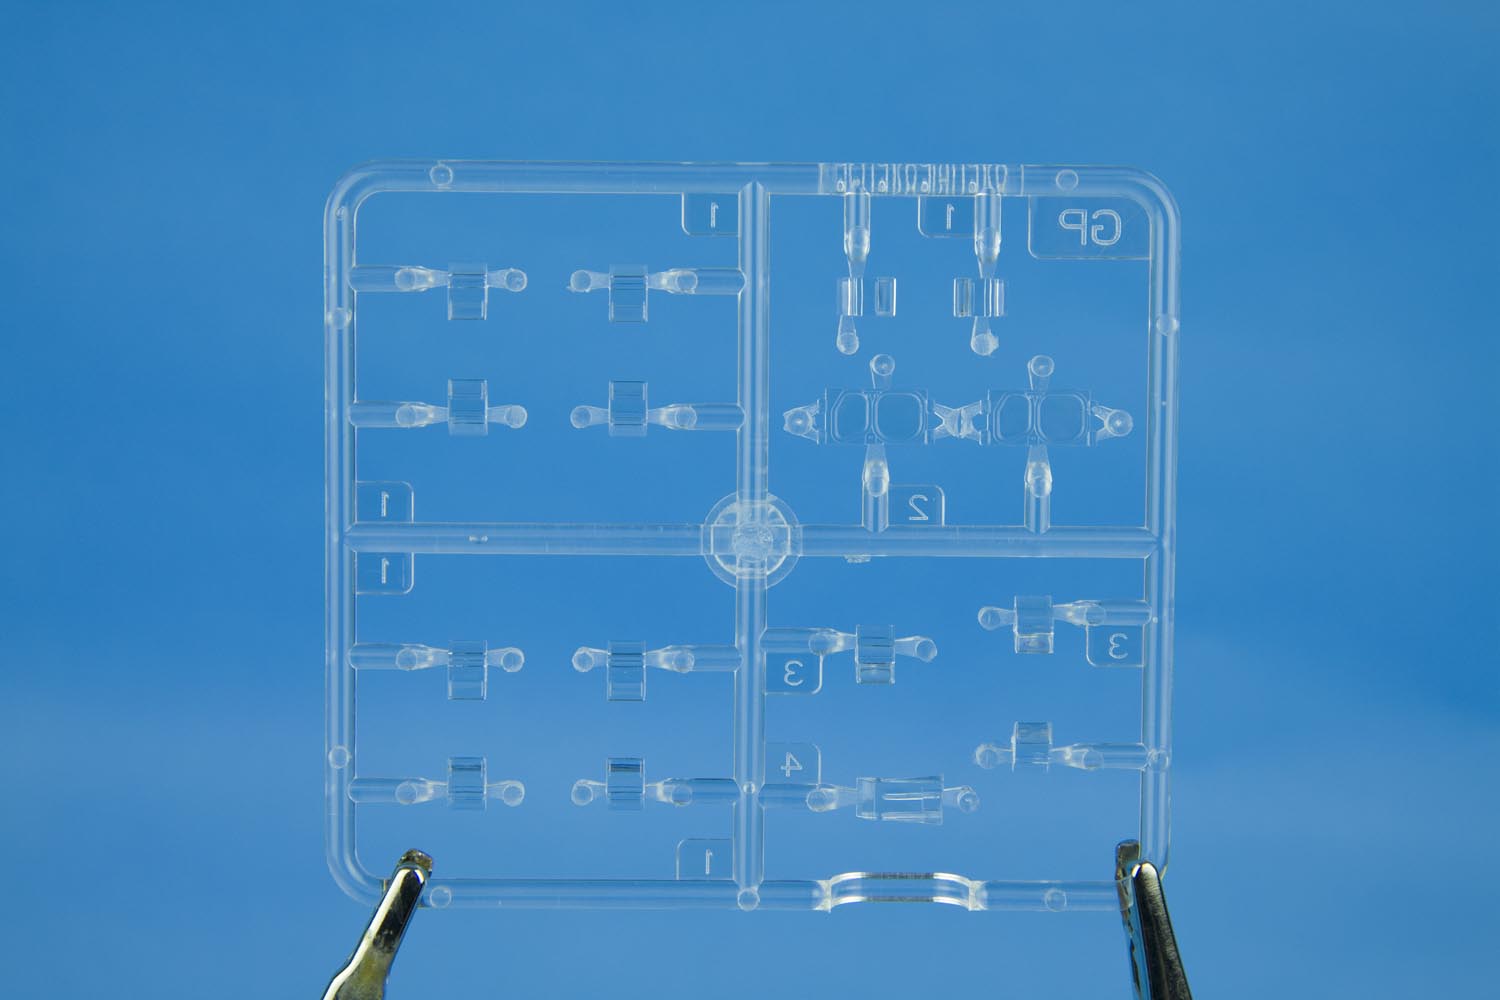
Sprue GP - clear parts
Sprue H - hull MEXAS modules, driver's hatch wiper hood, bustle bin racks, other bits
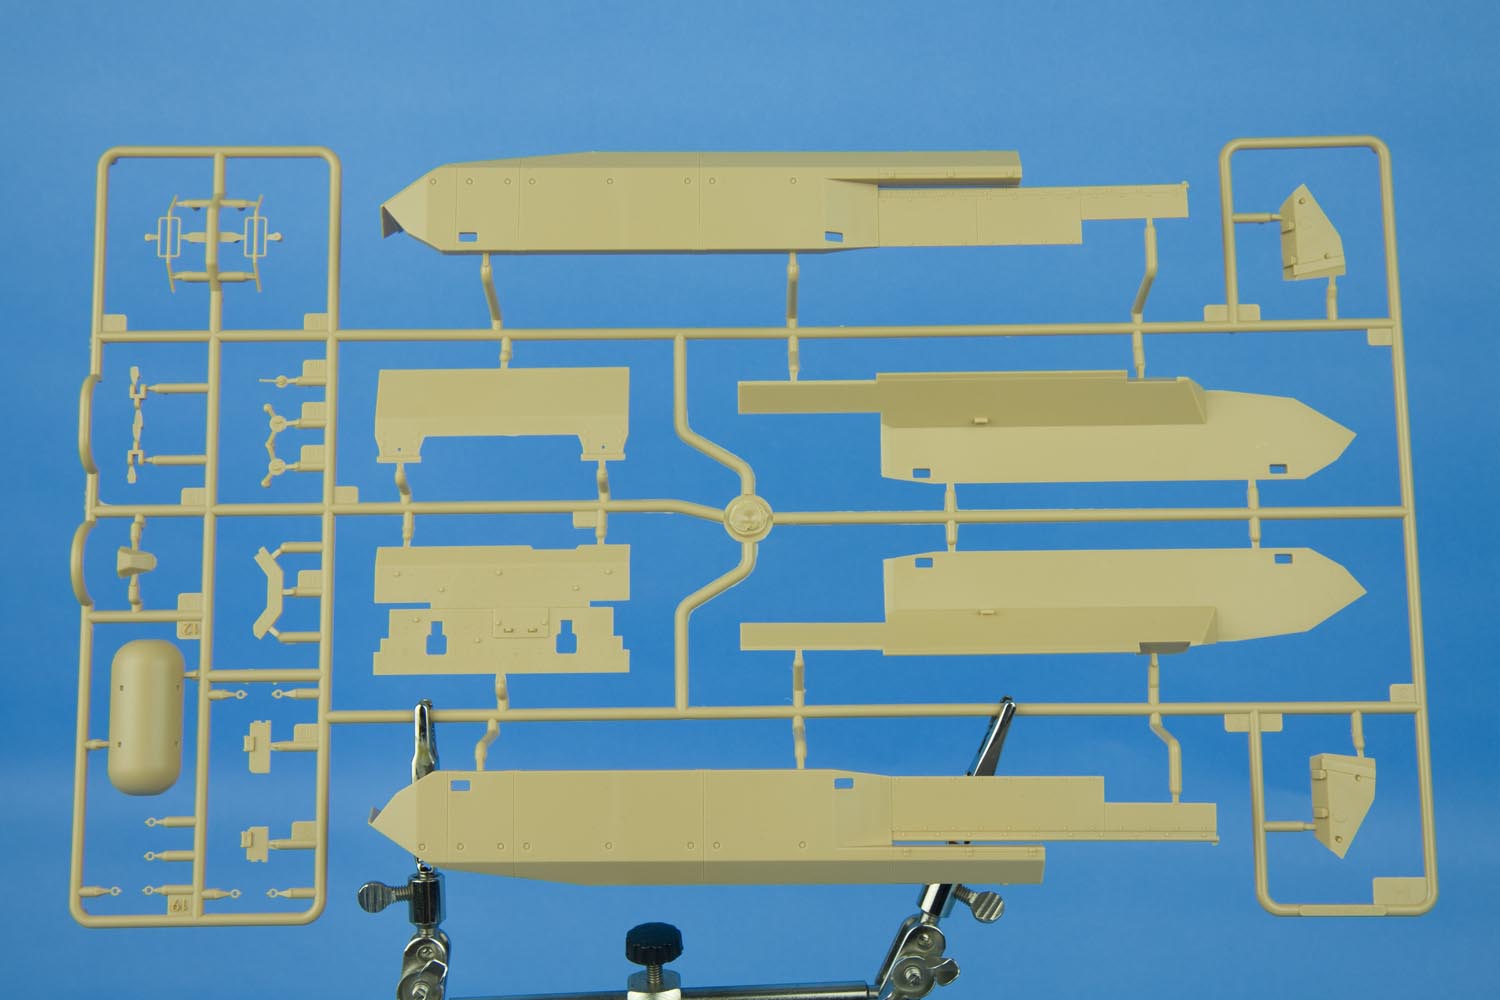
Sprue M - turret applique armour (not used with this kit), bustle bin mounts, smoke discharger brush guards

Sprue N - bustle bin parts (including another set of racks), C6 GPMG infantry type (second one included with this kit)
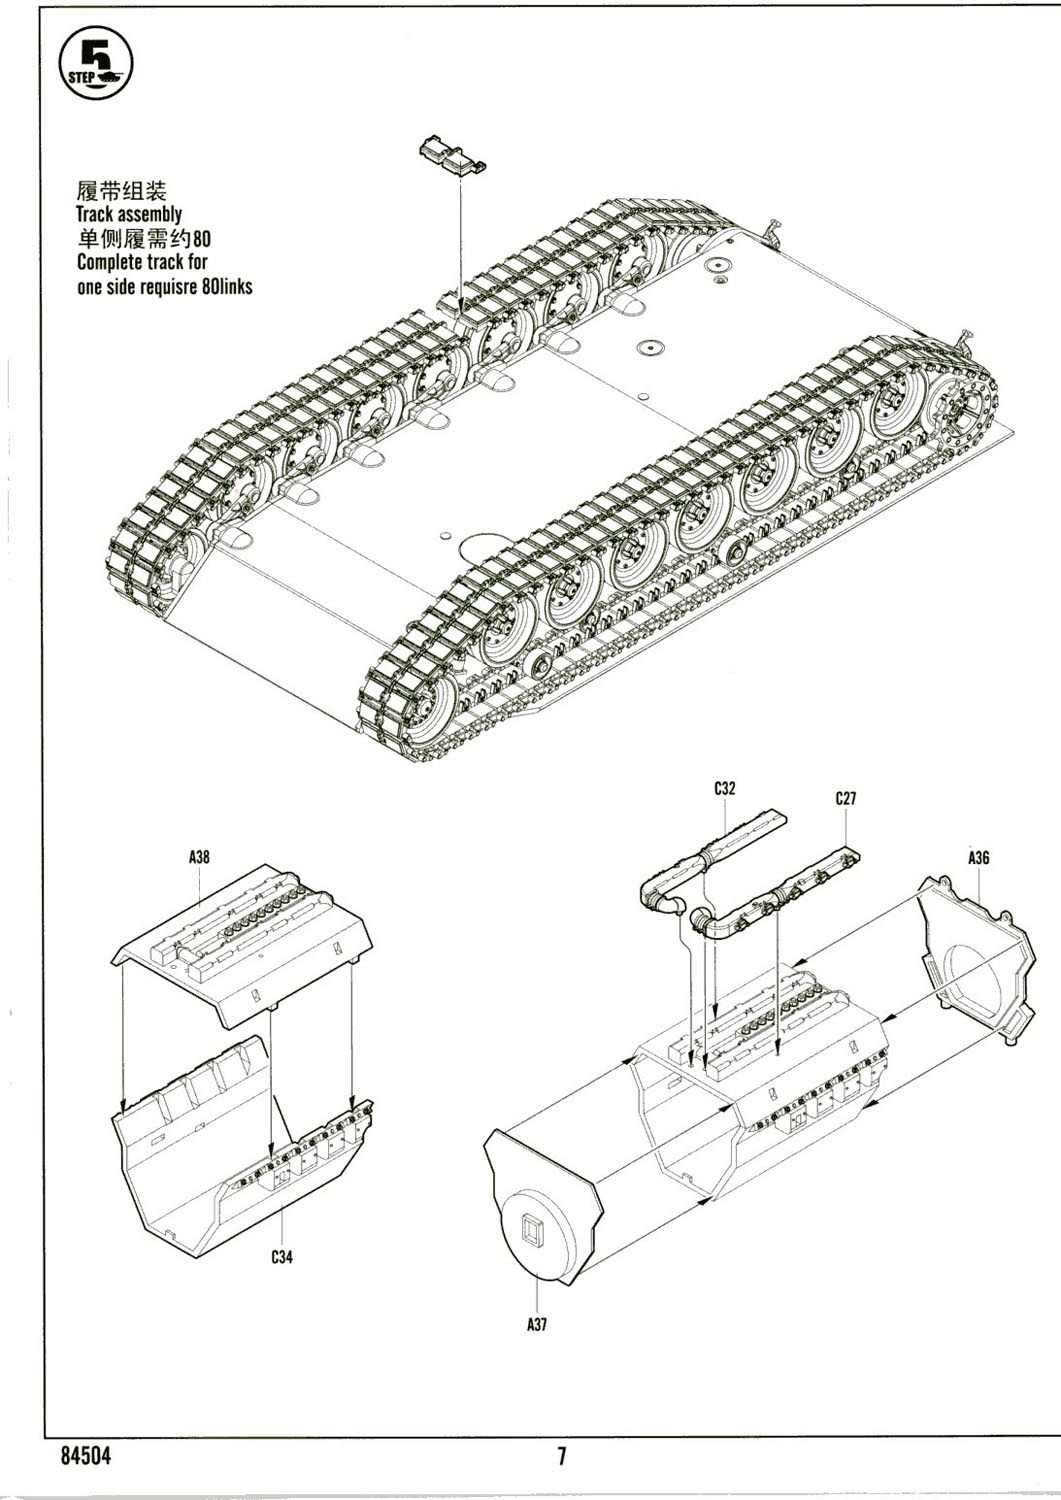
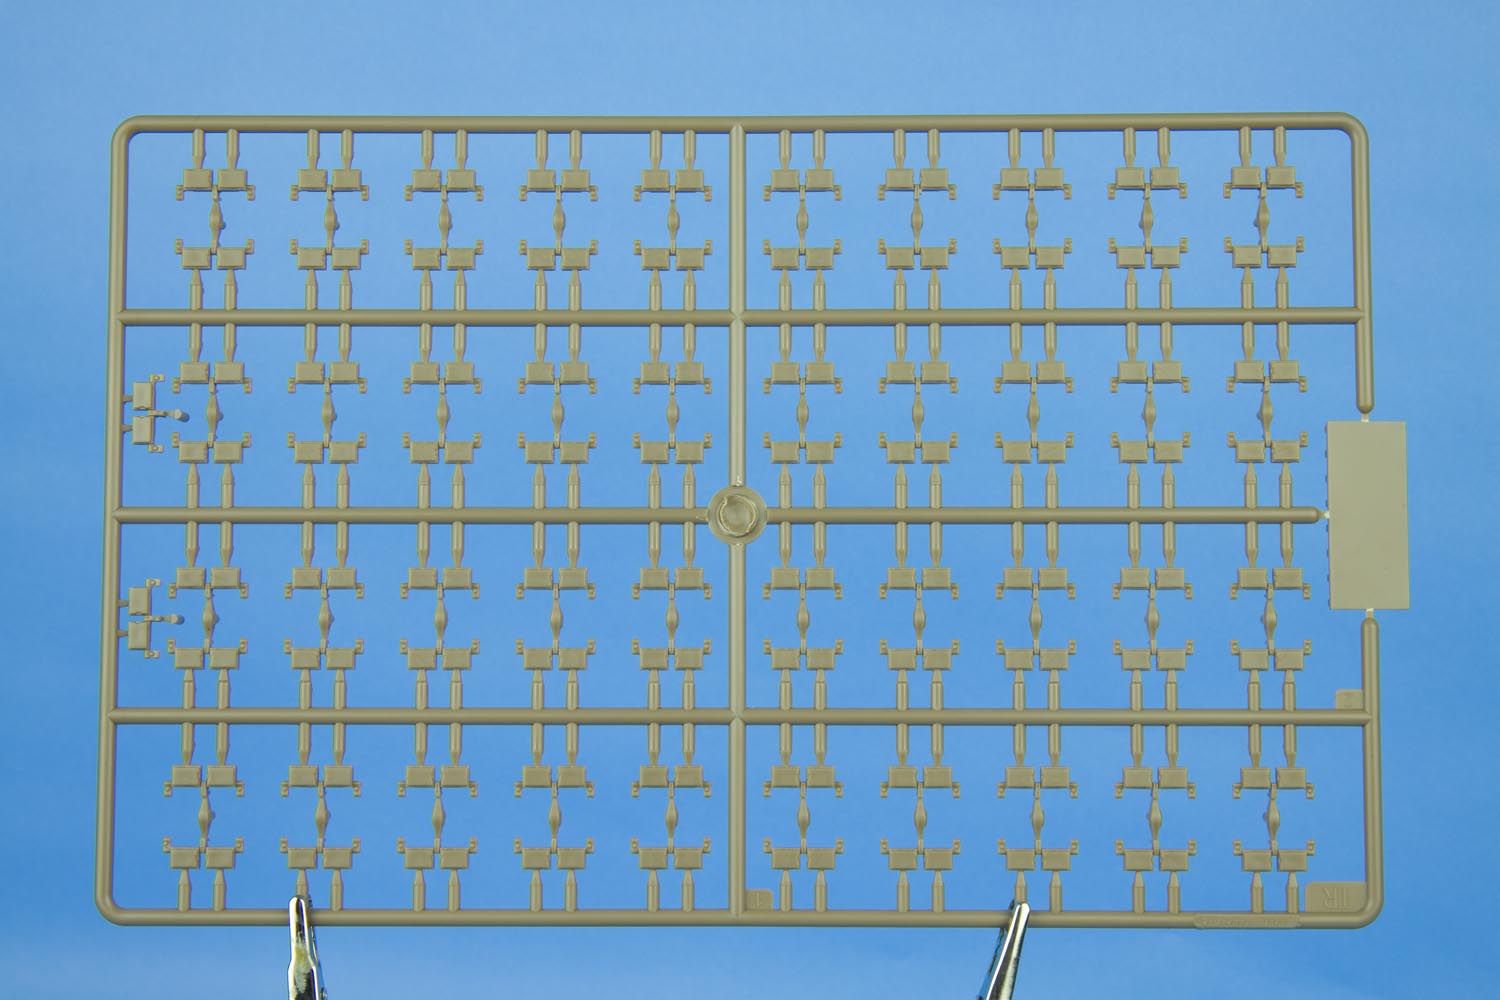
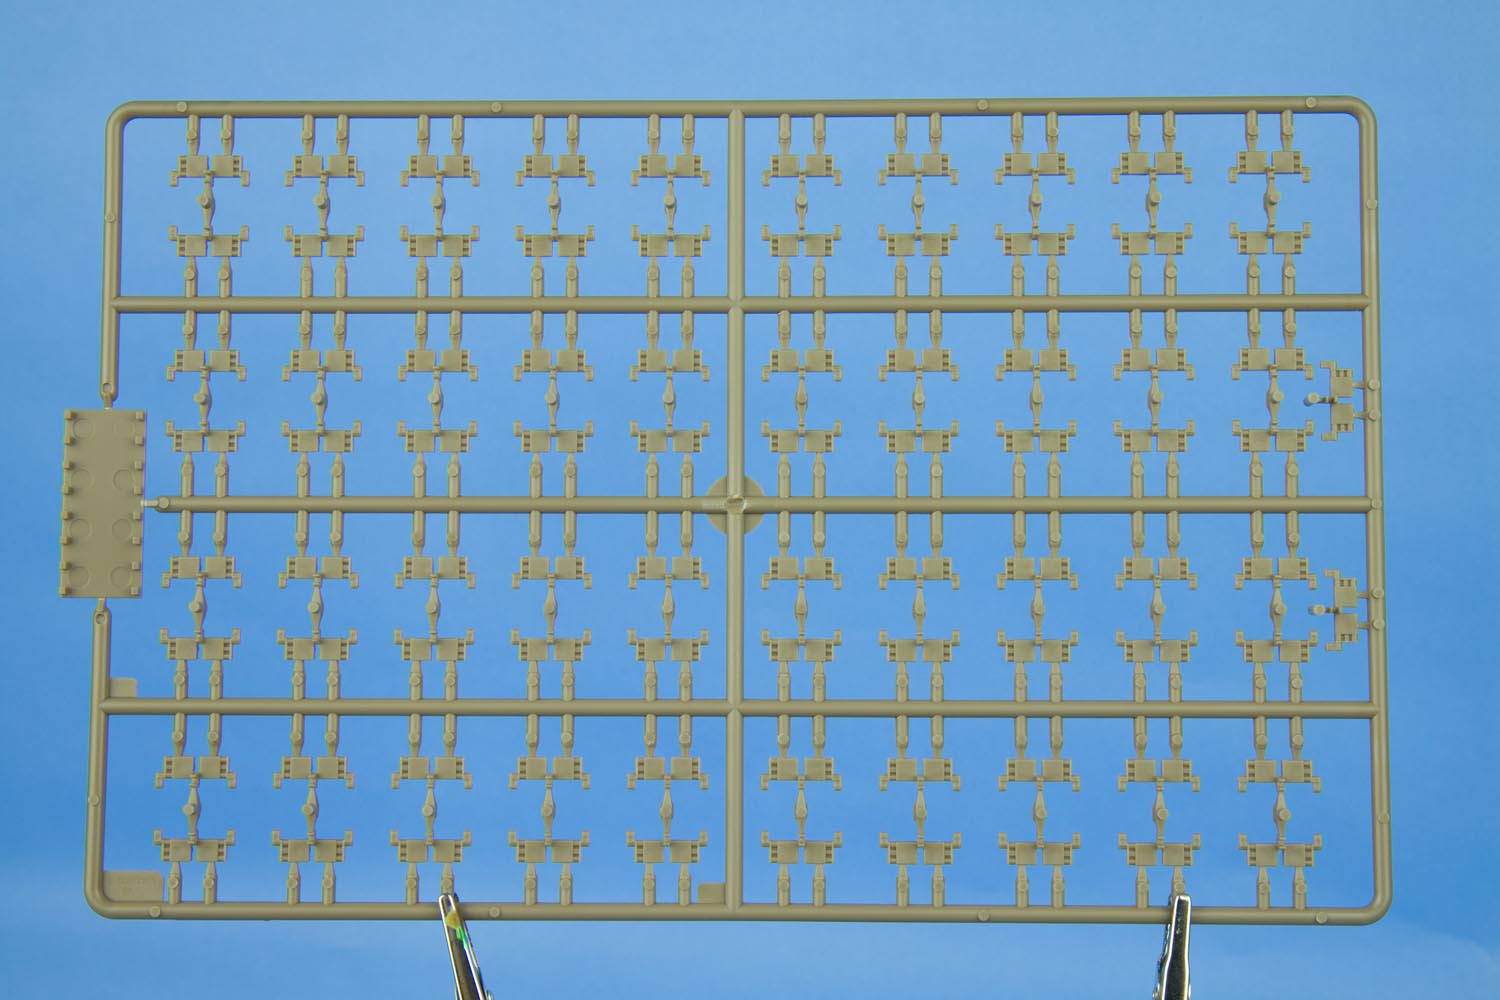
Sprue TR - tracks
Sprue W - turret MEXAS modules (and mounts), C6 GPMG Ack-Ack type (third C6 included with this kit), ECM unit
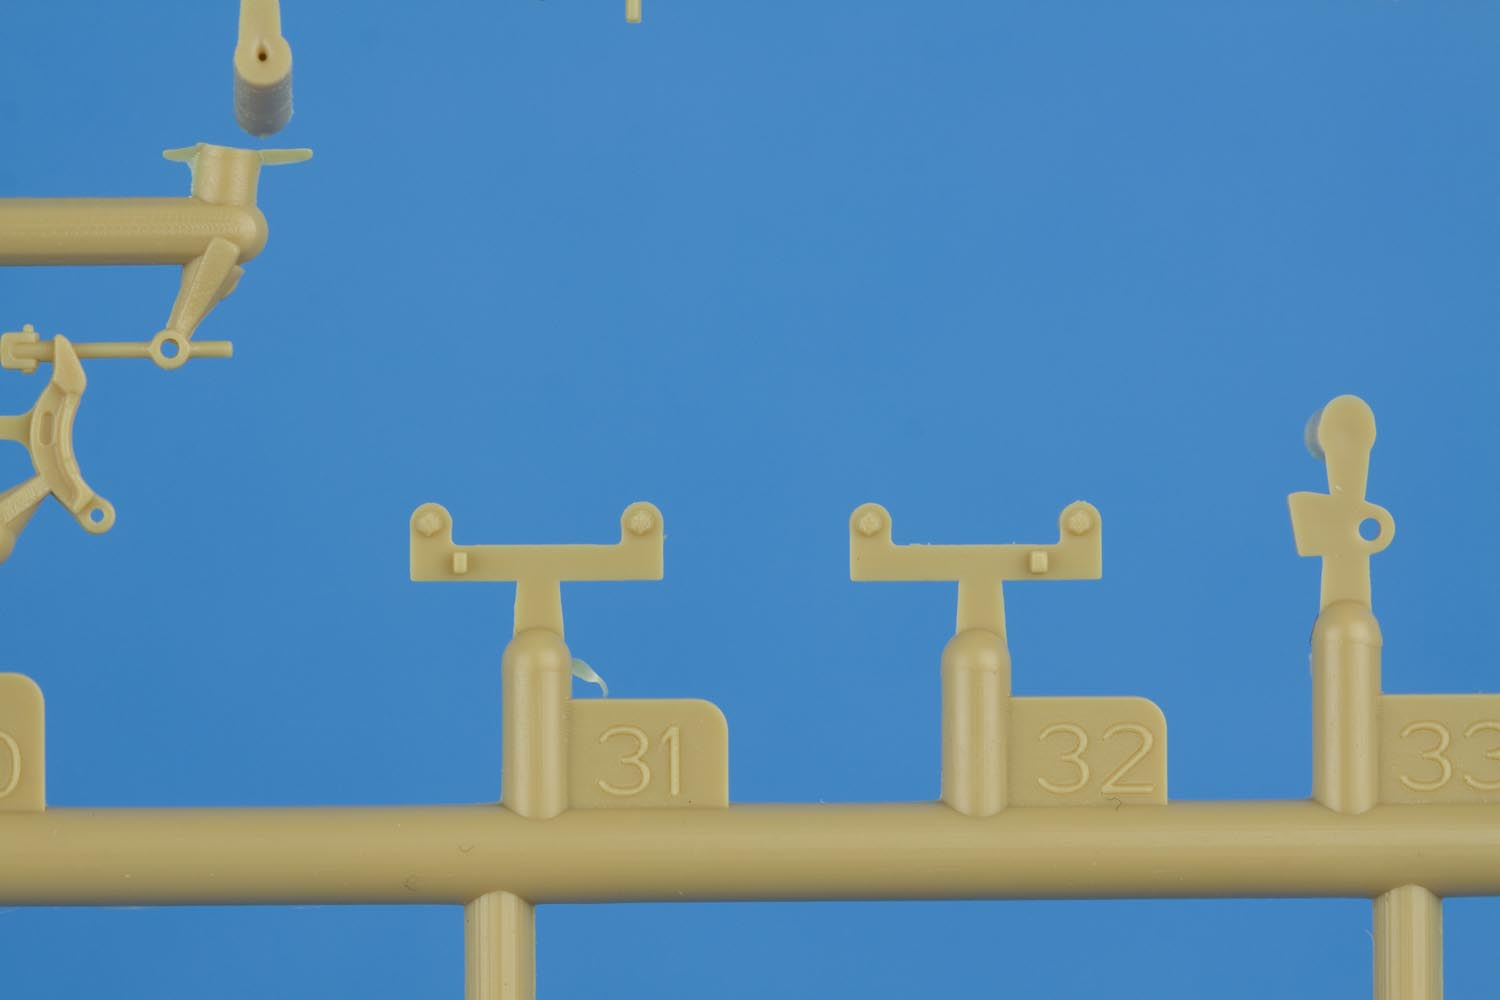
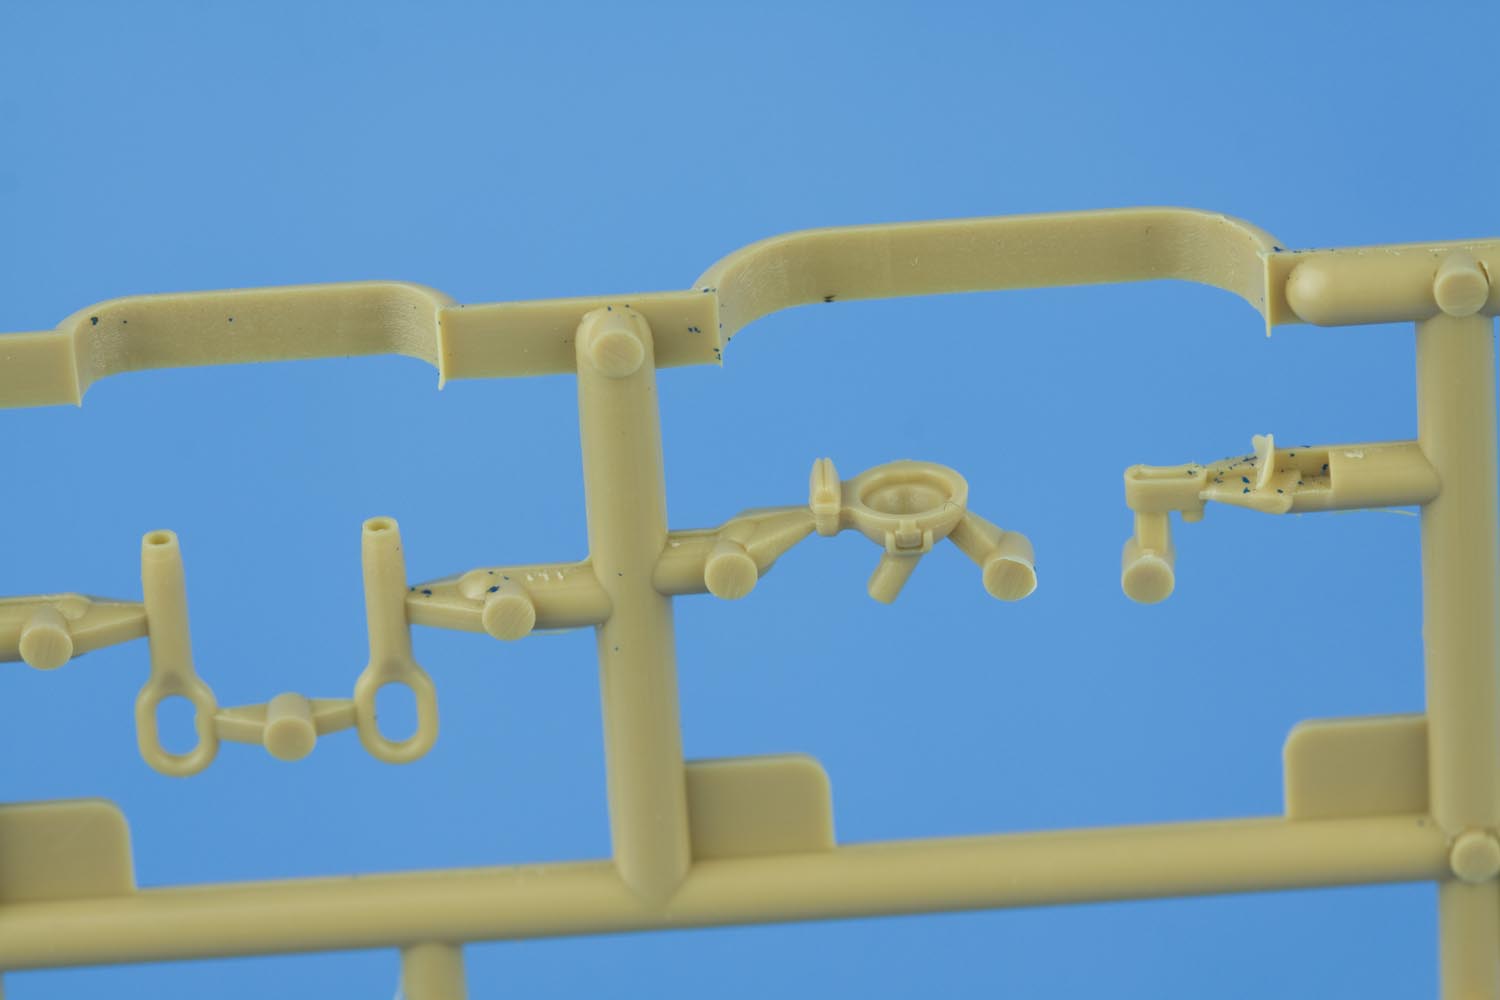
The level of detail in this kit is insane! The fidelity of casting and the really small parts Hobby Boss pulled of will have undoubtedly raised the bar. That being said, some of the very fine parts will be difficult to remove from the sprues without breakage; this will not be a kit for the faint of heart! Because of the fidelity of detail present in this kit, this review is perhaps more critical and less forgiving than would be the case for lesser kits.
There is a little more flash on many of the parts, particularly the very small parts, than I am used to seeing with modern kits. This will require more cleanup effort on the part of the builder but the reward is that these same finely detailed parts will ultimately contribute to a much better build.
I have chosen to supply many more photos of kit parts instead of trying to describe the kit parts in text. This will hopefully allow the reader to rely less on my opinions and to draw their own conclusions I have also included a lot of my own reference photos where they will assist in the evaluation of kit parts.
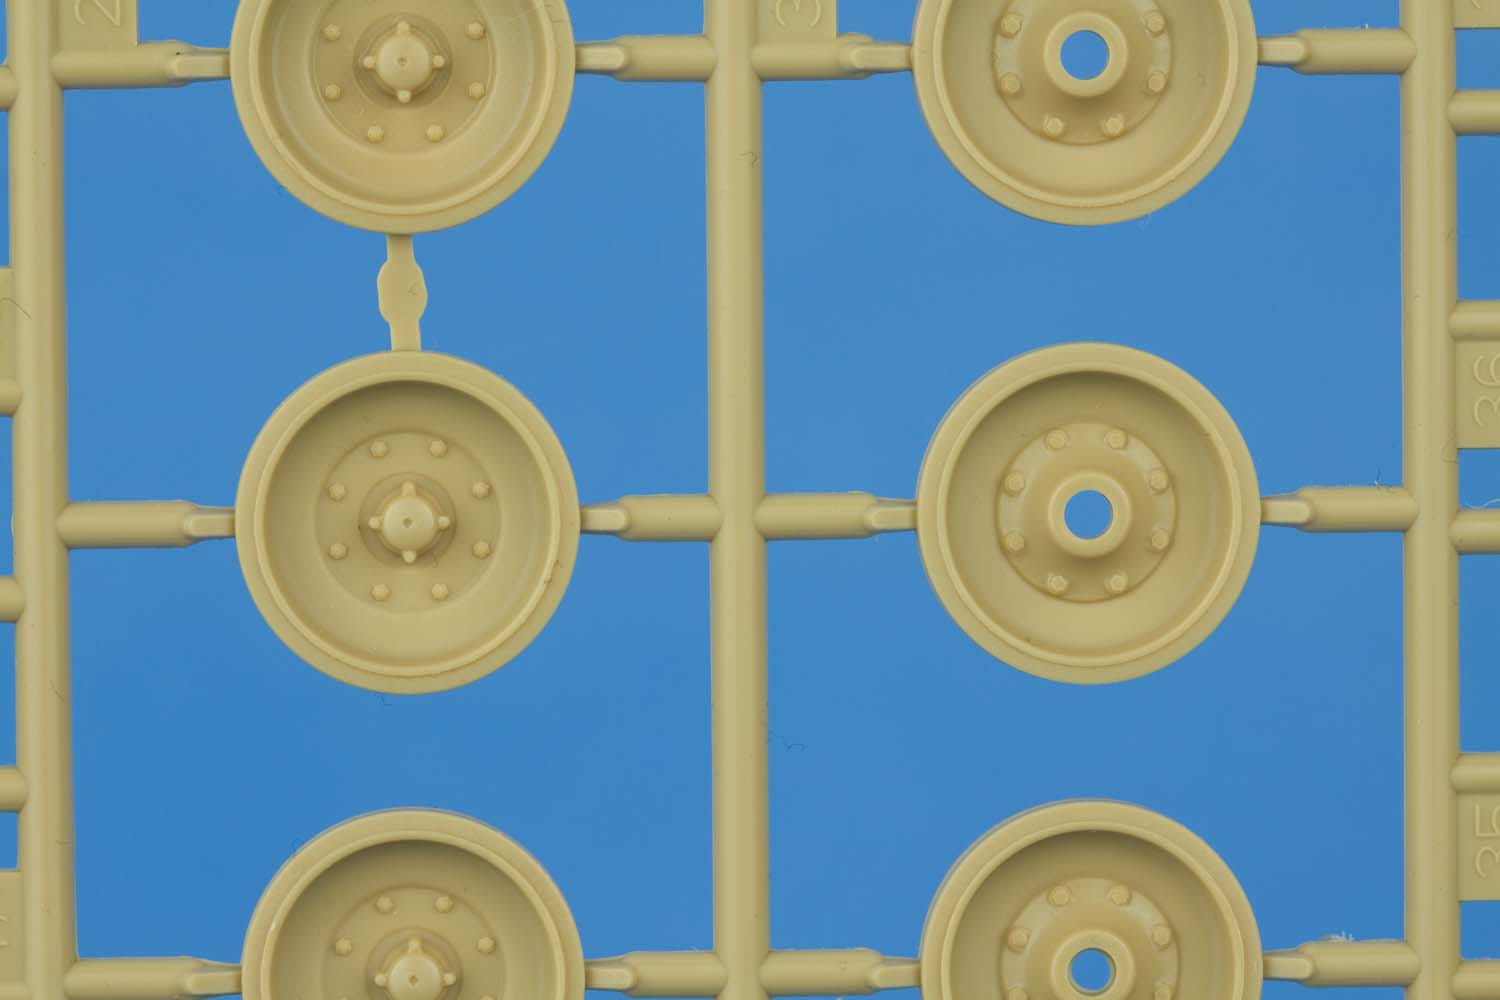
The kit's road wheels do not include poly caps! It's about bloody time the kit producers figured out that we do not play with these things on the carpet so movable wheel thing is simply unnecessary. I'm very pleased to see that Hobby Boss have chosen to do without the design compromises required by those awful vinyl cylinders. The road wheels have very fine detail on the front and rear face and compare quite well with reference photos.
Real road wheels

The idler wheels feature front and rear detail as well.
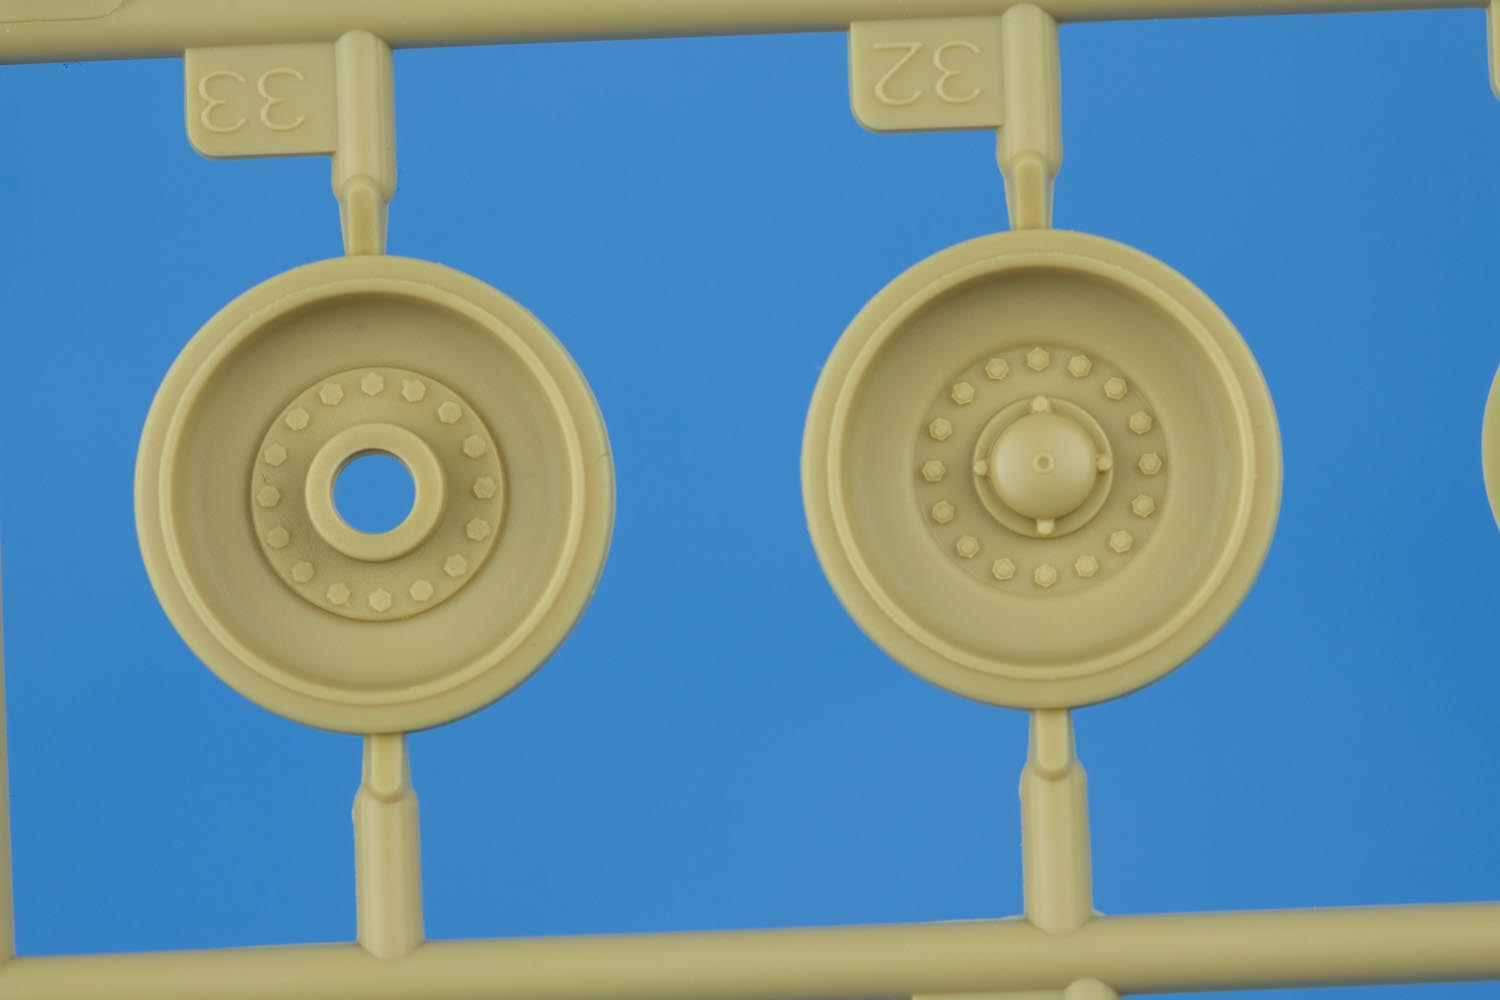
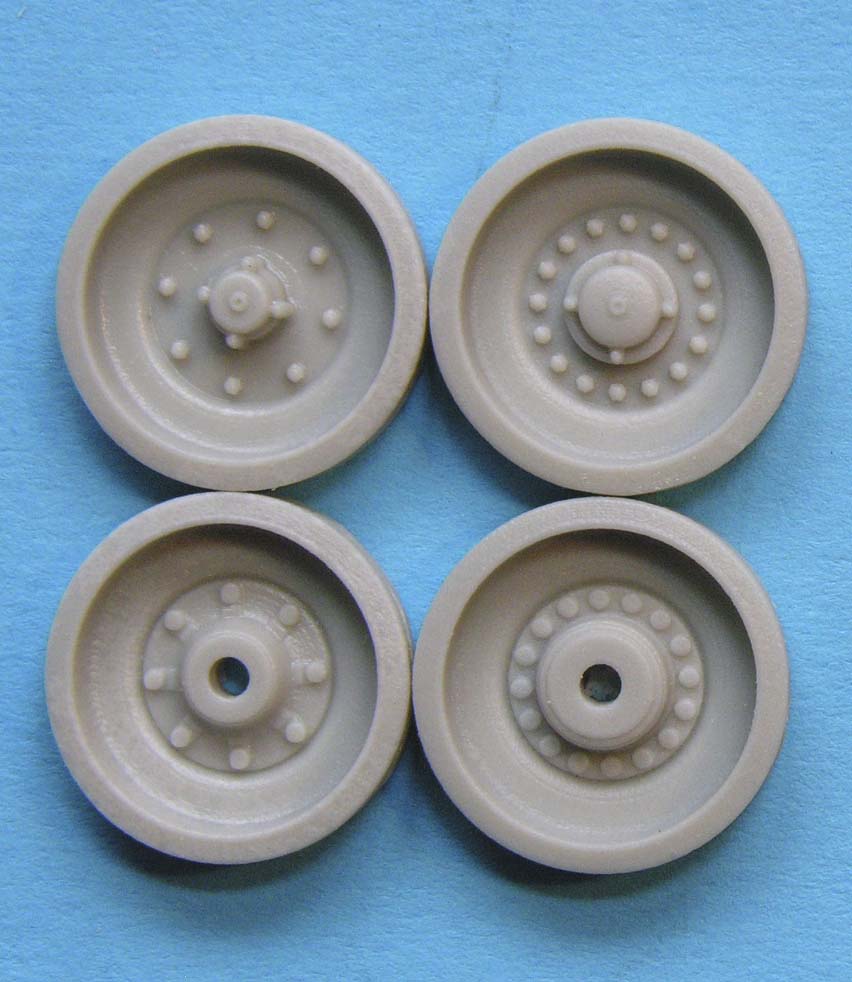
The kit wheels are very good and a welcome departure from the brake drum like bulge required to accommodate poly caps! As good as the kit wheels are, I think the Leopard Club wheels (LW001-1 are still the best available in 1:35. I don't have LW001-1 on hand to photograph but Michael Shackleton was kind enough to send me a photo of the wheel set.
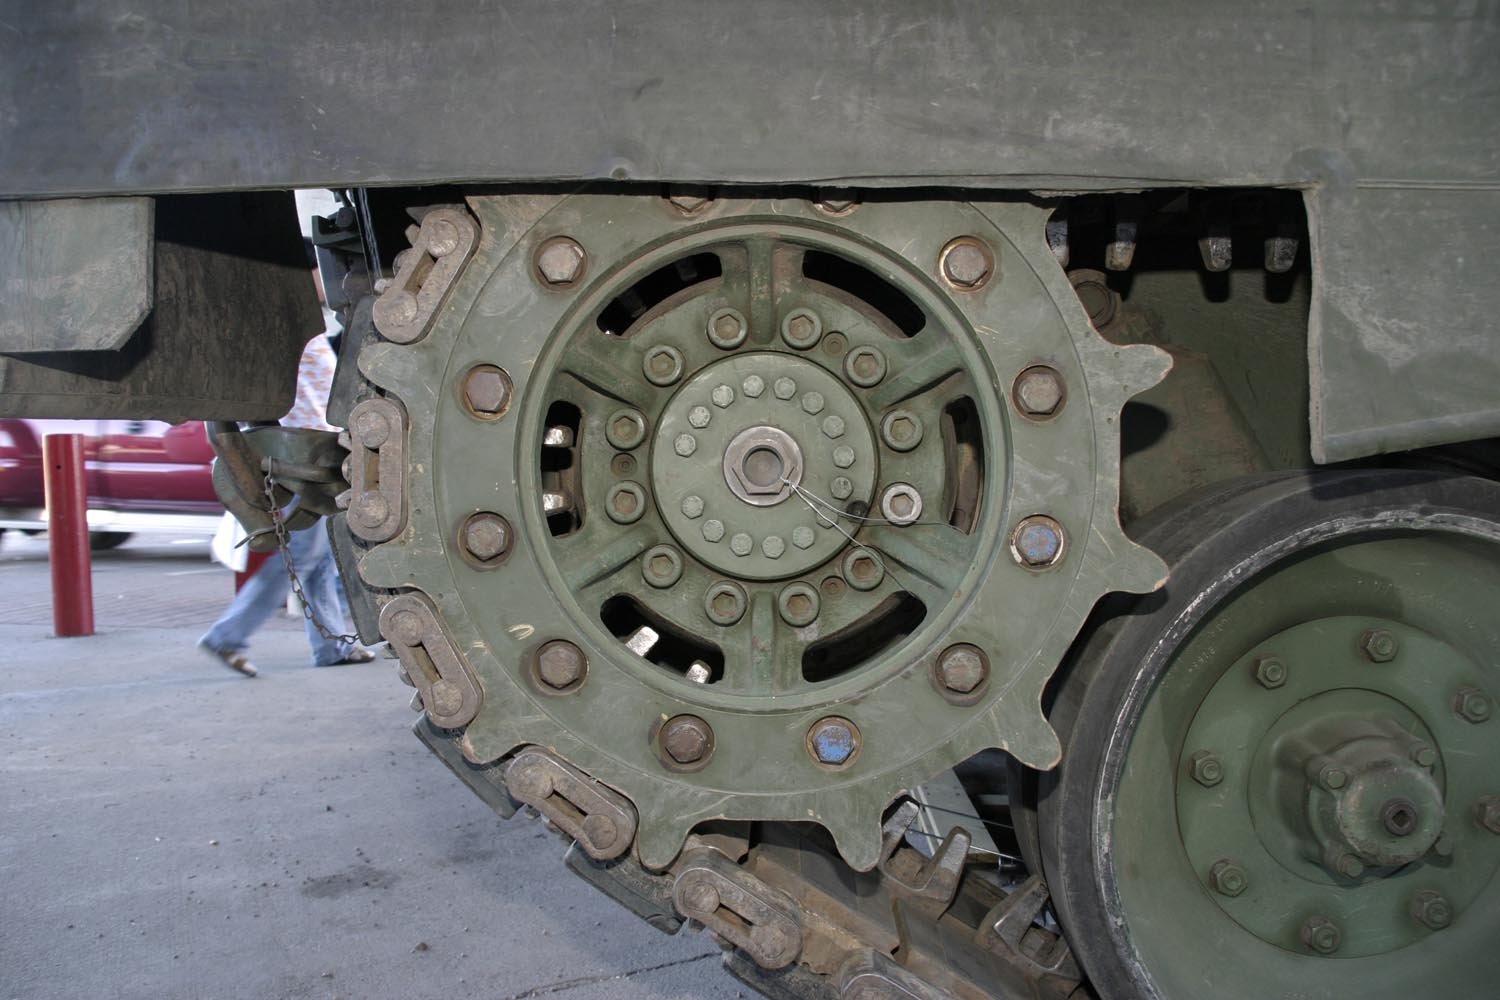
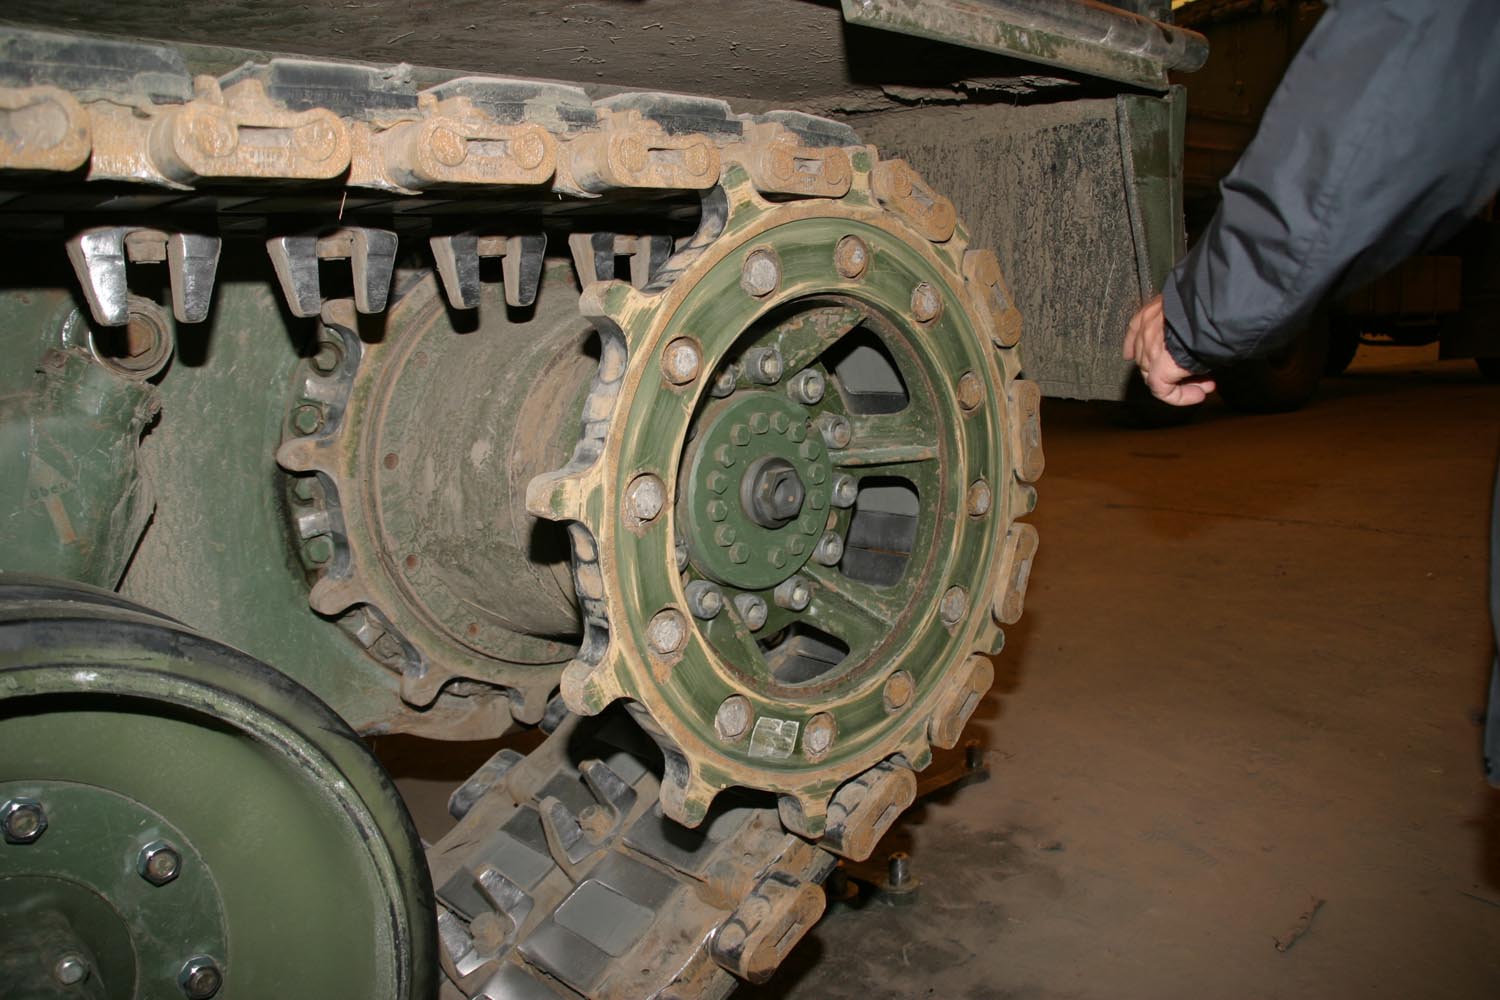
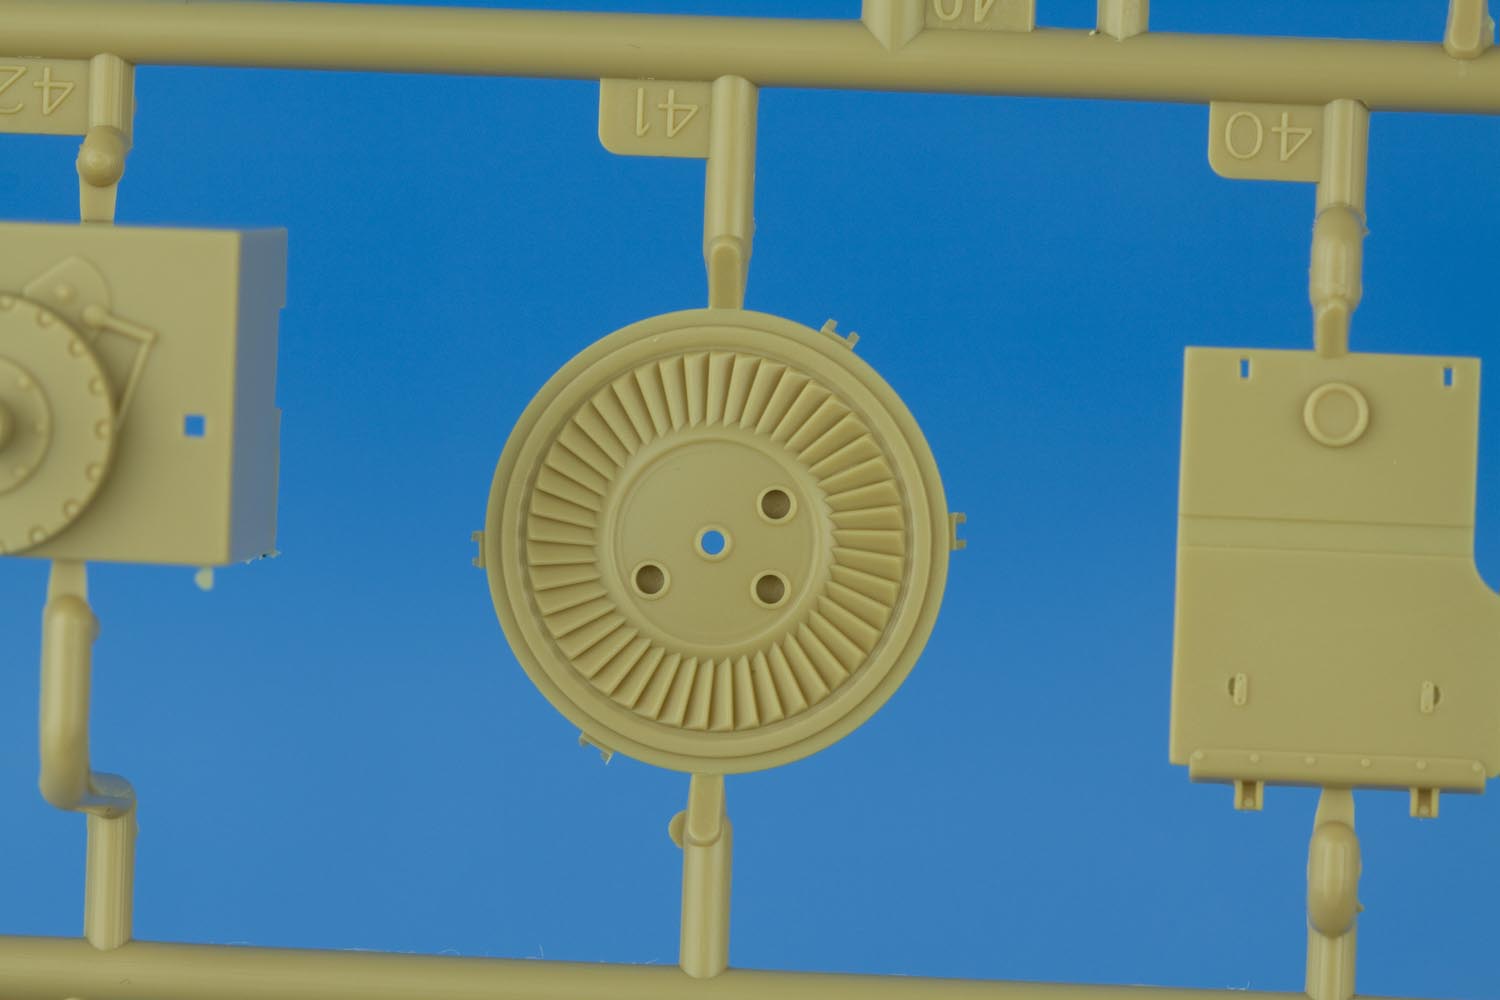
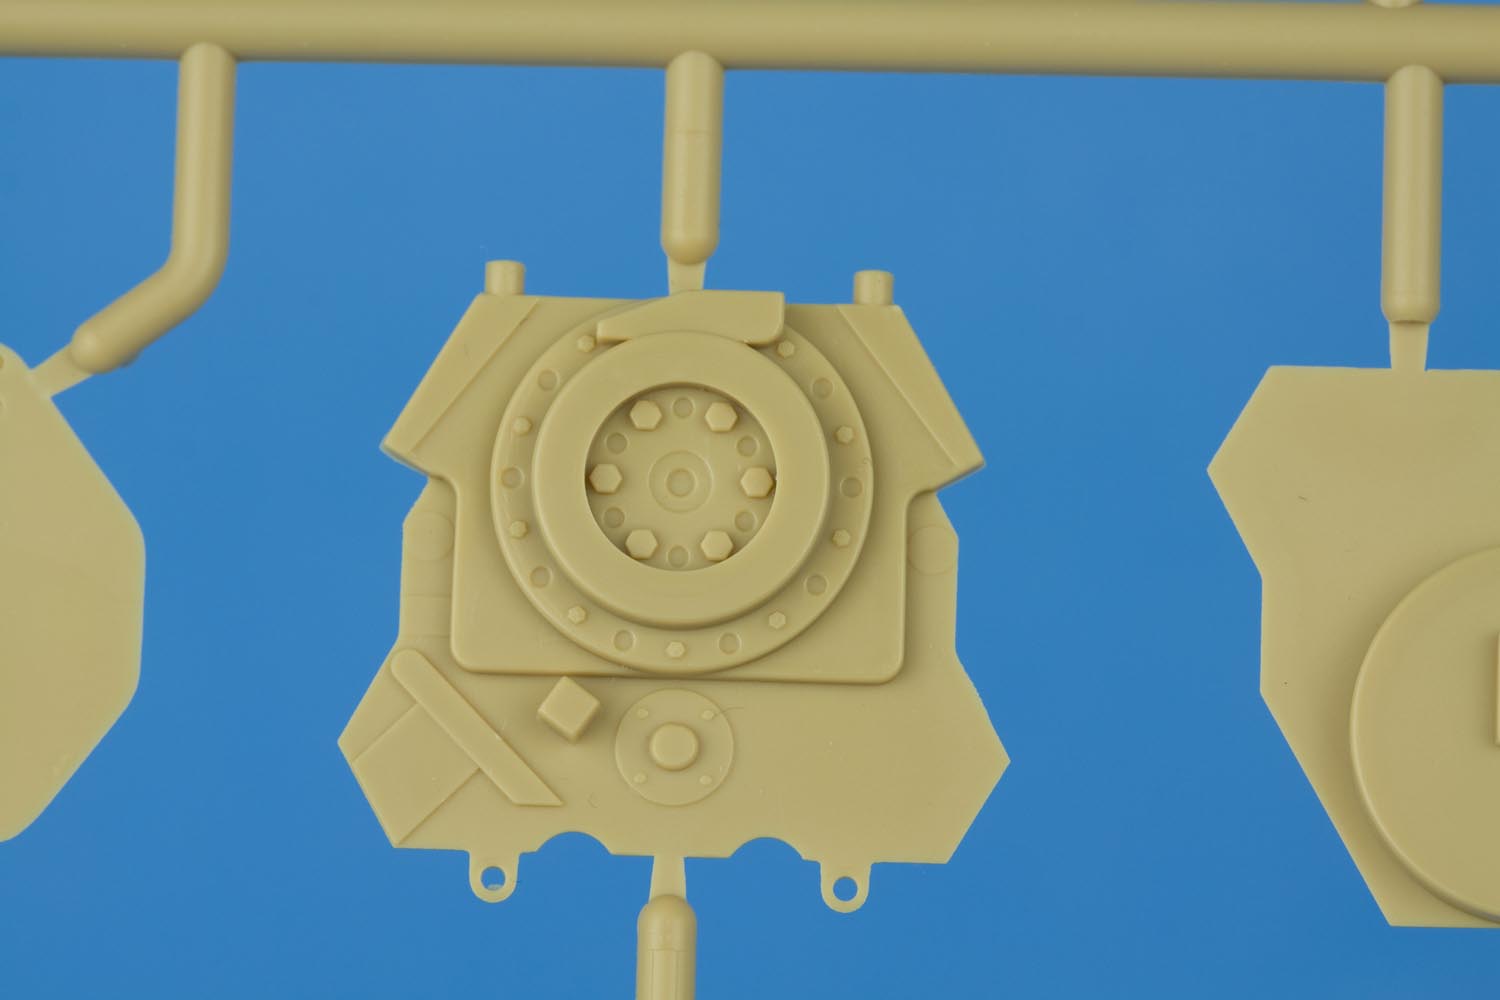
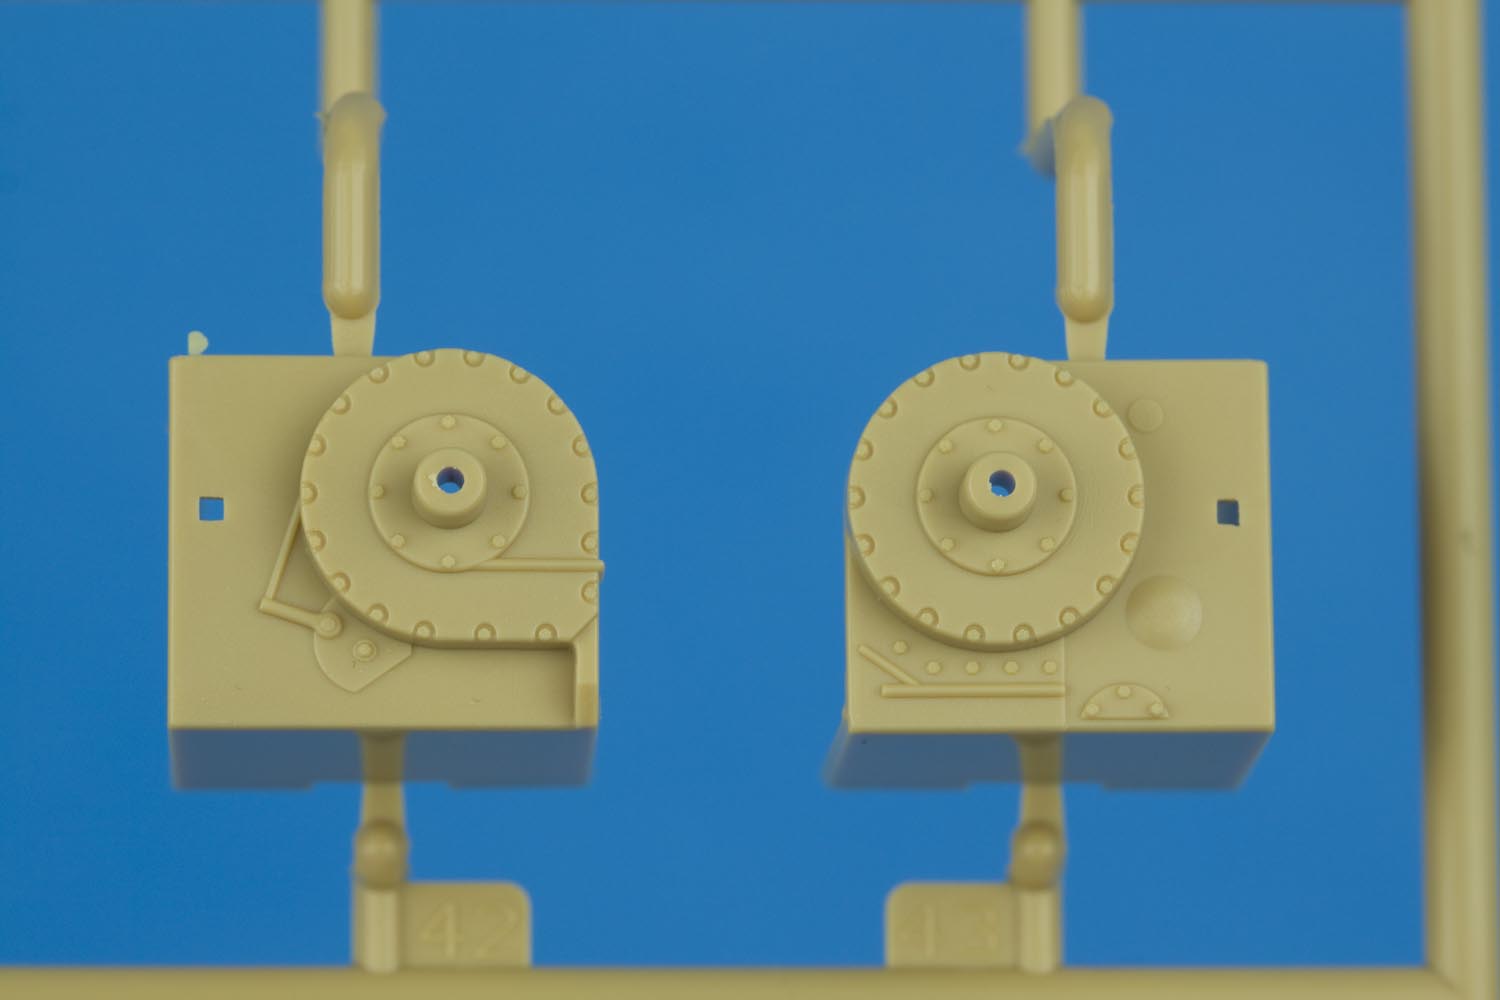
The drive sprockets are the type with the guide tooth slip ring flange. The hub detail on the drive sprockets is absolutely stunning with the front facing sprocket ring being a separate part.
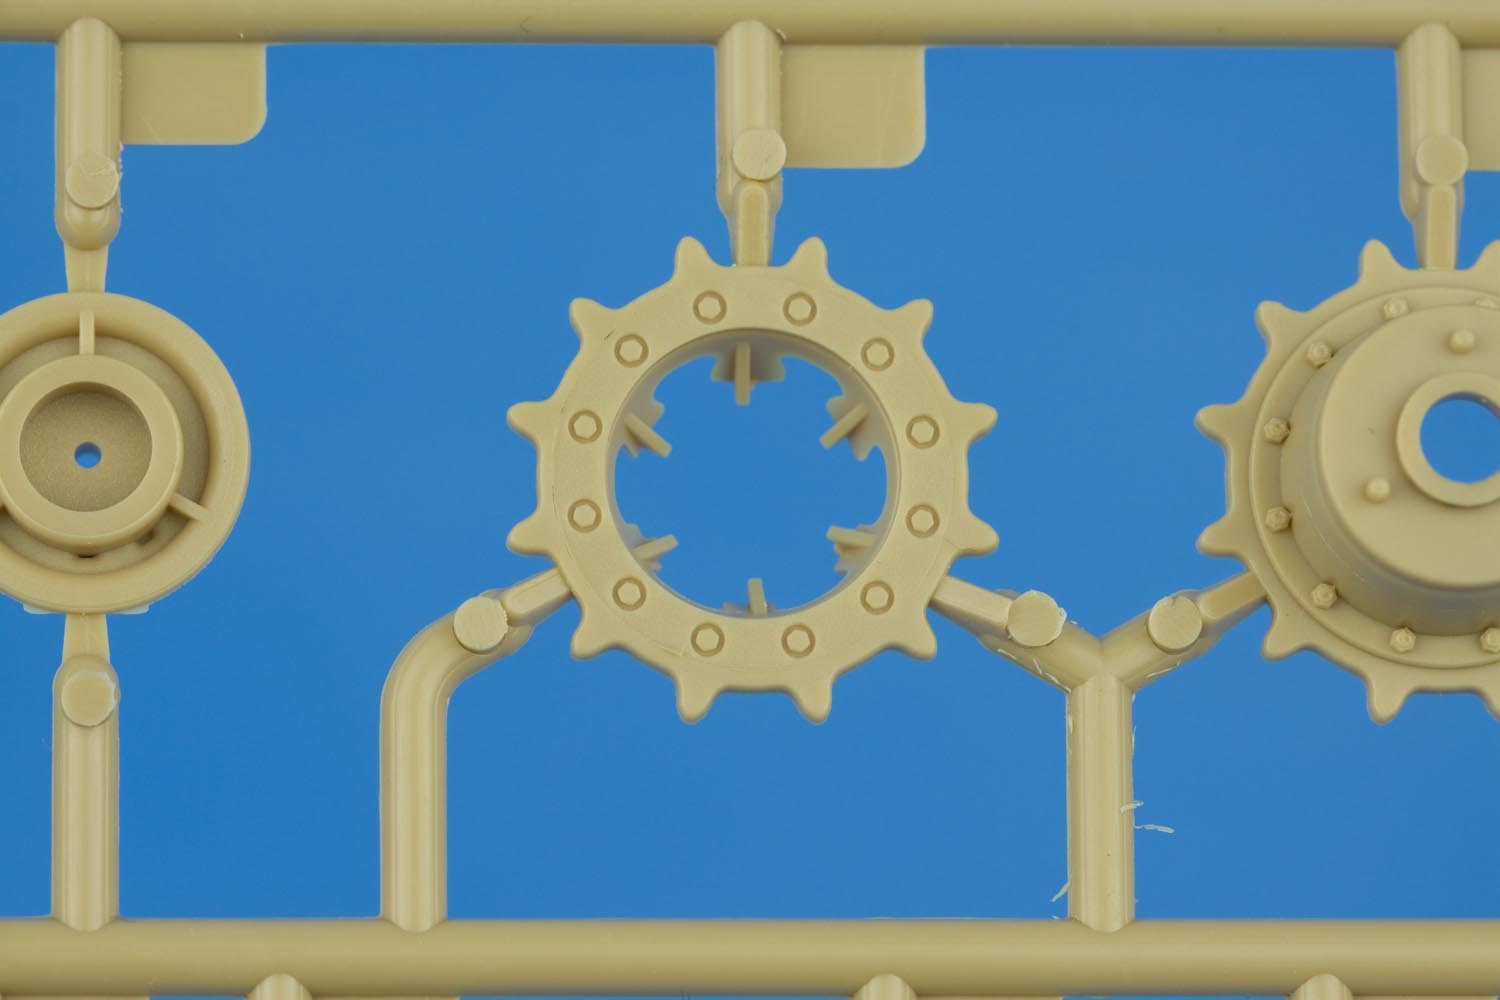
Real drive sprocket reference photos

The tracks are supplied as separate track blocks with the guide teeth and end connectors attached. There do not appear to be any locating pins or marks to aid in the alignment of a track block with the following one. A jig has been provided to aid in assembly of short sections of the track but I fear that the lack of locating marks will make a straight assembly of a track run quite challenging.
Also, the end connectors and guide teeth are all cast parallel with the track blocks. The lack of any articulation here will be very noticable when the tracks curve around the drive sprocket and the idler wheel.
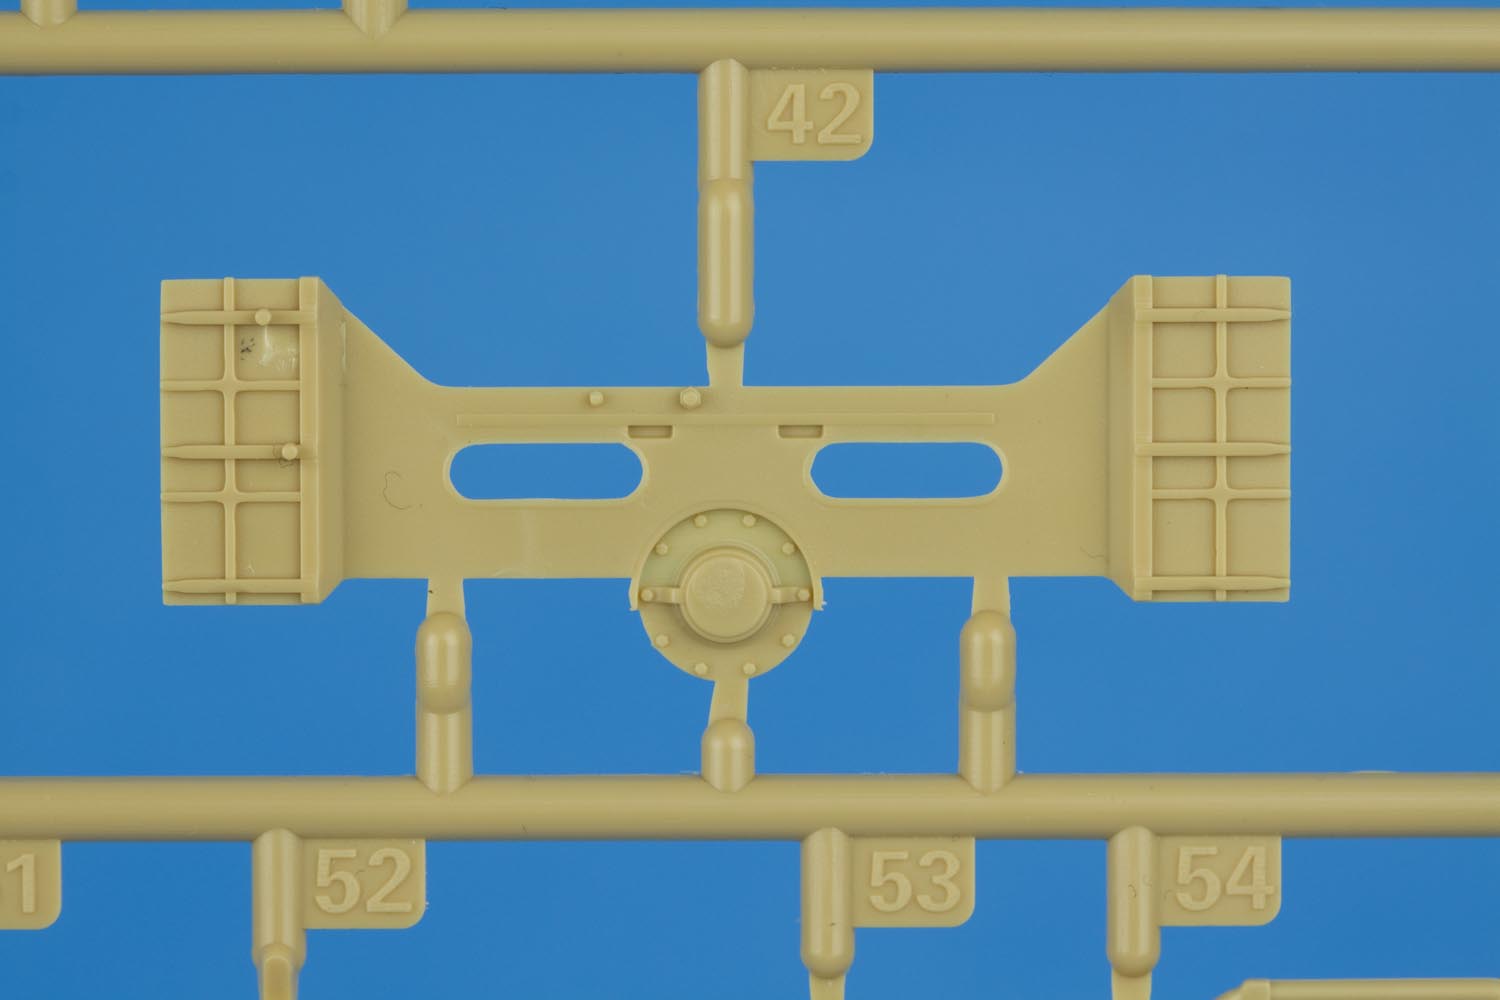
Personally, I think one would be better off to use the Meng Leopard 1 tracks as they have better end connector detail and the assembly is far more straight forward.
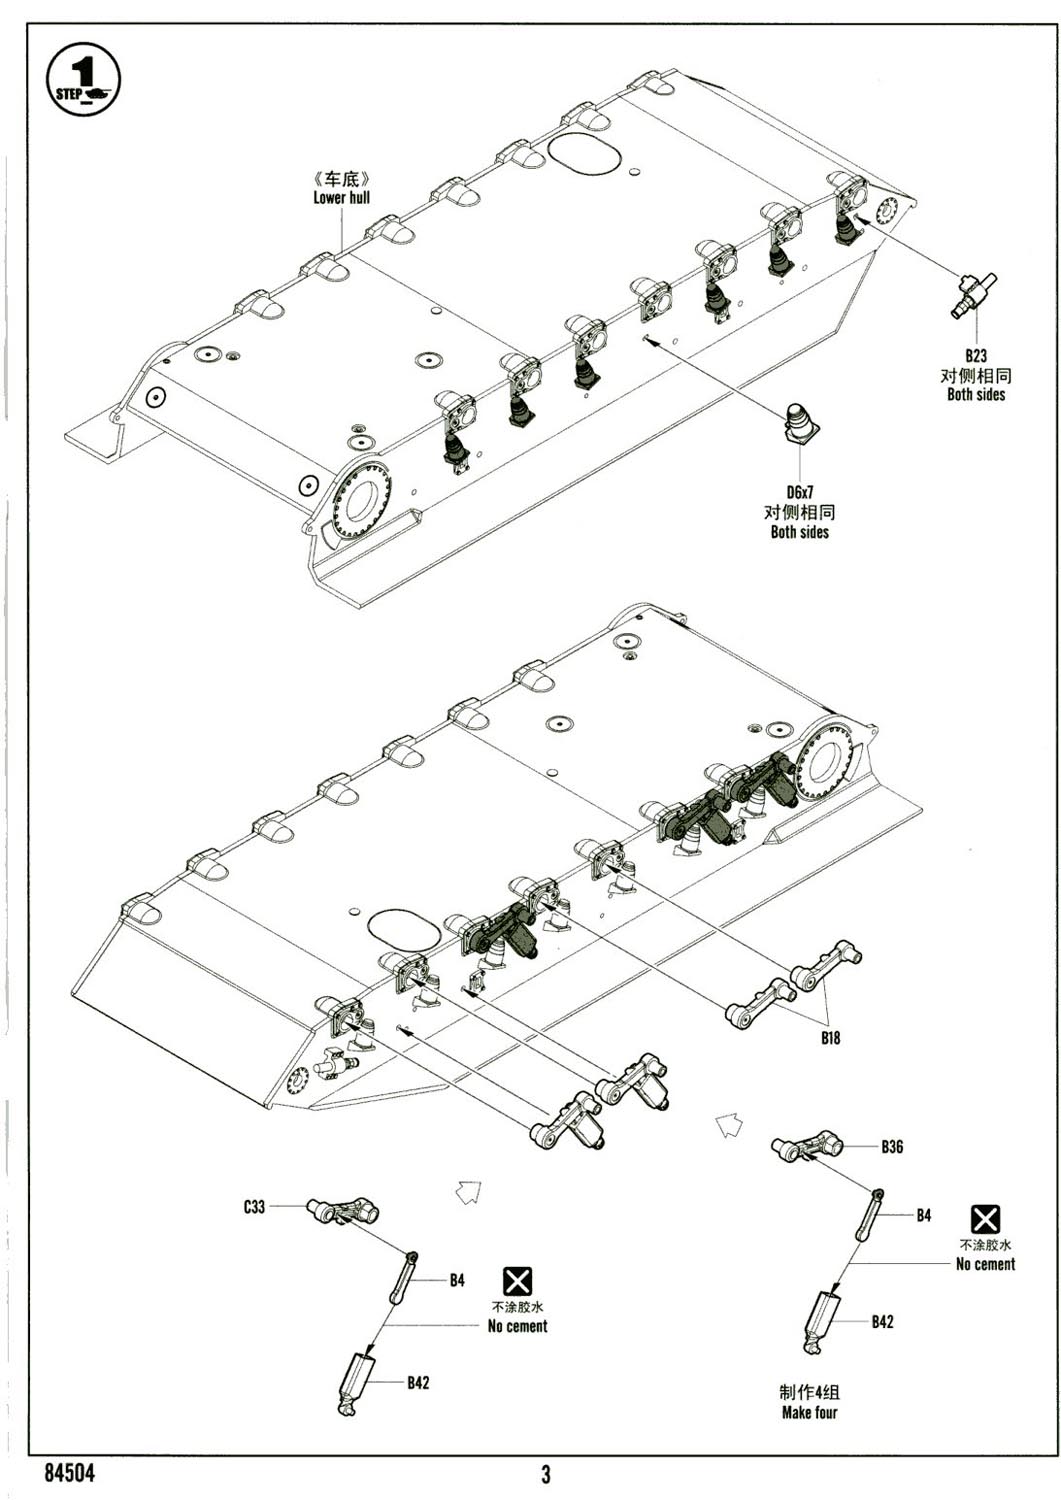
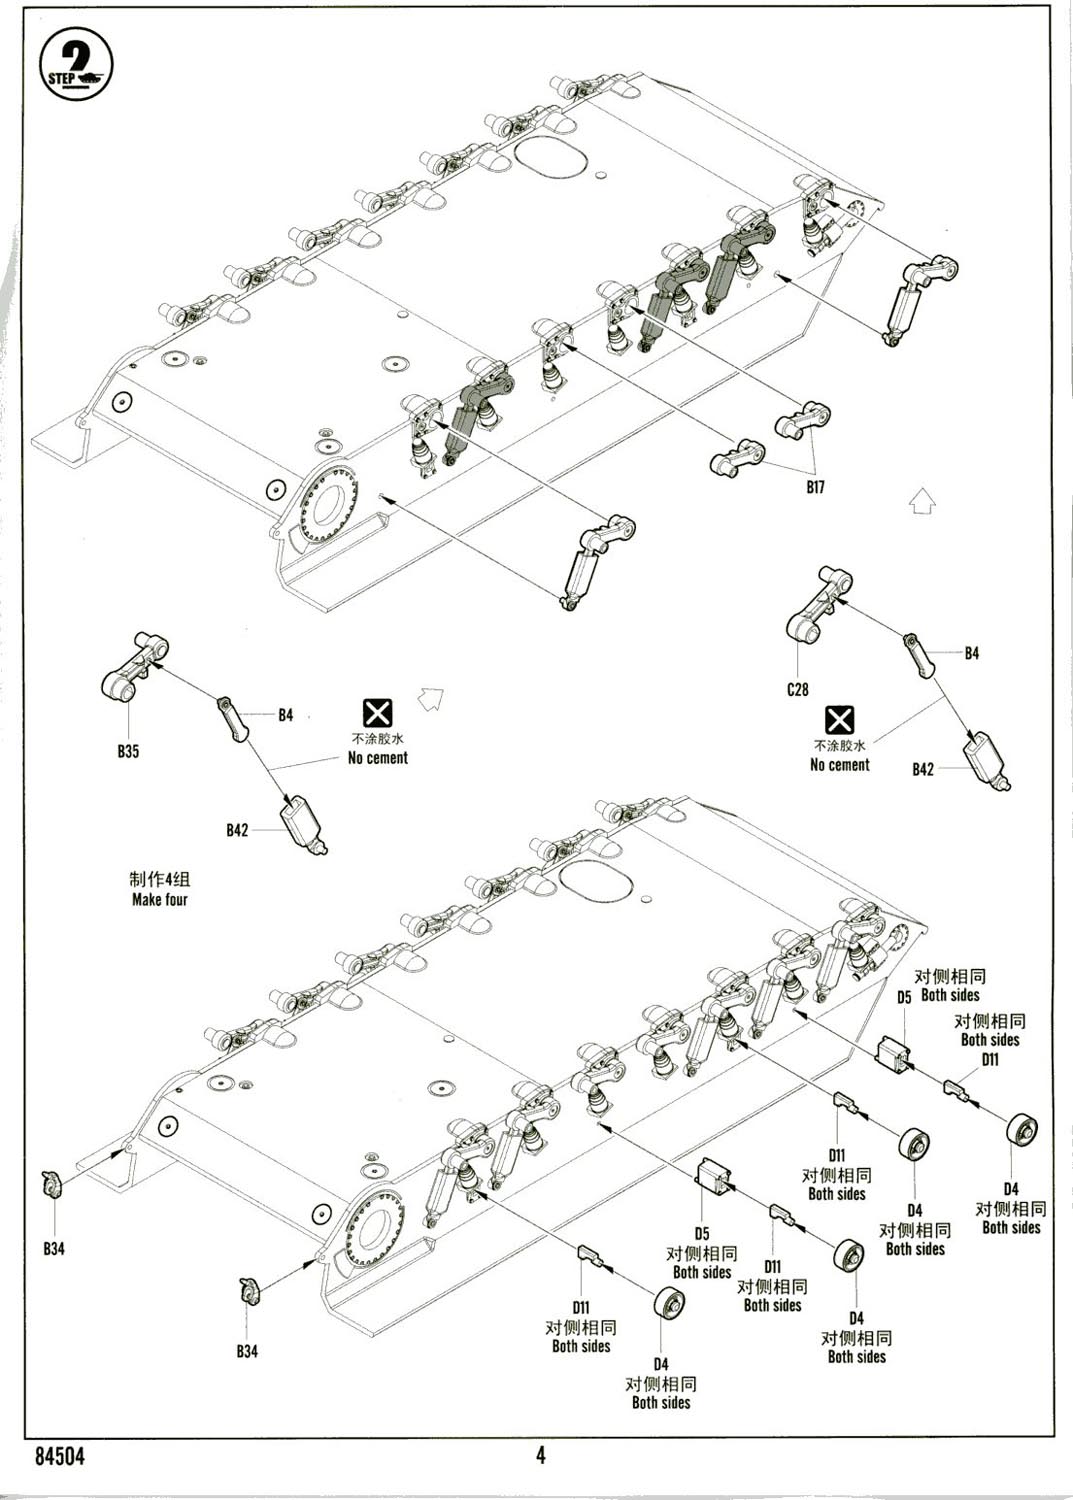
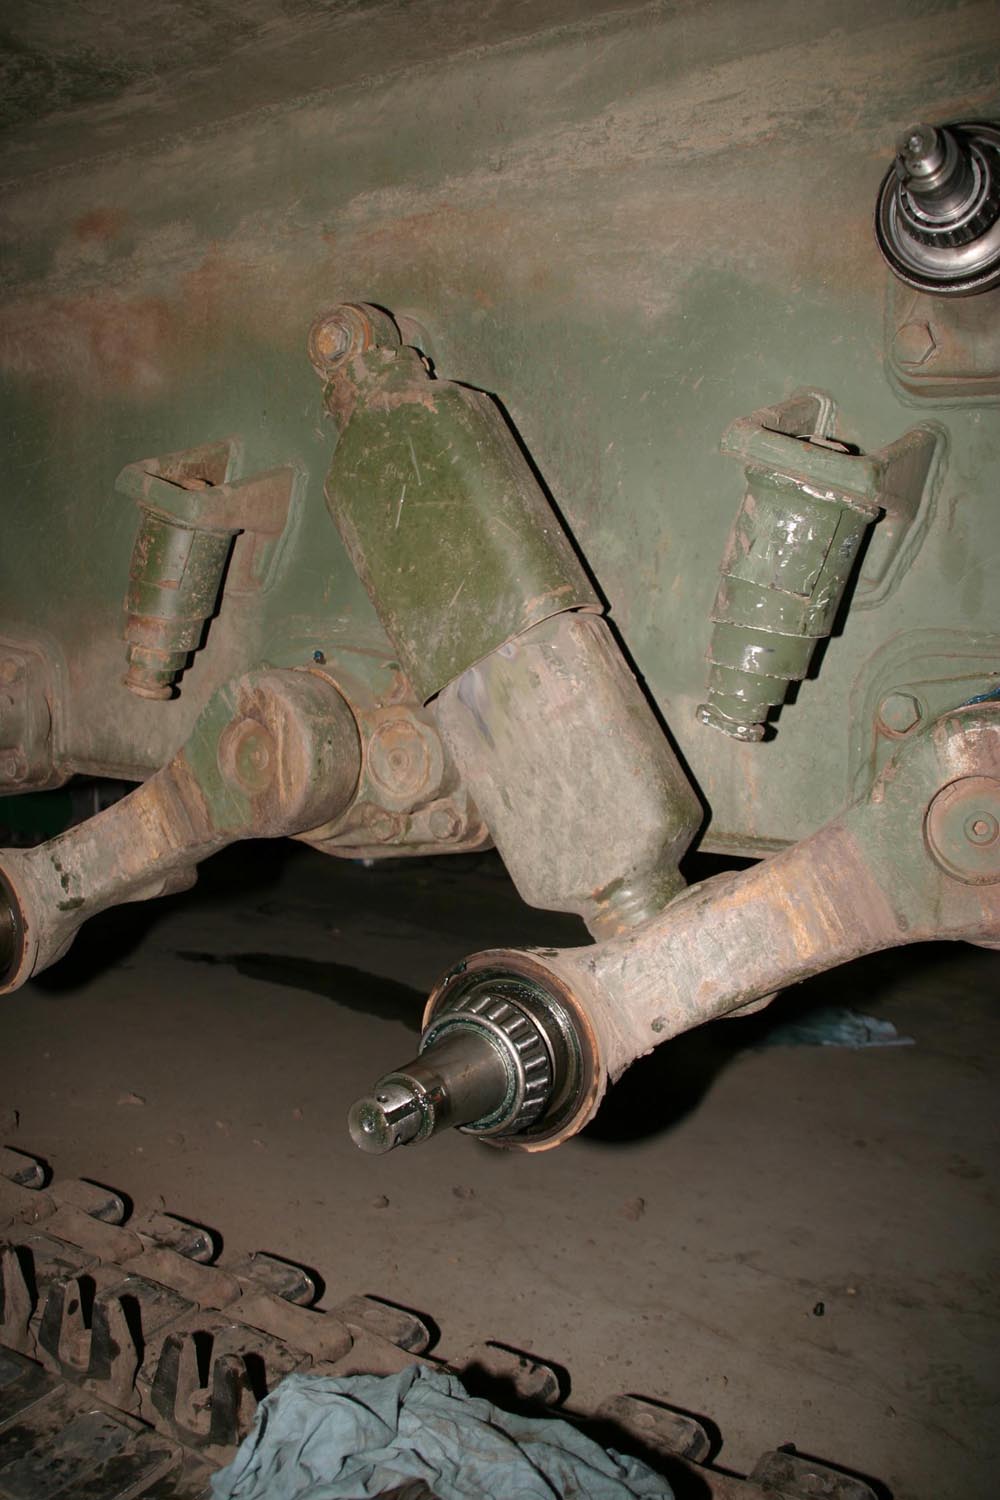
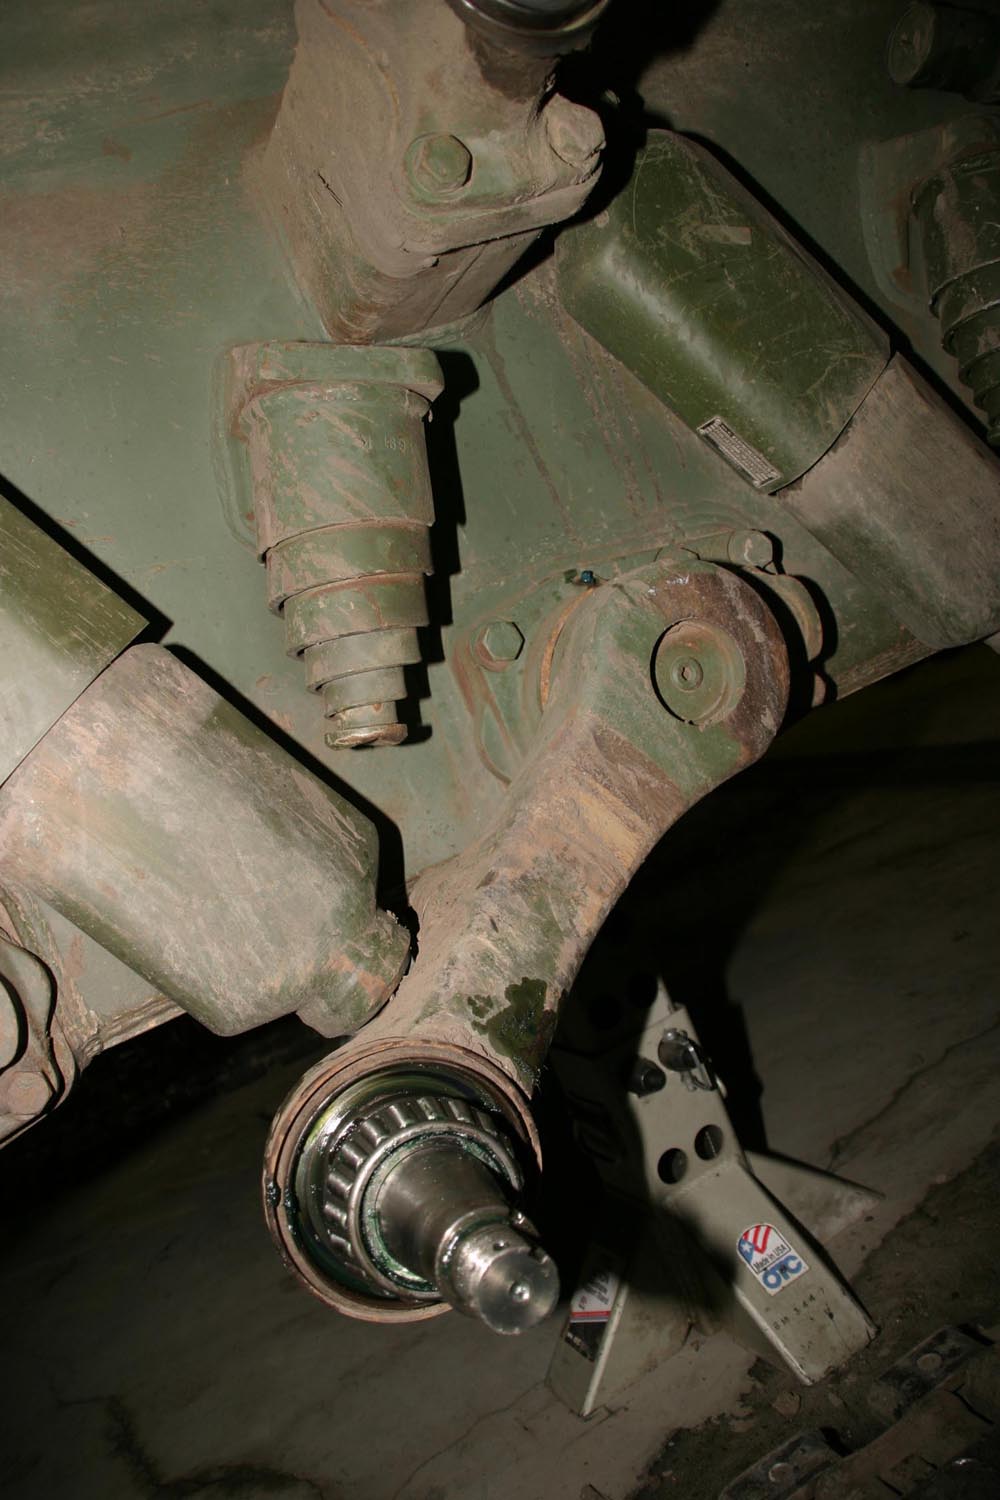
All suspension bits are separate parts with virtually nothing being molded onto the lower hull tub. The bump stop springs are separate and very nicely molded even though they are a little thick at the bottom.

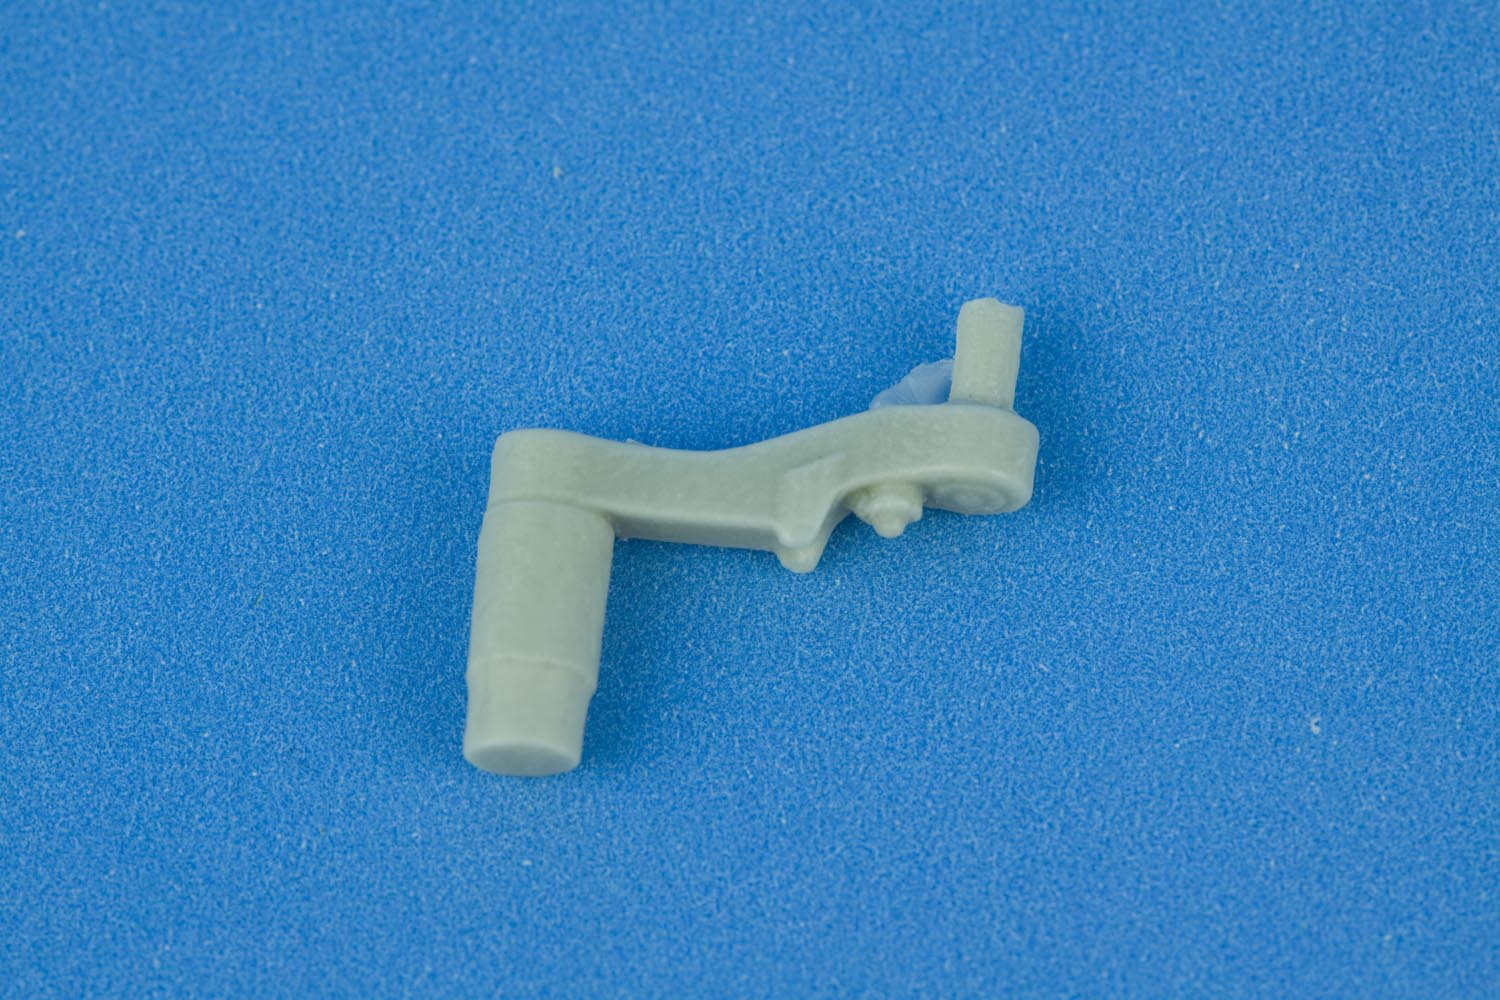
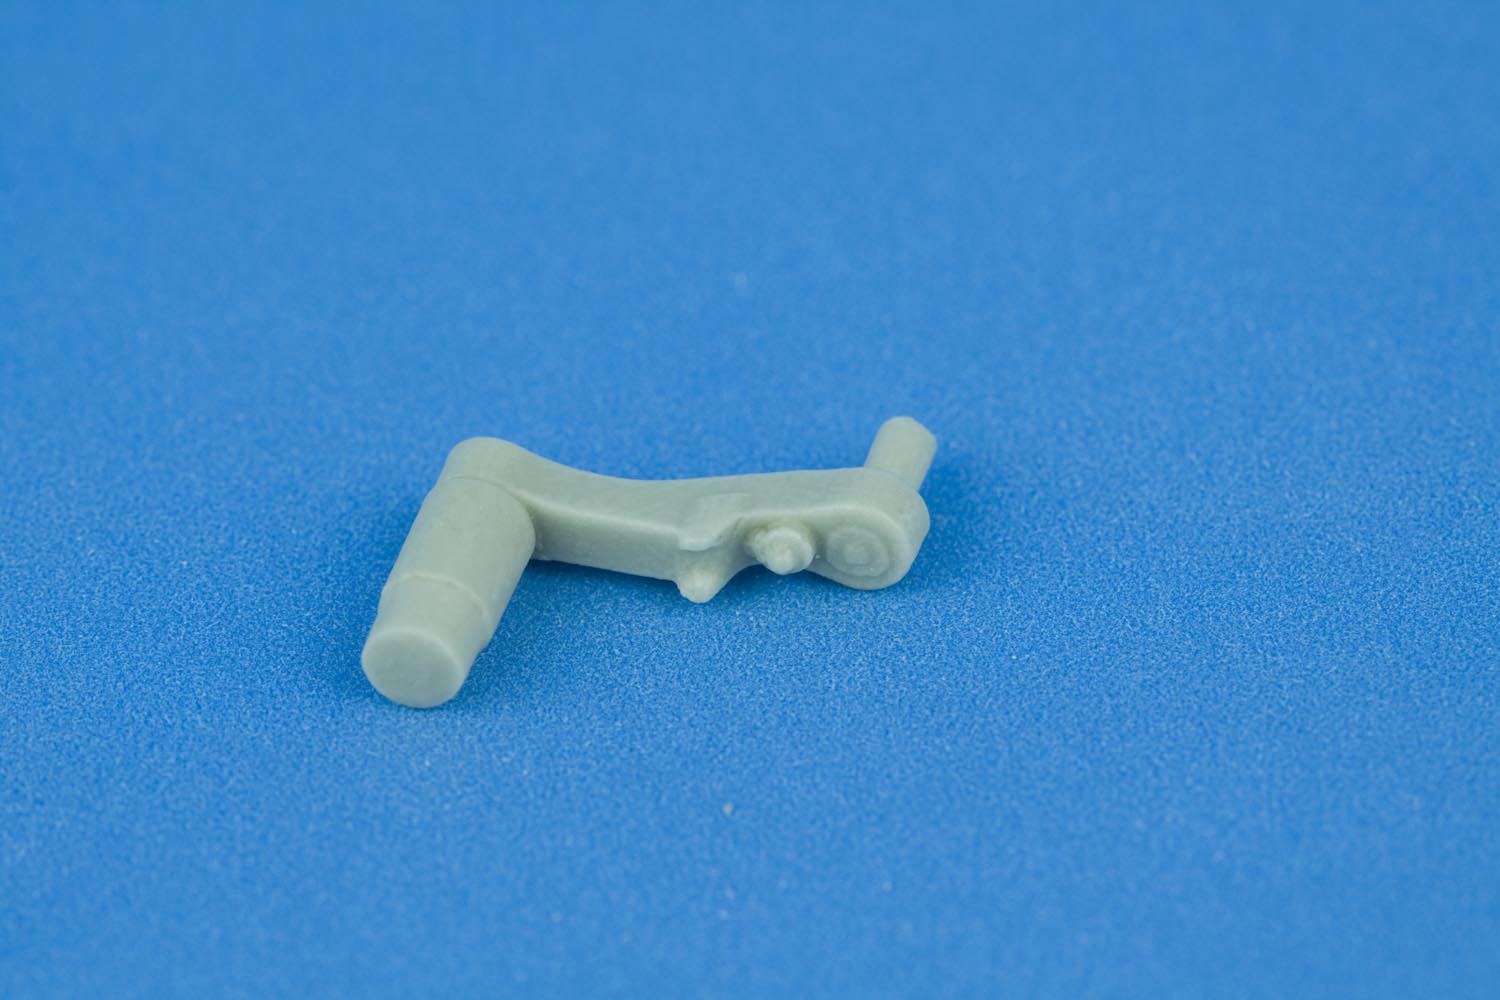
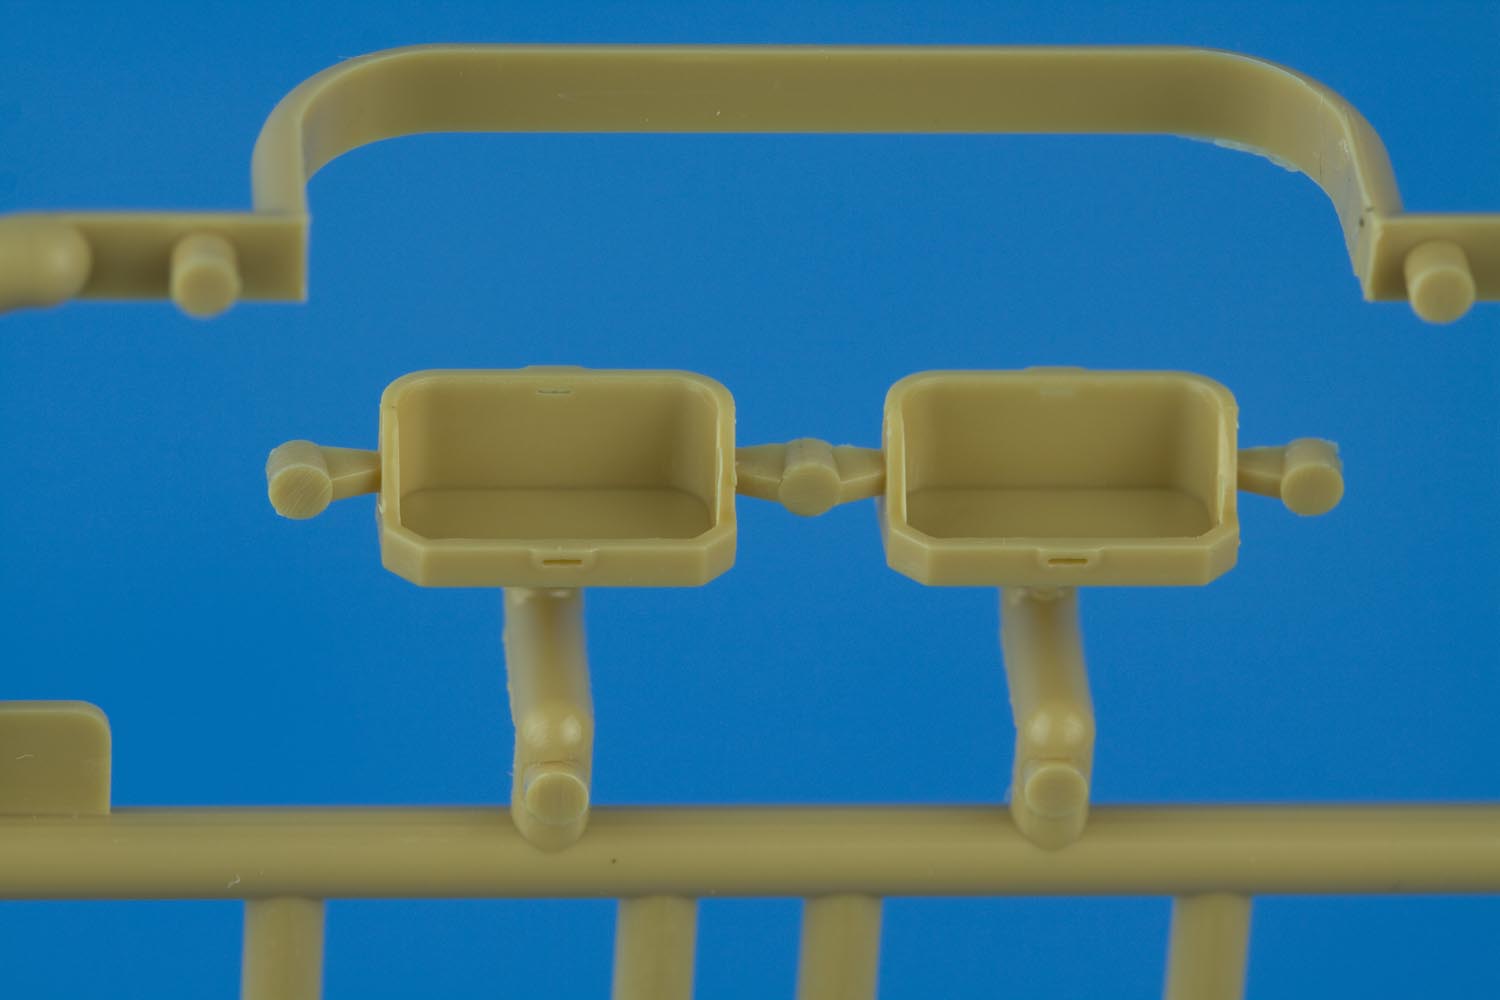
The return roller mounts consist of separate bases and mounting hubs. The shocks each consist of two parts; the top bit is hollow which allows for movement of the separate shock strut. This will facilitate posed suspension with not a lot of additional work. The shock struts don't quite have the quite shape according to my reference photos.
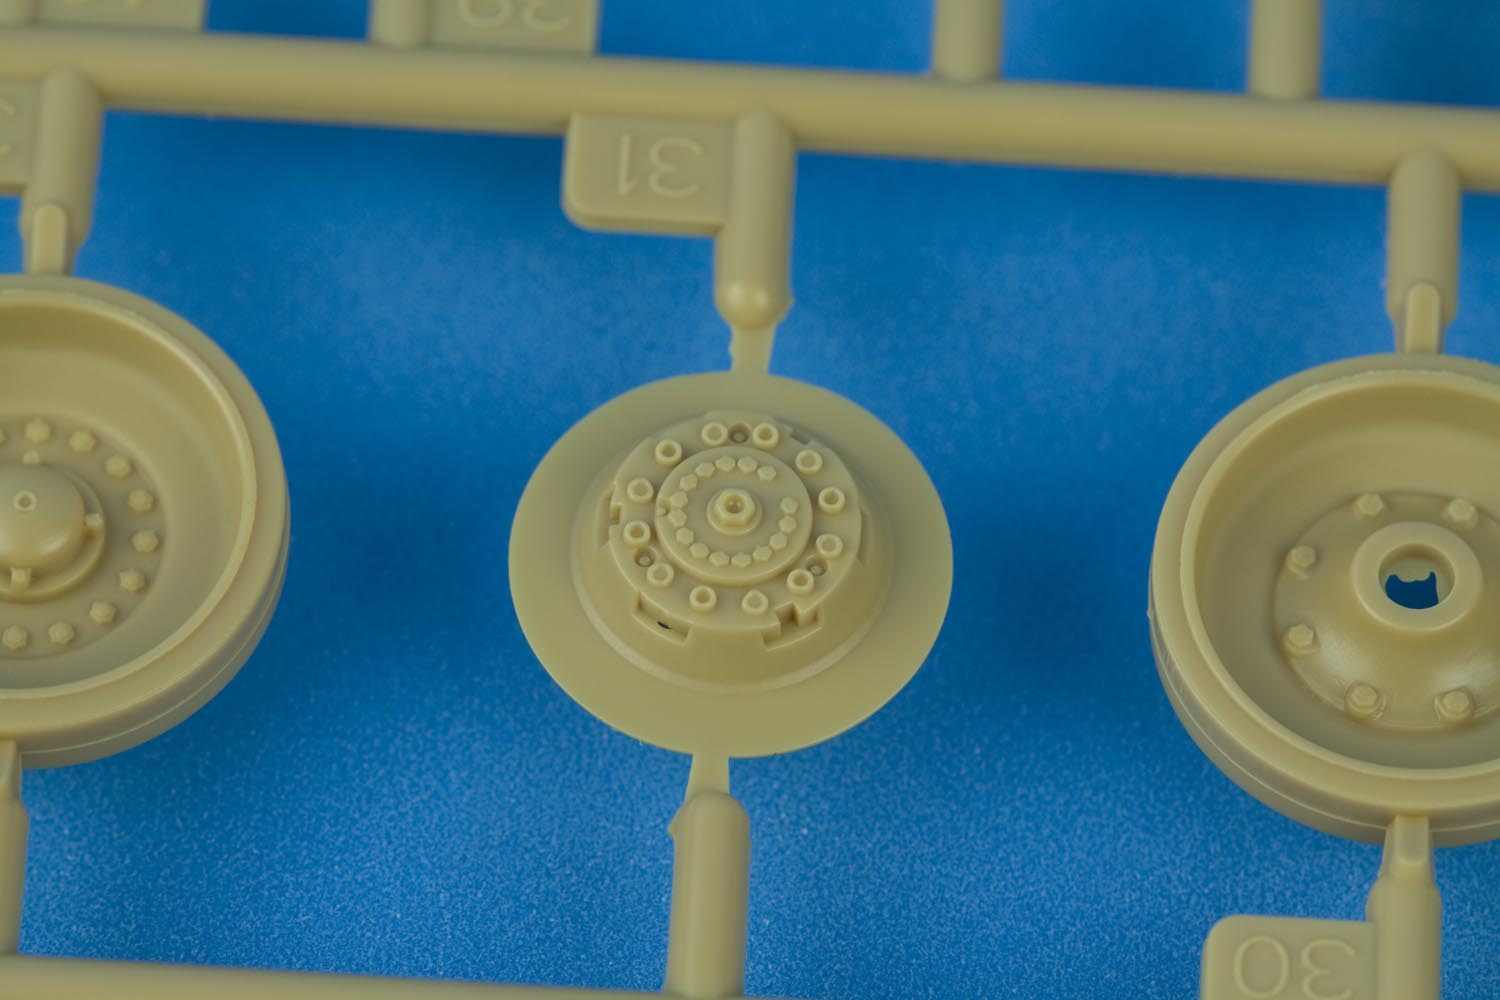
The idler wheel adjuster is a separate piece as well with nice hex bolt definition.
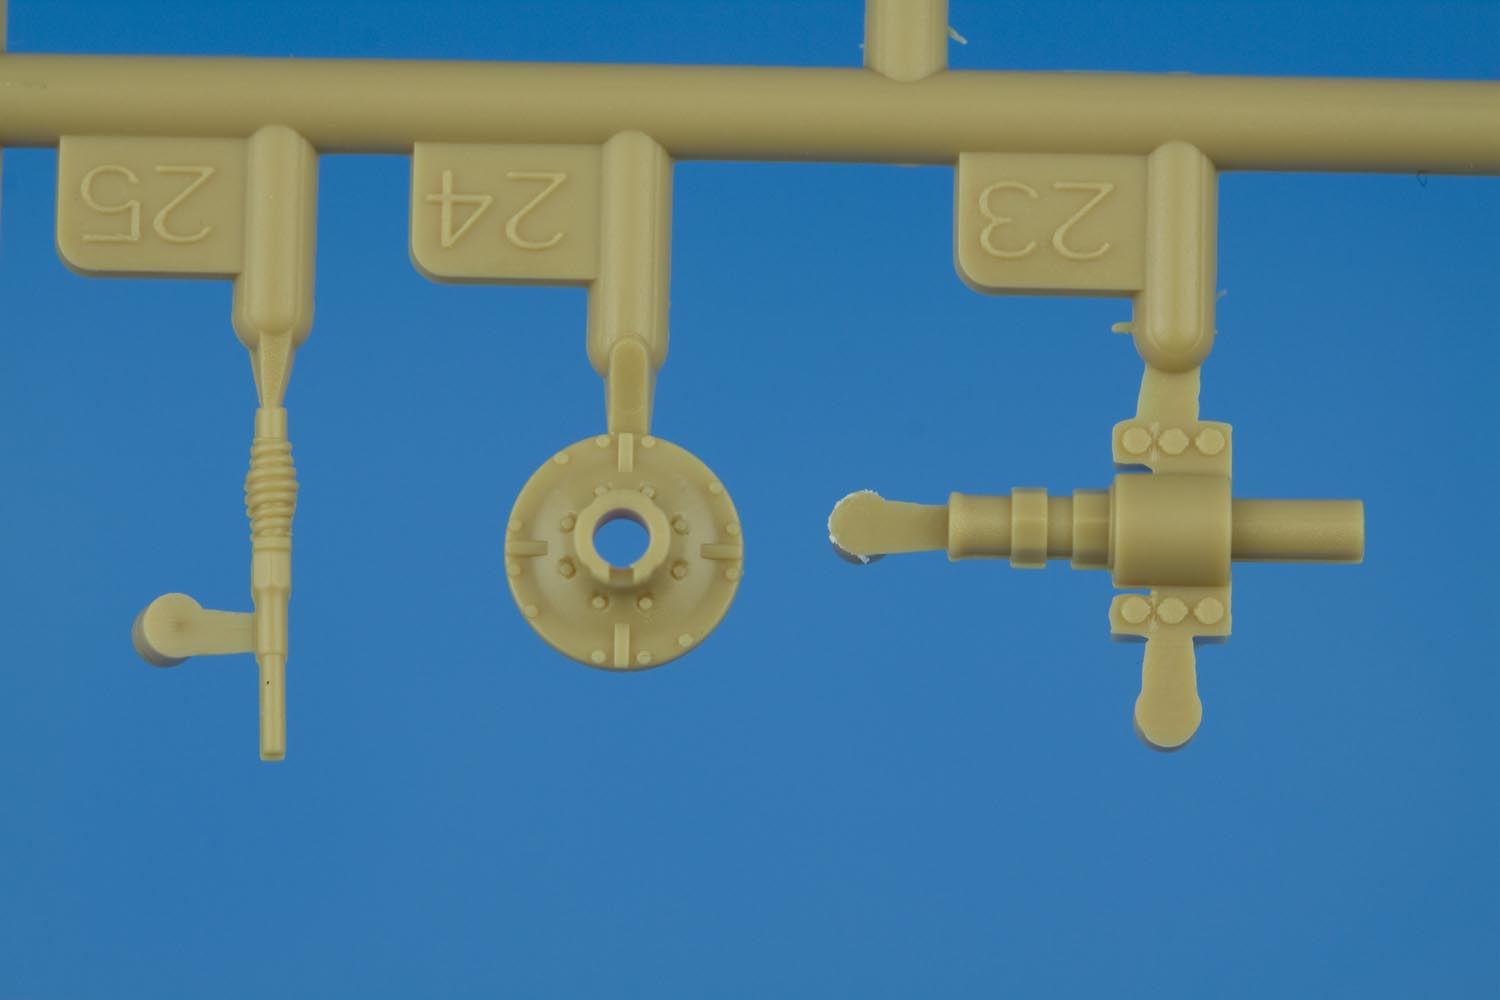
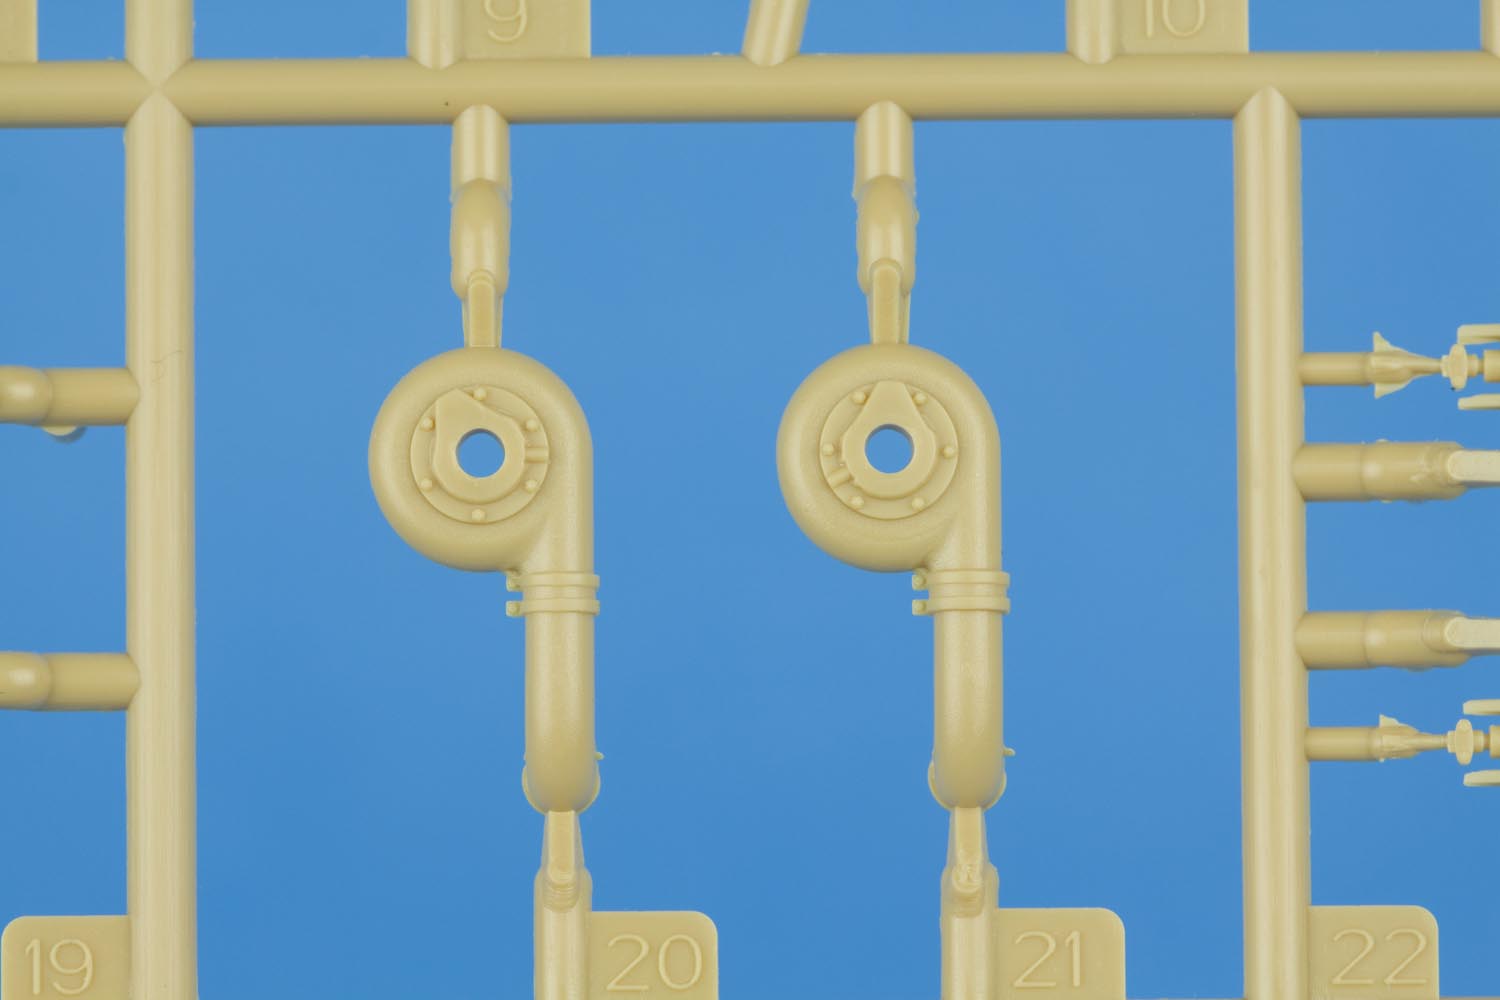
The other parts in the above photo are (from left to right) an aerial base and an engine super-charger housing.
Real suspension reference photos


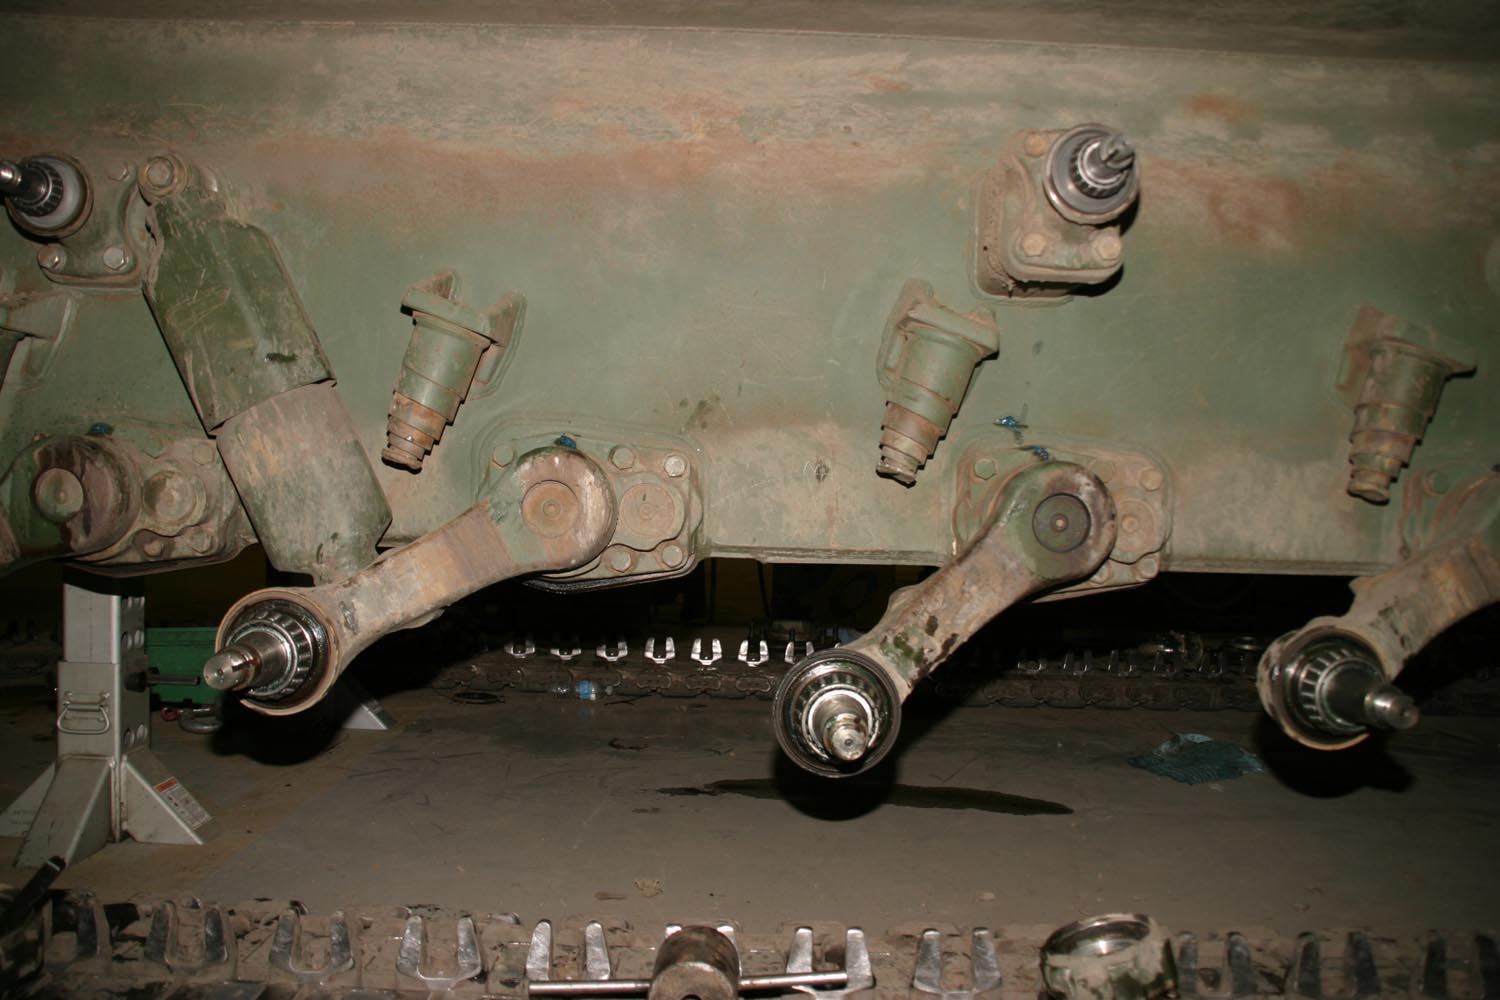
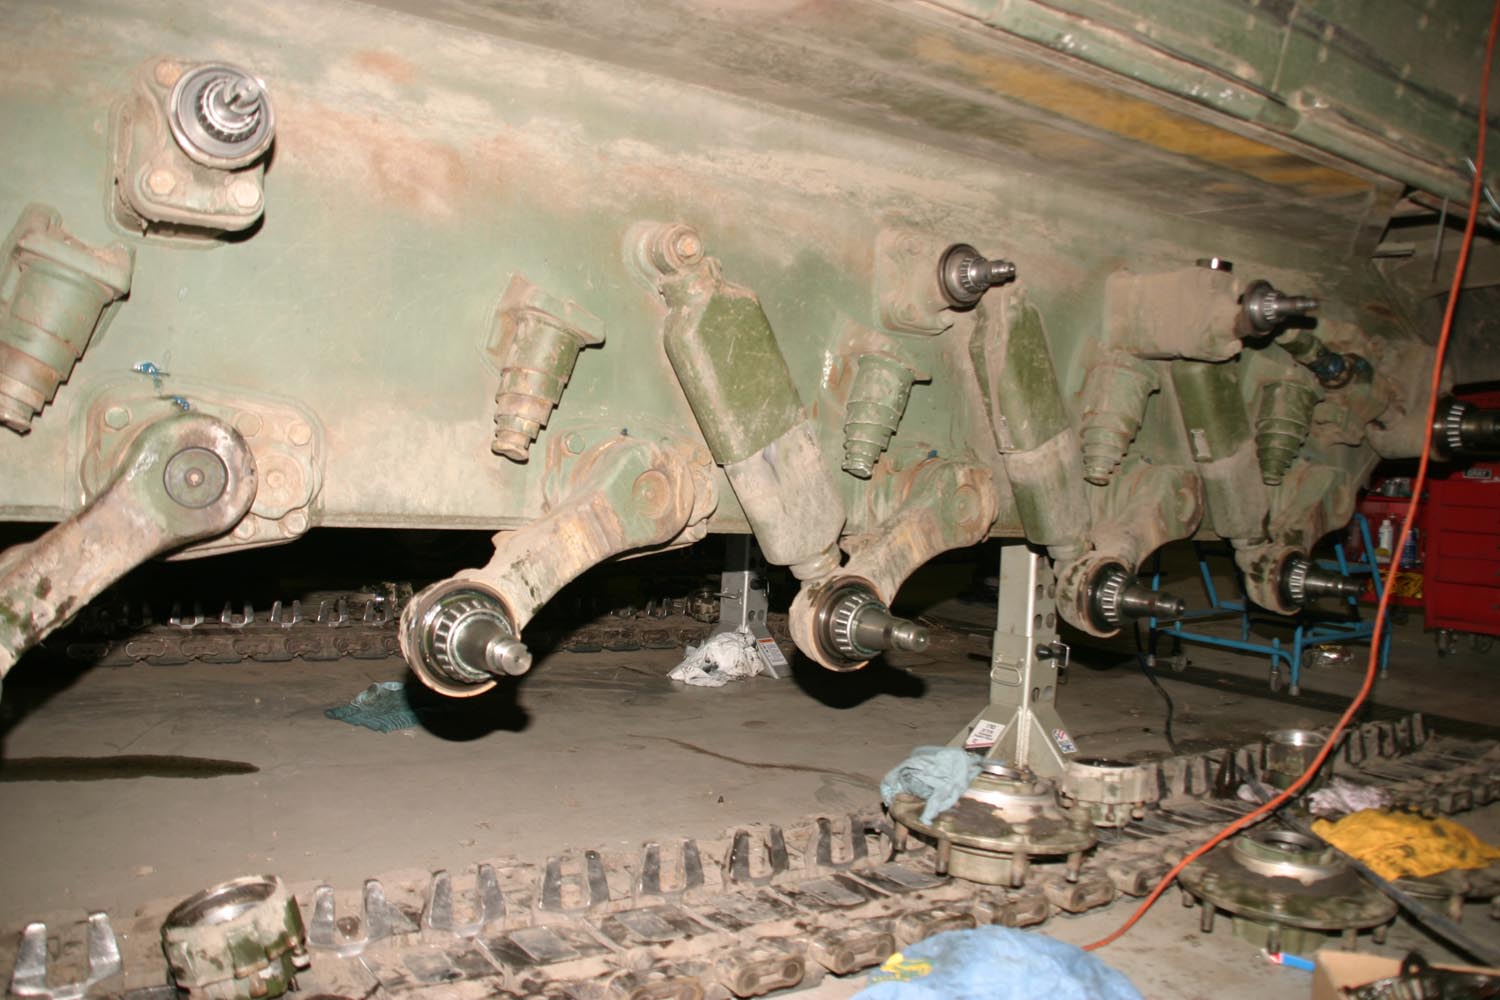
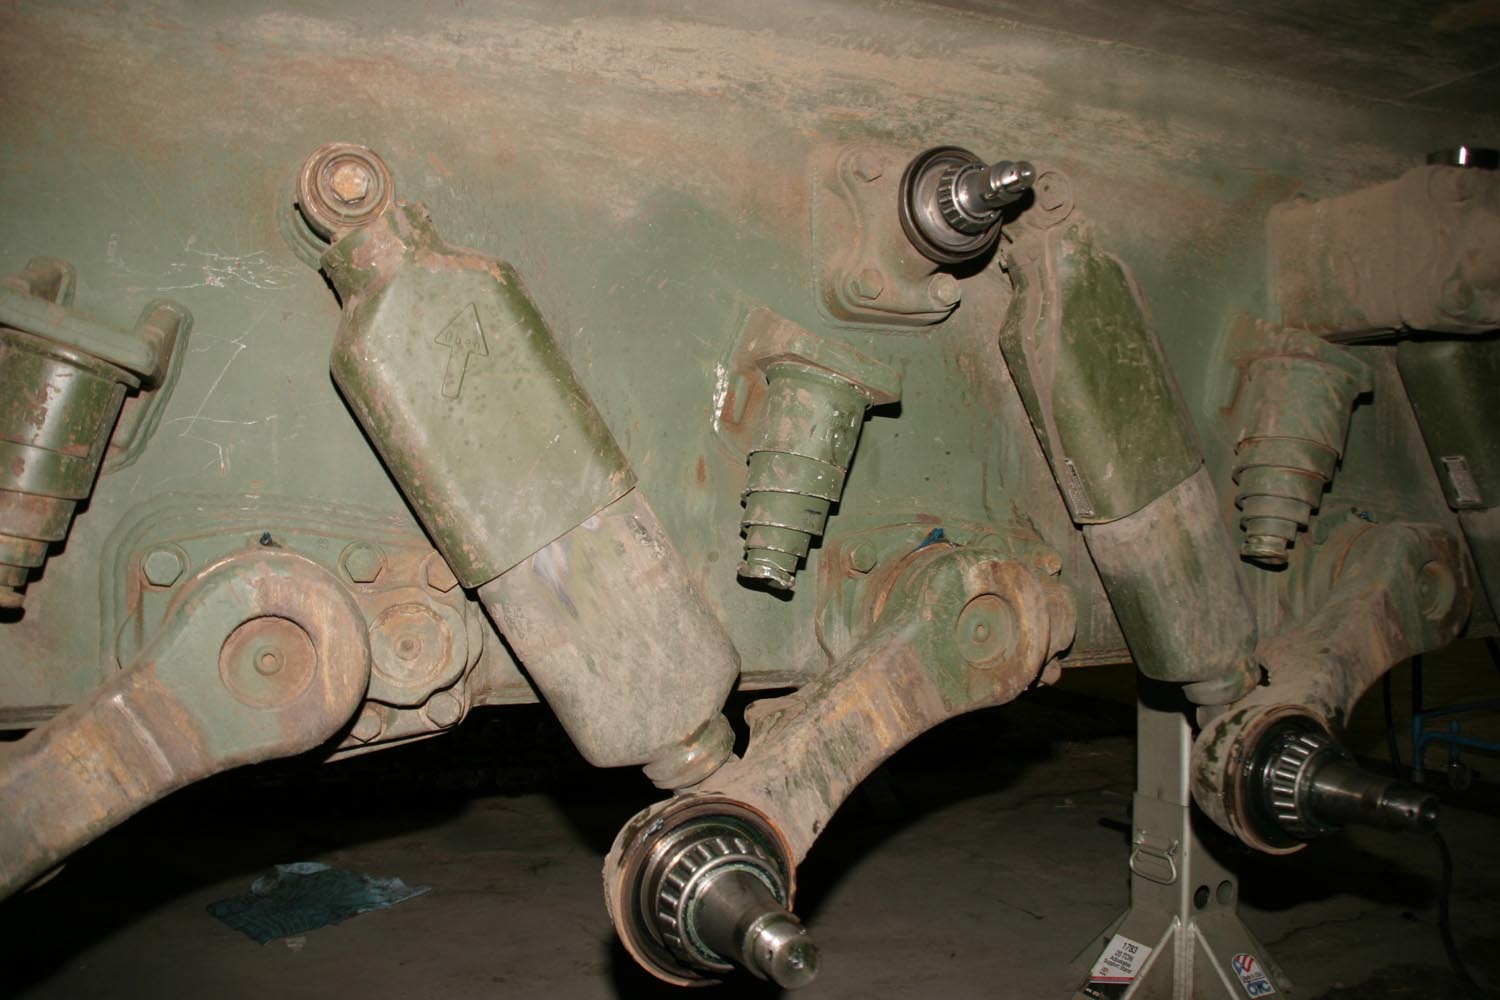

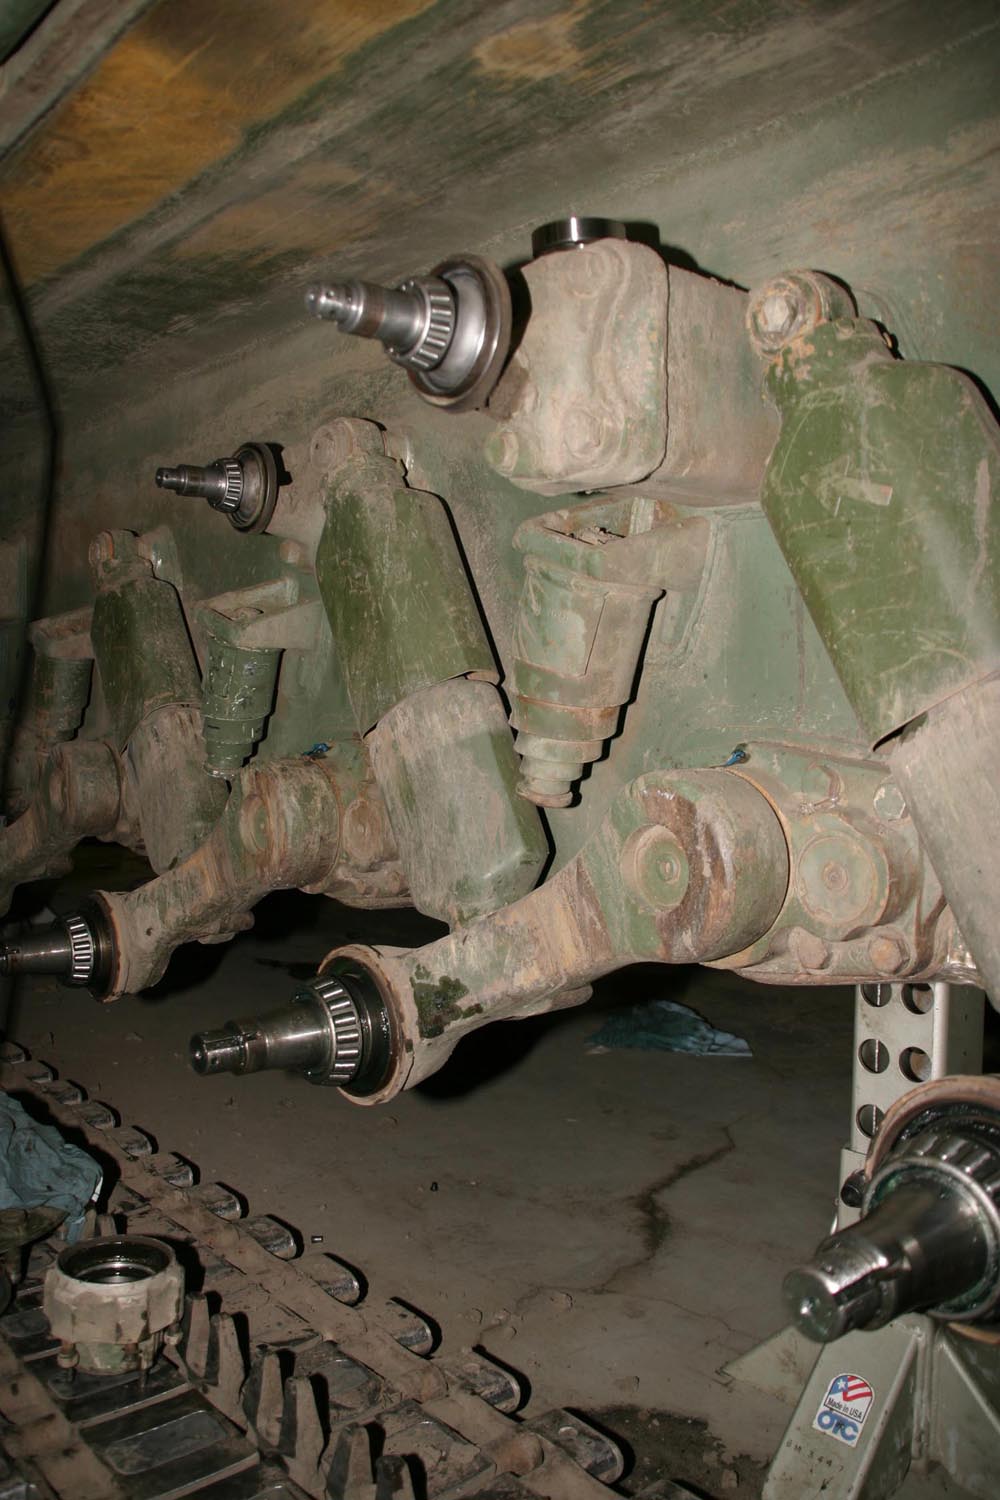

The kit's trailing arms are straight. The real ones are not.

Leopard Club trailing arms (found in LW010 and LW011) - notice the swept profile
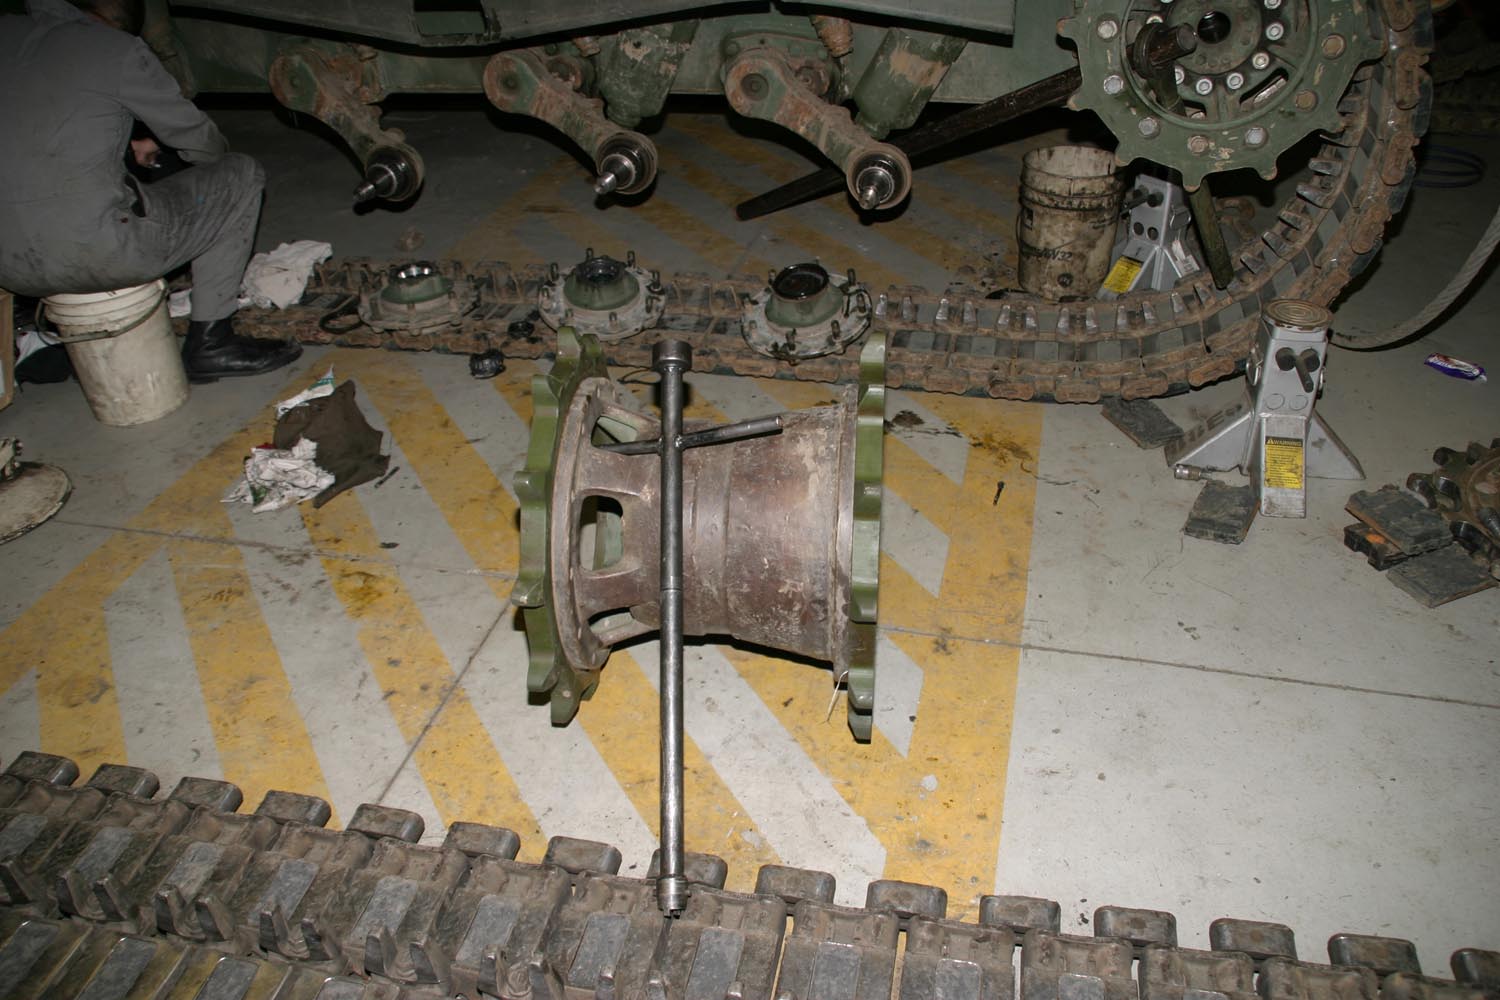
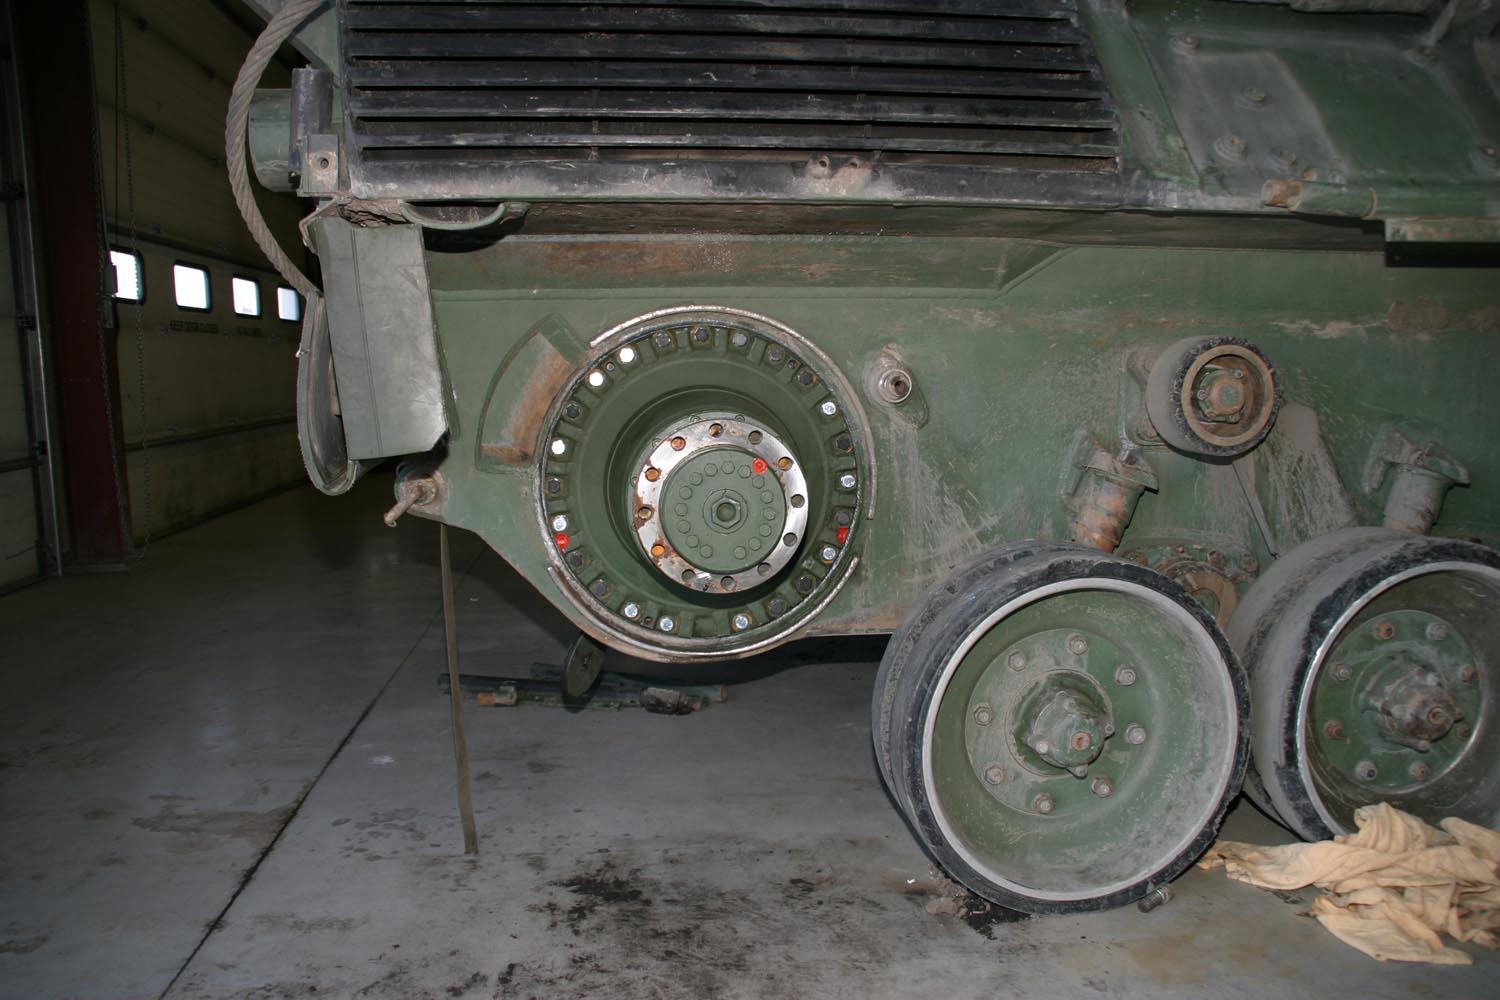
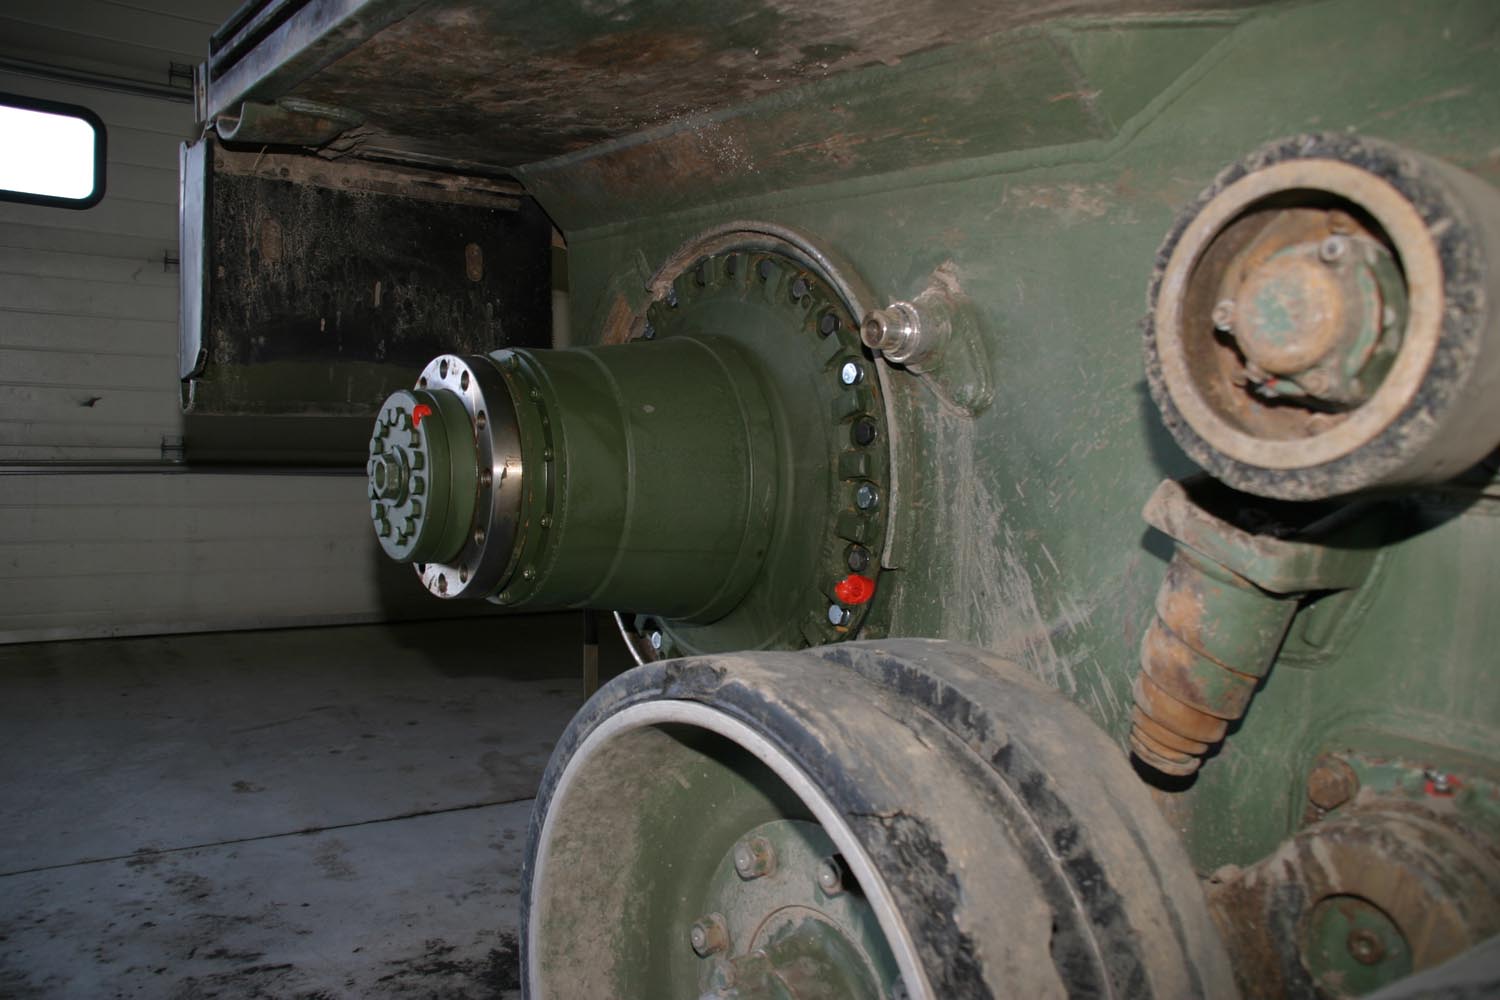
The lower hull features some nice, but not completely accurate final drive detail. This will be partially visible behind the drive sprocket if one looks really hard because it will be buried behind the rear side skits.
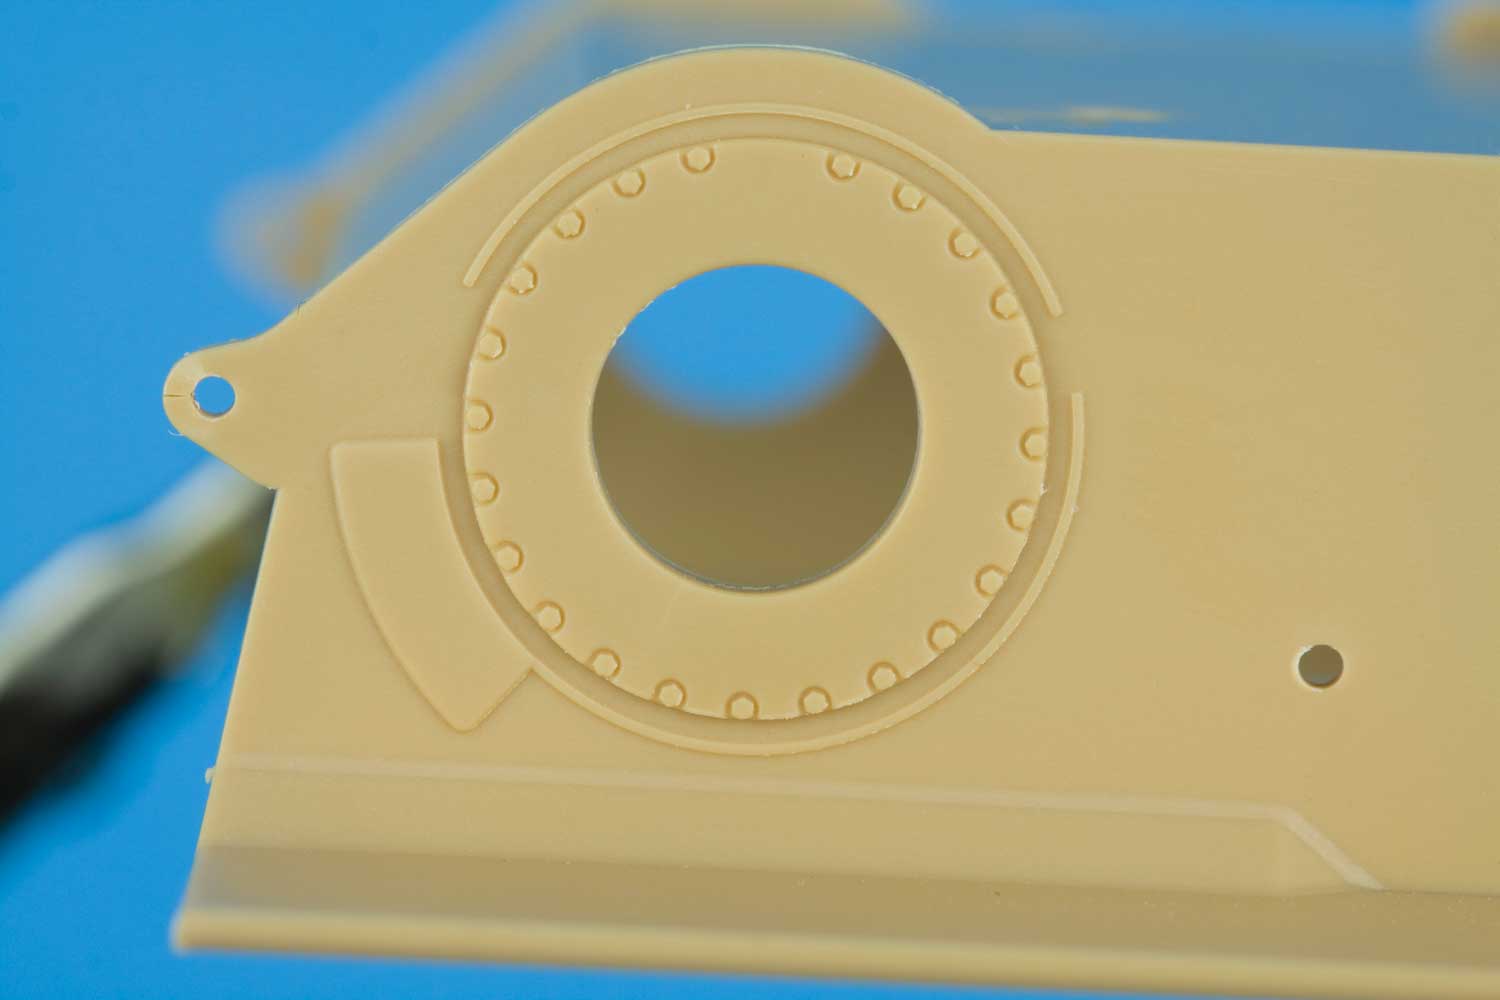
Real final drive reference photos


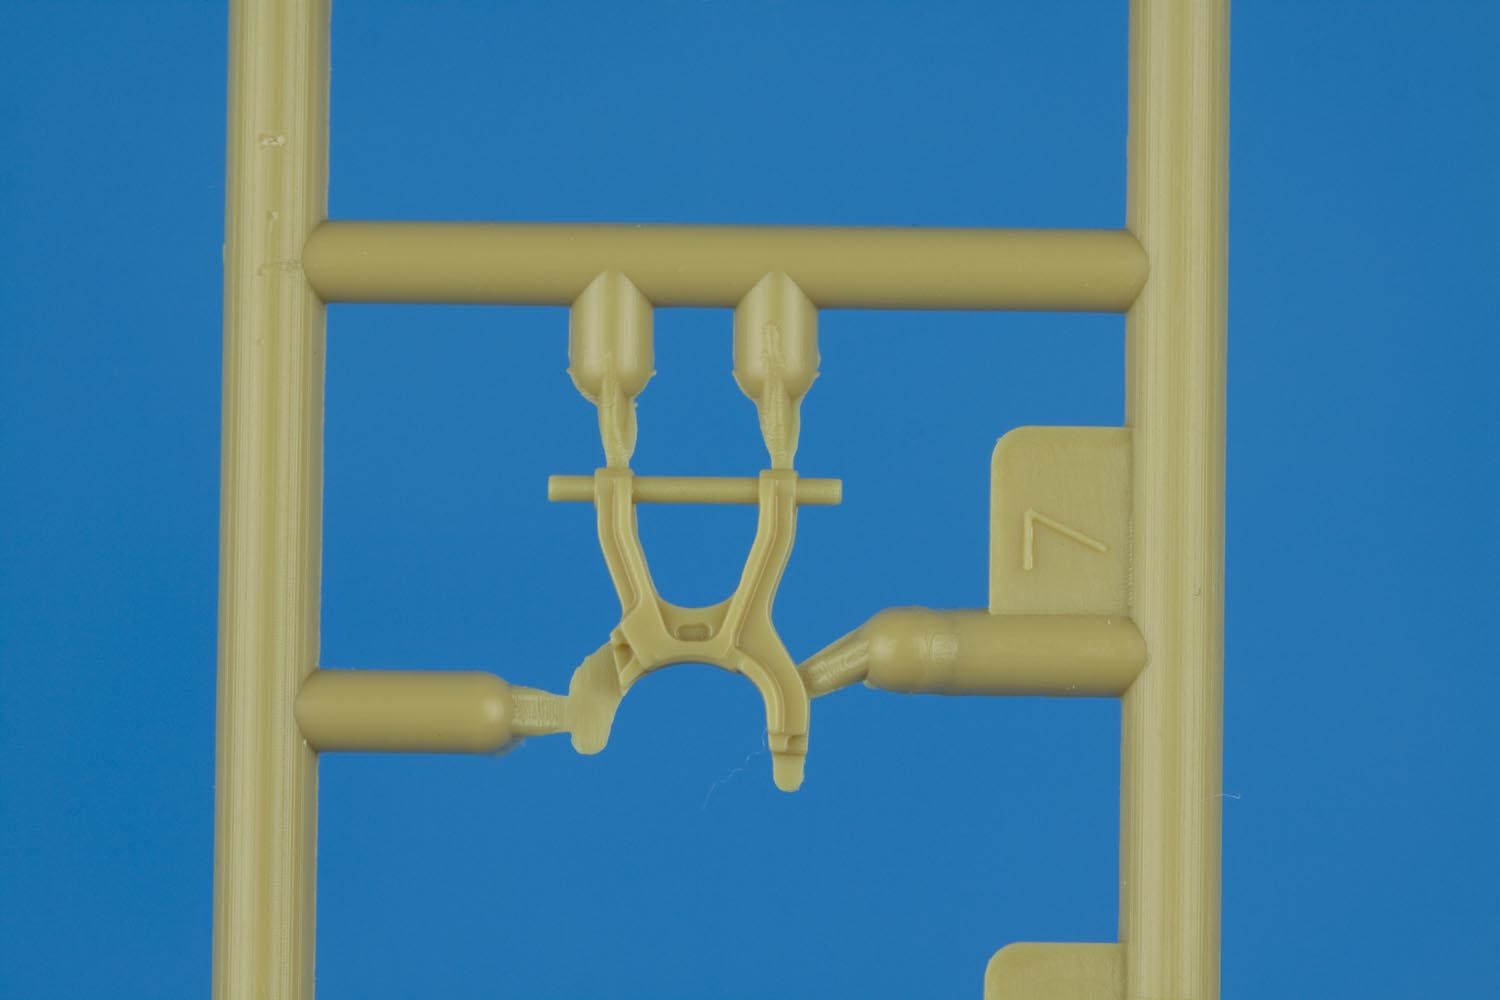
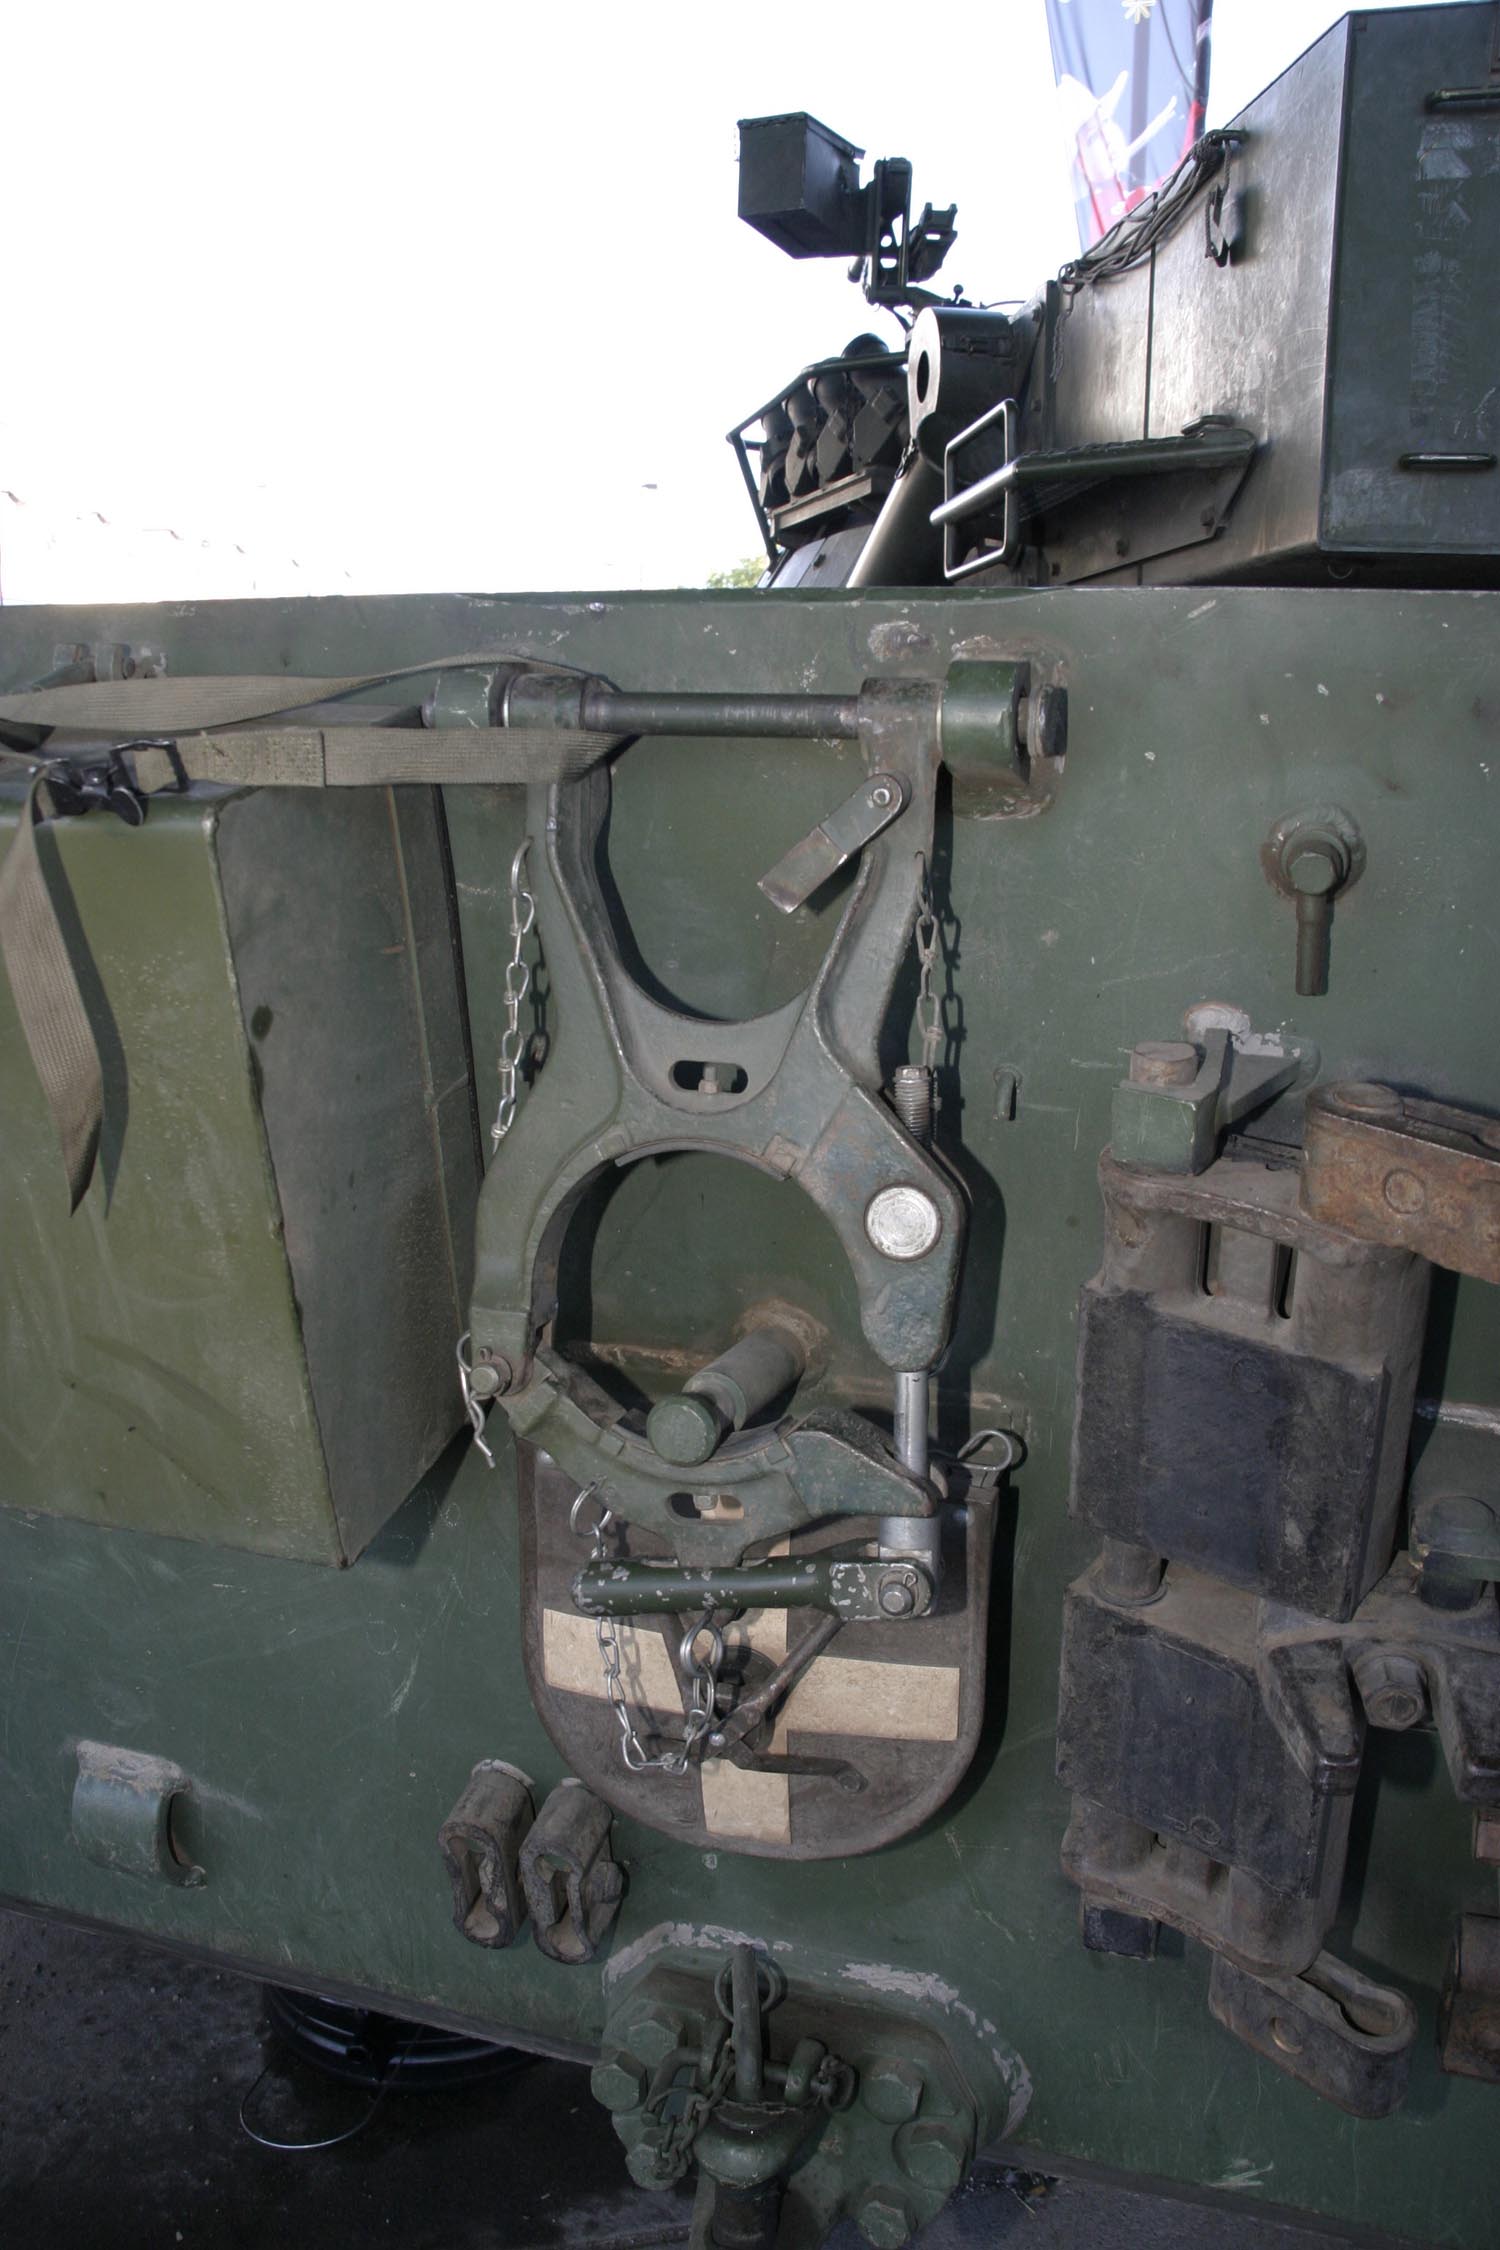
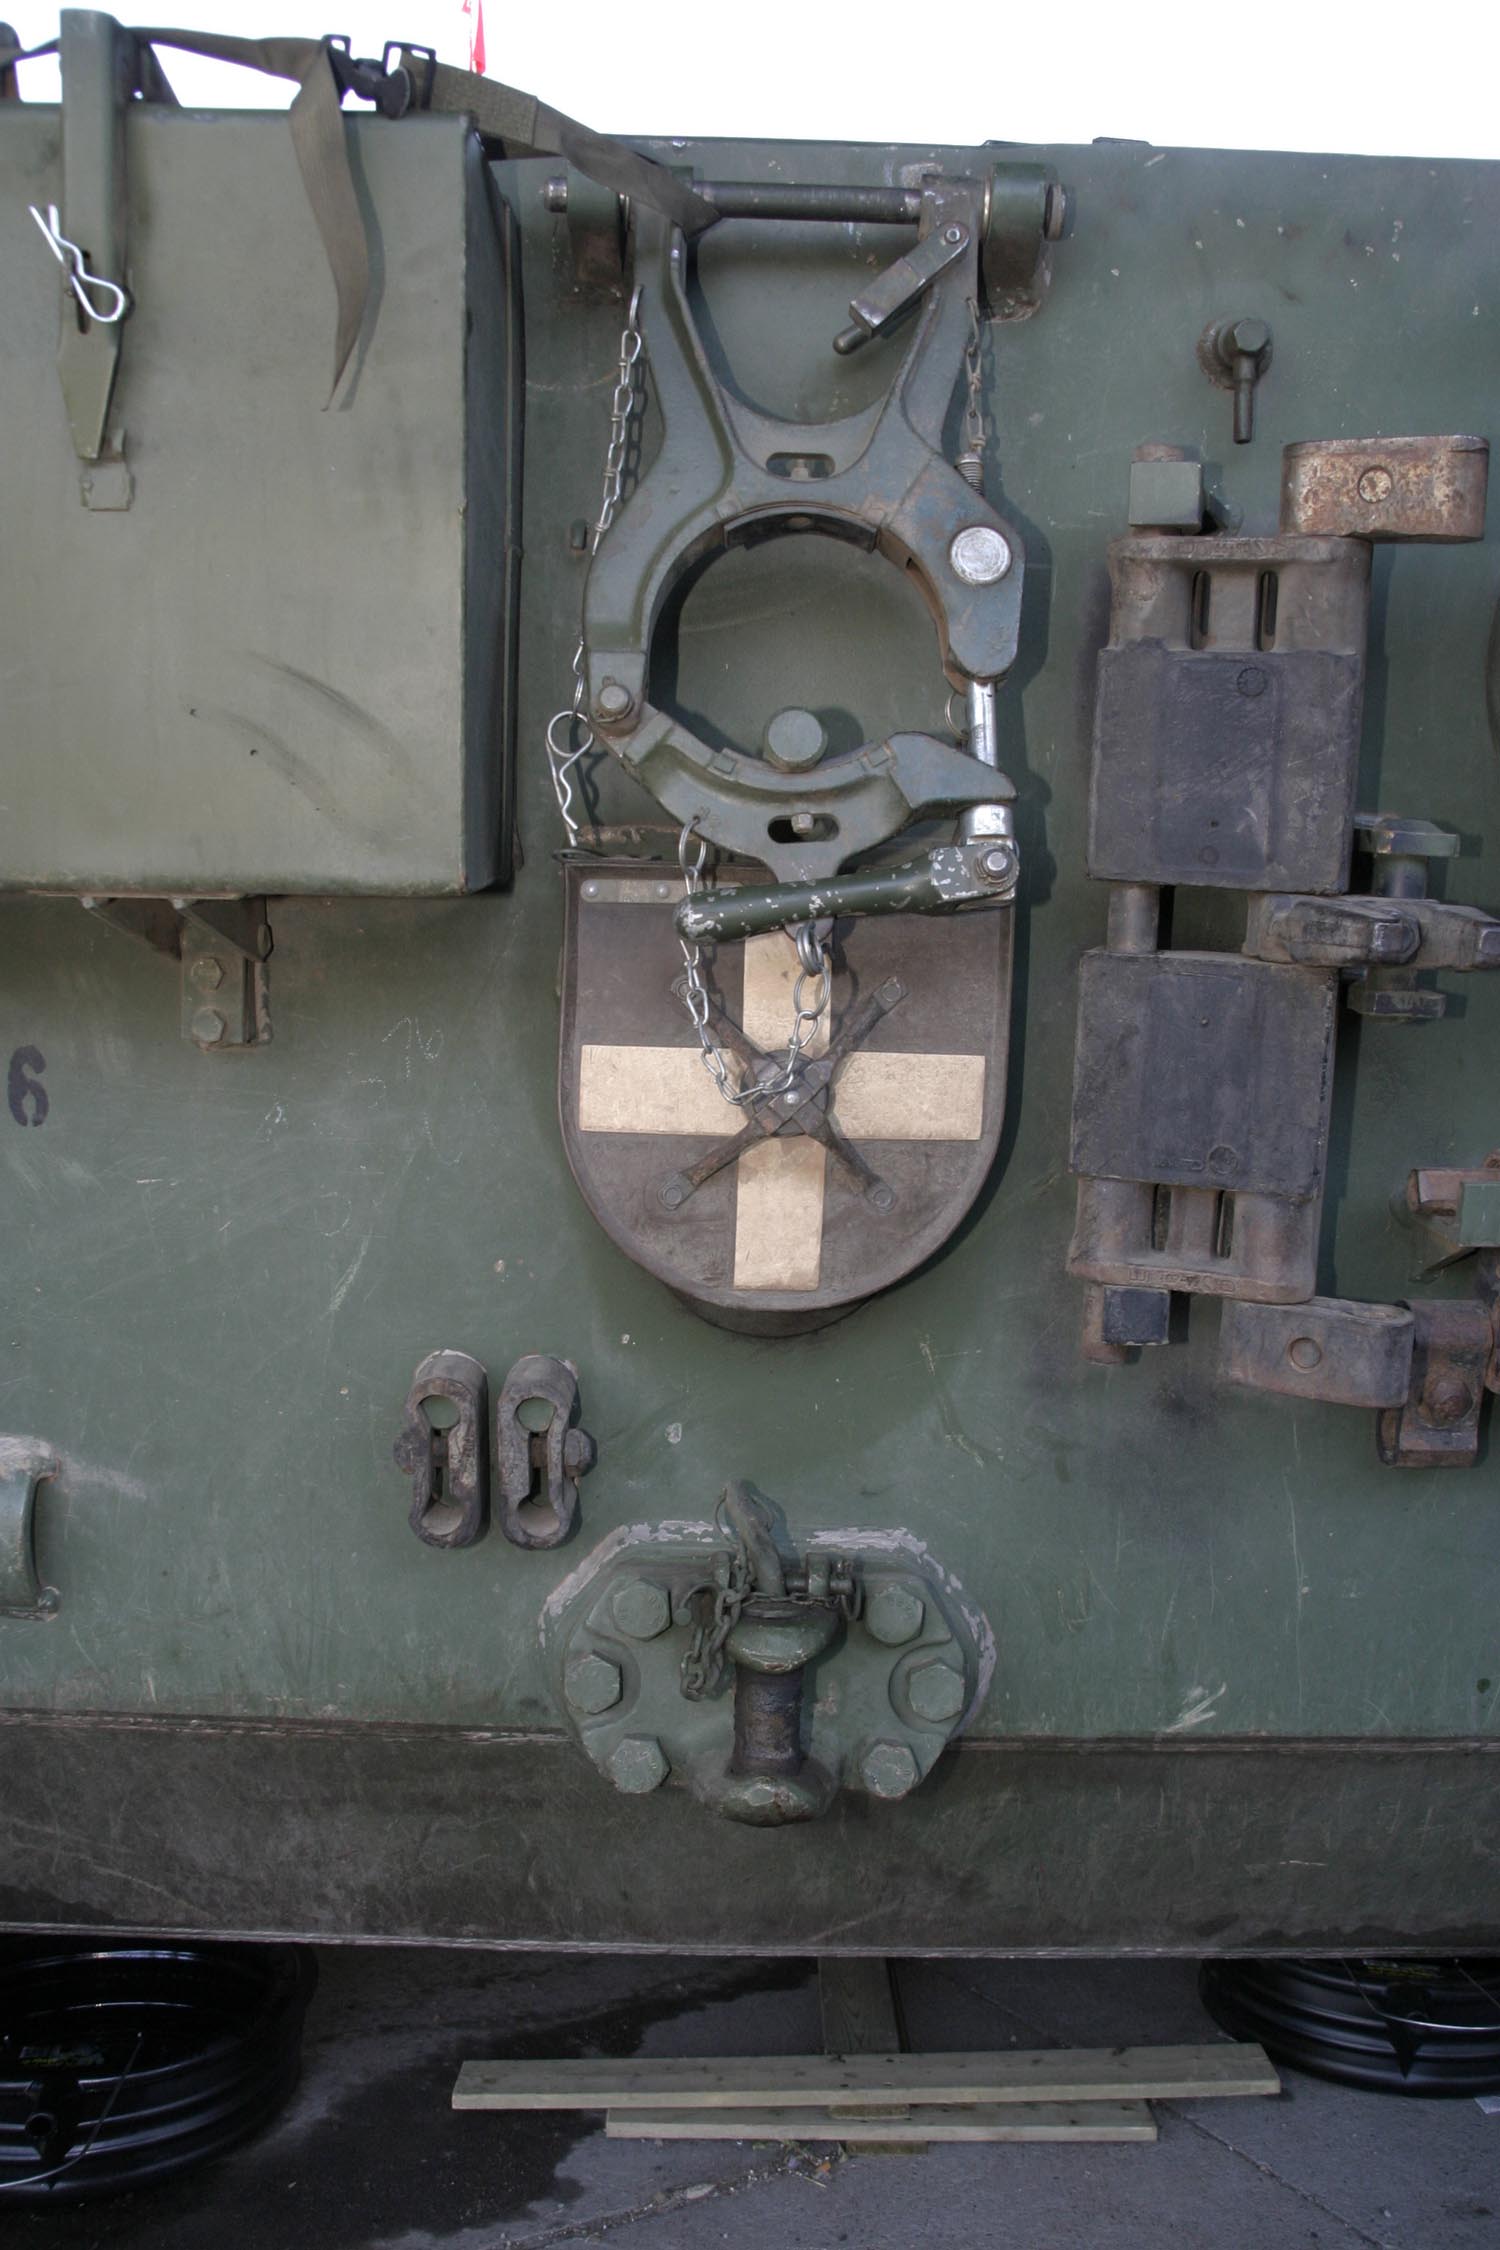
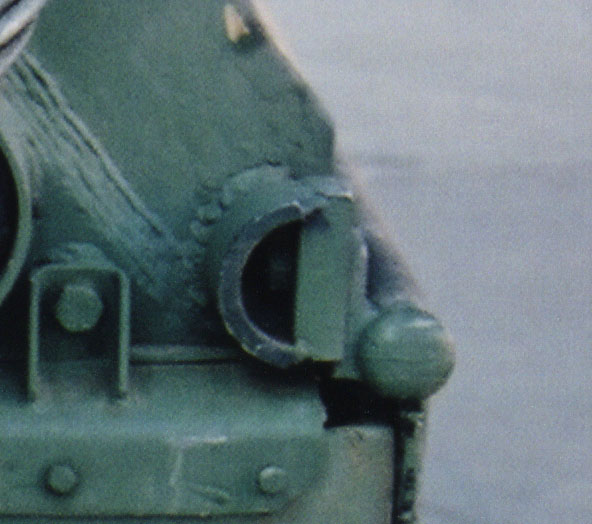
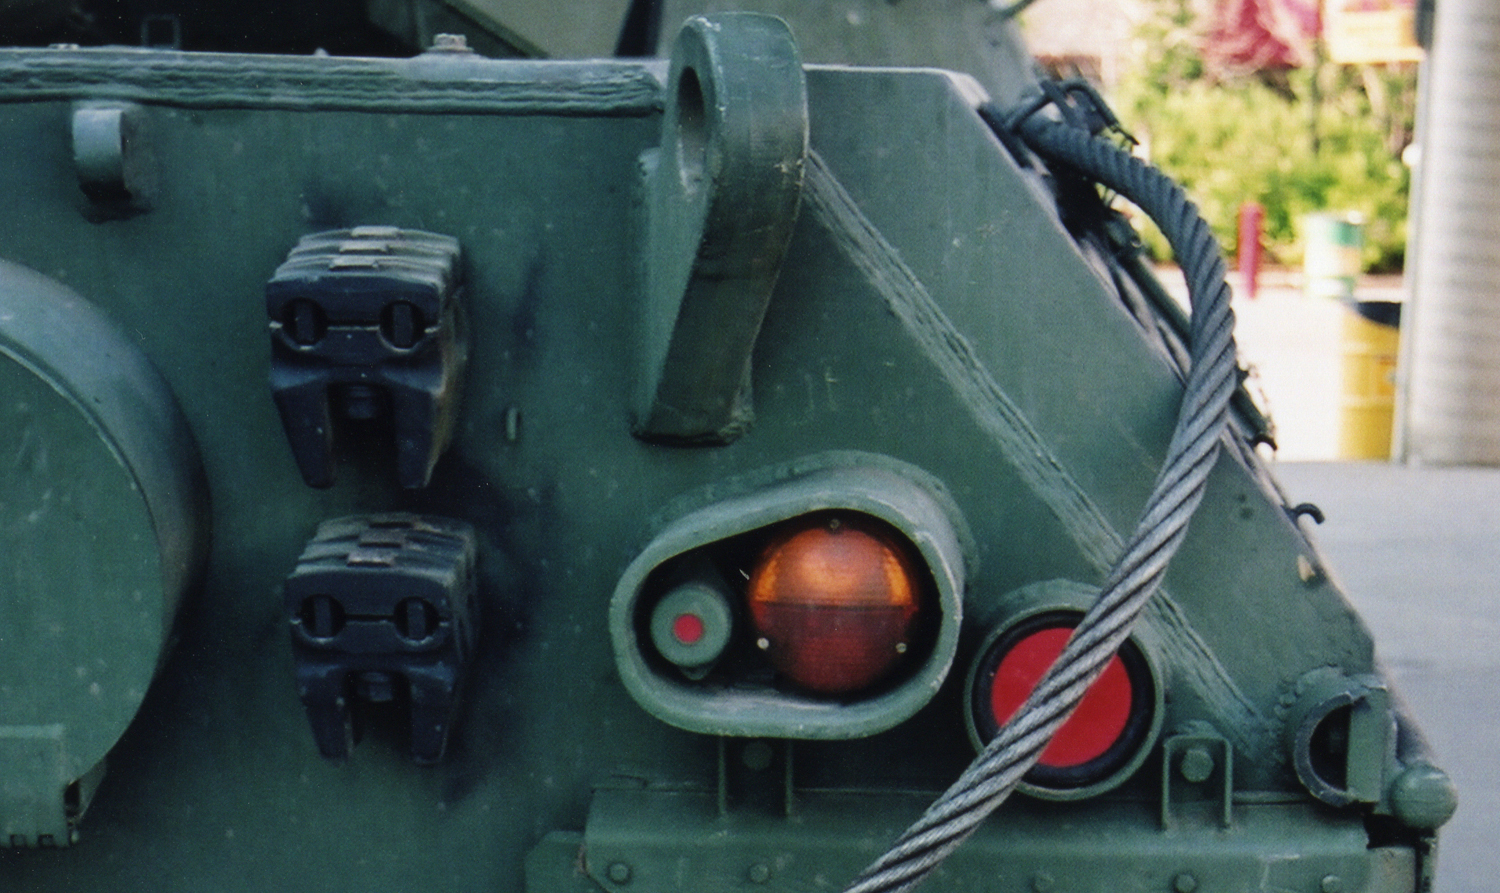
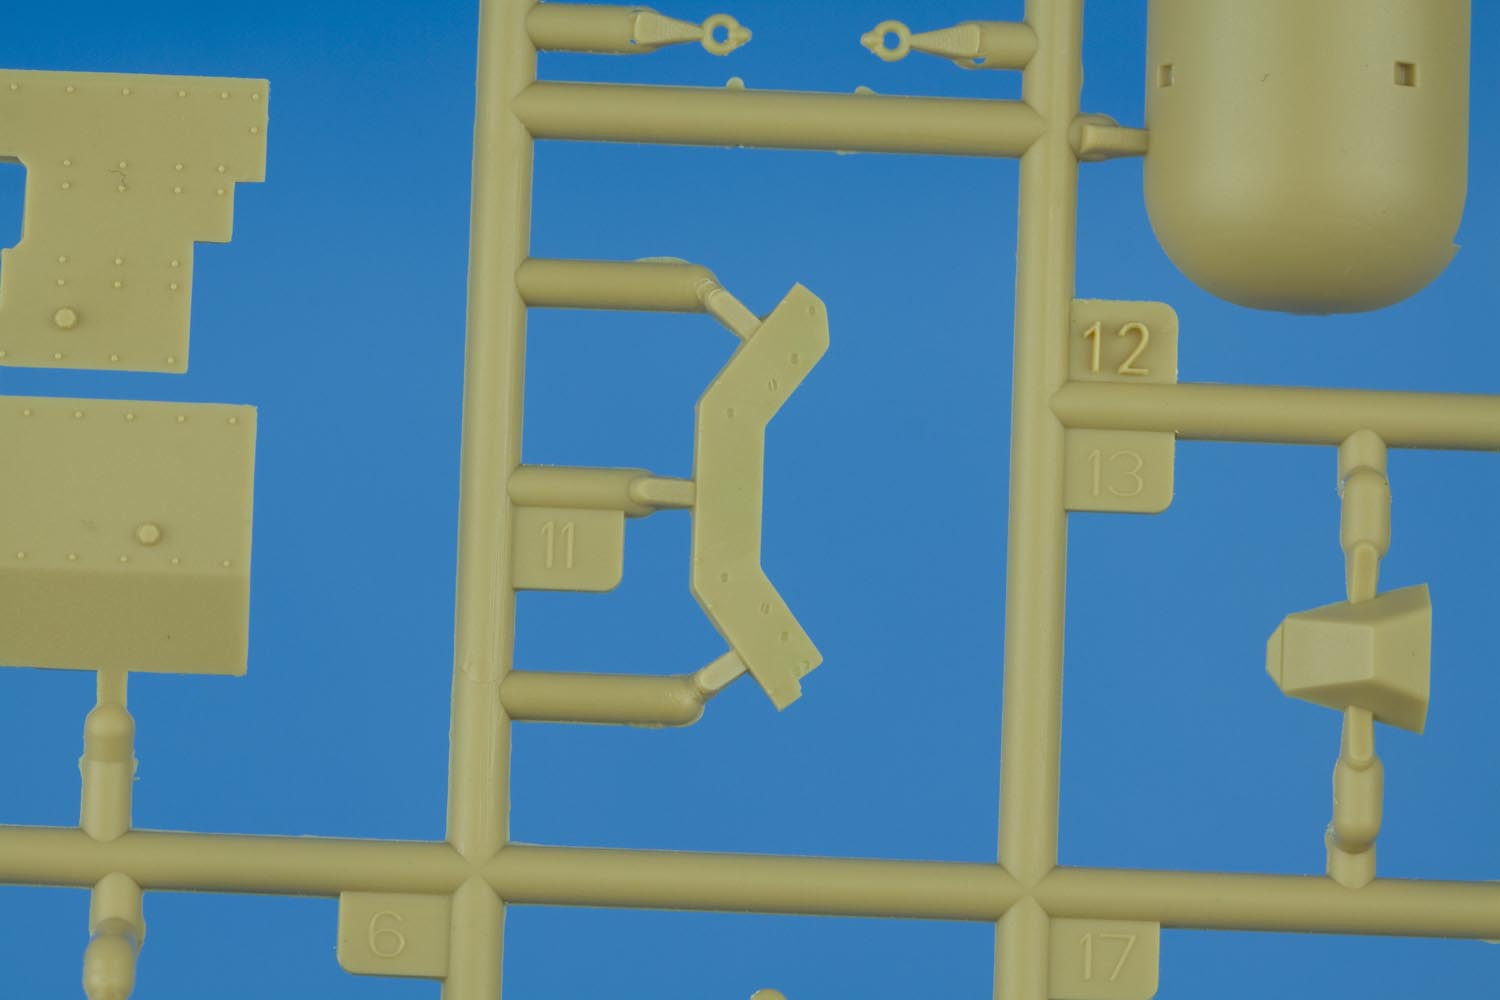
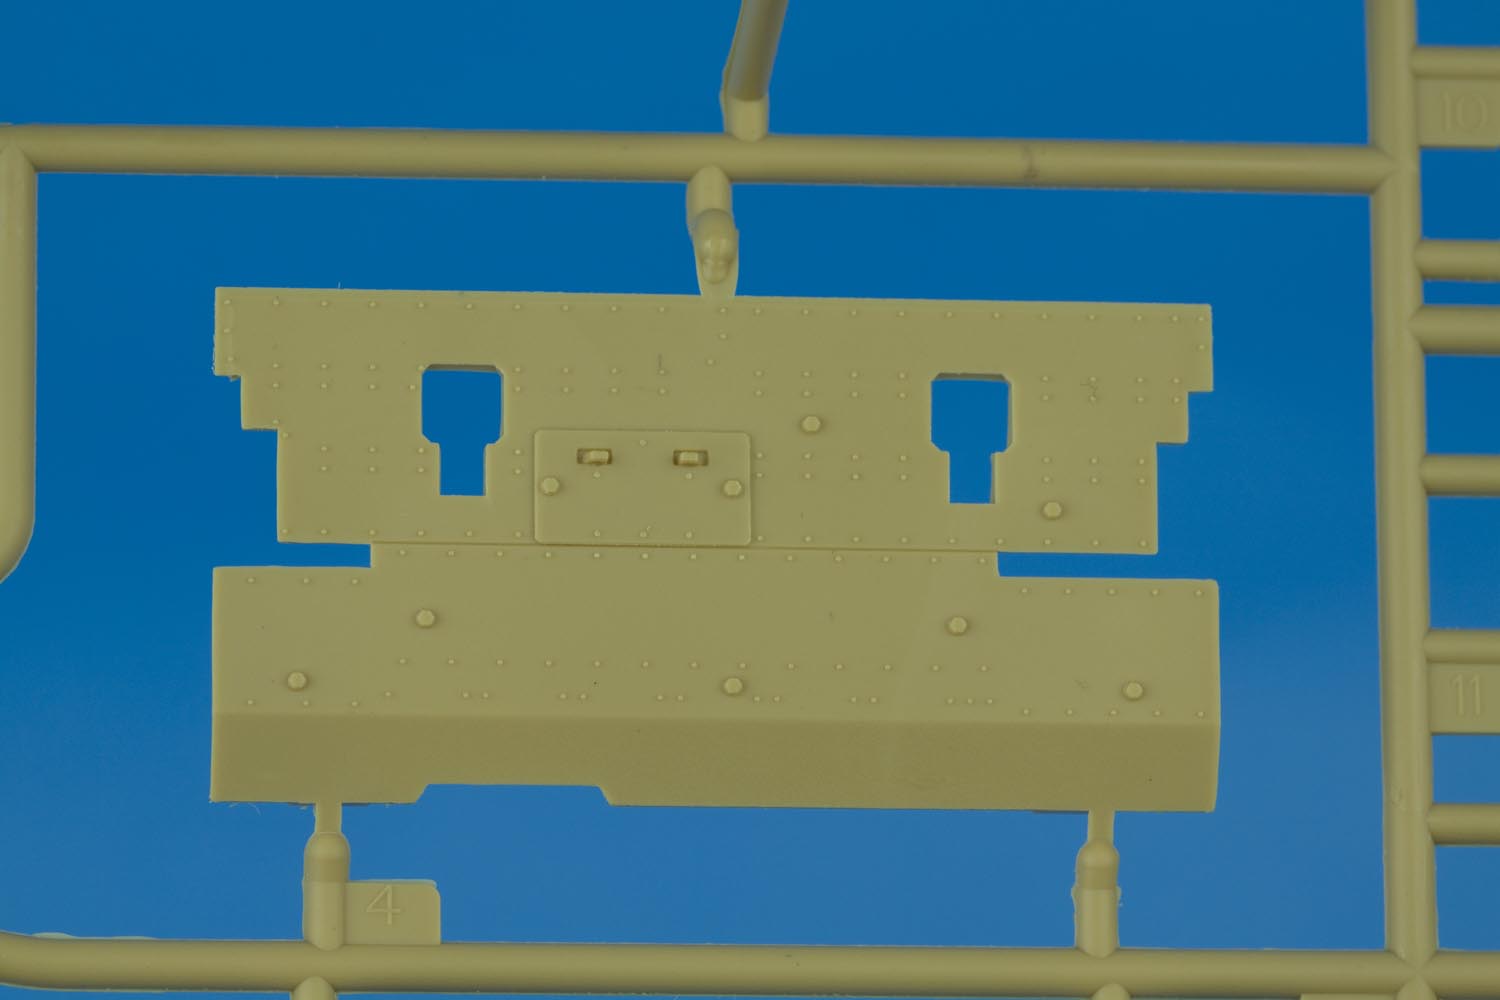
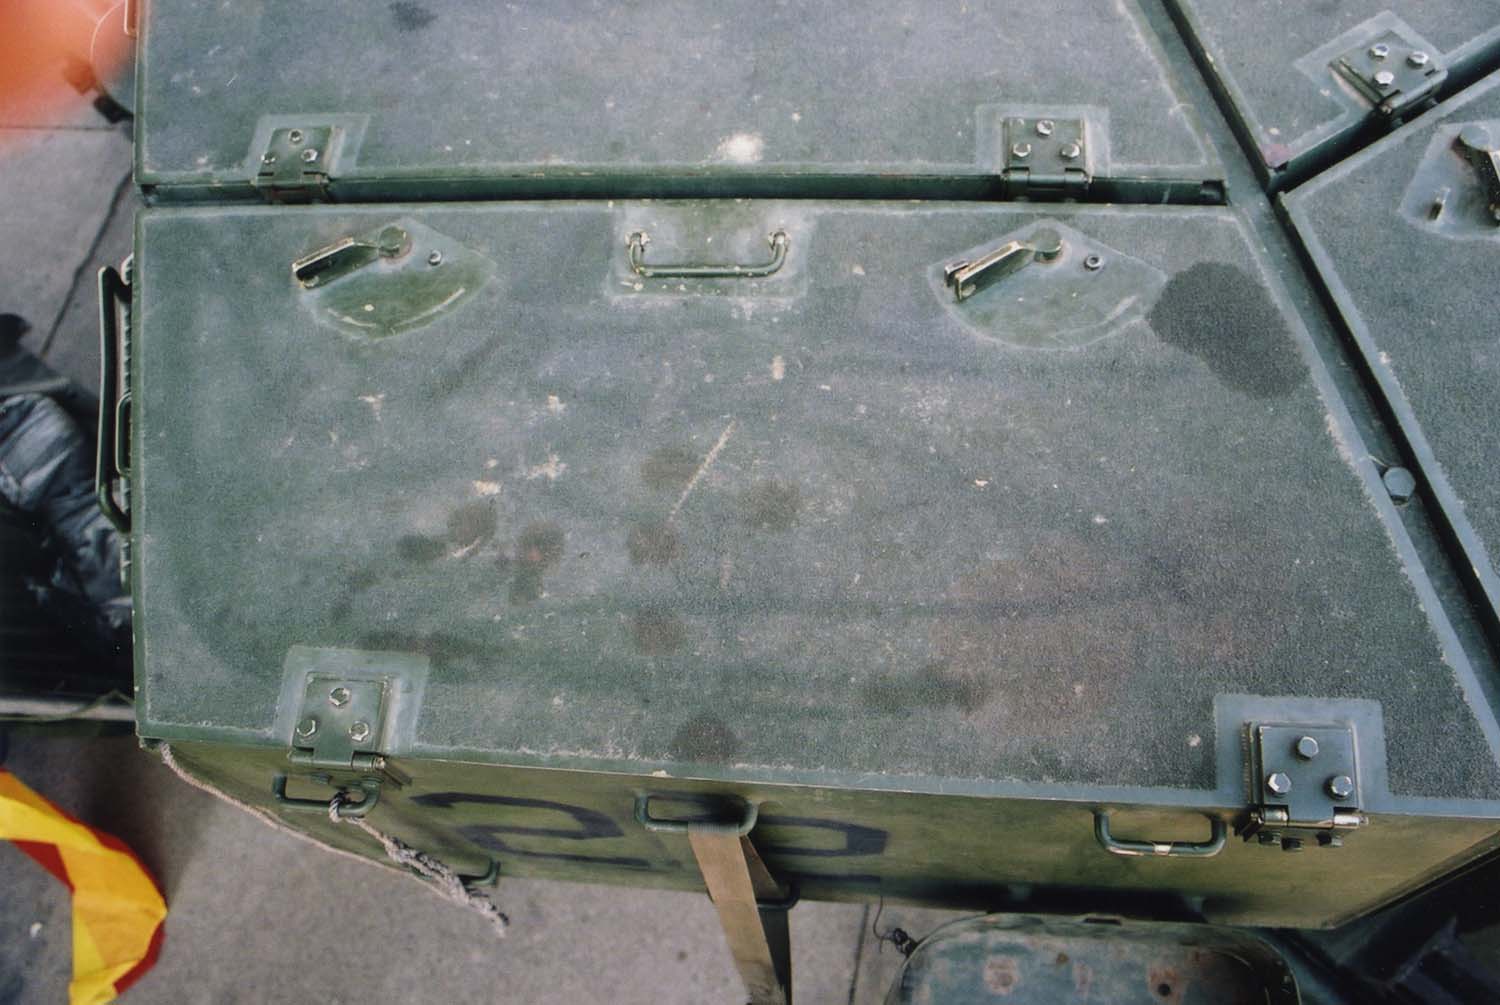
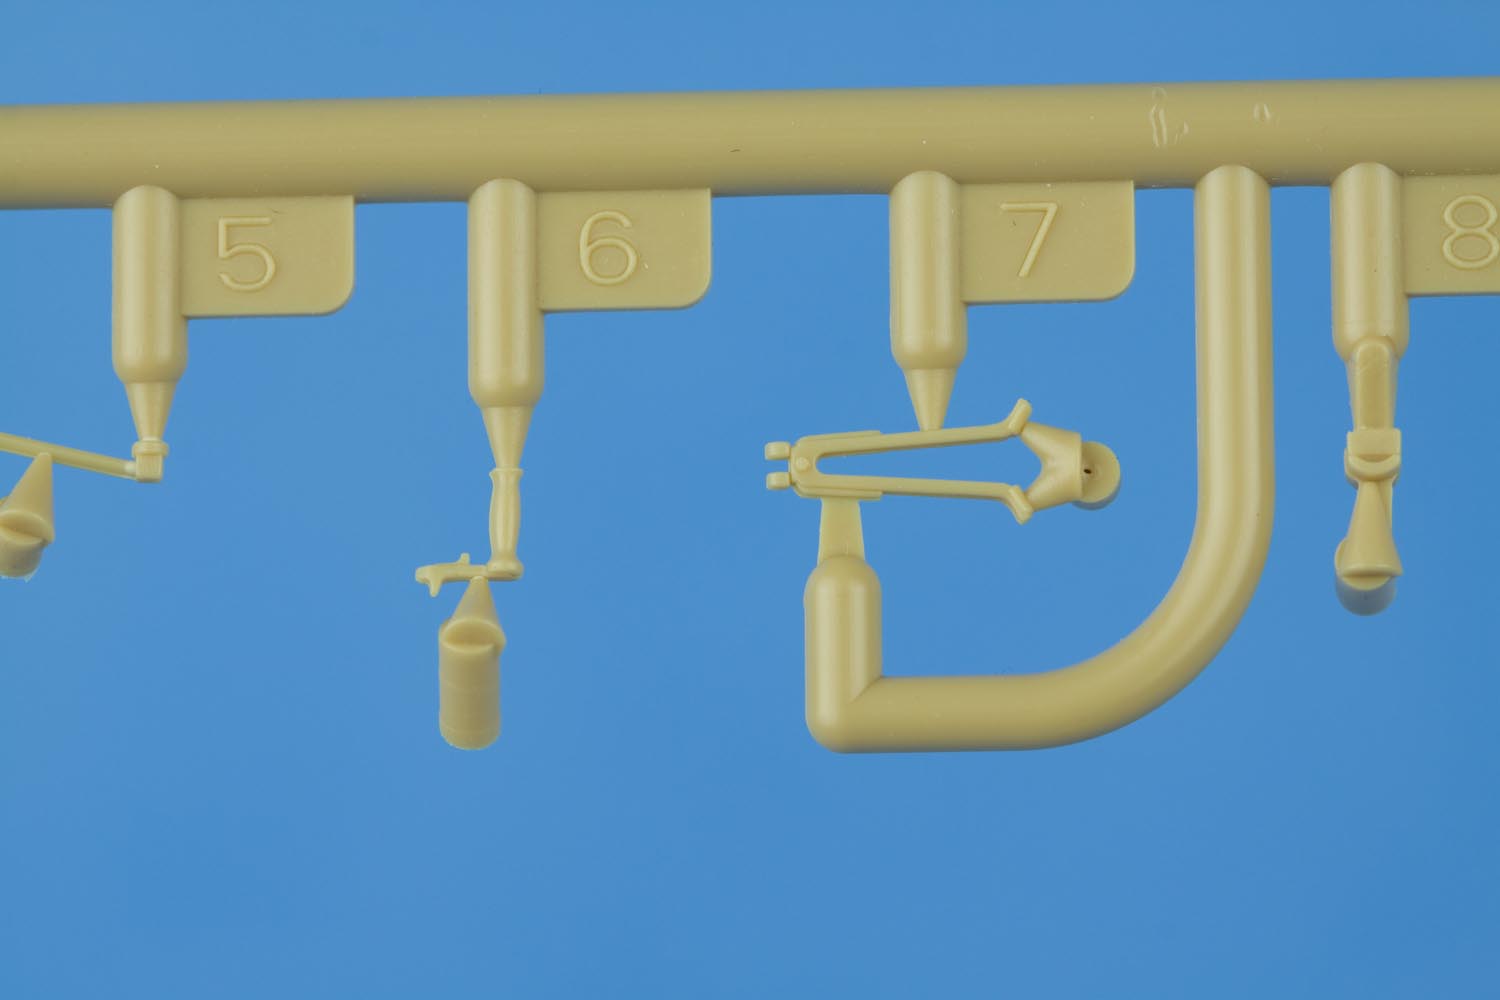
The hull rear has no molded on parts; everything is separate. This includes the spare track blocs, the spare guide teeth and end connectors, the gun crutch mounts (both center and eccentric are included), tool box, lifting eyes, bilge pump outlet, signal light clusters and the towing pintle. The level of detail of these parts is exceptional Take for example the convoy light; check out the fine rivet detail:
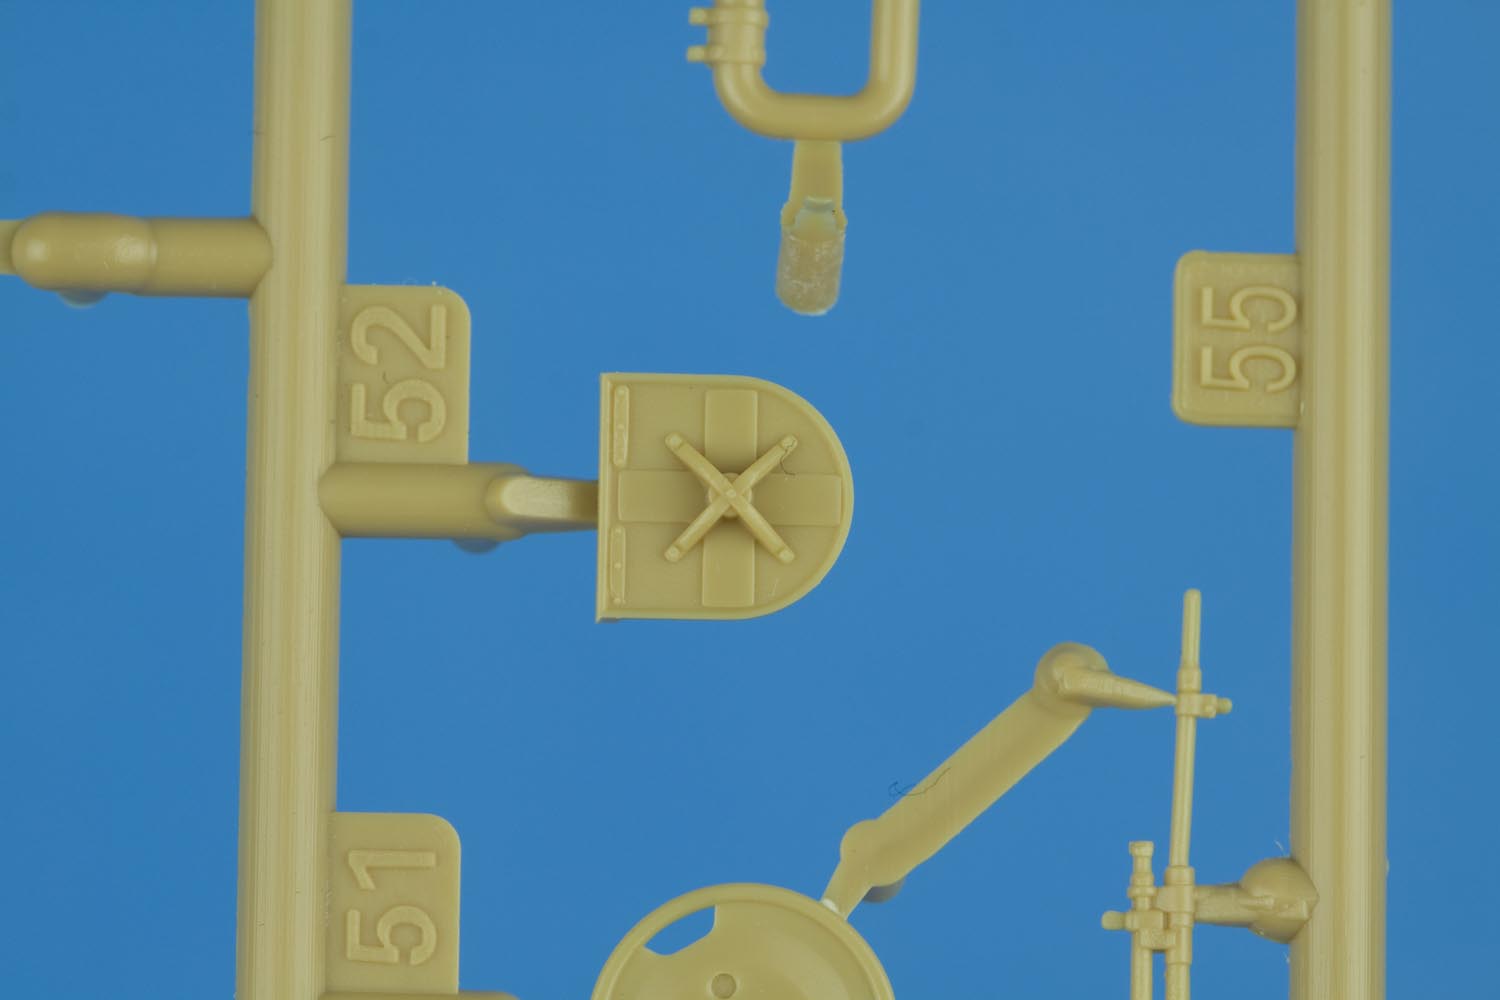
The gun crutch alone consists of 6 parts, one of which (A-3) is about 1-1.5mm in length. The hand crank knuckle on the gun crutch is particularly nice; no simplified blobs here!
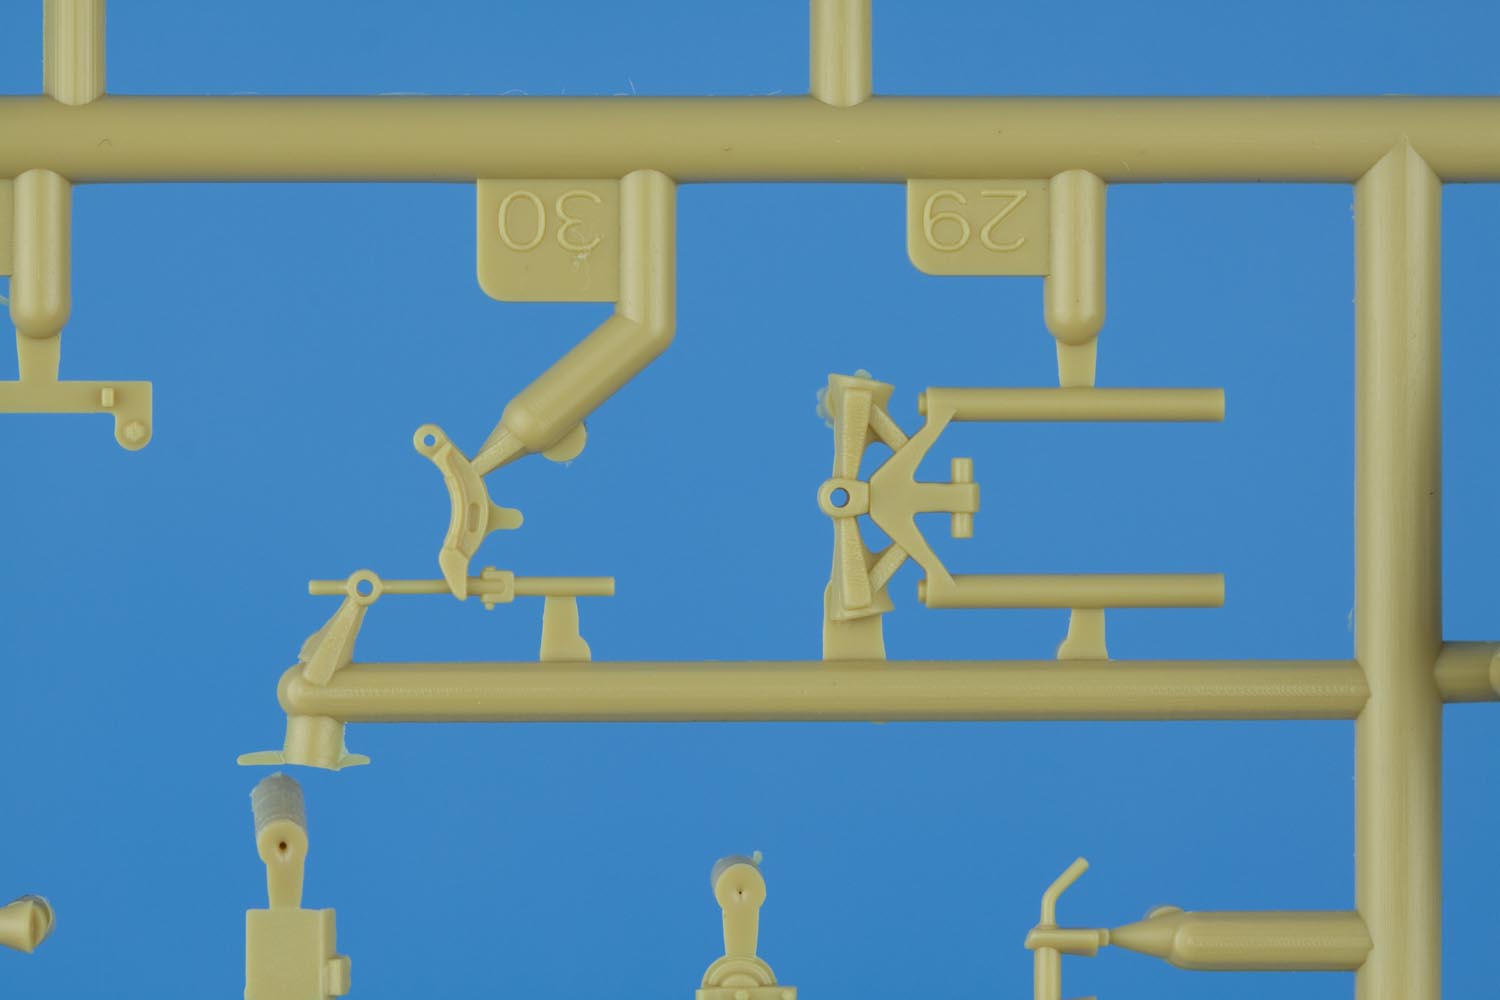

One problem with the very tiny parts A-3 and A-4 is that the instructions aren't 100% clear as to the orientation of such pieces. This is where reference photos are necessary to clear up any doubts.
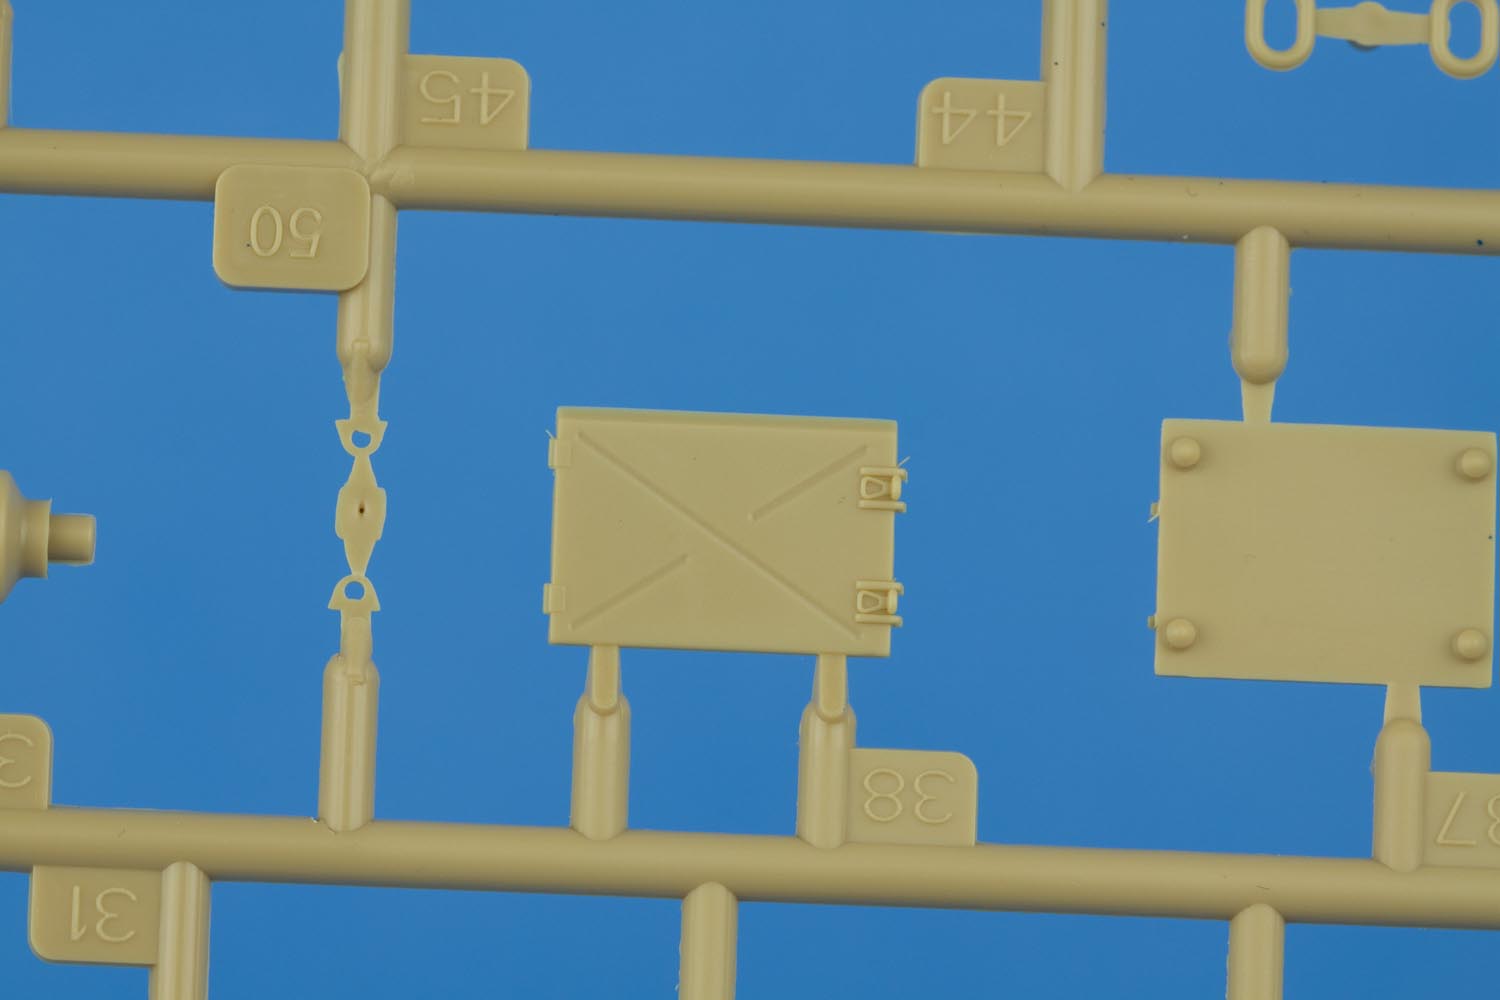
The infantry telephone box features a separate lid, latch handle and hasp. These parts are usually simplified and cast in place with the telephone box lid and it is usually left to the after-market to provide the separate parts via photo-etch. Not so with this kit; part A-18 is the separate latch for the infantry telephone while part A-20 is the separate hasp. The rear of the hatch lid even has nice hinge detail.
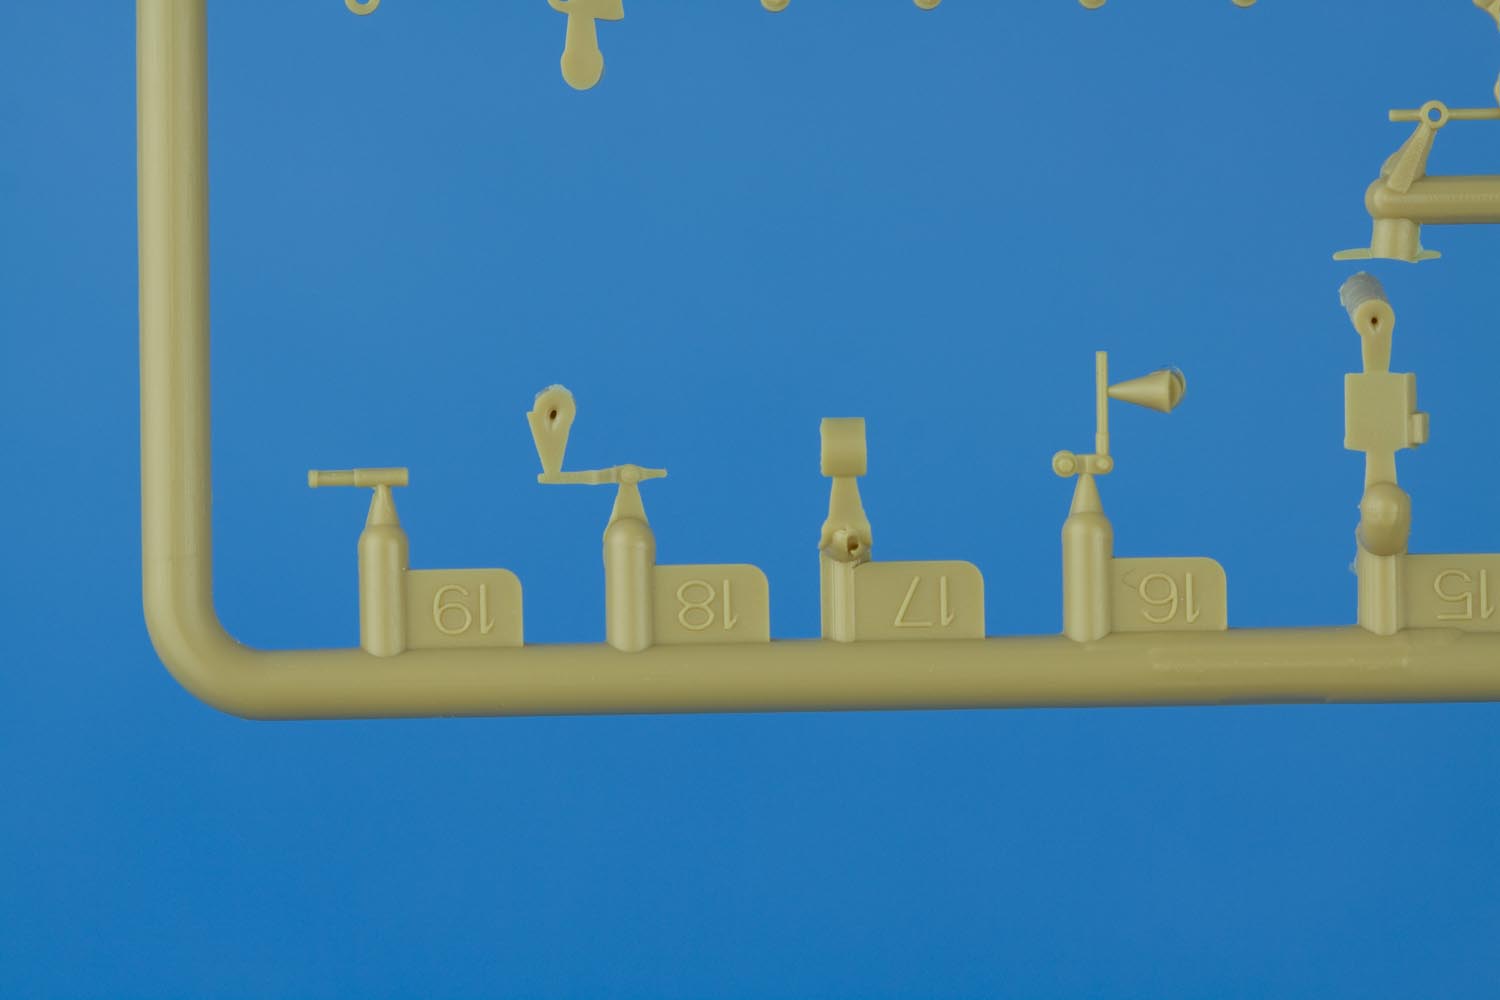


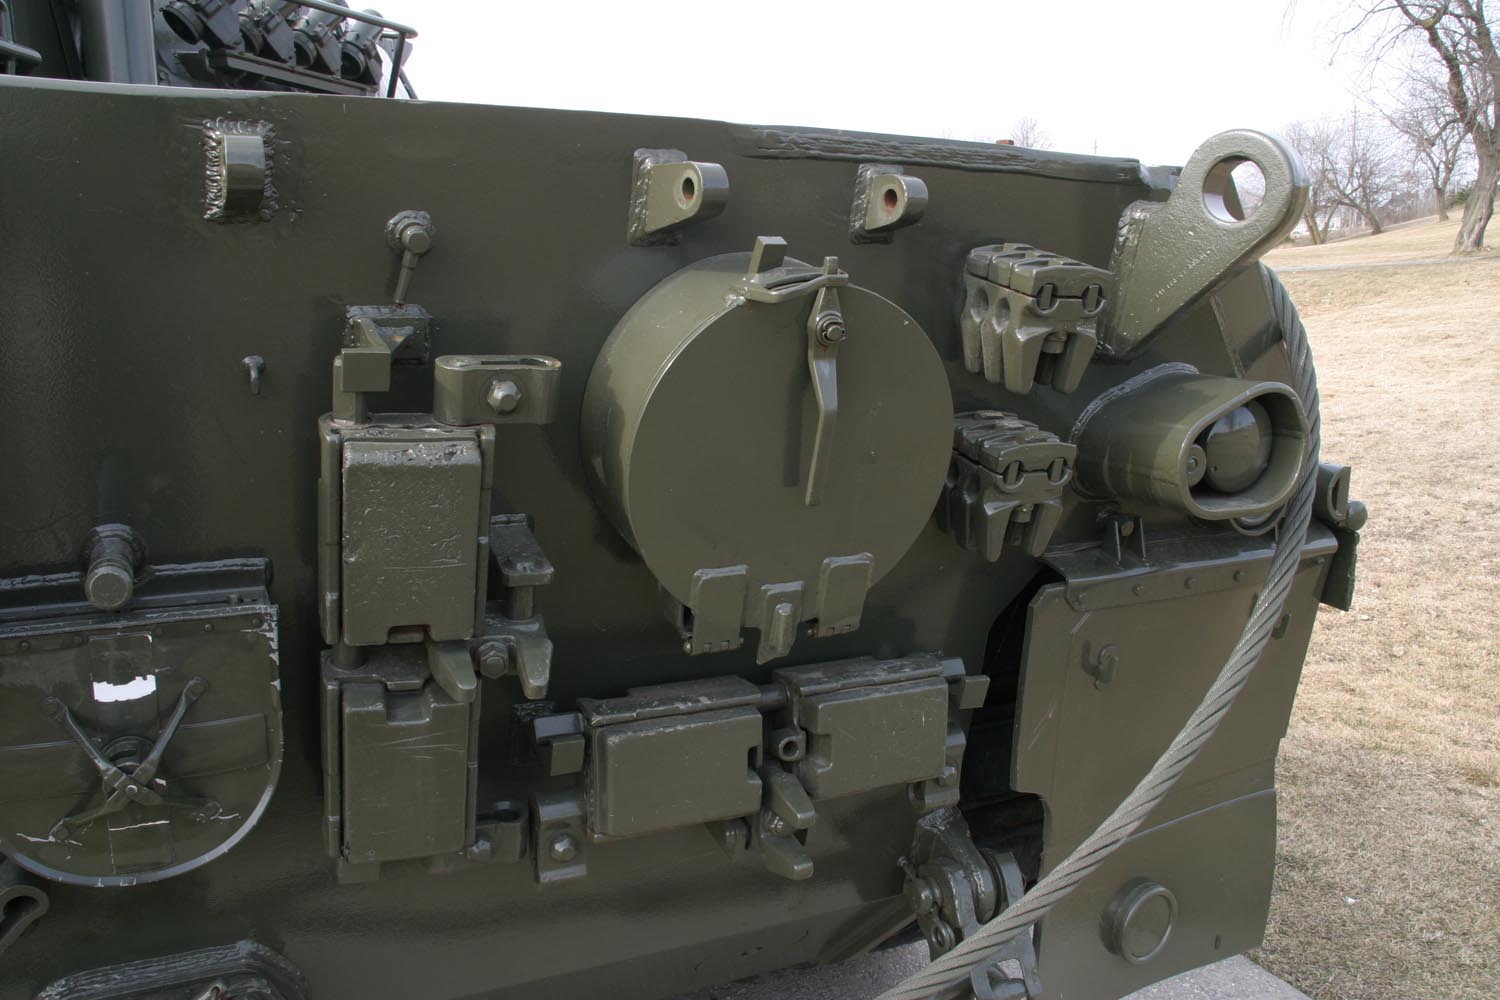
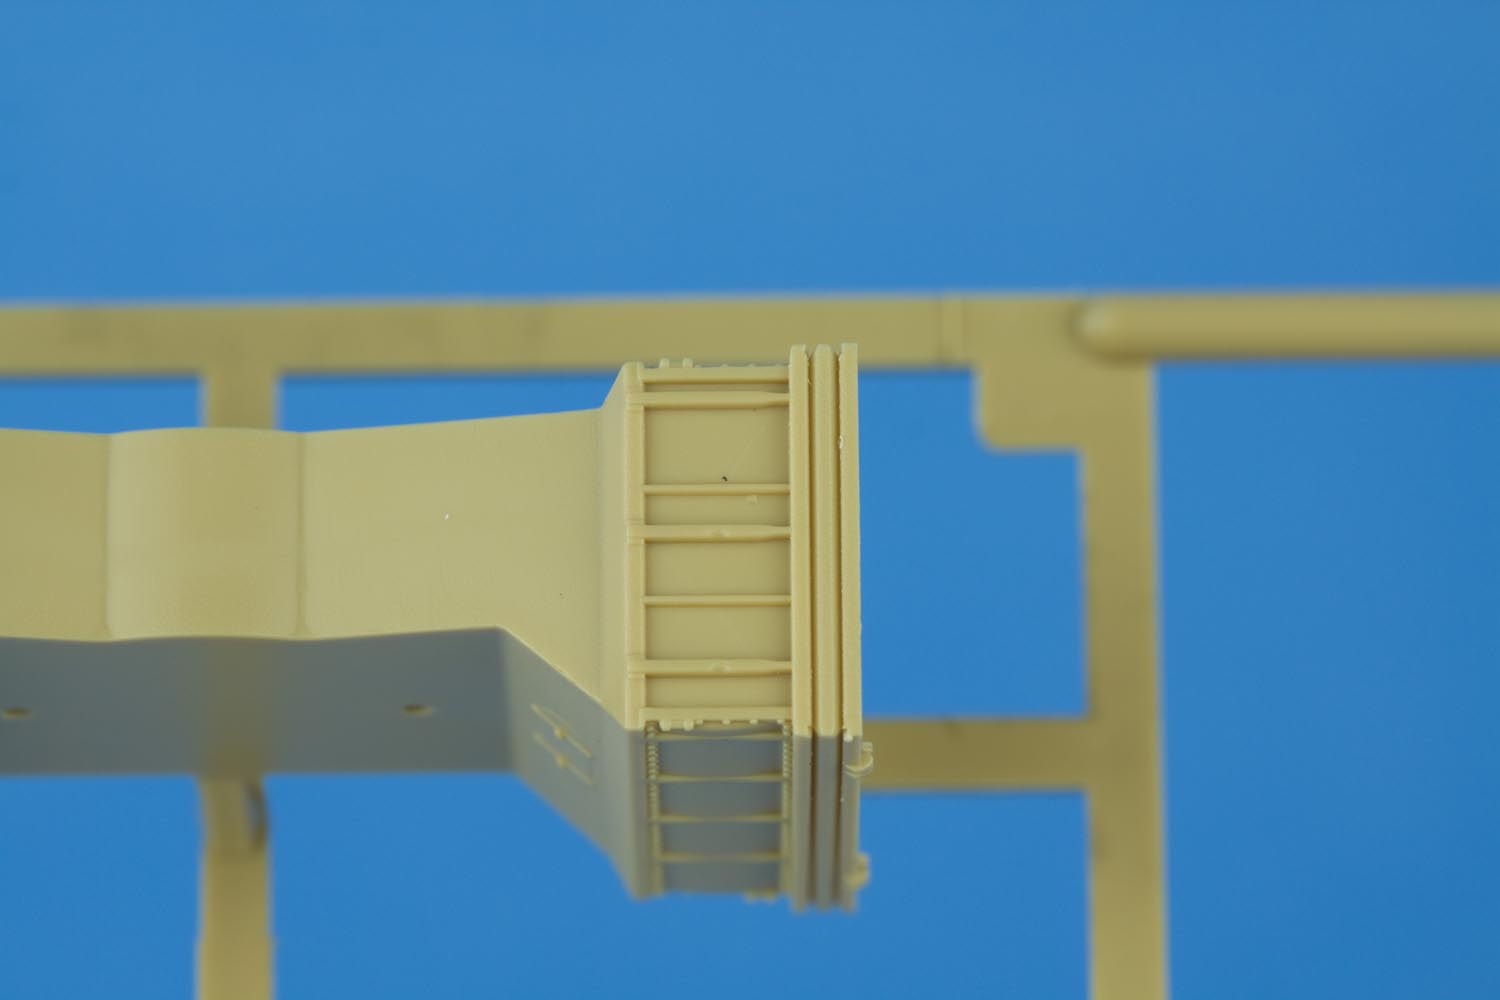
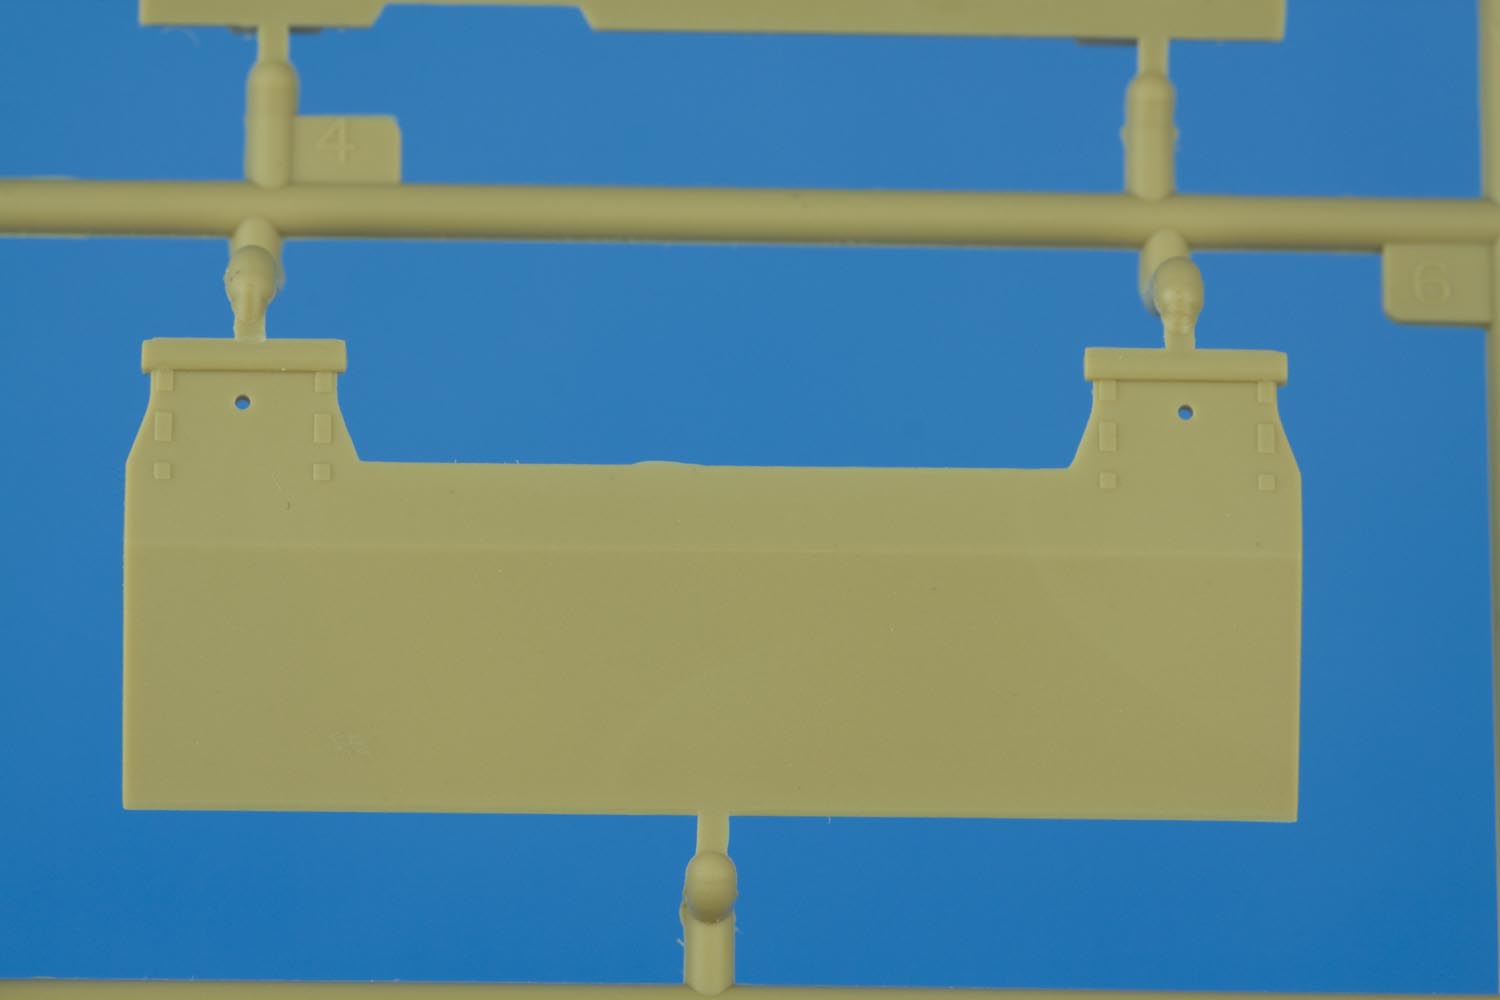
The big toolbox found on the hull rear is very nicely done with a proper handle as opposed to a big simplified chunky part. The tool box locking latches are included as separate parts; this is to be expected when the kit contains a 6 piece gun crutch!

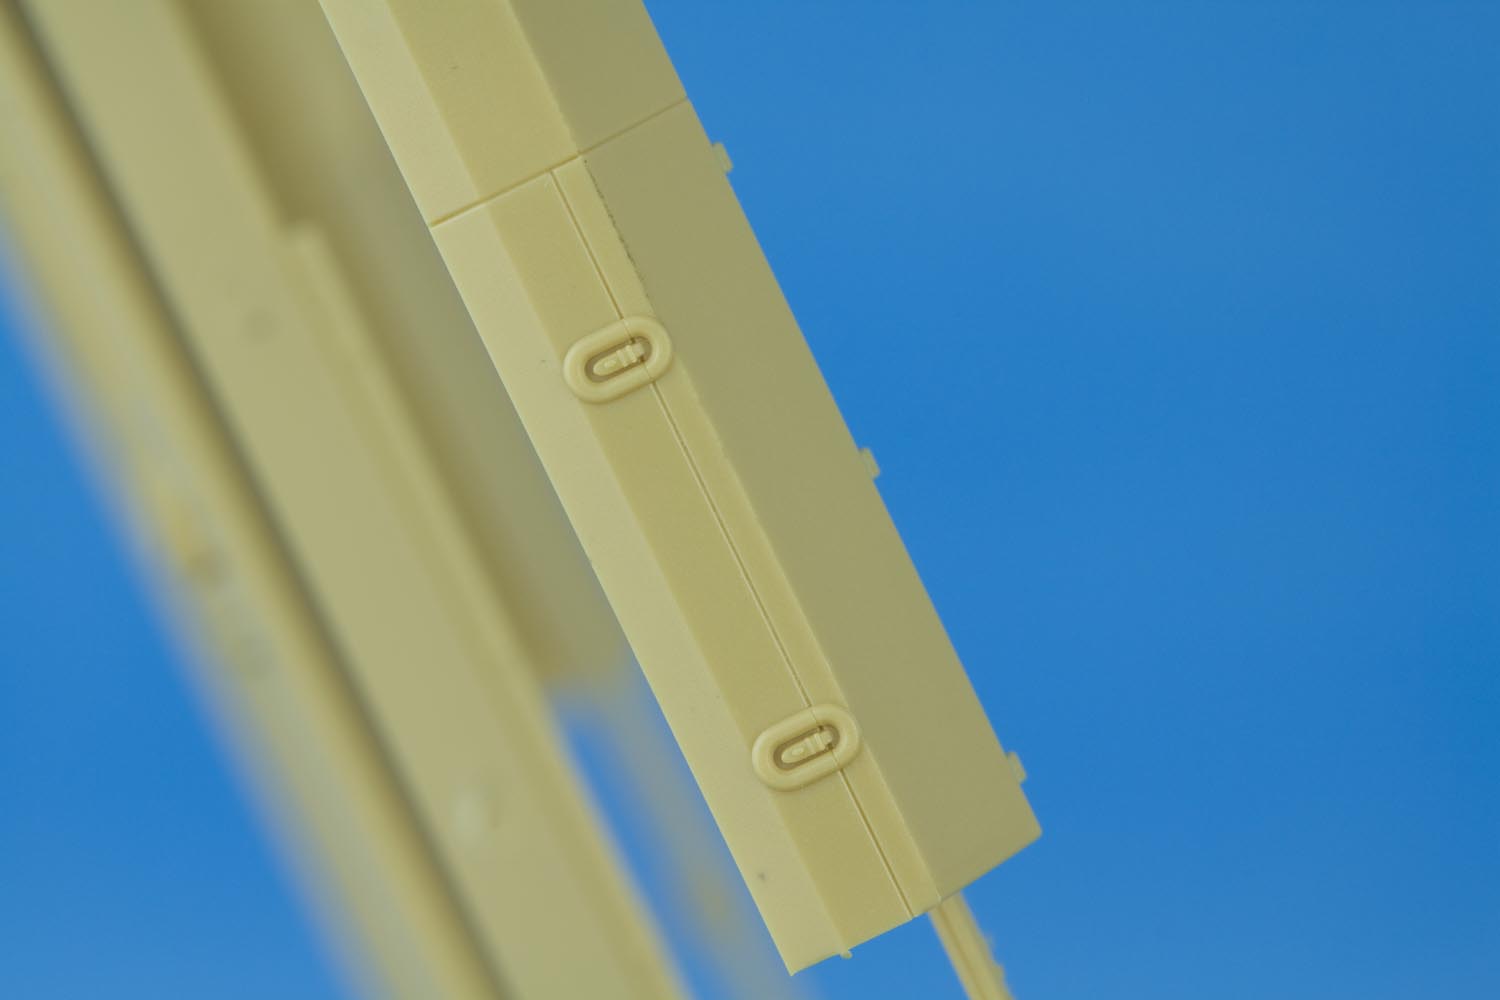
Never seen before in plastic is the inclusion of the side skirt 'C' brackets! It is quite frankly about time these found their way into an injection molded Leopard kit! The curve on the 'C' part of the bracket is a little shallow when compared to reference photos but their mere inclusion in this kit is an excellent start.
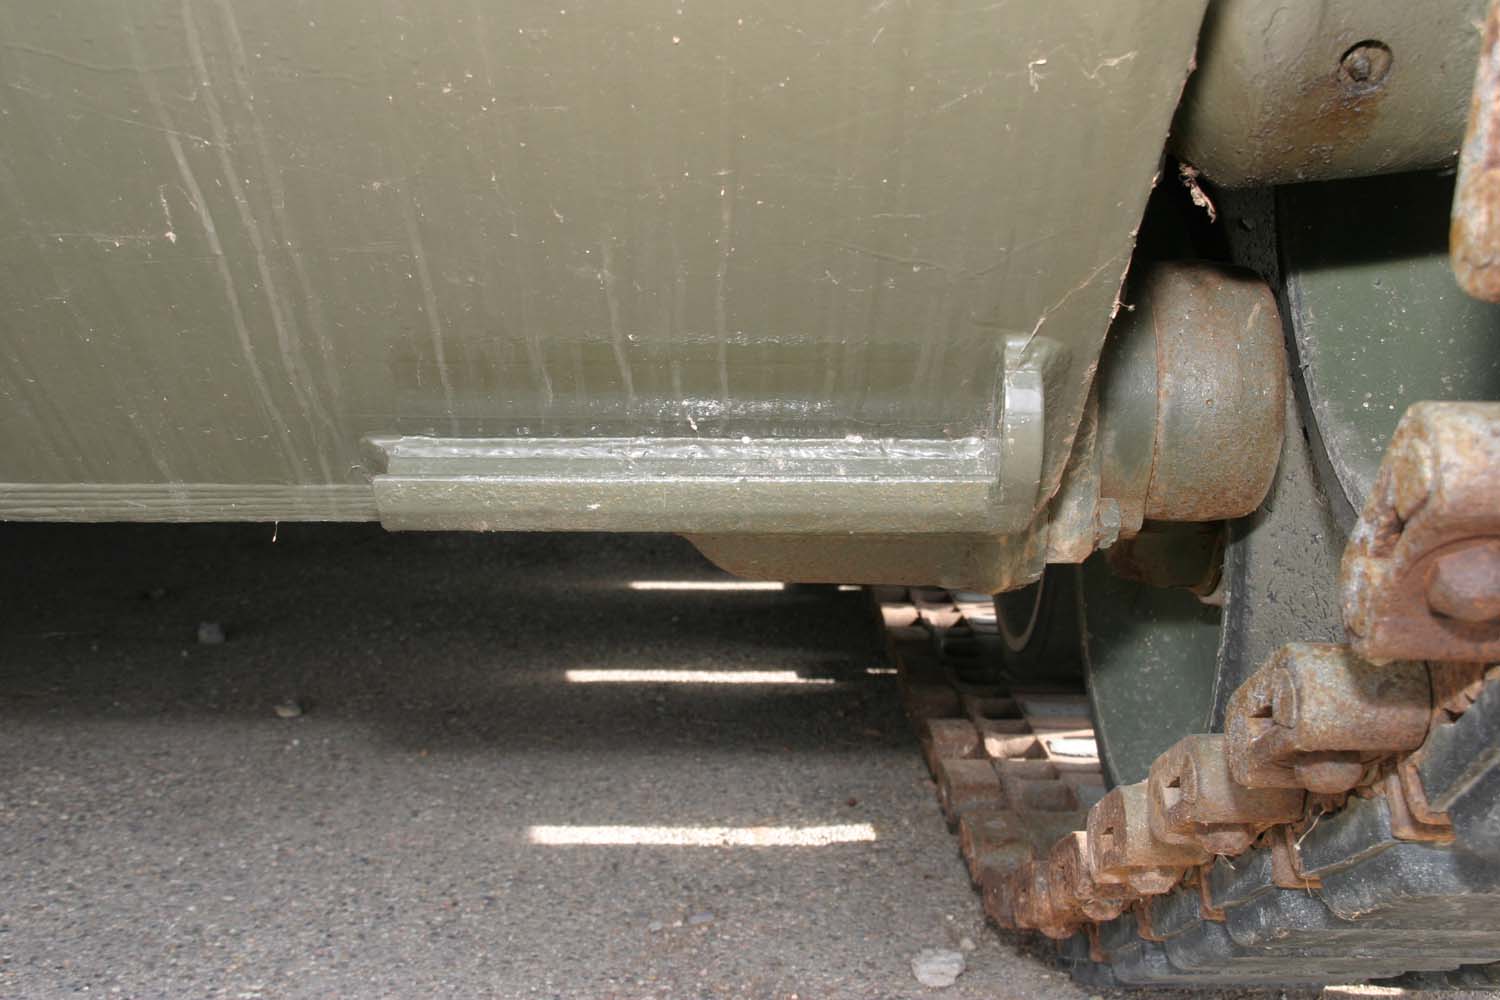
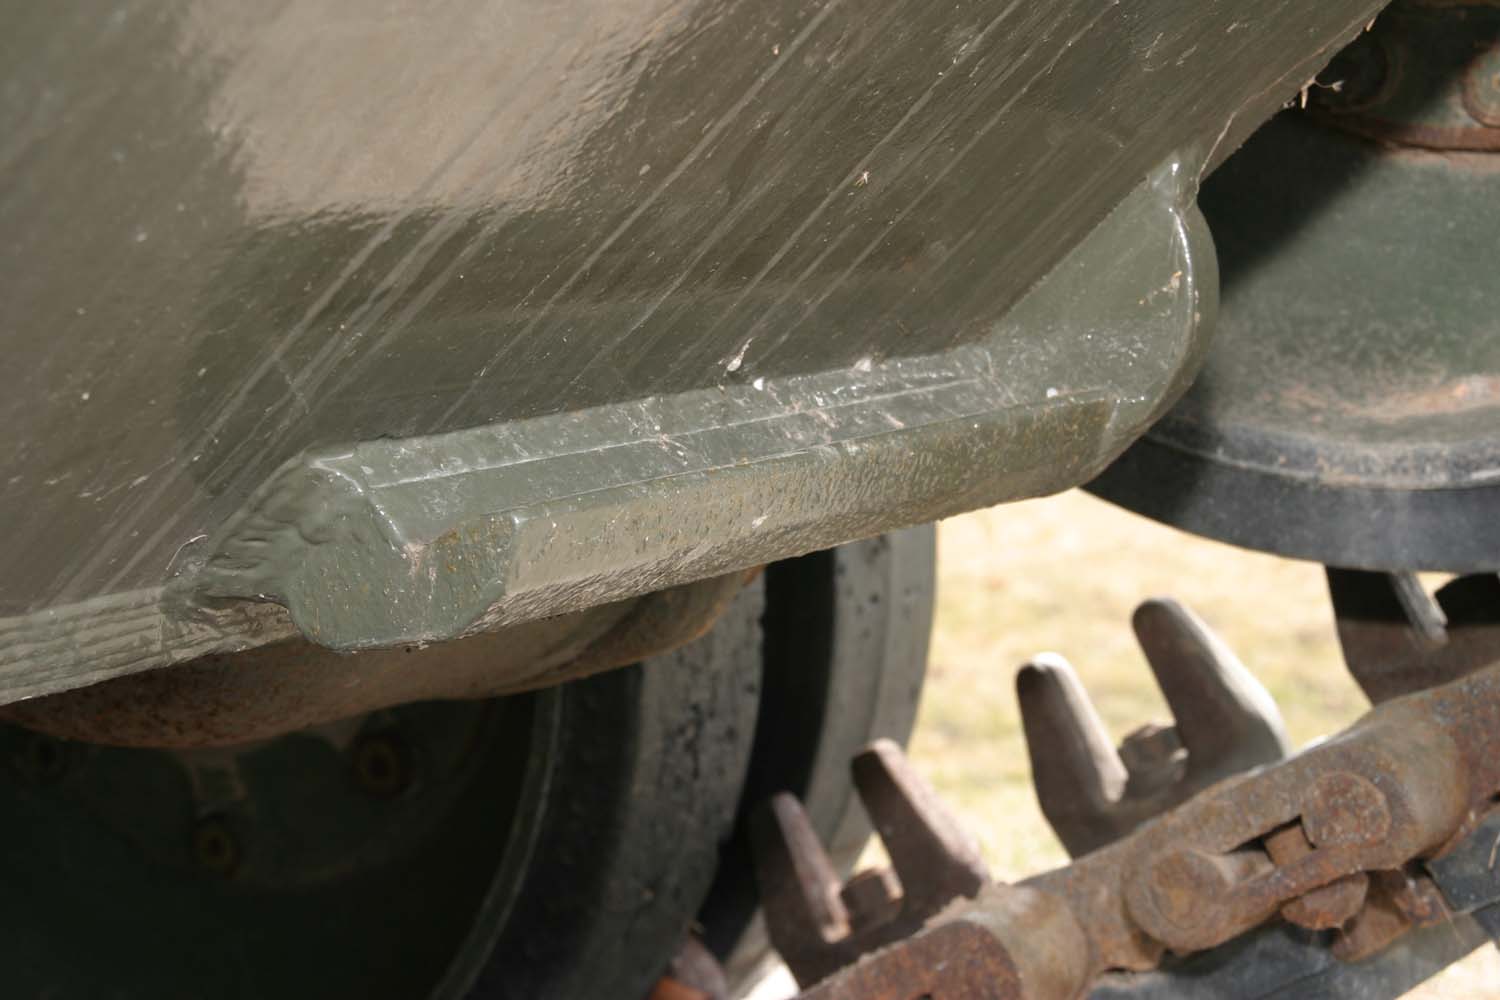
The mud flaps are particularly well done having accurate detail on both sides. The flaps looks to be scale thickness (for a change) and even include PE parts for the clips used to retain the flaps when folded up.
There are some light ejector pin marks on the rear of the mud flaps. These look to be easily dealt with or simply hidden beneath the drive sprockets and tracks!
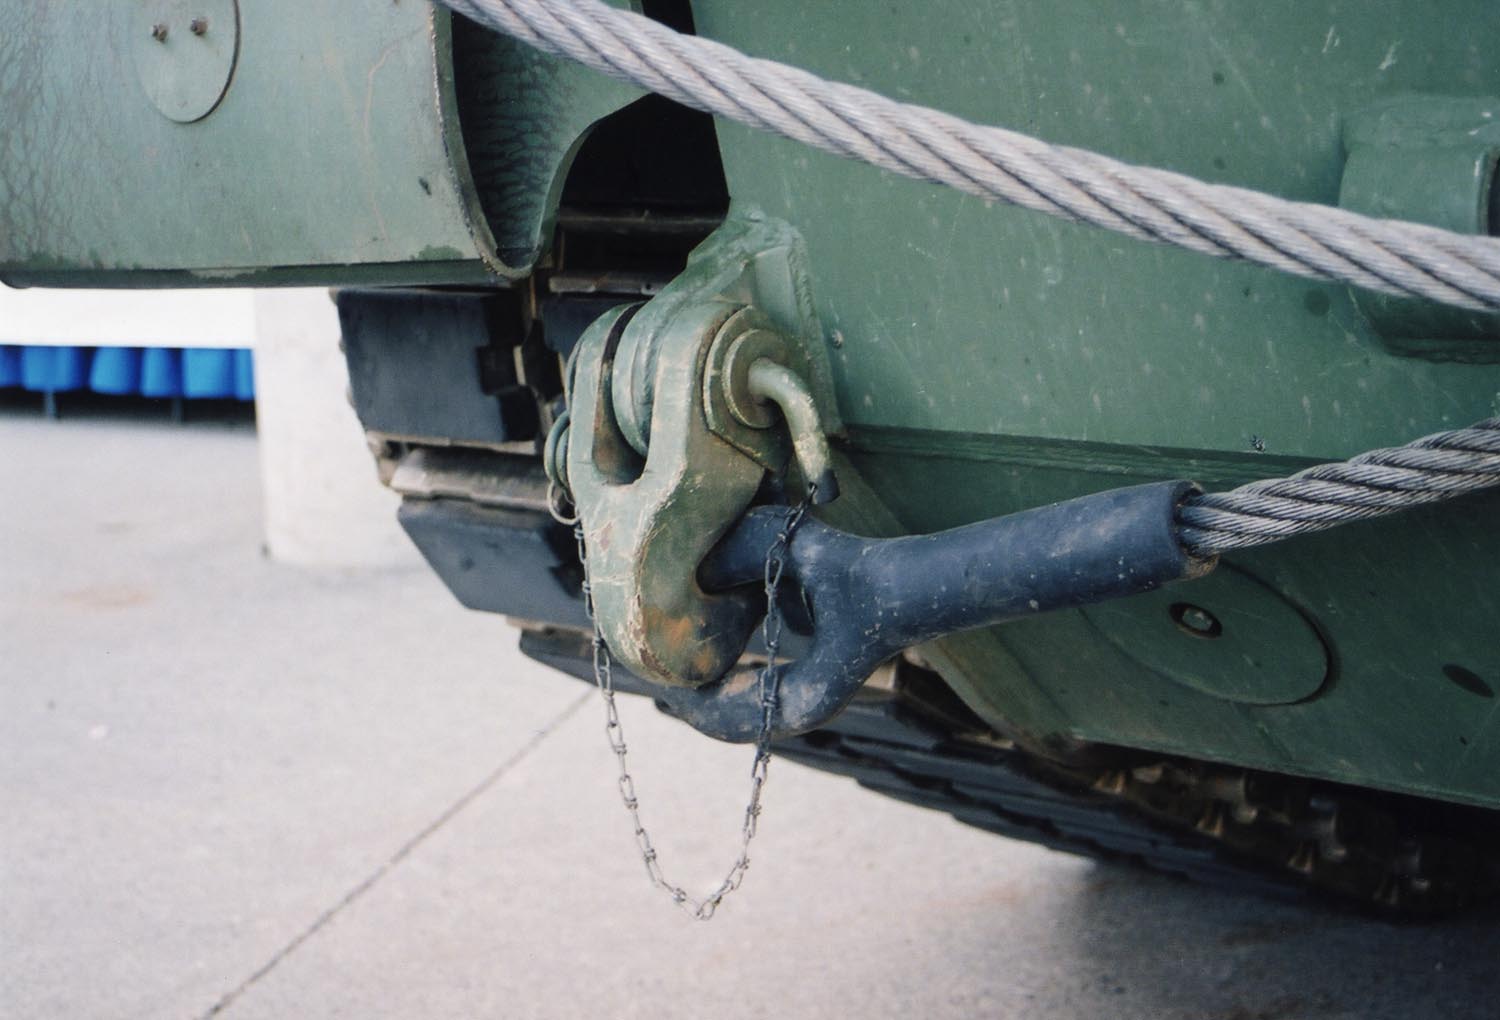
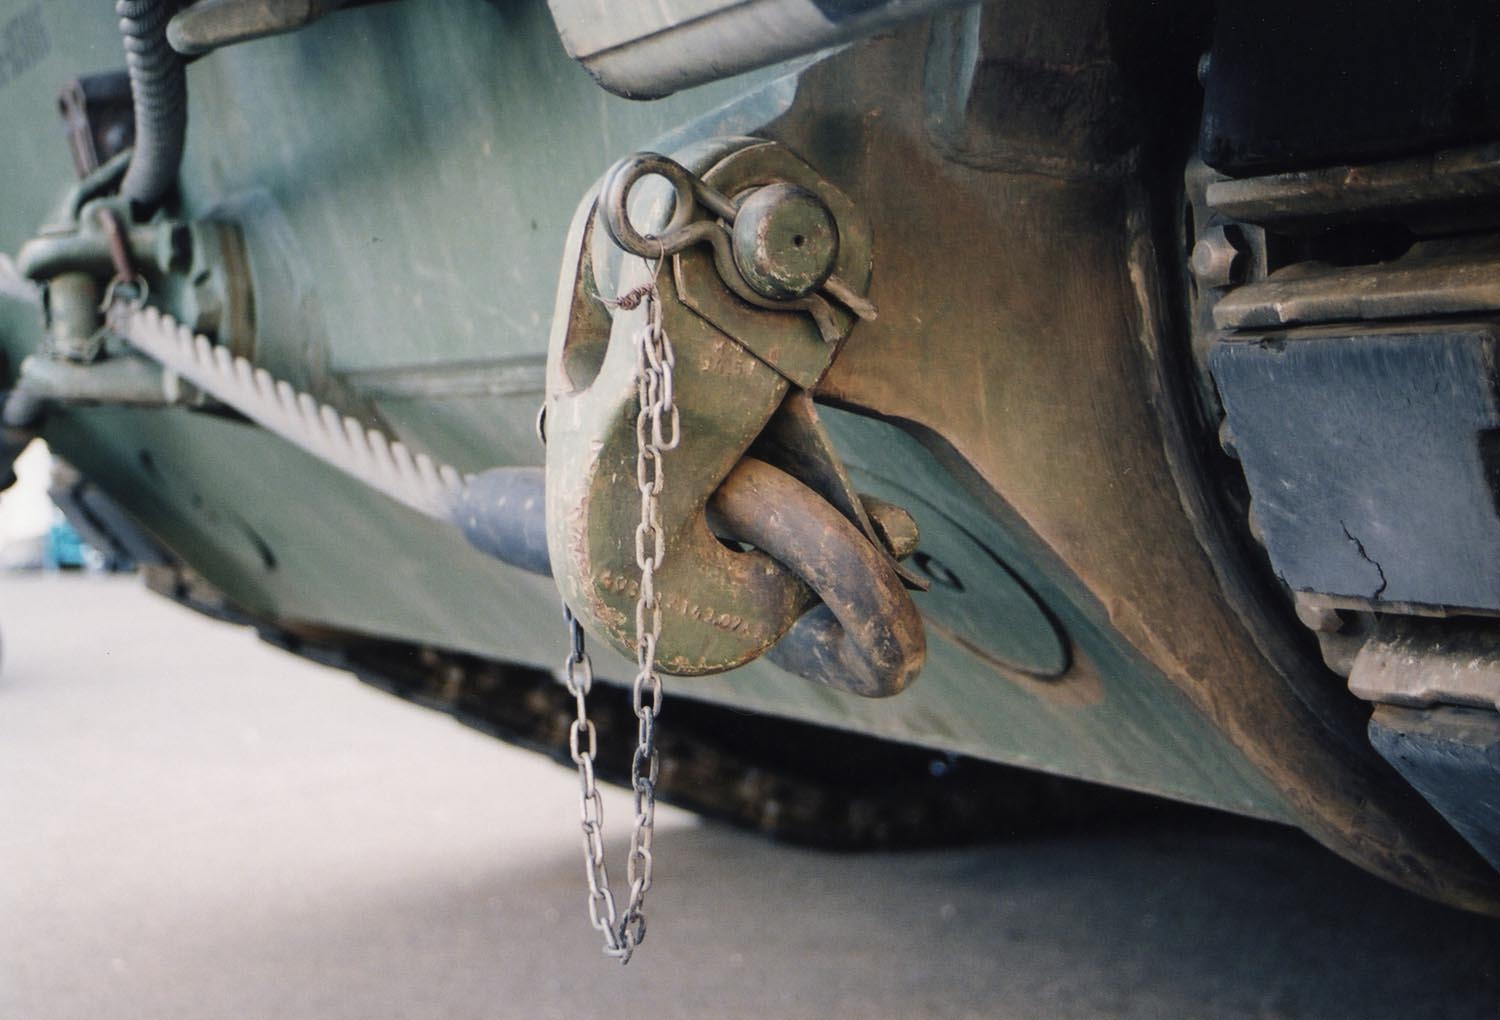
Also included as separate parts are the towing hook bollards (often referred to as 'T' hooks). The kit includes four of these; 2 for the rear hull and 2 mounted on the glacius plate towing eyes. The only thing missing from these parts is the locking plate, split pin and retaining chain.
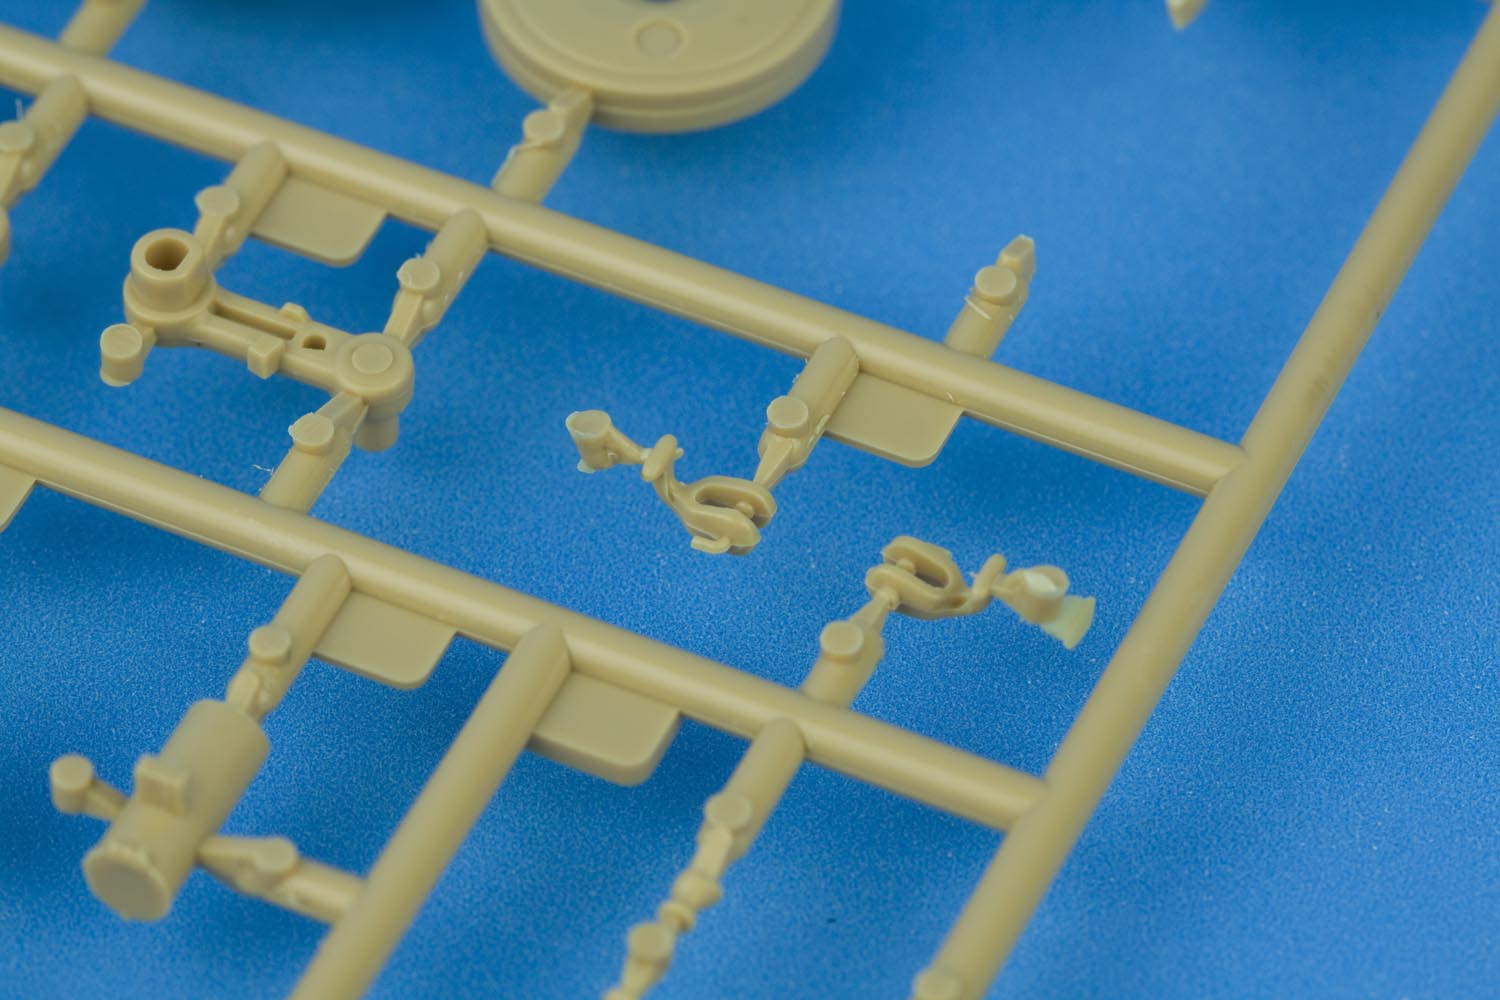
The retaining pin is a bit simplified but this is easily fixed for an even mildly ambitious scratch builder. Or perhaps one may elect to use the Leopard Workshop detail set LW025 which includes everything needed for a perfectly accurate towing bollard.
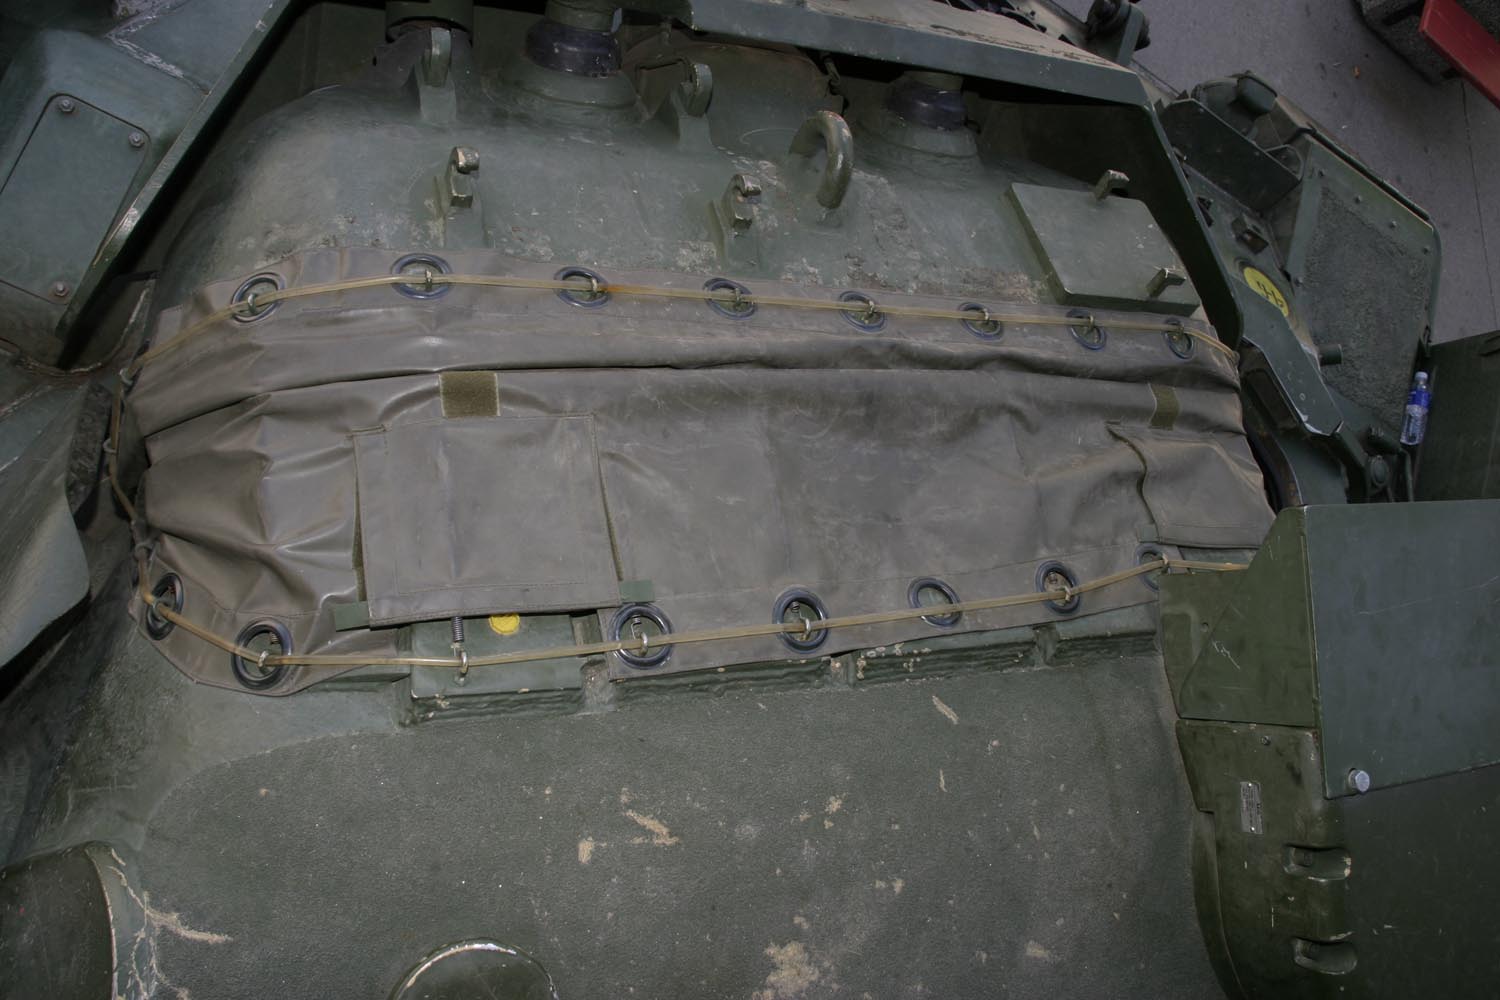
The real hull plate does not unfortunately include any of the prominent well beads that are plainly visible on any 1:1 scale Leopard. I'm not sure why but this is something which has been missed in every Leopard 1 kit to date. It could be the OCD modeler in me but the weld beads are something that I look for which in my opinion would be present on the perfect Leopard 1 kit. However, we know that the perfect Leopard 1 is in the realm of the unicorn and the honest politician (both mythical creatures that many claim to have witnessed).
Jason Bobrowich had this to say about a the kit's tow cables:
I am currently building the HB Leopard C1 MEXAS and I noticed during the hull build that the tow cables provided by HB are about 3-4 cm too short for properly mounting them on the rear hull shackles. The kit has you mount them straight down on the same side as the hull mount. This doesn't show the cabel as too short.
When the MEXAS mods were done the tow cable attachment points were moved rearward on the hull side but new shorter tow cables were not obtained. This resulted in the cables being criss-crossed on the rear hull. This is impossible with the HB cables. Therefore, I decided to use aftermarket cables instead.
Jason also noticed a small problem with the kit's gun crutch:
The other issue is the gun crutch. It is very nicely detailed but the part assembles with the locking handle in the unsecured position (ie. pointing straight down). On the real tank this could result in the gun crutch coming loose and opening up while going cross country. There is no way to correct this unless the handle is cut off and modifications made to re-attach it horizontally.
I really appreciate Jason reaching out to help improve our content. For those who don't know Jason, he served with the LdSH (RC) and was a crew commander on the Leopard C1. He is a well known resource on all things Leopard as well as being a regular contirbutor to various modelling magazines (AFV Modeller is the one which comes to mind) and websites. His first hand knowledge helps him craft incredibly accurate Leopards!
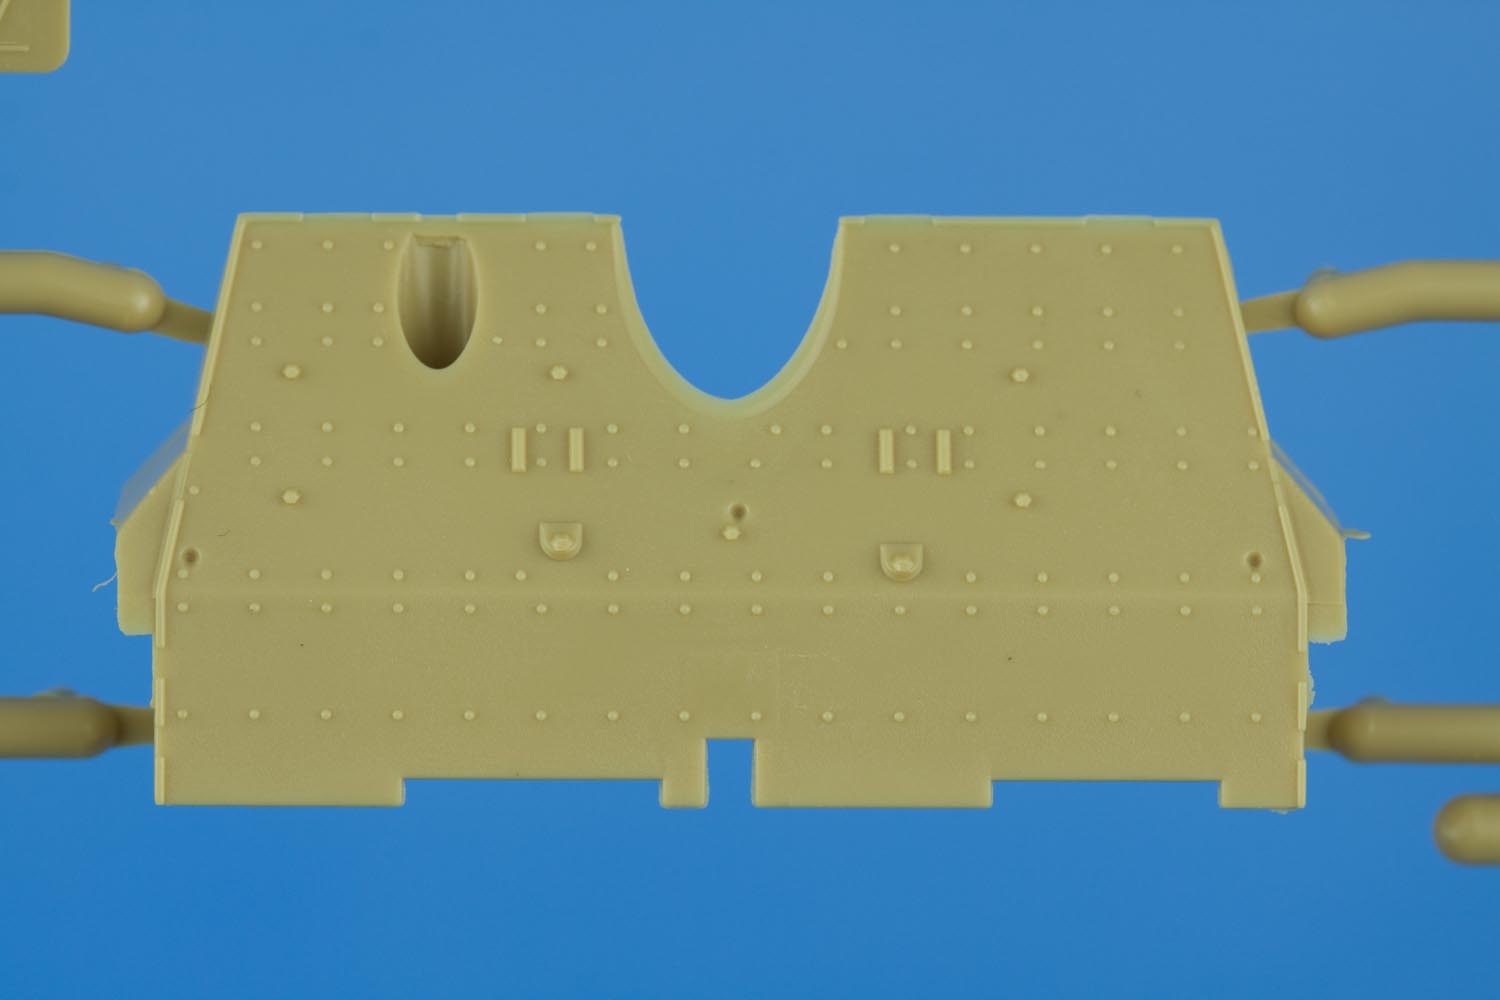
Unfortunately, the hull top does not have any weld bead detail on the front of the hull. Even thought most of the hull front will be covered by MEXAS modules, there are still a number of weld beads which are plainly visible on the real thing. I personally find it quite disappointing that these weld beads were missed by yet another kit producer; there is not a single injection molded Leopard 1 kit available which accurately represents these welds beads although the ancient Italeri Leopards gave it a good try.
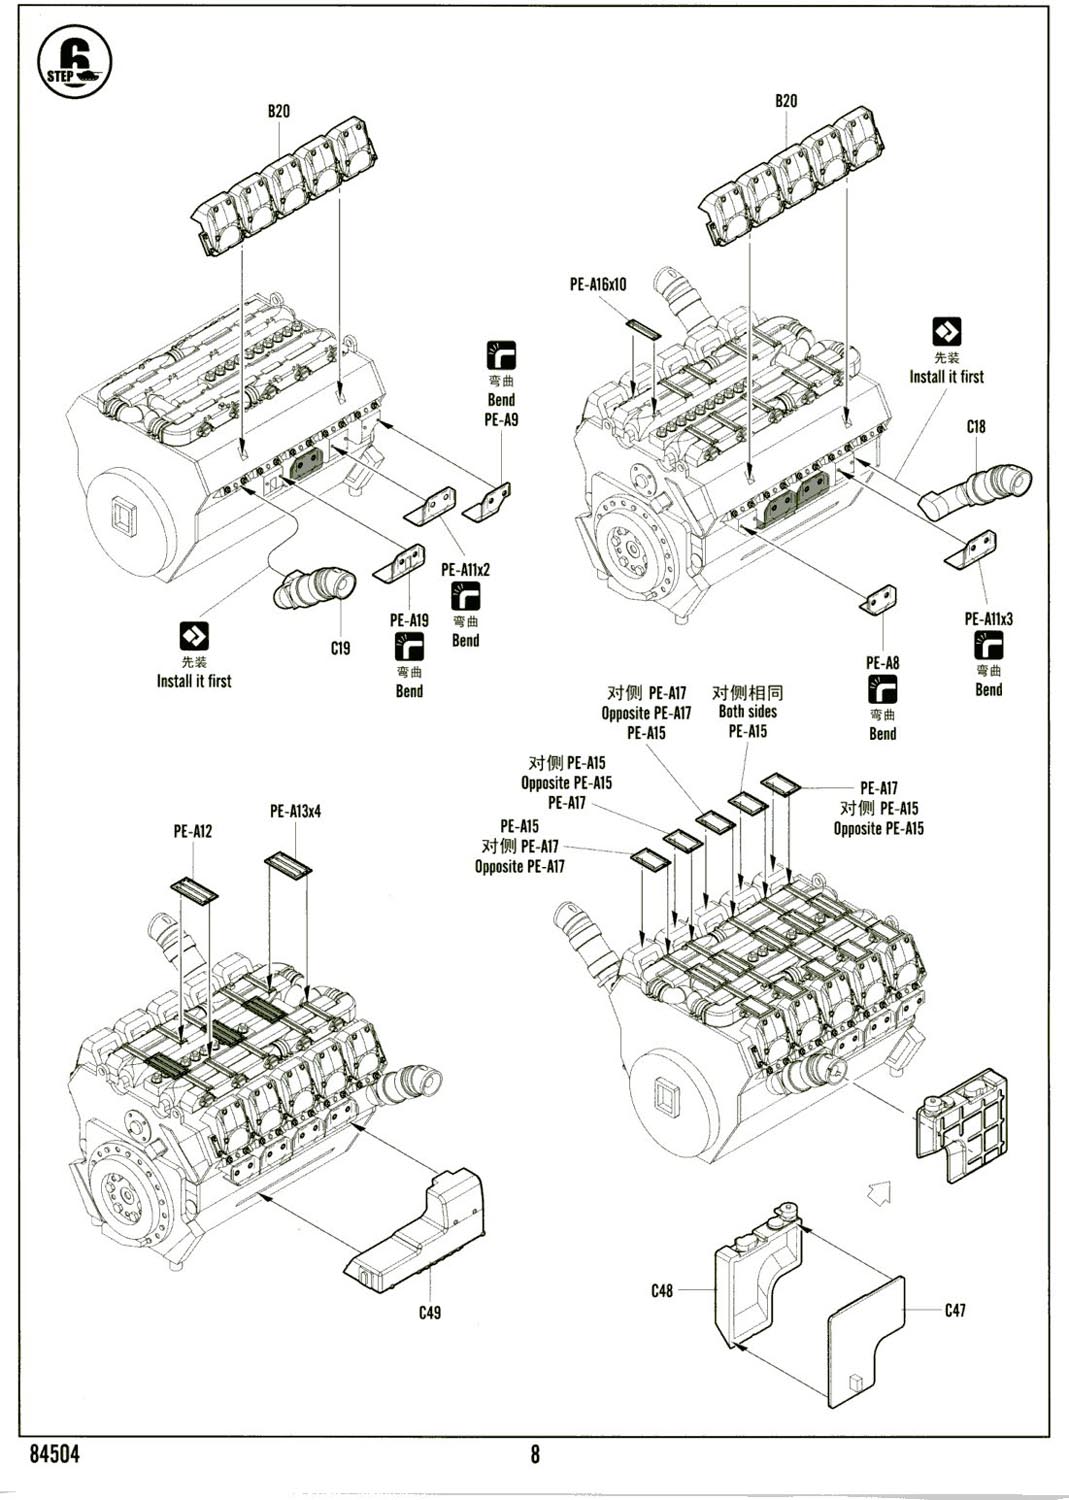
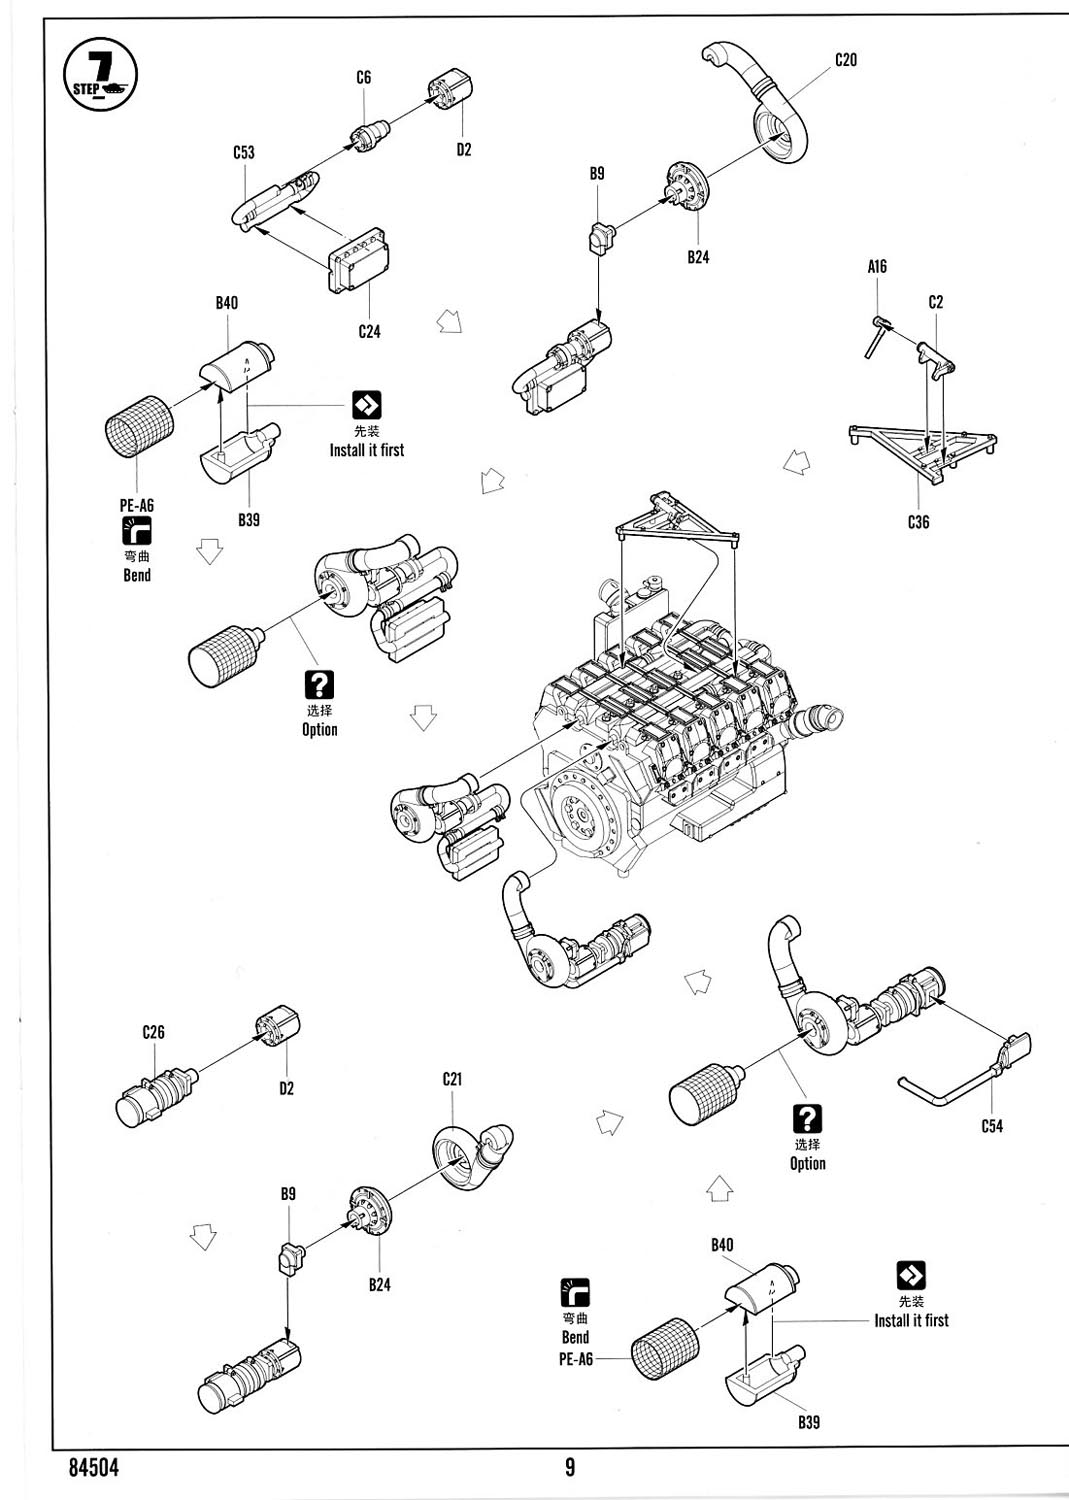
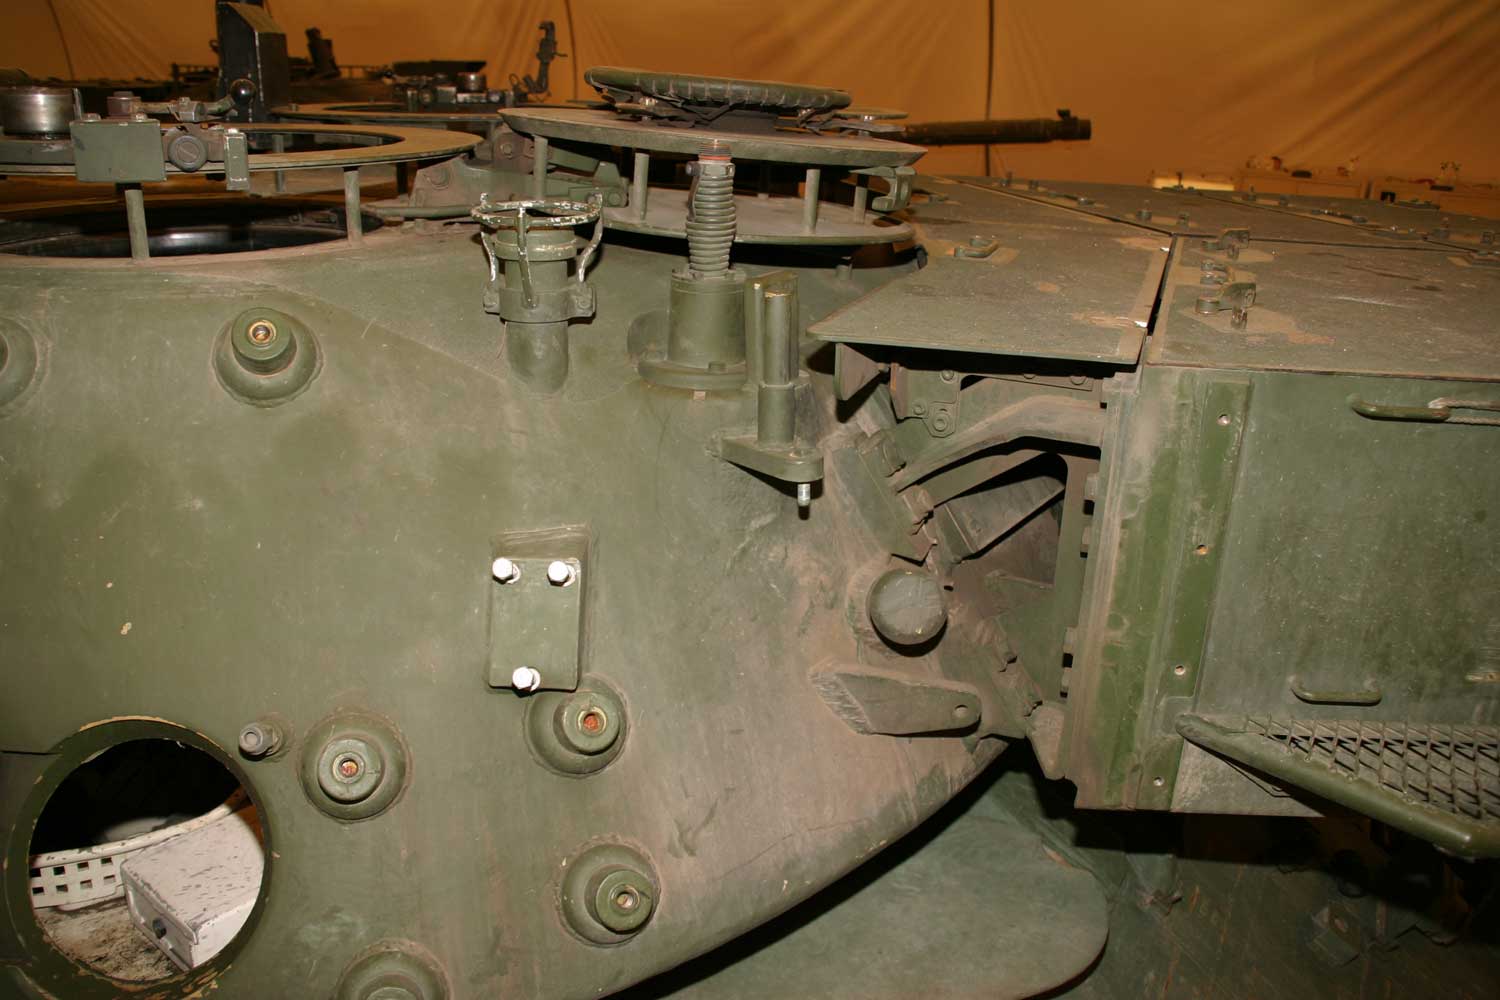
This kit does not include a separate engine deck. This is very odd given that the kit includes a beautifully detailed engine which the instructions would have one mount inside the hull! It would be such a shame to hide such a beautiful sub-assembly inside of the hull.
While we are mentioning that rather lovely engine, here are some photos of some of the engine parts:

From what I can see, the engine is missing most (if not all) of the cables or hoses found on the real thing. My impression is that this engine assembly was designed to be viewed inside the engine compartment of an opened up Leopard. Such a presentation will not be possible without the assistance of enterprising after-market vendors. For those wishing to go to town detailing this engine, there is a handy set of Leopard 1 engine photos available in the Leopard Club spotlight section.
Another nice bonus in this kit is the engine lifting frame. This sub assembly looks to be accurately detailed and consists of 5 separate parts. I'm am quite sure it will look fantastic when assembled.
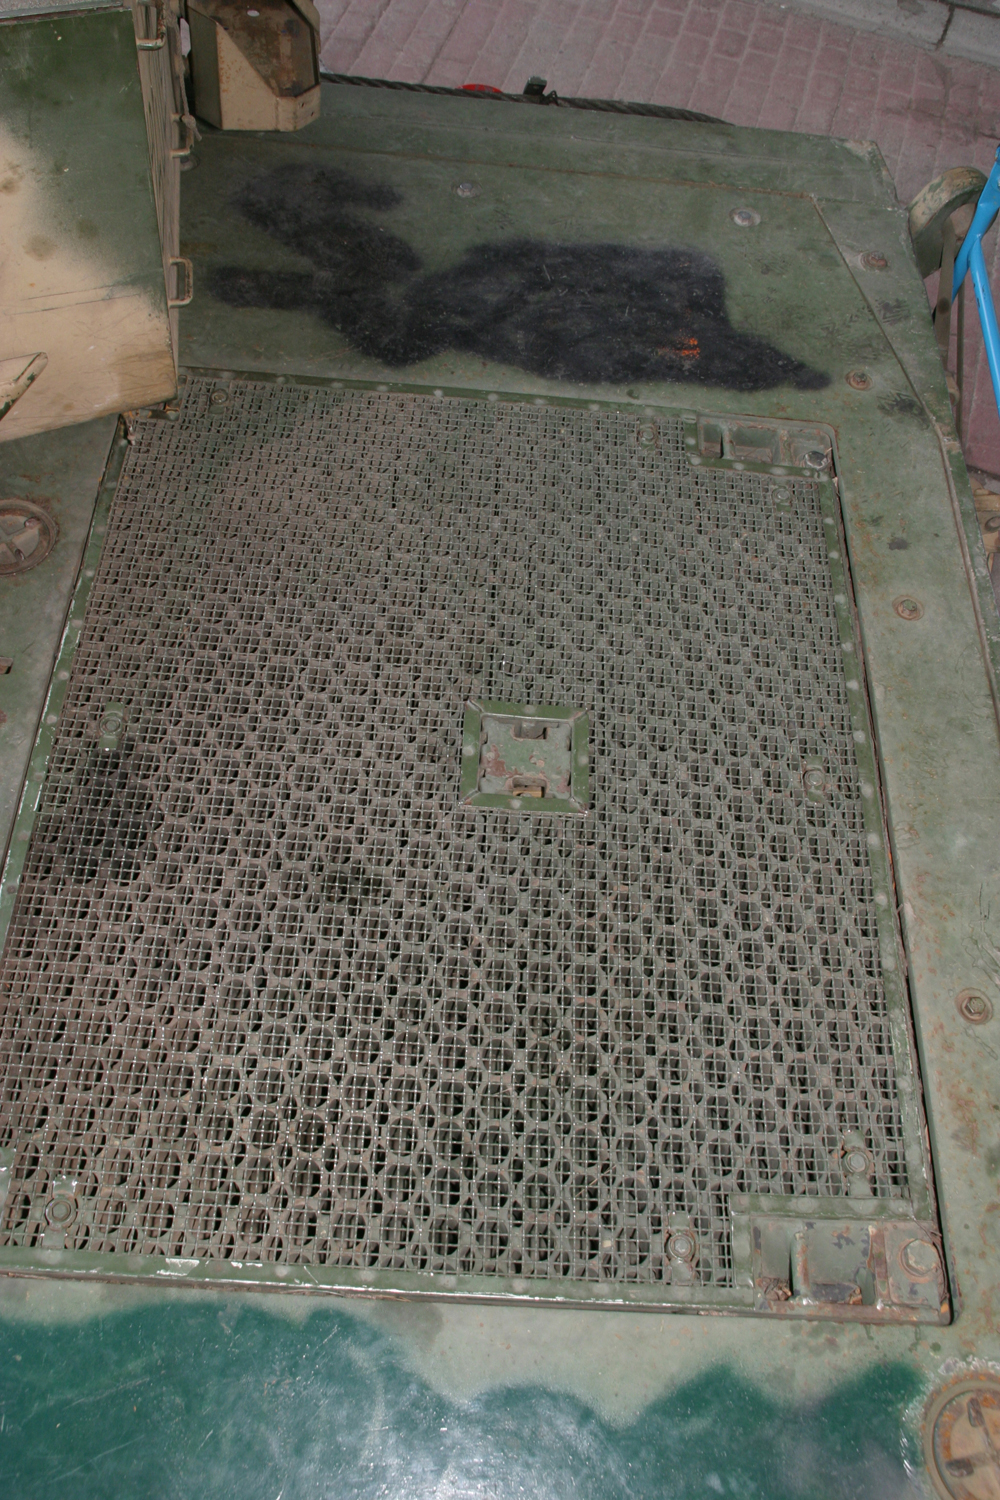
The engine air intakes do not have any detail and are cast flat. The PE frets do not include a screen for the intakes. This is something which was clearly overlooked.
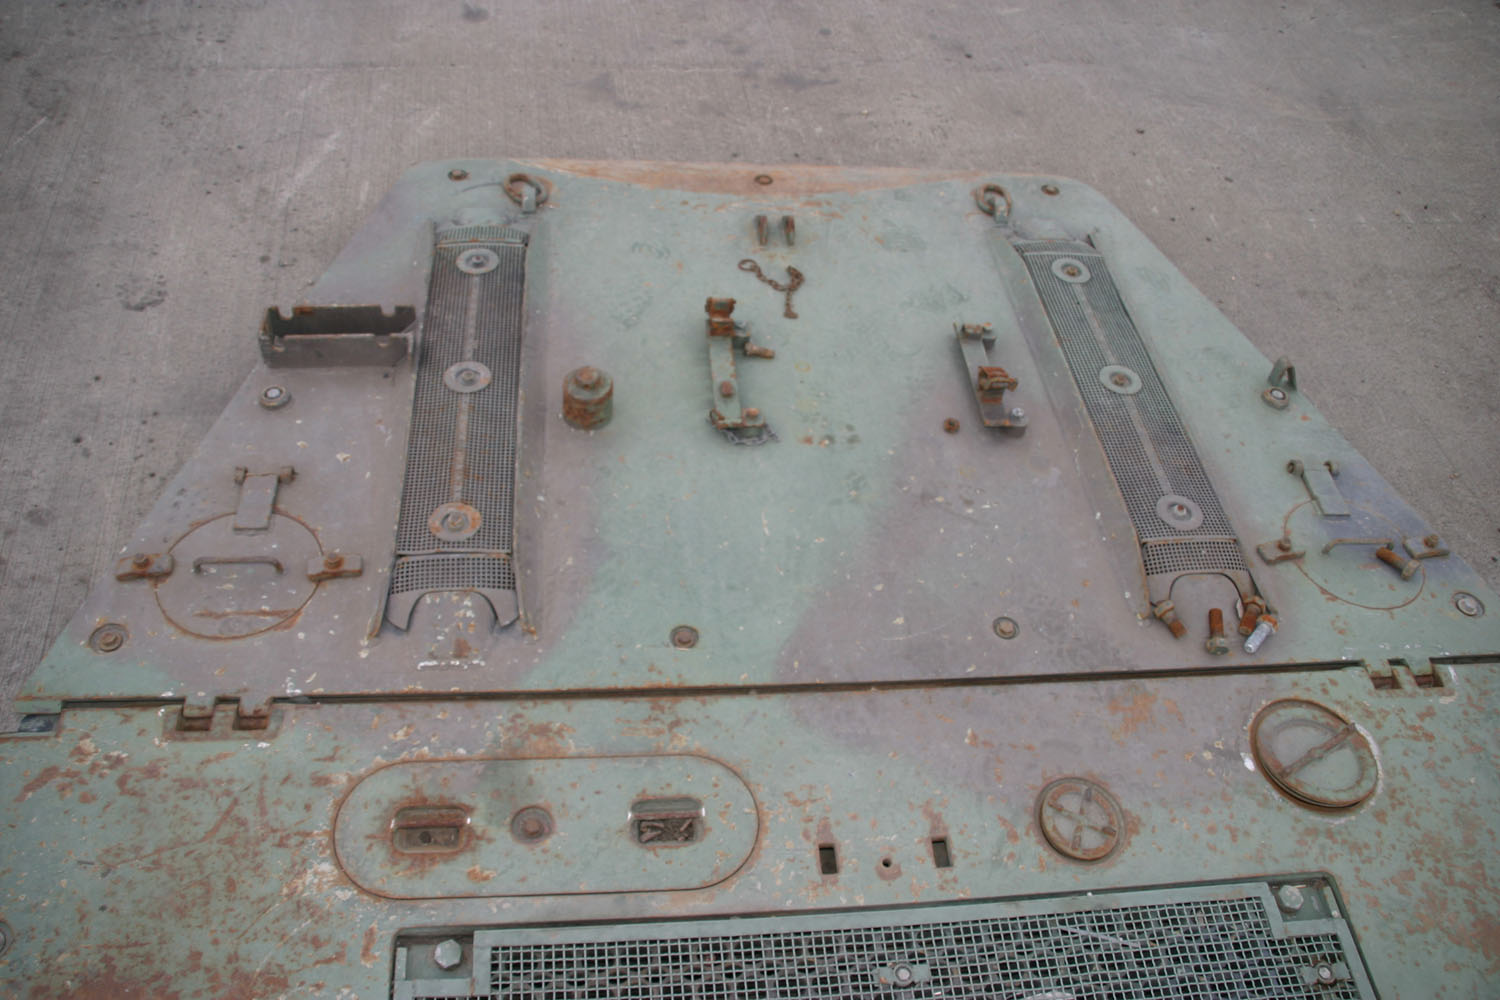
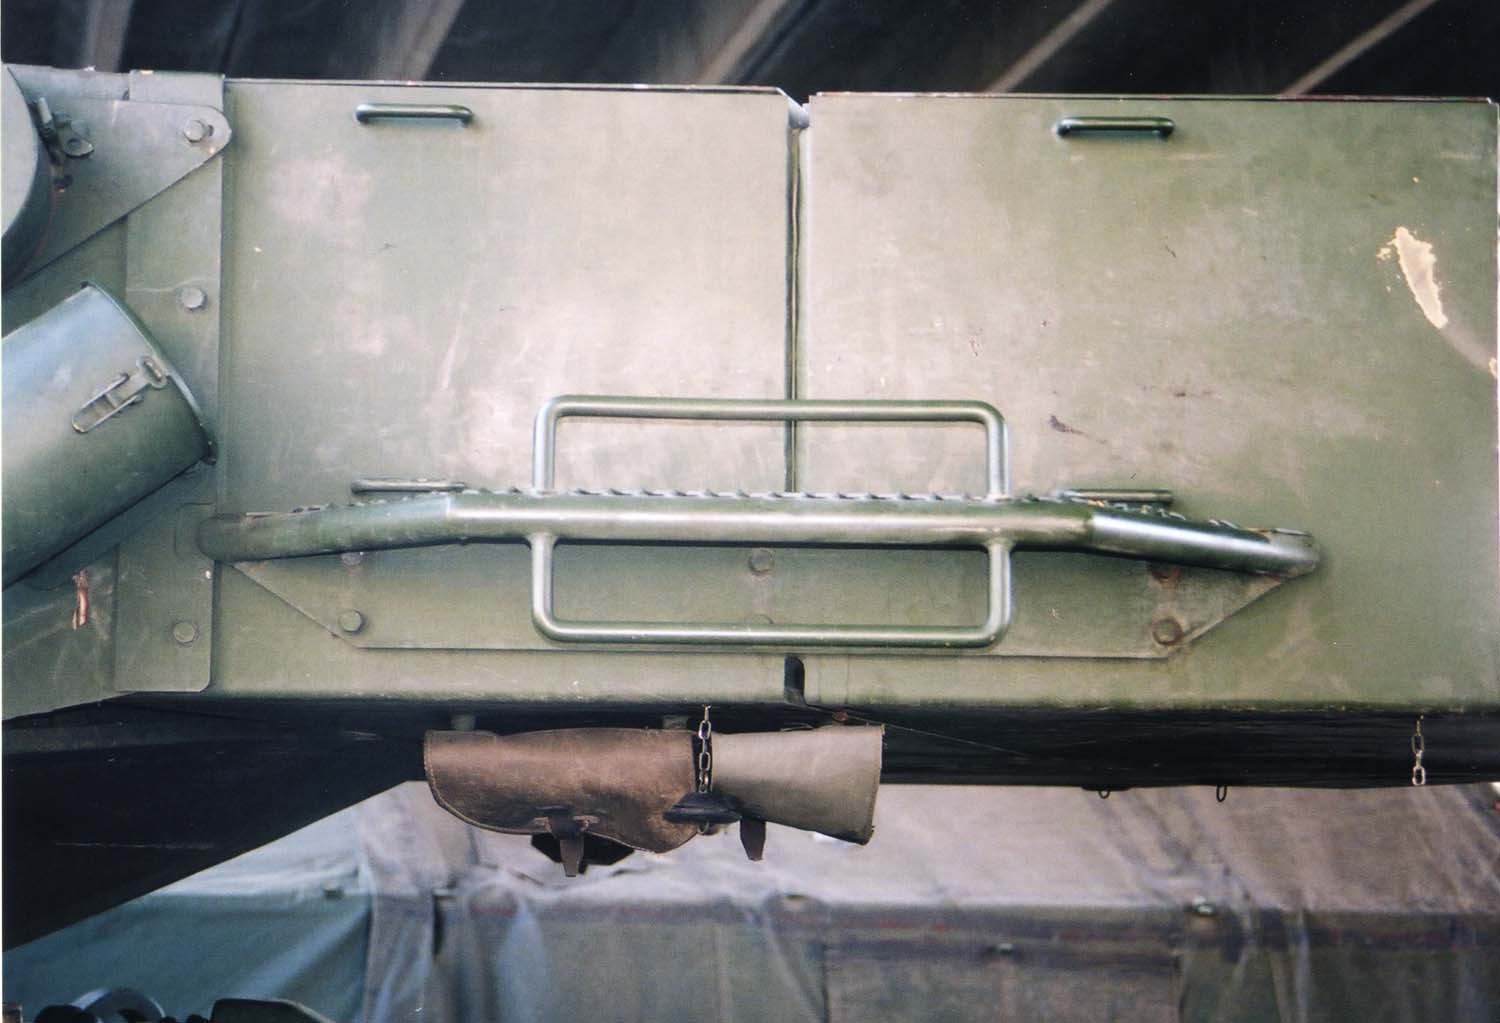
This is what the air intakes should look like
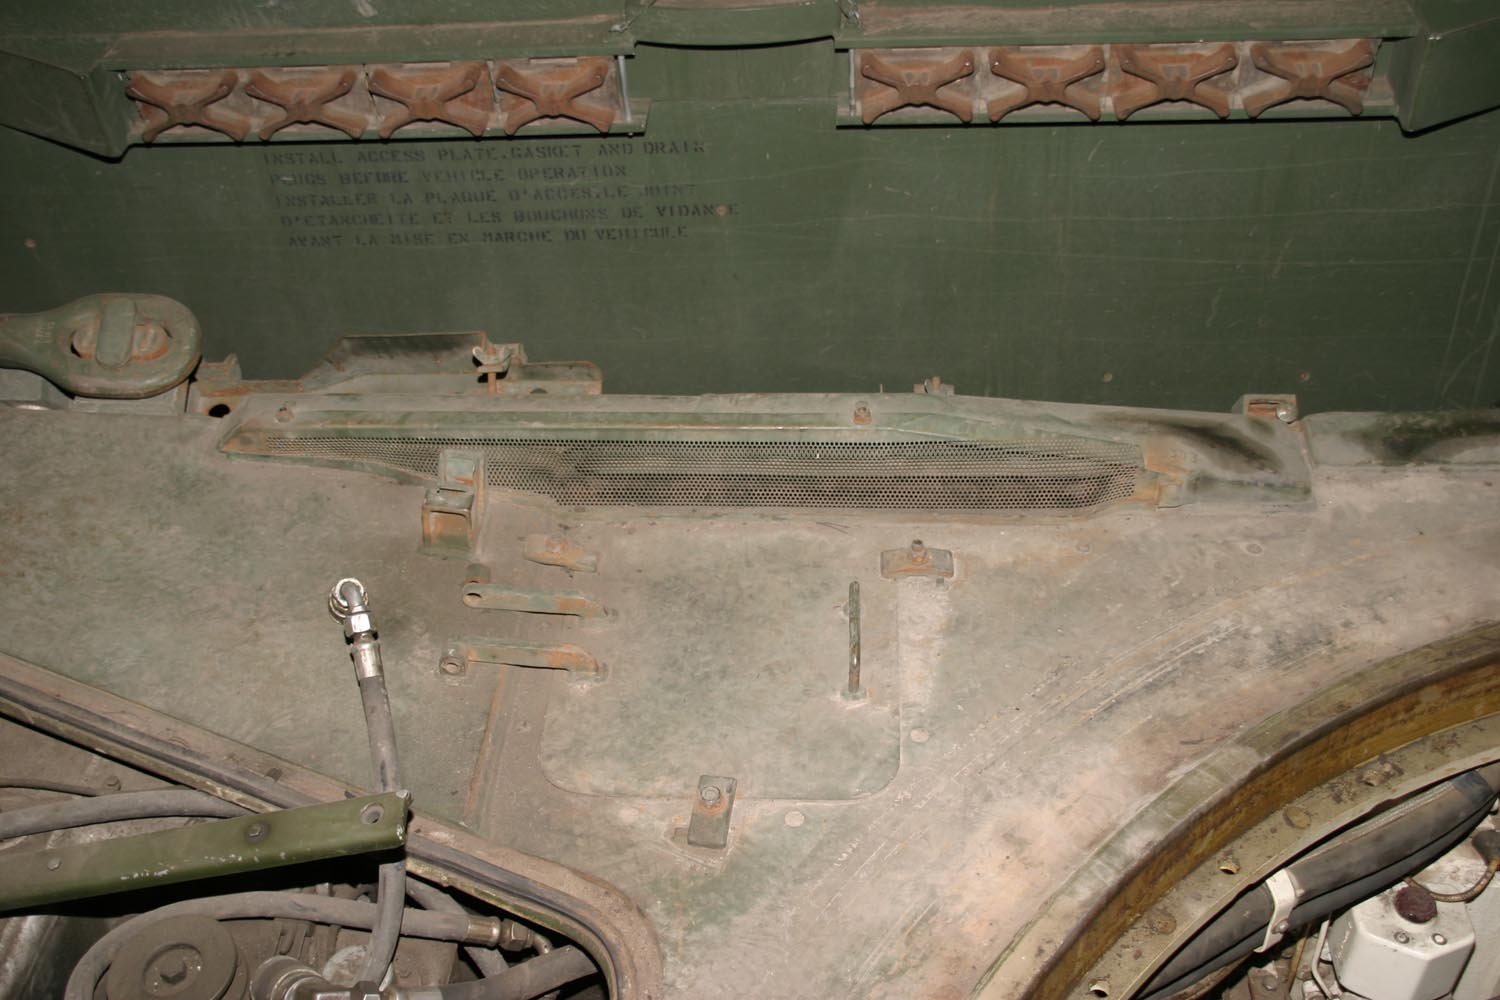
If the turret is posed at the 12 o'clock position, the missing intake screens will be largely hidden under the turret MEXAS modules. Still, this is a clear miss on the part of Hobby Boss (Meng didn't miss it - just saying).
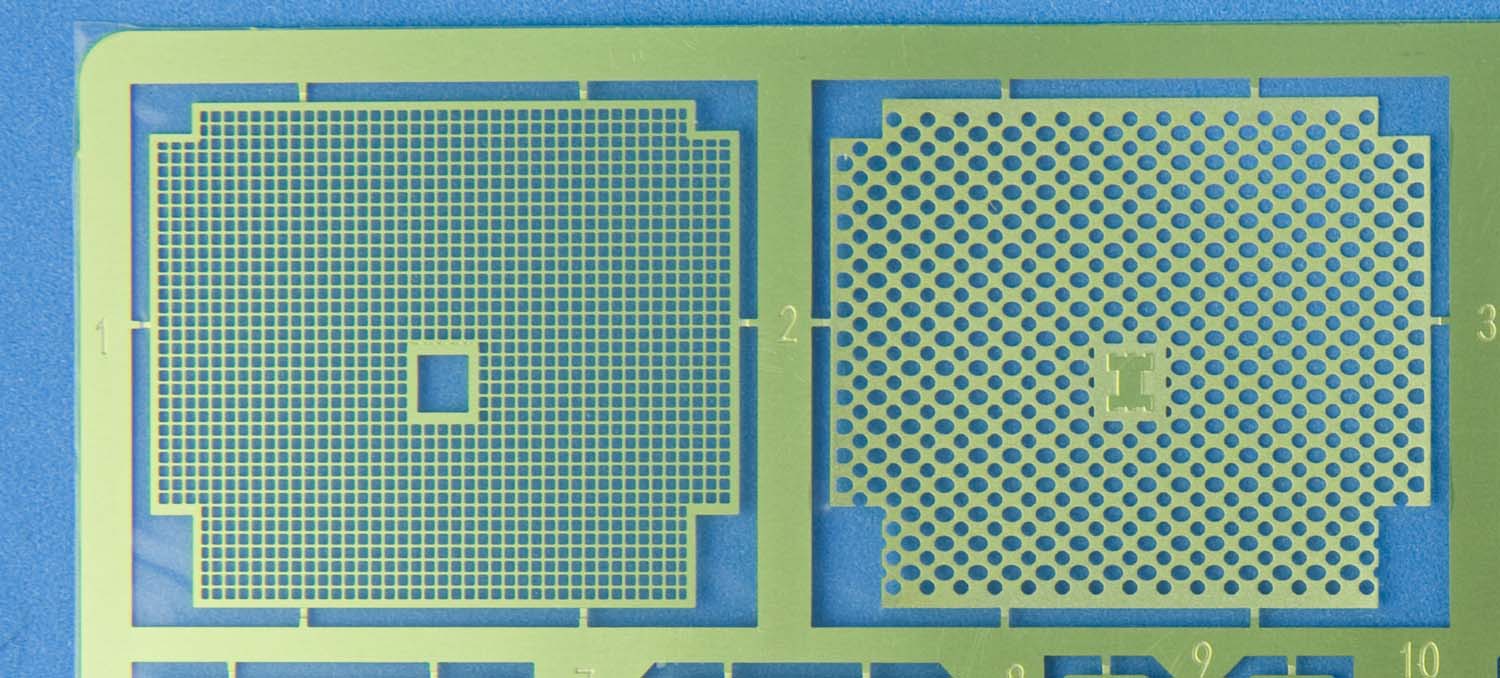
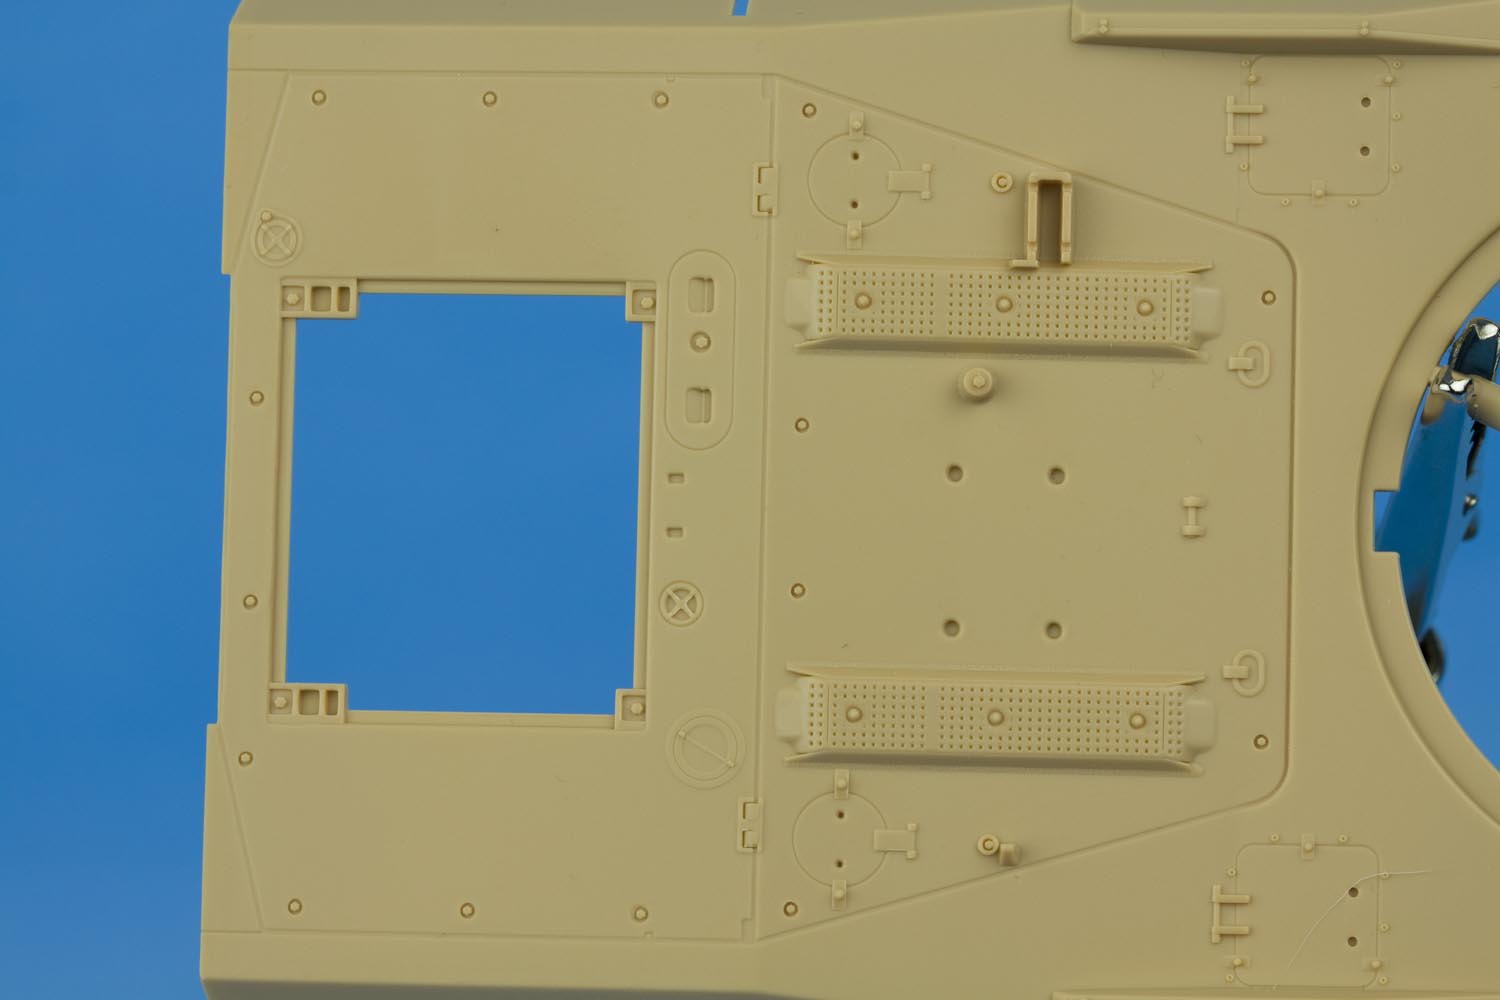
The radiator exhaust grill is provided by two photo etch parts. The top screen is quite nice but unfortunately omits the retaining clips found on the real thing. The bottom grill, while having the correct shape, lacks the three dimensional quality of the real thing (or the Meng part for that matter).
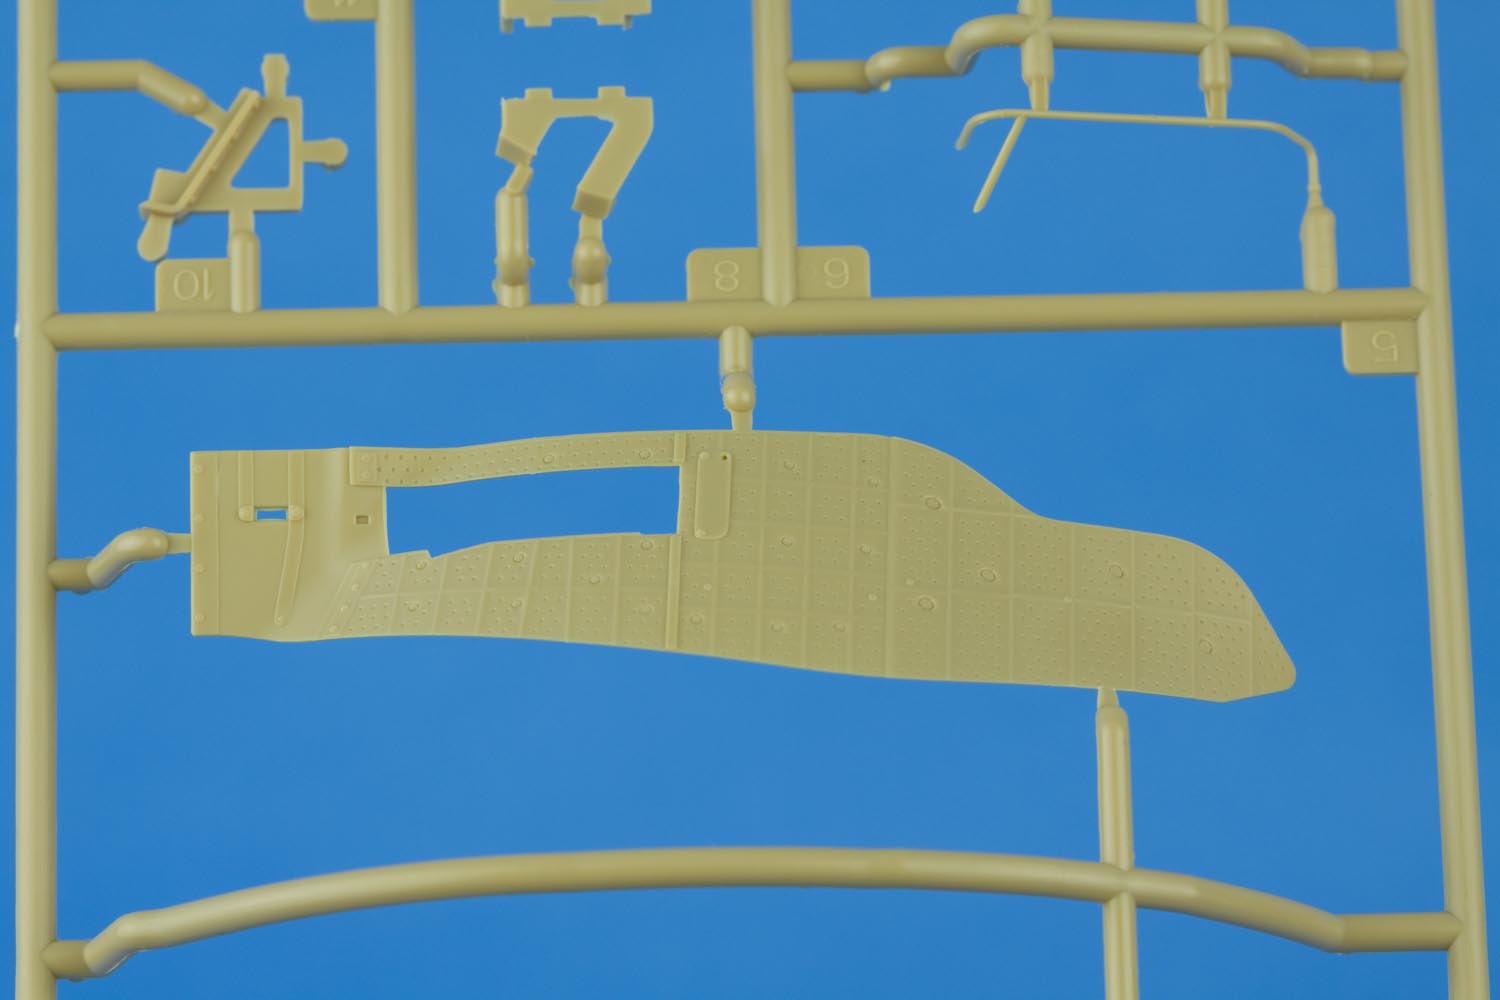
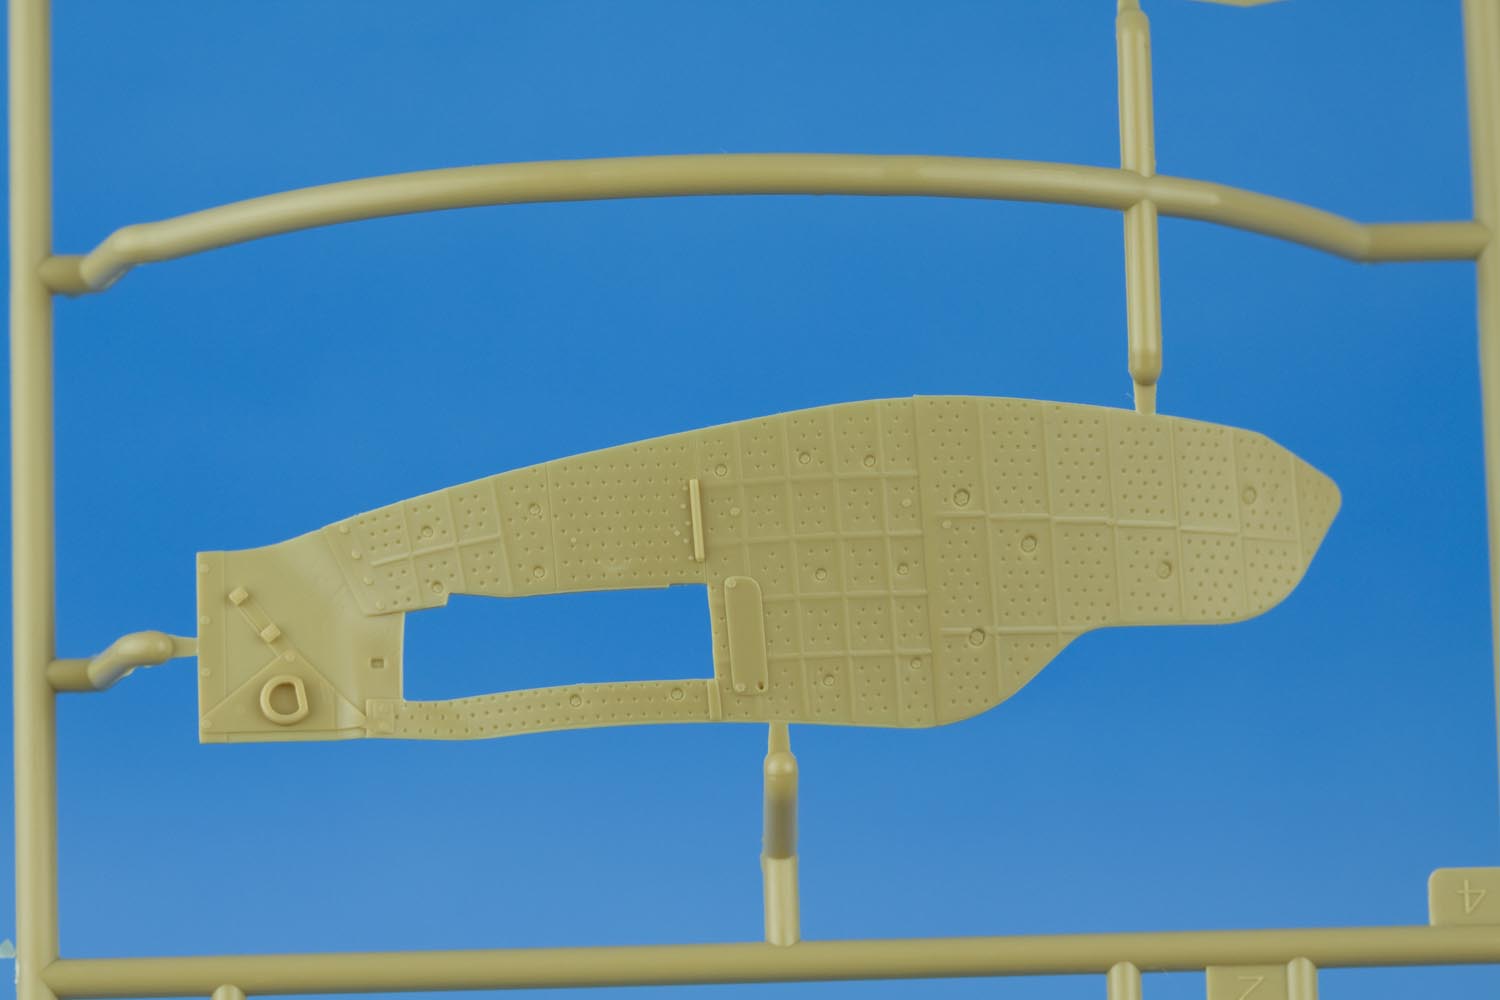
The engine deck is very finely detailed with all of the grab handles being included as separate parts. These separate parts are incredibly fine an may be difficult to remove from the sprues without breakage. It may be easier to simply use fine brass rod for the grab handles by using the existing locating holes.
The engine compartment ventilation grills are a little too course and could benefit from some after market lovin'. However, these grills will not really be visible with the turret a the 12 o'clock position as they will be covered by the large C2 bustle bin.
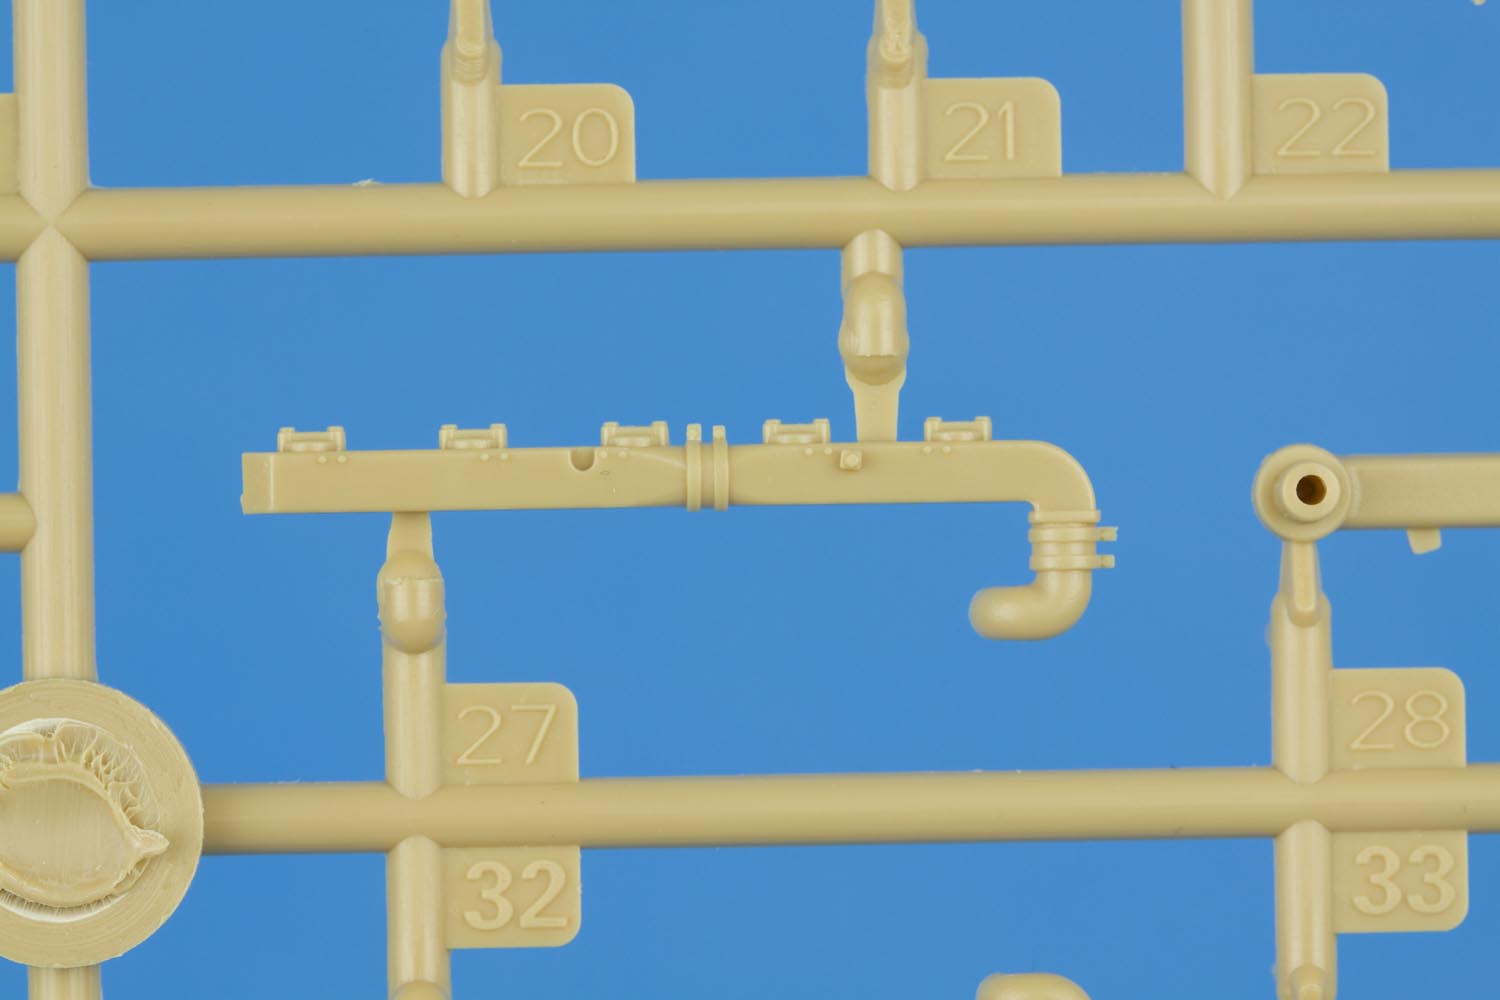
The final drive tool and tension adjuster ratchet found stowed on the rear deck are exceptionally detailed. Both tools are cast without their mounting brackets but with finely cast tool clasps which look reasonable. The mounting brackets for these tools are separate parts and not simply flat sections on the engine deck. This is a very nice touch.
The headlights feature very fine bezel retaining clips and are hollow thanks to slide molding.
The second image (below) also shows the hollow ends of the tow cable eyes which will make installation of the supplied
braided copper wire a breeze.

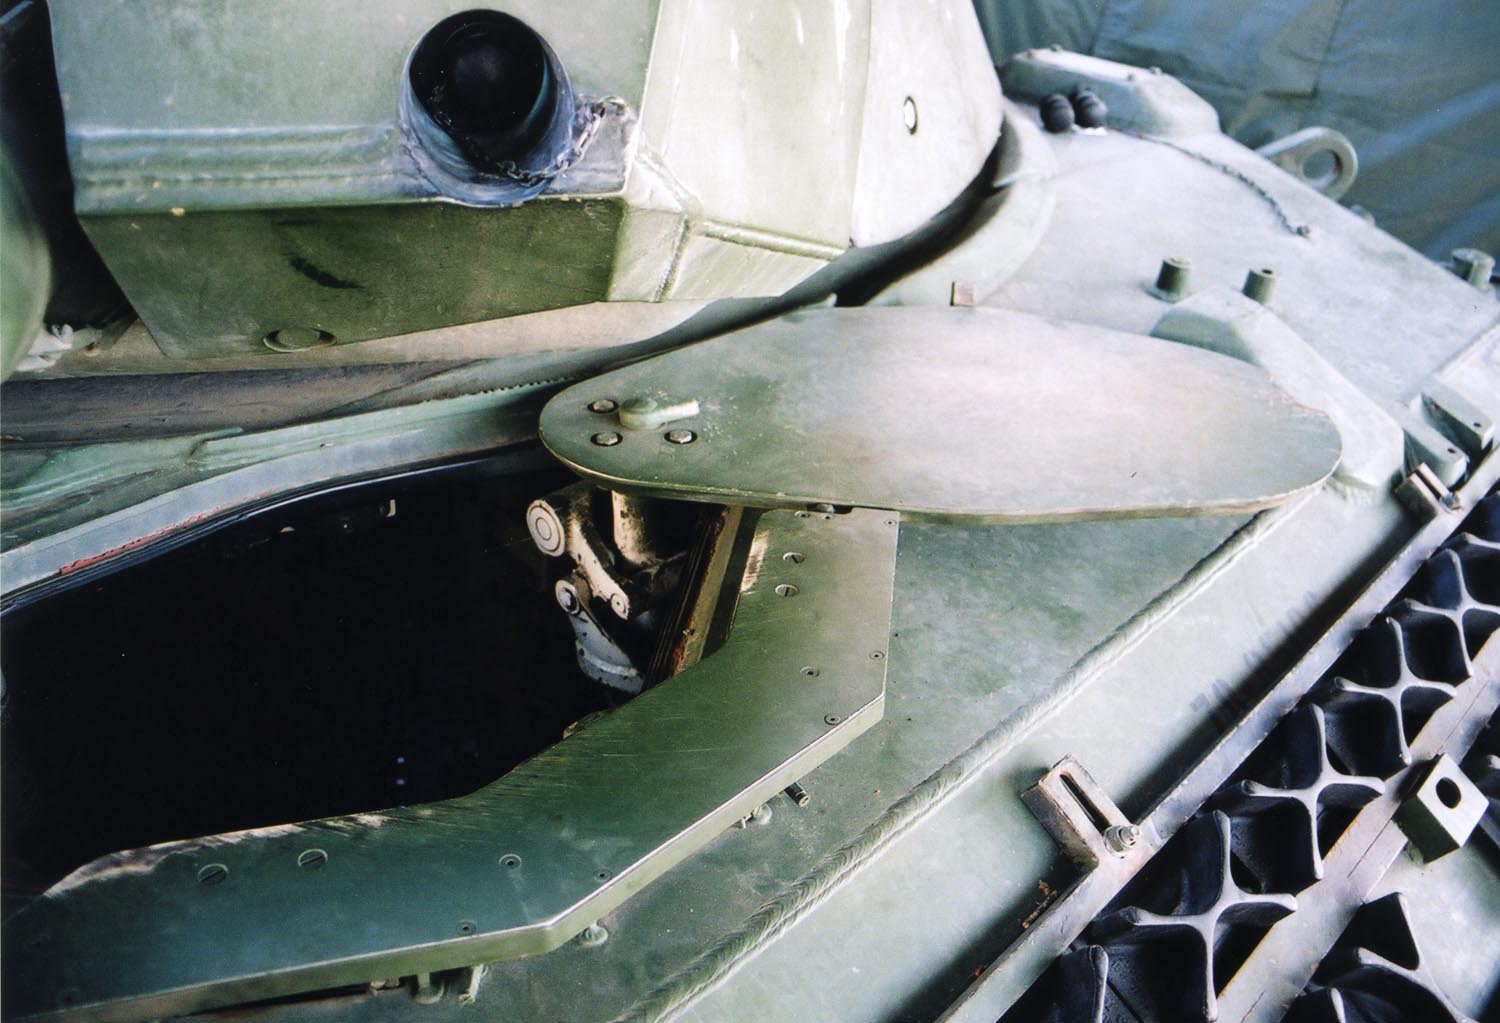
The driver's hatch and wiper cover are both beautifully done with with recessed screw and bolt heads.
Compare the superb kit detail on the kits parts to the following photo of the real thing:
The exhaust louvers are separate and seem to include the proper spacing. The tow cable brackets found on or beside the exhaust grills are included as separate tiny parts. The cable bracket part B48 is however missing the reinforcing web. This would be easily added with a little sheet styrene or by making use of the Leopard Workshop set LW033 which does include all of the proper brackets with reinforcing webs.
The kit exhaust louvers compare quite favorably with the real thing:

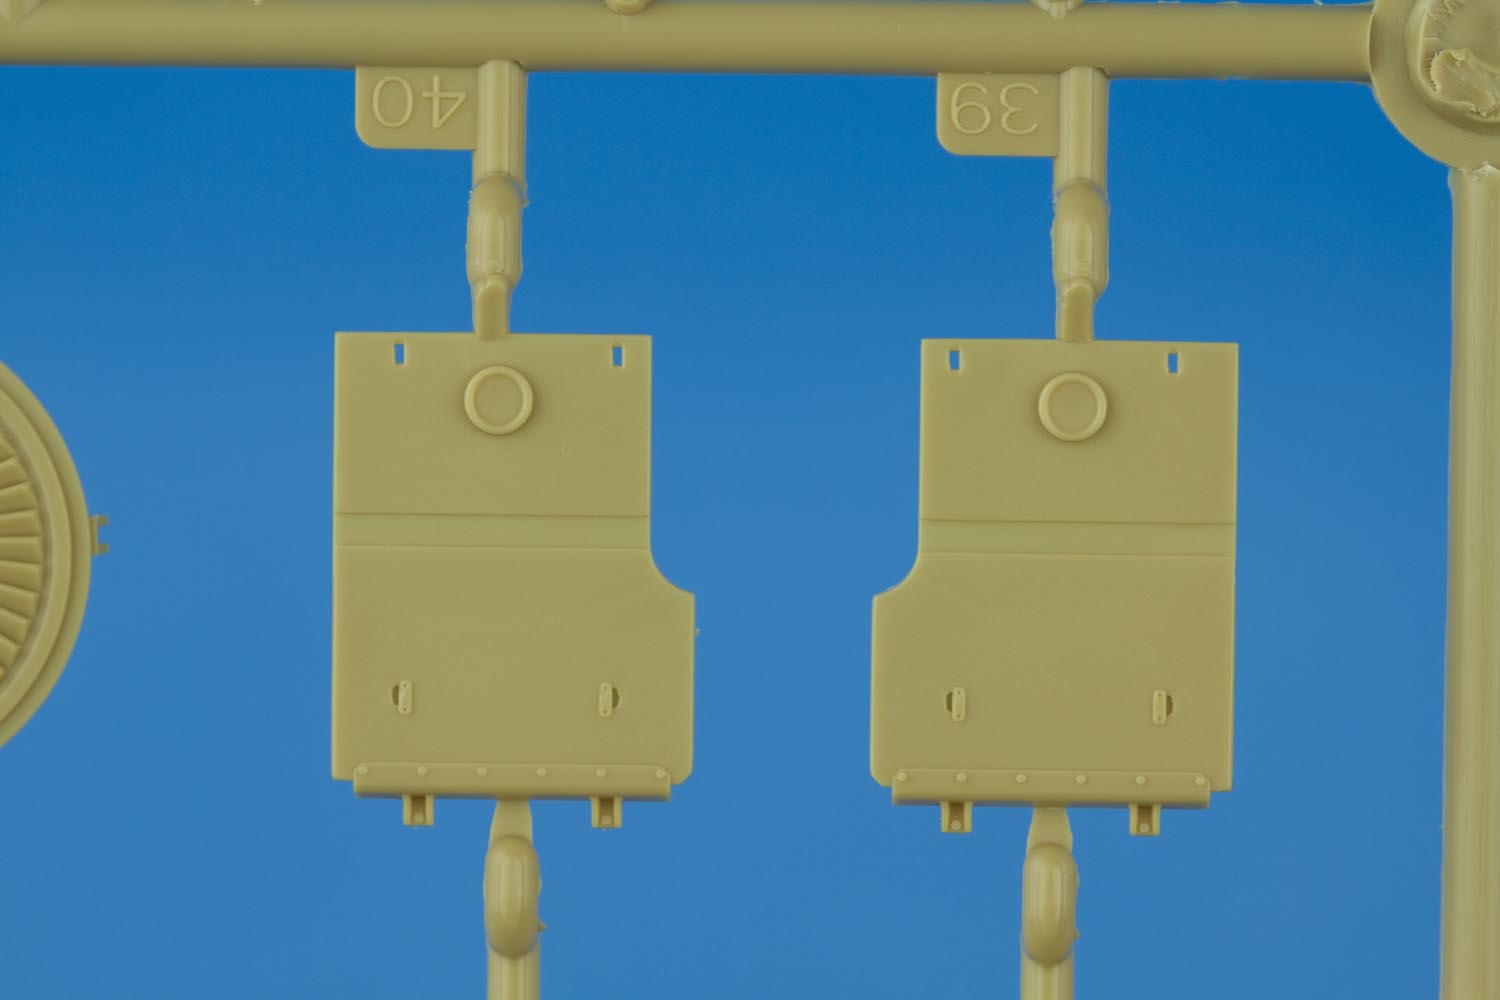
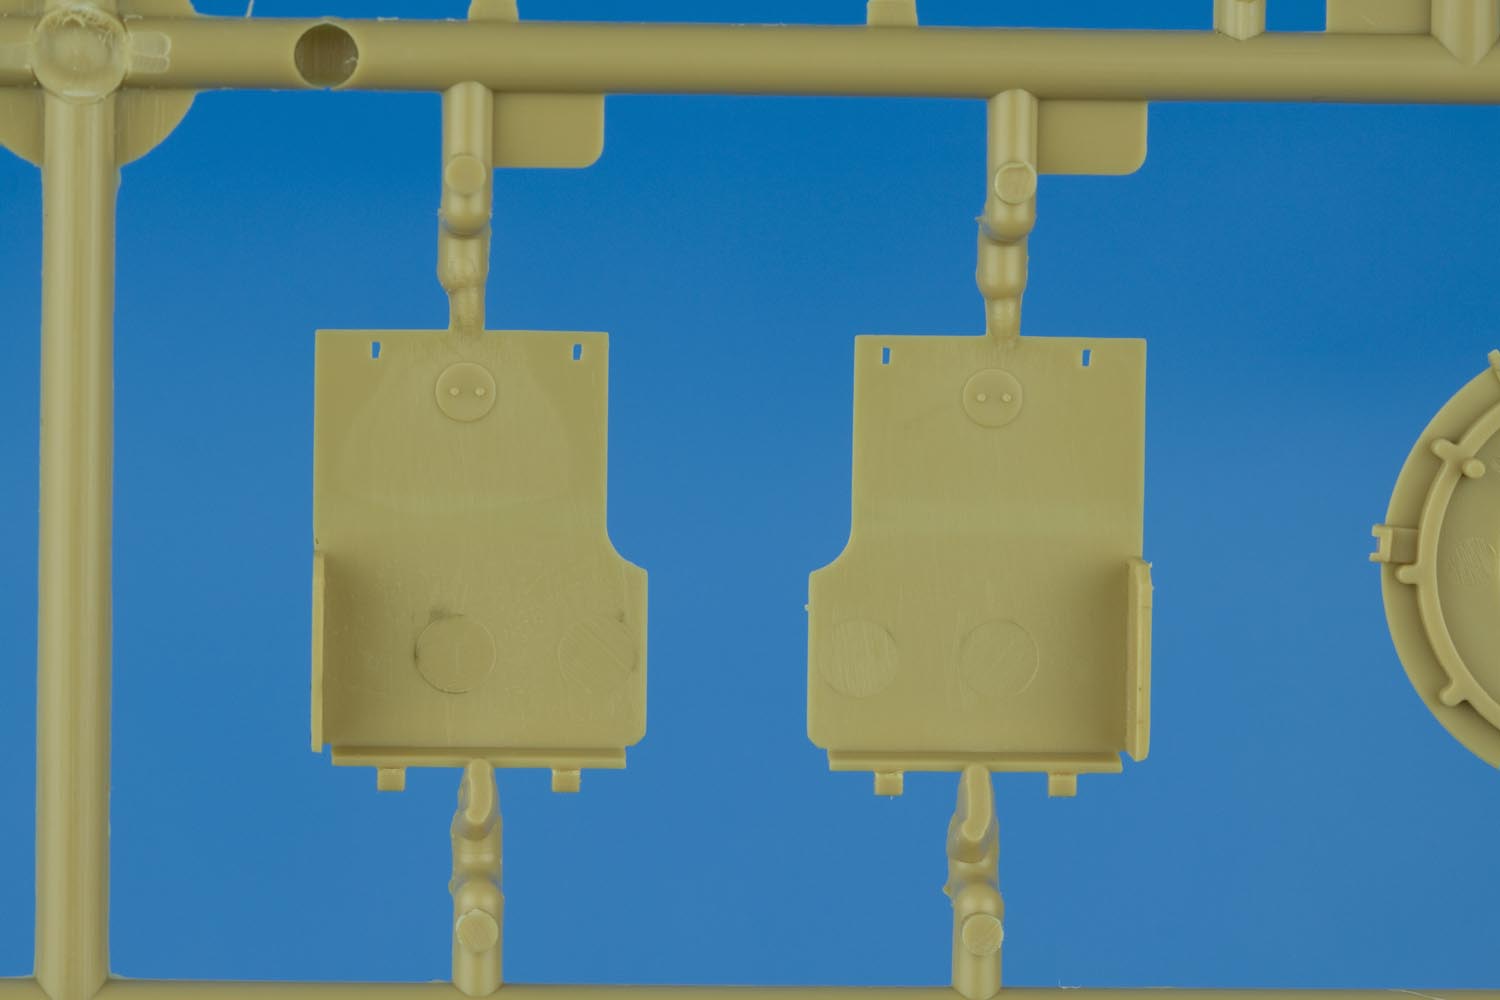
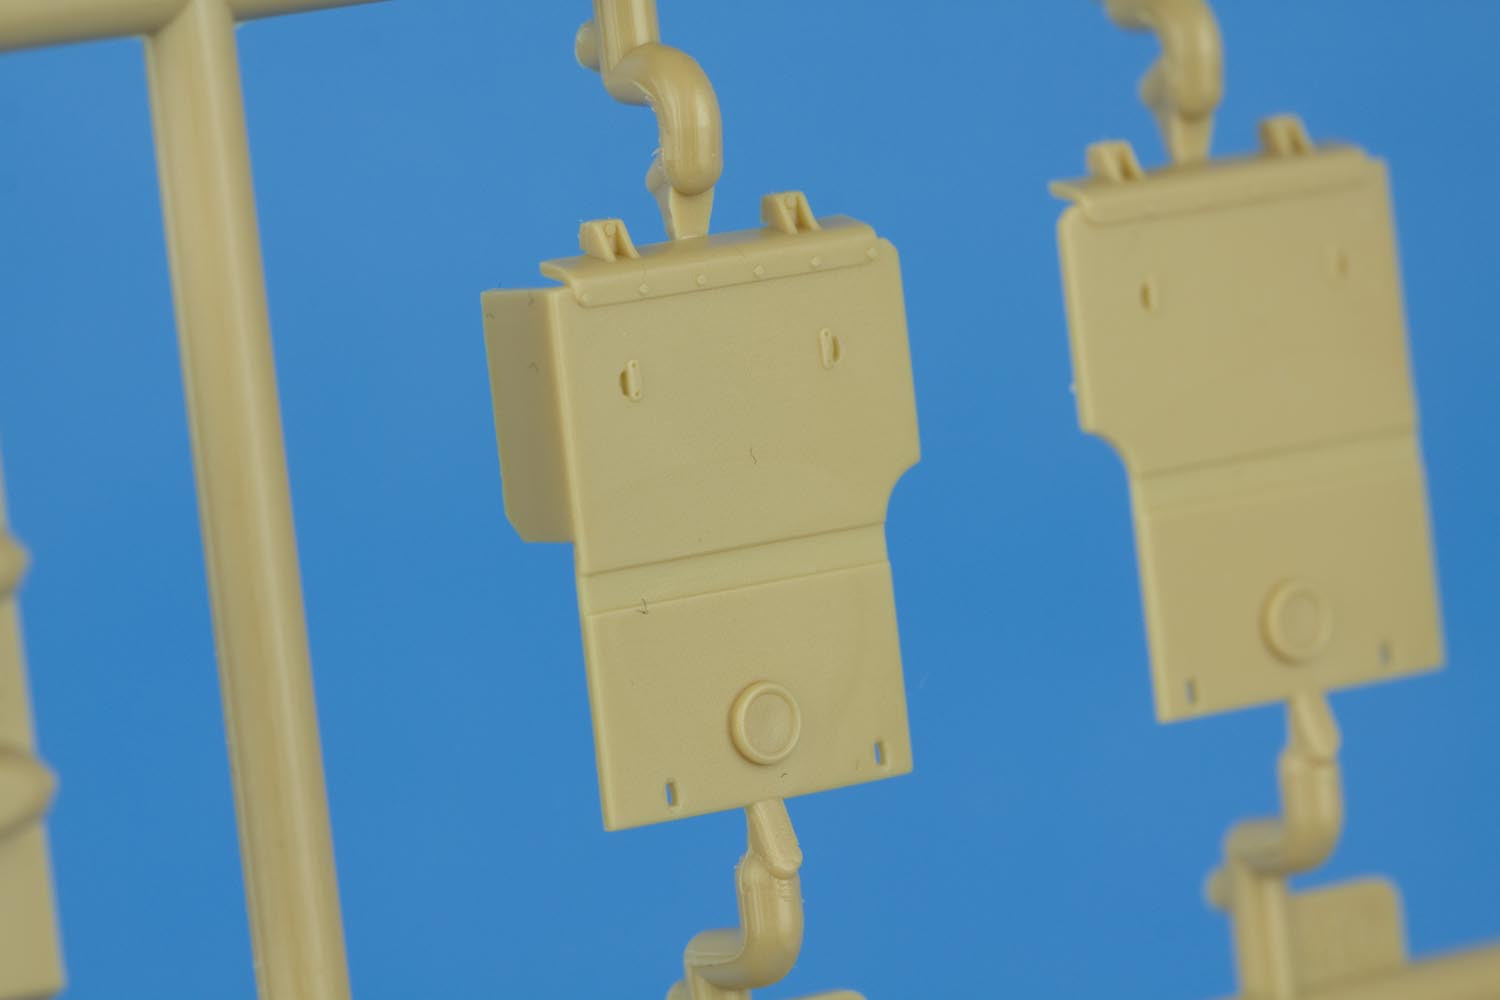
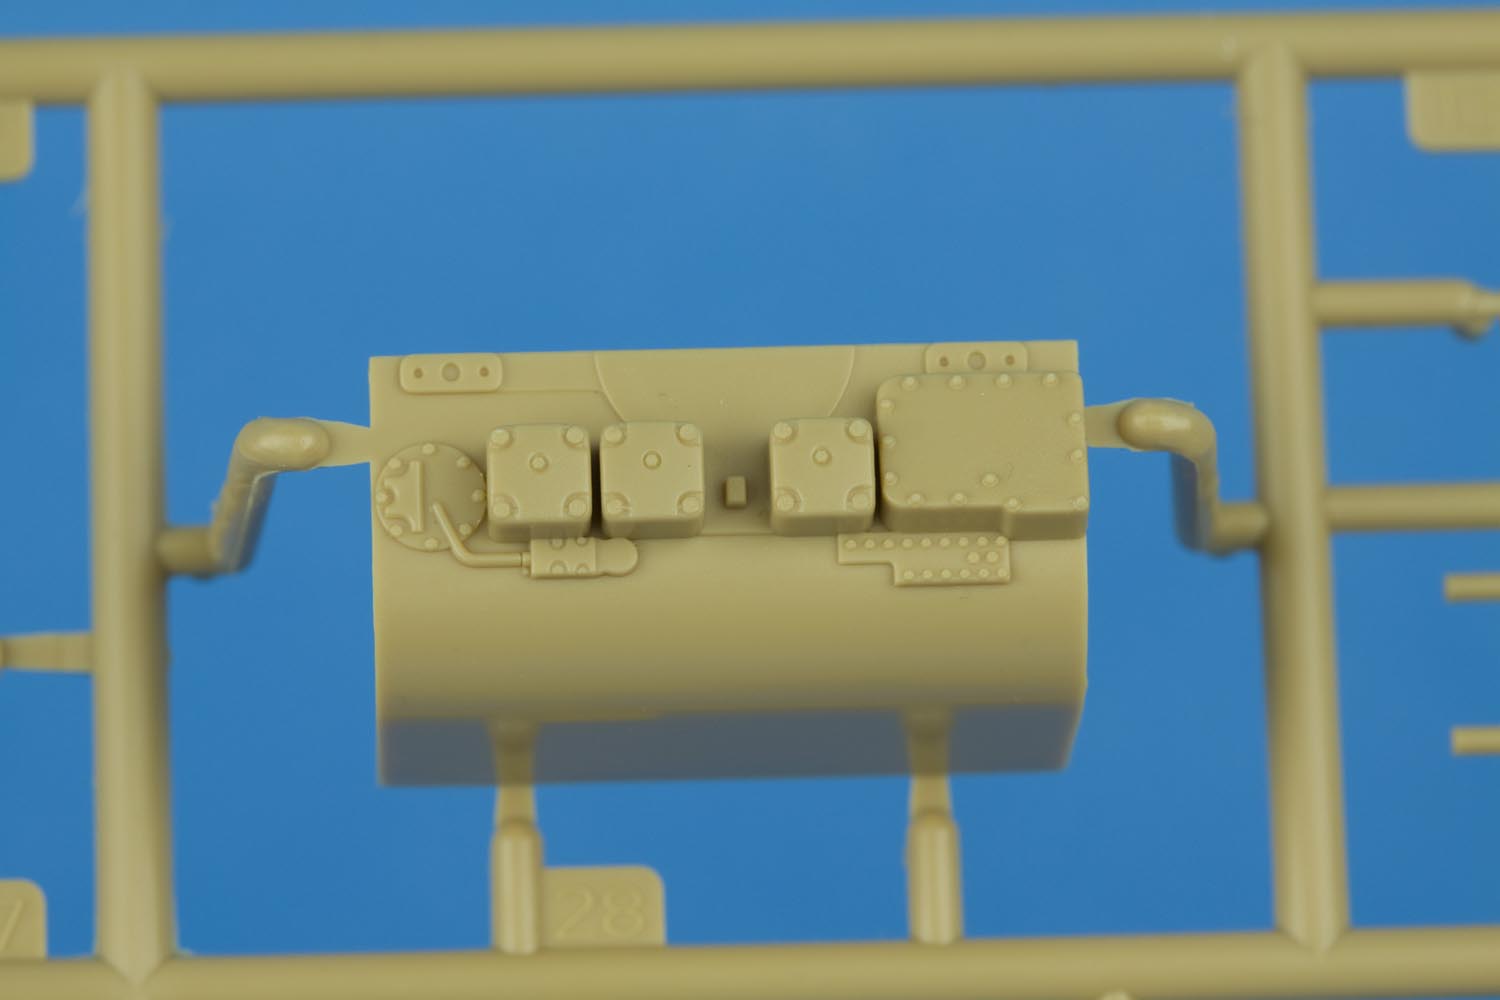
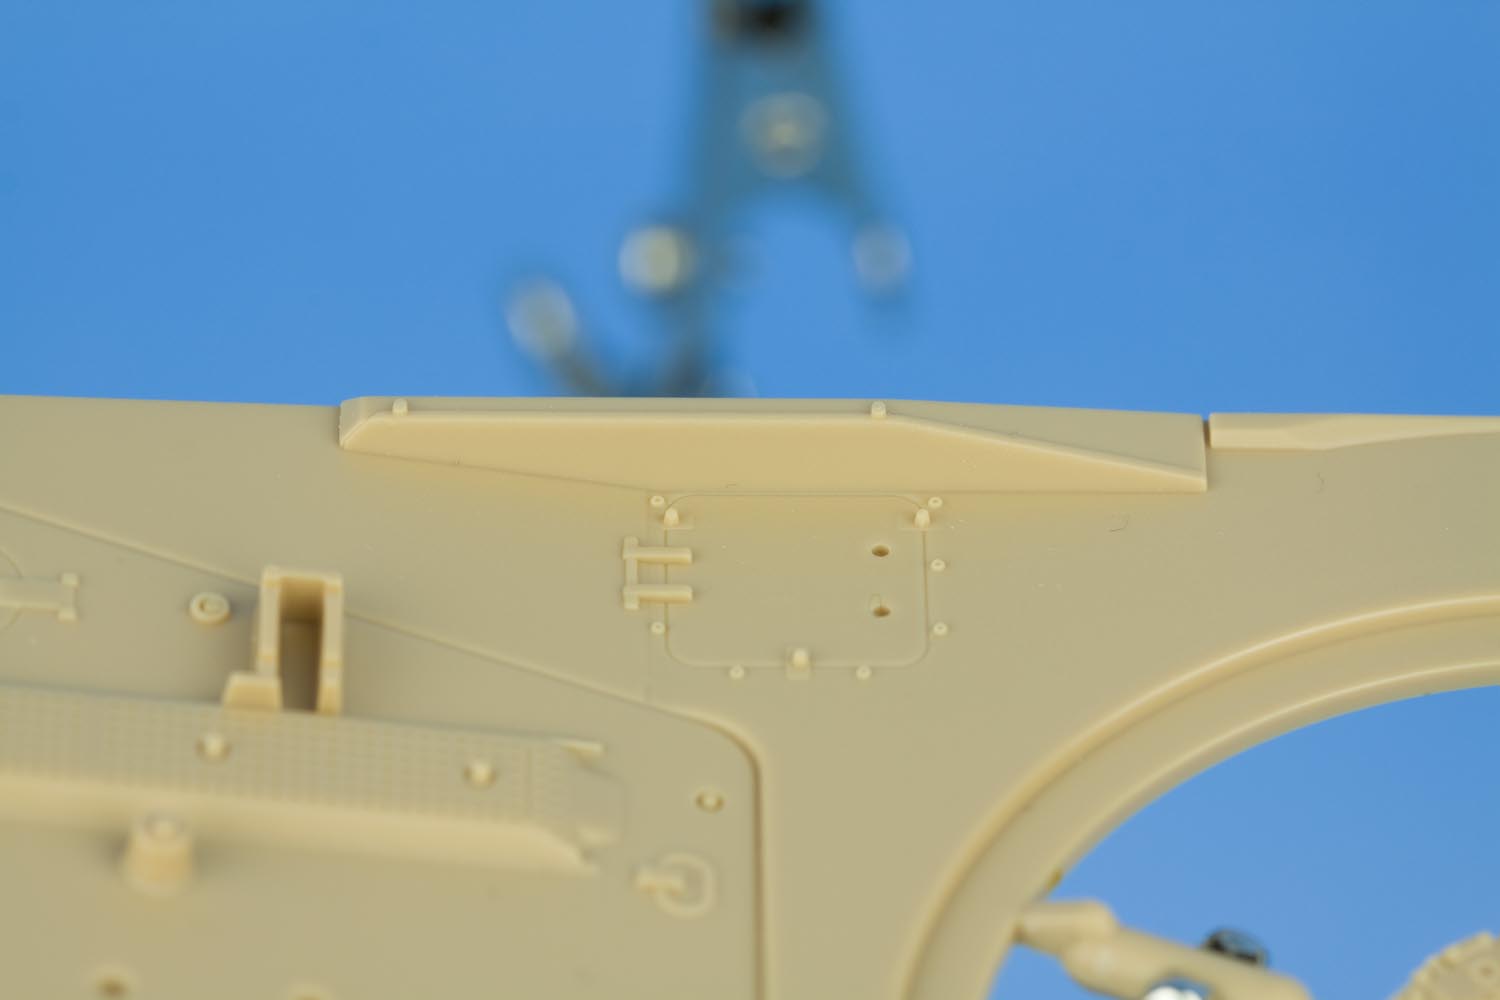
The tool stowage boxes which sit just forward of the exhaust louvers are presented as two separate pieces. The locking clips, which are cast in place are finely detailed. The rear of the toolbox features mounting pegs which will provide the necessary spacing between the box and the hull. At first I thought it odd that the hull top does not include any locating holes for these nicely presented stowage boxes. Then I realized that they would not be used on this kit as the MEXAS side modules would be taking their place (what a silly bunt I am). I suppose this part is present because Hobby Boss intends to use the same sprues for other announced Canadian Leopard 1s (the C2 and the C1 MEXAS).
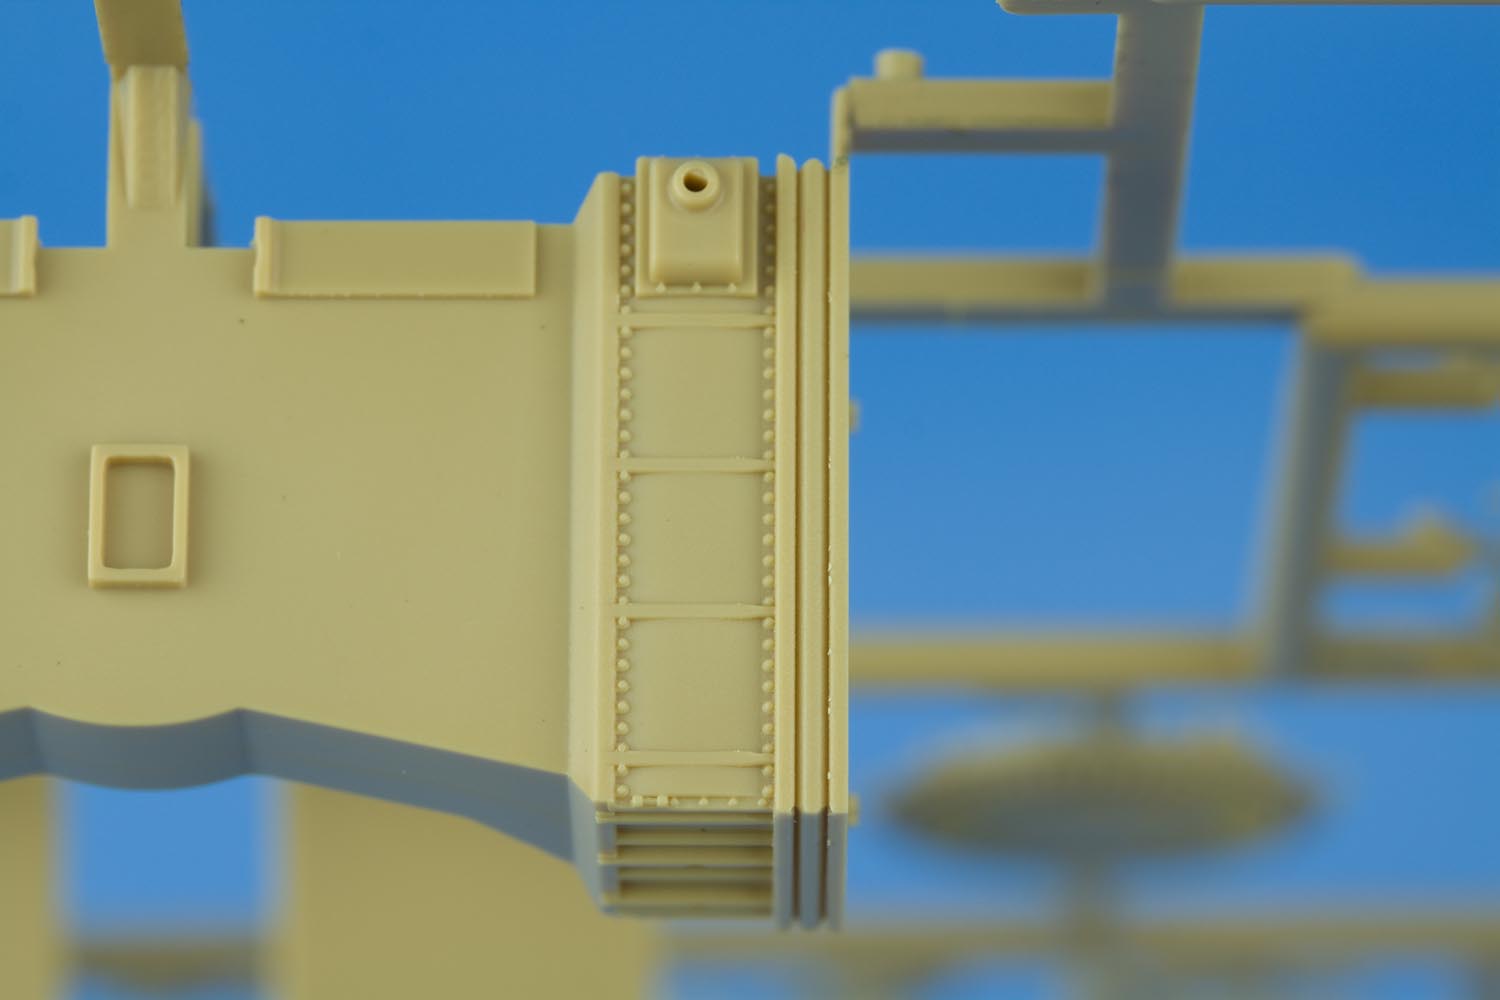
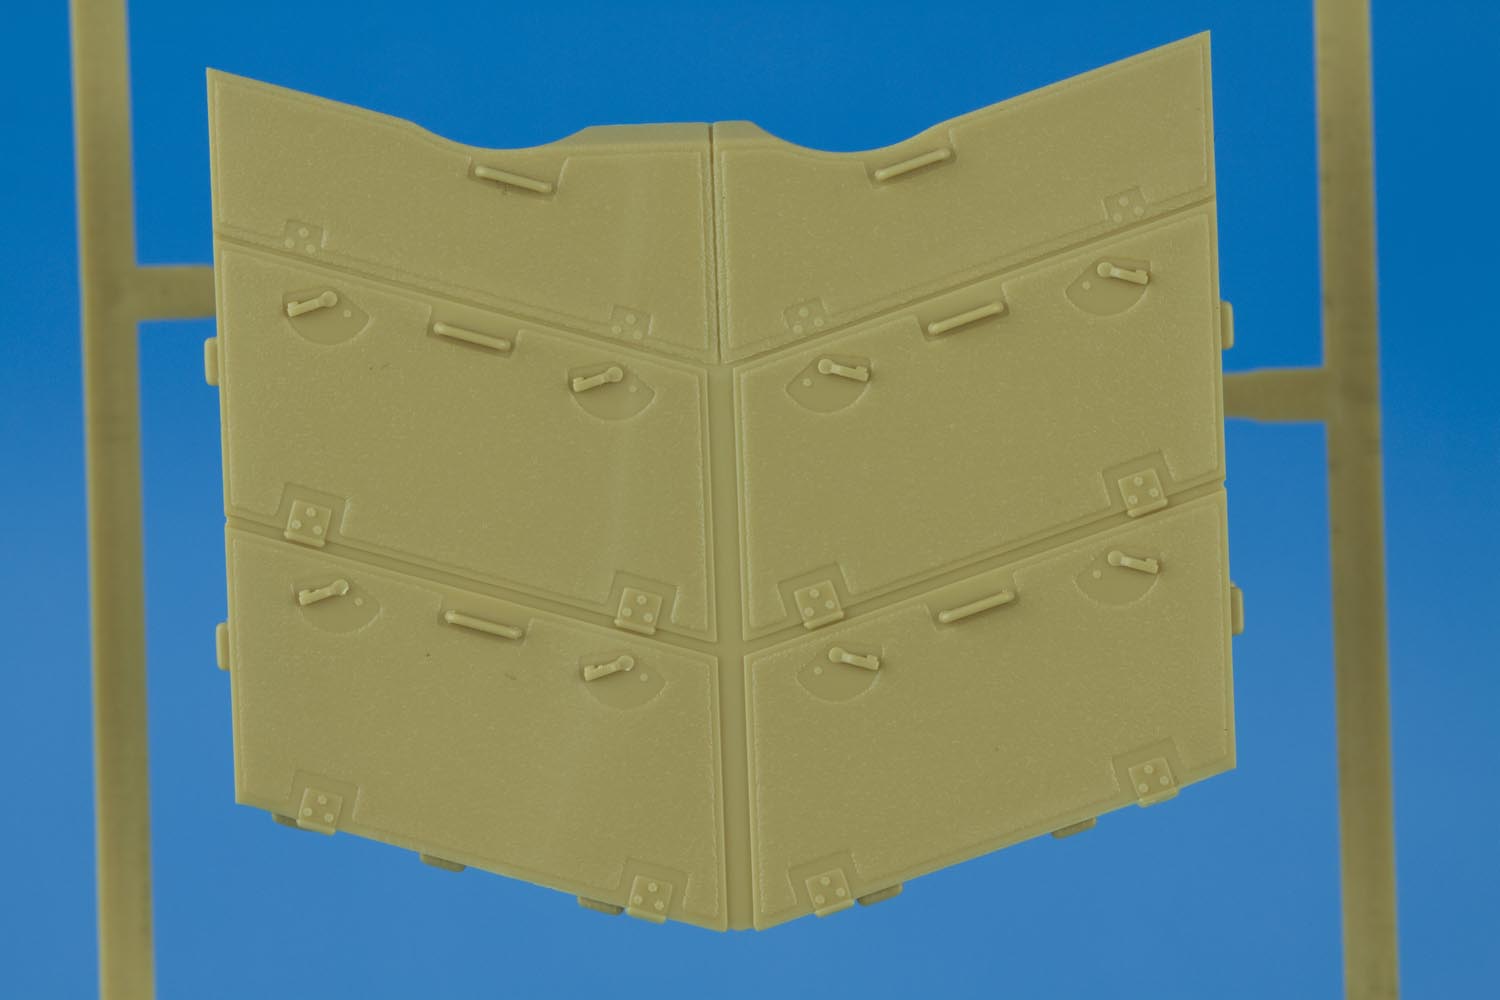
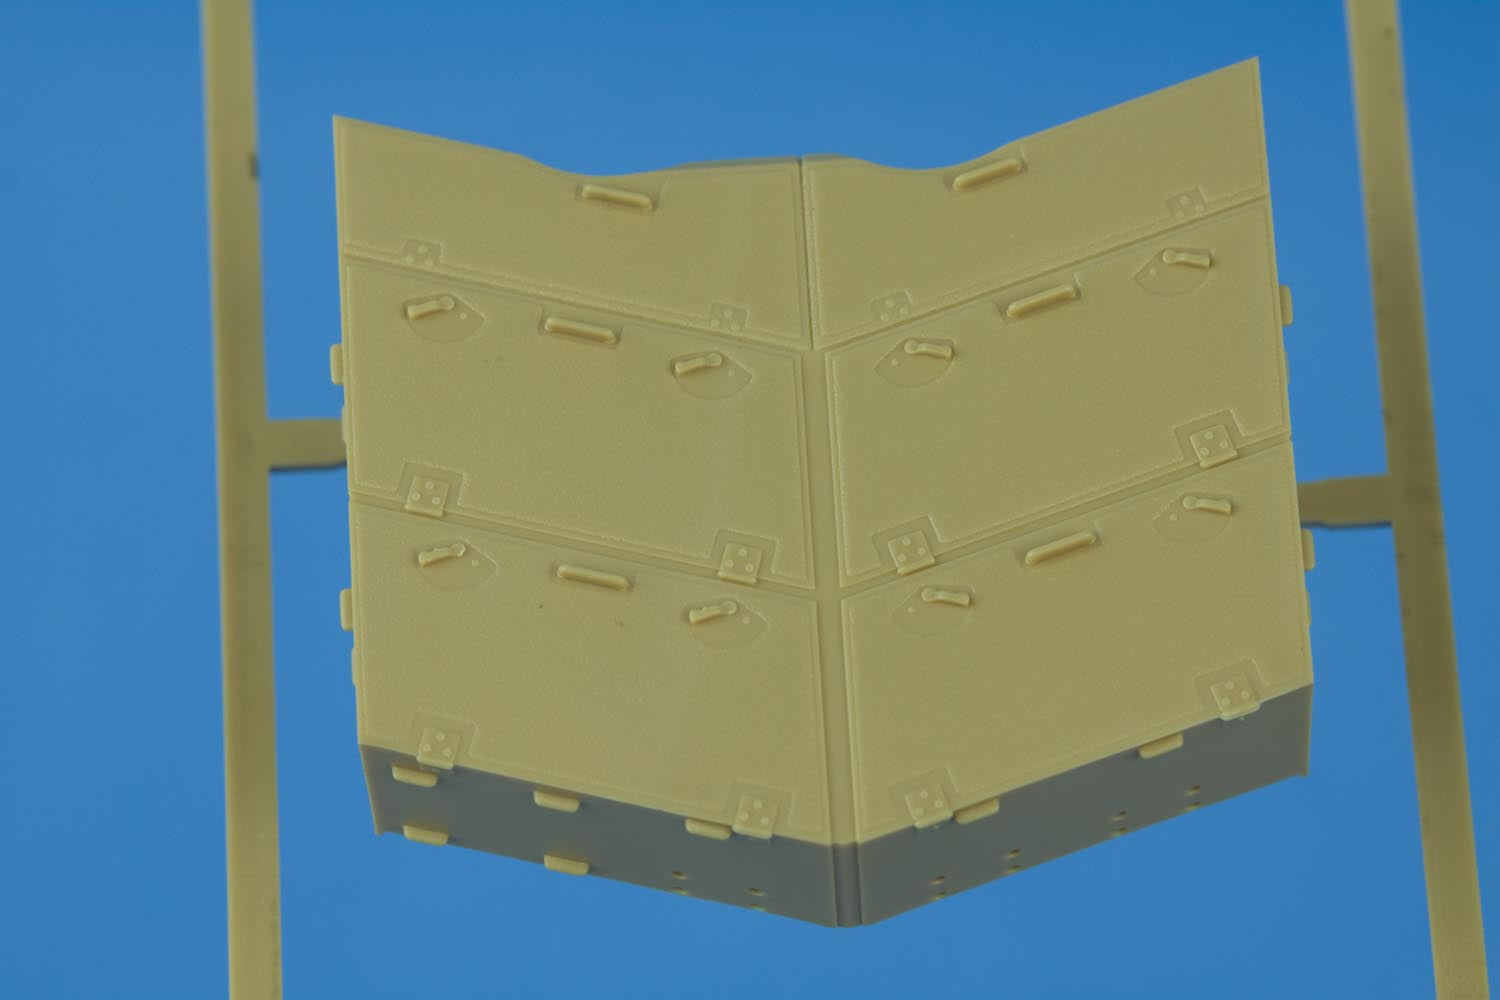
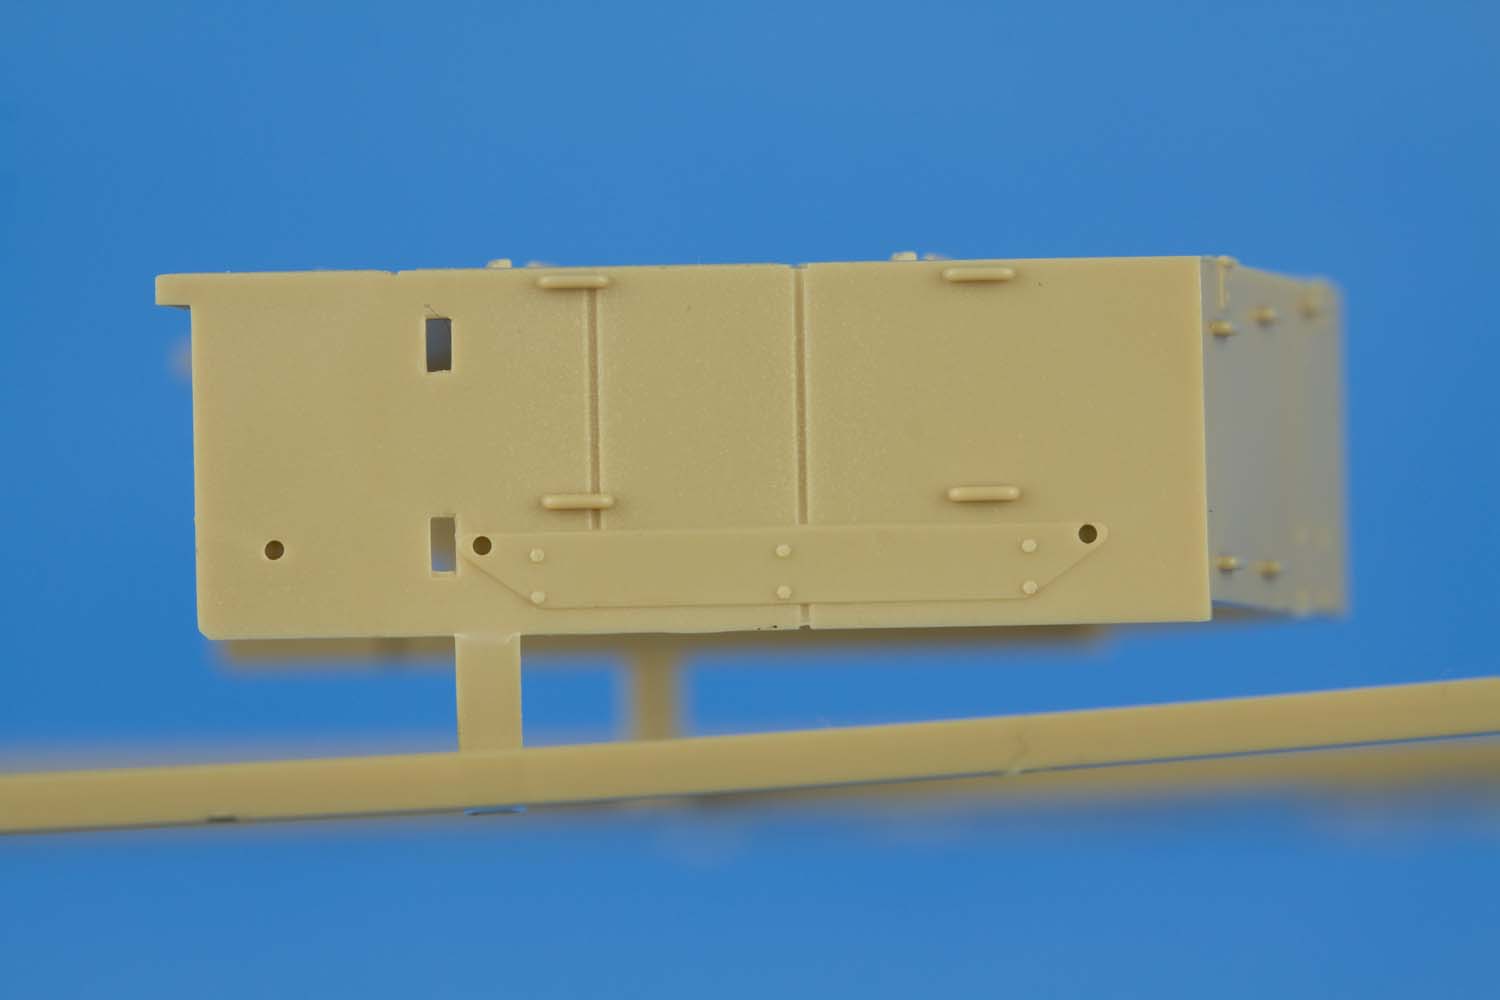
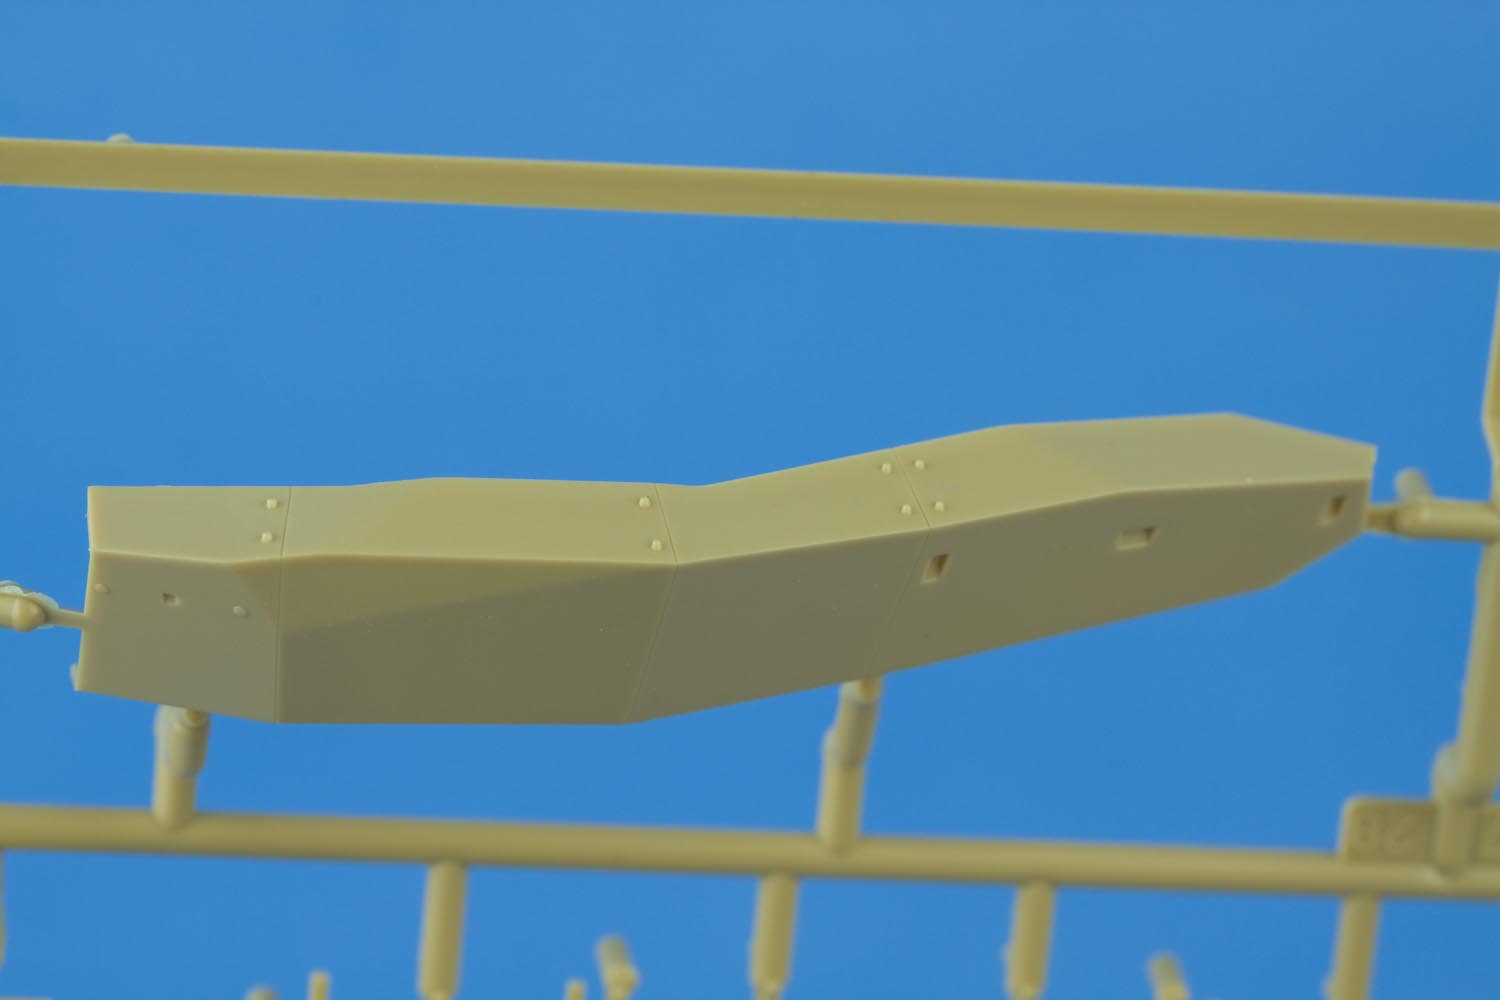
The hull side MEXAS modules are presented as one piece together with the tool box and light armoured side skirts (which cover the drive sprockets). A separate back plate is included so there will be no unnecessary gaps visible on the rear face of the MEXAS blocks. The tool stowage box features two incredibly detailed locking clips; there will no need for after-market PE here.
The hull front MEXAS modules feature finely detailed rivet detail. The lower glacius plate MEXAS module is cast integral to the engineer implement mounts. Unfortunately, the left side mount missed the flat circular plate on its outer edge. This is made up for the fact that the towing bollard (T-hook) and extension are separate pieces in the kit and not cast all as one part (as was the case for the Meng C2 MEXAS).
The real left side implement mount showing the aforementioned circular plate
 l
l
The real right side implement mount does not have the circular plate on its outer end

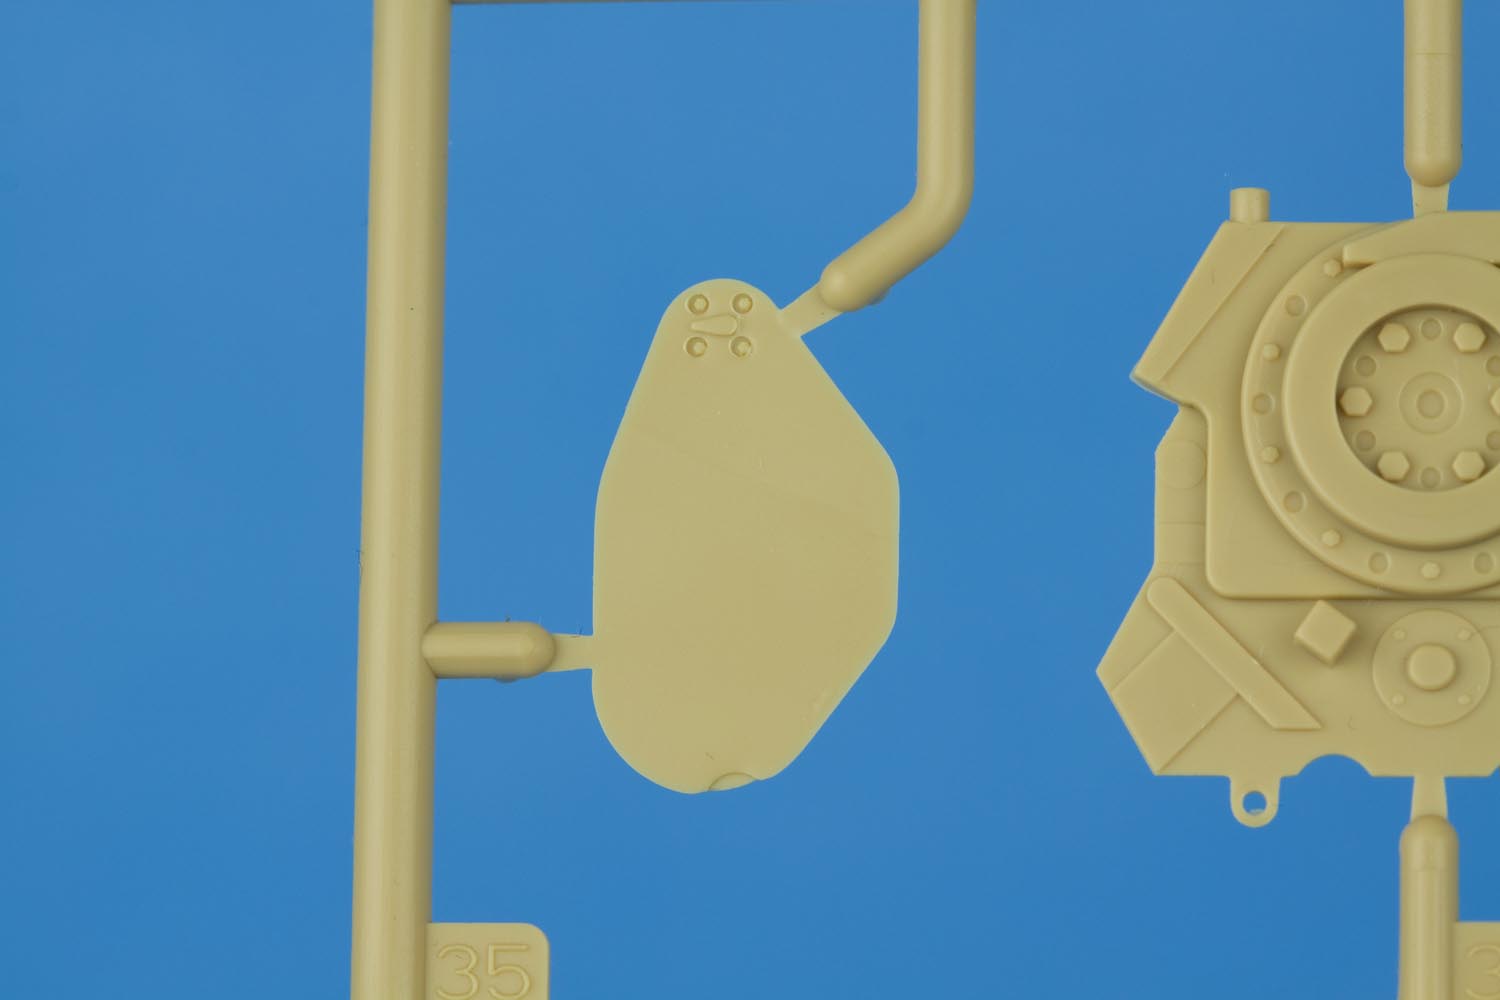
The turret is clearly slide mold with crisp detail on all sides. The range finder blanking plates are more or less circular which is correct! While the blanking plates won't be very visible under the MEXAS modules it nice to see this often mis-represented feature done correctly for a change.
The applique armour mount bases are cast in place as opposed to being included as separate parts. A fine cast texture is present on the turret shell; I think this is the first time this has been done in plastic. This texture looks a bit heavy handed to my eye but most if will be buried under the MEXAS modules. There is no anti-skid coating depicted on the turret top. A particularly nice touch is the full inclusion of the additional armour plates just aft of the mantlet; this is merely hinted at in other Leopard 1 kits.
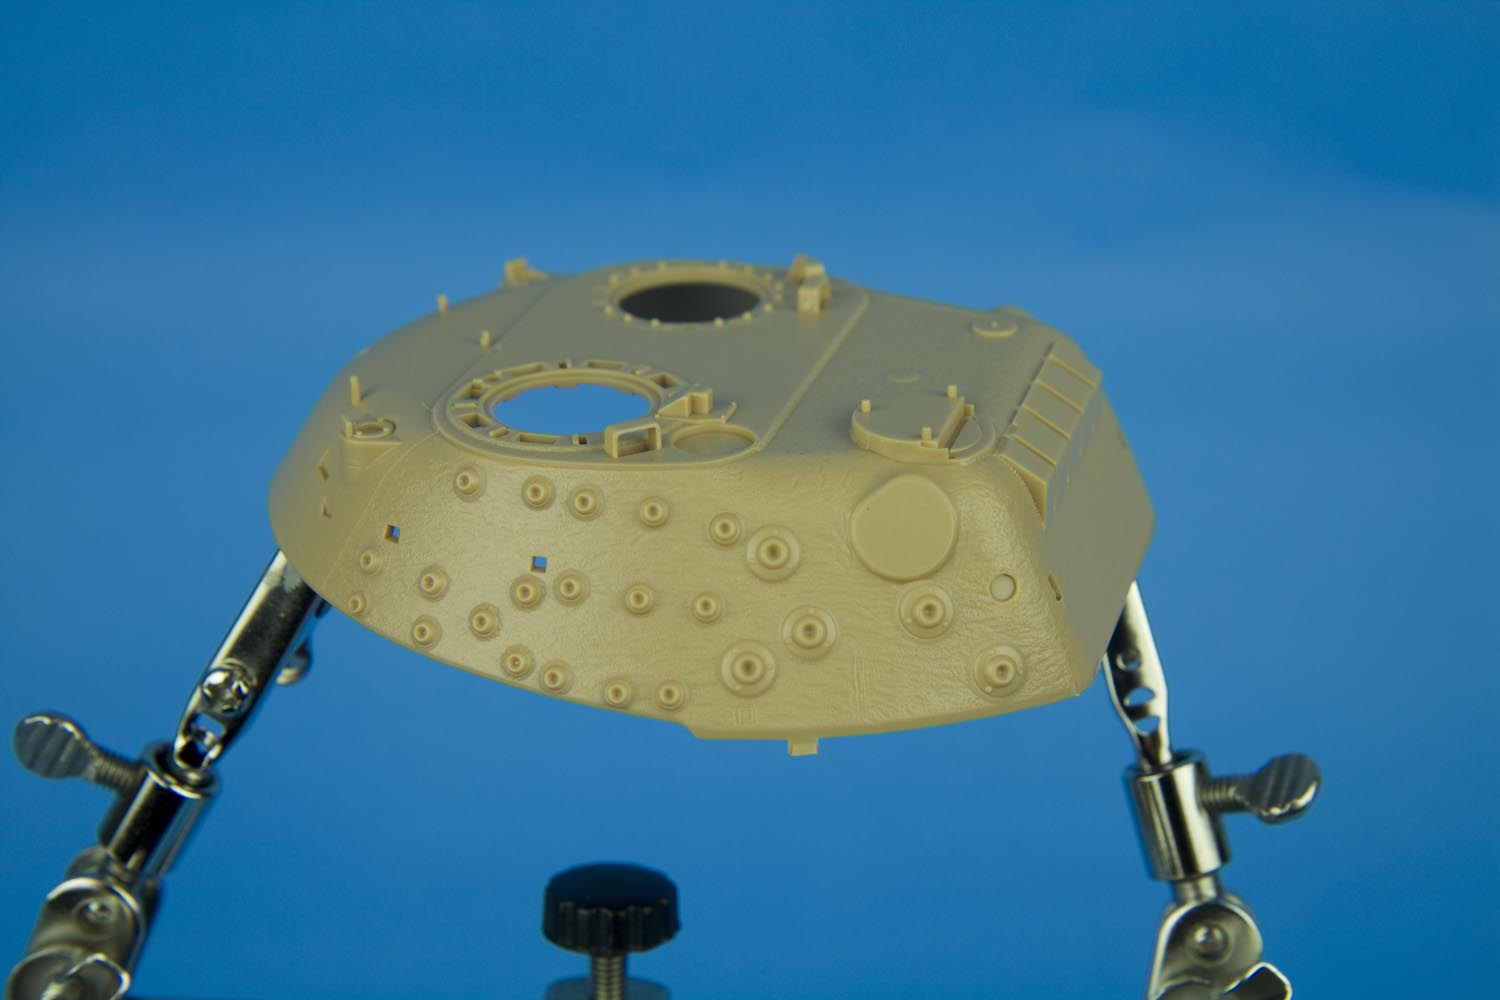
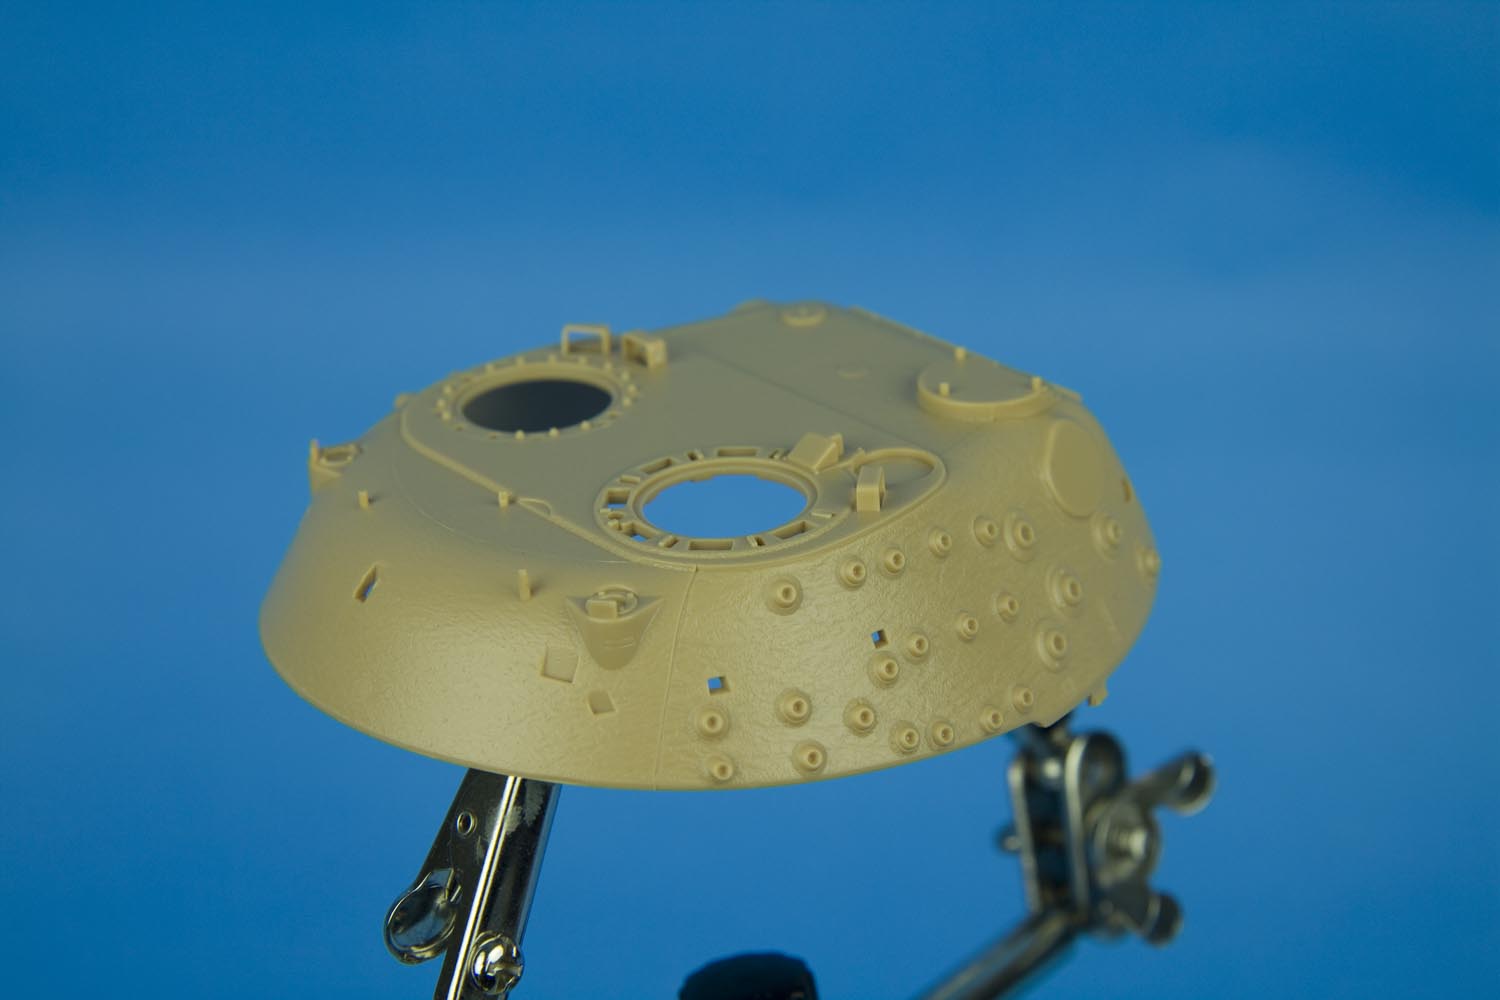
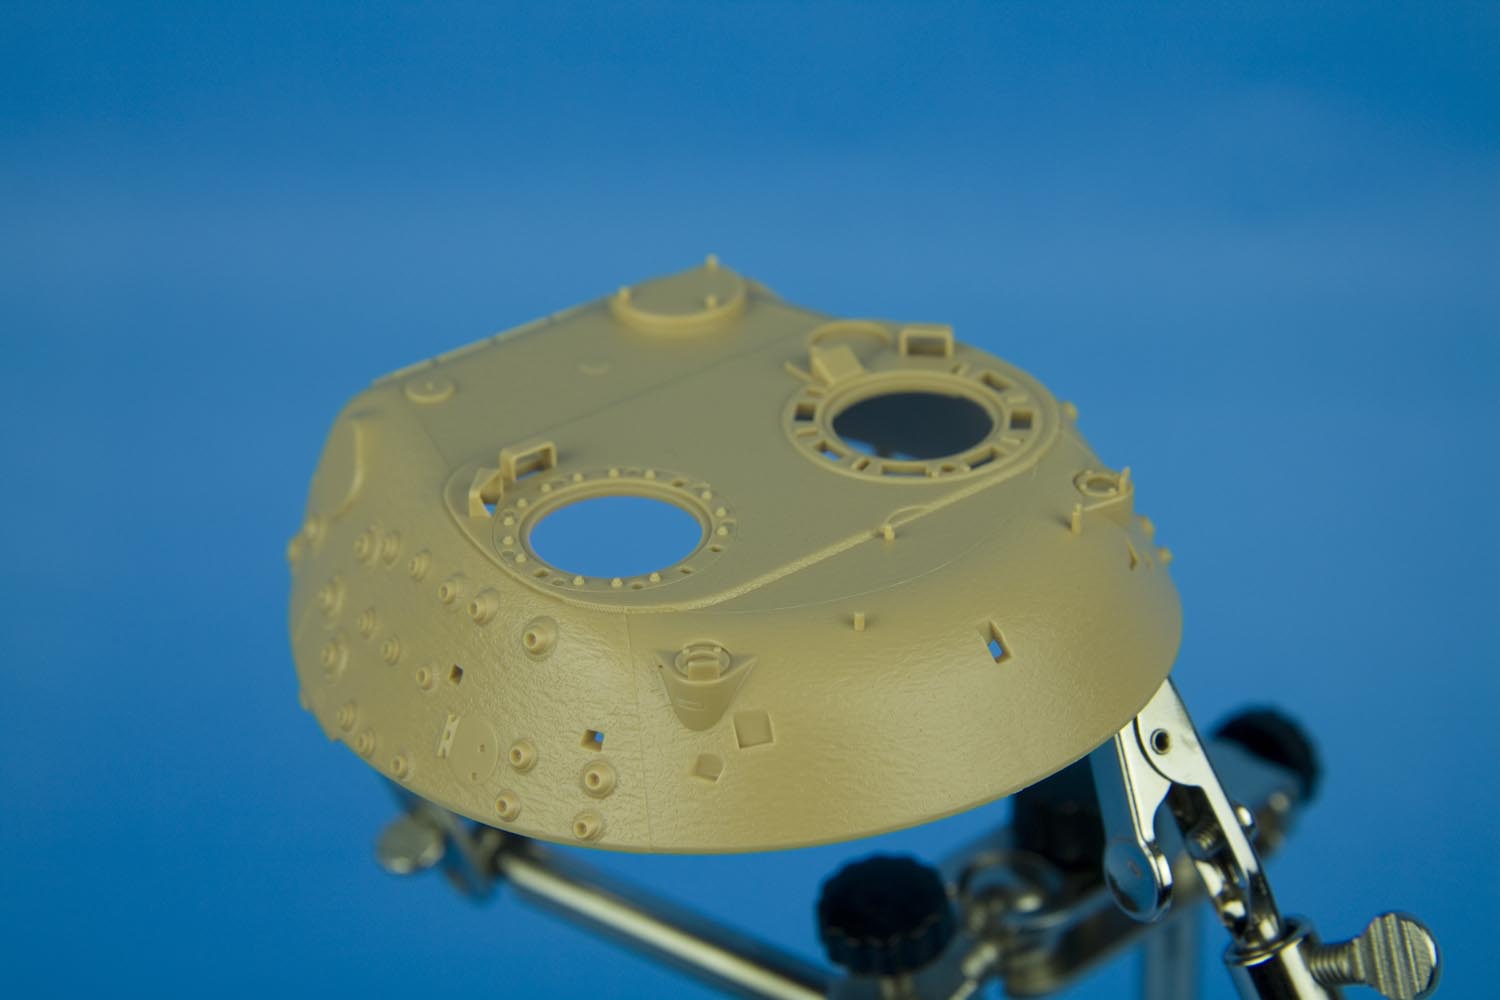


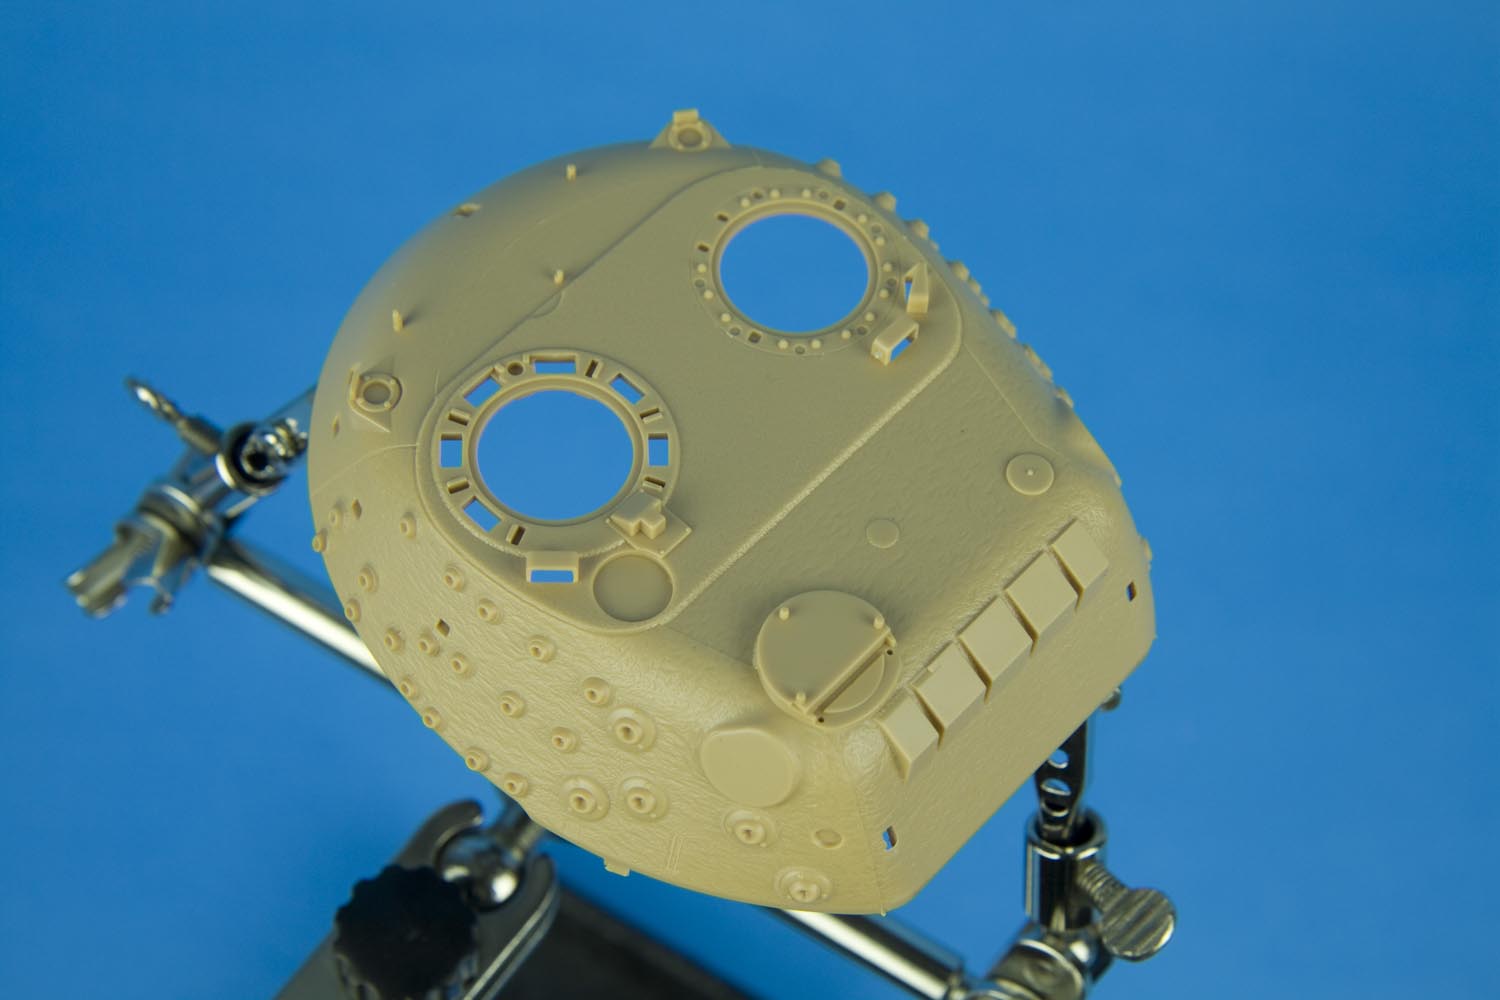
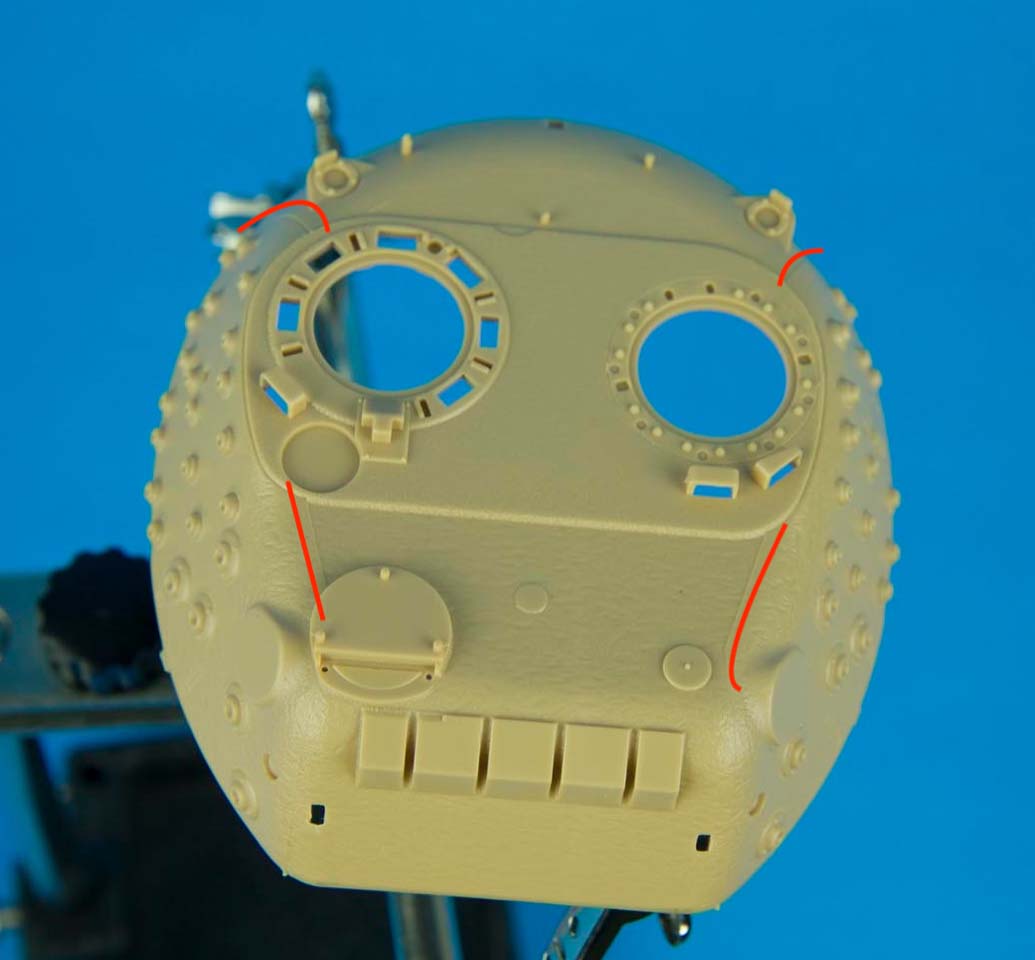
There are several very fine mold separation lines on the rear of the turret at the 4 and 8 o'clock position and around the turret top (the semi-circular arc behind the crew hatches is particularly visible). These don't exist on a real Leopard 1 turret and should be removed.
The offending mold lines are indicated in red (annotated image courtesy of Michael Shackleton)
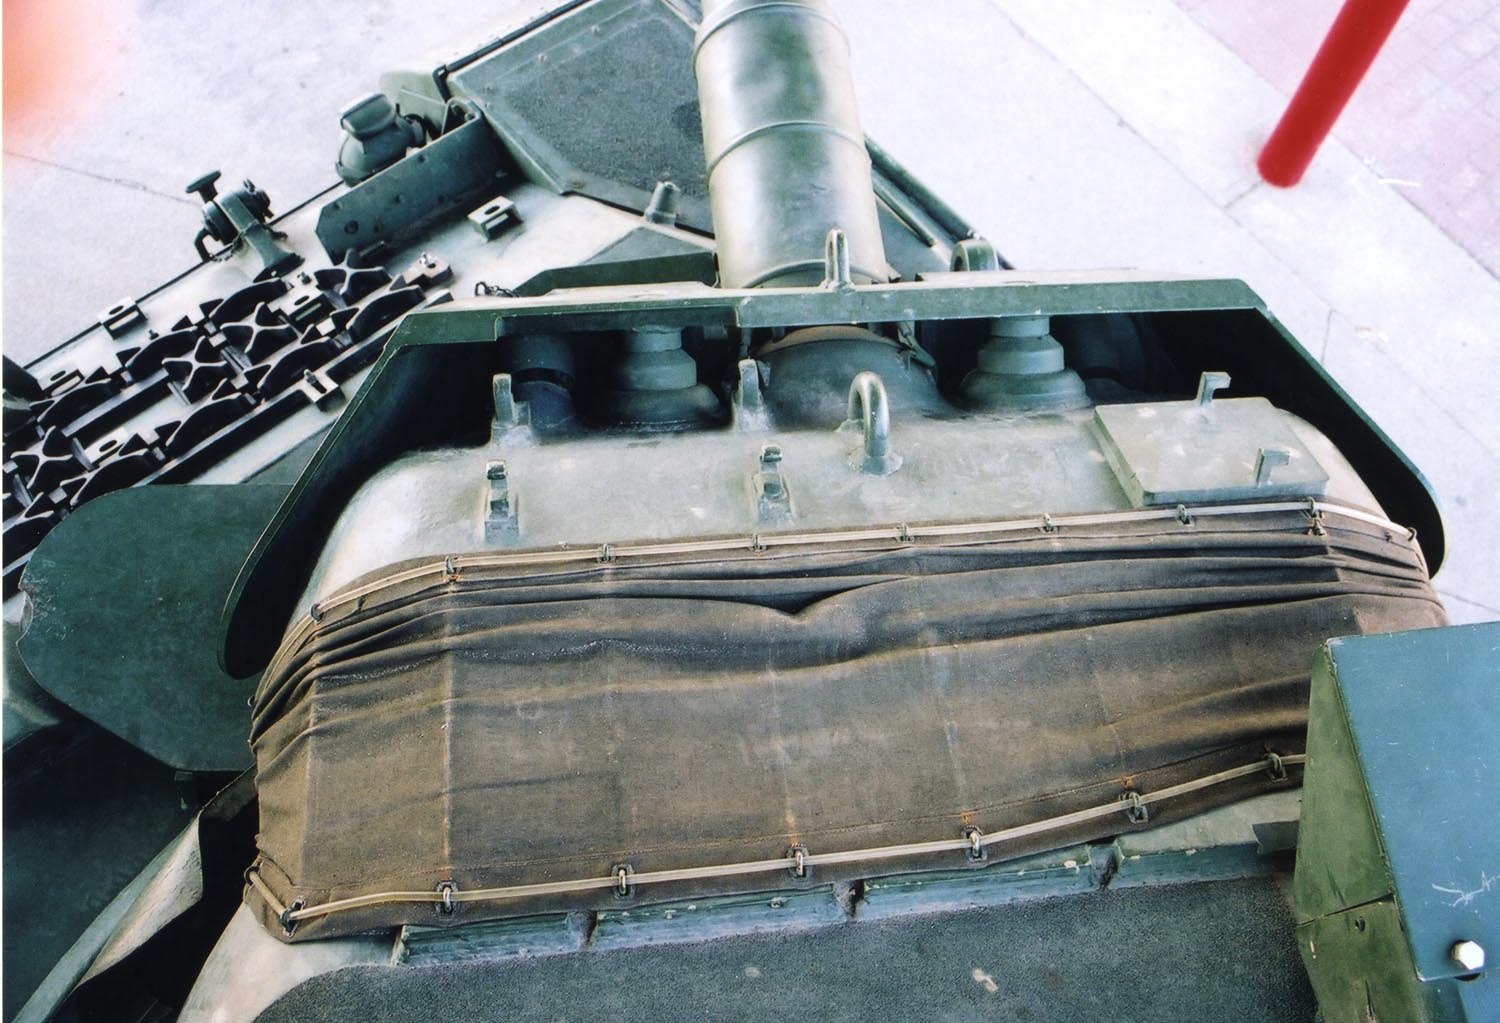
The bustle bin was very definitely created with a slide mold as it includes detail on all faces. The grab handles on the bin lids are simplified as rectangular blobs of plastic. I find it very curious that these handles were so crudely done when so many other tiny grab handles and such are included as very fine separate parts! The grab handles on the sides and rear of the bustle box are similarly simplified. The anti-skid coating on the bustle bin lids is presented not so much as a textured area but as a slight raised area. While we are used to seeing some attempt at scale texture in non-skid in model kits, I think this approach is actually more scale accurate. On the real vehicles, the non-skid texture is only apparent when the observer is about two to three meters away.
The following two photos illustrate what all those grab handles look like in 1:1 scale
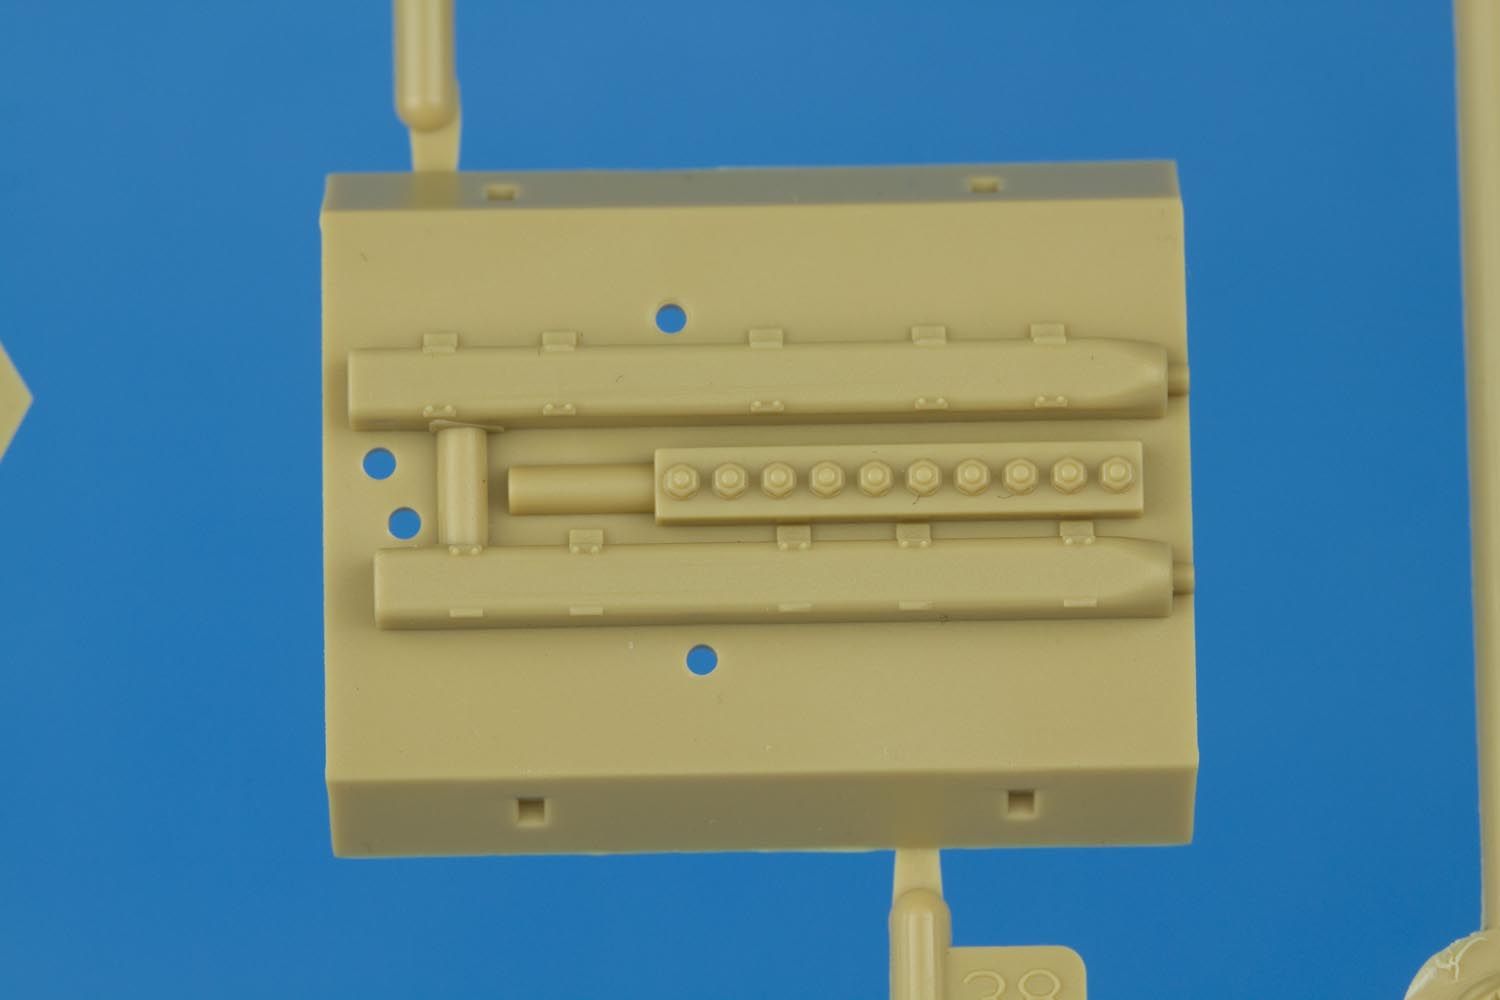
The frames for the bustle bin shelves are included as single pieces and with all of the tubing being being the proper diameter! Like many of the very small parts present in this kit much care will be needed to ensure that these fine parts are not broken when being removed from the sprue.
The POL can racks are provided in plastic. They look a little thick to me should be filed down to something closer to scale sheet metal thickness if one does not choose to replace them with after market photo etch.
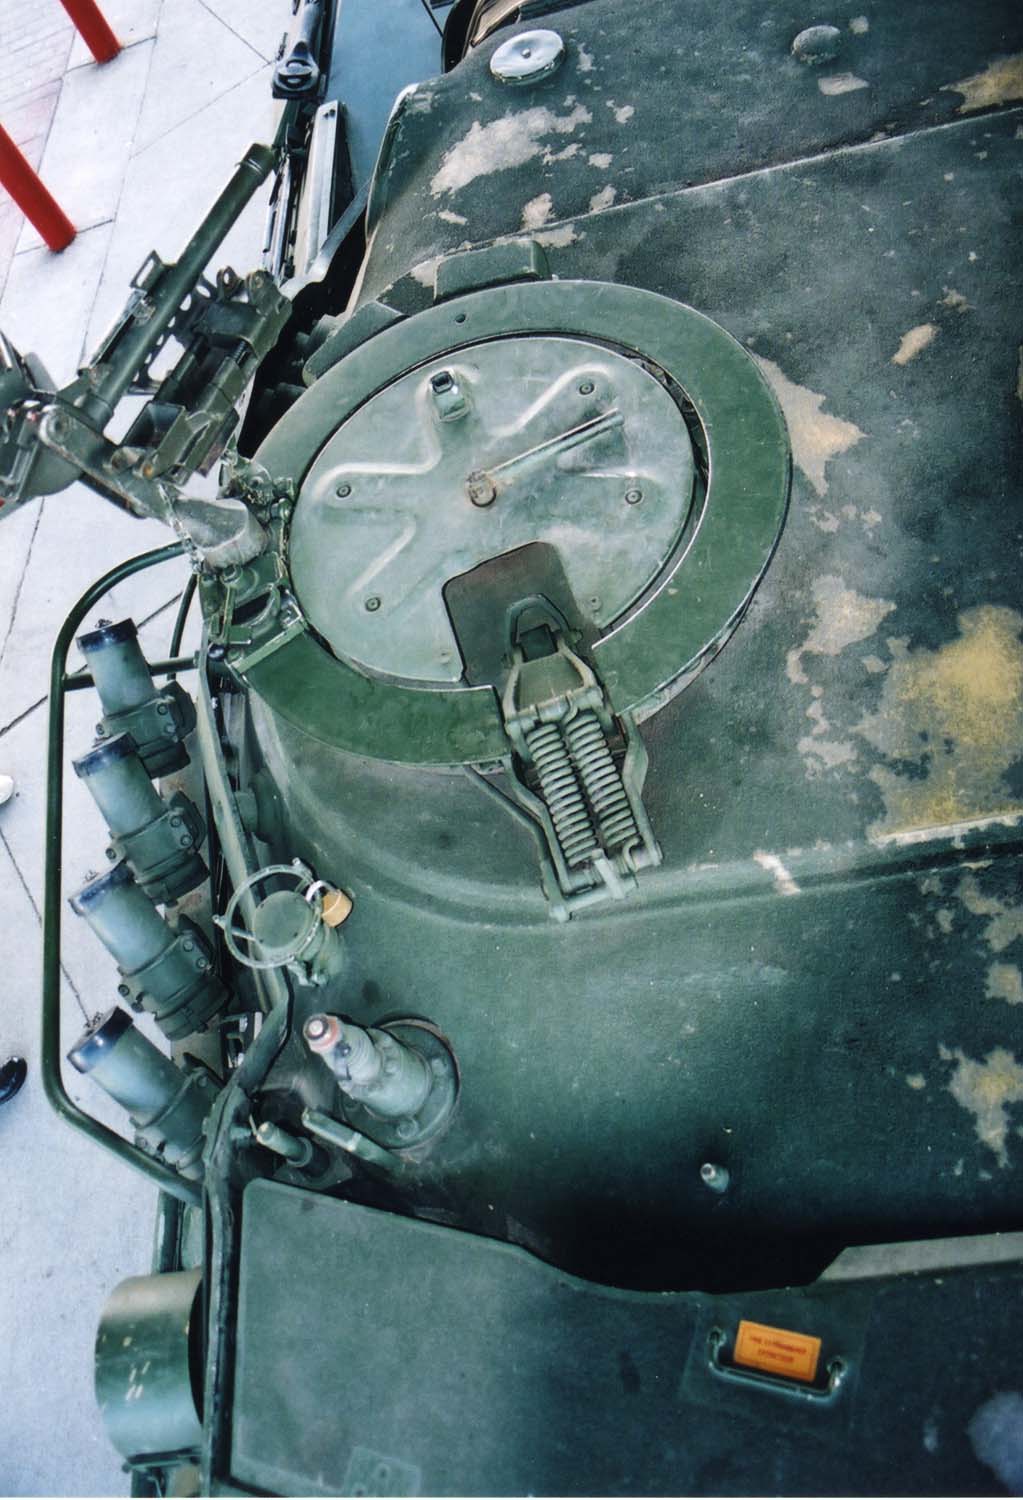
The commanders and loaders hatches are supplied as separate tops and bottoms. The bottom of the commanders hatch is flat out incorrect, being a duplicate of the top part. The hatch should have locking lugs and a closing wheel identical to that found on the loaders hatch. The loaders hatch inner face is correct with the locking lugs and the separate closing wheel being very well done. In an act of shameless promotion of Leopard Workshop products, it is worth mentioning that the LW033 - Leopard 1 Improvement Set includes two very nicely done closing wheels in addition to correct hatch tops and bottoms!

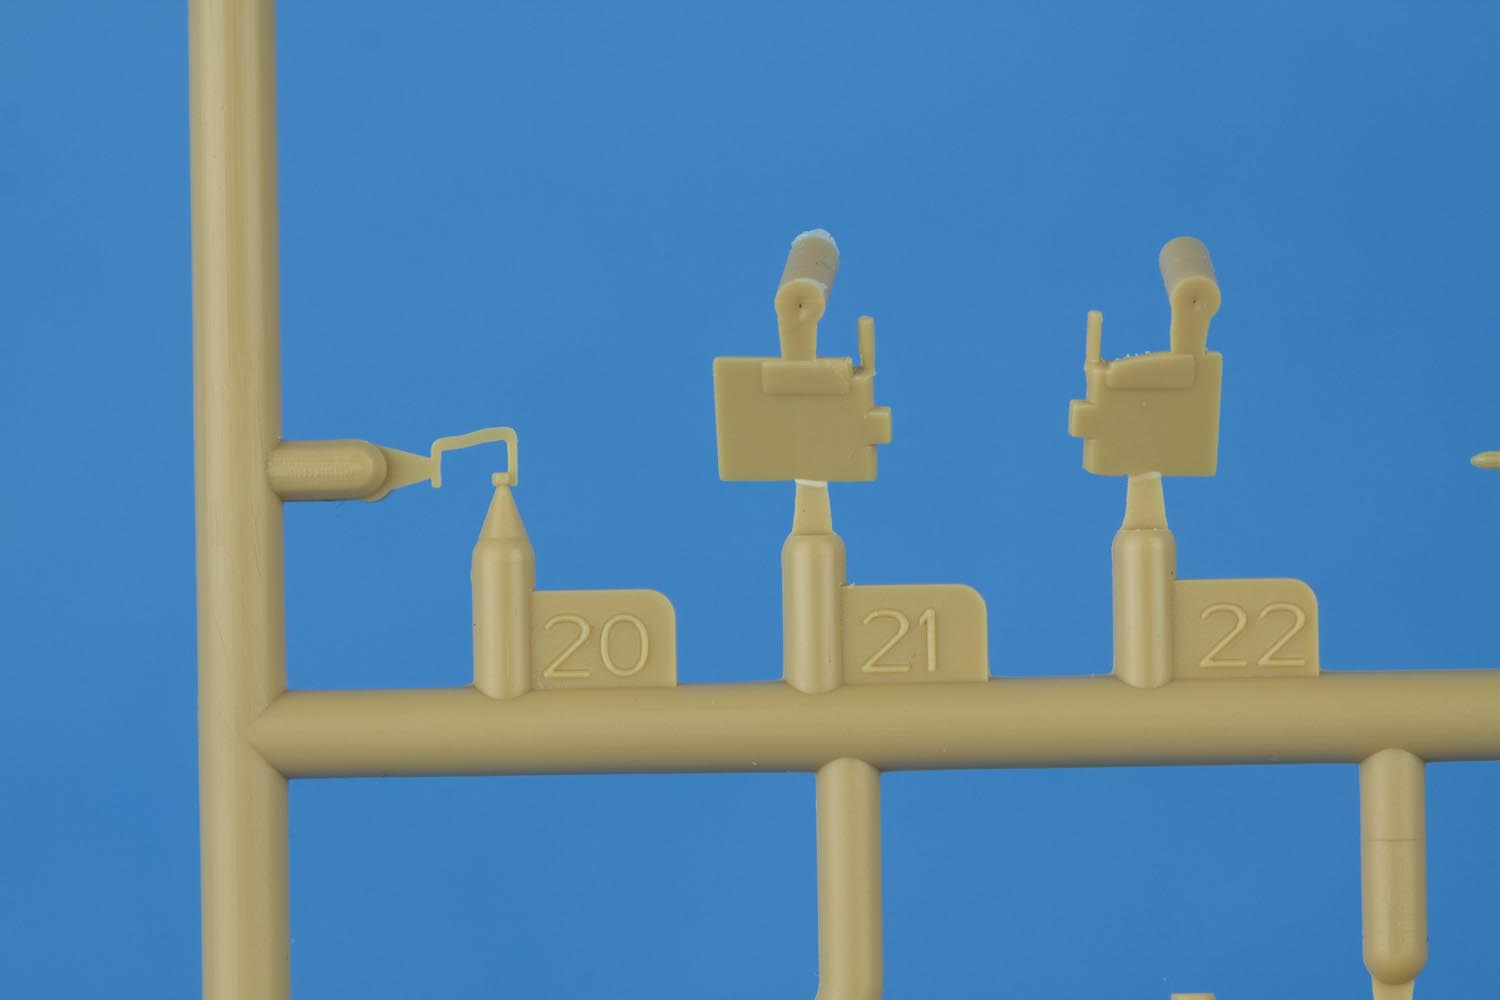
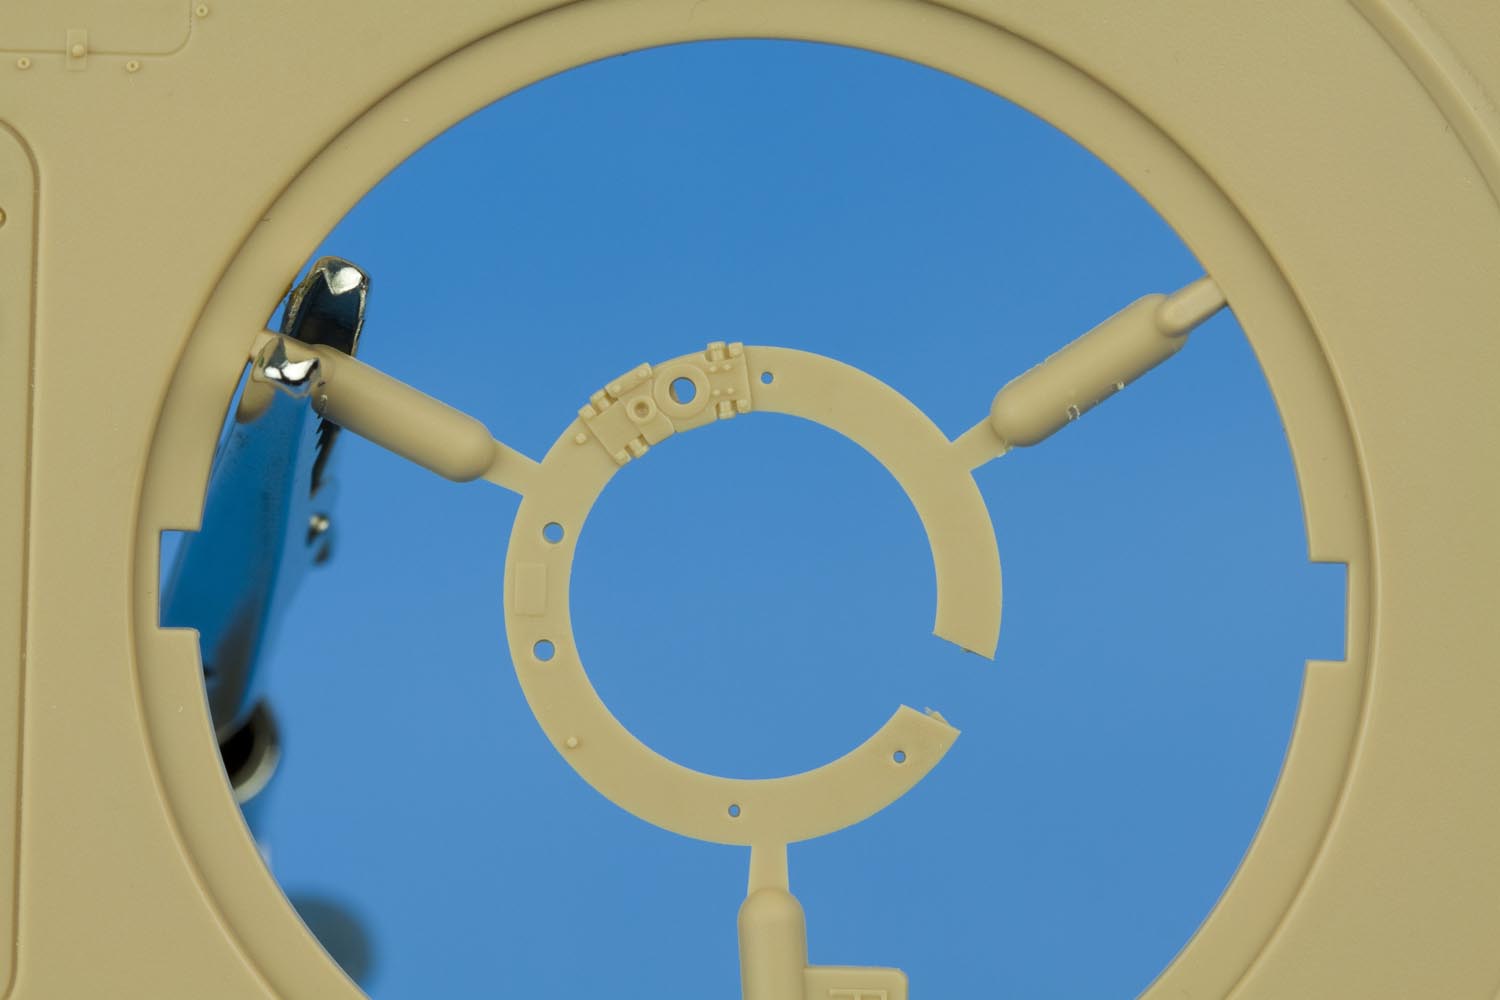
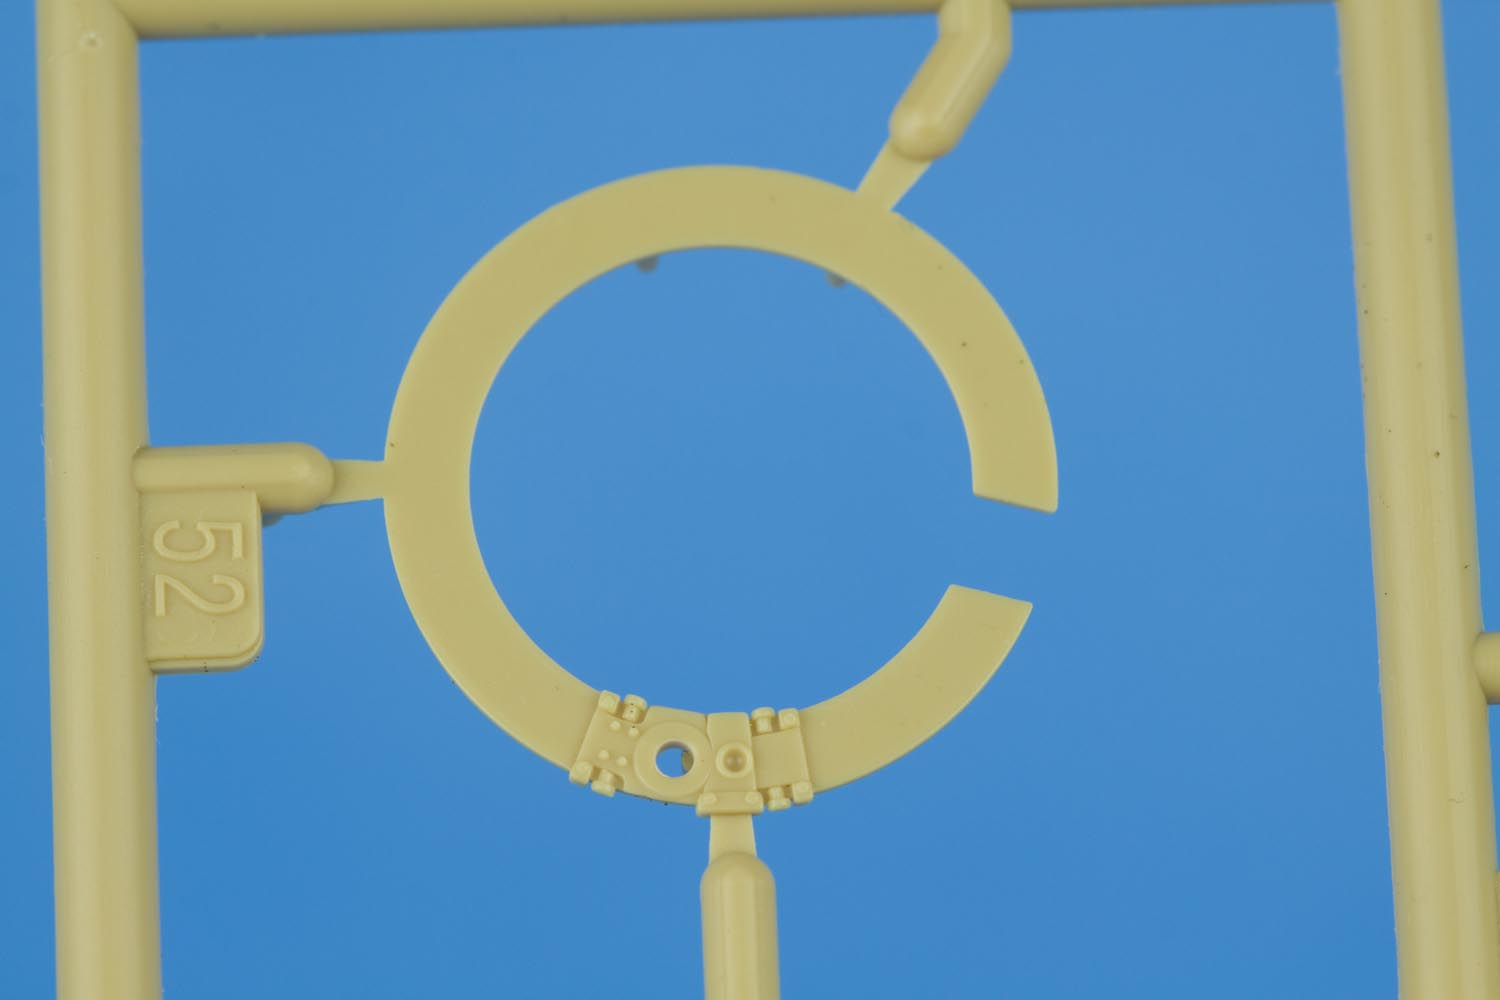
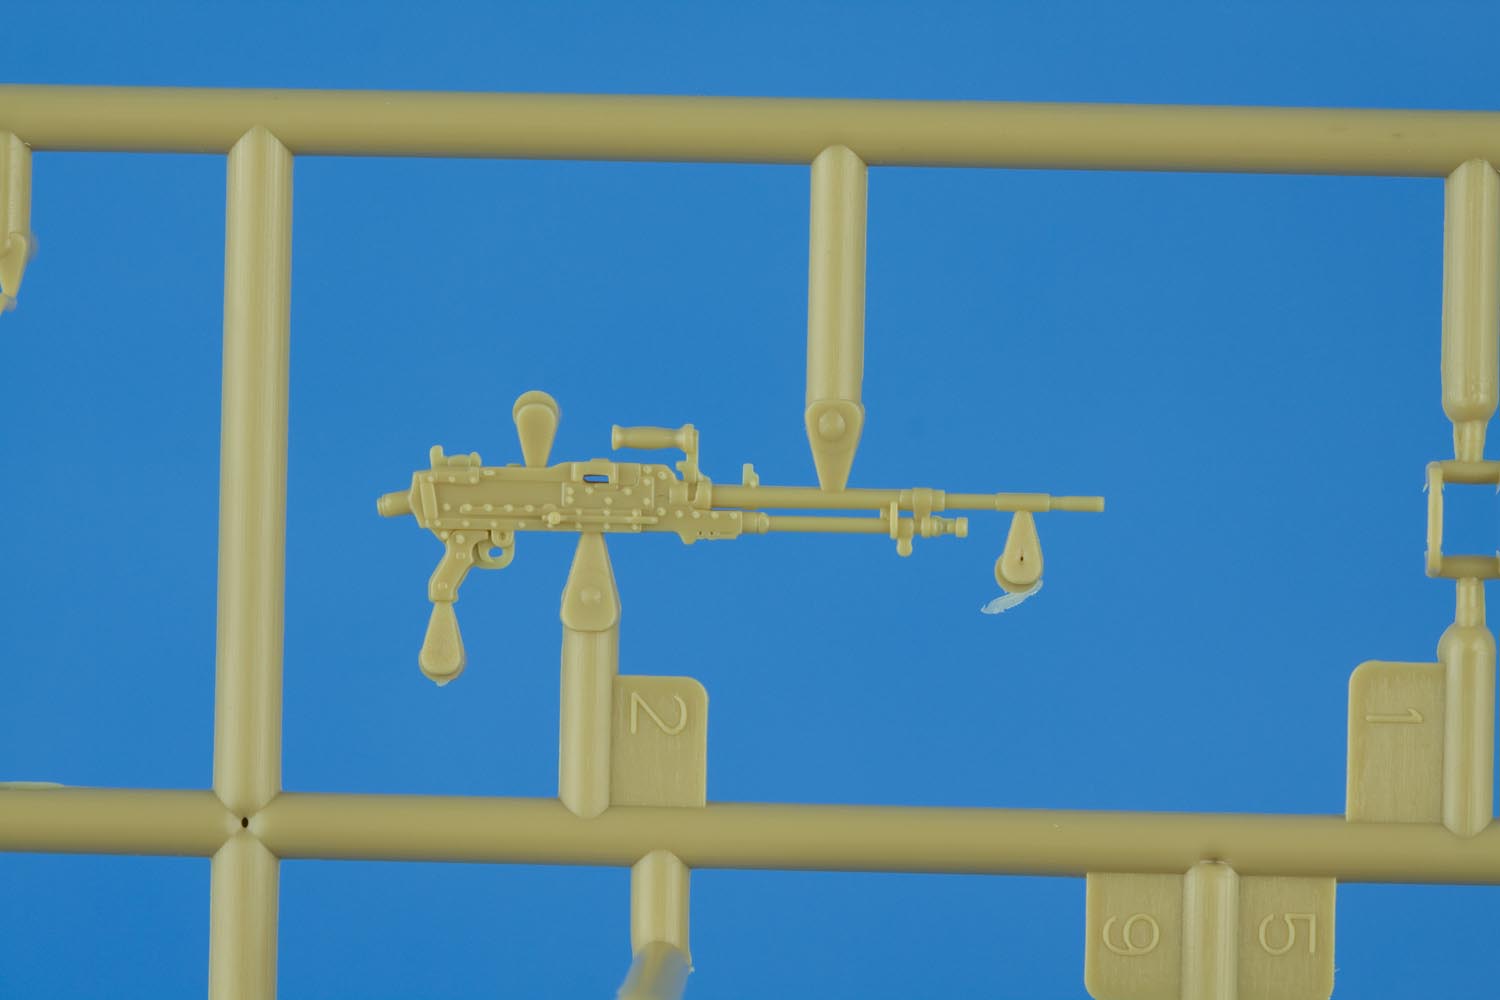
Two hatch rings are included with the MG mount base cast in place on the rings. Also included are a separate locking lever and MG travel locks in PE; I think this is another first for a main-stream Leopard 1 kit.
The C6 mount has received a fair bit of attention by the kit designers as it consists of 5 plastic parts and two PE parts (one for the box lid and one for the travel lock). This is normally simplified and crude by comparison in other Leopard 1 kits. It is fantastic to see this very visible assembly being given some attention for a change!
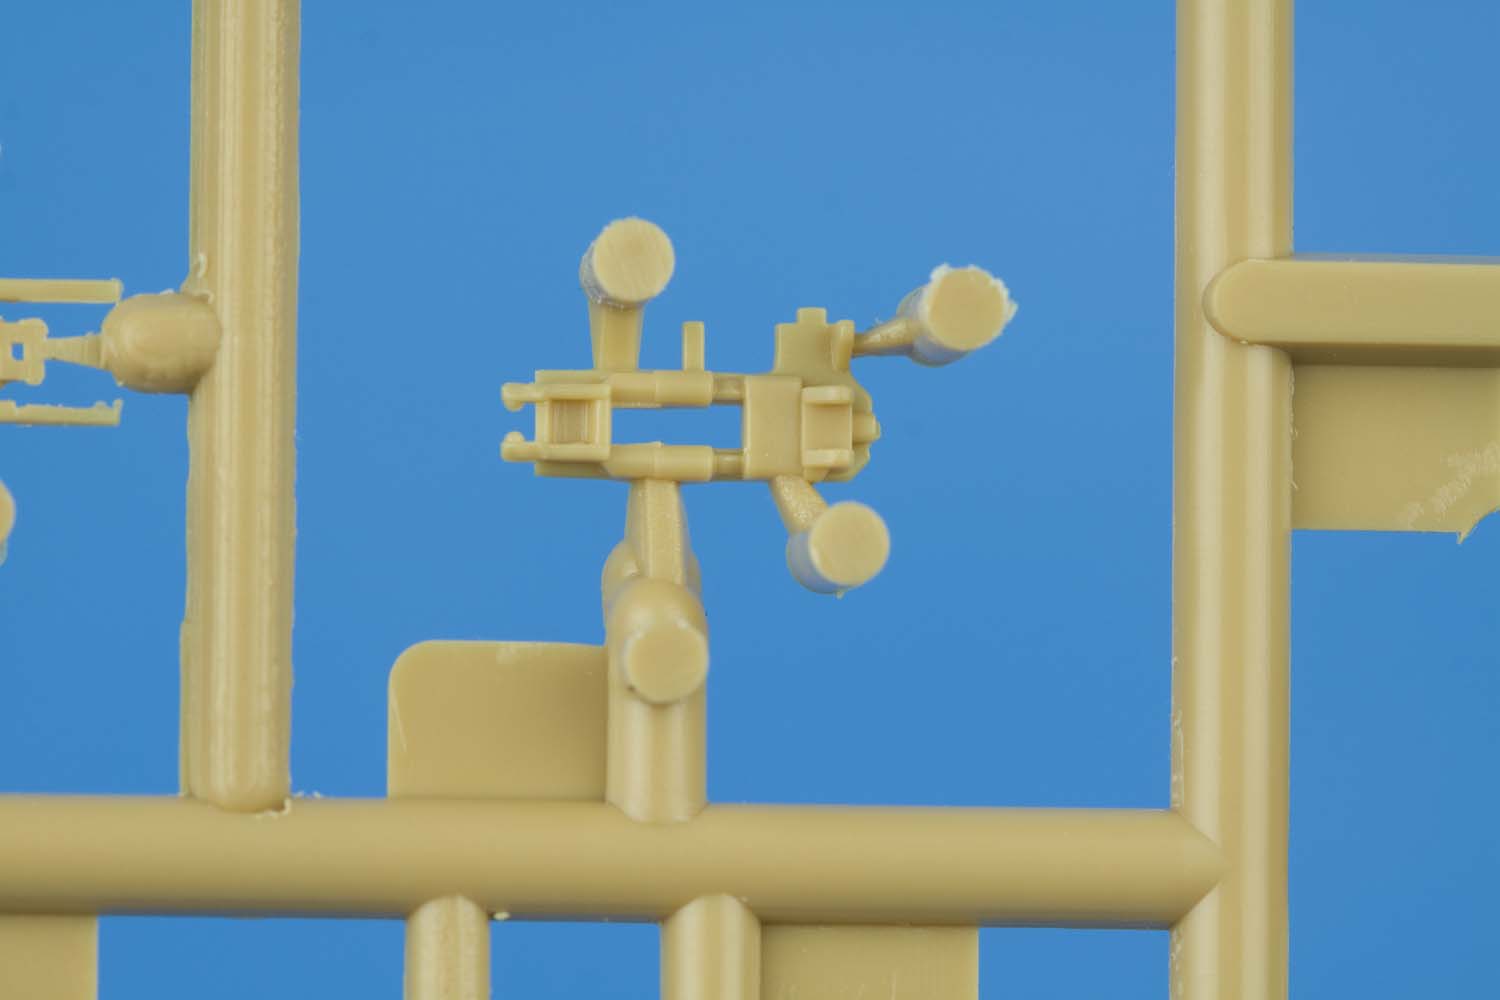
One thing that jumps out in the image above is that the row of 5 holes in the MG mount are not aligned nor are they consistently sized. The image below illustrates the hole alignment and sizing on a real C6 mount.
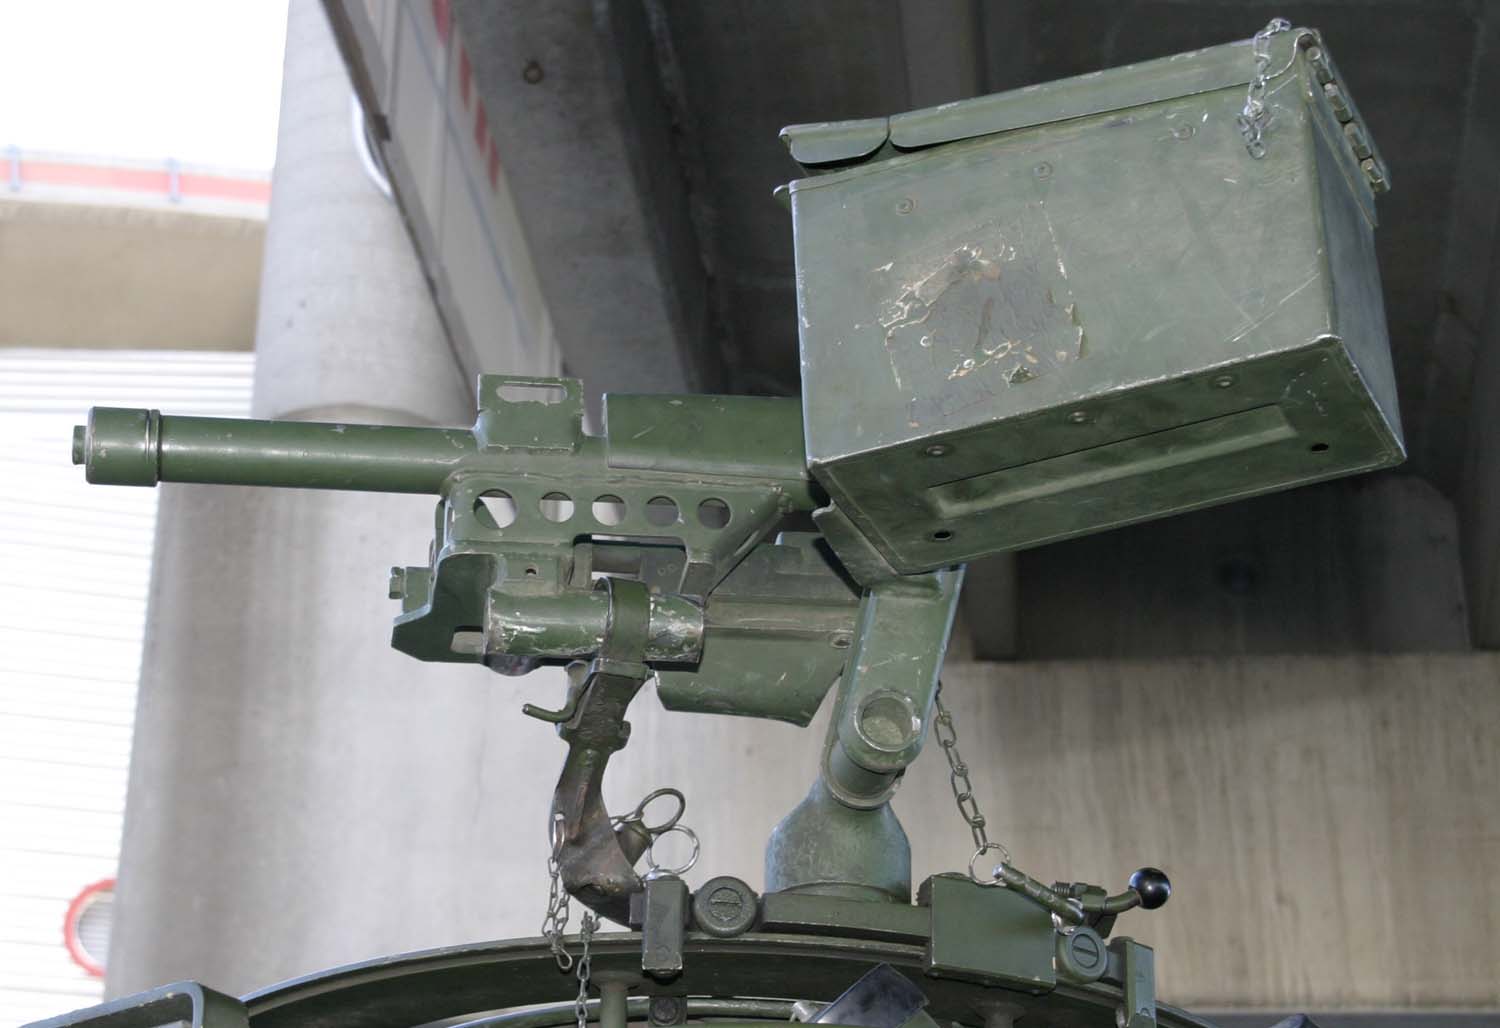
The kit MG ammo box bracket depicts the standard KMW type and is designed to hold a NATO 200 round 7.62x51 ammo tin. All C2 MEXAS in Afghanistan had the KMW ammo tin bracket replaced with a modified .50 cal ammo can; this modification had been standard for some time on C2s stationed at CFB Edmonton with the LdSH (RC).

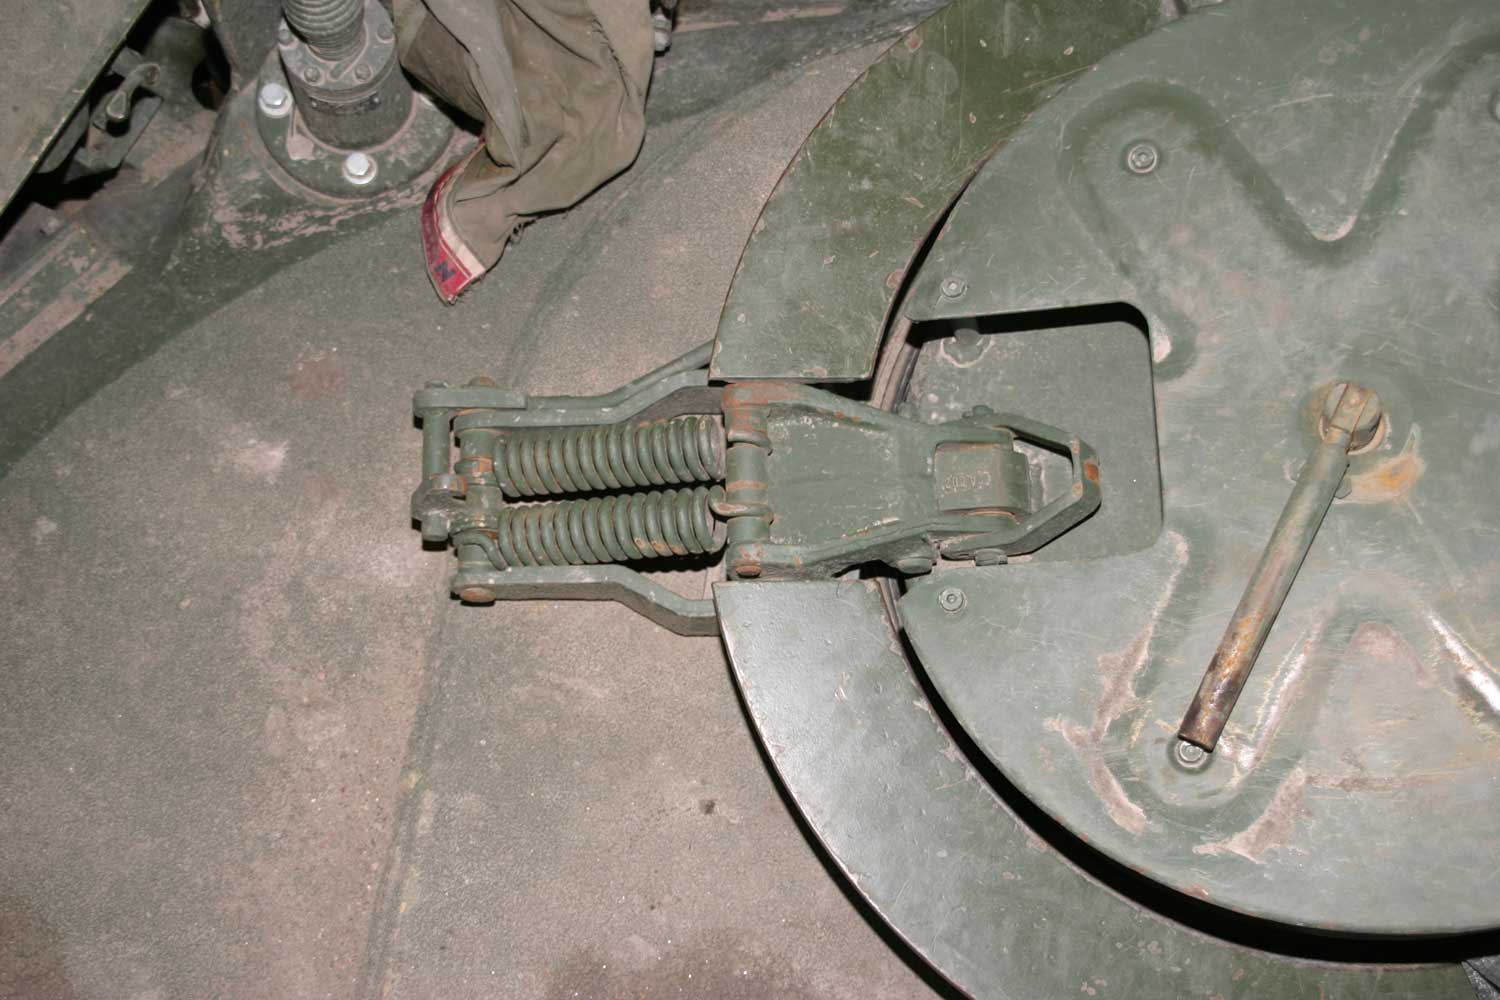
The loaders hatch spring and hinge assembly is very nicely done, sort of. The spring part is present but the hinge bracket is not. This will be glaringly obvious if the hatch is depicted closed. The Leopard Workshop Leopard 1 Improvement Set includes a complete hinge and spring assembly which could be used to rectify this omission. Unfortunately, there is nothing provided for the hatch to be displayed in an open state either! In this case, LW033 would once again provide the proper parts (although I have not tested LW033 parts for fit with this kit).
This is what the kit gives you (part number C-8):
The real loaders hatch hinge - take note of what the kit missed
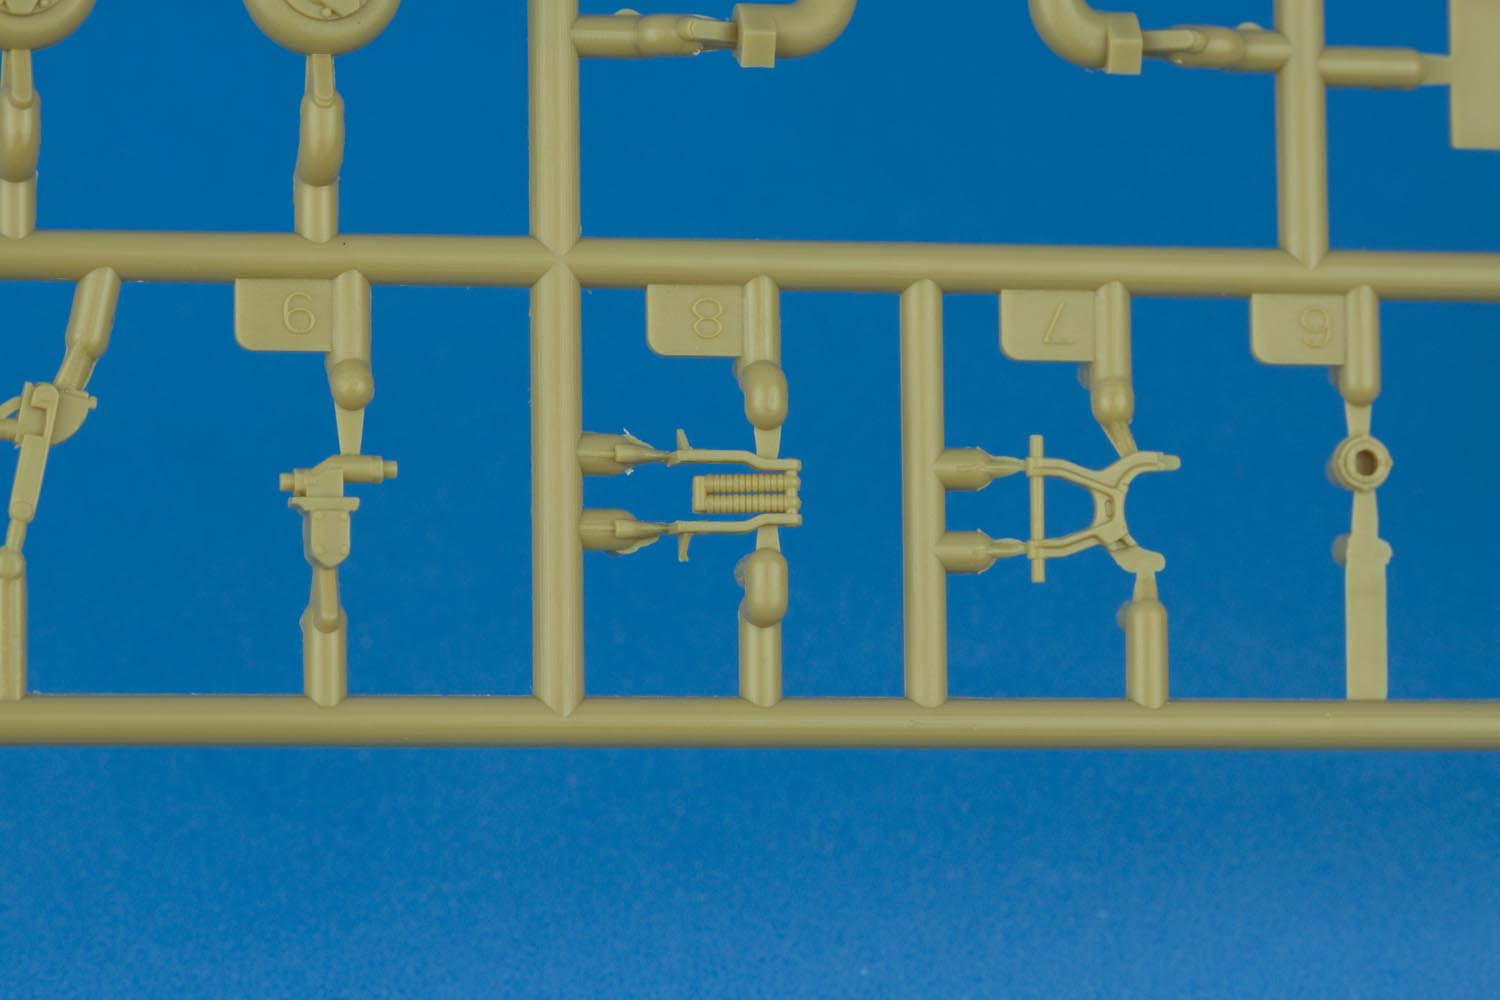
The kit provides a total of 3 C6 GPMGs; 2 infantry type (with stock) and 1 AA mount (with spade grips). The detail on the C6s is simply stunning; these are without a doubt the nicest renderings of the C6/MAG-58 I have laid hands on in 1:35. The barrel change handle and bipod legs are separate parts and also very nicely detailed. In fact, the barrel change handle is the first correct representation I've seen in plastic. I'm not sure why there are two of the infantry type C6s but this is not a bad thing as one of those beautifully detailed pieces will find its way to another Canadian Leopard build!
C6 infantry type - two are included
C6 AA type (with spade grips)

The AA C6 includes separate pieces for the spade grips and butterfly trigger but is lacking the trigger linkage assembly found on the left rear of the receiver. Below is an image of an M240 with the spade grip assembly; the spade grip and trigger linkage housing are visually identical to that used on the C6.
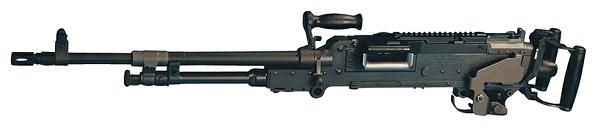
Image sourced from ModernFirearms.net
The ECM unit is split in two halves with three PE parts for the battery tray. All other C2 MEXAS kits provided the IBD fairing which fit between the last rear-most MEXAS module and the bustle bin, thus requiring a scratch built or after market part. Not so with this kit as the correct field manufactured bracket is included with the cable reel and barrel brush can in the correct locations (according to the reference photos I have access to).
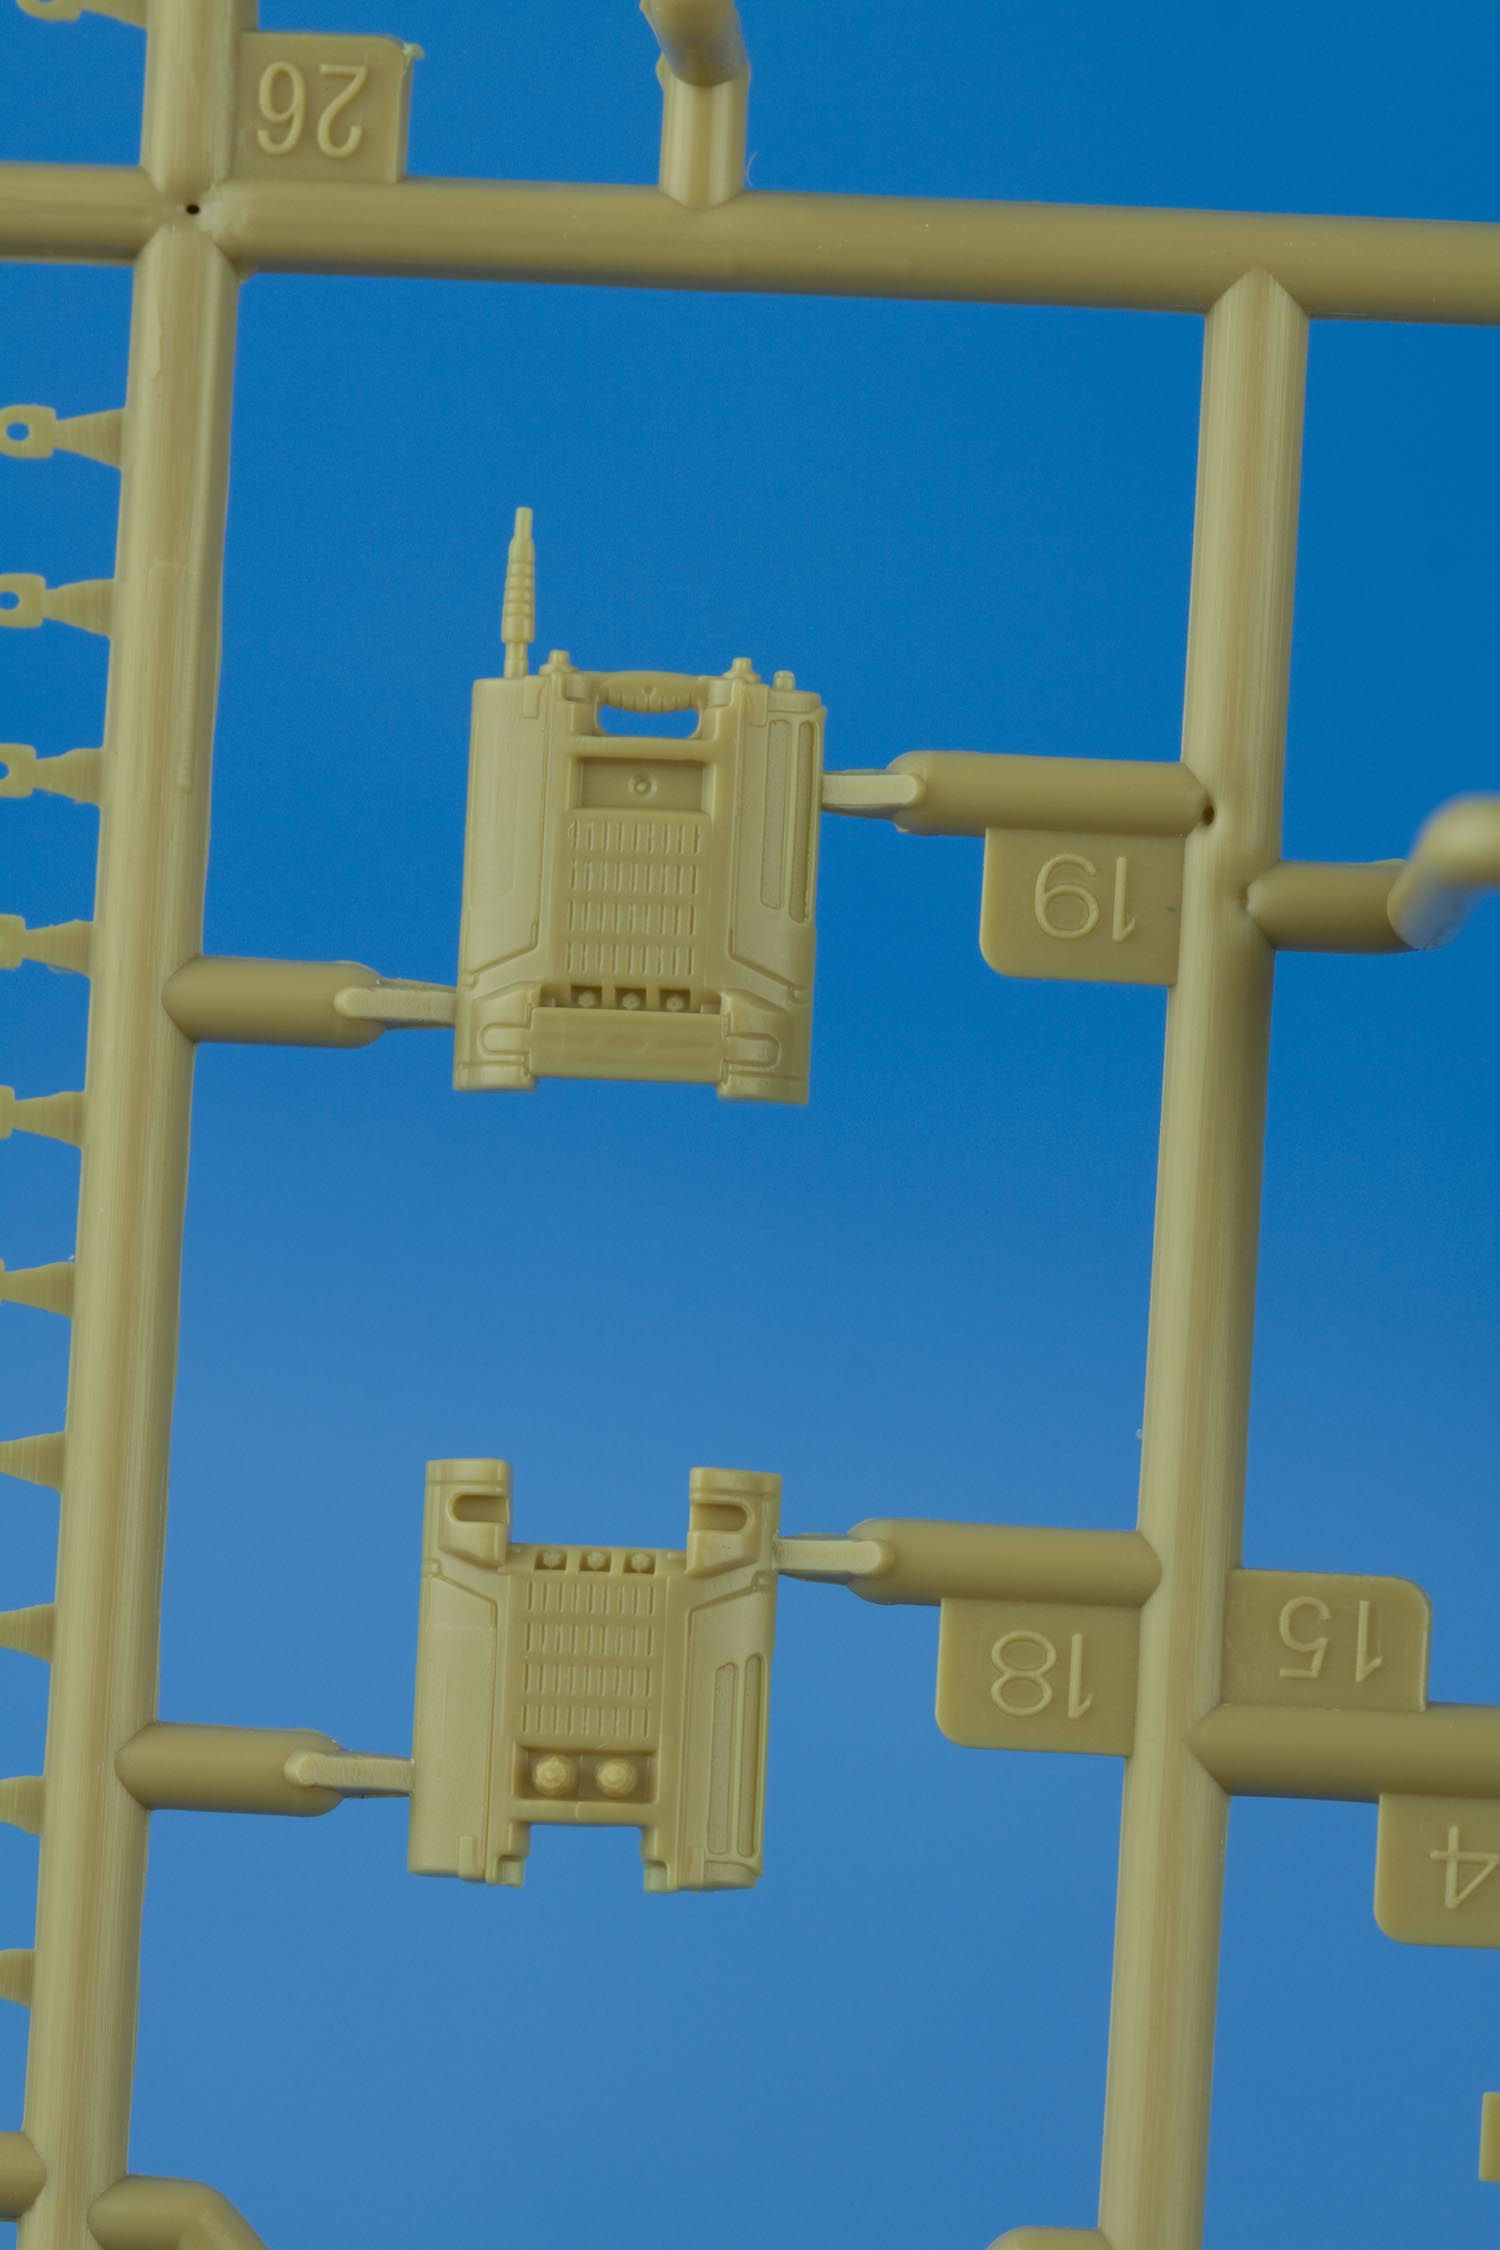
The turret MEXAS mounts are included and compare favorably to reference photos.

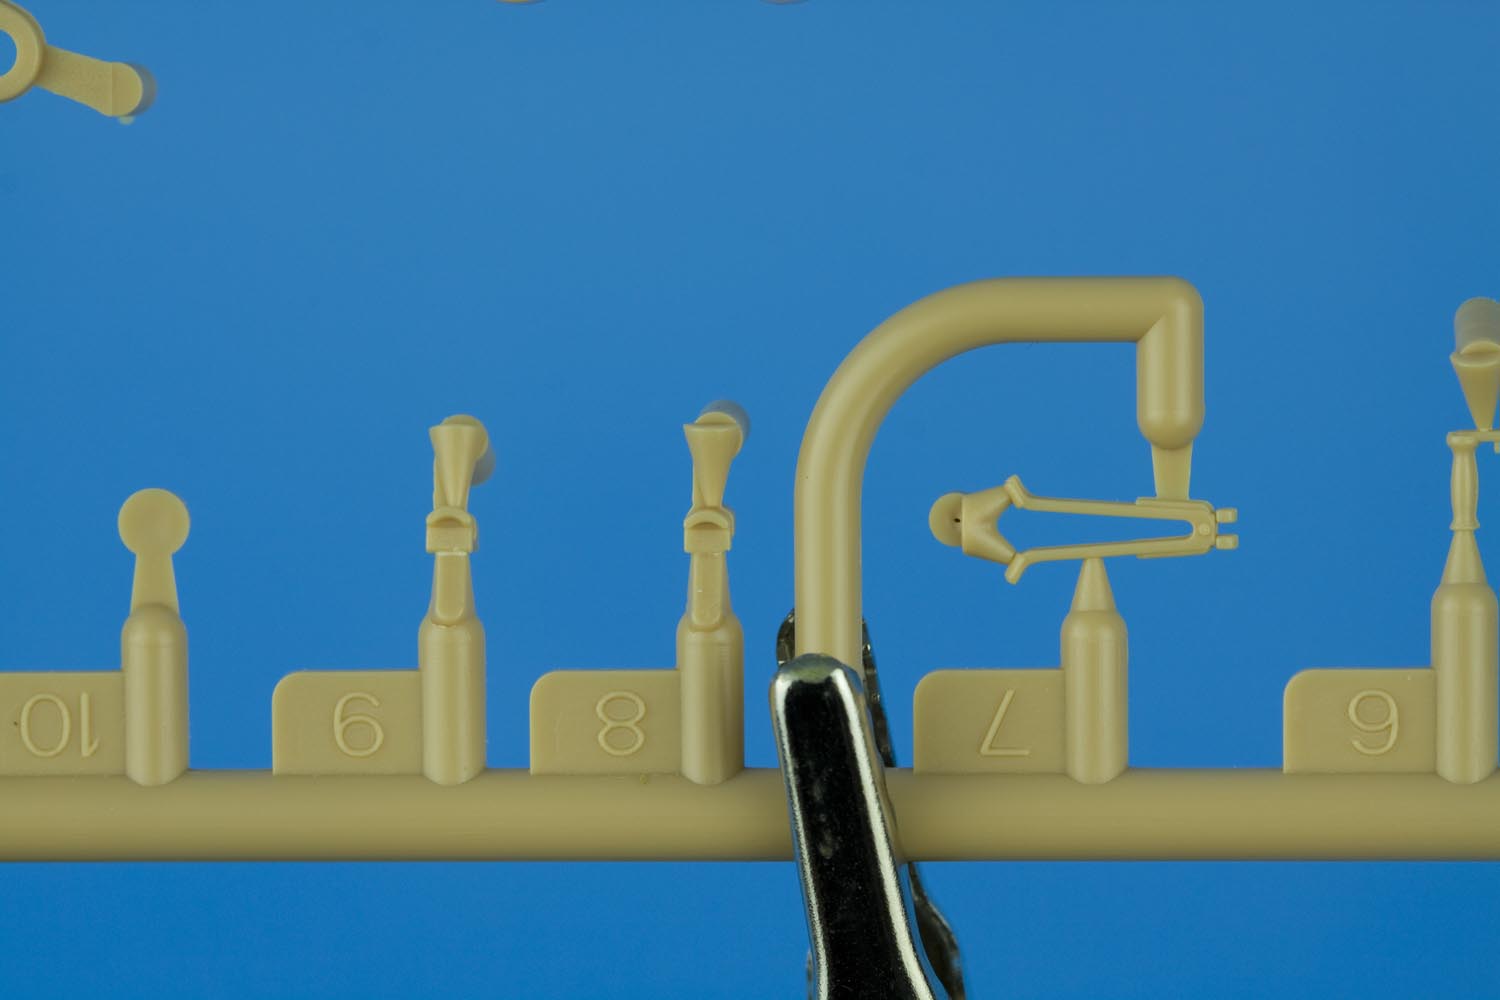
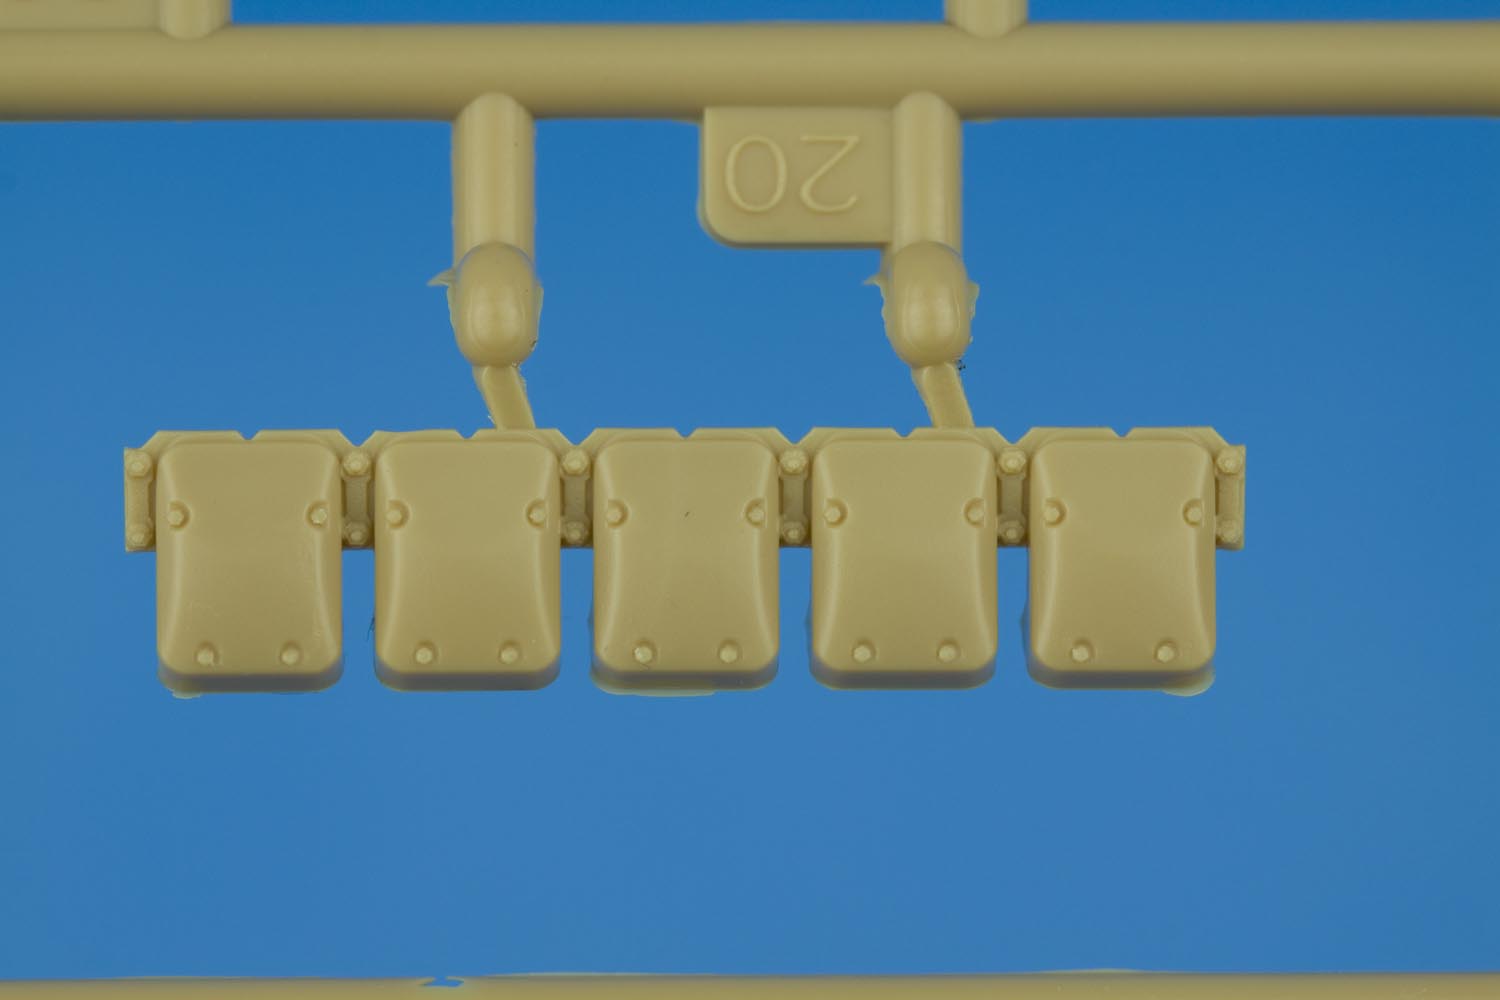
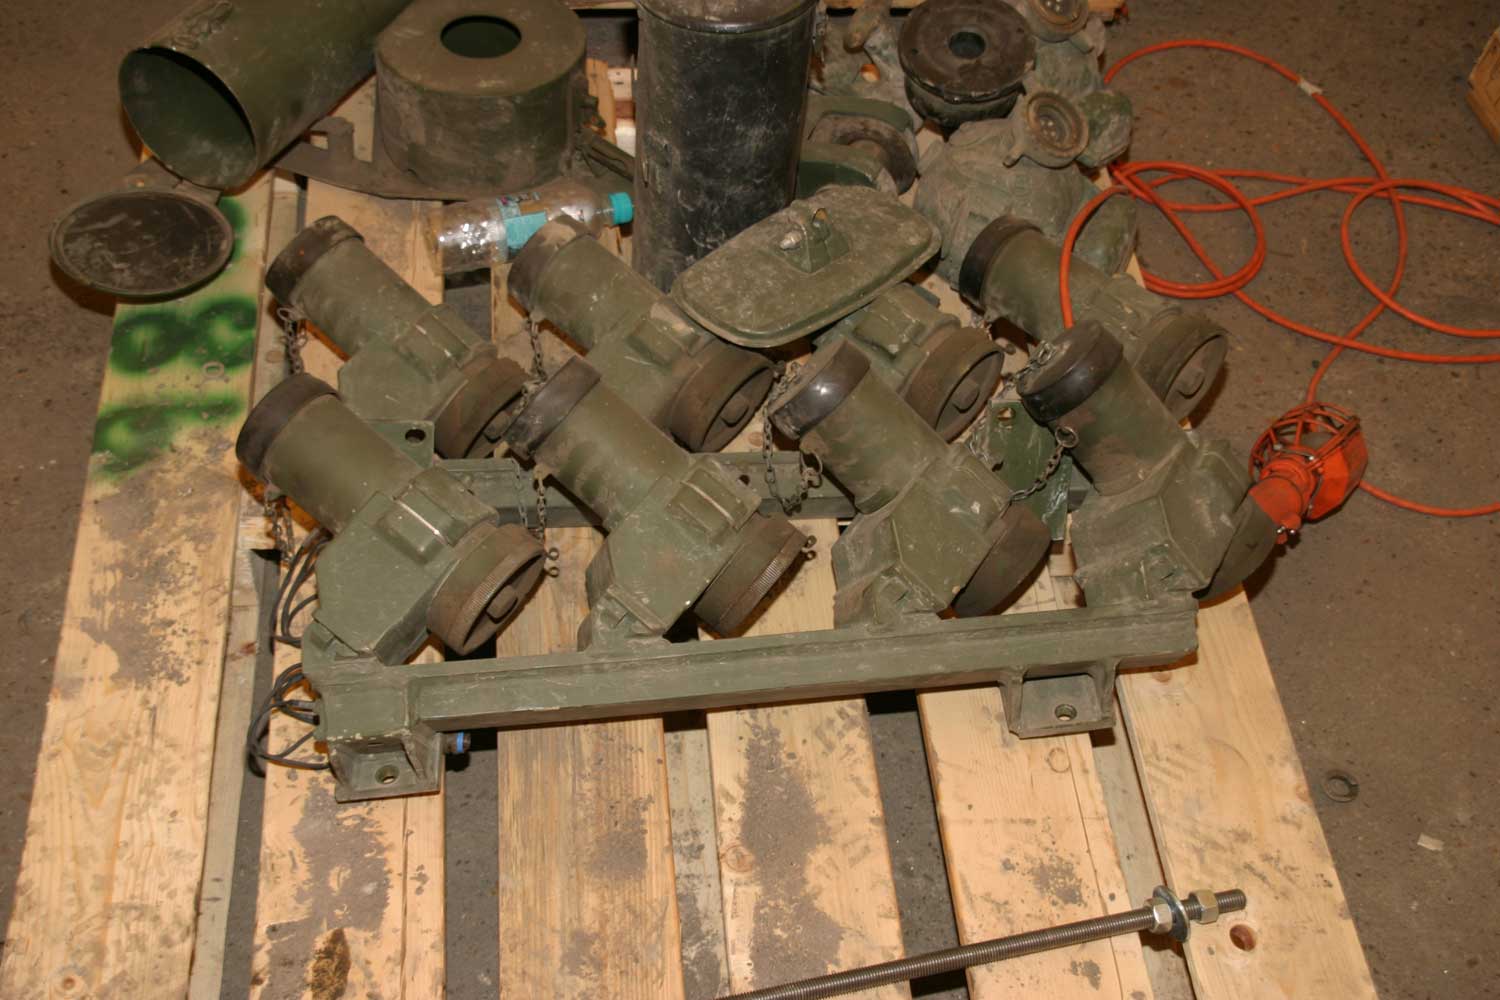
The kit includes a total of 16 smoke dischargers; four on each of the F sprues and four on each of the E sprues. The back of the smoke discharger mounts will need to be filled because they feature rectangular holes are not present on the real thing. The kit does not include the cap retaining chains; these will have to be sourced from the Leopard Workshop set LW026 or one of the many Leopard 1 photo etch sets available.

Real C2 smoke dischargers
The smoke discharger brush guard rails are incredibly delicate parts providing yet another example of the exemplary casting quality in this kit. The guards are less than 1 mm thick and are definitely not chunky over-scaled compromises as seems to be the case with other kits.
Despite the fact that the normal 1A5/C2 mantlet armour will not be used with this kit, the weld bead detail is stunning. I just had to include a photo as it looks so damned good!
While I'm at it I should mention the standard 1A5/C2 applique armour included in this kit which is also not used on a C2 MEXAS. I presume these nicely detailed parts will be used on the C2 Hobby Boss have announced.
The kit mantlet dust cover depicts the KMW type. It is nicely shaped but the fixing cable and eyelets are a little soft and undersized in my opinion. Leopard C2s in Afghanistan mostly used a Canadian manufactured replacement dust cover but reference photos do exist showing the KMW cover in use.
The KMW mantlet dust cover
The Canadian Forces replacement dust cover
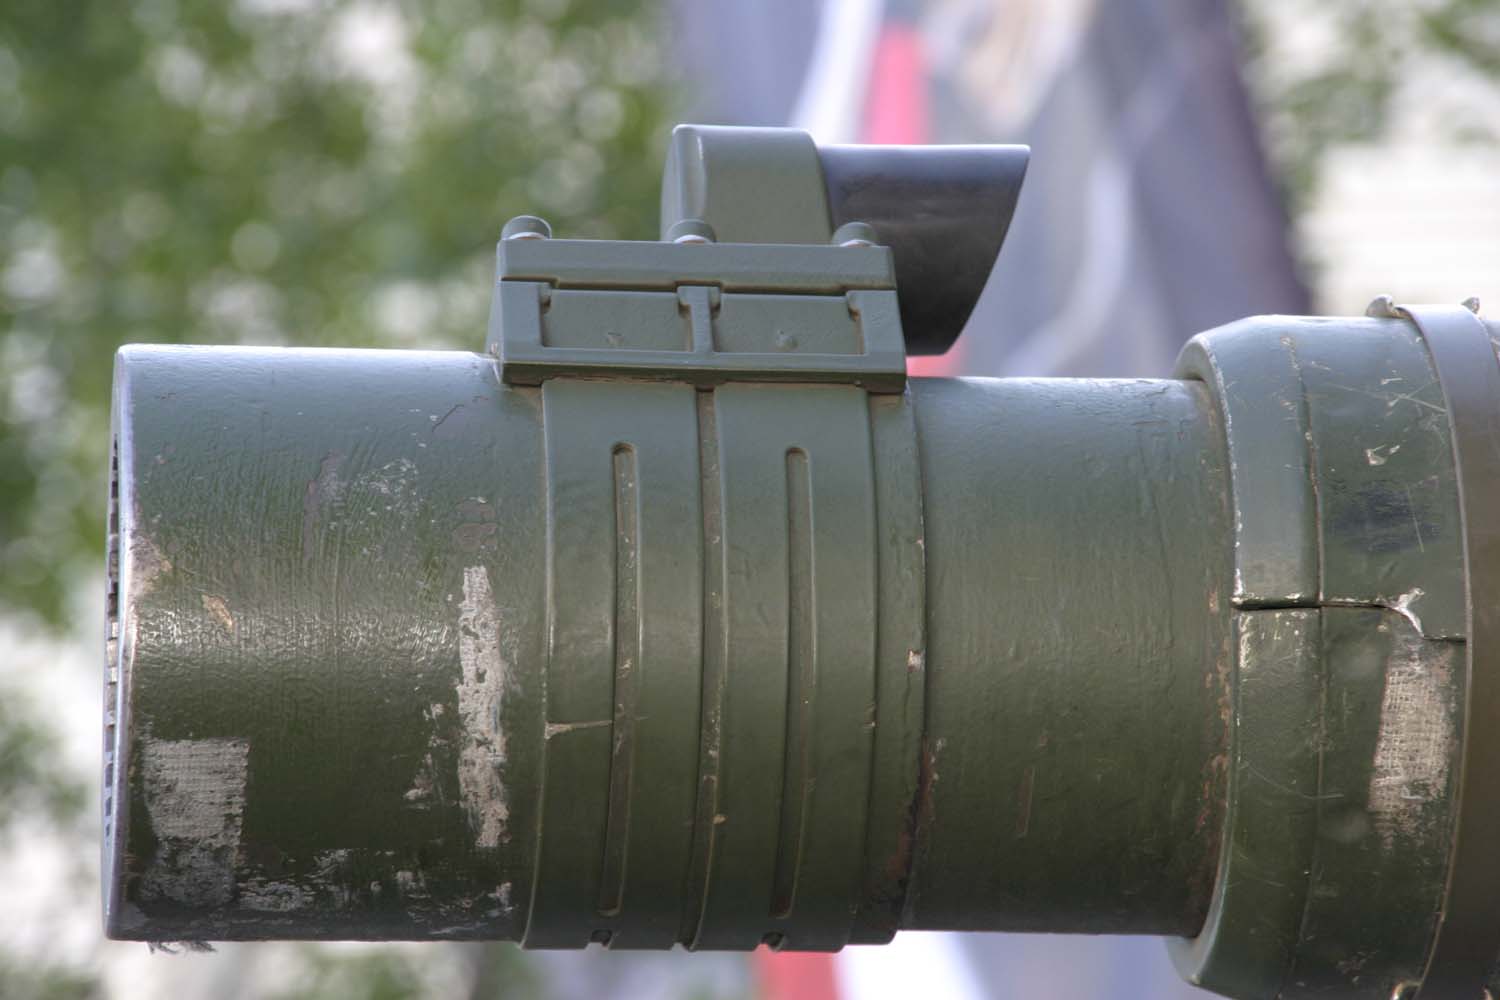
The mantlet MEXAS module is crisply molded with plenty of fine rivet detail. The stepped corner welds are nicely captured.
The lifting eyes mounted on the mantlet MEXAS module are included as very nicely detailed separate parts. Three are needed for the kit but a total of five are provided.

The turret side MEXAS modules are provided as single piece assemblies with the step plates provided as photo etch parts. The distinct anti-skid coating on the step plates will need to be added but the parts will be much close to scale thickness and will probably look fantastic when assembled.
A really nice touch that will go unnoticed by most is the inclusion of bolt detail on the underside of the turret side MEXAS modules.
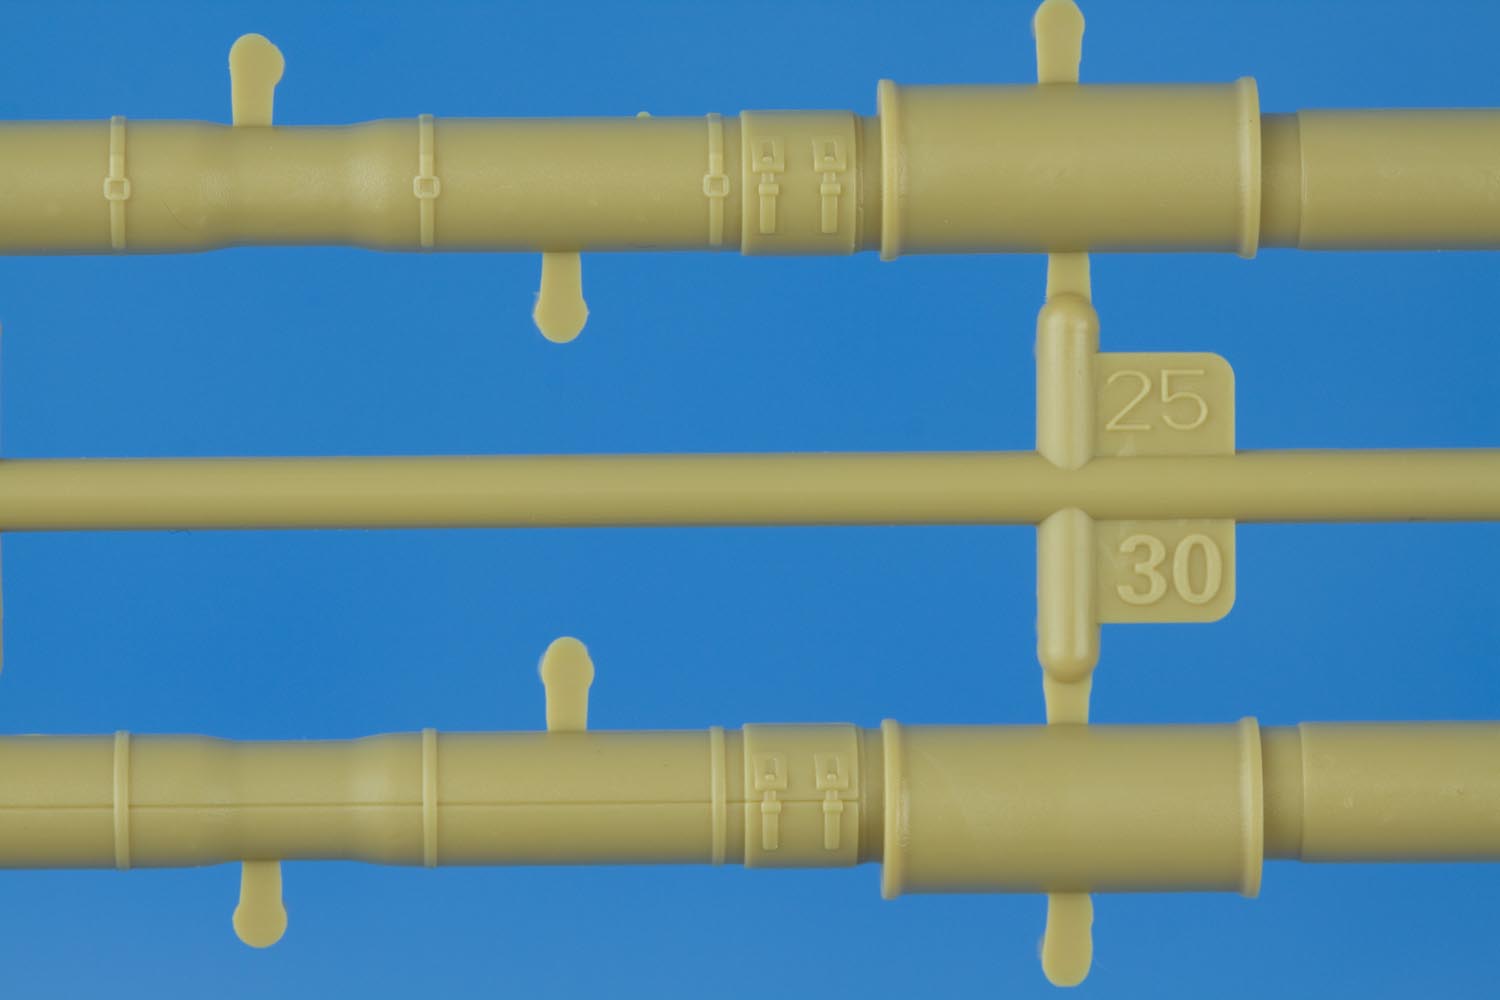
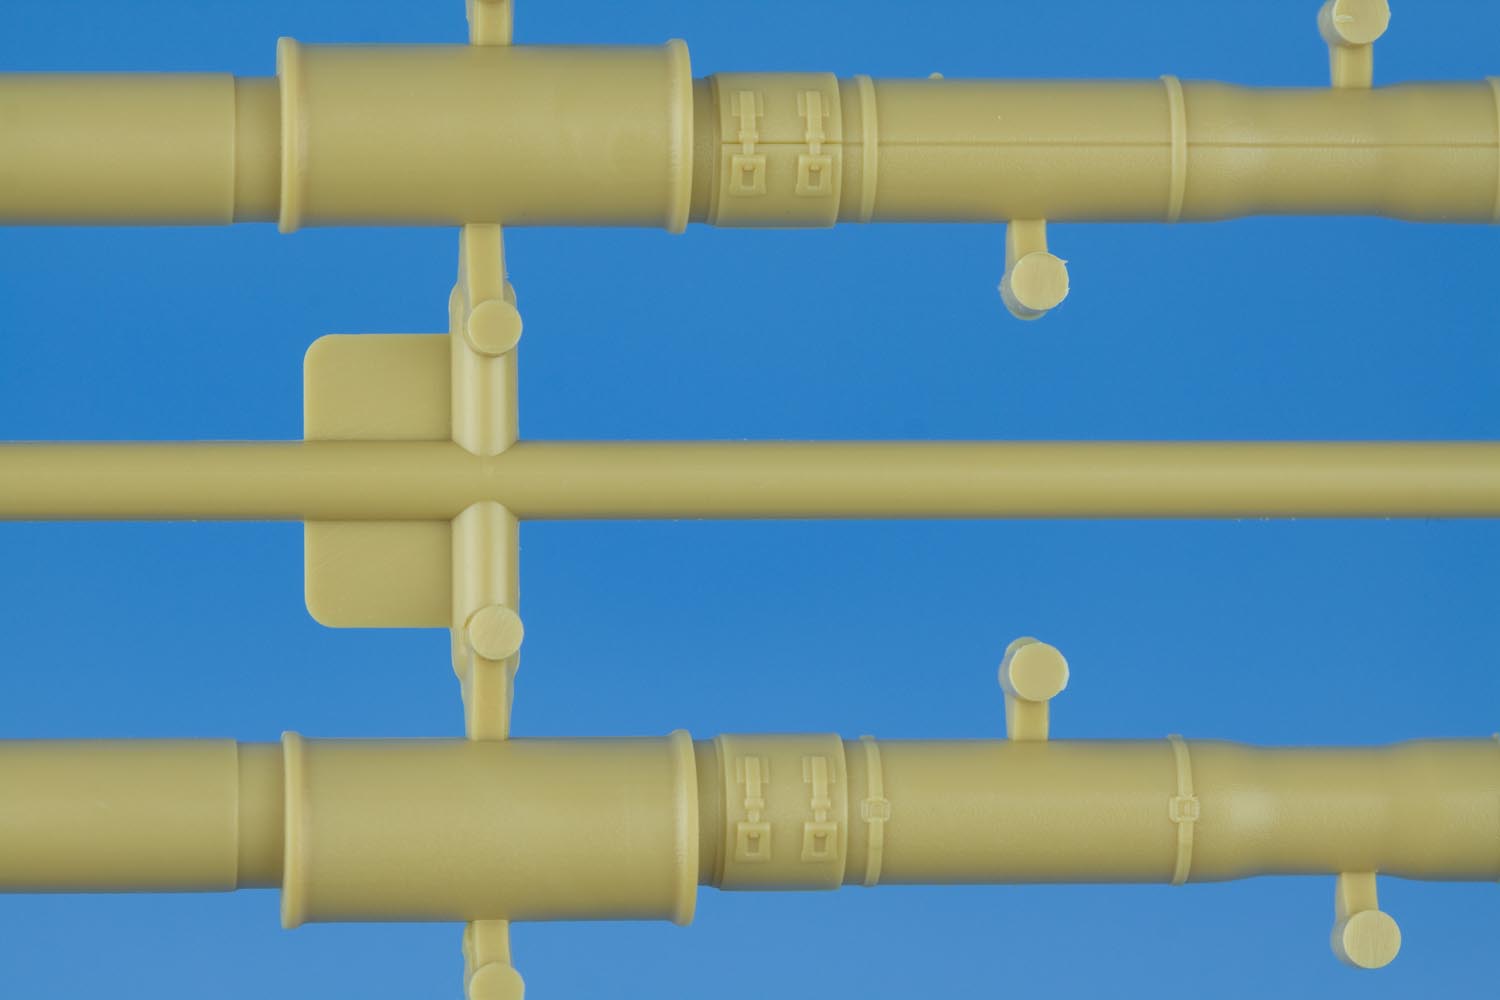
The kit provides two main gun barrels; one with mounting straps for a muzzle reference mirror and one without. The barrel with the MRS mounting straps is correct for use with this kit. Perhaps the second barrel is intended for the already announced C1 MEXAS kit.
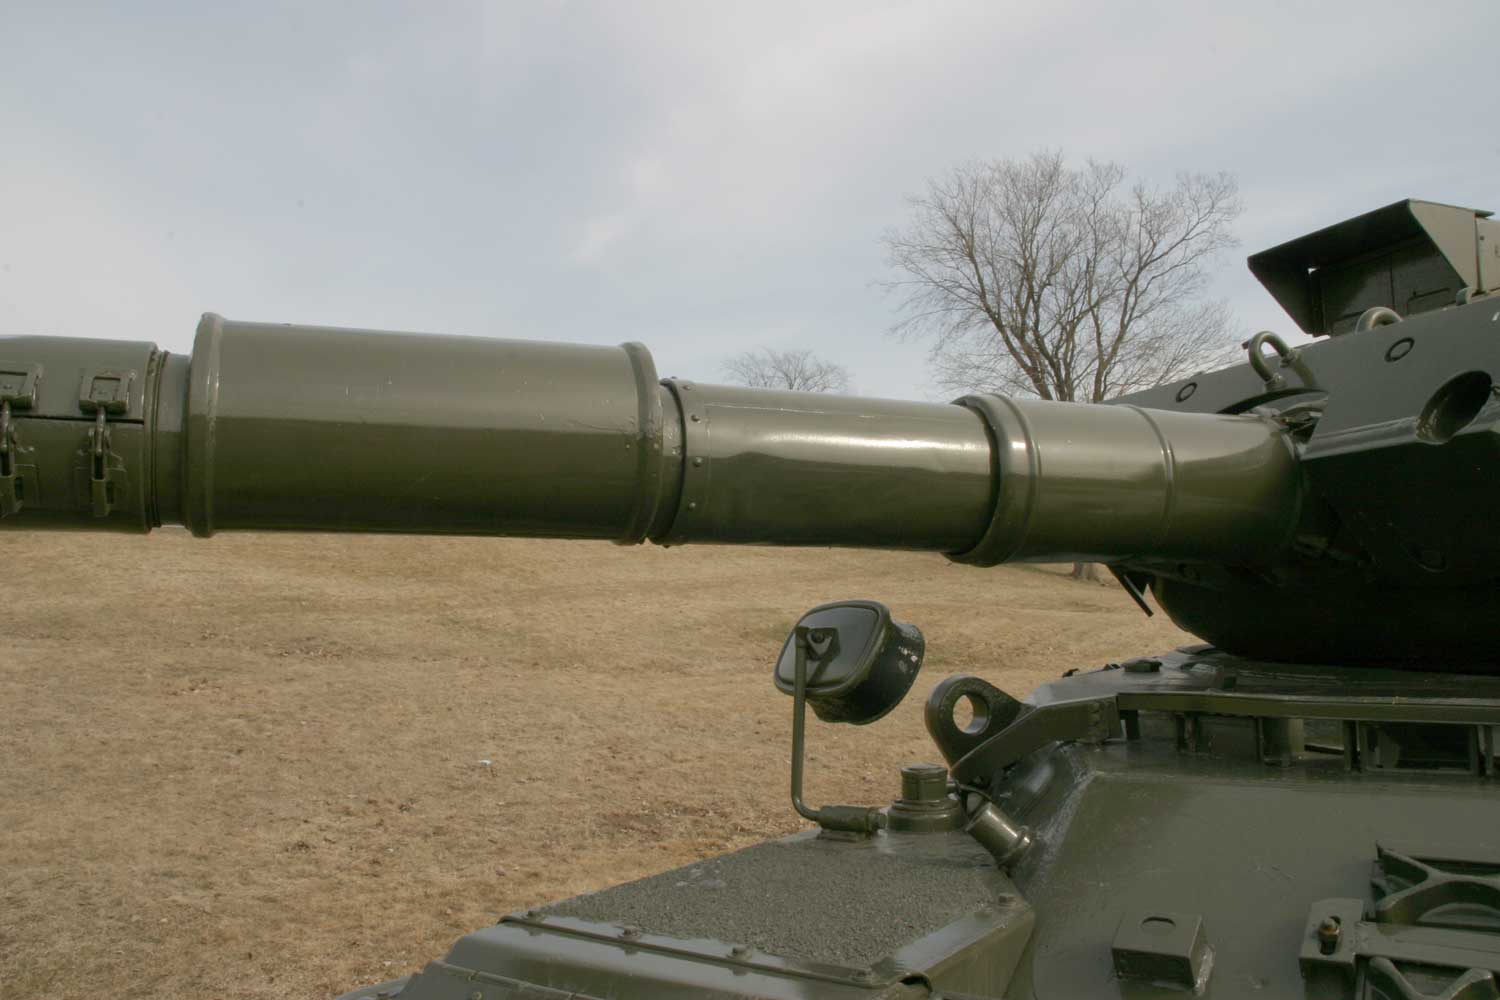
The main gun barrels are unfortunately a bit of a disappointment. On a real Leopard 1, the thermal sleeve section from the muzzle to the bore evacuator is split into a top and bottom part with straps and clamps holding the two halves together. Each barrel included in the kit depicts this split on only one side of each barrel. The finely engraved line is continued to the rear portion of the thermal sleeve, between the bore evactuator and the mantlet. On the real thing, this bit is not split top and bottom.
The clamps just forward of the bore evacuator are correctly reversed on either side of the barrels, but I find the detail to be a little simplified. The MRS mounting straps are depicted as two solid bands. The real straps have slots cut down the centre.

Just to prove that I'm not making any of this up, here are a few references photos of the real thing.
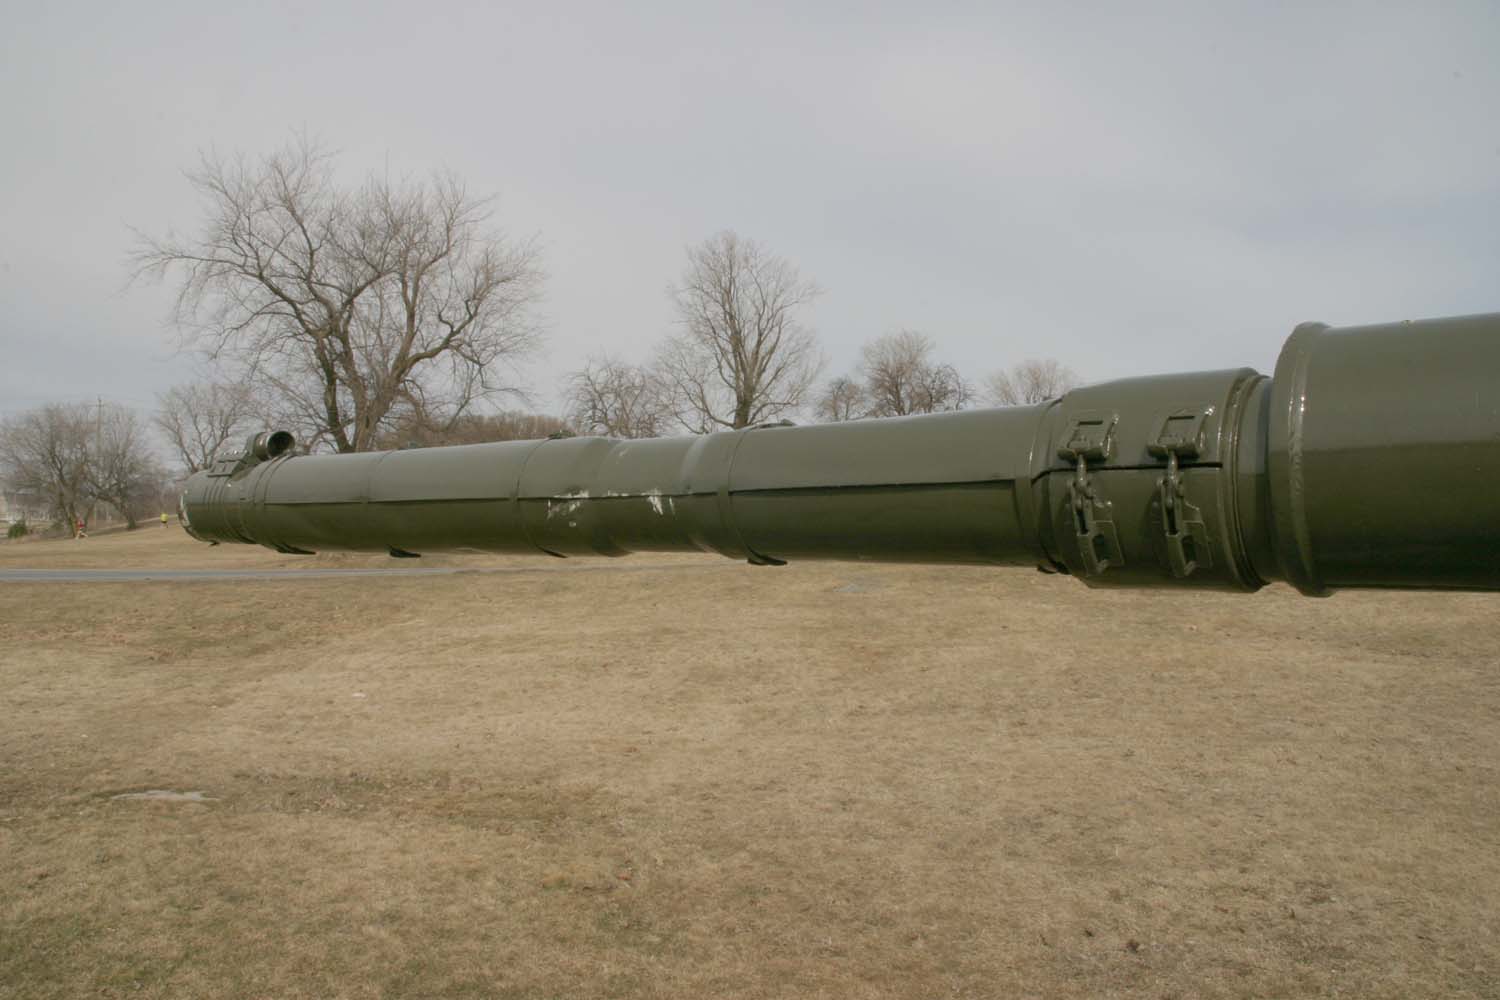
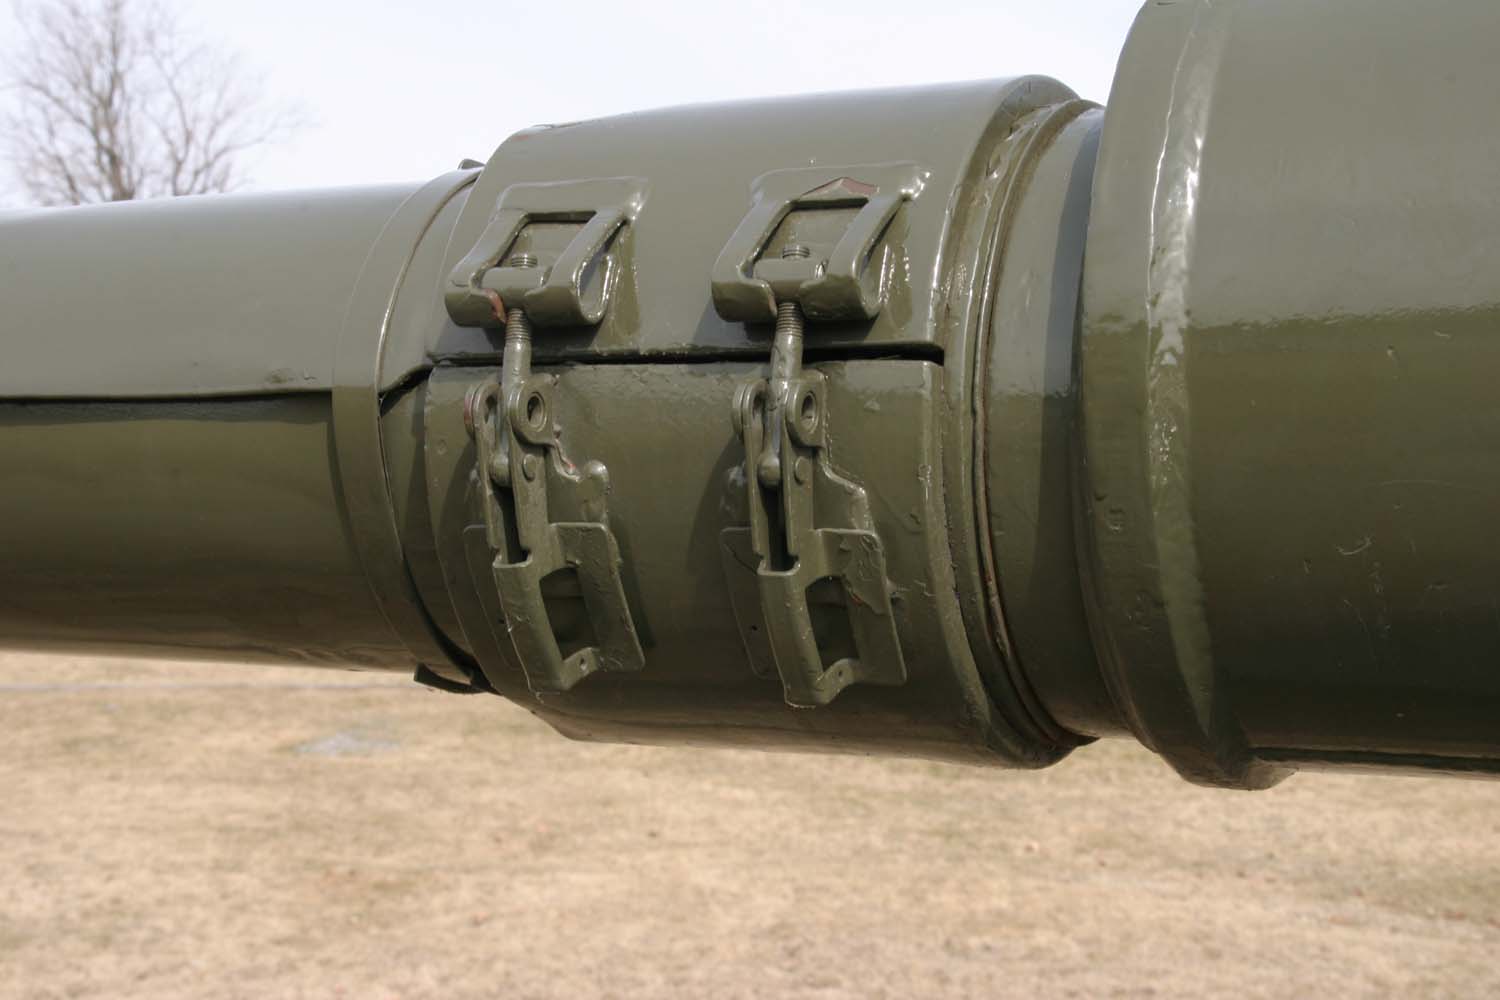
The above photos also illustrate that the top of the forward thermal sleeve section overlaps the lower section by approximately 8 mm. This is a detail that every Leopard 1 kit to date has missed. Aside for compatibility issues with this kit, the Leopard Workshop barrel LW019AC will be a much, much better choice than the Hobby Boss barrel. In my humble opinion, the kit barrels should be binned!
If you've read this far you will note that I have not mentioned the GPS antenna. I can't mention it because it is not present in this kit! I find this really perplexing given the attention to detail lavished elsewhere on this kit. This together with the botched main gun barrels are pretty big mistakes. I'm sure the after market will very soon come to the rescue with a resin GPS antenna.
This is the GPS antenna that Hobby Boss missed:

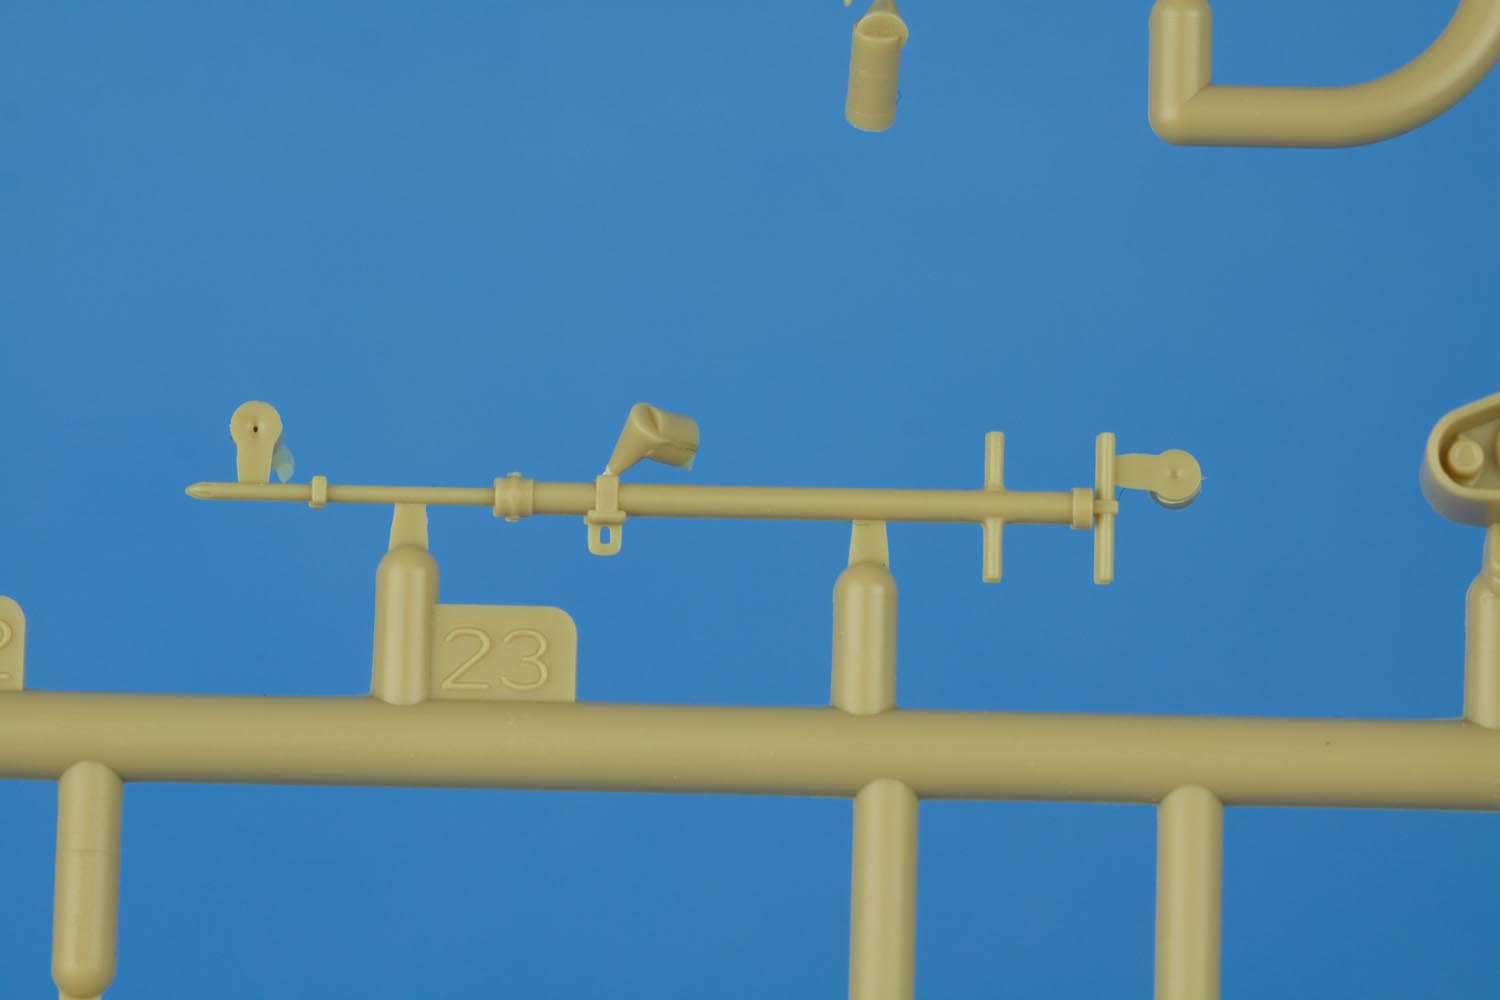
The aerial bases in the kit are both the same. This is correct for C2s based in Canada but deployed Leopards used two different aerial bases. Fortunately, the Leopard Workshop set LW014B includes the proper aerial bases as well as extremely tiny and extremely realistic springs.
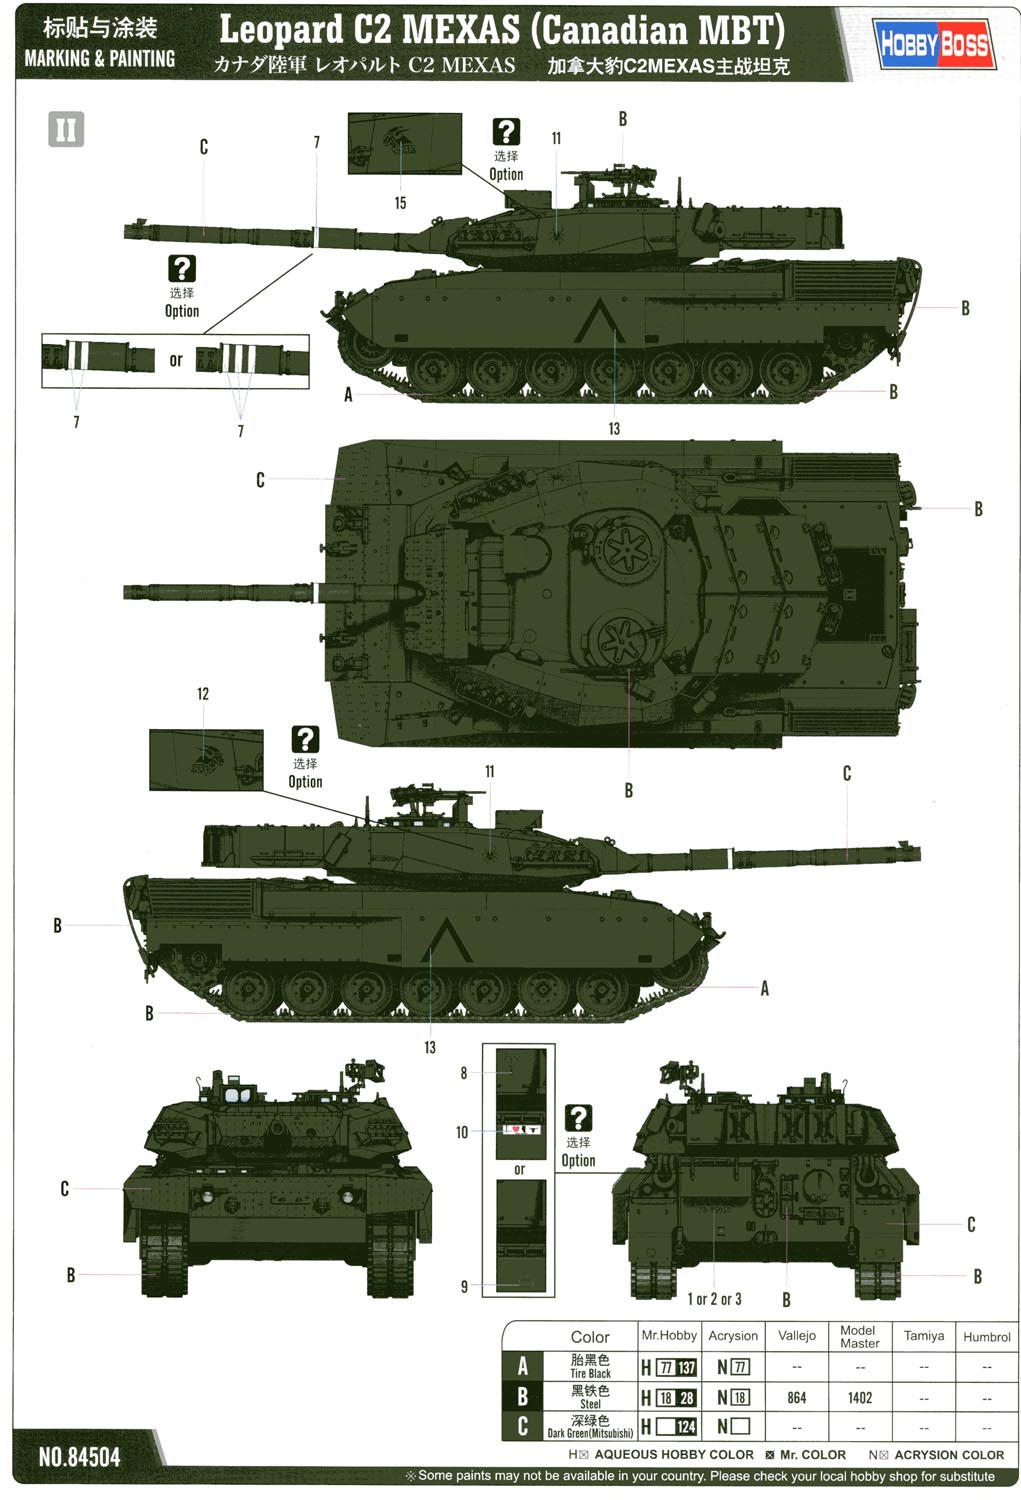
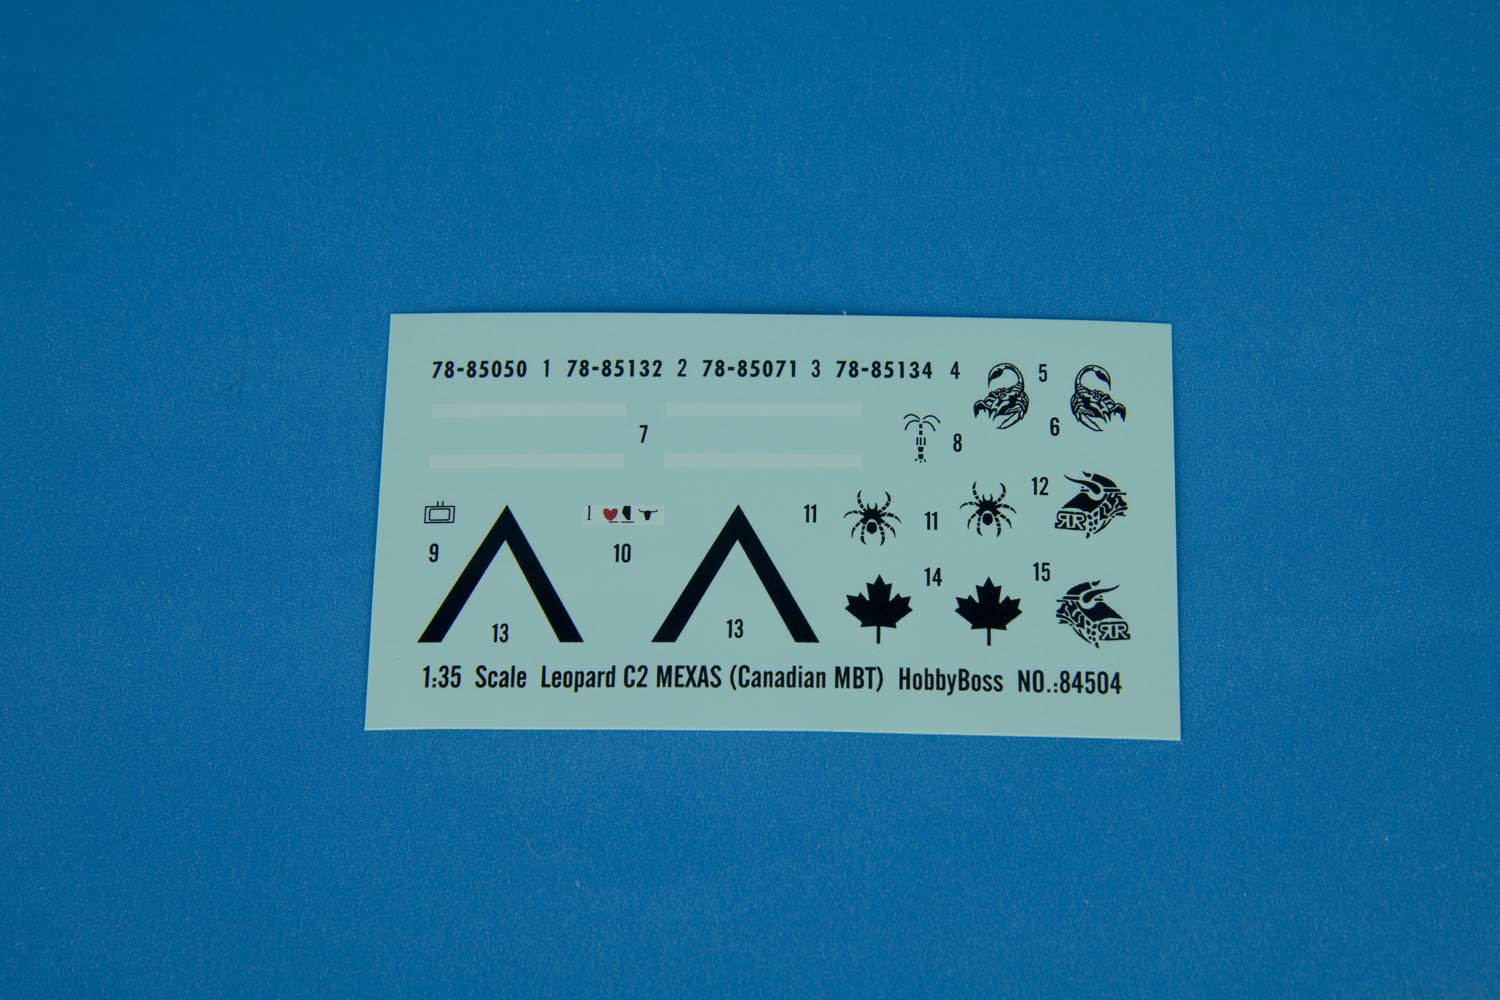
The decal sheet is very crisply printed, with no bleed through visible on any of the white backed decals. The sheet provides markings for four different vehicles crewed by members of A Squadron of the Lord Strathcona's Horse (Royal Canadians) Regiment in 2007 even though this it not made entirely clear in the marking instructions. What follows will be a detailed description of the markings the A Squadron vehicles actually wore in 2007.
Please not that all LdSH (RC) A Squadron vehicles wore the standard ISAF inverted chevron on the fifth from the front hull side MEXAS module (on both sides of the vehicle). All vehicles also had black maple leafs painted on the turret range finder blanking plates.
The first vehicle CFR presented is 78-8050. In 2007 this CFR was assigned to A Squadron, 2 Troop call with call sign 12A. The CFR was stenciled under the hull rear tool box. Two white bands would be present around the bore evactuator as a quick troop number indicator. The troop mascot, the viking, was present on both sides of the turret MEXAS modules just aft of the smoke dischargers. The black maple leafs were found on the turret range finder blanking plates but with a white outline (not represented on the supplied decal sheet).
The second CFR is 78-85132. This was call sign 12B or the troop sergeant's tank, which was the vehicle crew commanded by Anthony Sewards in 2007. The CFR was originally stenciled as 78-58132 which was corrected with a white grease penciled 85 over the incorrect digits. Mind you, as the days wore on the white corrected digits became less and less visible. The troop mascot, a stylized viking is also included on the sheet as is the Africa Corps-esque palm tree which appeared on the the left rear of the turret bustle bin. This vehicle also wore two white stripes around the bore evacuator. Lastly, this vehicle wore an I love Alberta beef bumper sticker on the rear hull tool bin, positioned top centre (about 3 cm from the top of the bin). The decals sheet does not include the 'T300' IBD sticker on the mantlet MEXAS module or the small Canadian flag Anthony had affixed to the comms aerial on the commanders side. It should also be mentioned that call sign 12B was fitted with a dozer blade kit, which would have to be sourced from the Meng C2 MEXAS or as an after market resin set.
The third CFR on the decal sheet is 78-85071. This was call sign 12C of 3rd troop and had 3 white rings around the bore evacuator. The CFR was stenciled underneath the hull rear tool box and 12C also had the 1 CMBG symbol stenciled on the tool box; this is not included on the decals sheet. Also missing from the decal sheet is the James Hetfield skill which was present on the commanders side of the mantlet MEXAS module. It should be noted that this vehicle was fitted with the track width mine plough implement.
The last CFR included on the decal sheet is 78-84134. This CFR was assigned to call sign 12 or the 2 troop leader's vehicle. Two white rings were present on the bore evacuator and the CFR was located underneath the hull rear tool box. However, the CFR digits 134 were re-painted in white (over the original black stenciled paint); the decal sheet does not correctly represent this variation. The palm tree would have been present on the left rear of the turret bustle bins and the viking troop mascot would have been present on both sides of the turret on the MEXAS modules just aft of the smoke dischargers.
The decal sheet includes the A Squadron HQ mascot (a scorpion) and the 1 troop mascot (a desert spider), neither of which may be used with any of the other markings provided. The best bet for SHQ or 1 troop vehicles would be to obtain the Echelon Fine Details sets D356006 or D356049.
Hobby Boss have a bit of a bad reputation in the Leopard world for their sub-standard attempts at various Leopard 2 models. It is clear that a lot of effort was poured into the production of this kit in hopes of redeeming themselves.
The inclusion of a mostly complete engine in plastic is a really nice touch (now the after market needs to bless us all with an engine bay kit).
While this kit isn't perfect, and there were several obvious mistakes or omissions, the level of detail is extremely impressive with maximal attention given to fidelity of detail. The C6 GPMGs (and mount), the main gun crutch, the engine details, the maintenance tools and the infantry telephone box are all examples of extreme attention to detail and hopefully represents a raising of the bar that the competition will aspire to.
Once again I am disappointed to say that this latest offering does not represent the quintessential Leopard 1 in 1:35 scale. Like the Meng C2 MEXAS, this kit has some extremely impressive features which again push us closer to that great white whale we all seek.
Once again, all Leopard 1 modelers and enthusiasts owe a great debt of gratitude to Anthony Sewards for the technical assistance and advice he provided in the creation of this kit.
© Leopard Club
![]() Contact us at leopardfibel@gmail.com
Contact us at leopardfibel@gmail.com