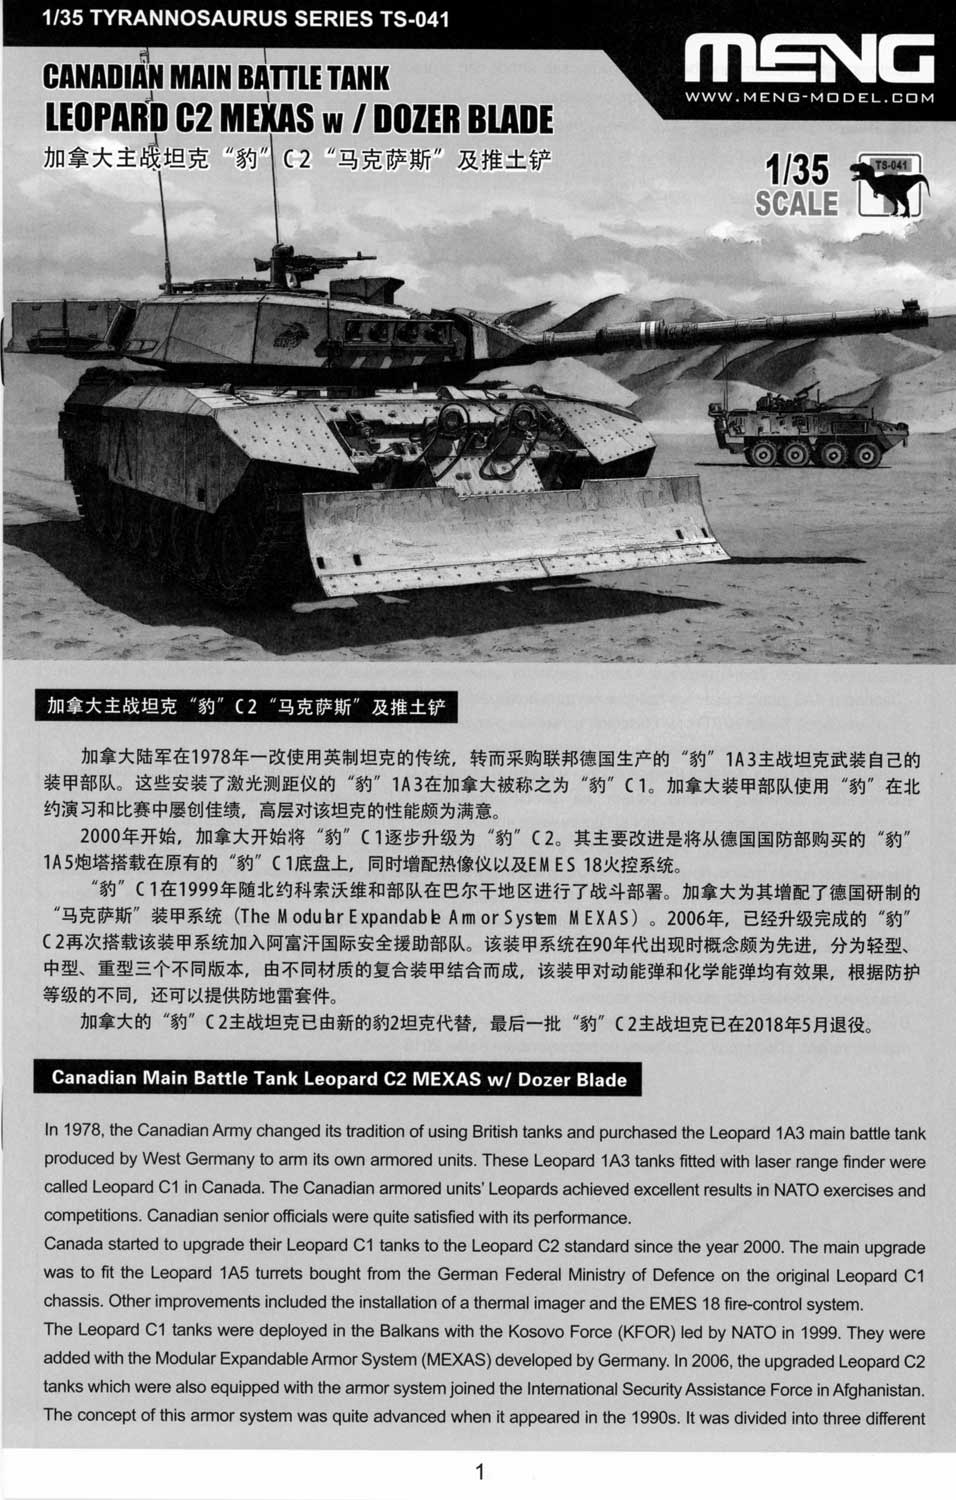
TS-041
Scale: 1:35
Media: injection moulded plastic (including clear parts), photo-etch brass, braided metal wire
Reviewed By: Dan Hay, all photos © Dan Hay
Review kit supplied by Dan's credit card and Lucky Model

Highs:
Lows:
Conclusion:
Highly recommended - the best Leopard 1 in plastic so far (as of 2019/01/21)
Thanks but no tanks! At the end of the 20th Century, this was the sentiment expressed by Canadian military planners. With the Cold War over and with the nation's armed forces primarily being involved in peace support operations, it was thought that wheeled light armored vehicles would be adequate for future international deployments. The politicians and armed forces brass were eager to cash in on the so called peace dividend that marked the post Cold War period.
One thing history has taught us is that unexpected events have a nasty habit of wreaking havoc with the best of intentions. The September 11th 2001 Al Qaeda attack on New York and Washington DC signaled an abrupt end to such wishful thinking. Very shortly thereafter, Canada deployed the first of many battle groups to take part in the ISAF mission in Afghanistan, initially in Kabul and later in Kandahar province. The Canadians deployed with the LAV-III, an eight wheeled vehicle armed with a 25mm Bushmaster cannon.
The rough terrain of Kandahar province proved to be too much for wheeled light armored vehicles. Despite being an excellent vehicle in its own right, the LAV-III lacked the mobility and firepower needed to operate effectively in the sun baked mud wall and irrigation ditch laden Panjwai District of Kandahar Province. These deficiencies became painfully apparent when on September 3 2006 the Canadian battle group suddenly found themselves involved in the most fierce combat action Canadians had seen since the Korean war. In what would later be known as the Battle of the White Schoolhouse, the Canadian soldiers faced a very tactically astute enemy fighting from fortified positions with interlocking fields of fire. The Canadians in their light armored vehicles were caught in a expertly planned ambush and through sheer bravery and force of will managed to extricate themselves and avert disaster. Even so, the cost of the day's action was very high with 4 soldiers tragically making the ultimate sacrifice.
In the inevitable after action analysis, it was concluded that the use of tanks may have dramatically changed the outcome of the battle. The 25mm canons of the LAV-IIIs did not have the punch required to dislodge the Taliban insurgents from their heavily fortified and well sited positions. Shortly after the battle, the Canadian battle group commander and the Chief of Defense Staff asked for tanks to be deployed to Kanadahar Province post haste. Parliament approved the request and tasked one of Canada's armored regiments to fulfill this urgent operational requirement. The soon to be retired Leopard C2 main battle tanks of the Lord Strathcona's Horse (Royal Canadians) Regiment were fitted with additional protection in the form of the Modular EXpandable Amour System (MEXAS) developed by IBD Deisenroth Engineering of Germany. B Squadron of the Lord Strathcona's Horse (Royal Canadians) provided crews for the MEXAS up-armored C2s which were air-lifted to Kandahar province in late 2006. In early 2007, B Squadron crews were relieved by their colleagues from A Squadron of the LdSH (RC).
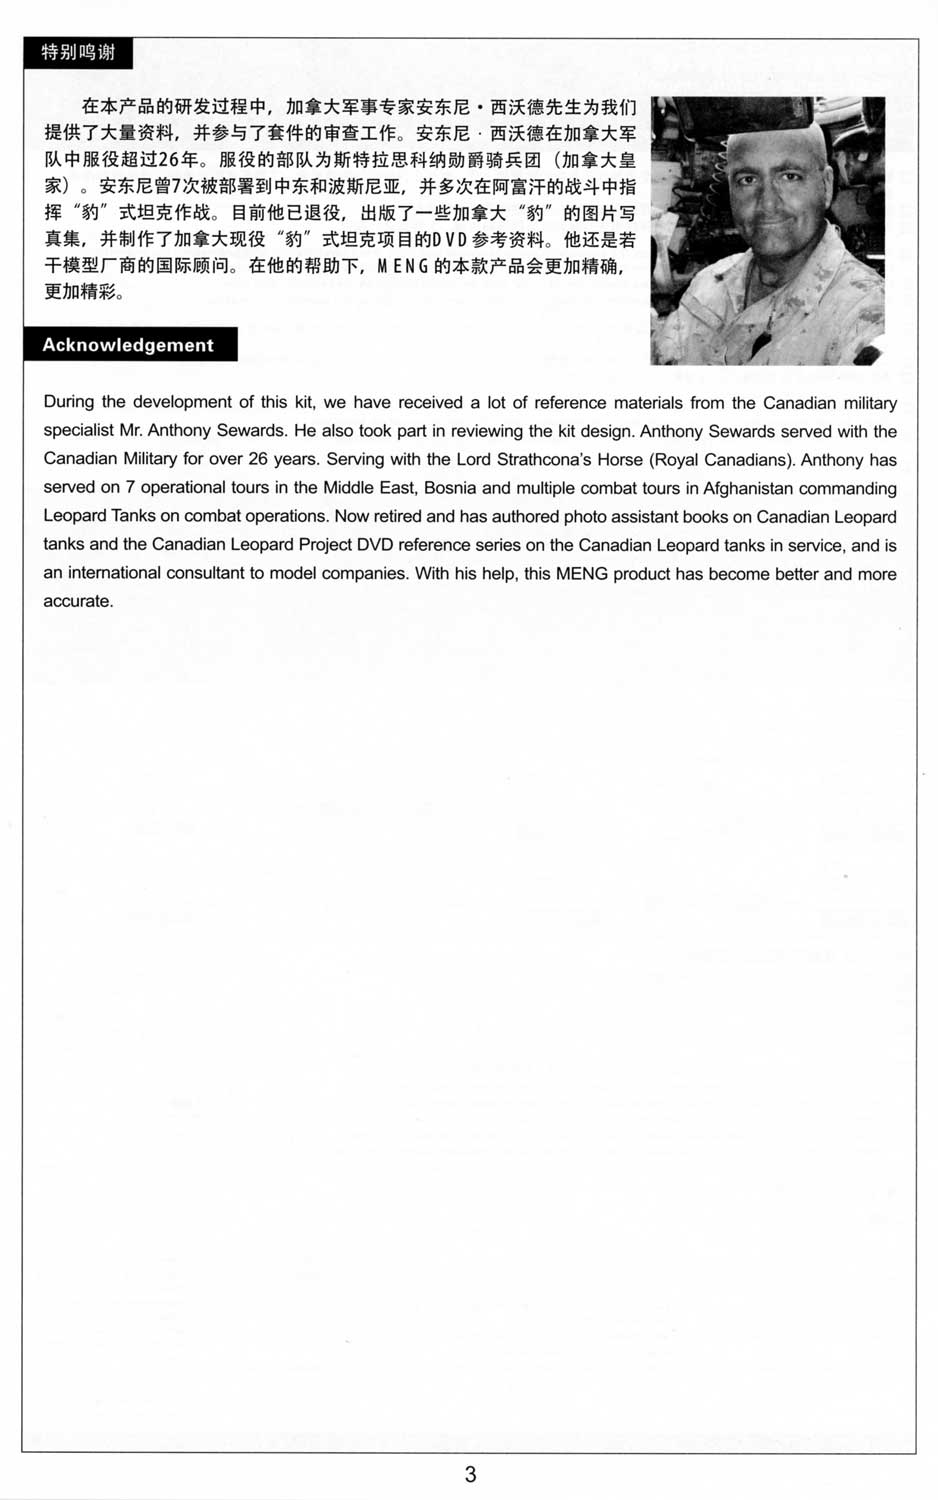
Anthony Sewards served as crew commander and troop sergeant with A Squadron of the Strathconas from February to September 2007 on Roto 3 of Operation Archer in Kandahar Province Afghanistan. This was Anthony's 7th overseas tour and his second time serving in Afghanistan; he was there in 2002 with the LdSH (RC) Recce Squadron. Upon returning from what was to be his last operational tour, he retired after having served over 26 years with the Canadian Armed Forces as a Strathcona.
Anthony Sewards is a name that should be familiar to modelers and enthusiasts of modern Canadian military vehicles. Being a modeler and a budding historian, Anthony was keen to observe and photograph his regiment's vehicles on operations in Afghanistan. This first hand experience combined with a love of modeling led Anthony to author several books, compile many collections of reference materials and participate in the creation of many after market detail sets (primarily with Real Model) and mainstream kits (he contributed to the Hobby Boss Leopard 2A4M-CAN). Being a former user of and current research specialist on modern Canadian military vehicles, it was natural for Meng to invite Anthony to collaborate in the creation of the latest entry to their line-up of Leopard 1 models, the C2 MEXAS. Anthony worked closely with Meng during the development of this kit, providing reference material and advice which ultimately resulted in a much more accurate model.
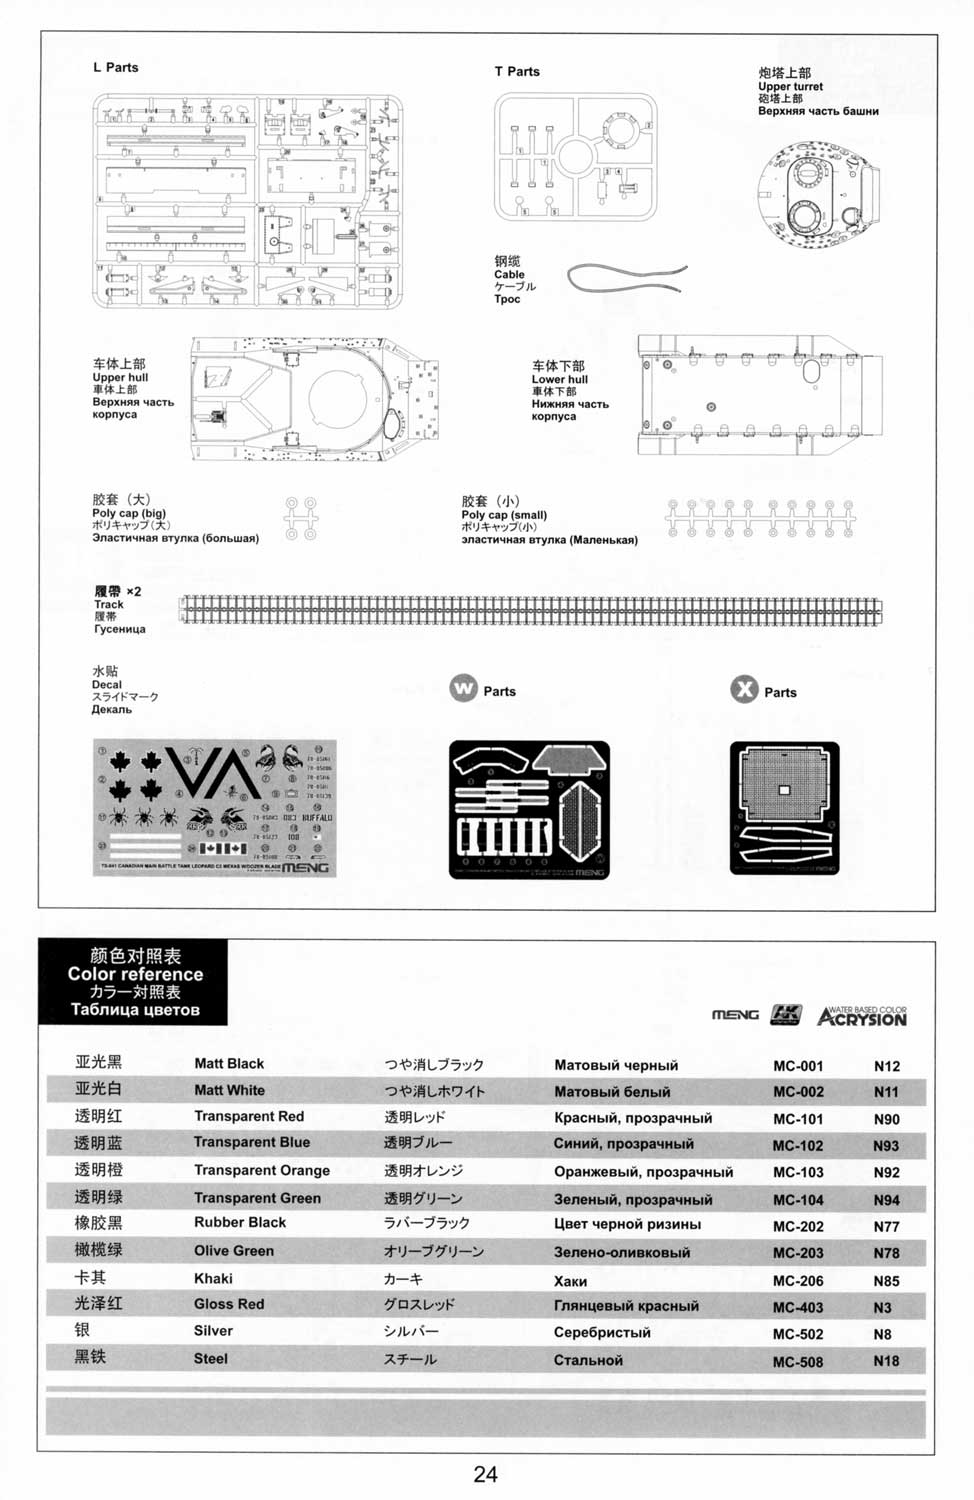
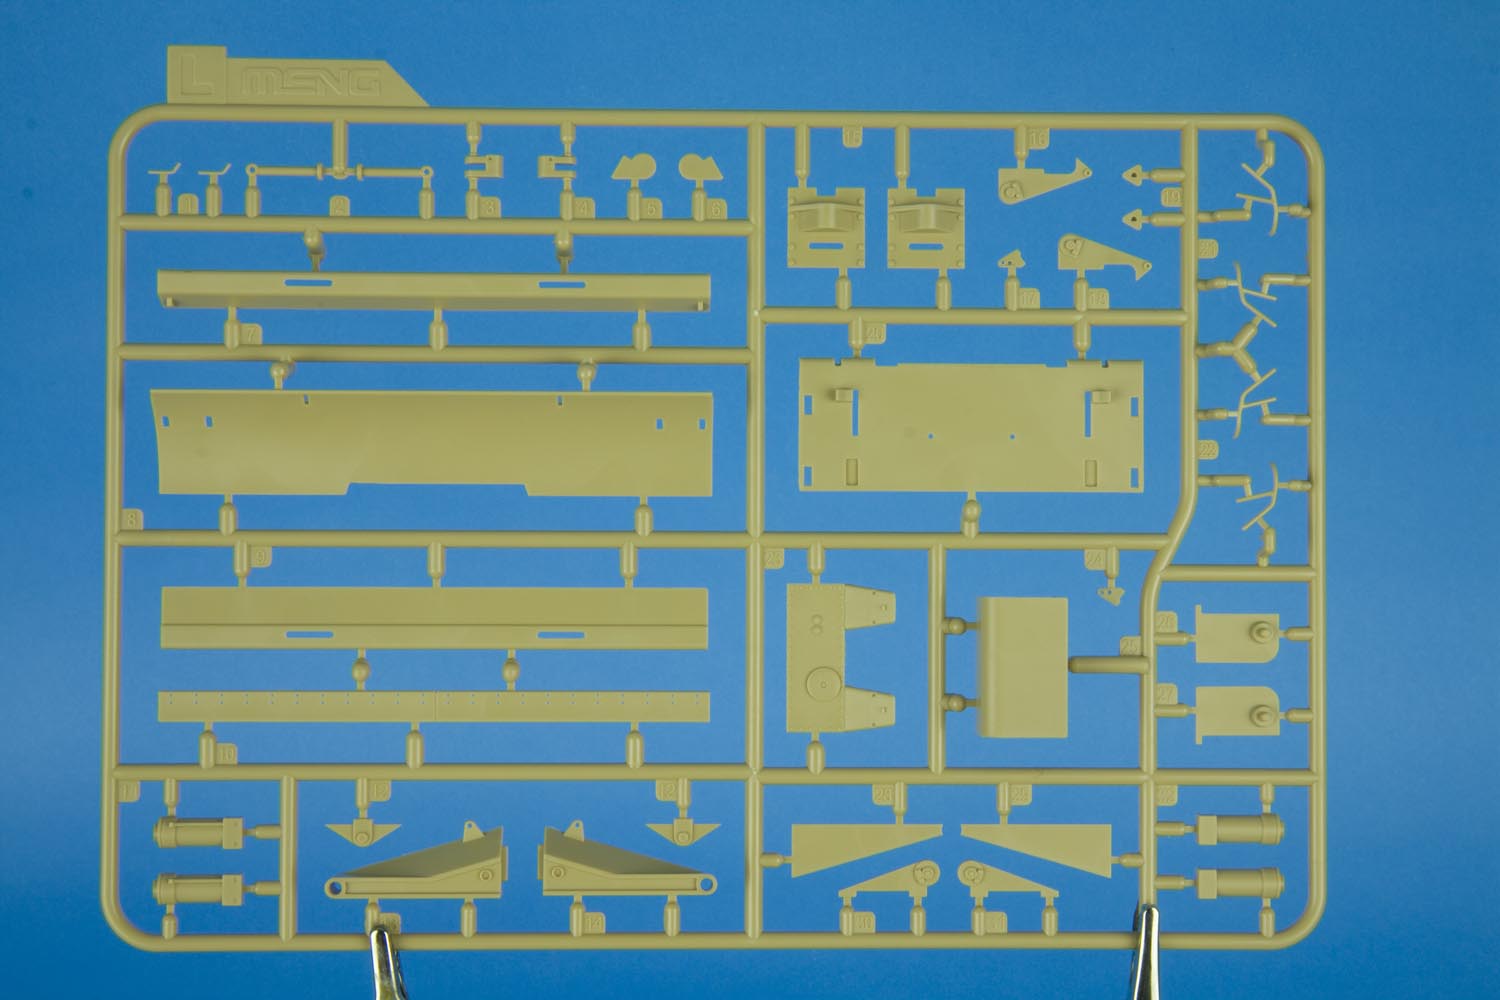
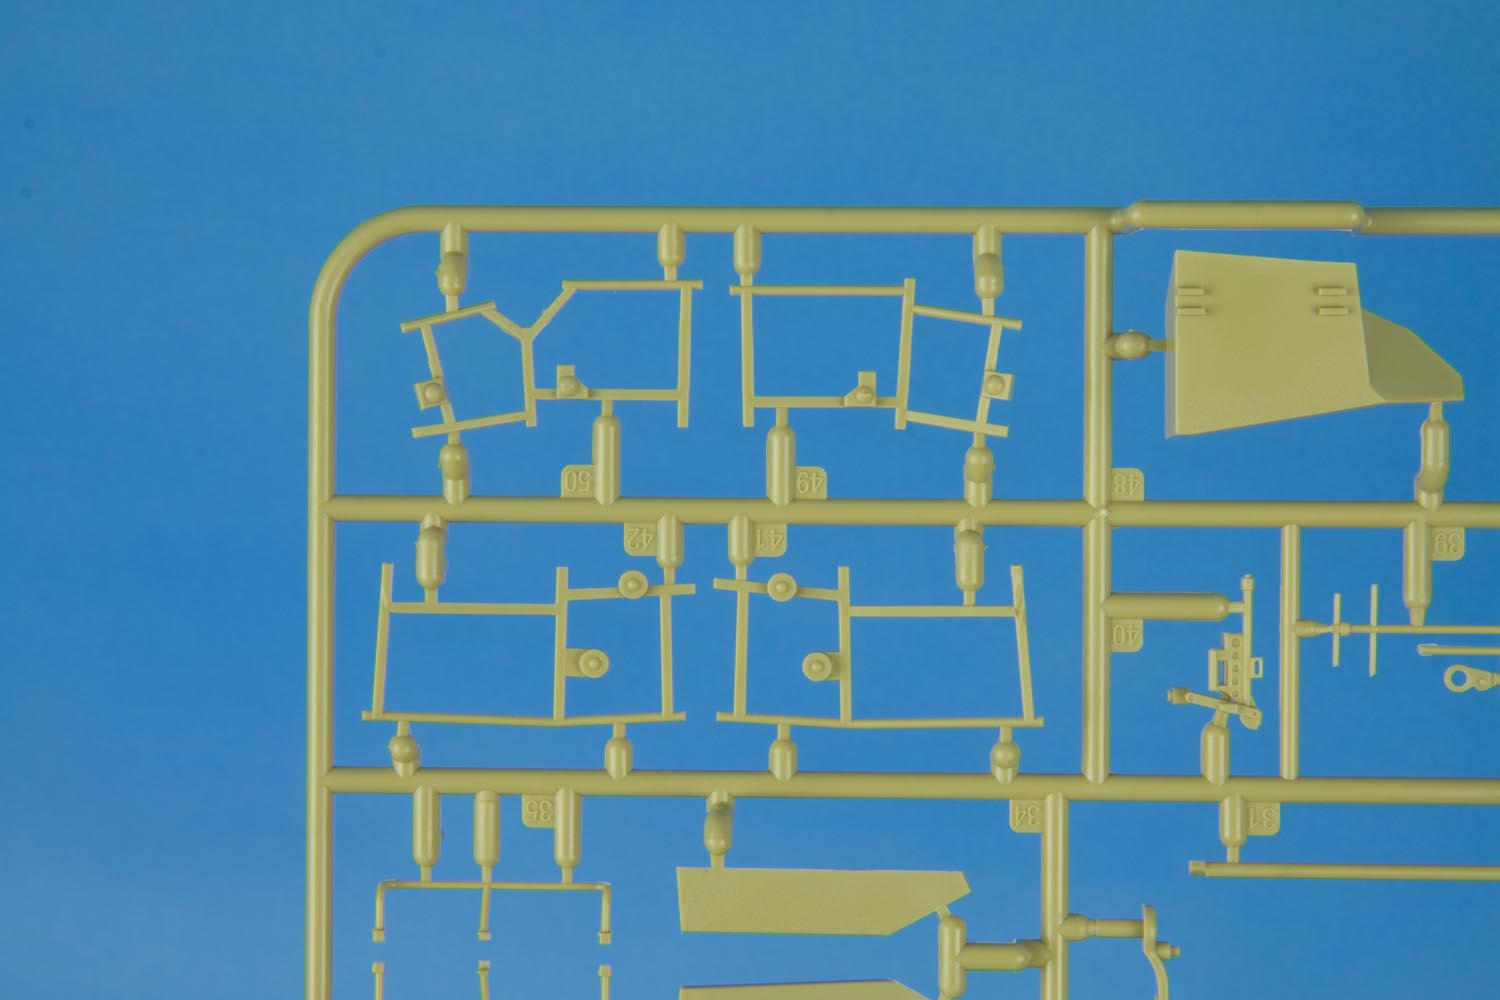
The kit contains 500 injection molded plastic parts (included one clear sprue), 2 photo etch frets, vinyl tracks and poly caps, soft braided wire and water-slide decals. The instructions are supplied as a 24 page grey-scale booklet and a separate 4 page colour painting and markings guide is supplied as a glossy fold-out.


A number of the sprues are identical to those provided with the Meng 1A5 (reviewed here) albeit rendered tan plastic.
Sprue B (2 included) - idlers, alternate sprockets, spare track links, stowage box and various fittings

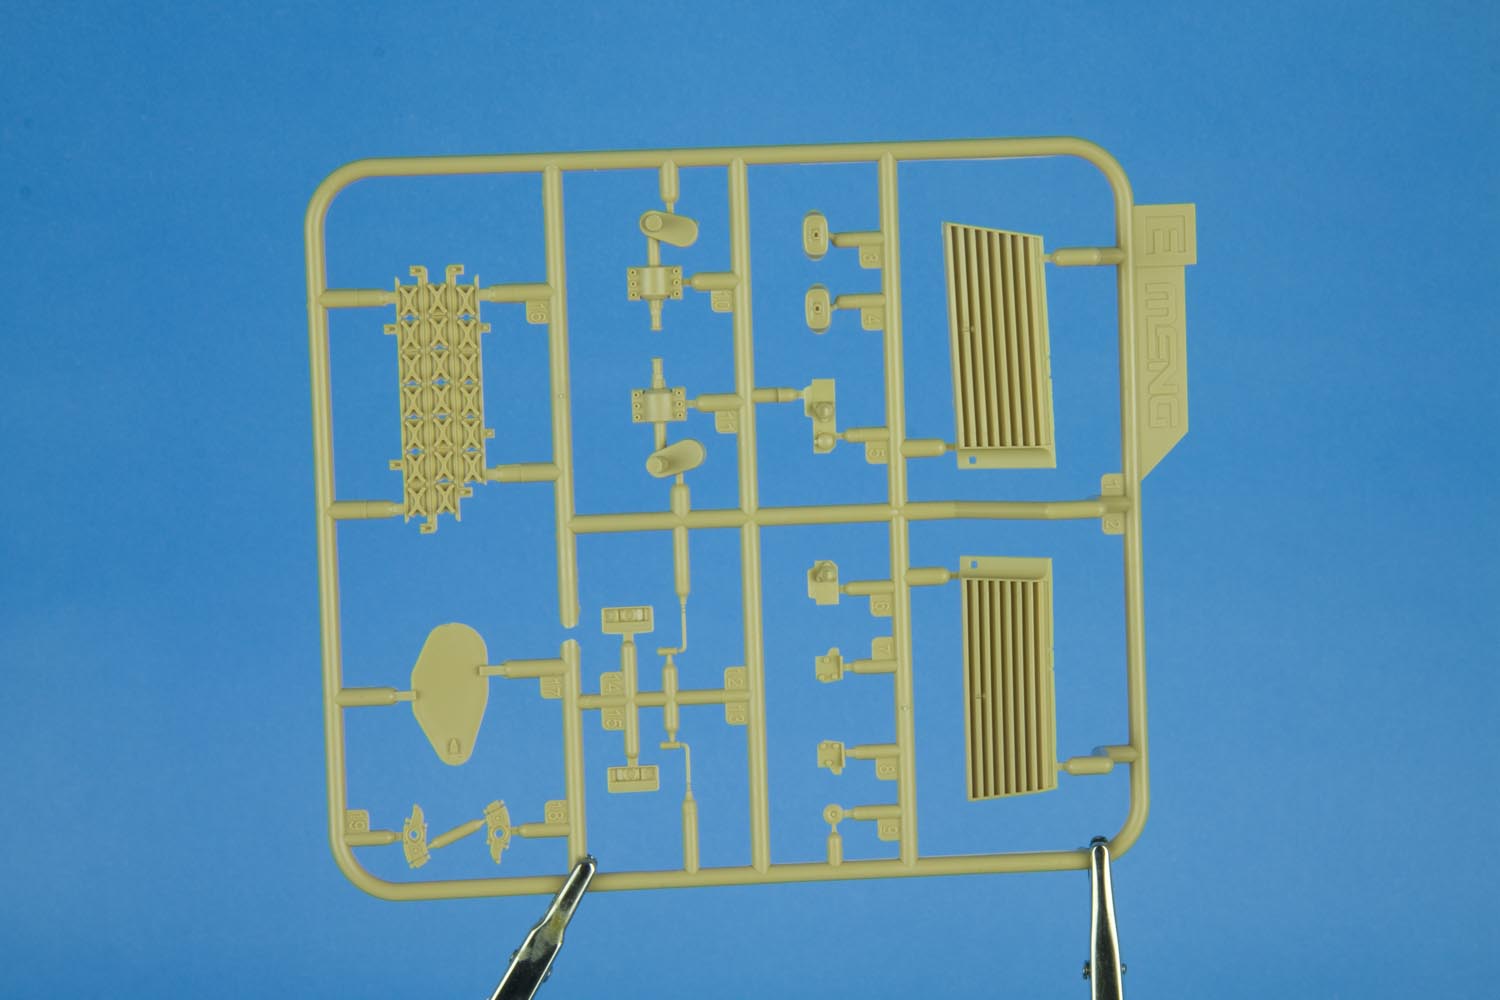
Sprue D - side skirts (not used), rear hull plate, cooling exhaust grills (neither are used),
tool box, travel lock, mud flaps

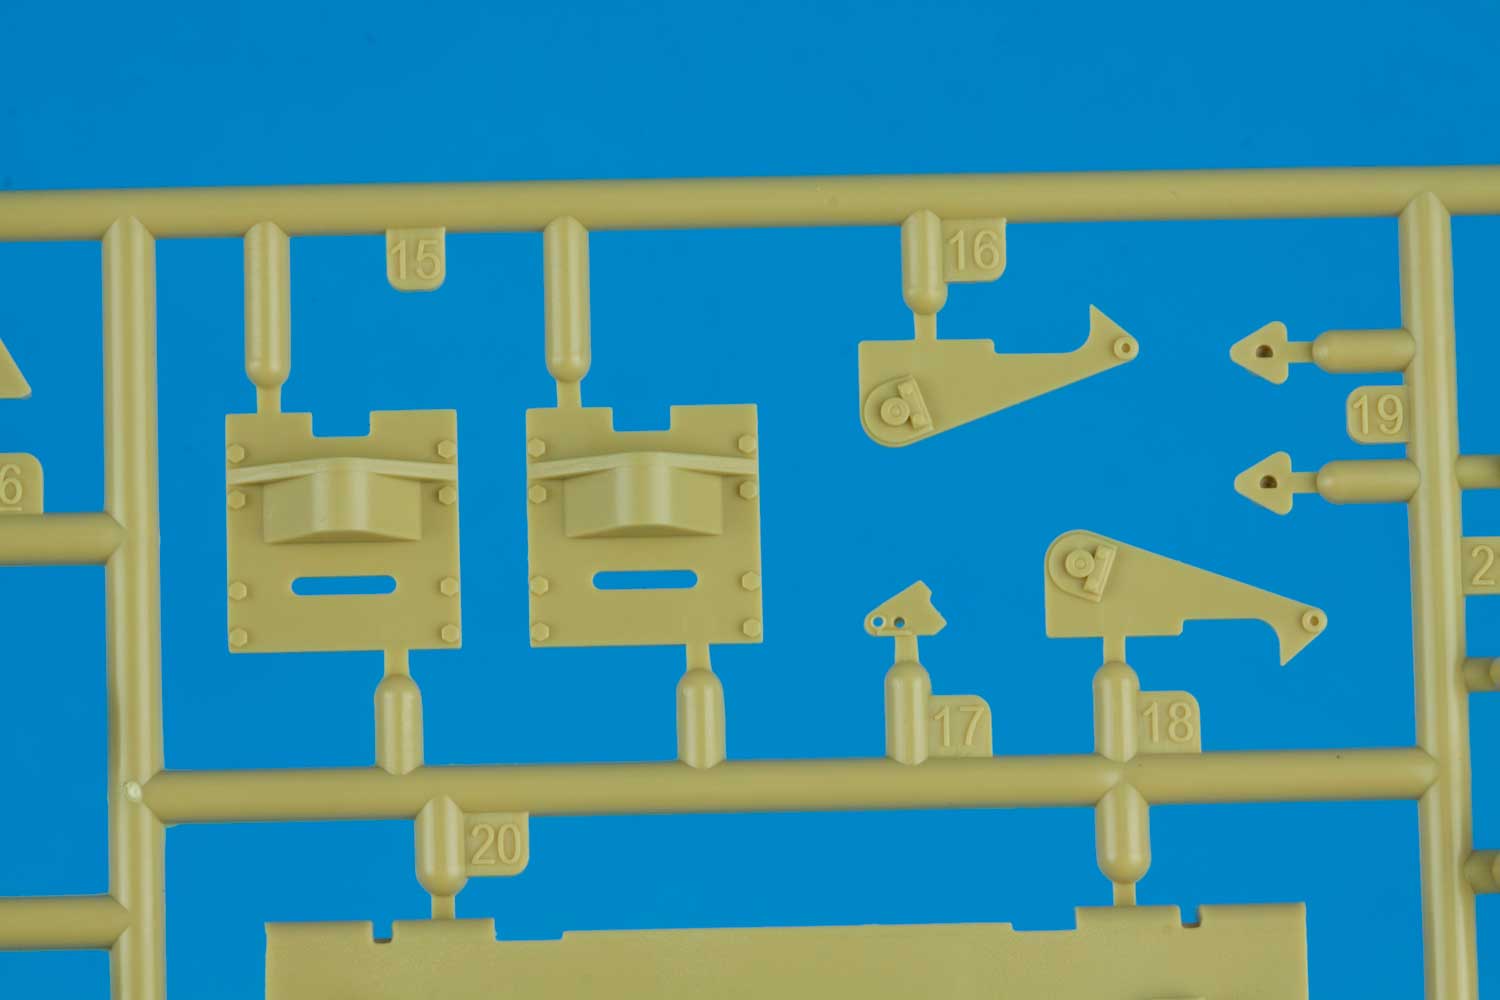
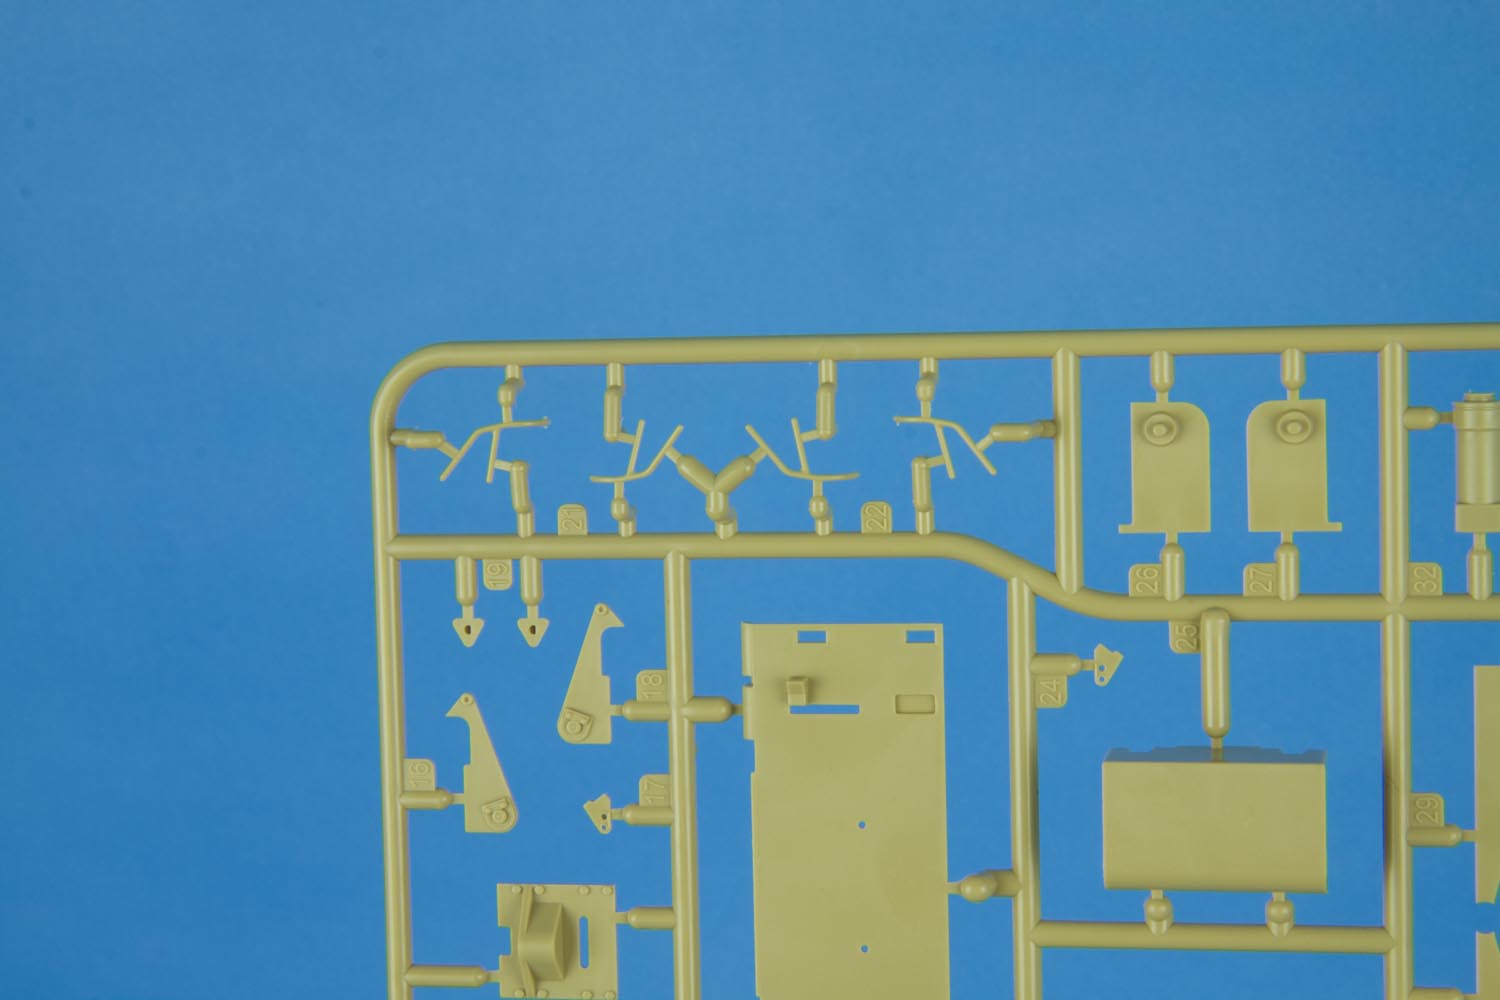
Sprue E - welded exhaust grills, snow grouser rack (not used), driver's hatch, various suspension bits
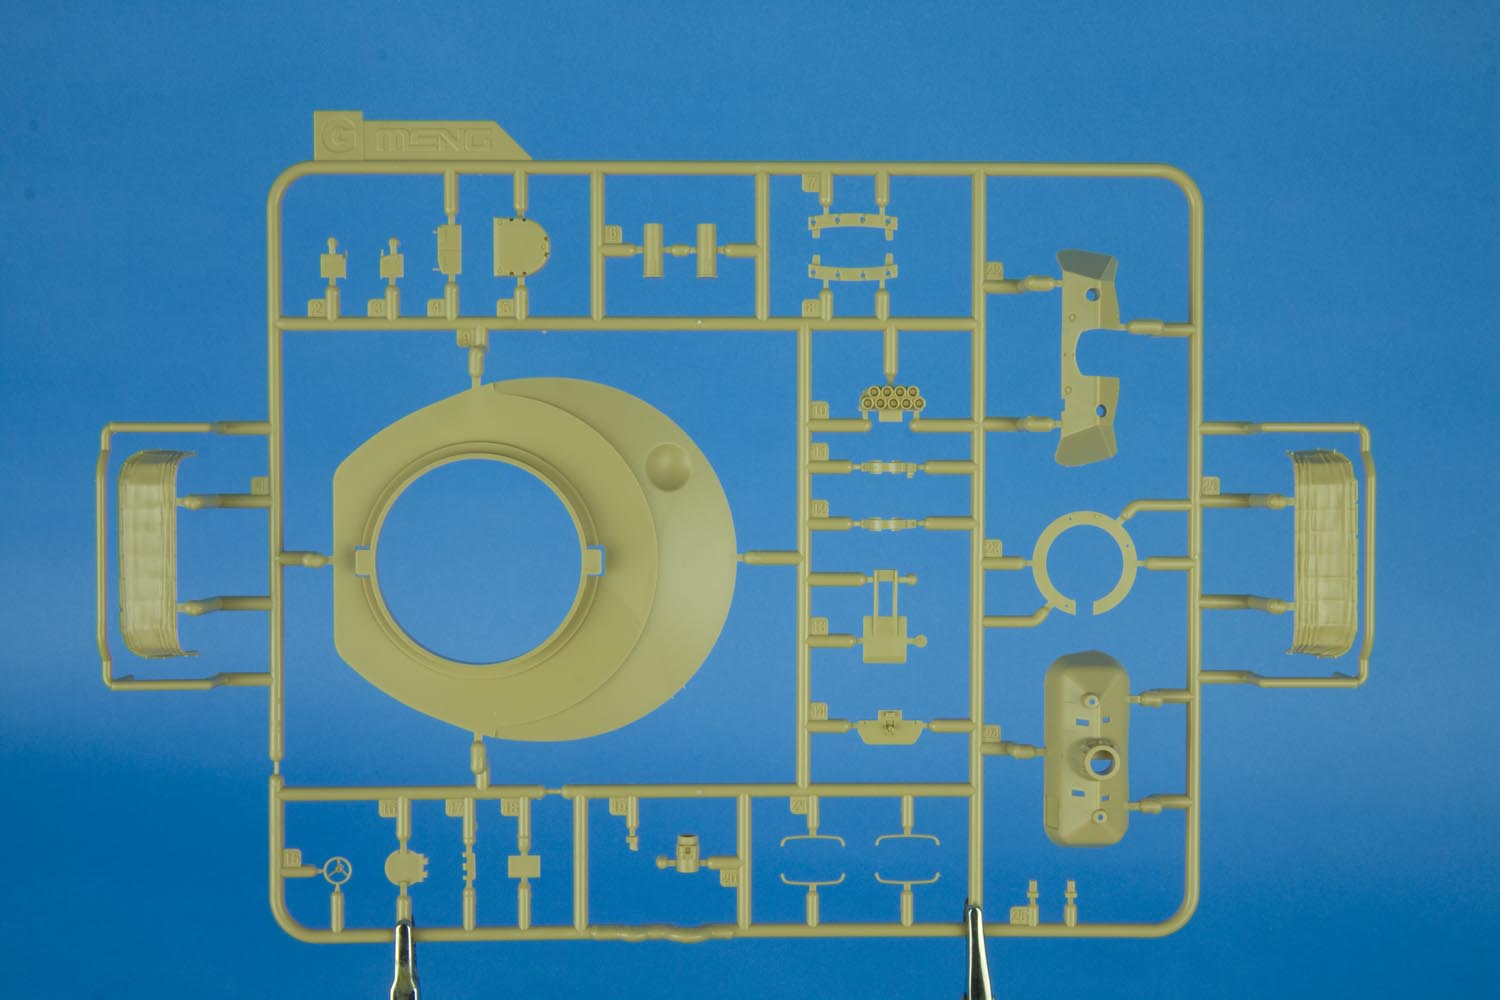
Sprue G - turret base, mantlet, mantlet shield (not used), mantlet dust covers,
EMES-18 sight housing, various other fittings
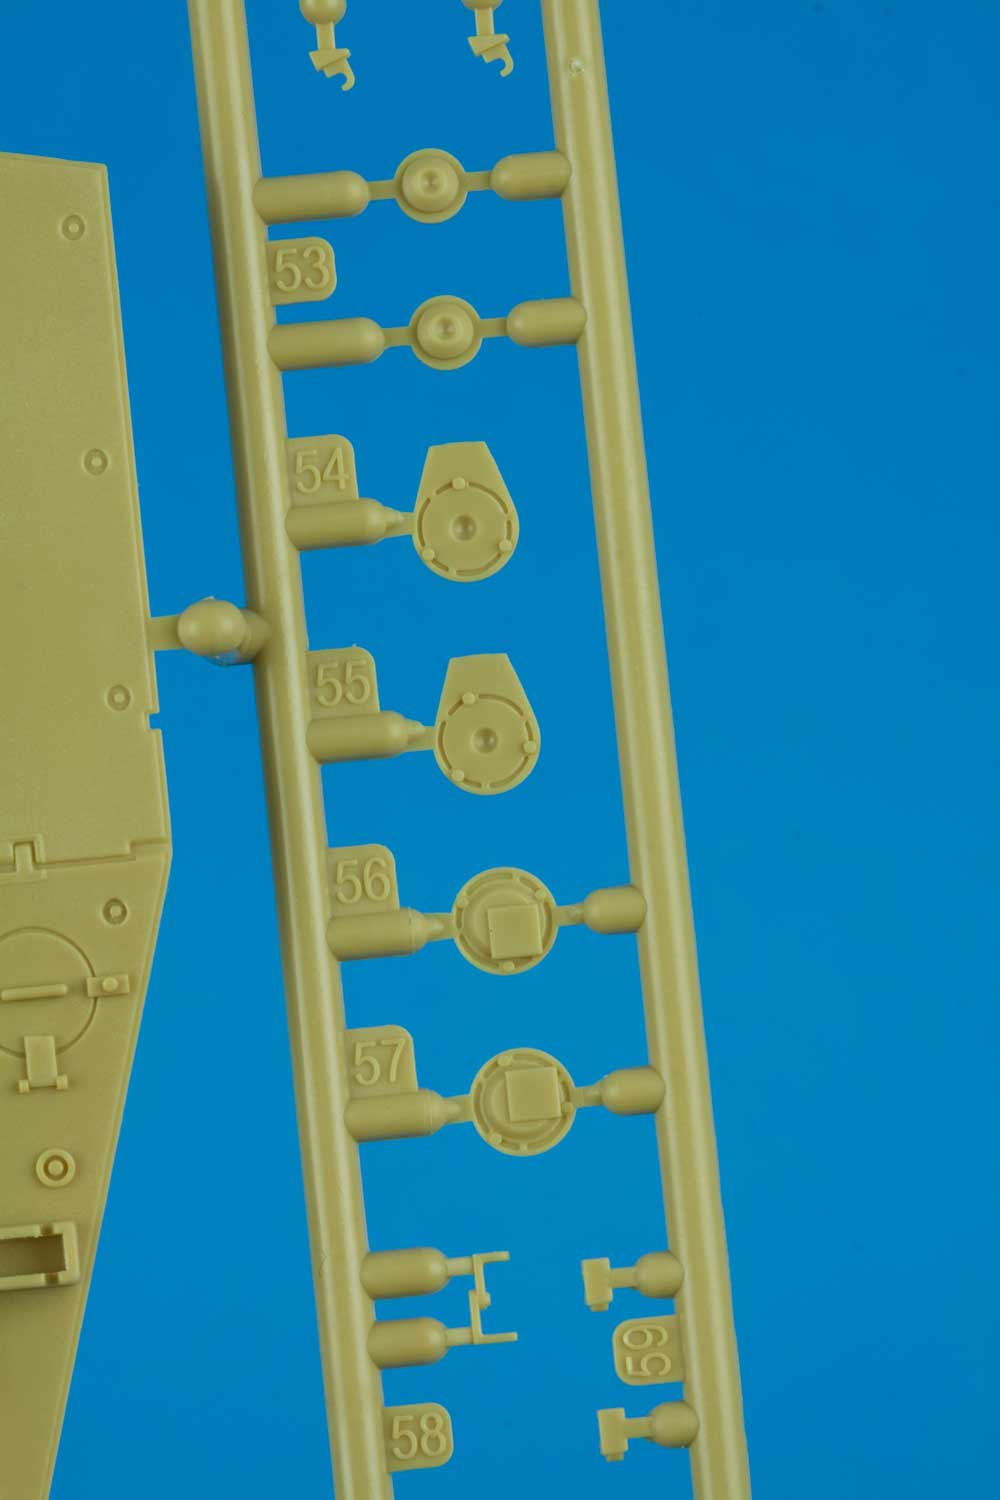
Sprue J - main gun, searchlight (not used), PZB-200 (not used), smoke dischargers

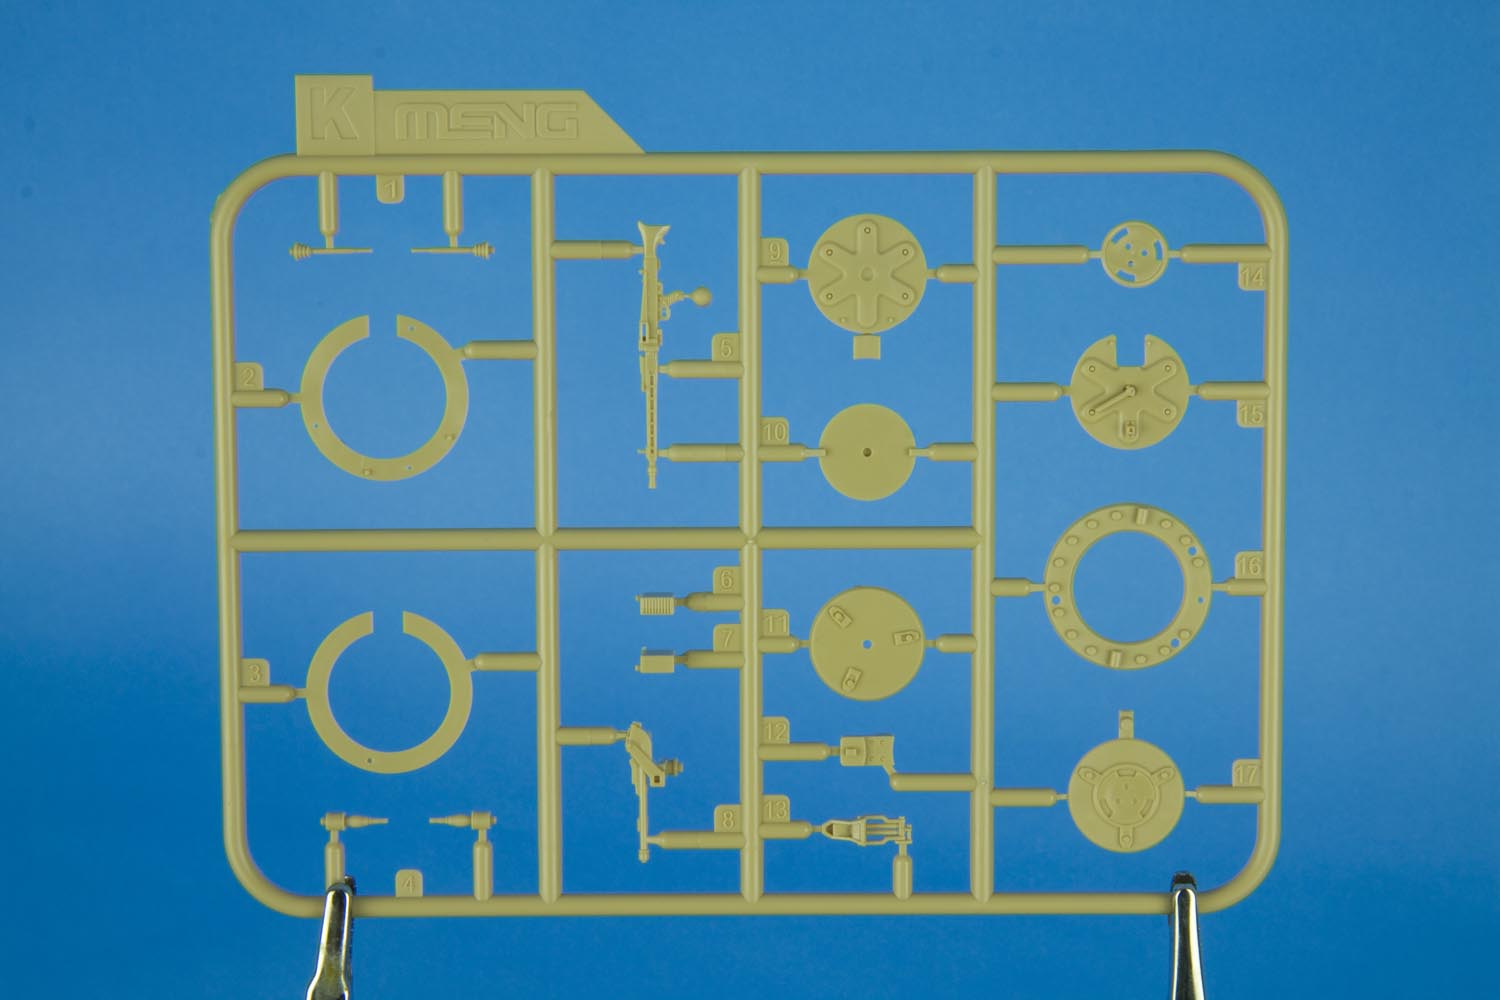
Sprue K - commander's and loader's hatch and cupola parts, MG3 and mount (not used),
SEM 80/90 aerials (not used)
Sprue T - clear parts - periscopes, EMES-18 sight front face, headlight lenses
![]()
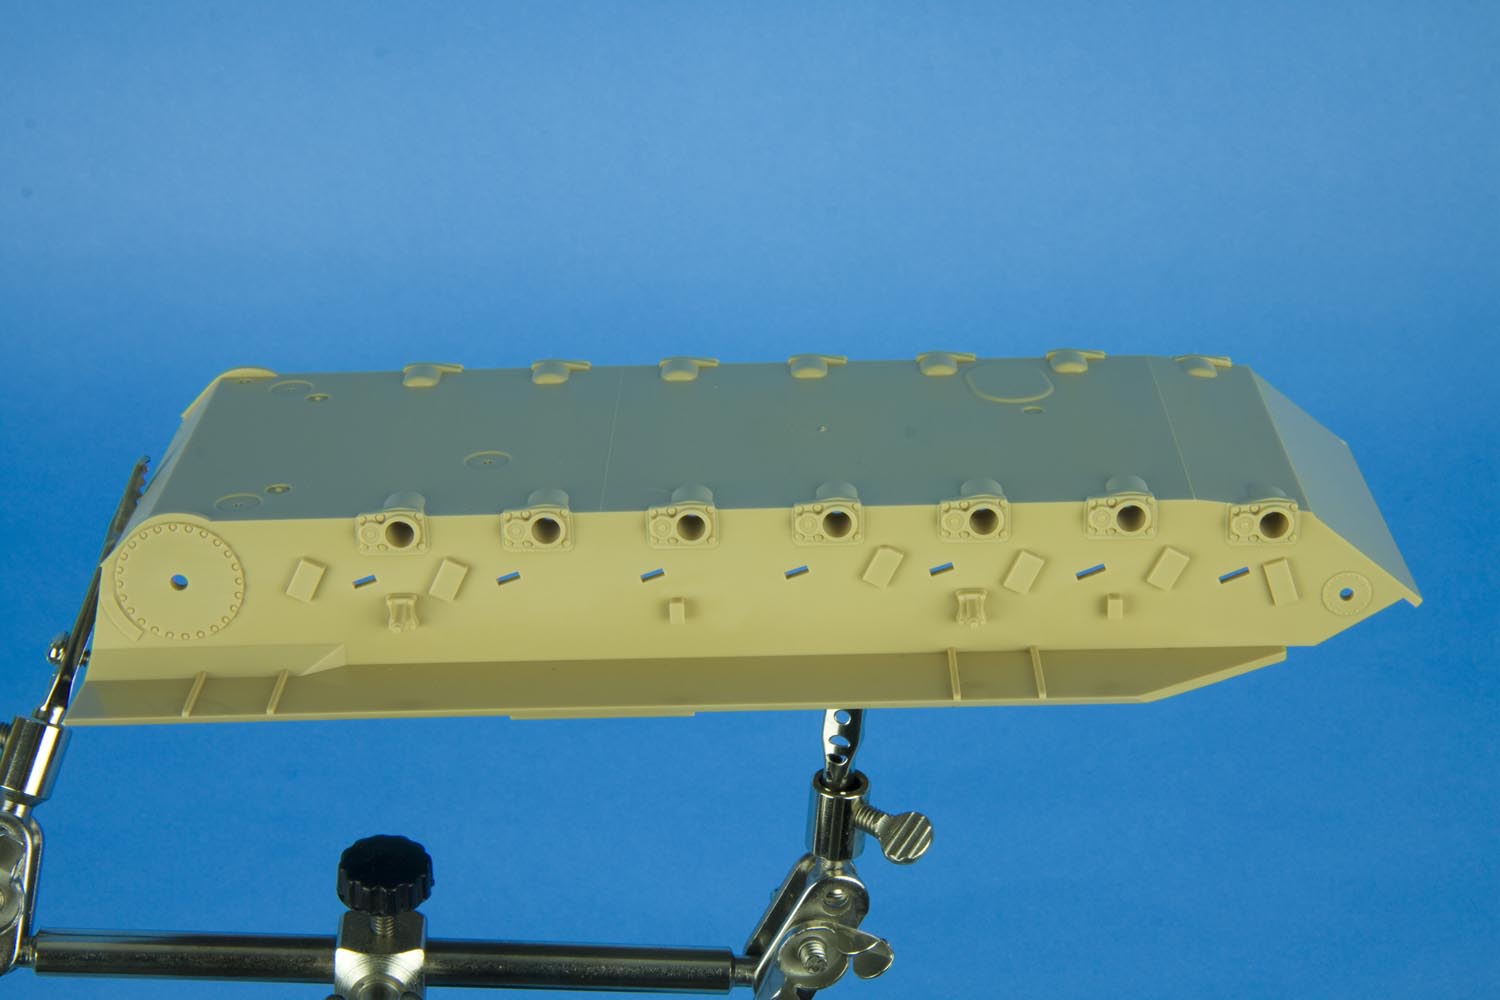
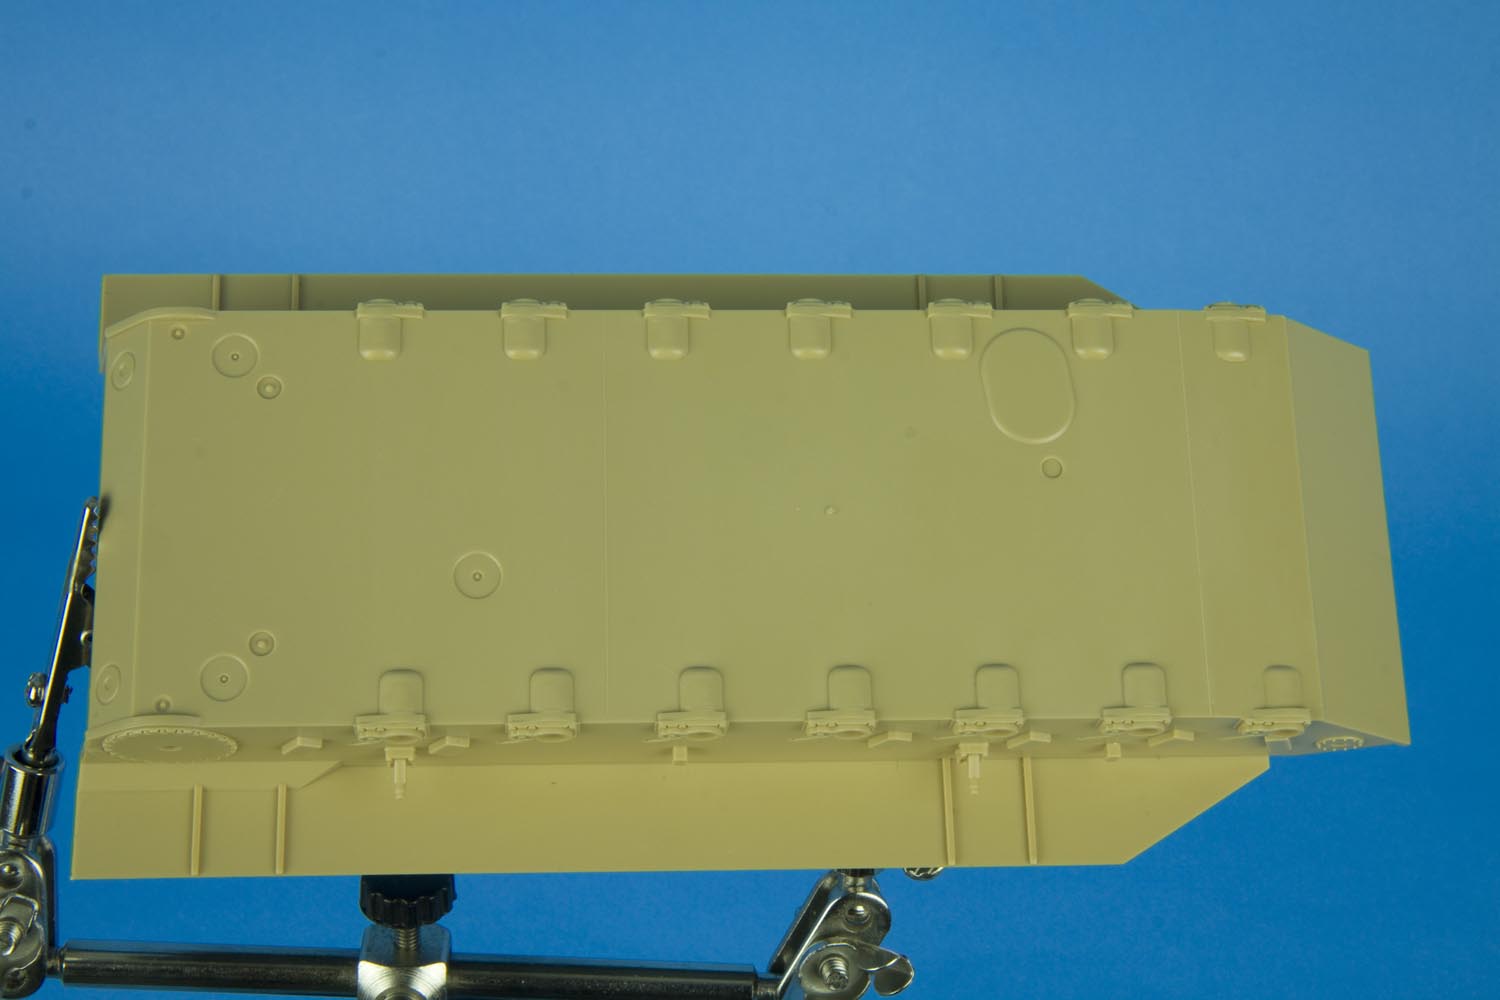
Hull bottom
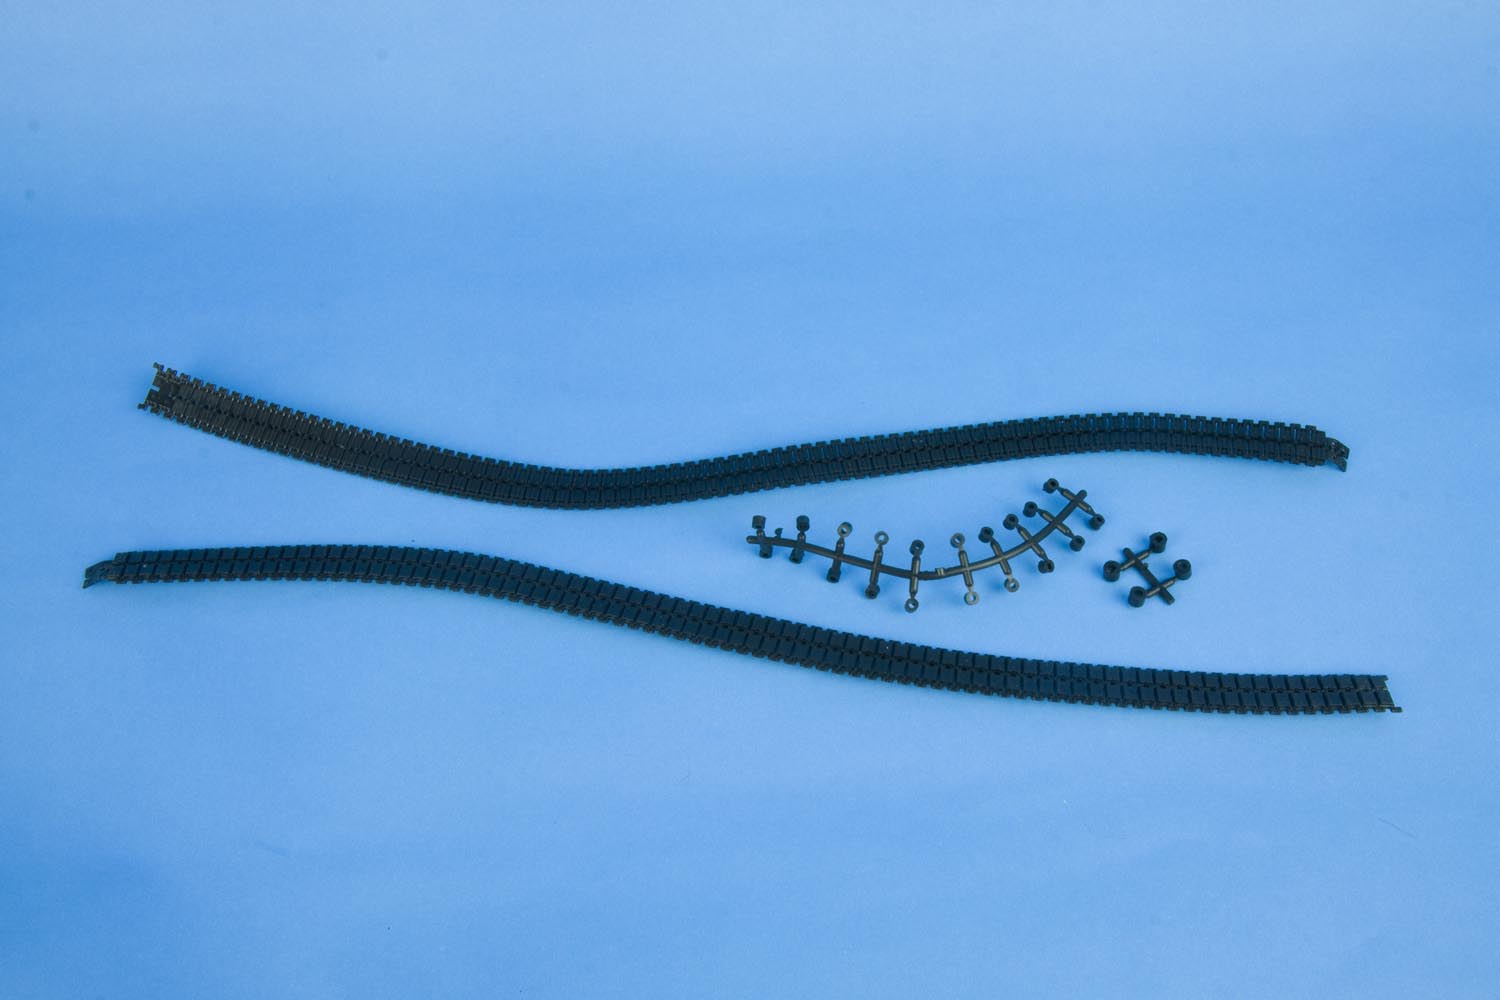
Tracks and poly caps - identical to those provided in the Meng 1A3/4)

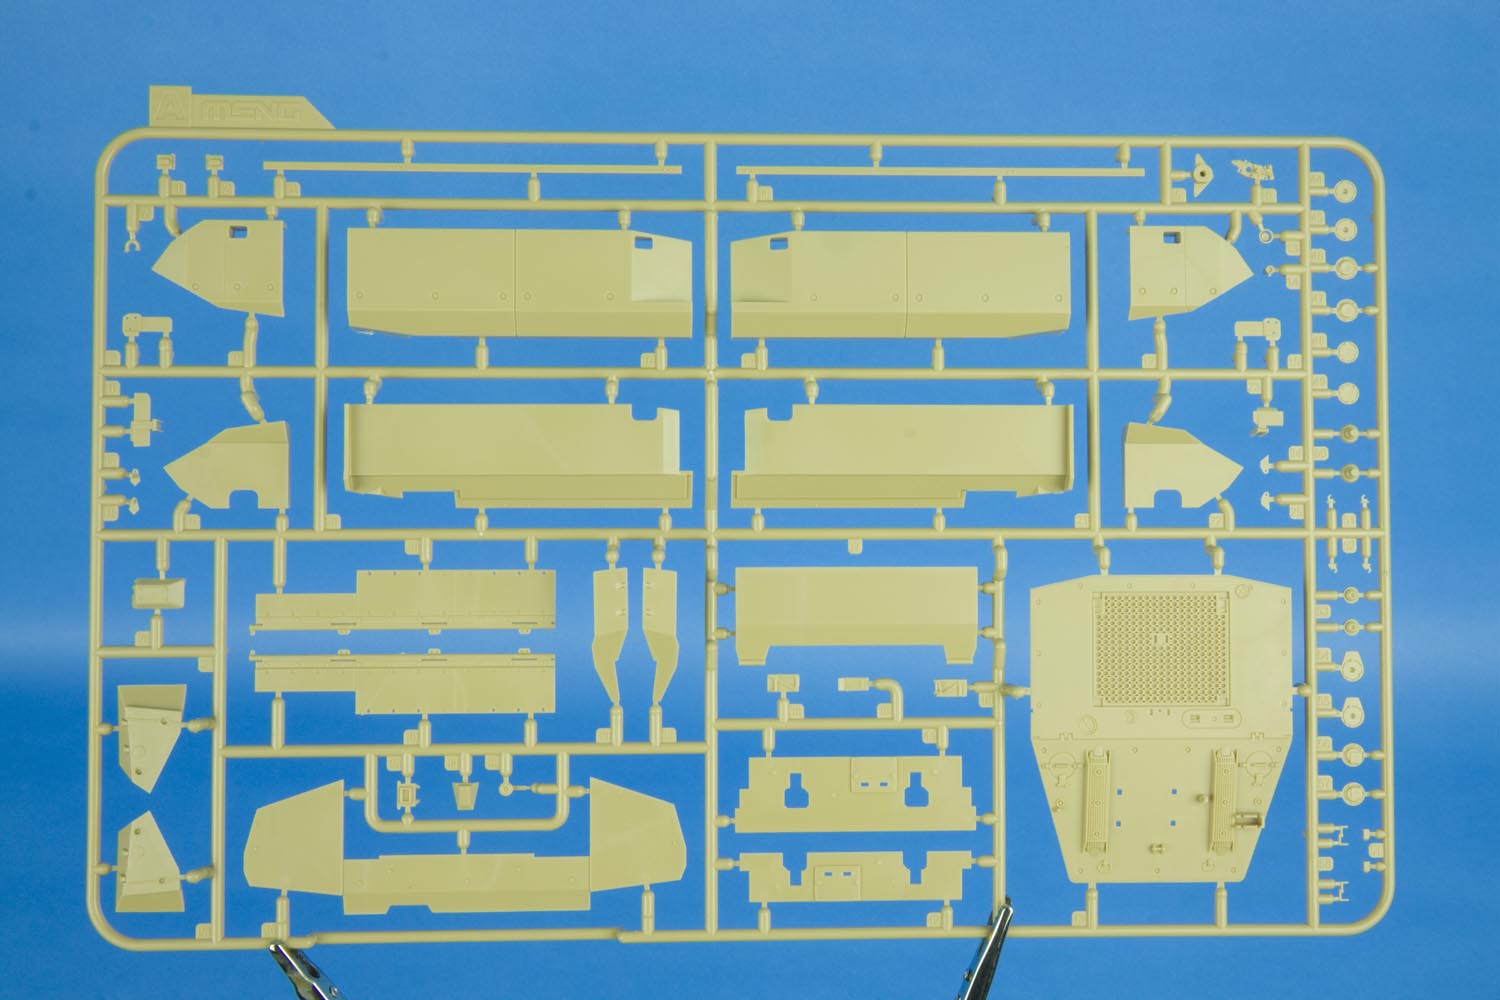
Sprue A - hull MEXAS modules, separate engine deck  ,
turret MEXAS mount parts and various small bits
,
turret MEXAS mount parts and various small bits
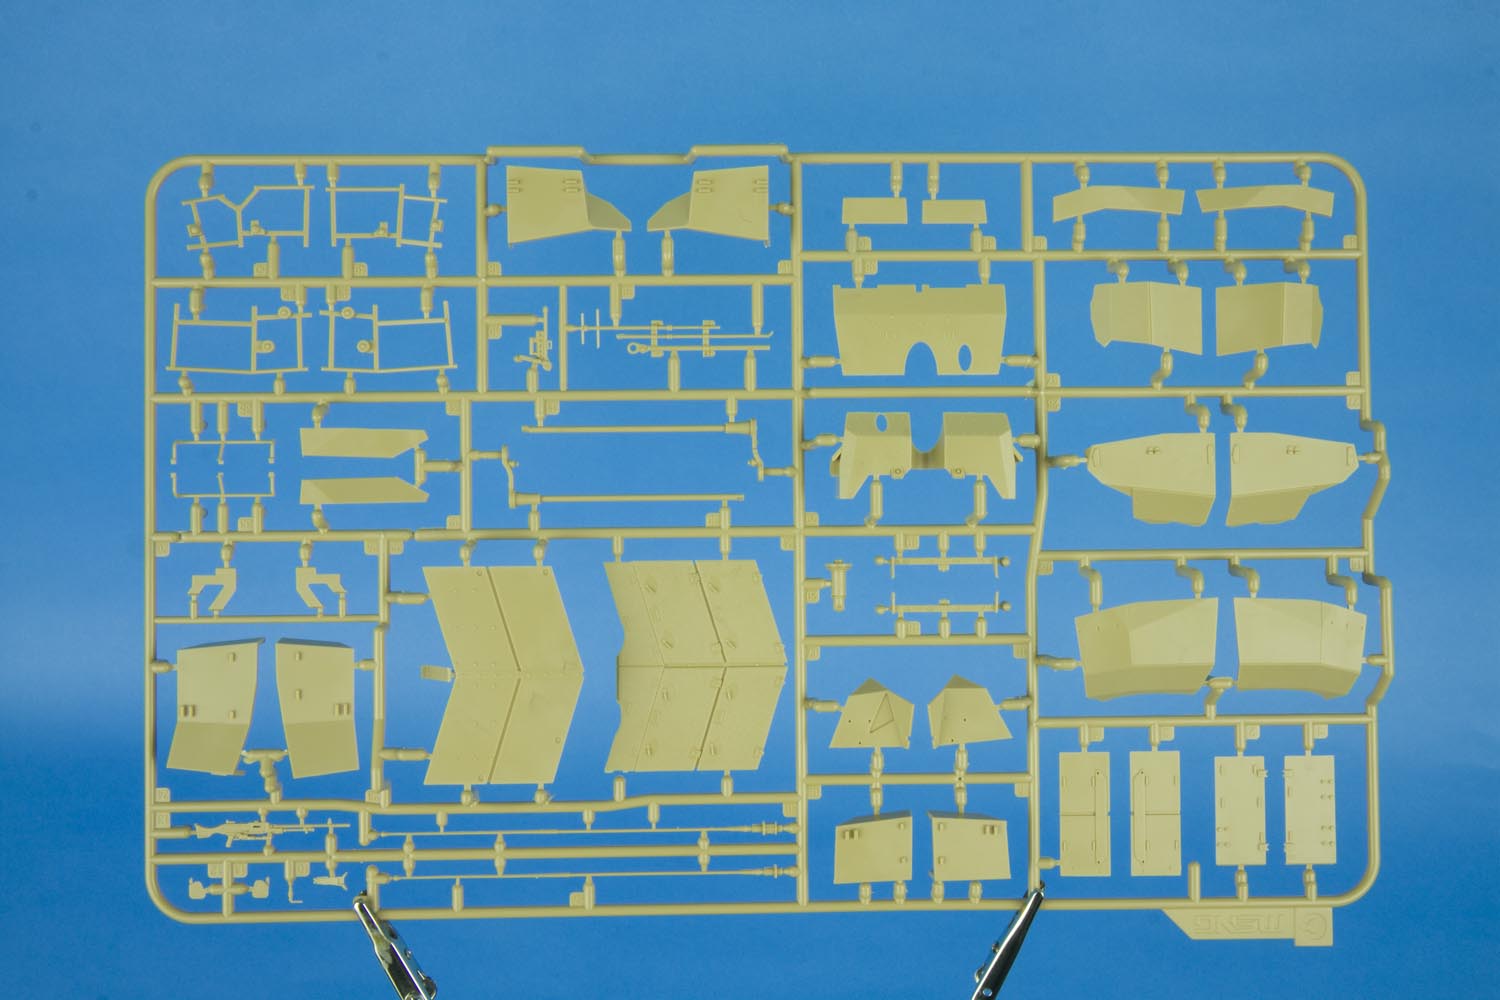
Sprue C - turret MEXAS modules and mounts, turret bustle bins, C6 and mount, Canadian aerials,
vehicles tools
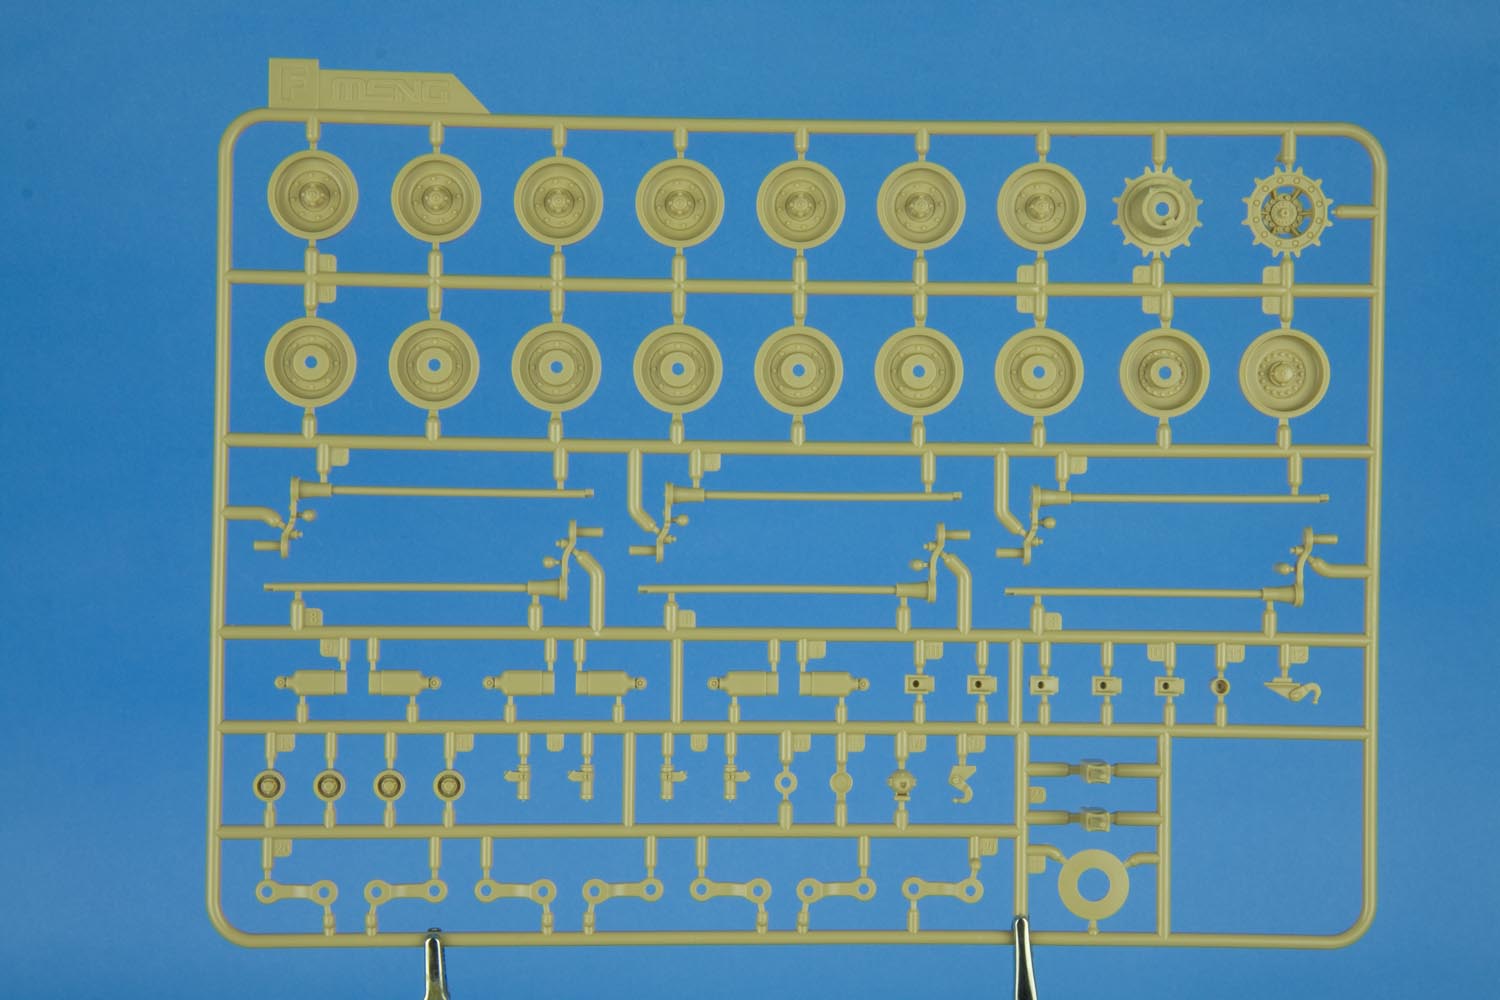
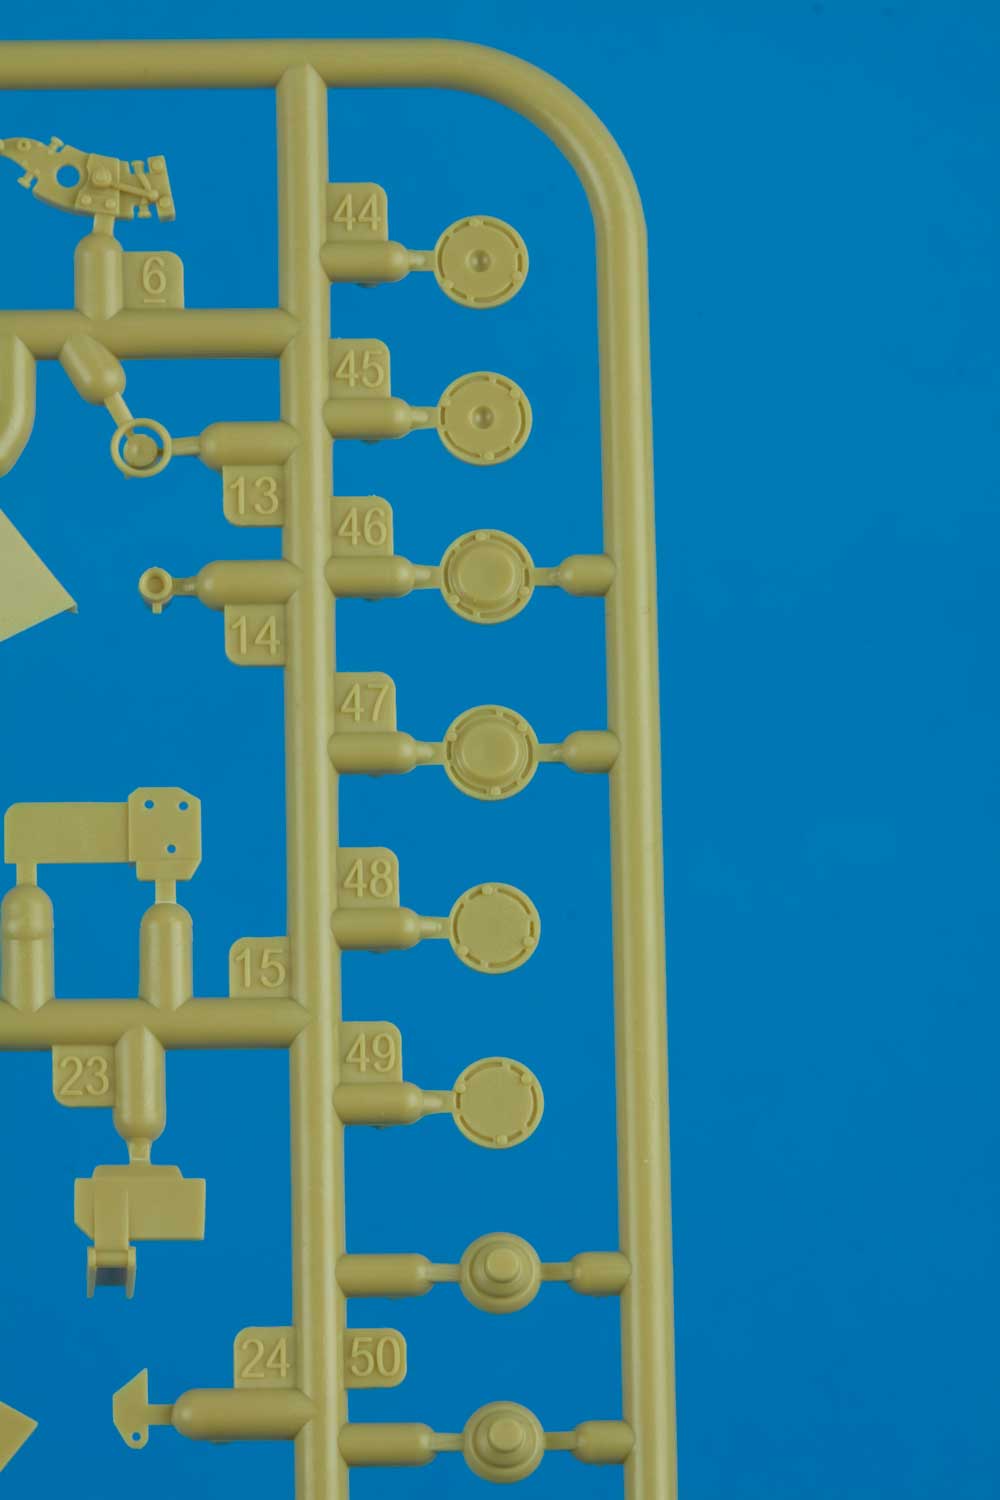
Sprue F (2 included) - road wheels, drive sprockets, re-worked suspension arms (and torsion bars),
various suspension parts, smoke dischargers and headlight housings
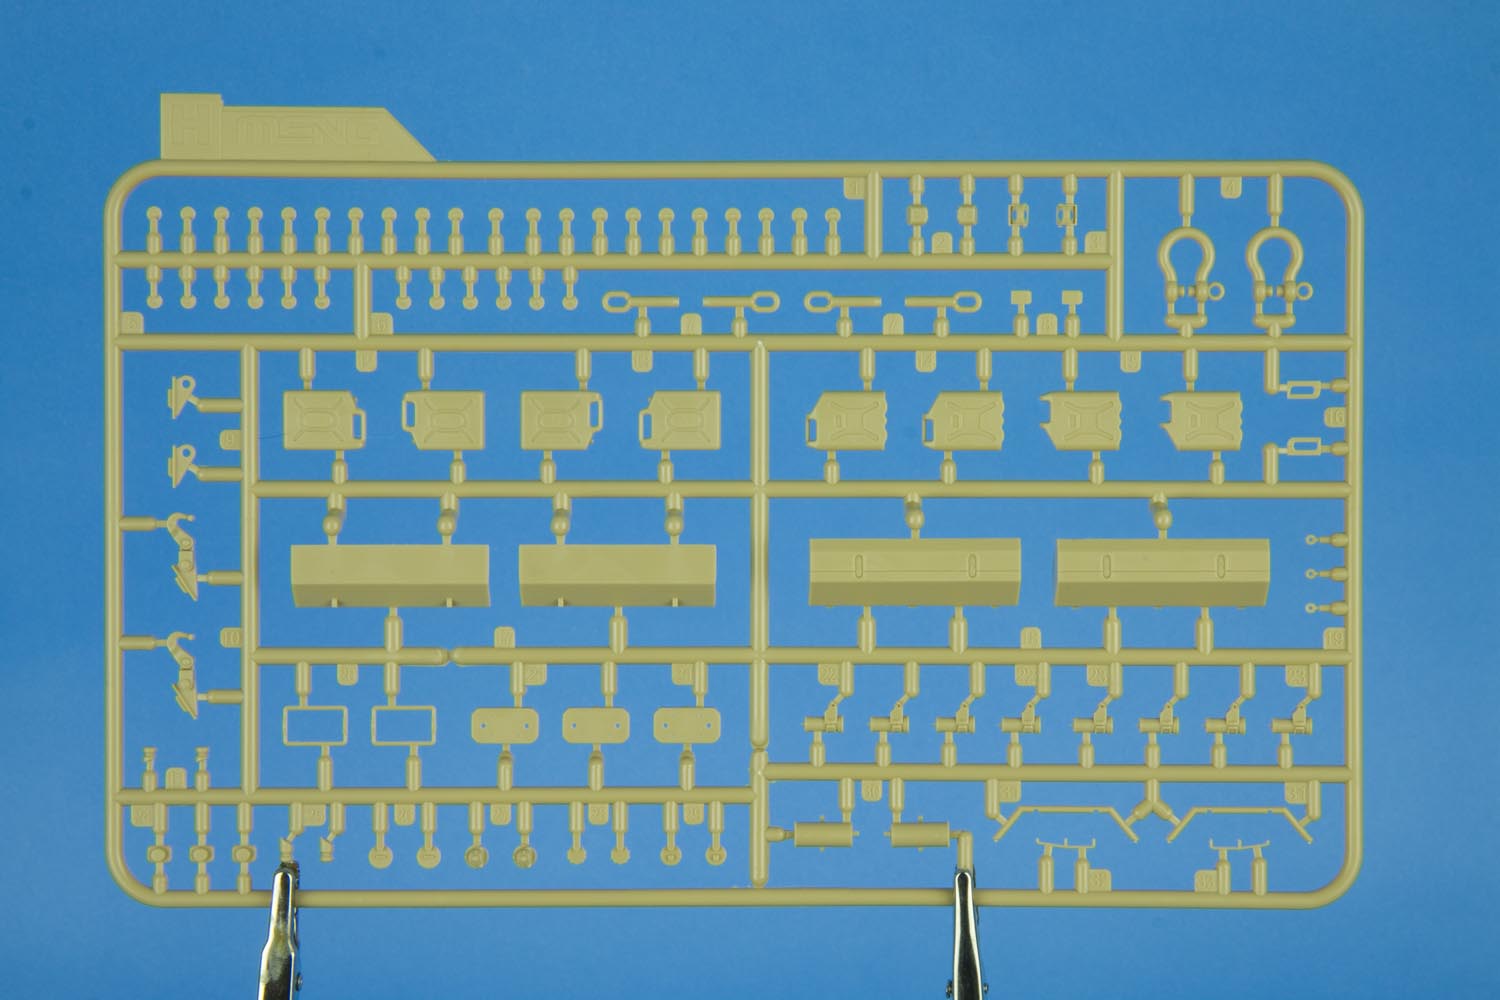
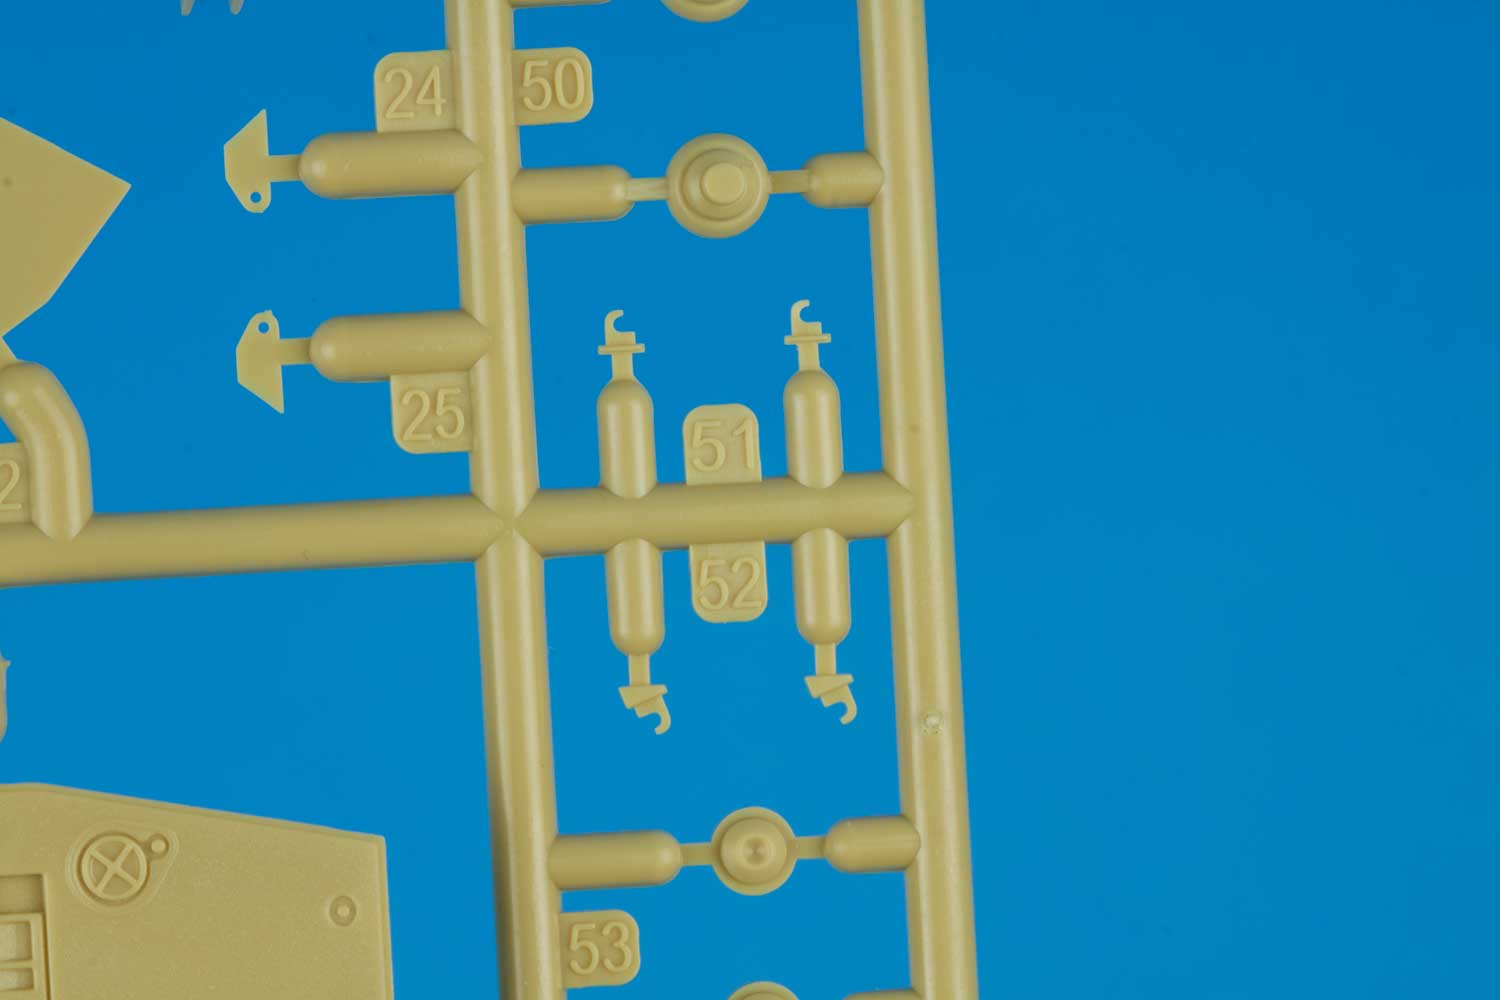
Sprue H - turret armor mounts, MEXAS hull stowage boxes, smoke dischargers (this kit has a lot of
these), POL cans, transport shackles, tow cable ends, various turret fittings
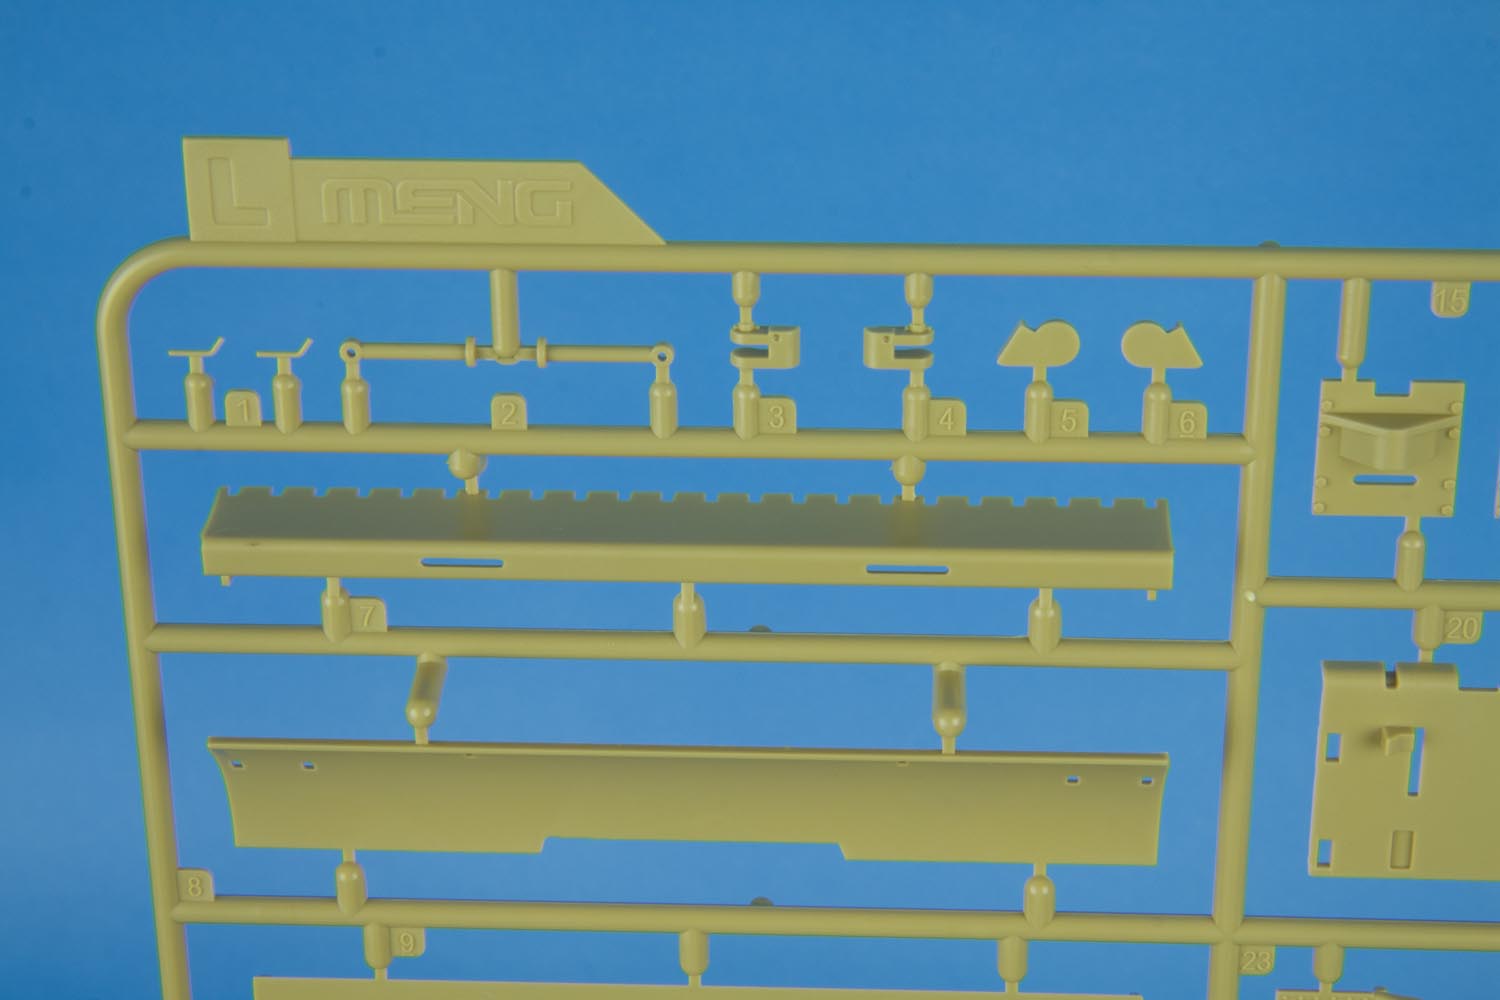
Sprue L - dozer blade (oh yeah)
Etch W - EMES-18 housing sun shade, drivers periscope wiper cover, loader's periscope covers,
stowage straps (for POL cans) and bustle bin stowage rack screen

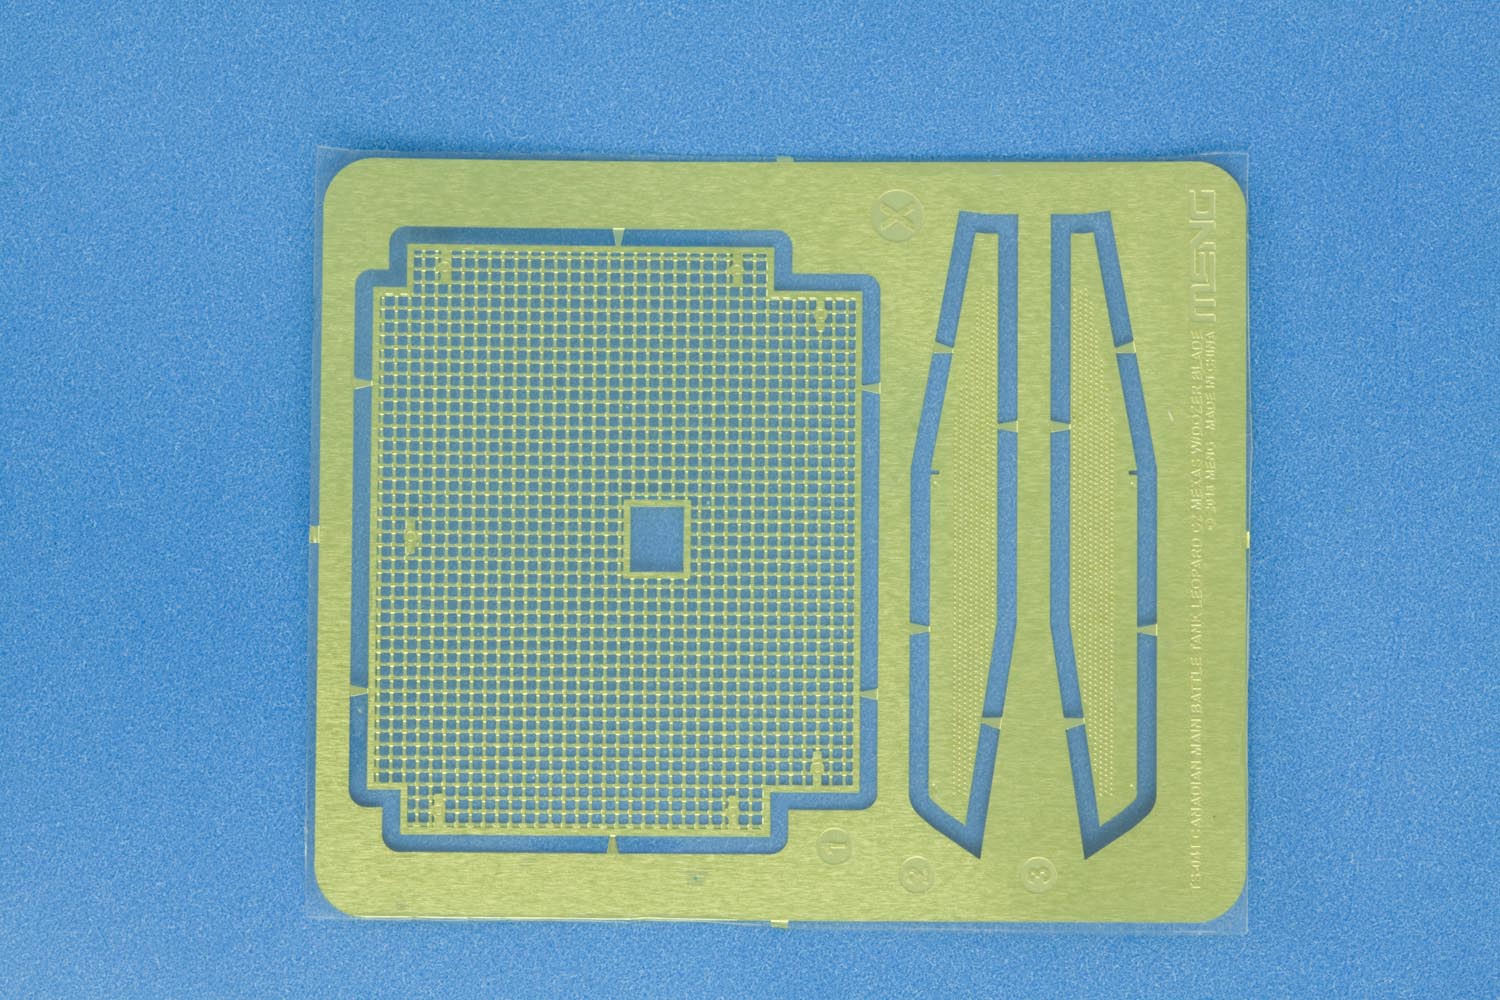
Etch X - engine cooling grill, engine air intake screens
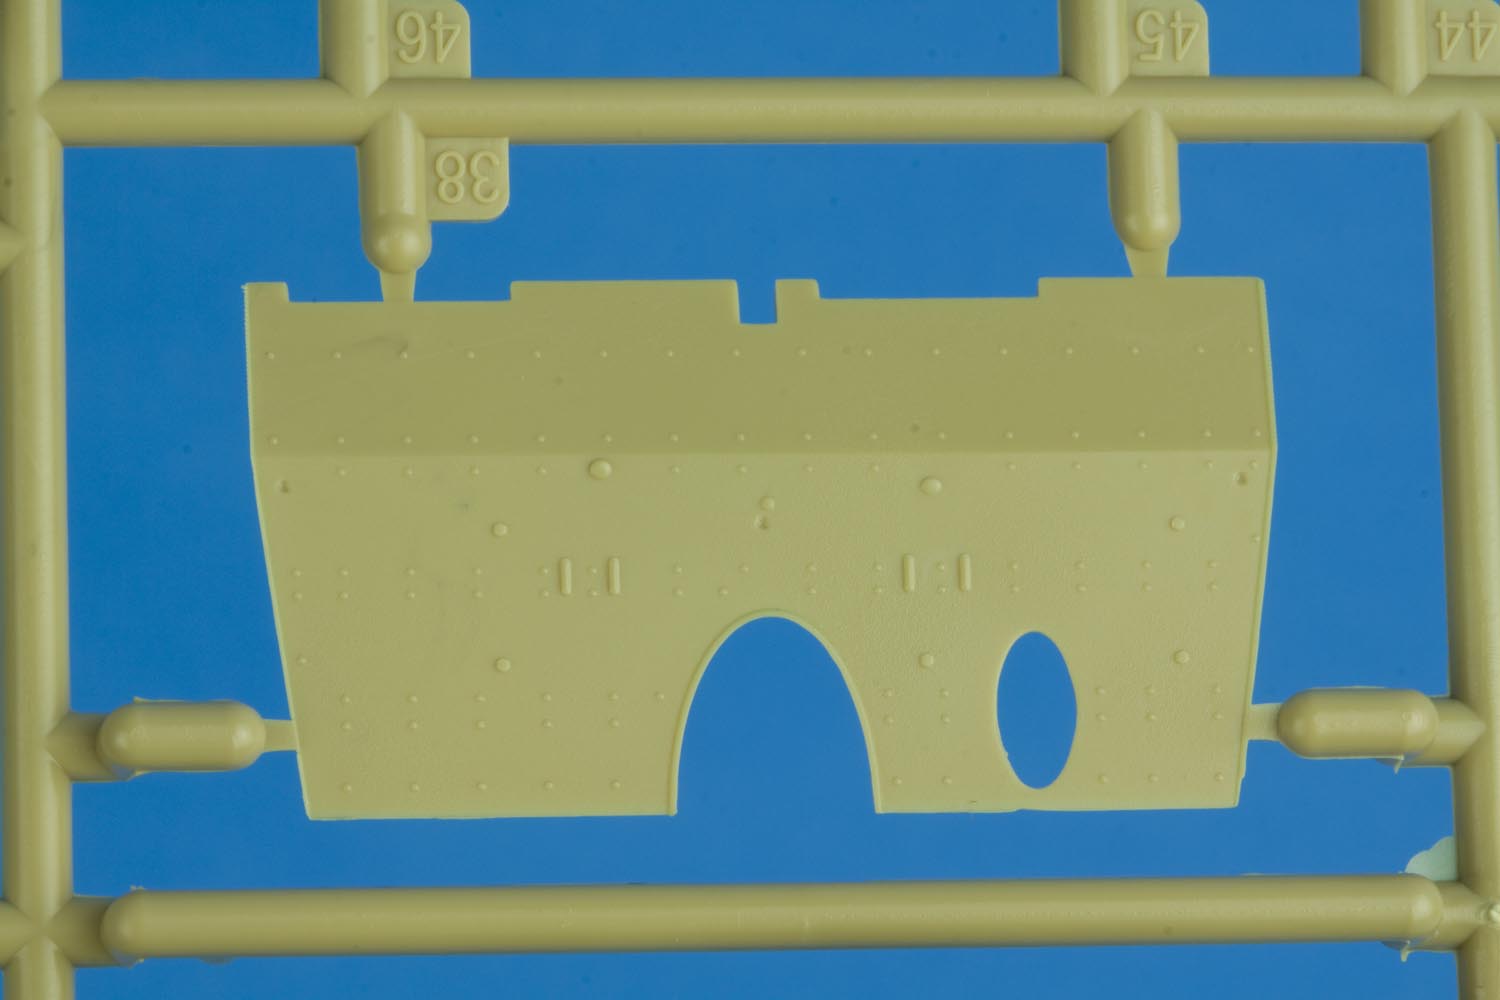
Hull top and ECM jammer
Turret


Tow cable

Decals
The parts are all crisply molded with little or no flash and minimal sink marks. This is the usual high standard of production that we have come to expect from Meng. There are some pretty gnarly ejector pin marks but these are located in areas which will not be visible on the finished kit.
As mentioned, the kit included a number of sprues which originated with either the Meng 1A3/4 or the 1A5. Upon inspection the parts from these legacy sprues do not seem to have changed. Therefore I won't say much about these parts because Michael Shackleton has done an excellent job describing these bits in his earlier reviews of Meng Leopards:
I was very pleased to see the dozer blade, the separate engine deck and the turret MEXAS module mounting frames. These three features will provide builders with many display and diorama options that until now would have been difficult or costly to achieve. Bravo Meng!
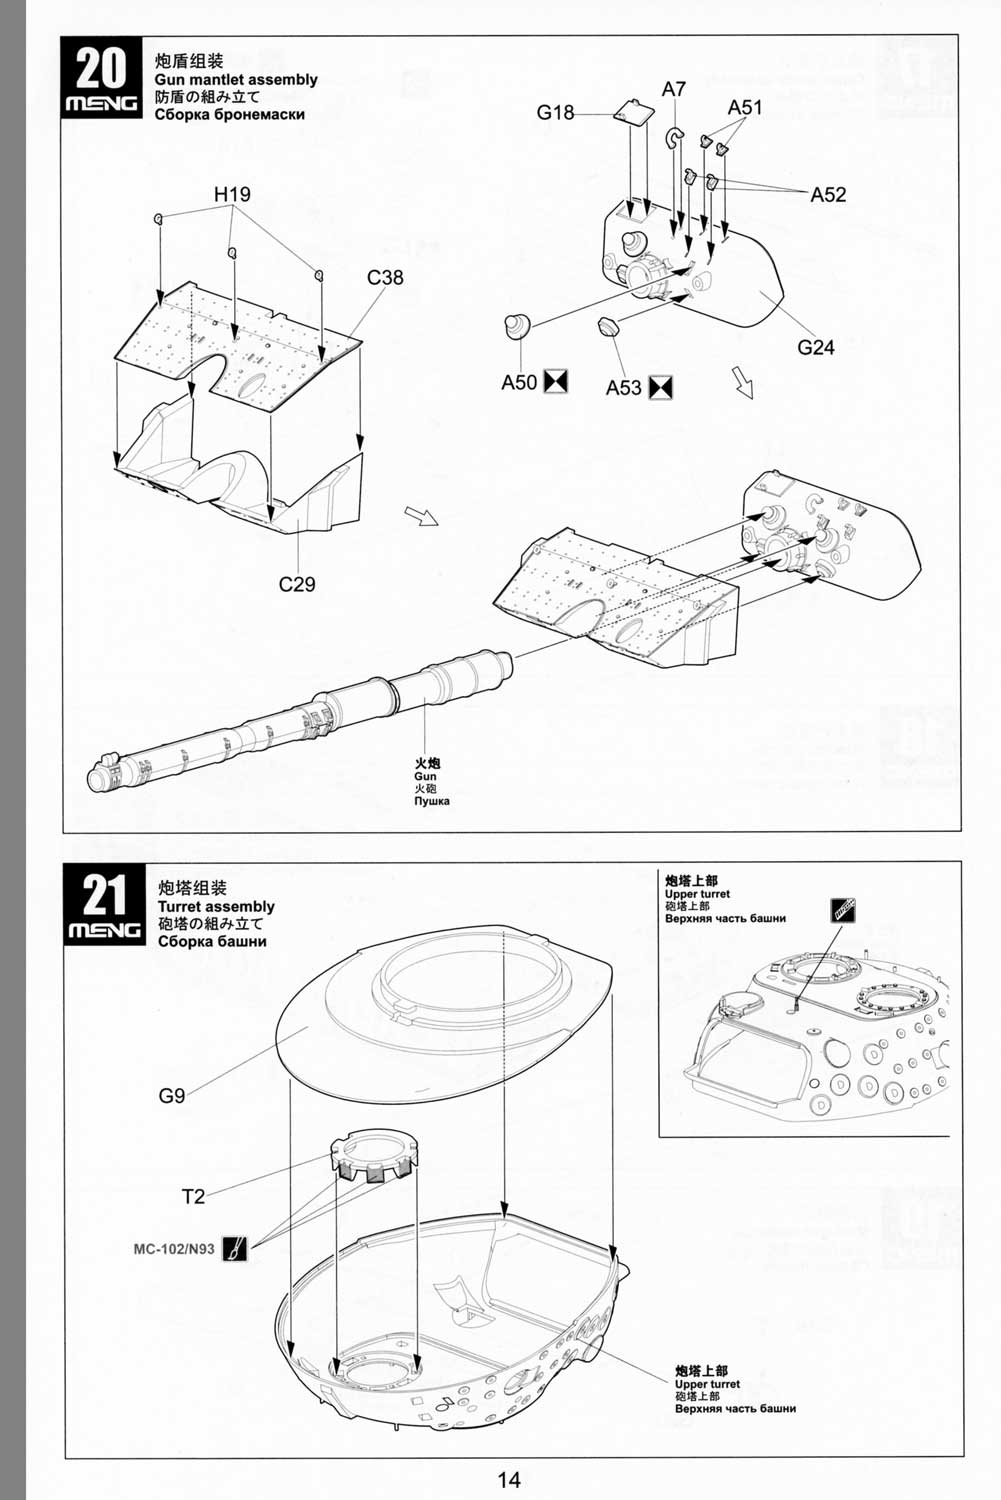
This review will not discuss parts which originated with older Meng offerings. This would include but is not limited to the EMES-18 sight housing (which is still the wrong width), the commander's and loader's hatch and the main gun mantlet.
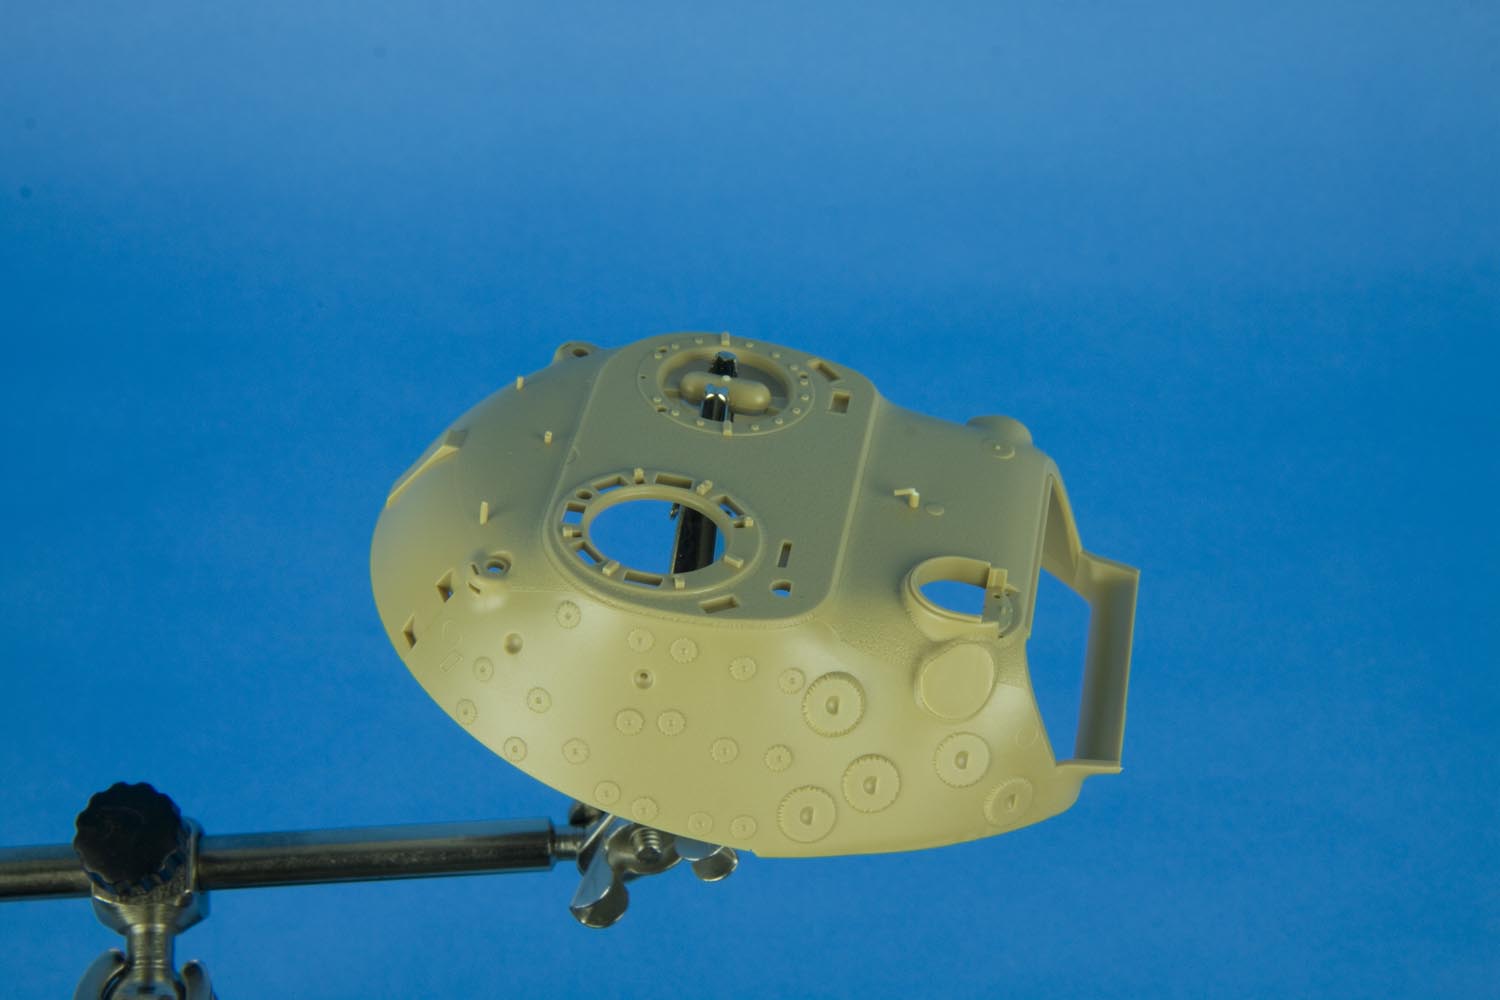
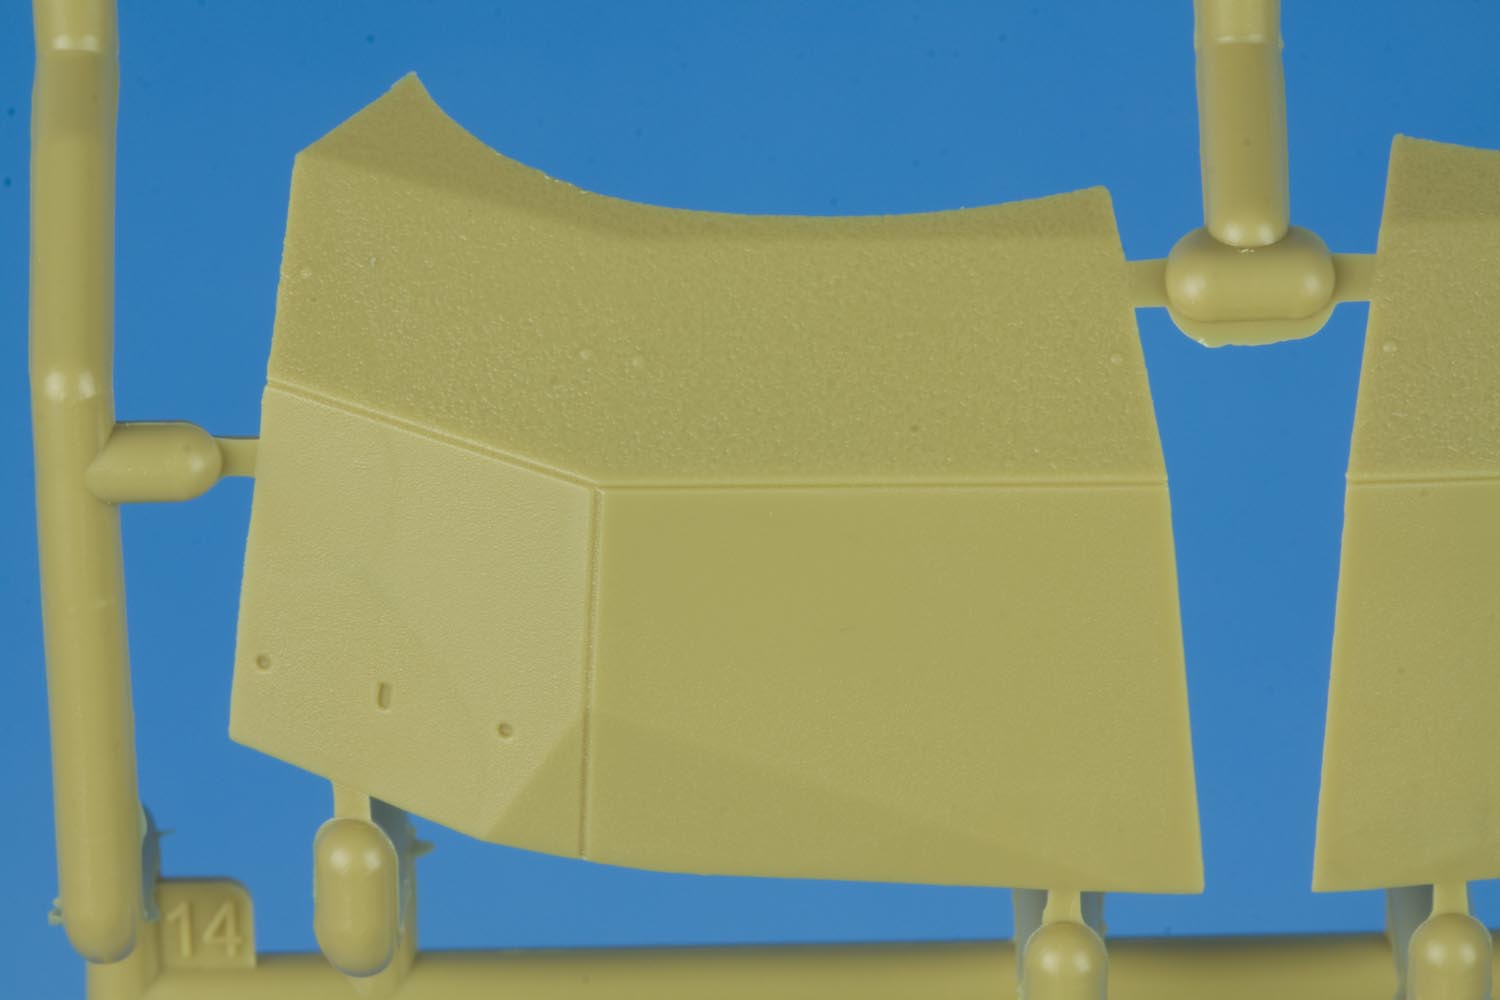
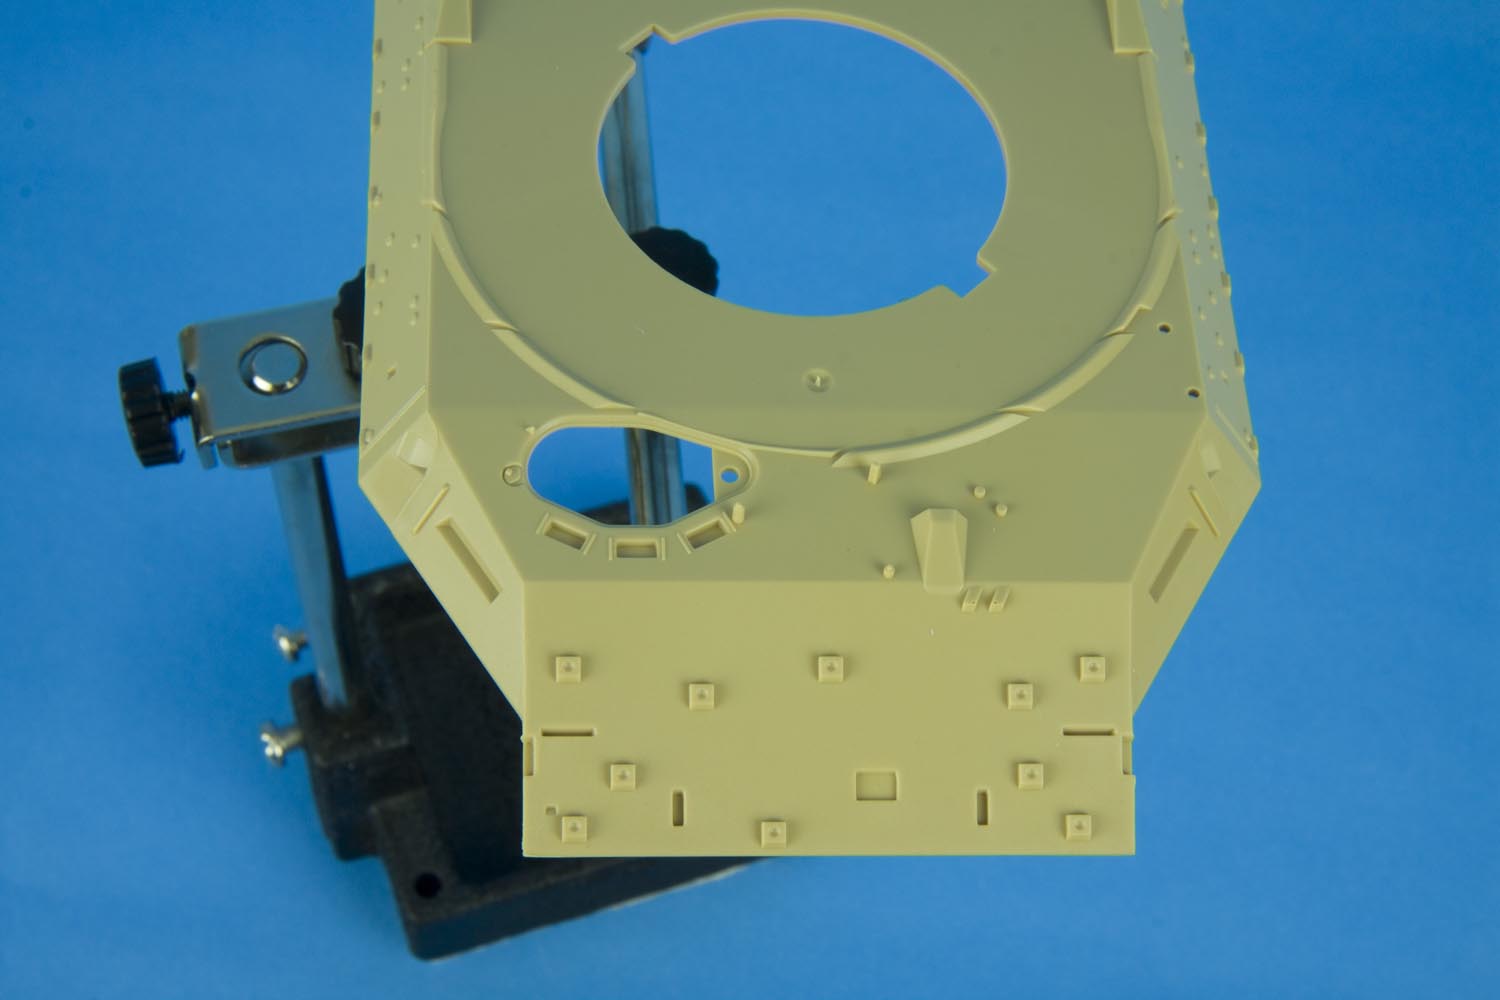
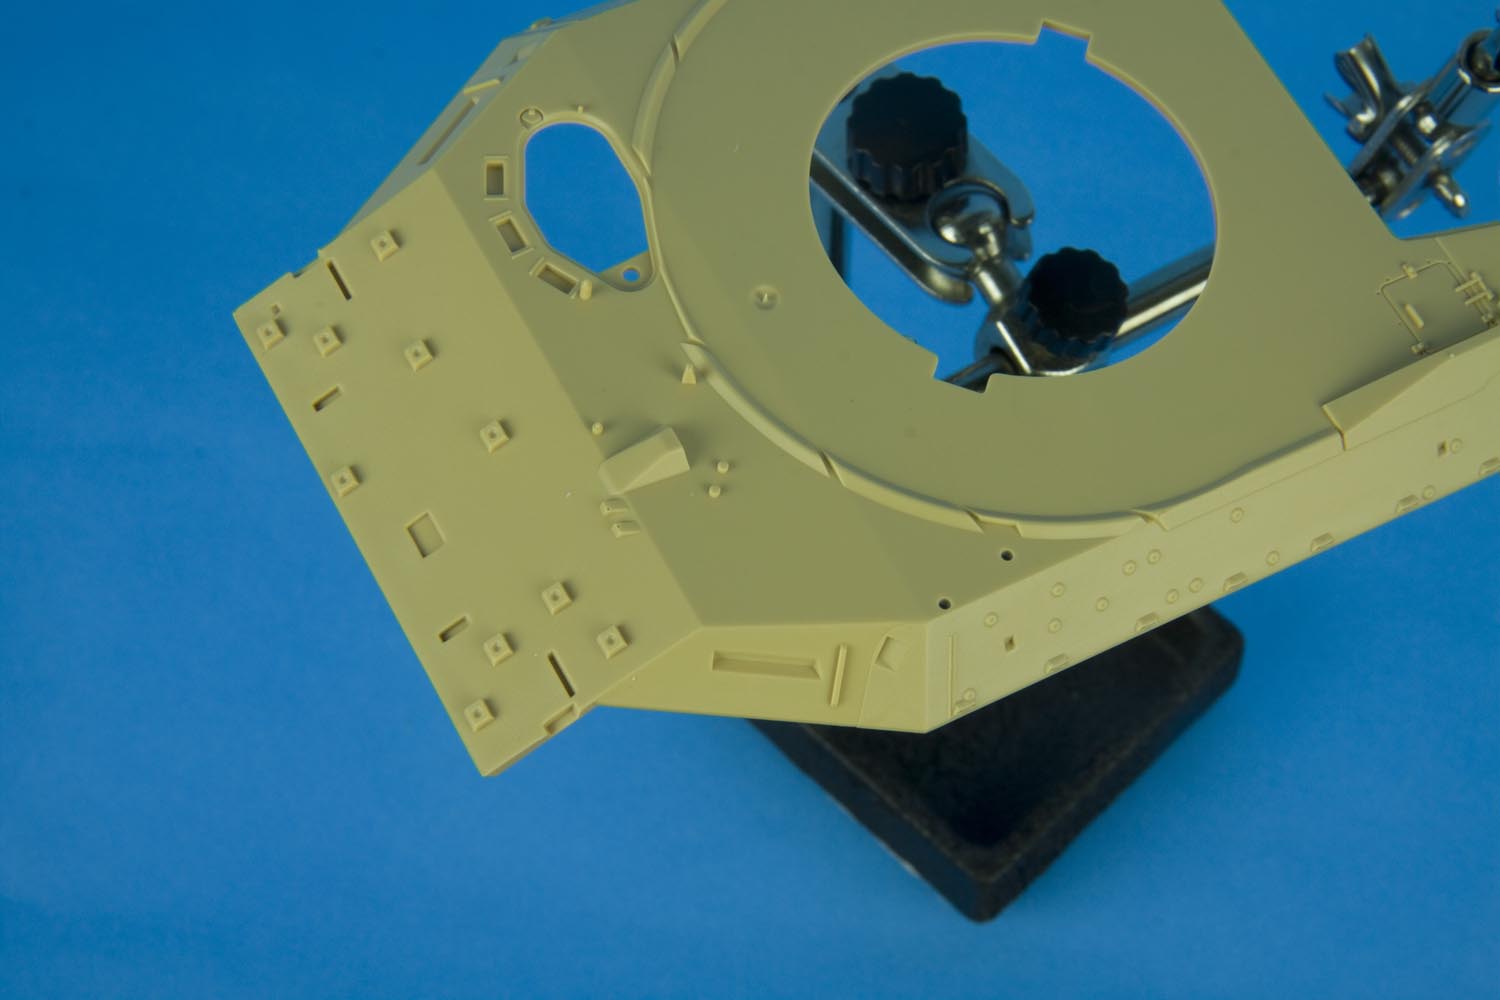
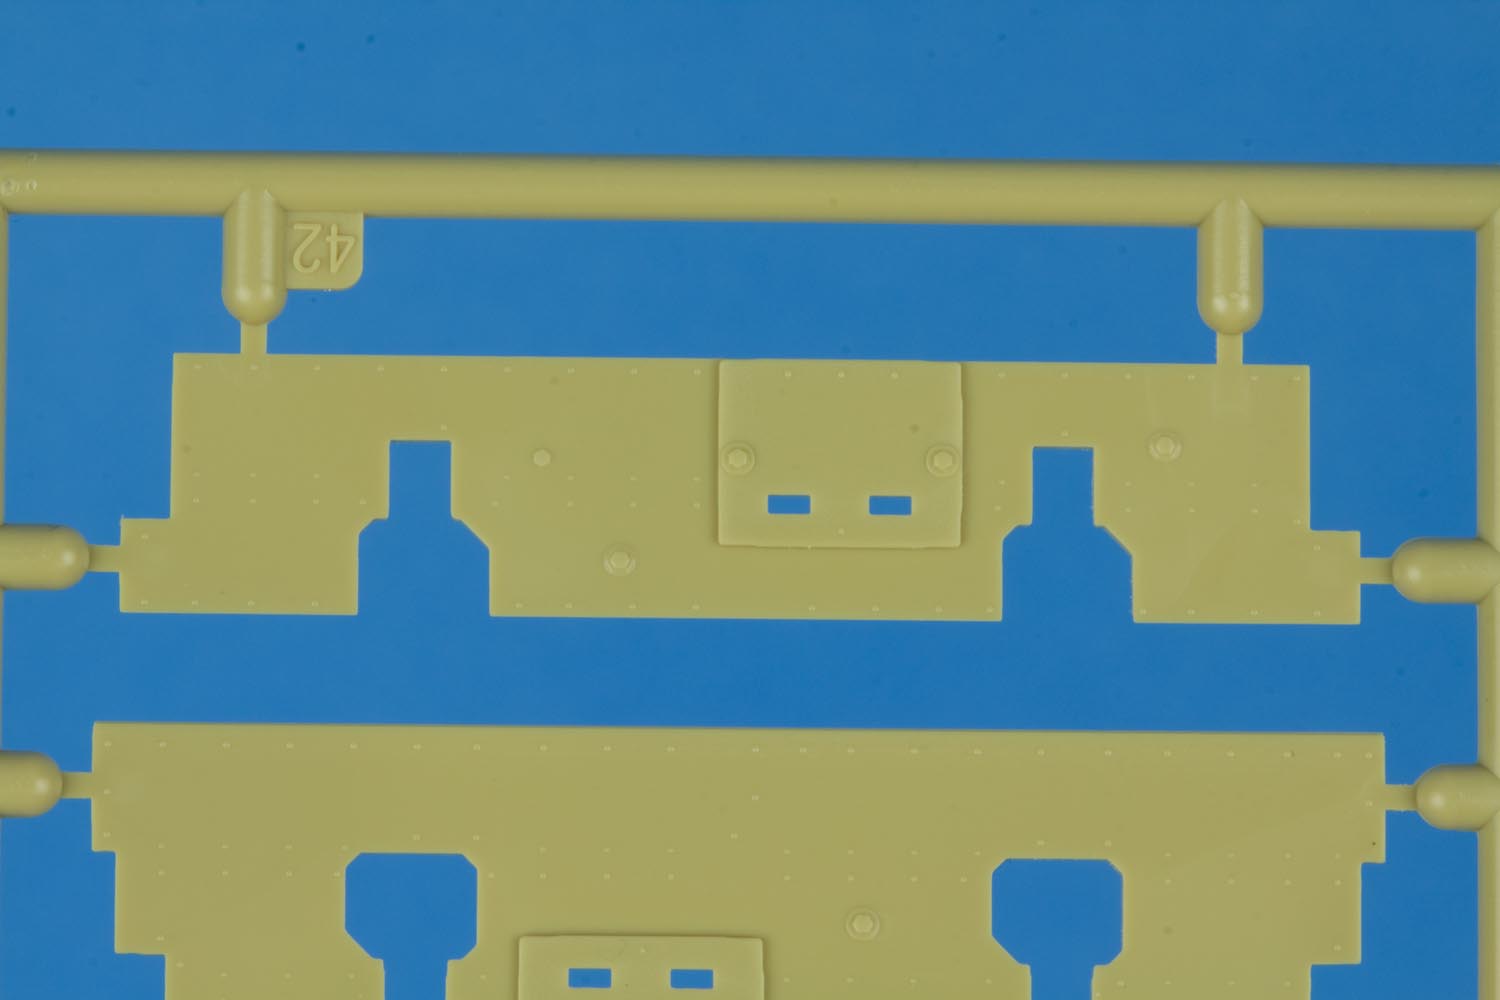
While very similar to the turret included with Meng's 1A5, the turret shell has been updated to reflect the Canadian modifications to the 1A5 turret. It is clear that a lot of care and attention was given to depicting the distinctly Canadian features of the turret. Generally speaking, these details are extremely well designed and rendered with crisp molding of fine details throughout. There are several really fine and easily breakable cylindrical posts on the turret top. The keen eyed reader will note that one of these was broken off while photos were being shot in my studio. I believe Michael noted the same thing when he reviewed the Meng 1A5!
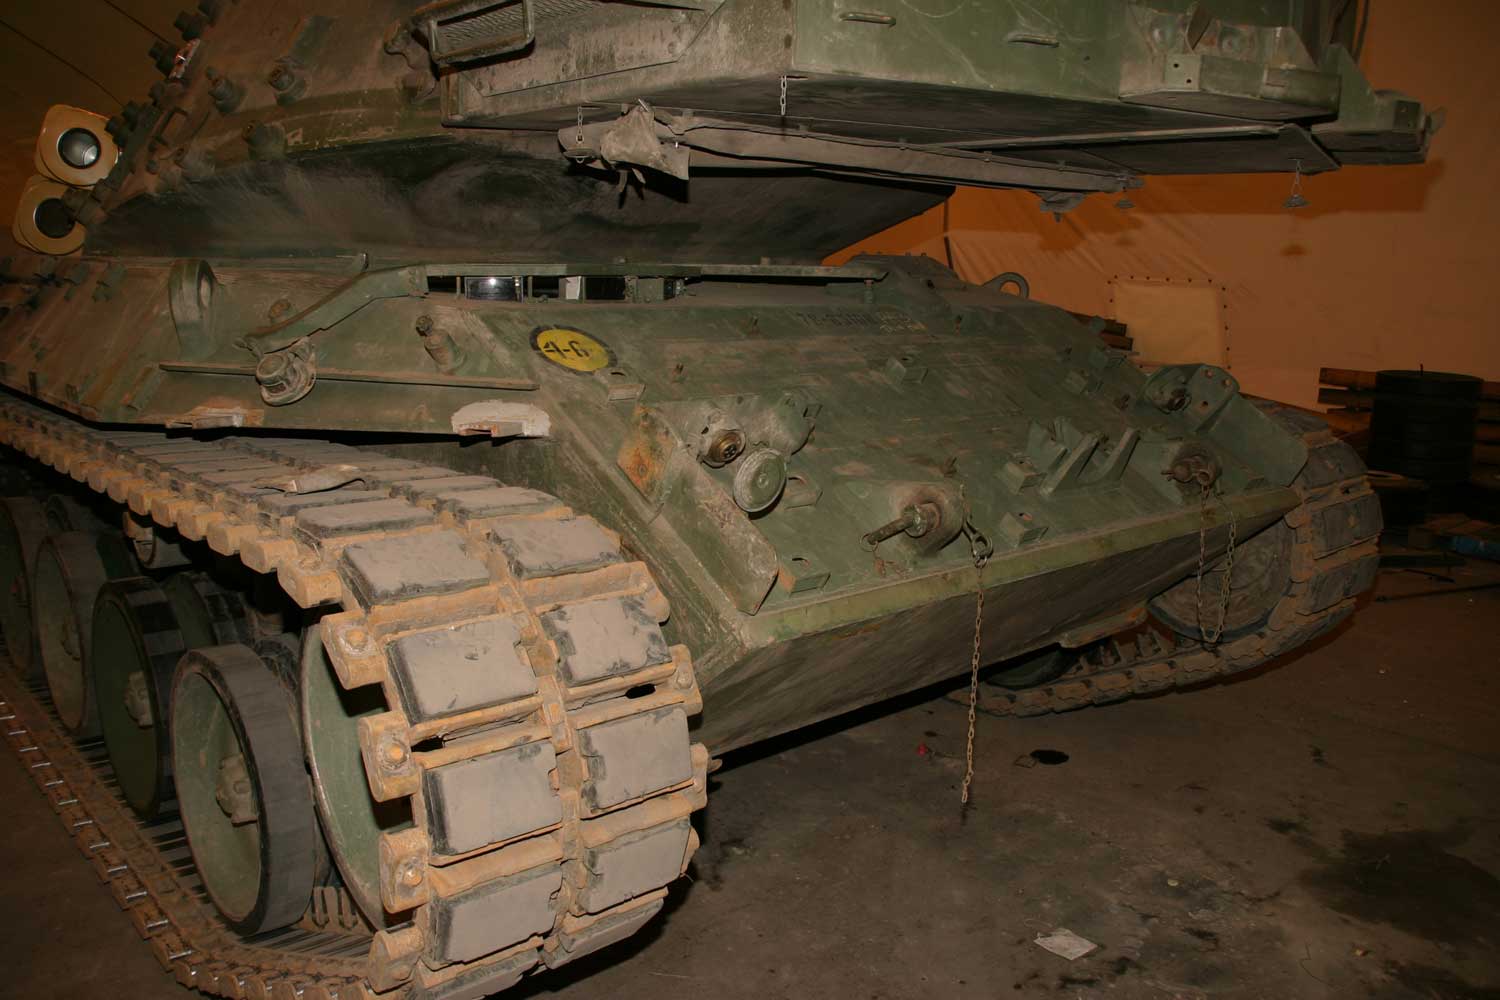
The main turret shell features the anti-skid coating applied to the C2. Such anti-skid coating is typical of all Canadian armored vehicles because winter can be cold, icy and quite slippery! The texture of the anti-skid coating is very fine and not over done and is applied only to the appropriate parts of the turret top. The photos below illustrate the visible demarcation line of the anti-skid areas.
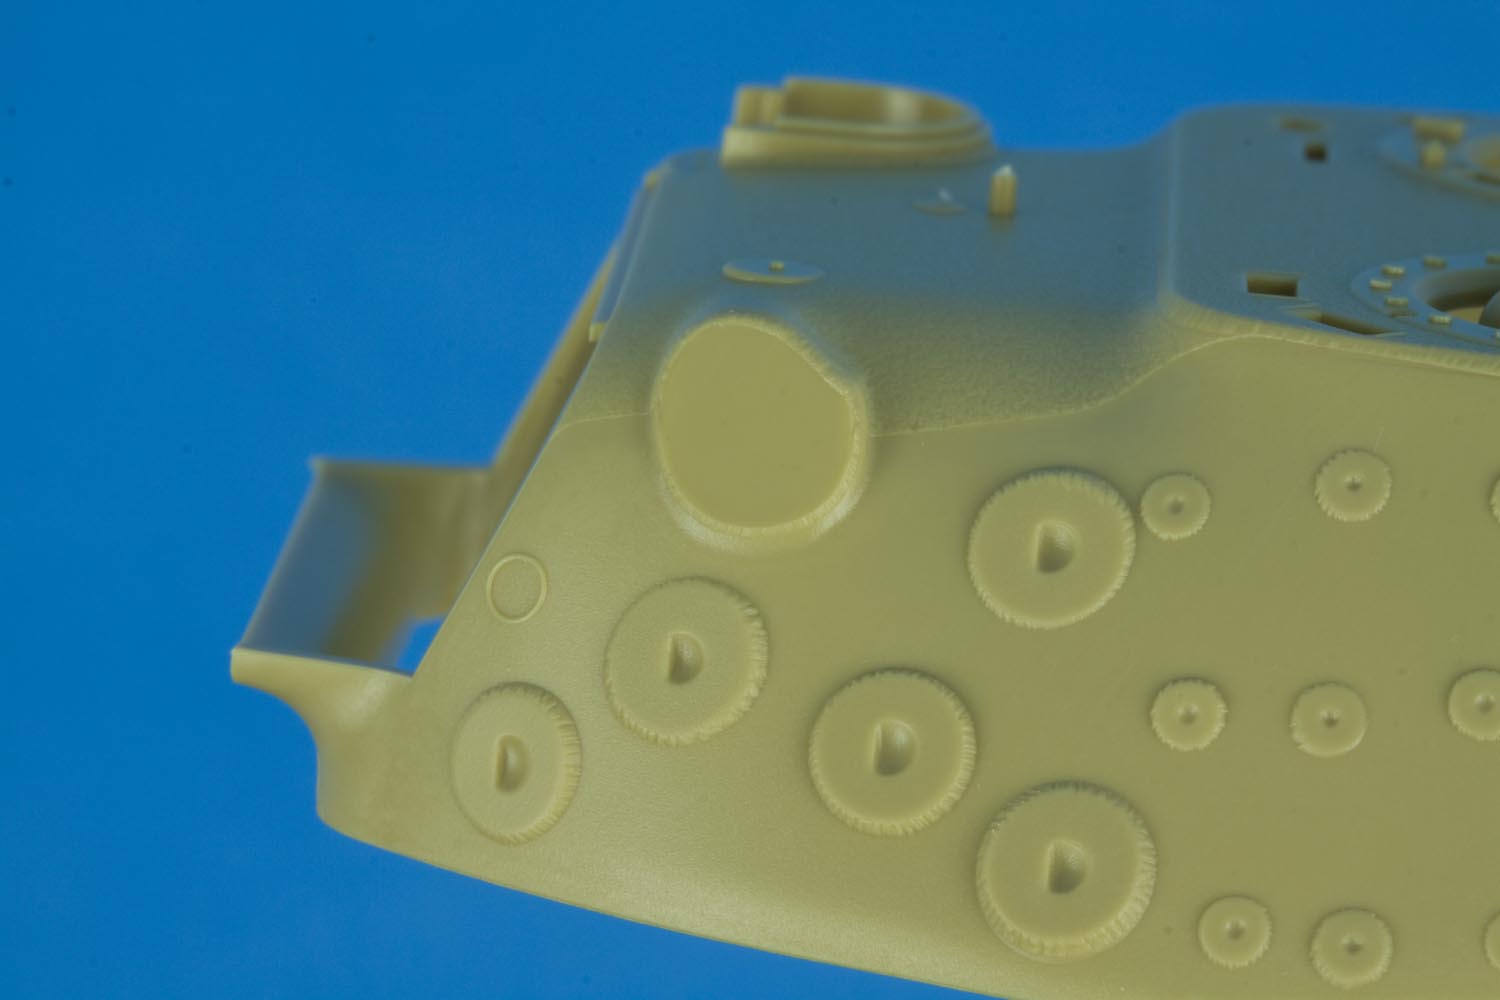

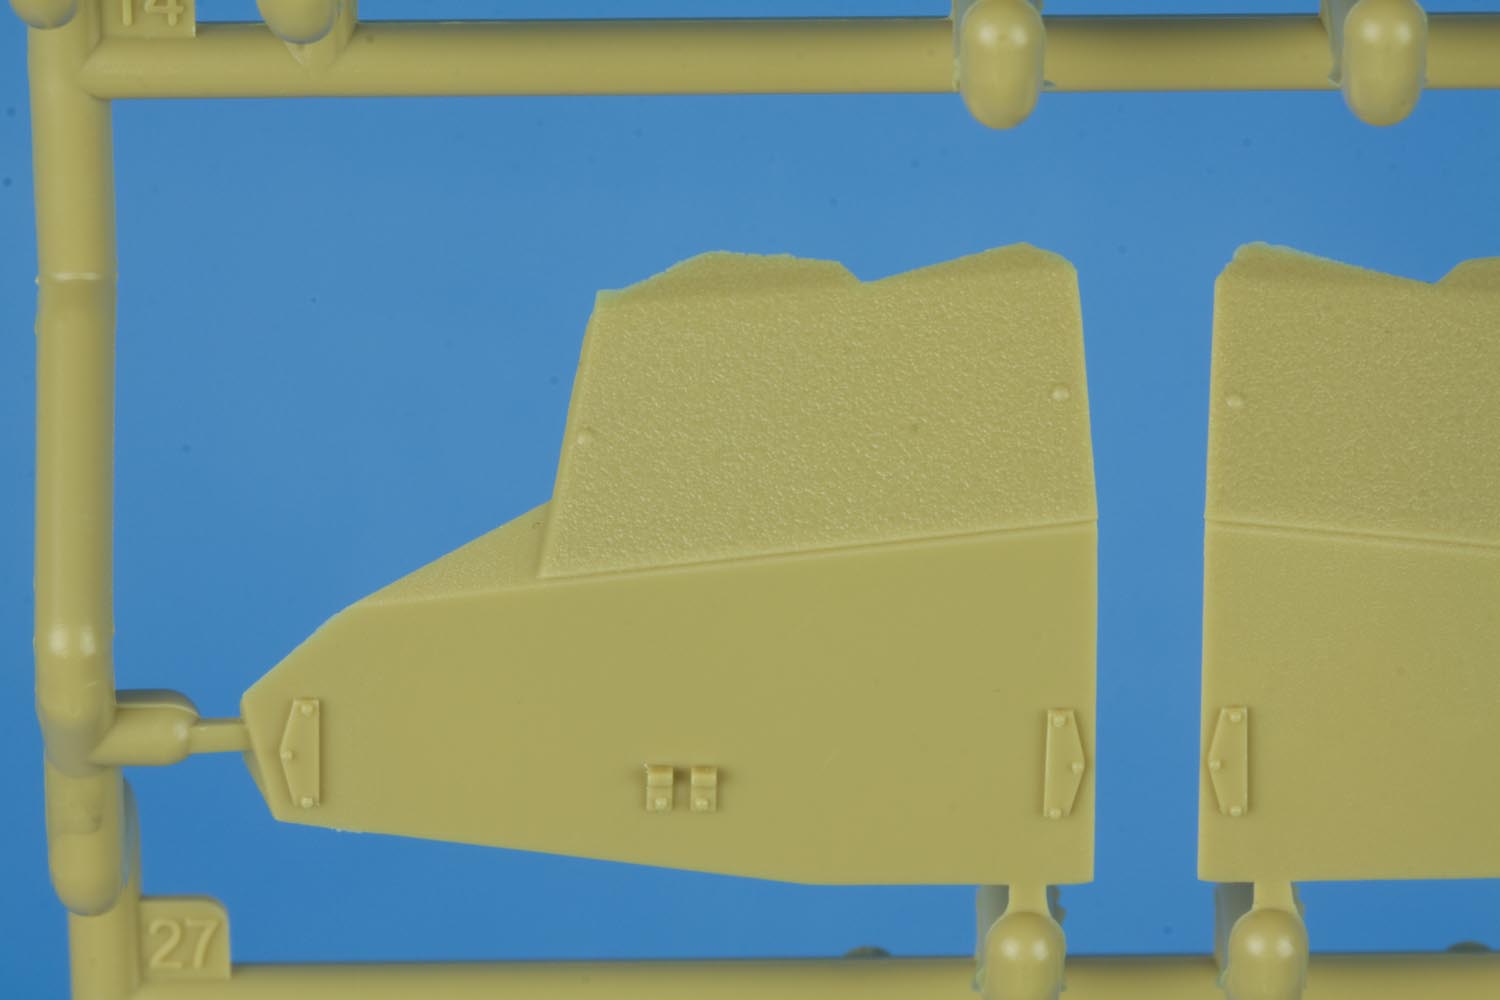
Unfortunately, one other thing which is plainly visible in these photos is the incorrect shape of the blanking plates over the range finder heads as well as the weld beads running in the wrong direction. I find it curious that Meng chose not to update these aspects as the turret was clearly modified for this kit. Below is what the blanking plates and weld beads should look like on a C2:
![]()
![]()
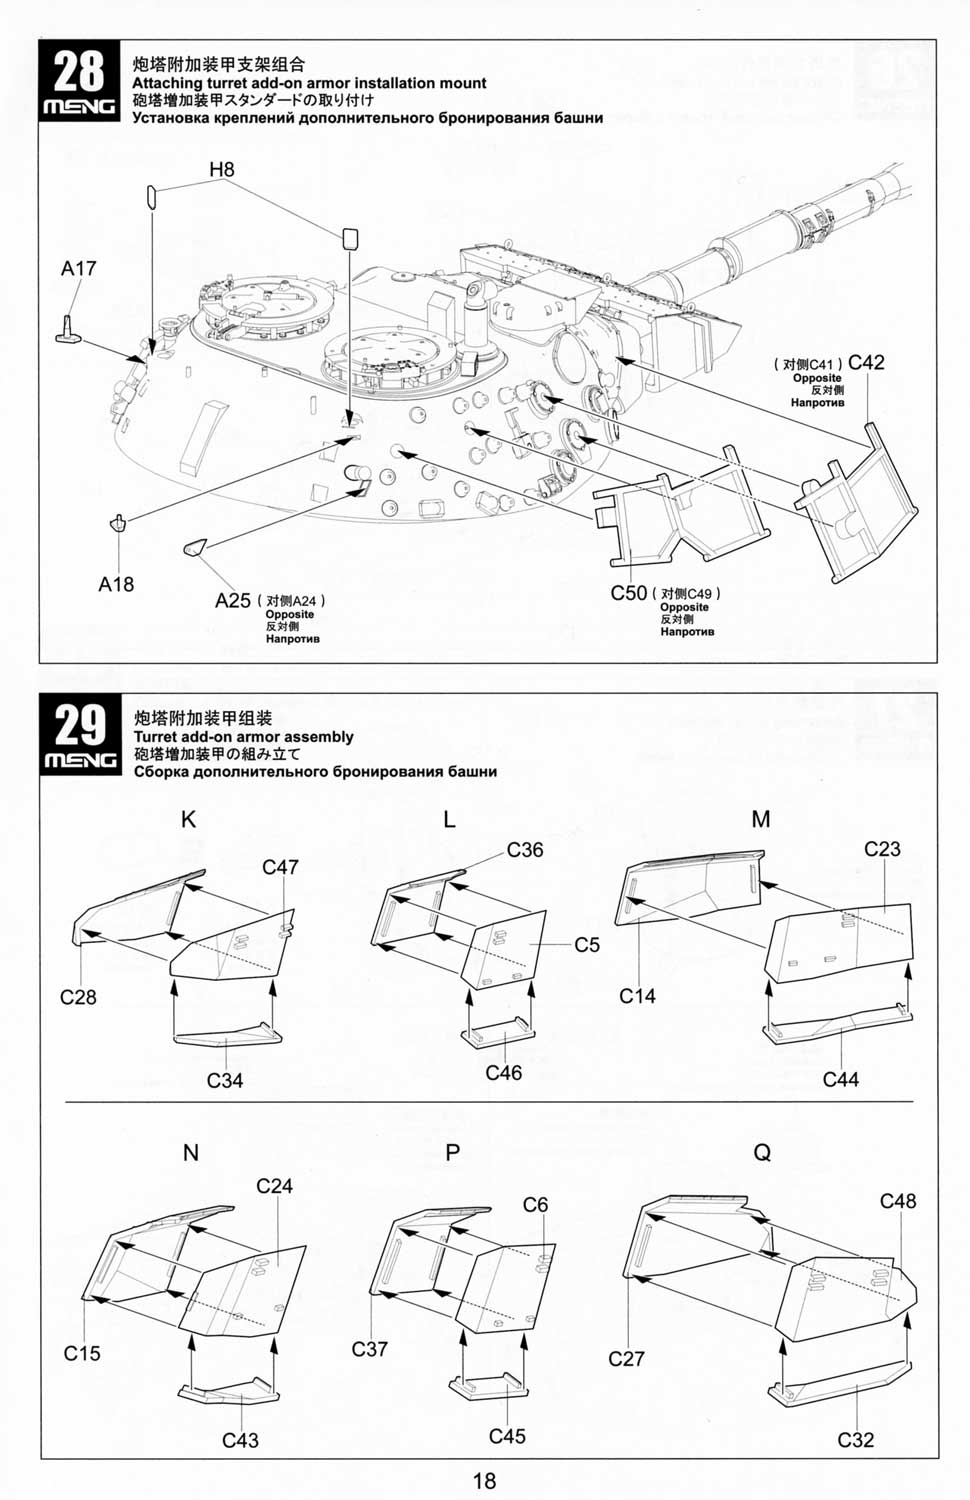
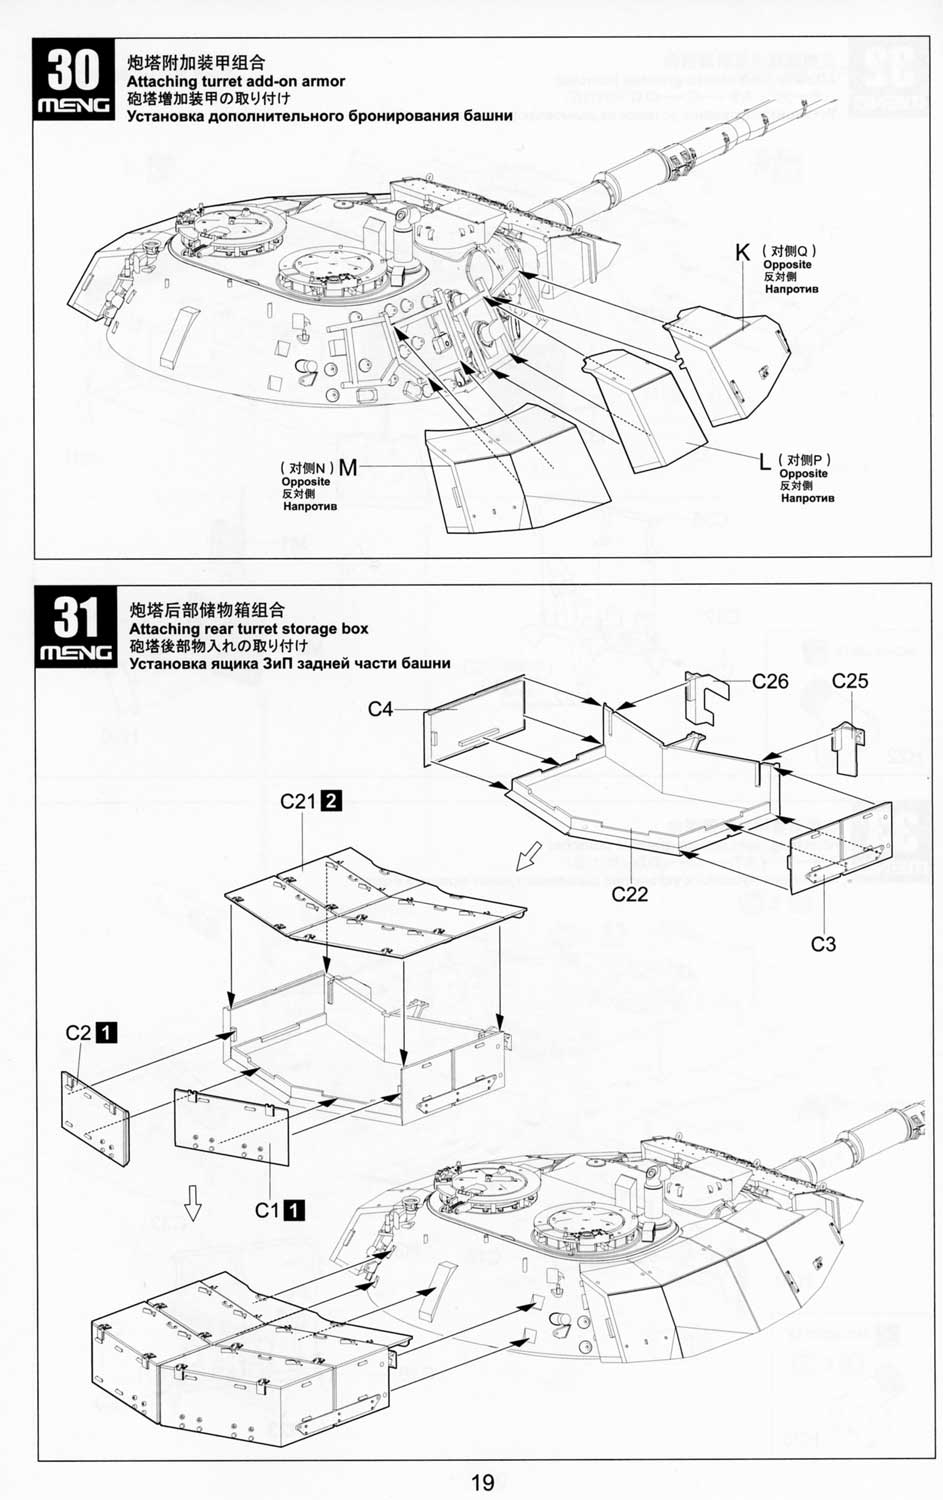
Like with the Meng 1A5, the applique mounts are separate pieces which have well defined locating holes. In addition to the regular amour mounts, the kit provides the MEXAS specific mounting frames and adapter hardware. But wait, that's not all! The kit includes numerous other small parts used to depict the MEXAS mounting system. This is a really nice touch as it provides the builder the option of depicting the kit in any number of maintenance or up-amour assembly scenarios.
The turret MEXAS modules themselves are beautifully rendered, with delicate anti-skid coating (where appropriate).
The mantlet MEXAS modules are equally well details with very fine rivet detail. The rivets detail is so fine that an overly thick application of paint runs the risk of hiding them!
Equally impressive for their small size yet high fidelity are the searchlight mount hooks which on the finished kit will be partly hidden underneath the MEXAS mantlet module. These tiny little pieces were present on the Meng 1A5 and I am extremely impressed that this little detail wasn't overlooked in this kit.
The rear turret bustle bins feature a very subtle and scale appropriate anti-skid texture. The texture depicted in the kit compares quite favorably with the real thing.
As with the Meng 1A5, this kit includes two mantlet dust covers; one for a horizontal main gun and one for a slightly elevated main gun. These are very nicely done and are in my humble opinion the nicest examples I've seen in plastic to date. Unfortunately, they are not accurate for a C2 MEXAS in Afghanistan. B Squadron of the LdSH (RC) replaced all of the mantlet dust covers in theater sometime between late 2006 and early 2007. The replacement dust cover differed from the standard issue KMW cover and had been appearing on C2s in Canada at about the same time. The two photos below illustrate the type of mantlet dust cover which was fitted to C2s in Afghanistan.

Fortunately, the Legend 1A5/C2 mantlet cover set correctly depicts this revised style of dust cover.
The main gun barrel included with the kit is worth mentioning. It is the same barrel included with the 1A3/4 and the 1A5 which features the original KMW thermal sleeve securing straps. The main gun thermal sleeves on Canadian Leopards were fitted with plain old hose clamps when the KMW straps broke. Consequently, a better choice for the main gun barrel would be the Leopard Workshop LW019AC which is depicted wearing plain old hose clamps. This barrel also corrects the other errors present on the Meng barrel.
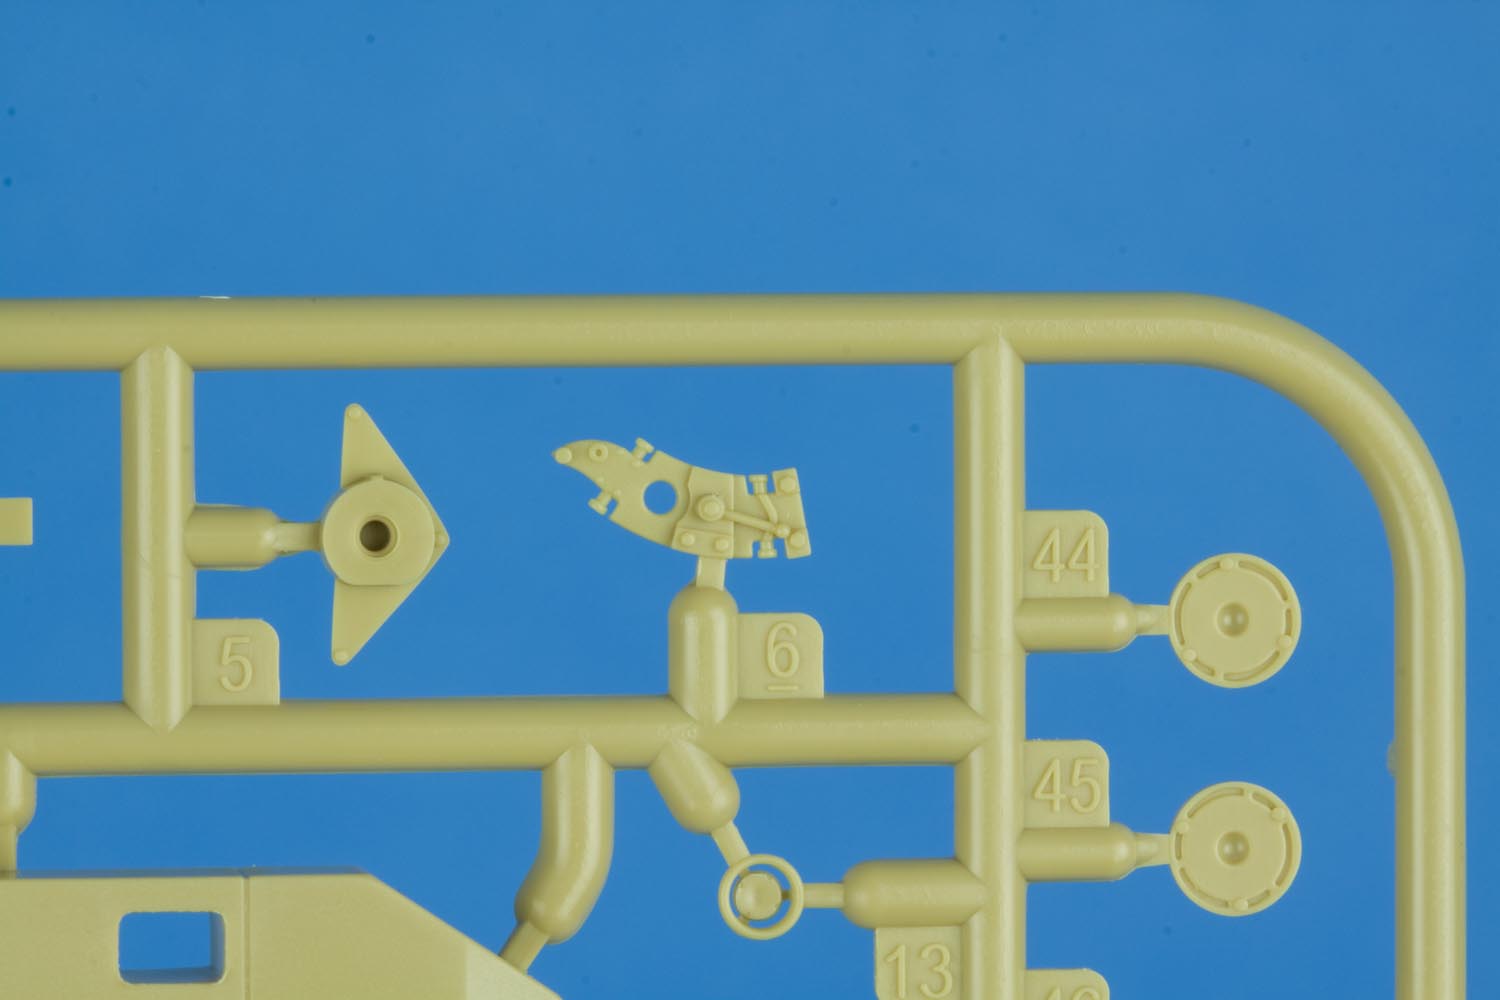
The GPS antenna located behind the loader's hatch is presented in one piece with the delicate brush guard. This part seems to be a little simplified. In my kit this part displayed a very slight sink mark which should (in theory) be easy to fix without obscuring the small screw head details.
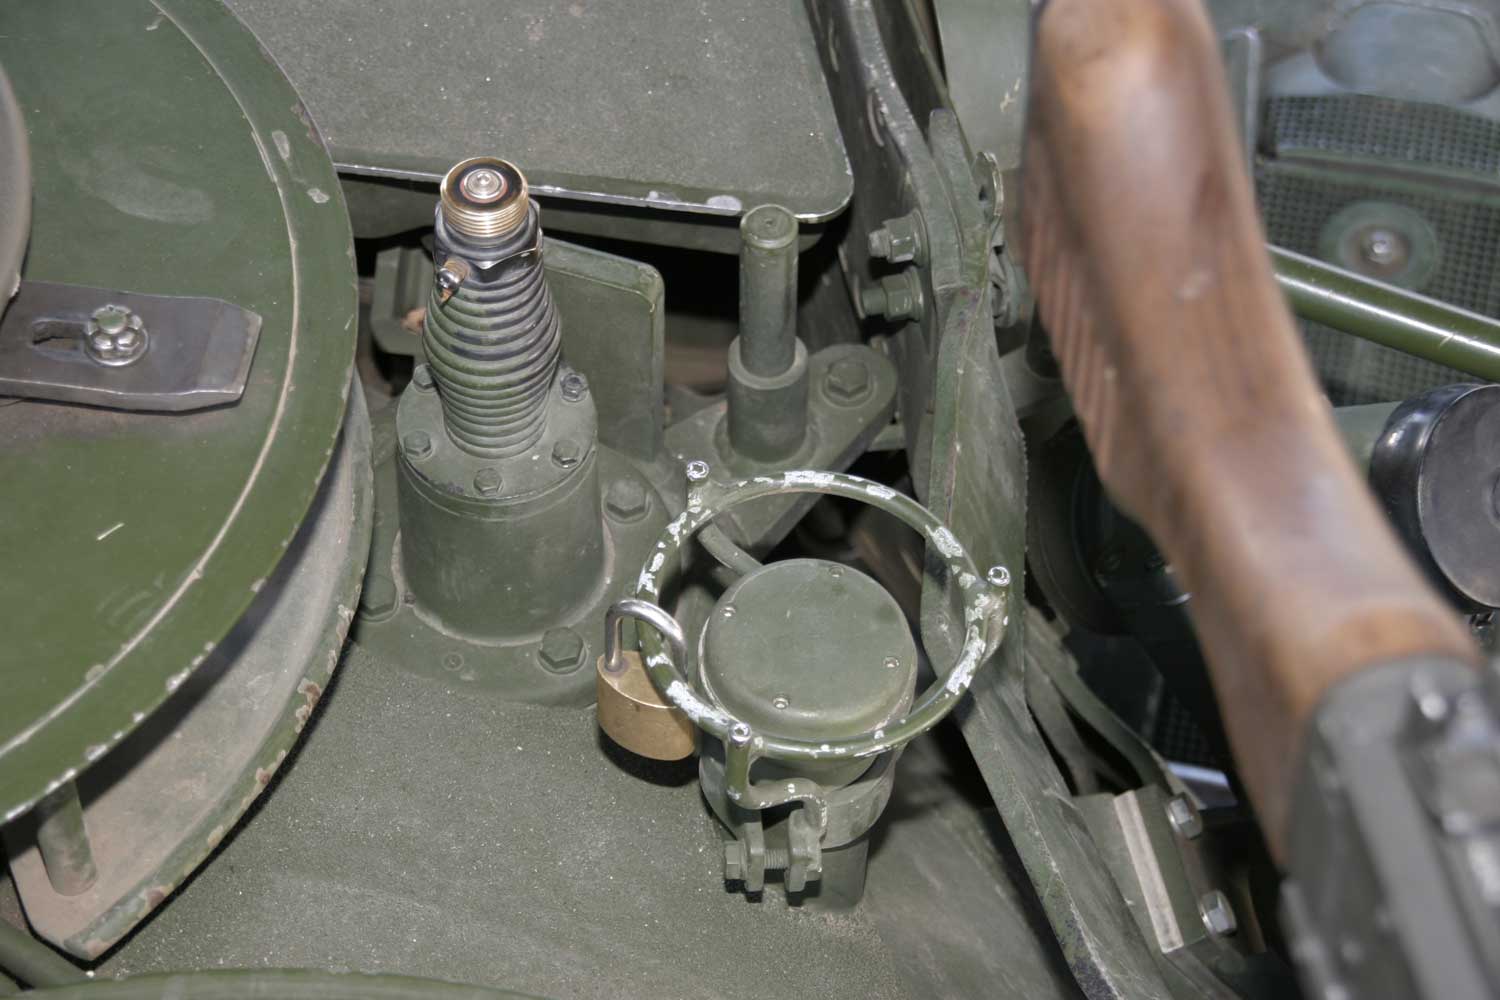
For reference, here is a photo of the real GPS antenna on a C2:
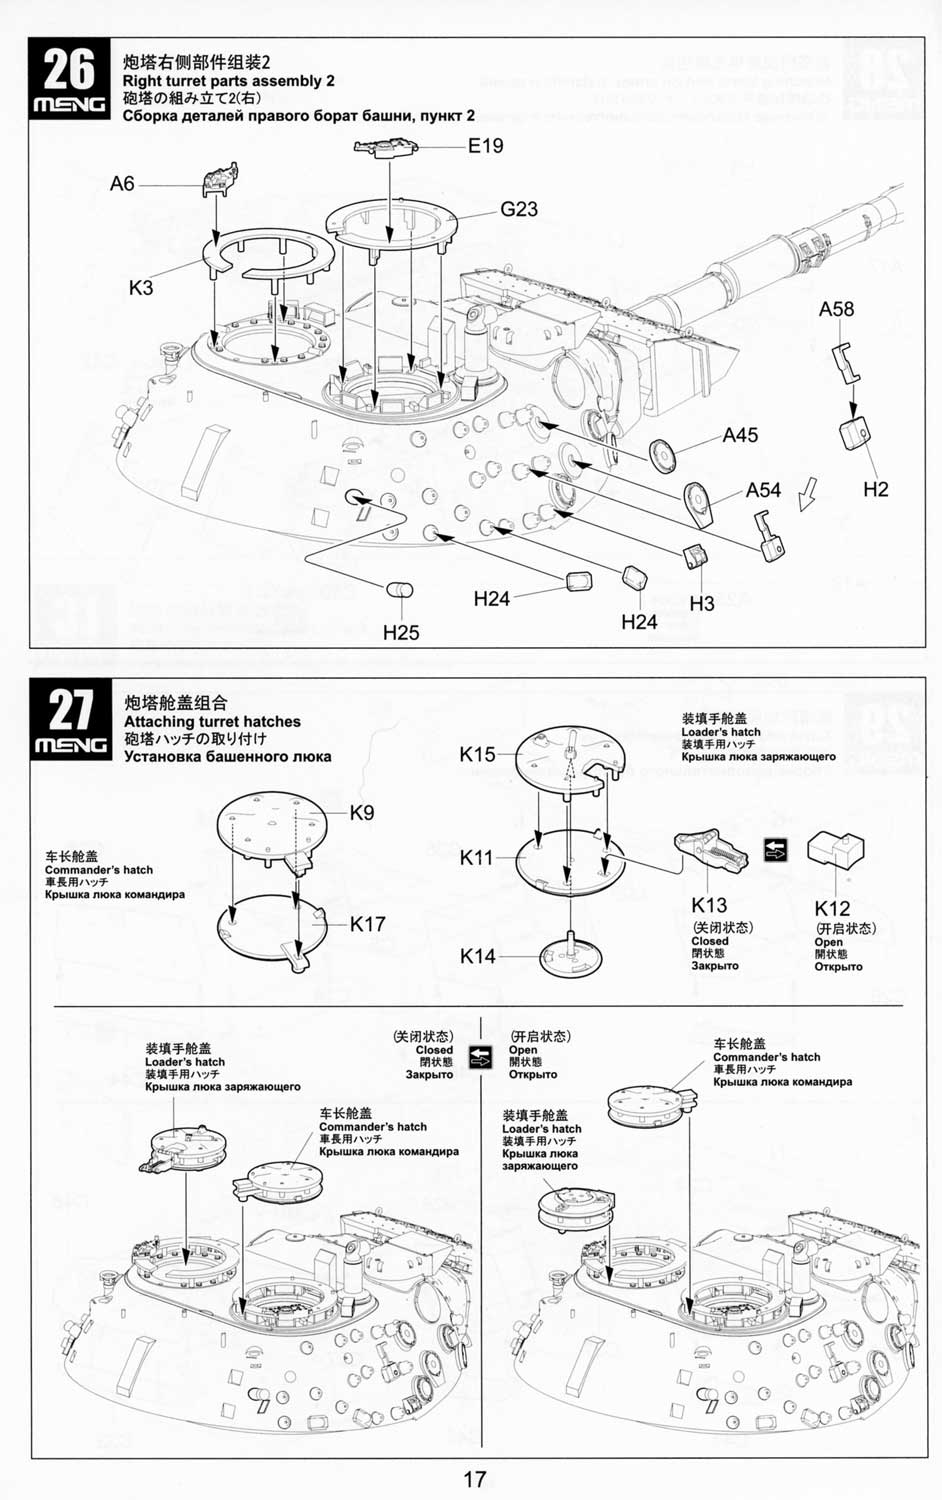
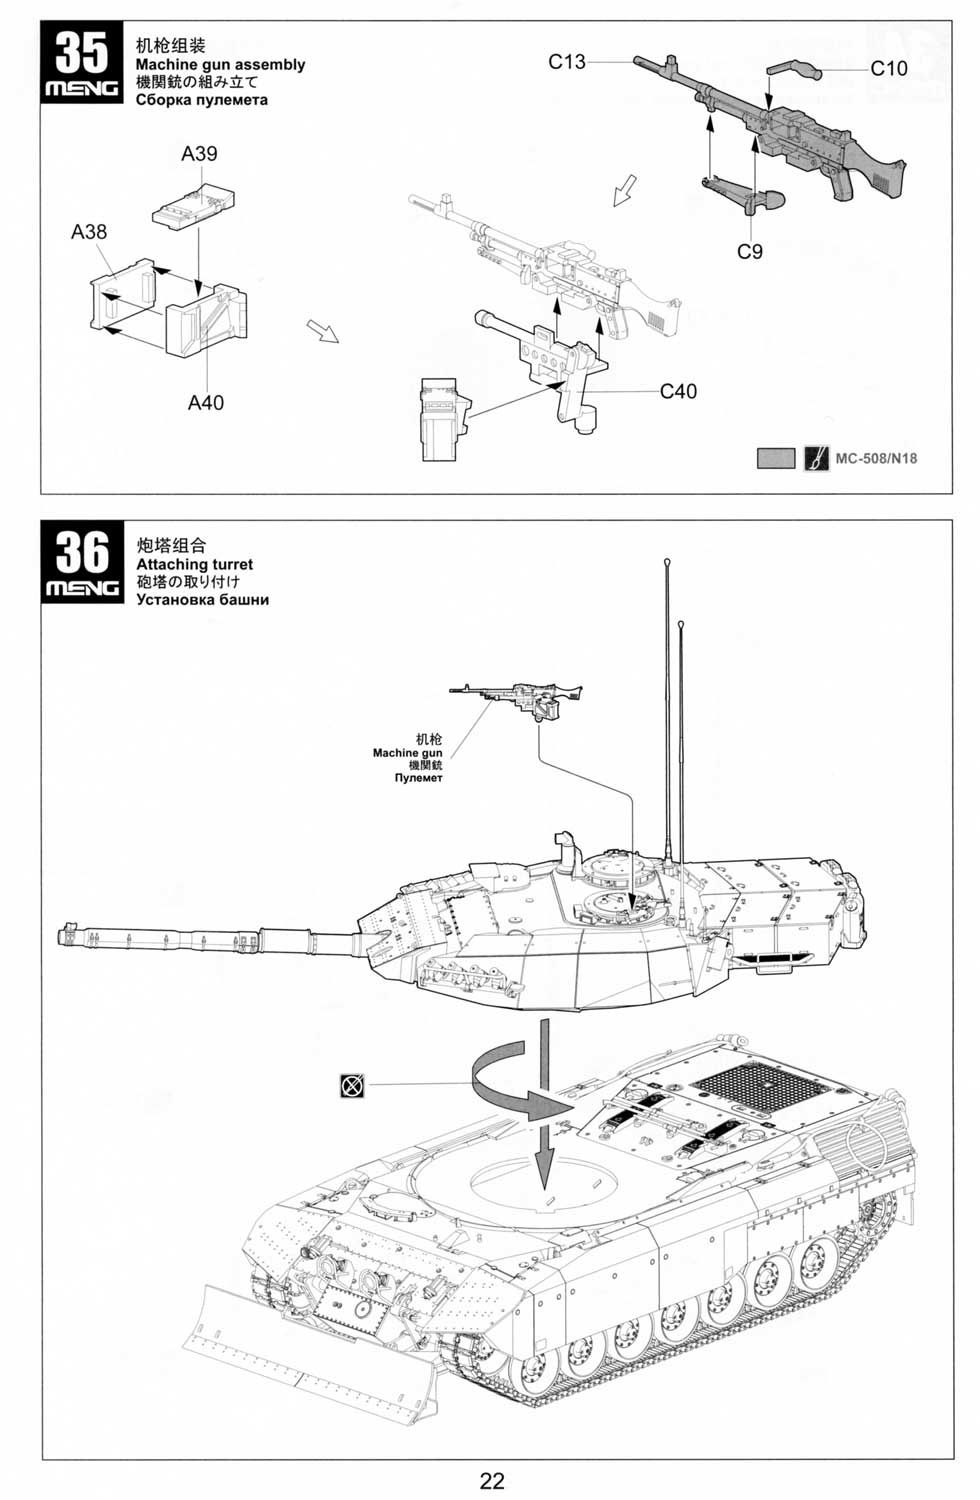
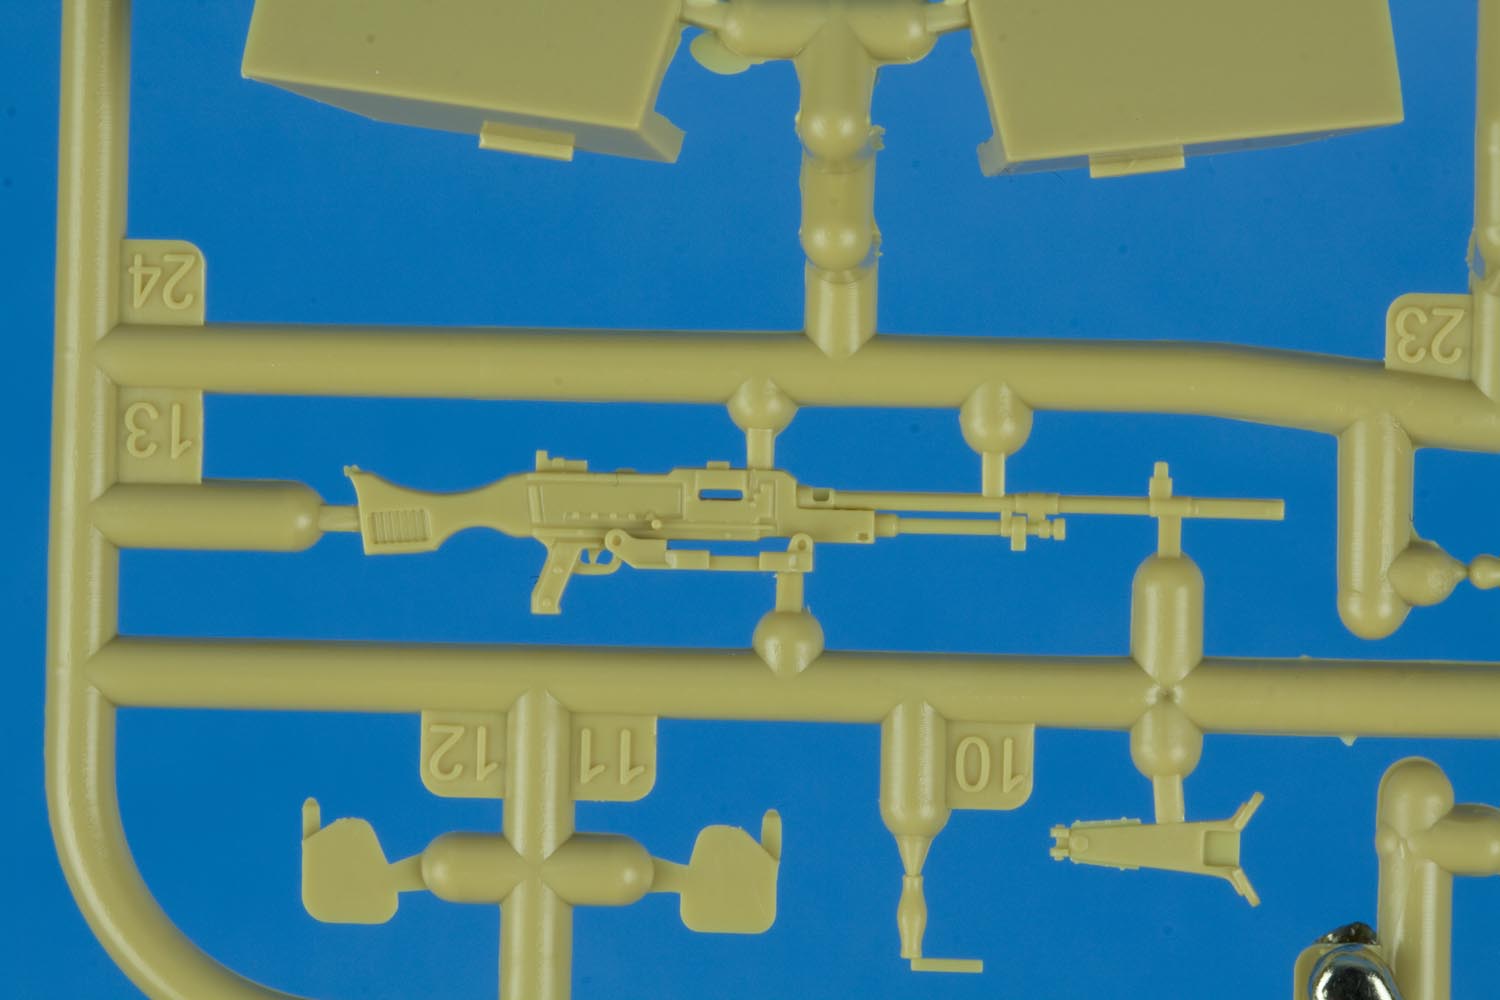
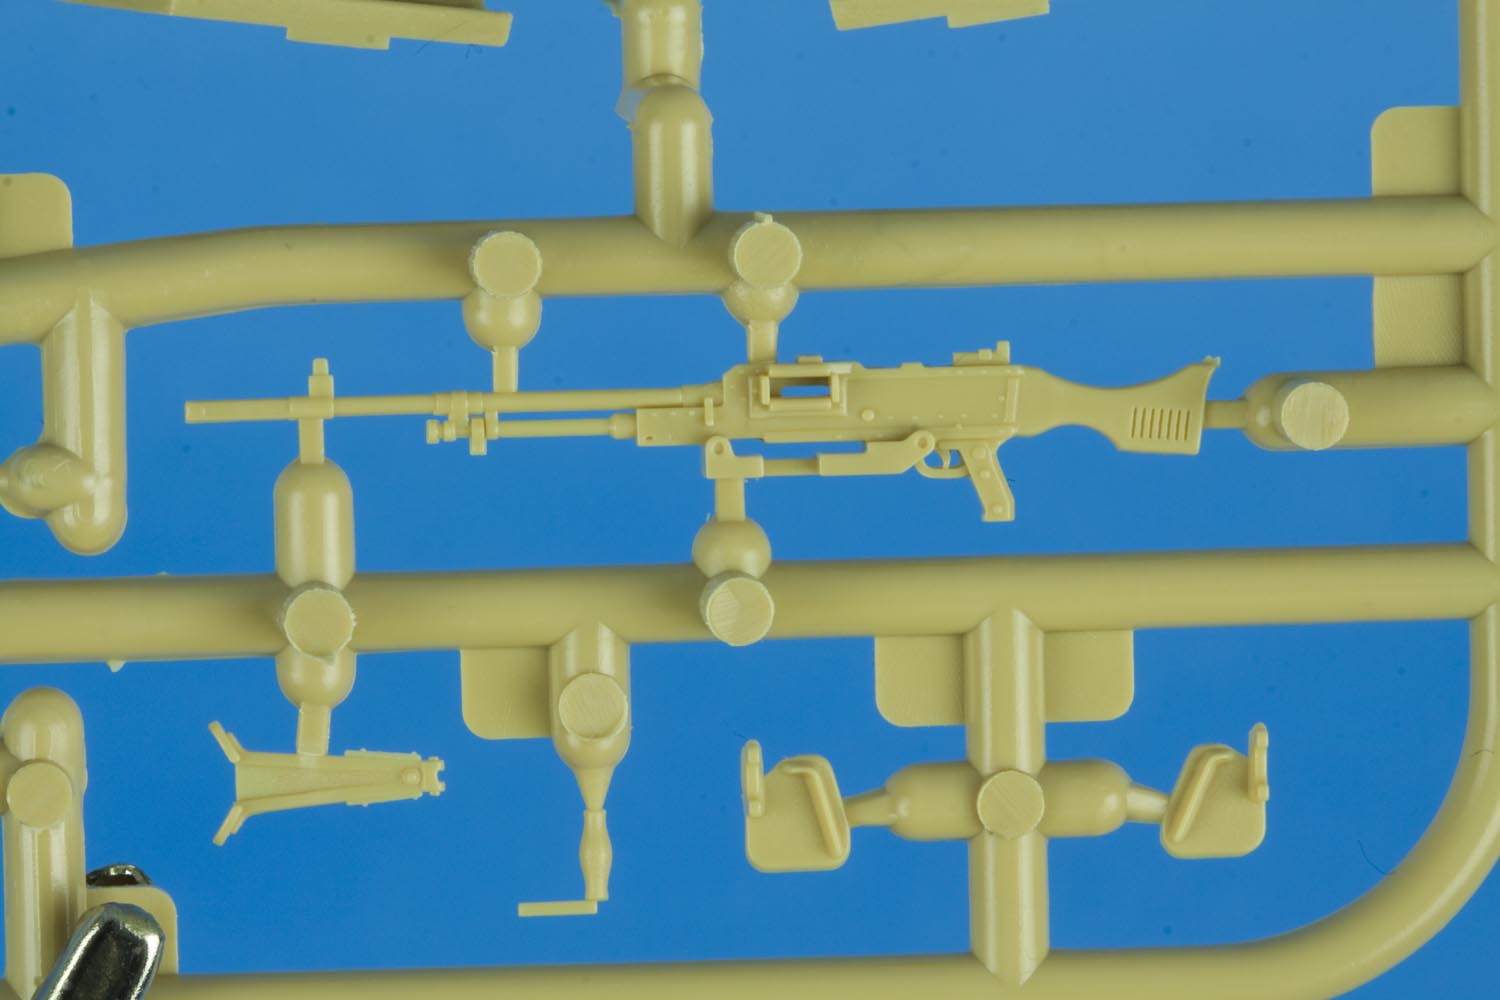
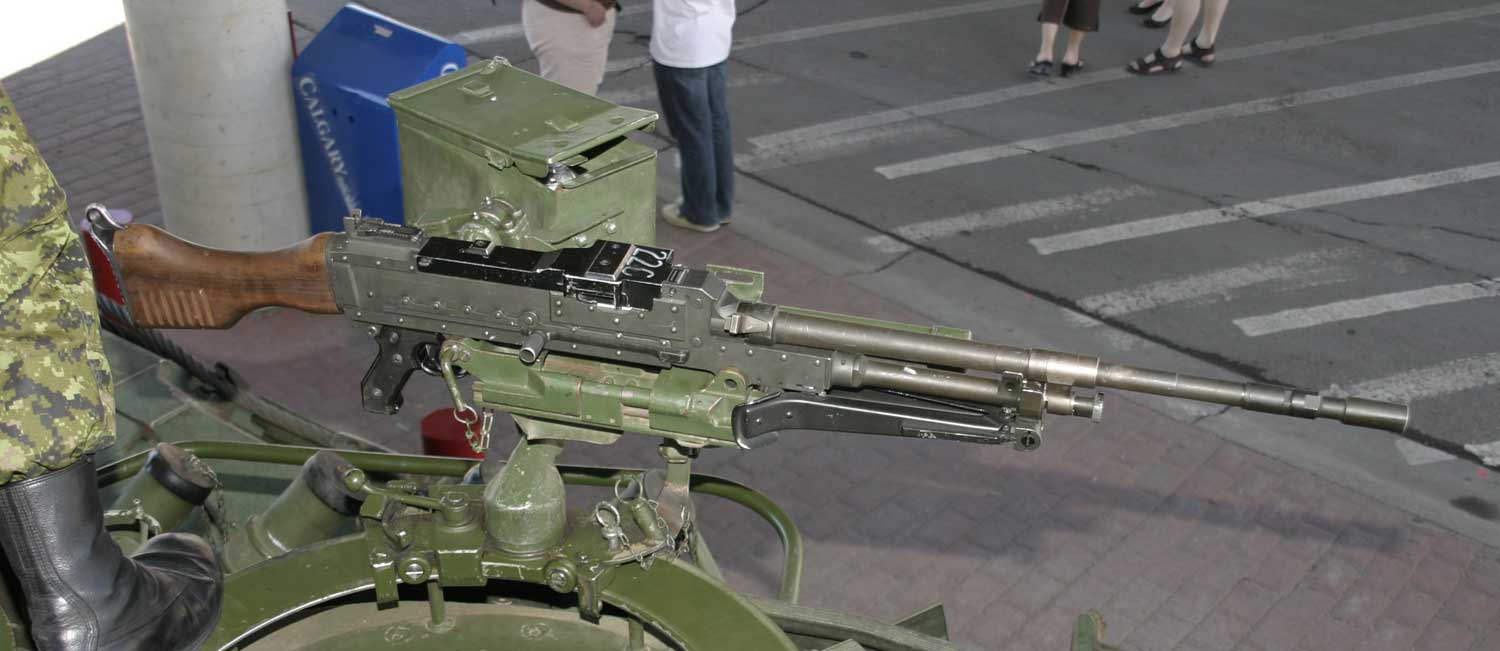
One thing which has always puzzled me is how many other manufacturers of injection molded amour models have completely bungled the FN MAG (or L7A2). In many other kits, the depiction of the MAG is crude, poorly proportioned and toy like. The C6 supplied with this kit is an exception to that rule being beautifully depicted. Separate parts are provided for the barrel change handle and the bipod legs although the later have a web of plastic in between them (likely to prevent these delicate parts from breaking) which should be removed. A really nice touch (carried over from the Meng 1A5) is that the MG mount base is provided separate from the hatch skate rings.
For comparison, this is what a real mounted C6 MG looks like:
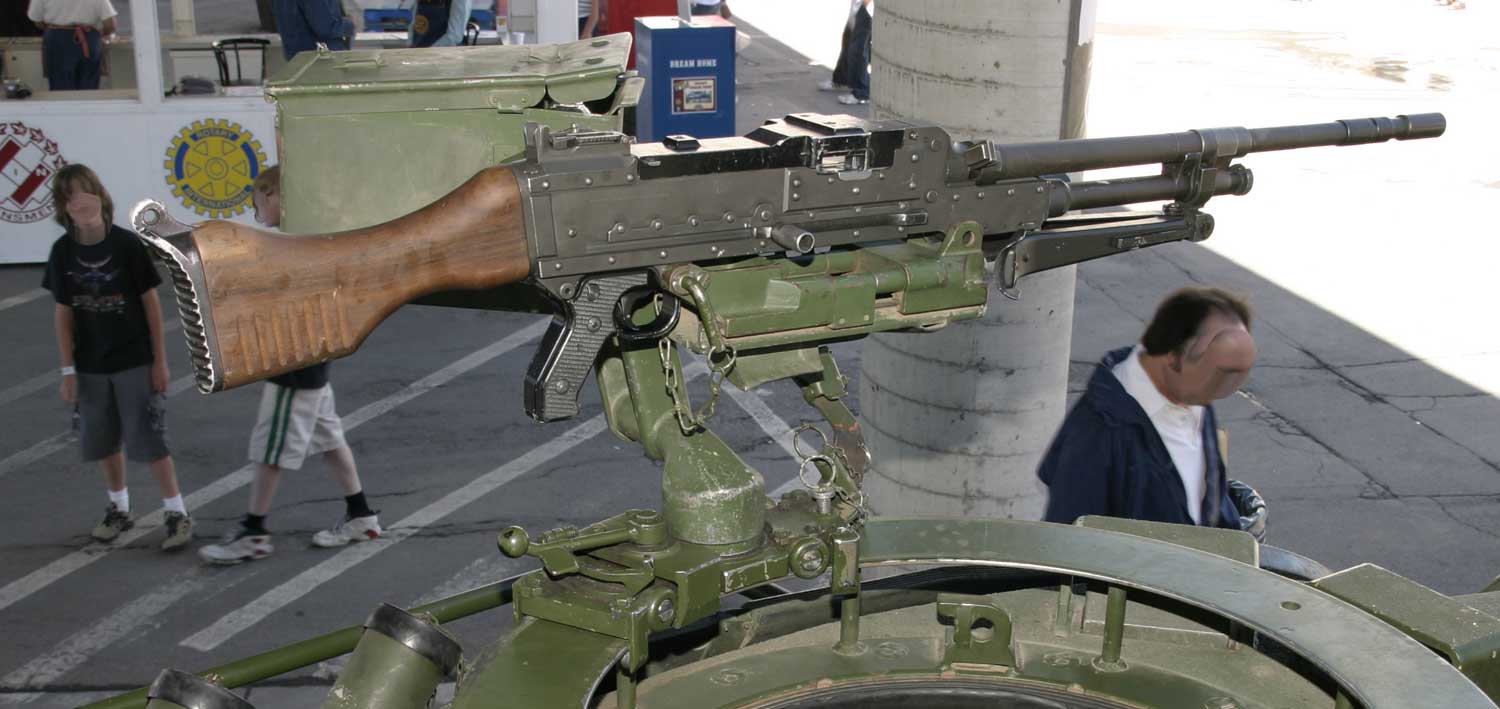
The real C6 depicted here is fitted with the AFV barrel which is missing the front sight post and the vented muzzle break usually seen on the infantry barrel. Either barrel would be accurate for an operational C2 in 2007; crews seemed to mix and match.
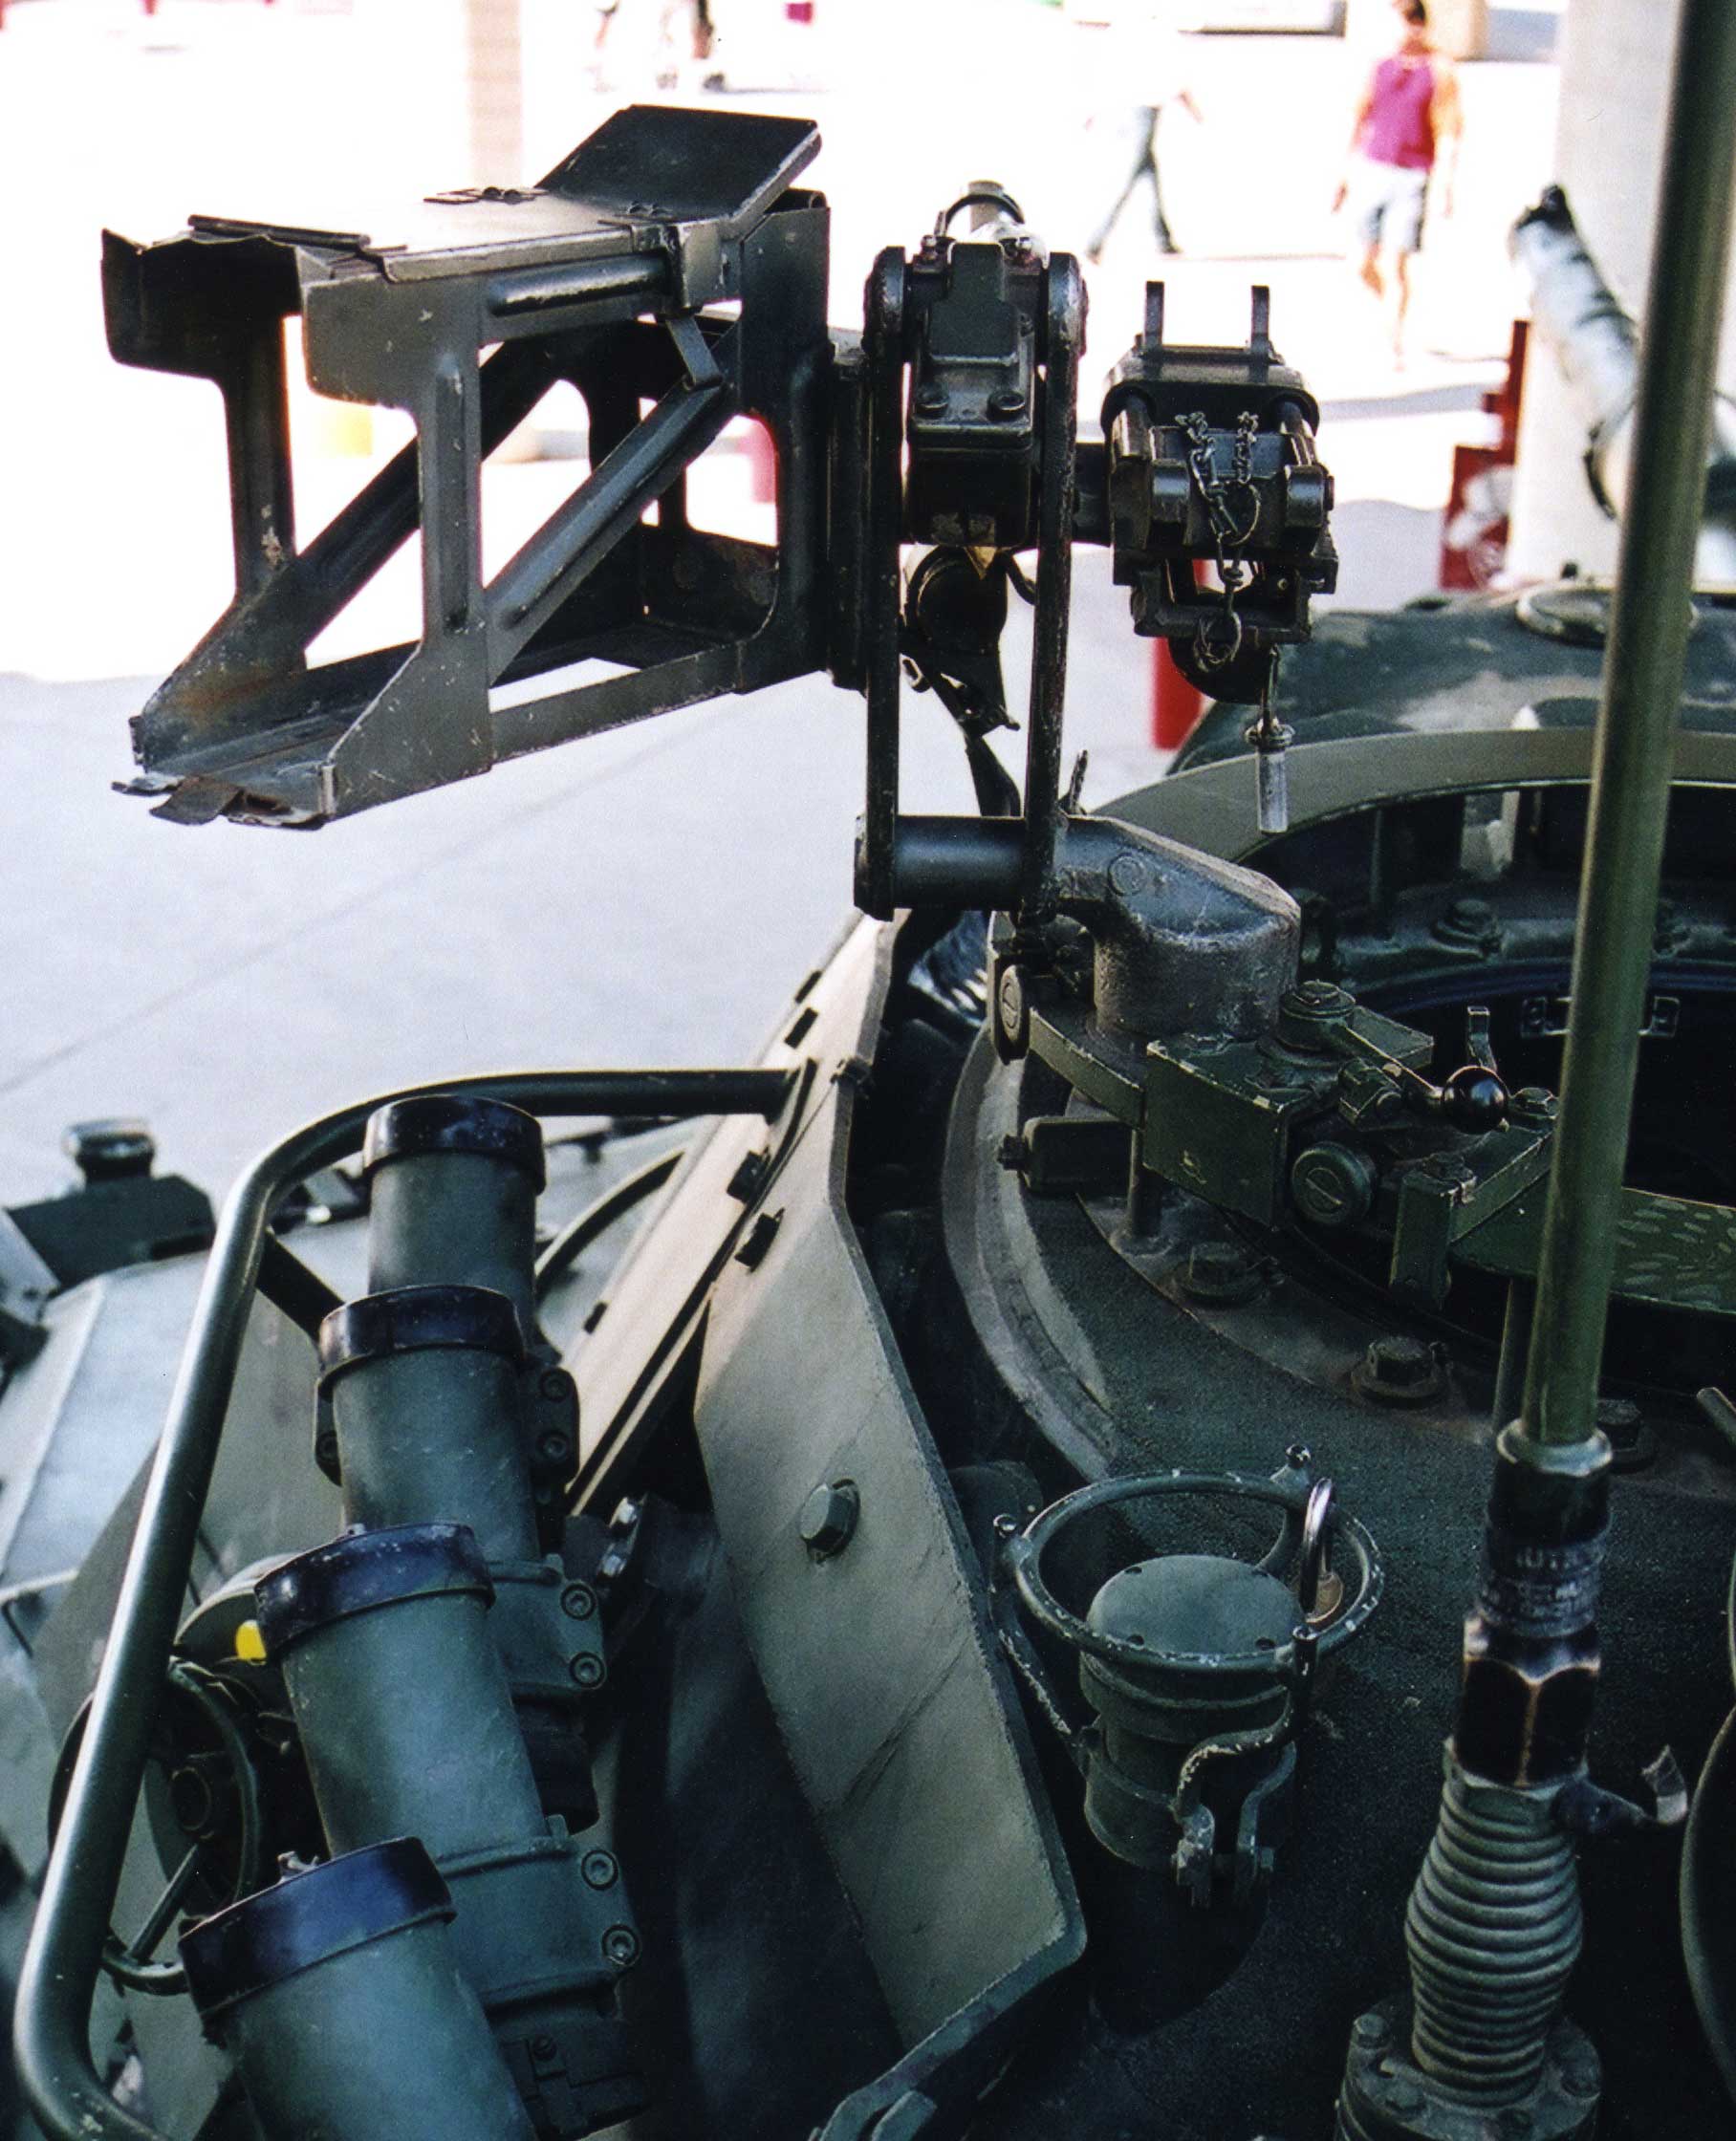
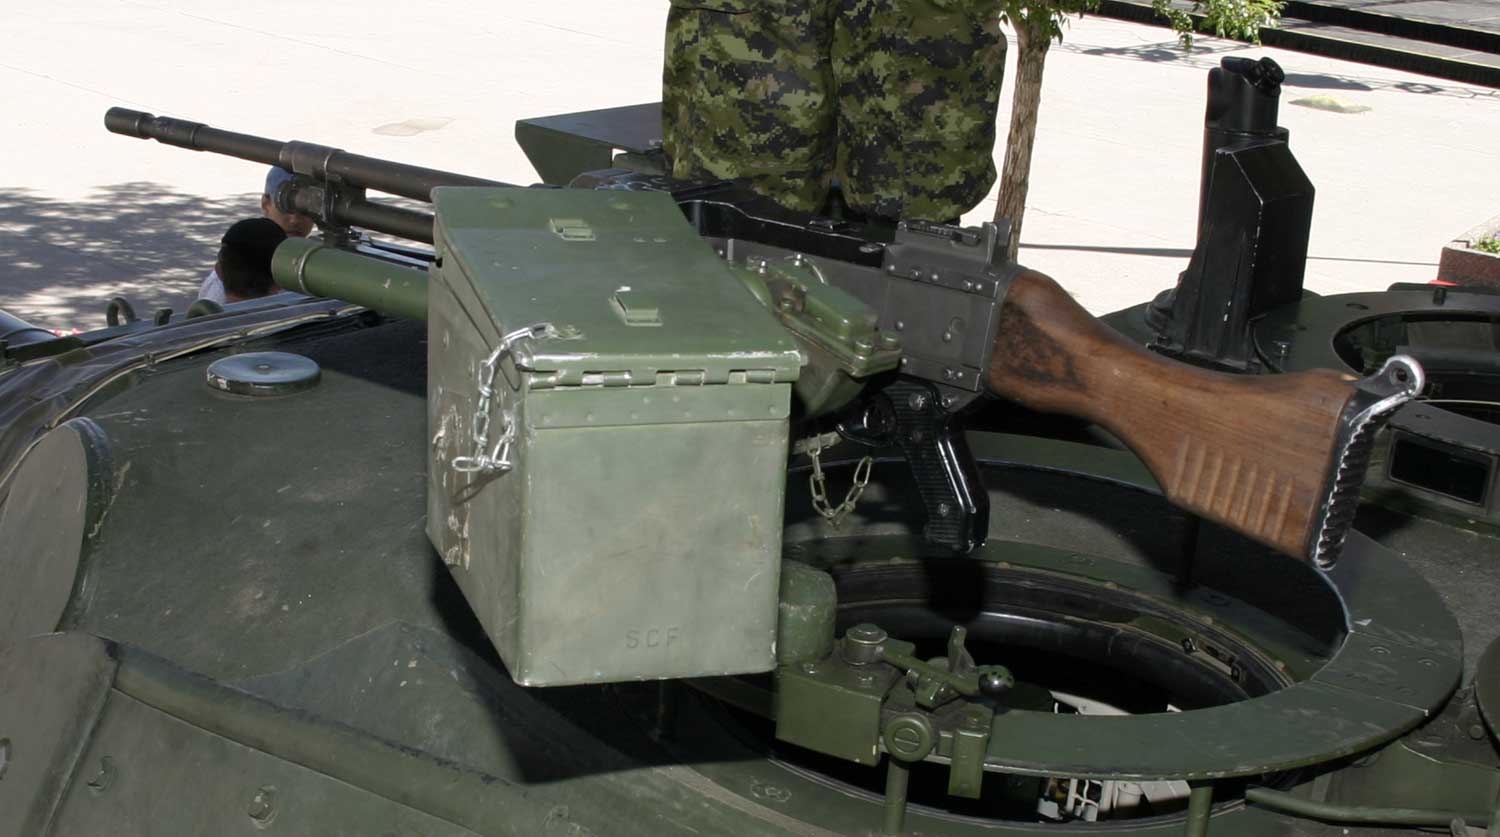
Unfortunately, the MG mount travel locks are not included (but may be found in LW025). The C6 ammo box provided is the old type as would have been supplied by KMW. An often seen Canadian modification is the use of a modified .50 cal ammo box bolted to the MG mount in place of the existing smaller version originally fitted to Canadian Leopards. The C2s used in Afghanistan used this larger capacity ammo box. The first image below depicts the original smaller ammo box while the following three depict the modified box often used on Canadian Leopards.

Canadian armored vehicles use a different communication system and hence different aerials than used on European vehicles. The kit takes this into account, providing two aerials with bases which feature the different thickness where the top and bottom sections would screw together on the real thing.
Leopard C2s in Afghanistan used two different aerial base configurations and two different masts but the kit parts are both the same. The Leopard Workshop turned brass set LW014B addresses this by providing two different aerials, each having the correct mast and base.
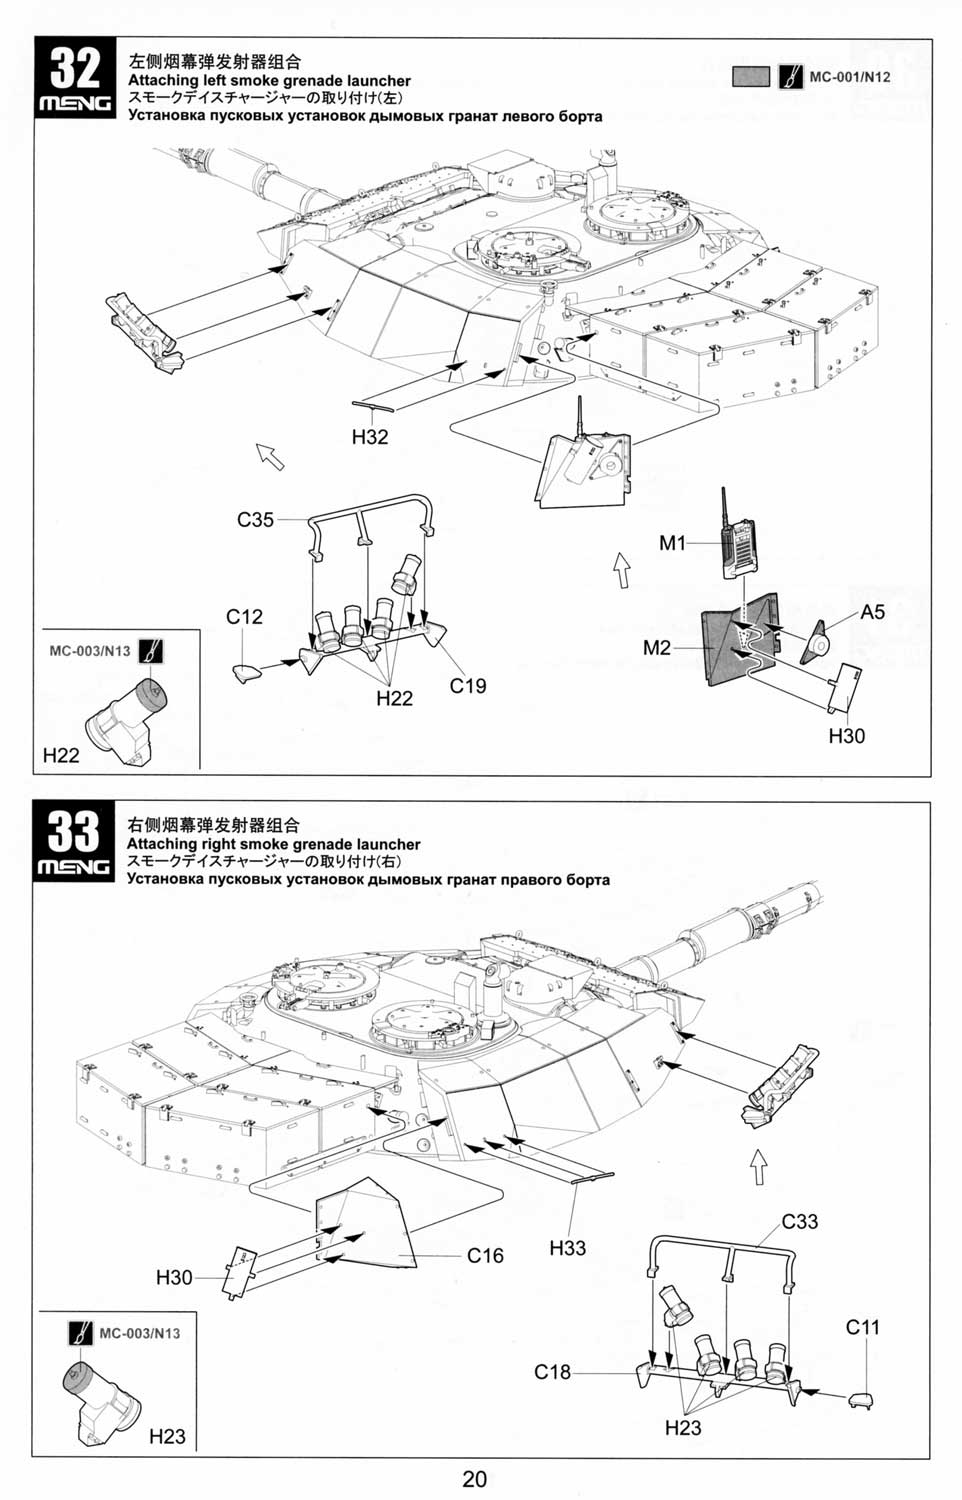
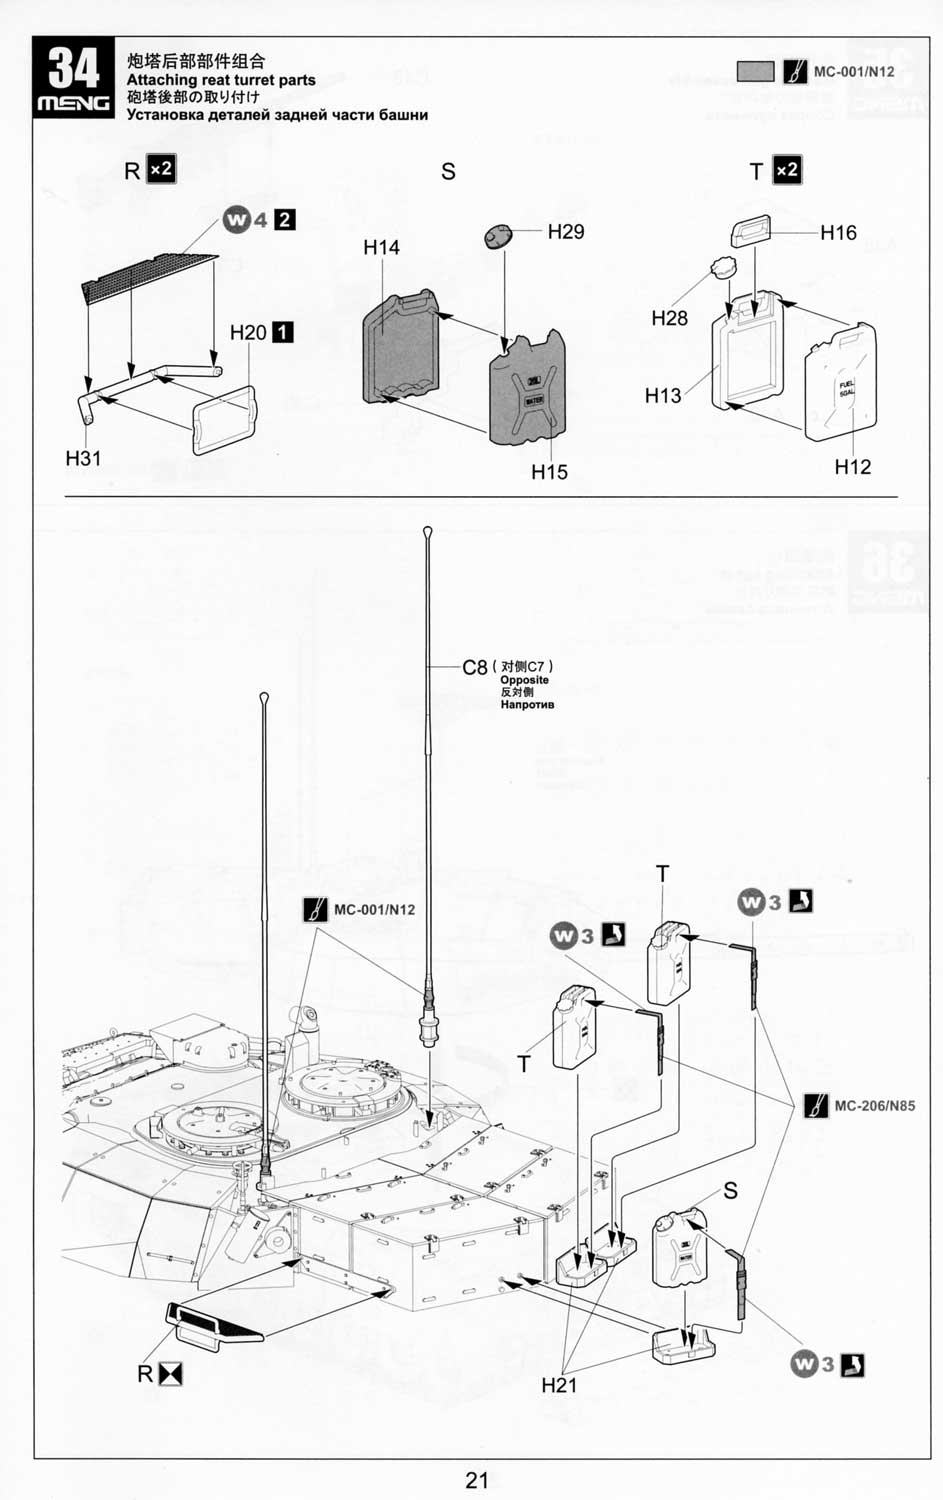
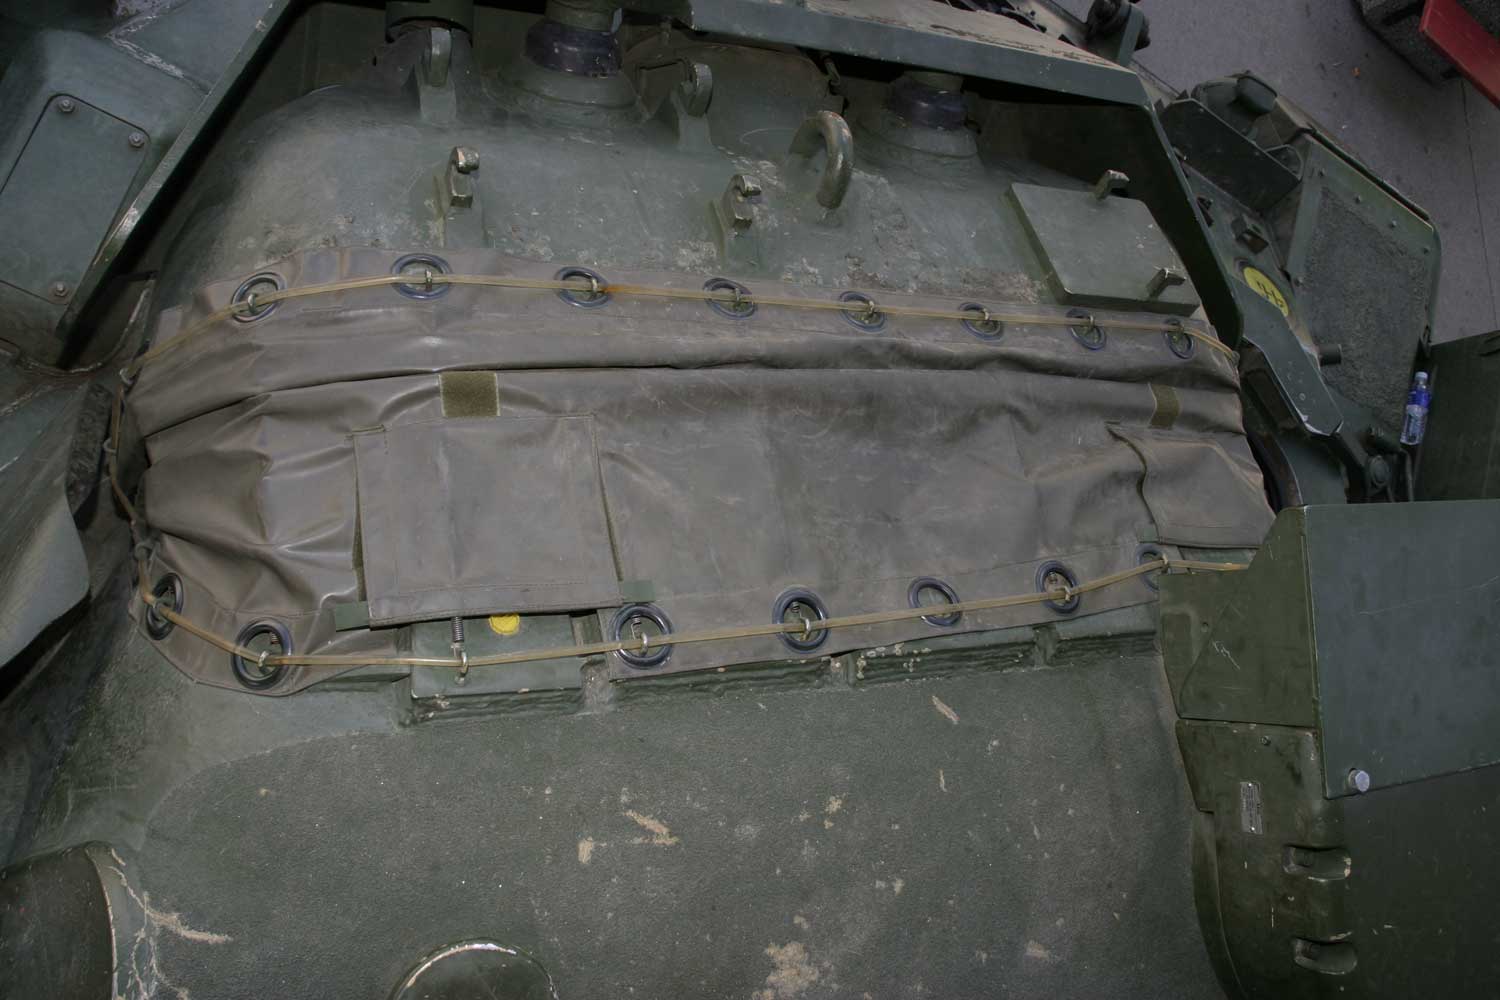
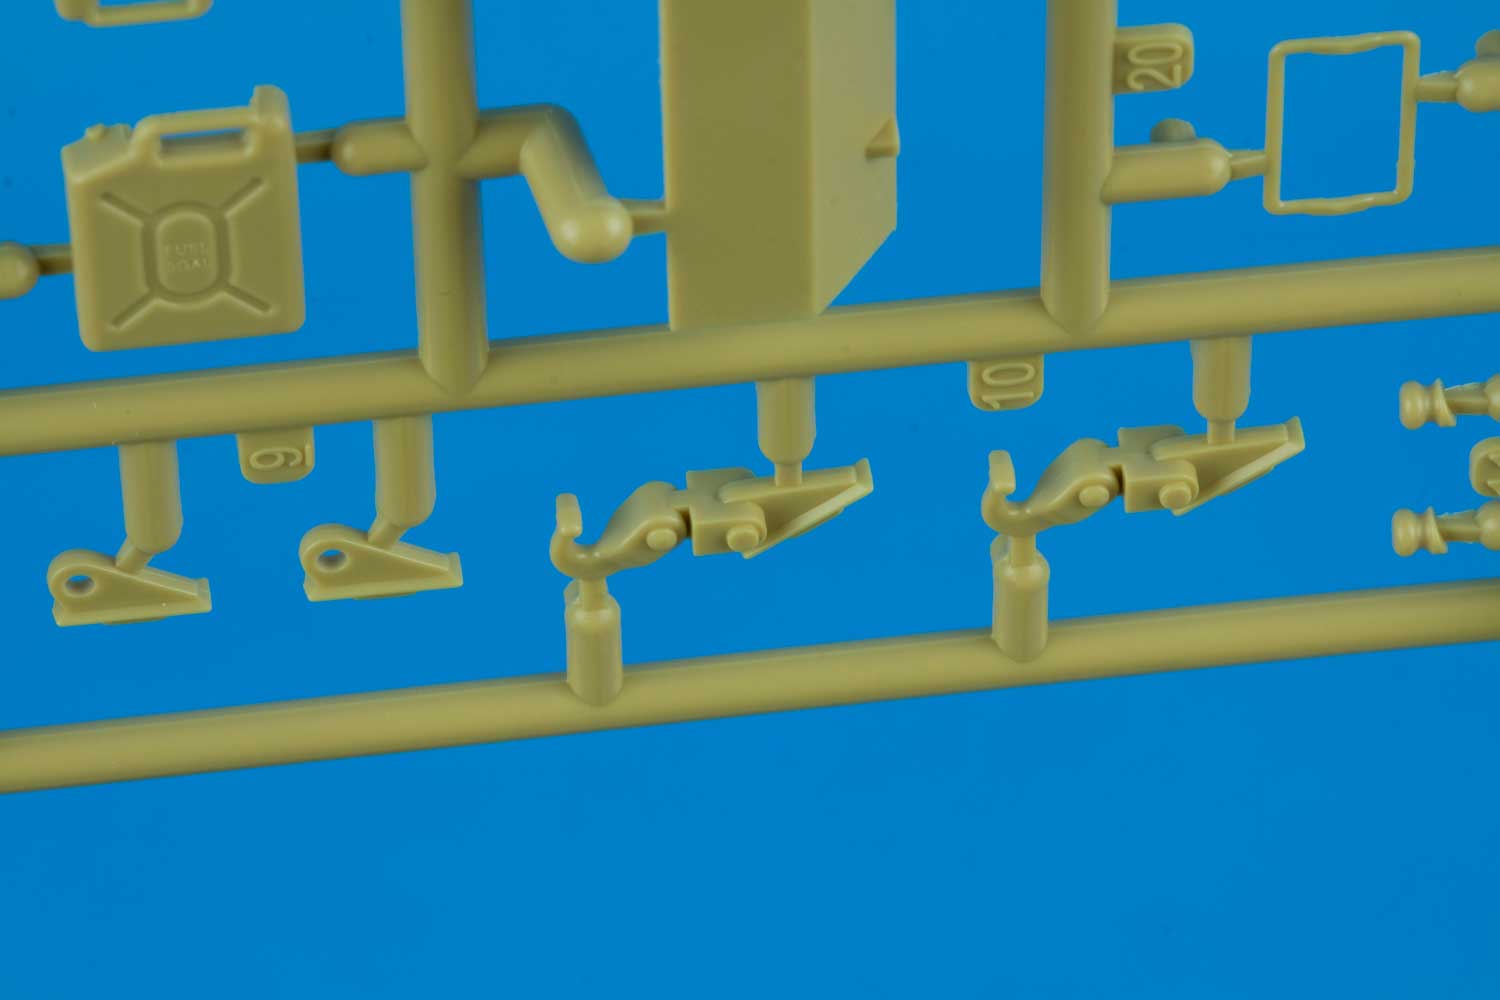
The POL and water cans and carrying brackets normally fitted to the rear of the turret bustle bins are included on sprue H. Each of the POL cans are made up of 4 individual parts for added realism. Wow! The securing straps are included on photo etch fret W. The carrying brackets appear a little thick but look to be easily filed down for correct scale thickness. I personally think this is a better alternative than providing etch parts which would be overly fiddly to assemble but I am quite sure not everyone will agree with this opinion (M.S. doesn't). A photo of real POL can racks has been provided here for the reader's interest and edification.
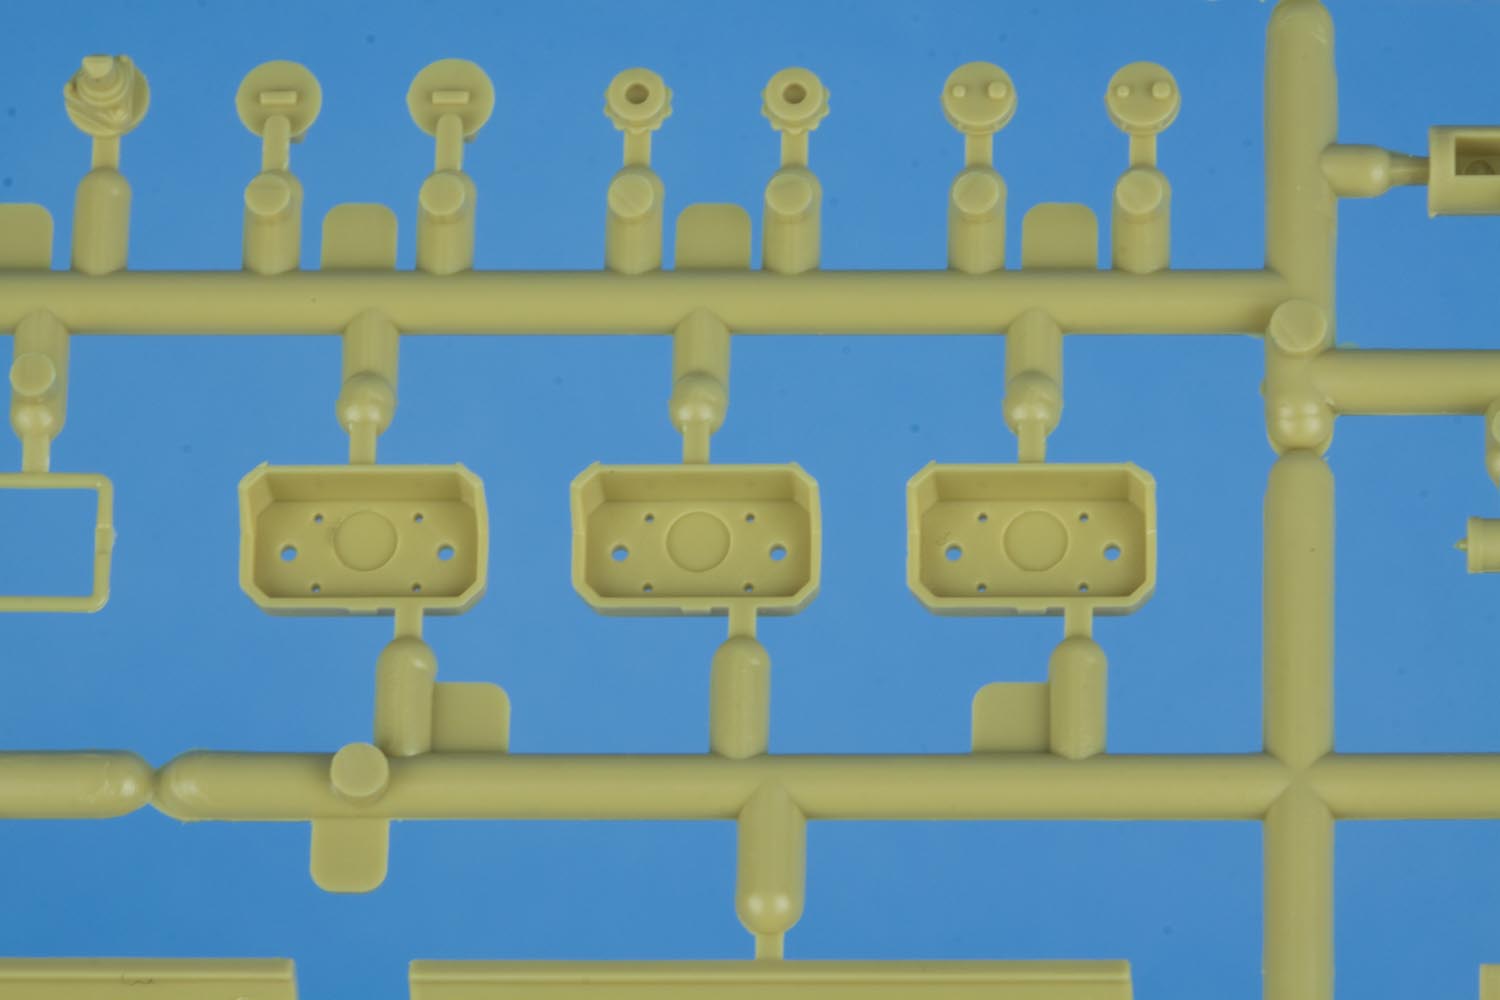
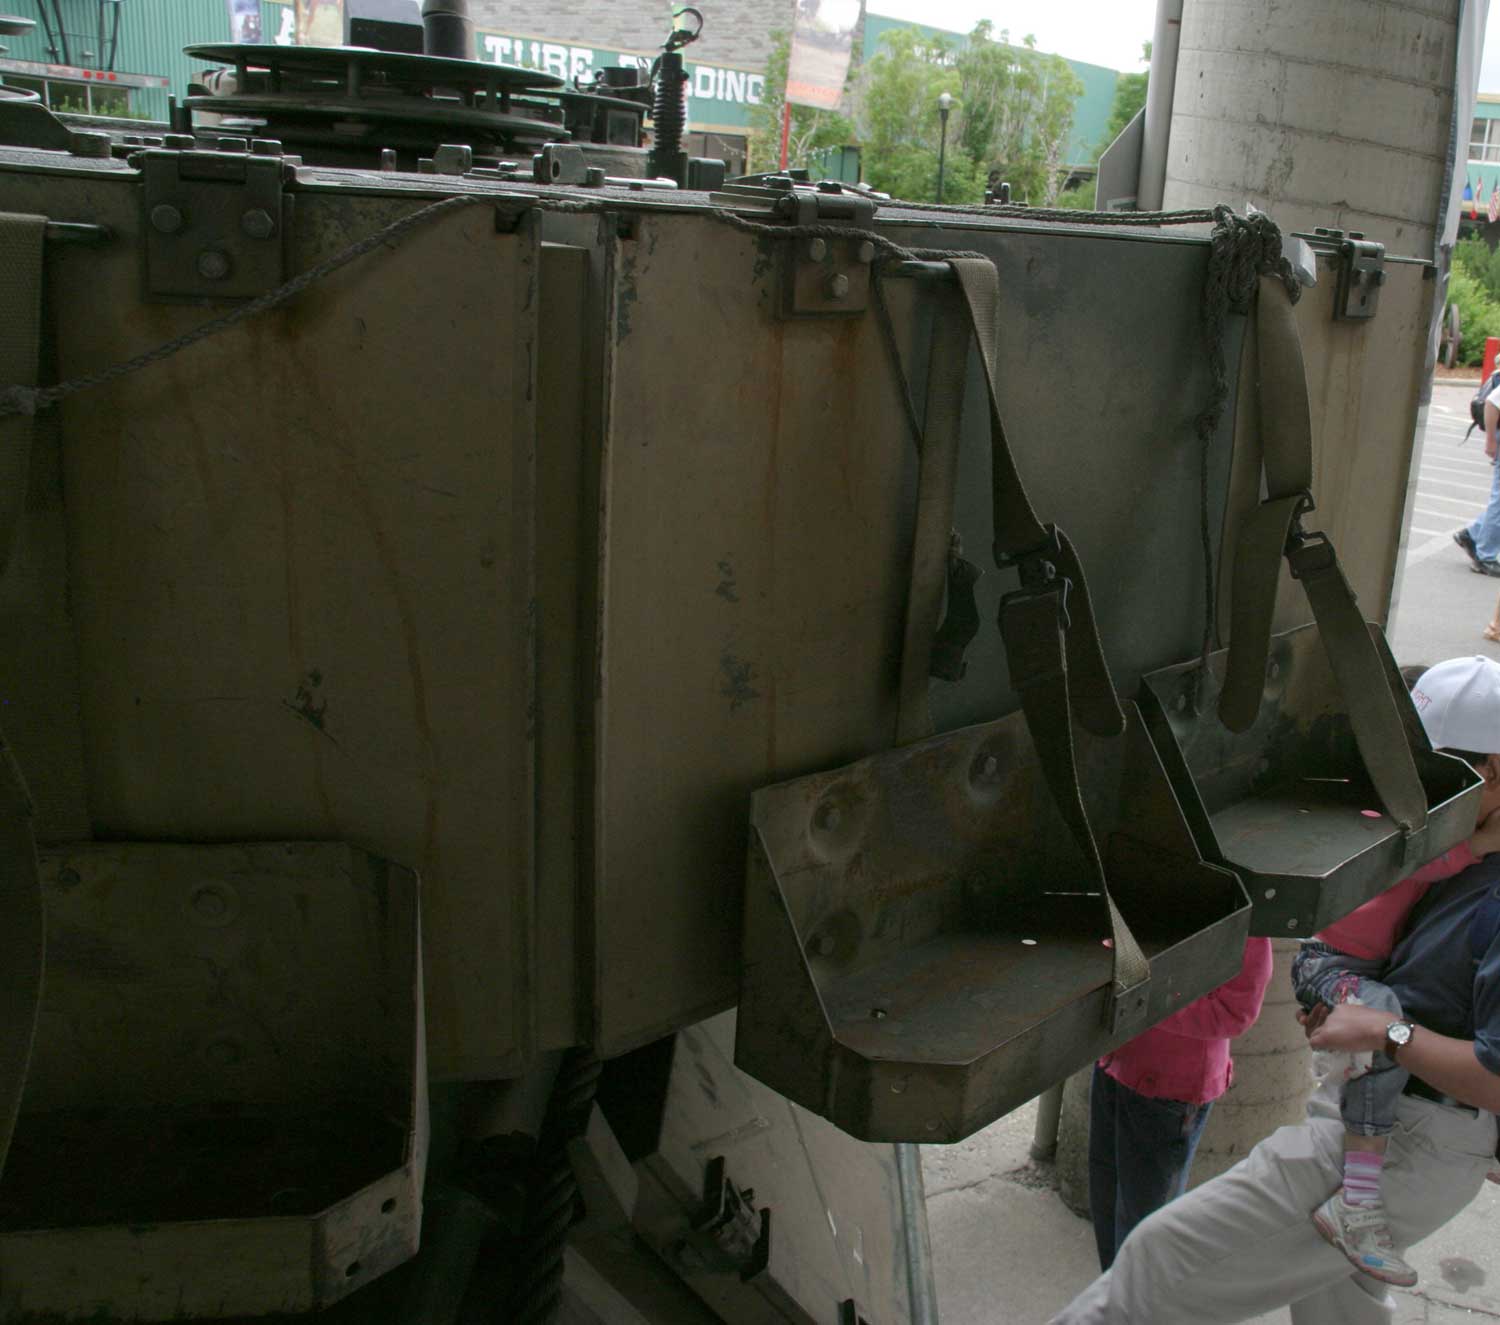
As can be noted, the kit parts have an ejector pin in the bottom and are missing the attachment bolt details. This will not be an issue if the racks are assembled complete with the provided POL and water cans; this would be correct for an operational vehicle. Please note that the photo of the real racks was taken at a public display where hull and turret external stowage would have been removed to prevent theft; hence the empty racks.
The threat of remote controlled IEDs was high in Afghanistan. For this reason all Leopard C2s deployed in theater carried electronic counter measures jamming equipment. The type used with Canadian Leopard C2s was roughly back-pack sized and was carried in a field manufactured armored mount behind the loader's hatch, located between the turret bustle bins and the rear-most MEXAS module. The ECM unit is faithfully reproduced, with excellent details on both sides of the unit. This part is actually included on the hull top sprue together with the field expedient armored cover.
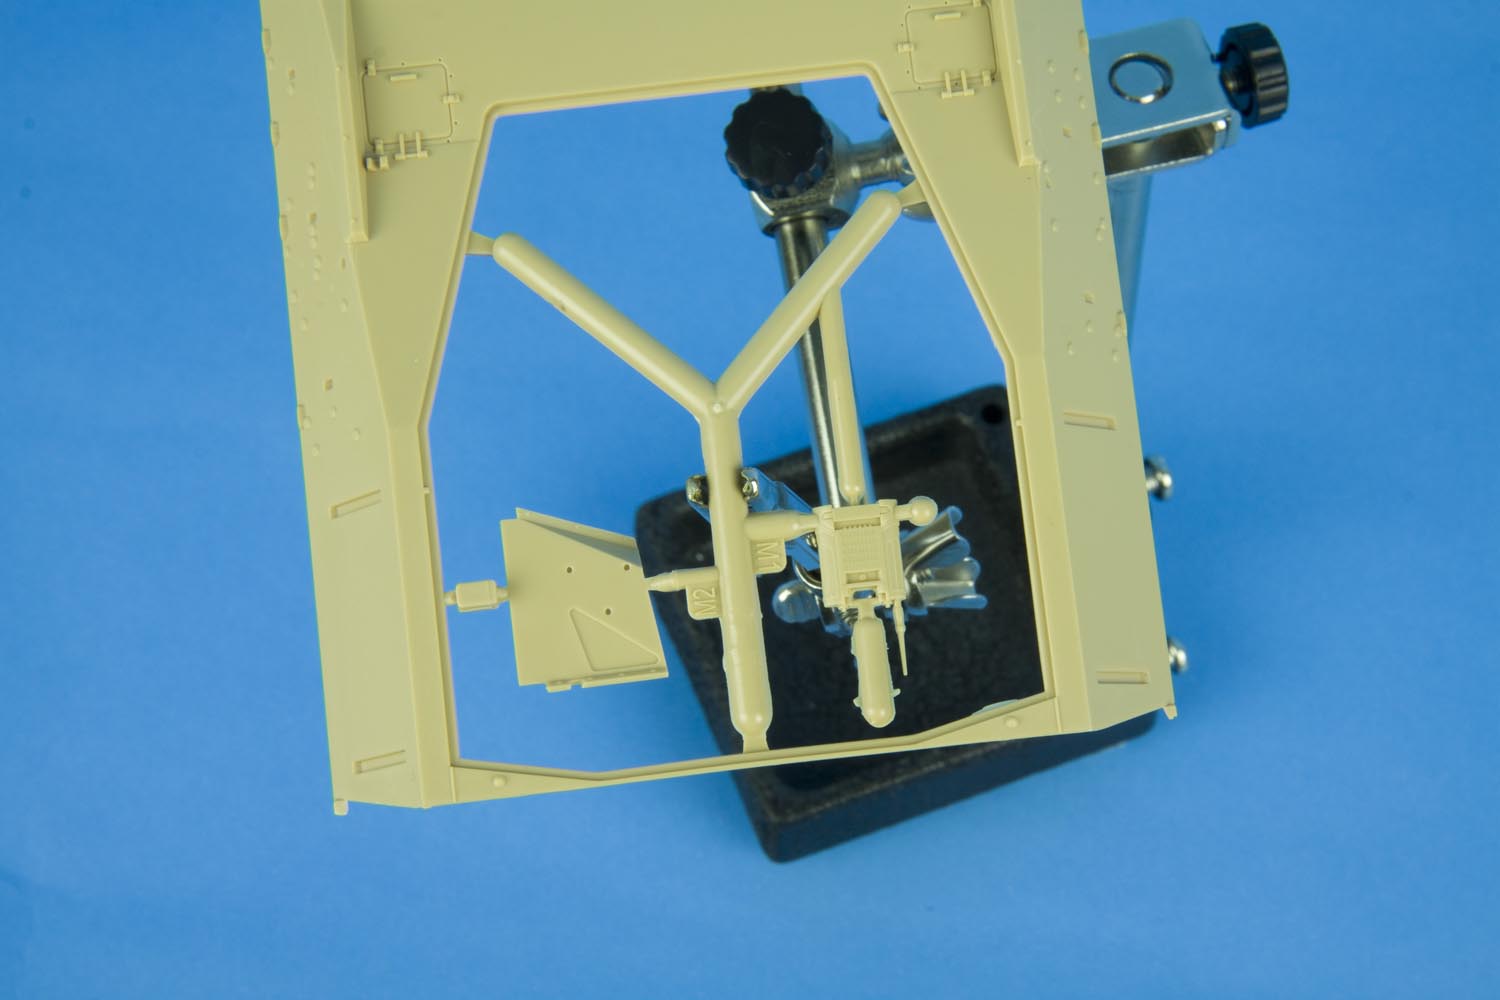


Photos of the real ECM jammer unit are sparse due to operational security concerns. The Real Models MPA title Canadian Leopard C2 MEXAS in Afghanistan contains several photos of the real thing and the armored mount for those readers who insist on doing their own research. I mention this to point out that the Meng ECM jammer is beautifully done. It is a shame that when mounted behind the armored cover much of that crisp details will be hidden from view.
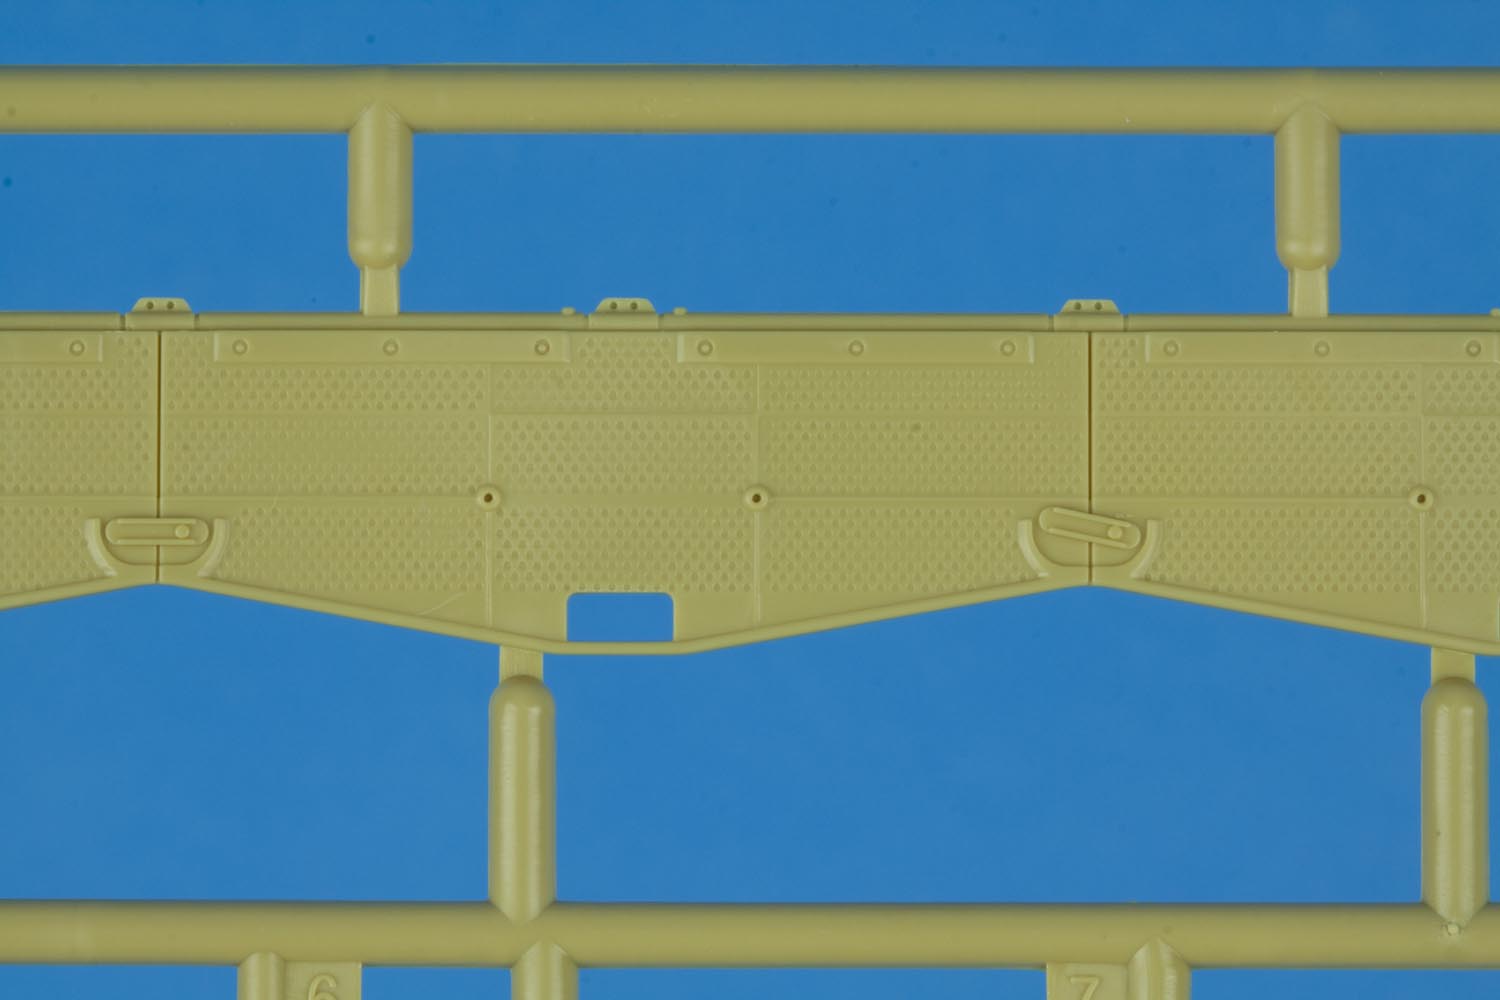
Once again, this review will not look at the parts sourced from past Meng offerings which are covered in other Leopard Club reviews, with one exception. The detail on the rubber side skirts is quite phenomenal. Despite the fact that these parts will not be used on a C2 MEXAS I couldn't help but mention them and include a photo.
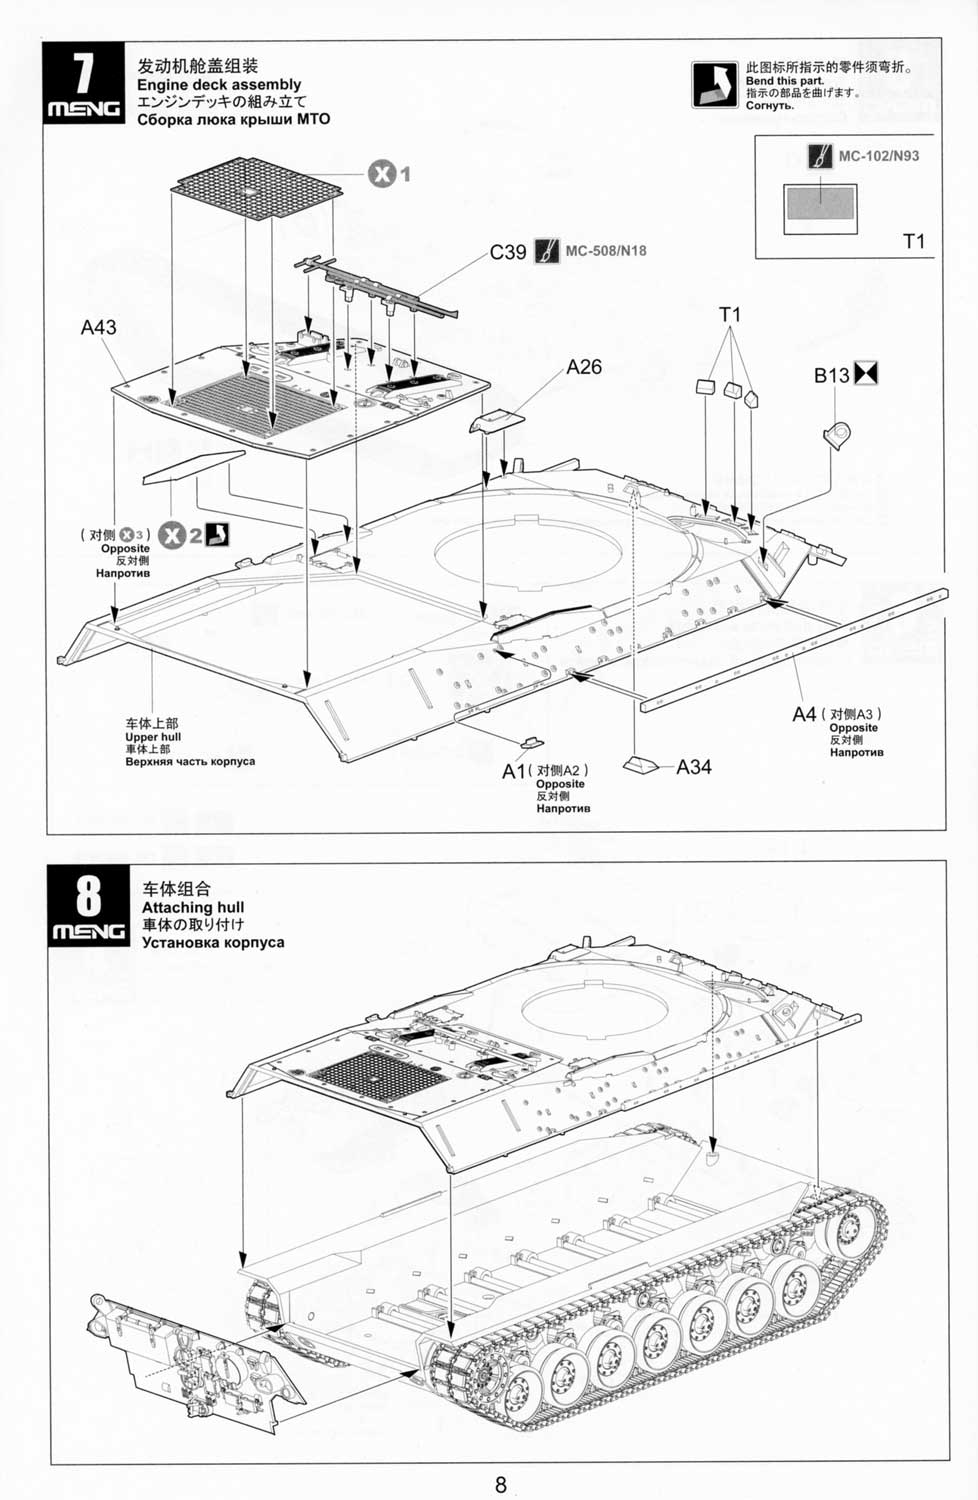
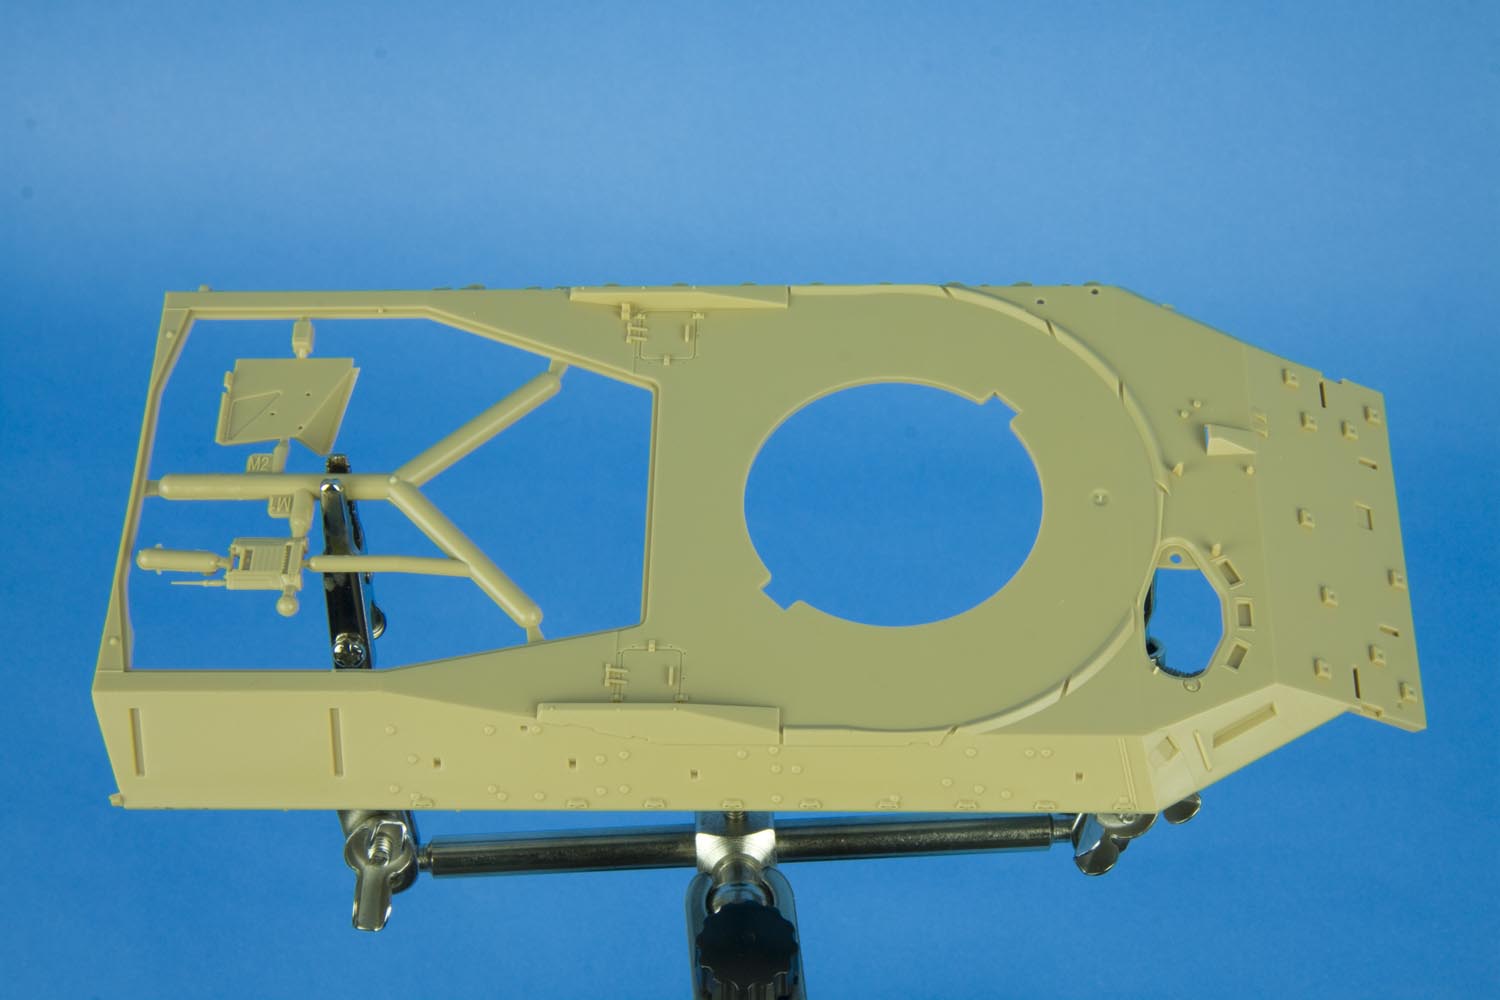
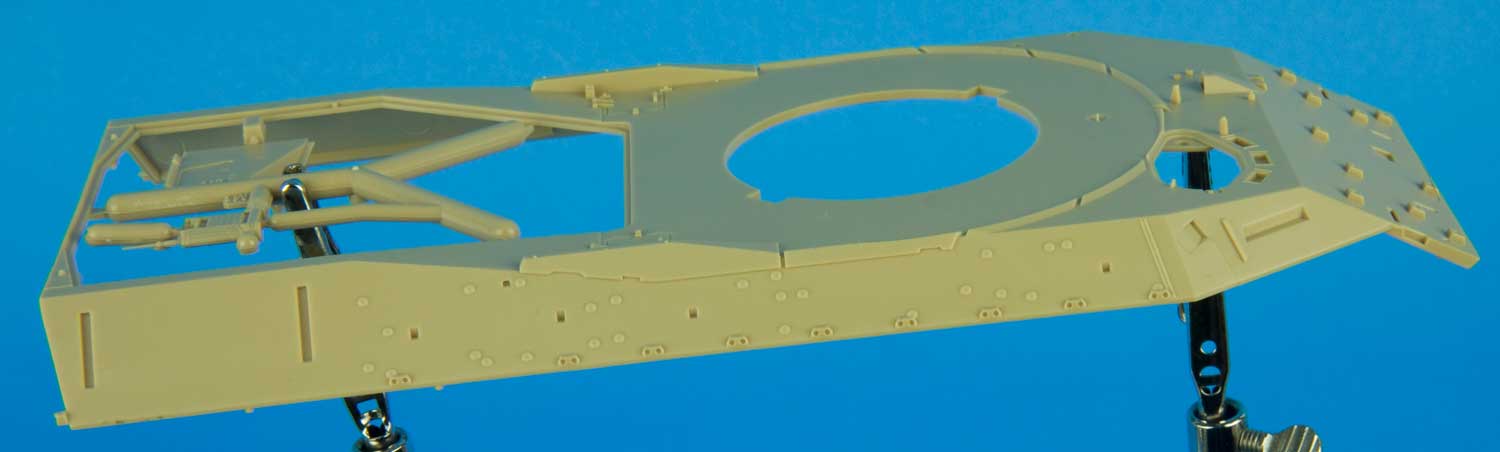
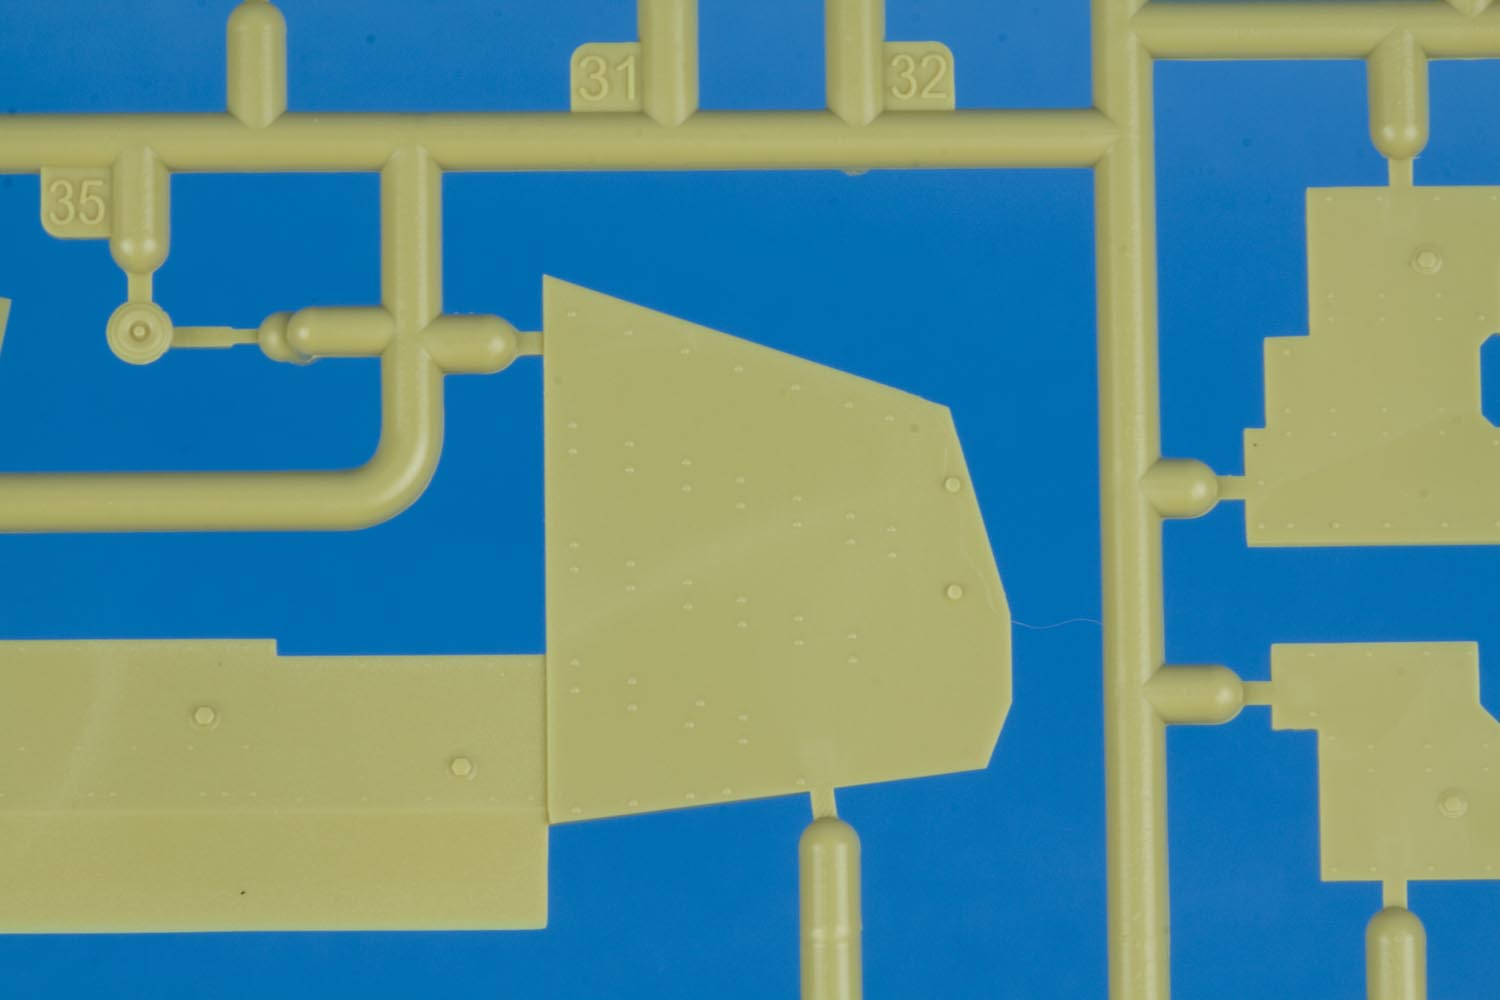
The upper hull is not sourced from one of the past Meng Leopards and looks to be a newly tooled offering. The engine deck is separate with very nicely done air intake grills. The cooling exhaust grill is now molded integral with the hull top and not a separate part as with the 1A3/4 or the 1A5. The detail on the cooling grill is excellent and is spot on accurate with the real thing. The only issue I can note is the solid grab handles on the fuel filler access hatches. This type of simplification is however to be expected and they are easily replaced with brass wire or some such thing.

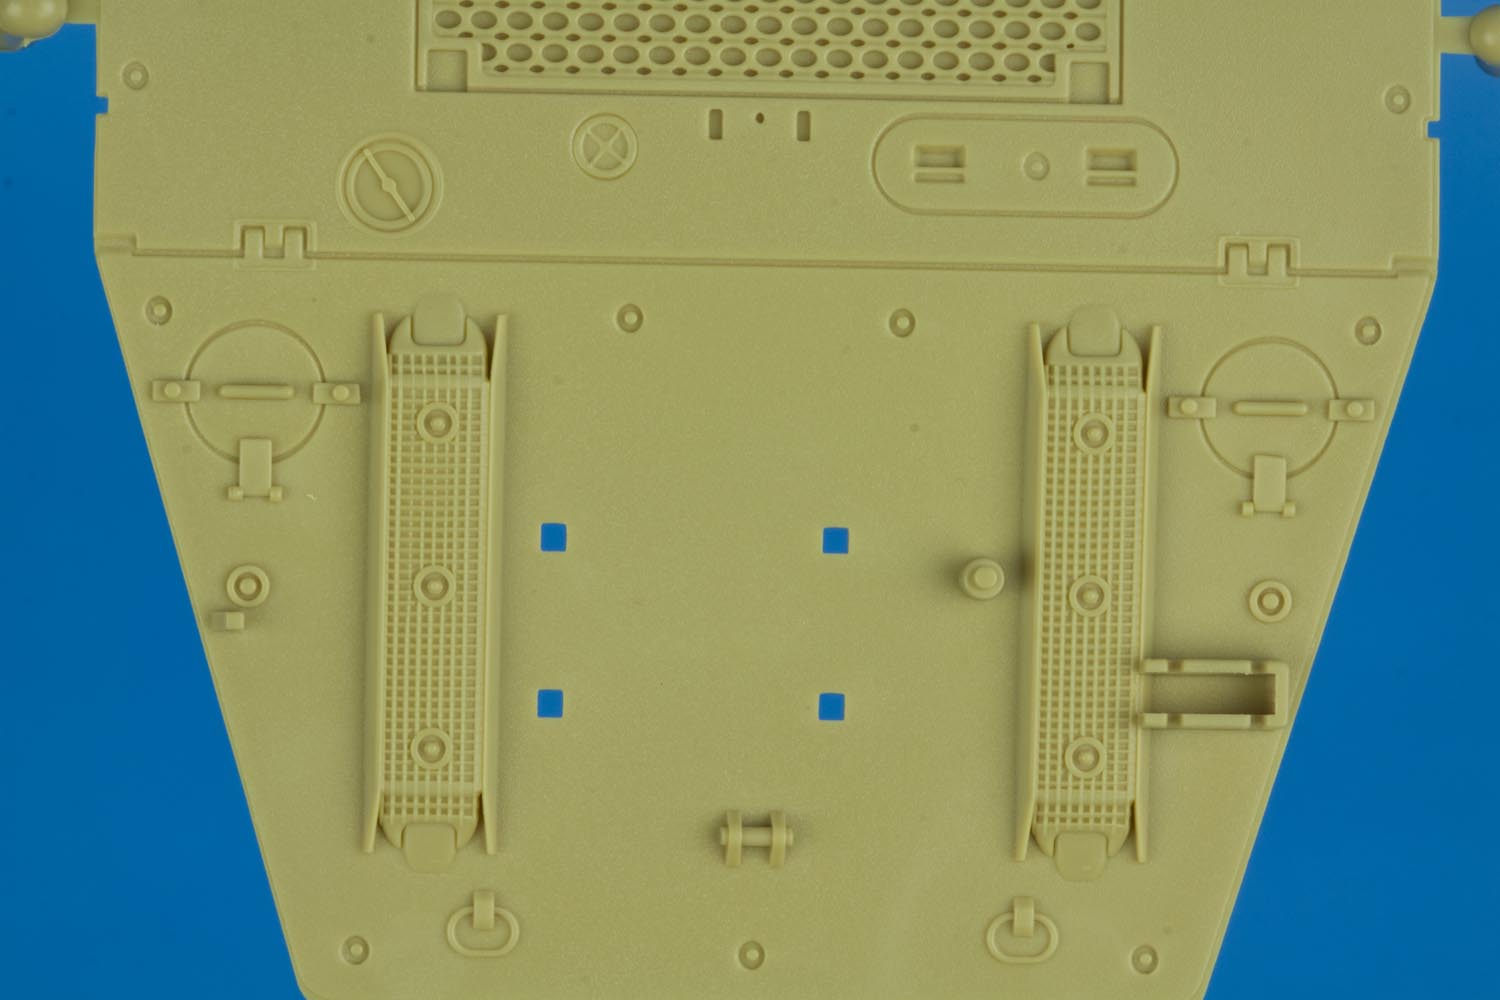
The separate engine deck will enable the addition of after-market engine bay kits. It would be fantastic if the PSM engine bay worked with this new hull top.
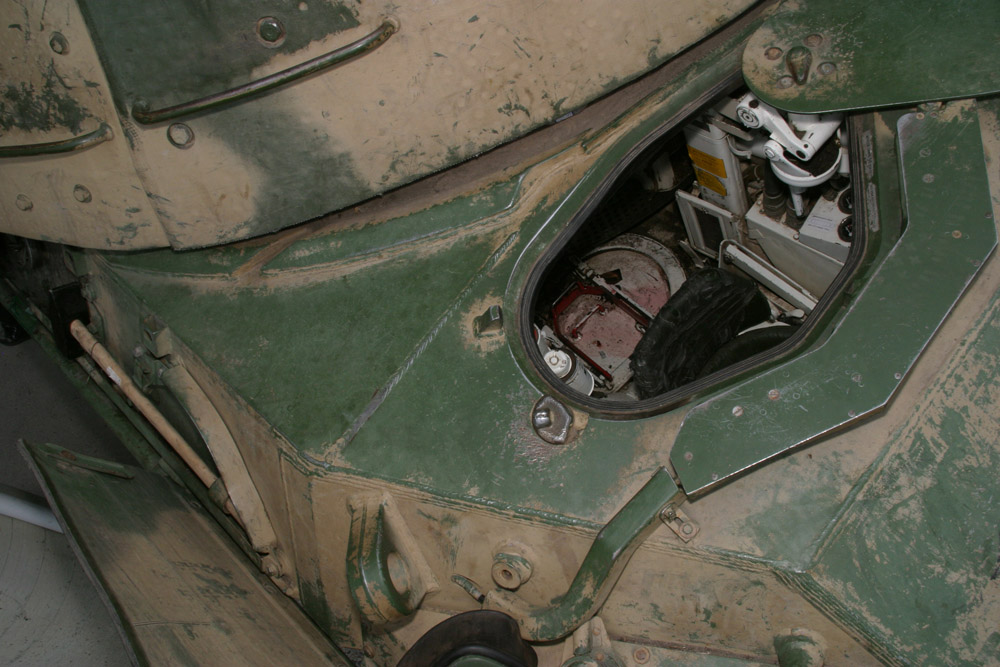
The new hull top is molded without fenders, which makes sense as these would have been removed from the real vehicles prior to the installation of the MEXAS hull modules. The photo below was taken in late 2006 and depicts one of the C2s going through pre-deployment servicing and mounting of MEXAS kits prior to deploying to Afghanistan with B Squadron of the Lord Strathcona's Horse (Royal Canadians) Regiment.
The MEXAS mounts on the front of the glacis plate are faithfully captured, as is the armored cover for the implements power socket. The latter includes a separate piece for the sockets, fitted from the inside of the hull top.
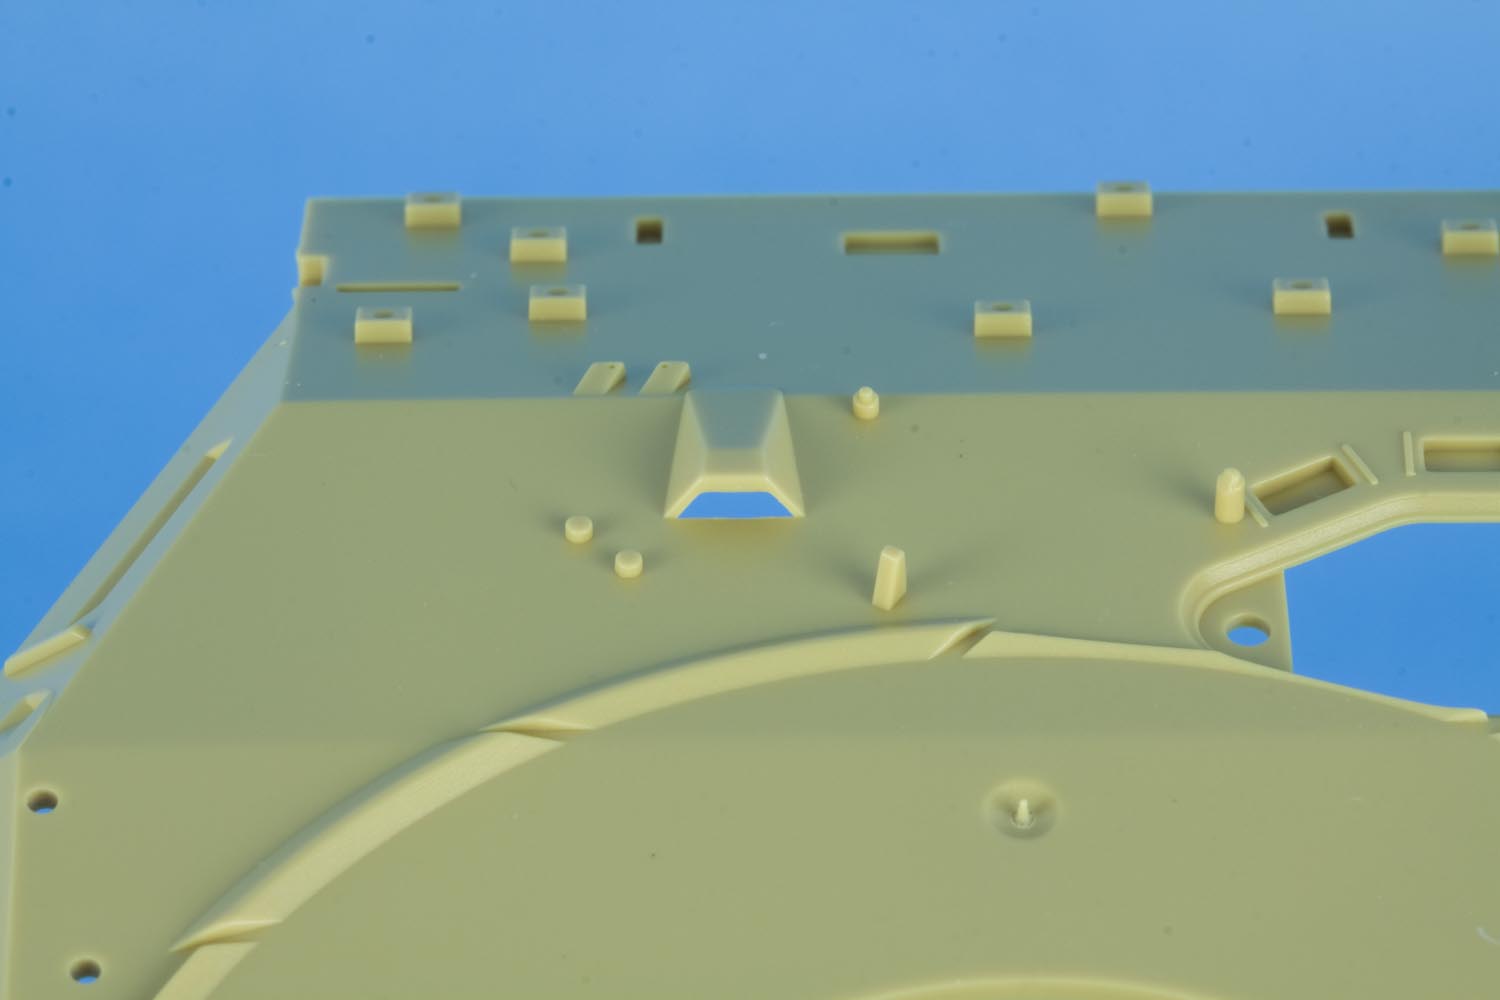
The hull sides now feature tool mount bosses instead of locating holes. These will be partially visible underneath the MEXAS blocks so this is a really nice touch on Meng's part.
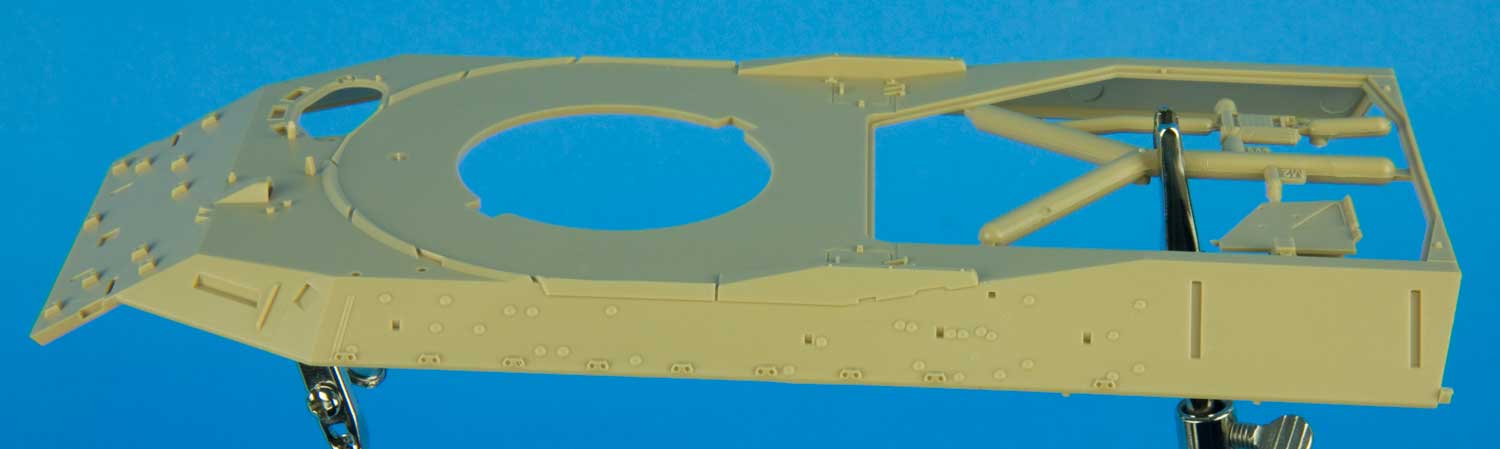
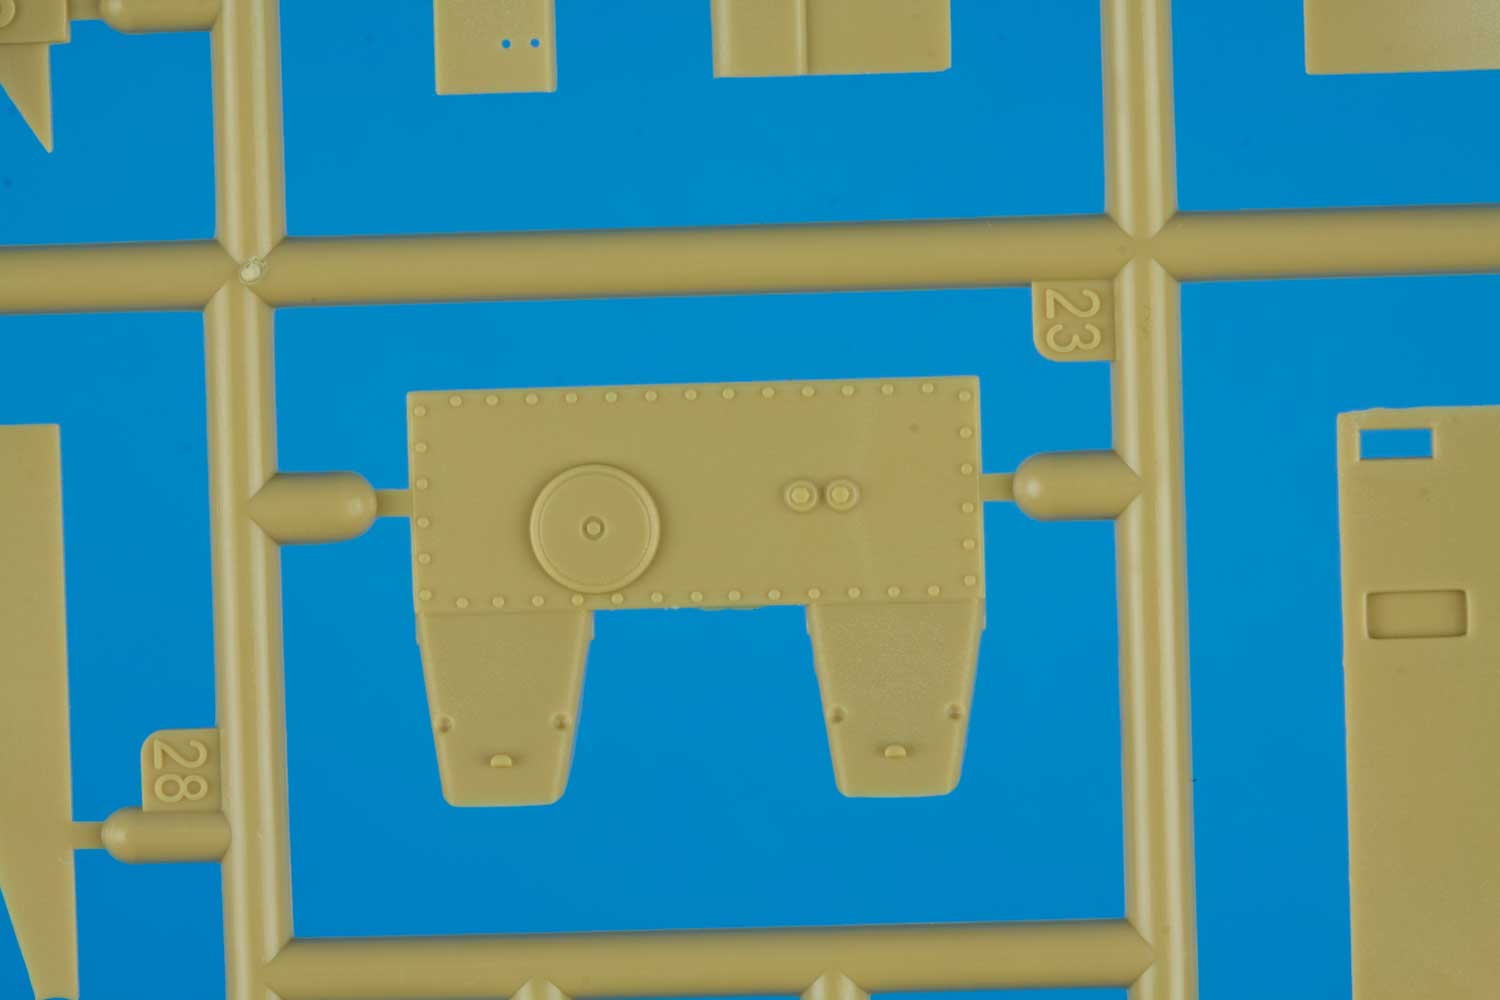
Unfortunately, Meng did nothing to address the lack of weld seams on their Leopard 1 hull. These weld seams are mostly hidden beneath MEXAS modules so perhaps this is why they didn't address this deficiency? Even so, there are a few welds seams on the rear hull plate which are very visible; these are still missing from this model (the rear hull plate is the same as that used on the 1A3/4 and the 1A5).
I'm not even going to talk about the horribly simplified handle on the toolbox on the rear hull plate. This hasn't changed from Meng's previous Leopard kits.
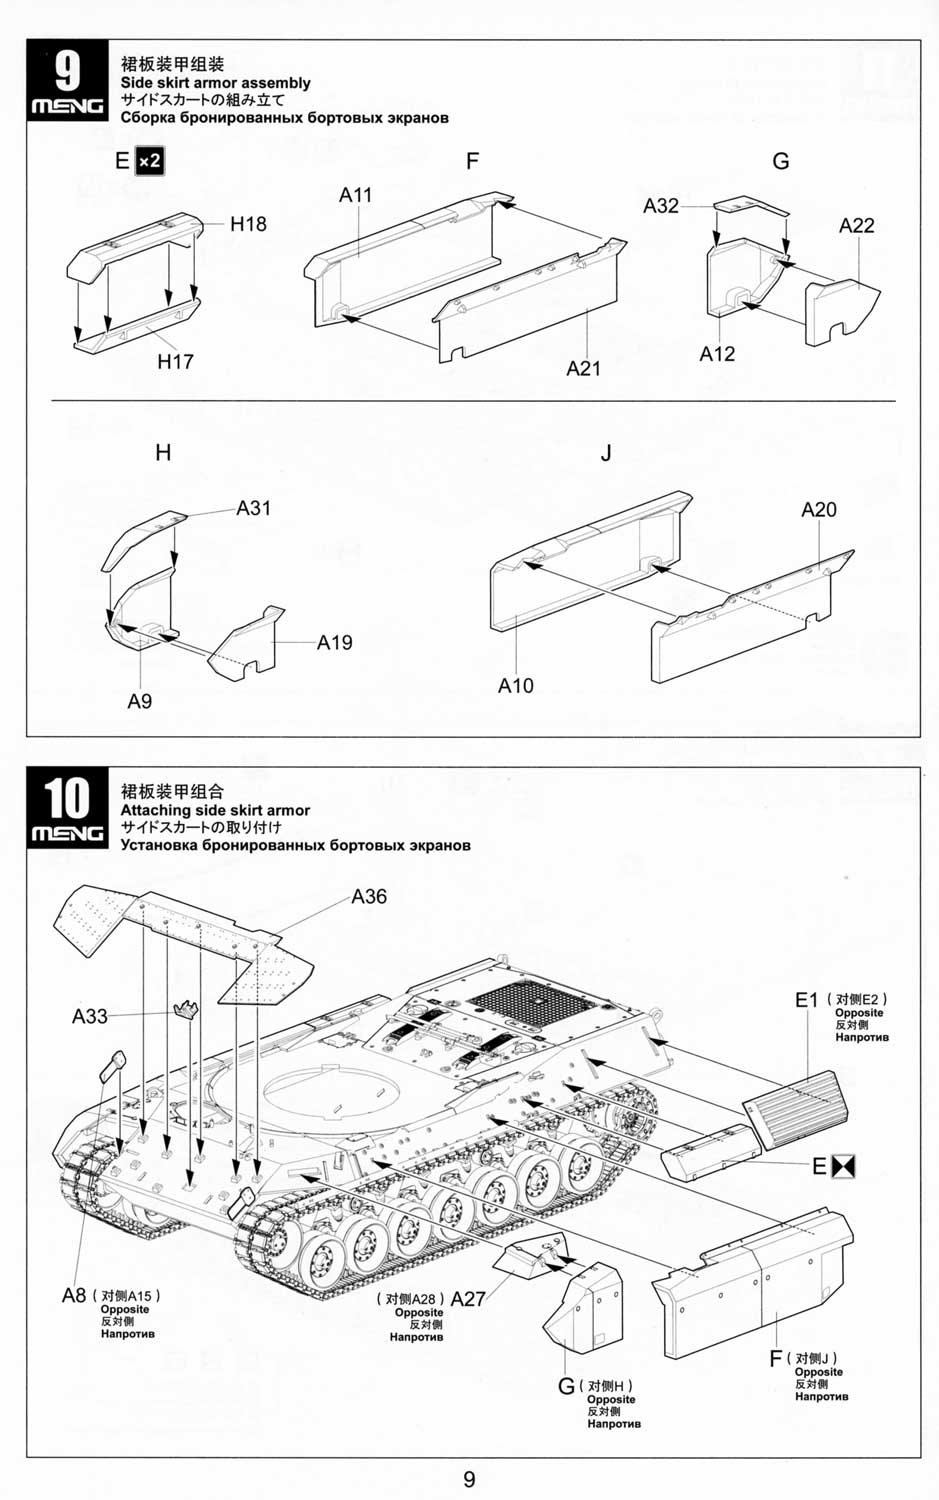
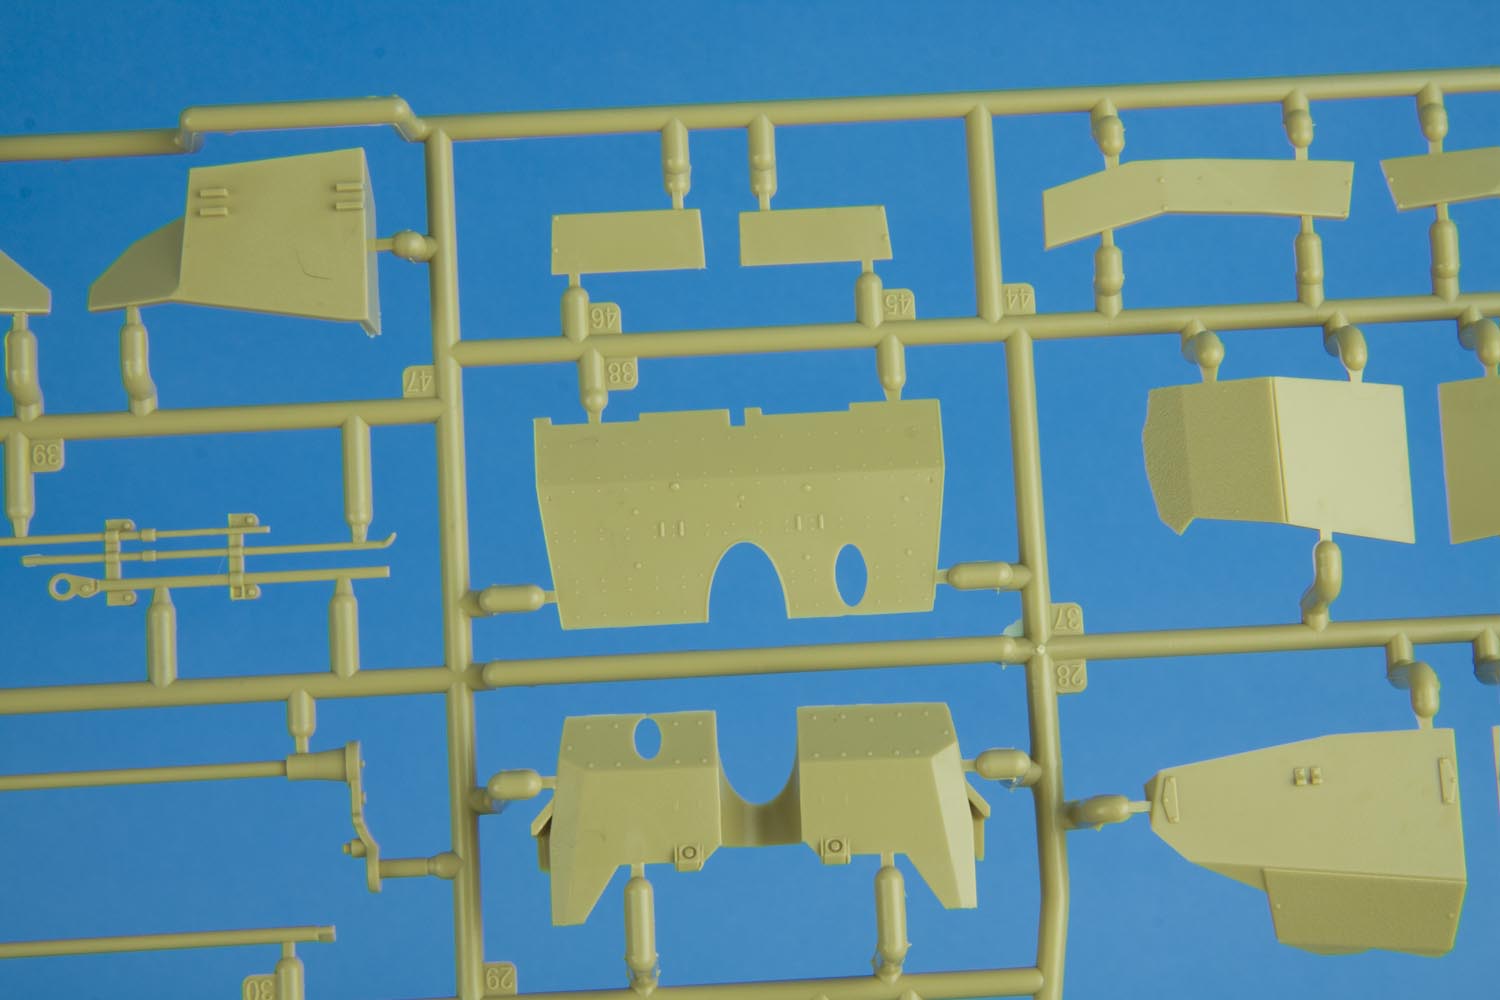
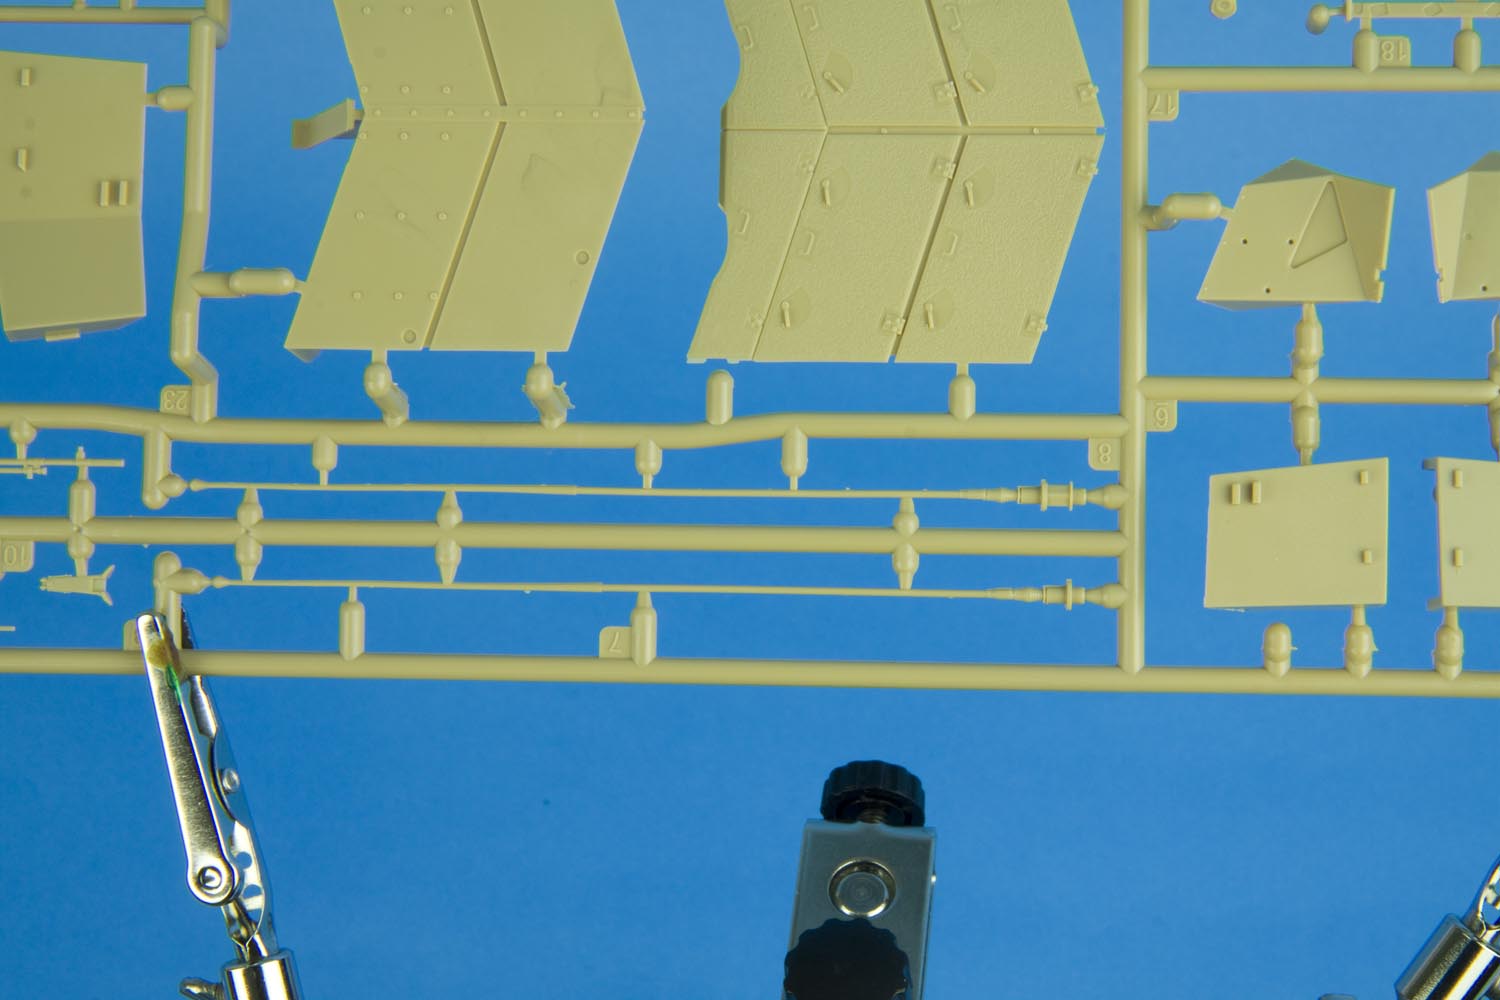
The hull MEXAS module parts are mostly found on sprue A. The kit provides options for a fully up-armored gun tank with all of the glacis MEXAS modules installed as well as the partial upper glacis covering when the dozer blade is mounted. The glacis and track cover parts feature very fine rivet detail, similar to that found on the turret mantlet MEXAS module.
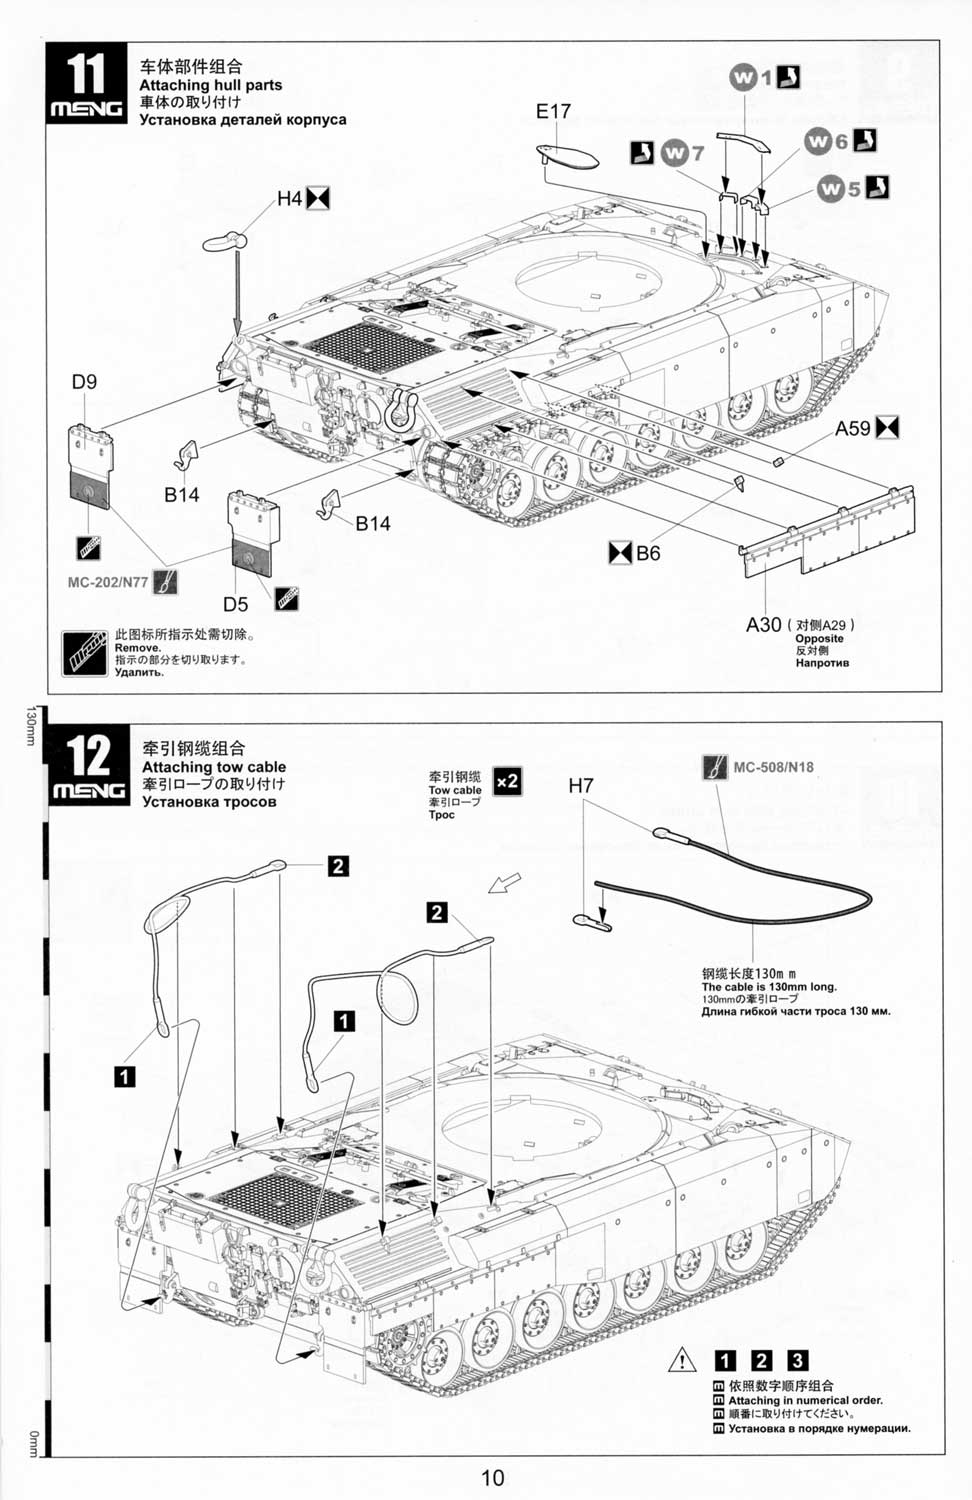
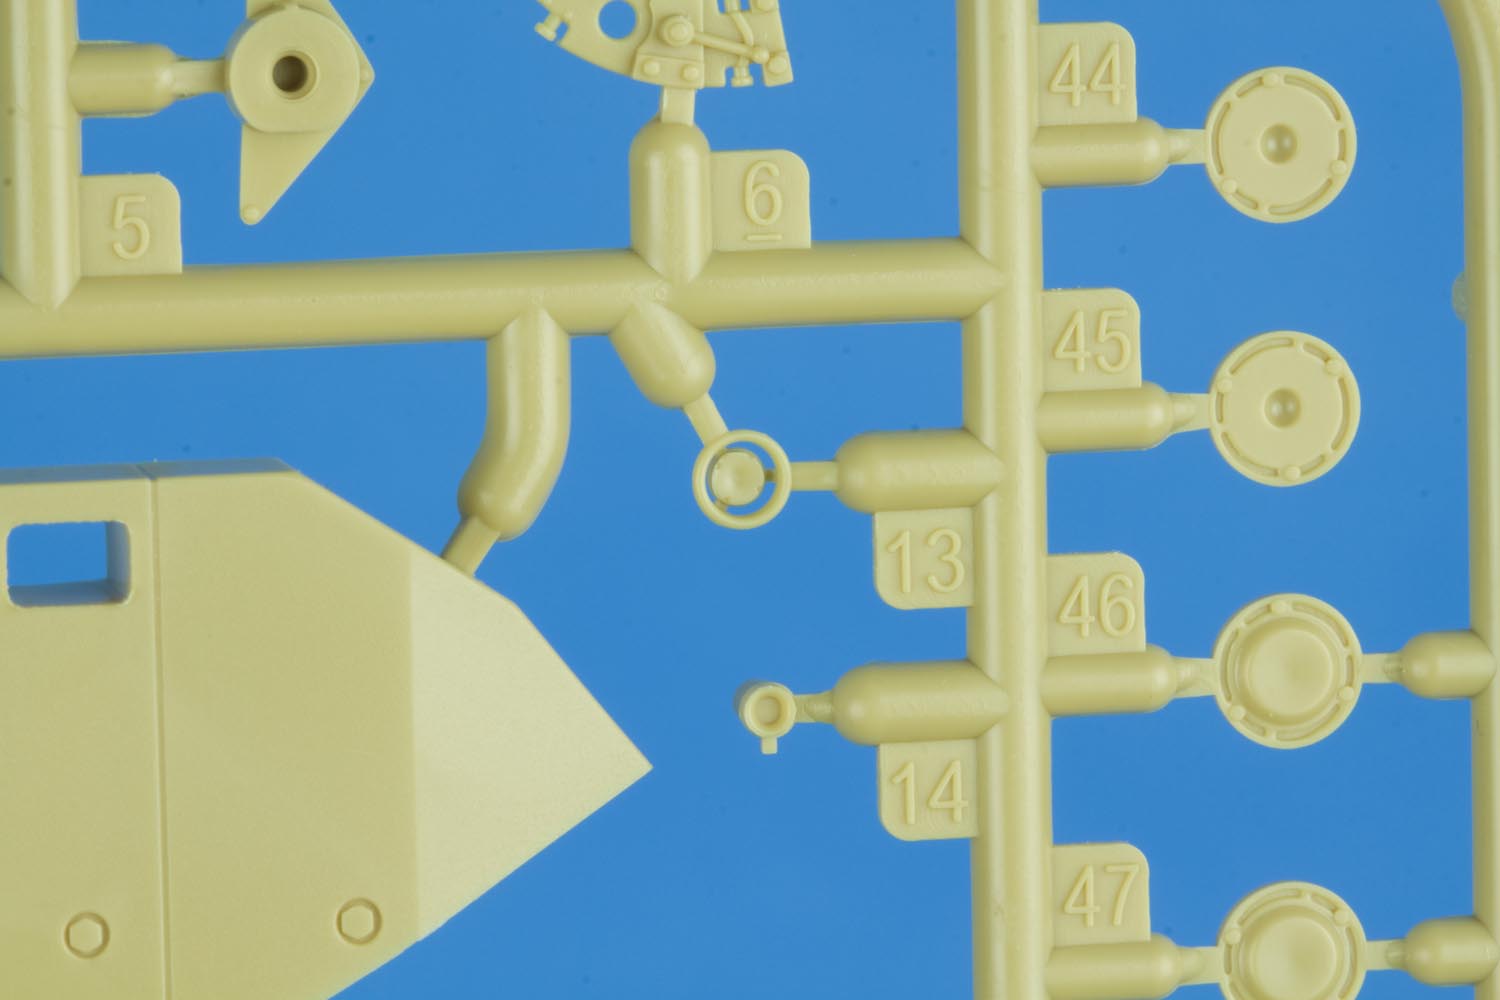
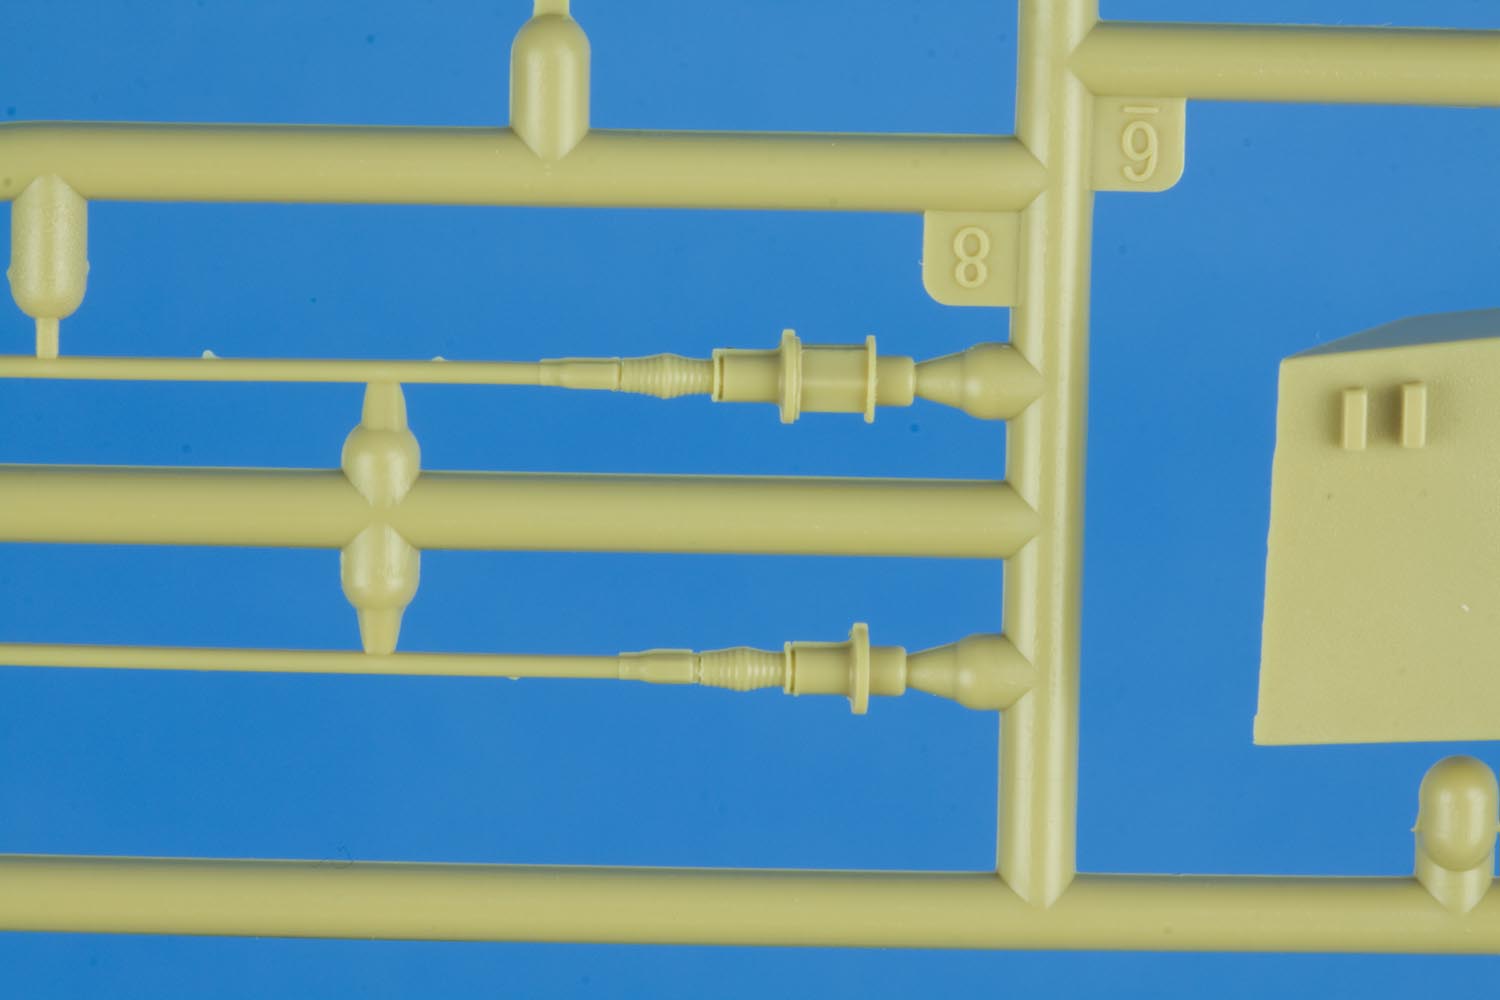
The upper glacis plate MEXAS module necessitated the use of extensions for the towing bollards (T-hooks) and the headlights. The kit parts for these extensions are somewhat simplified, being molded as single parts.
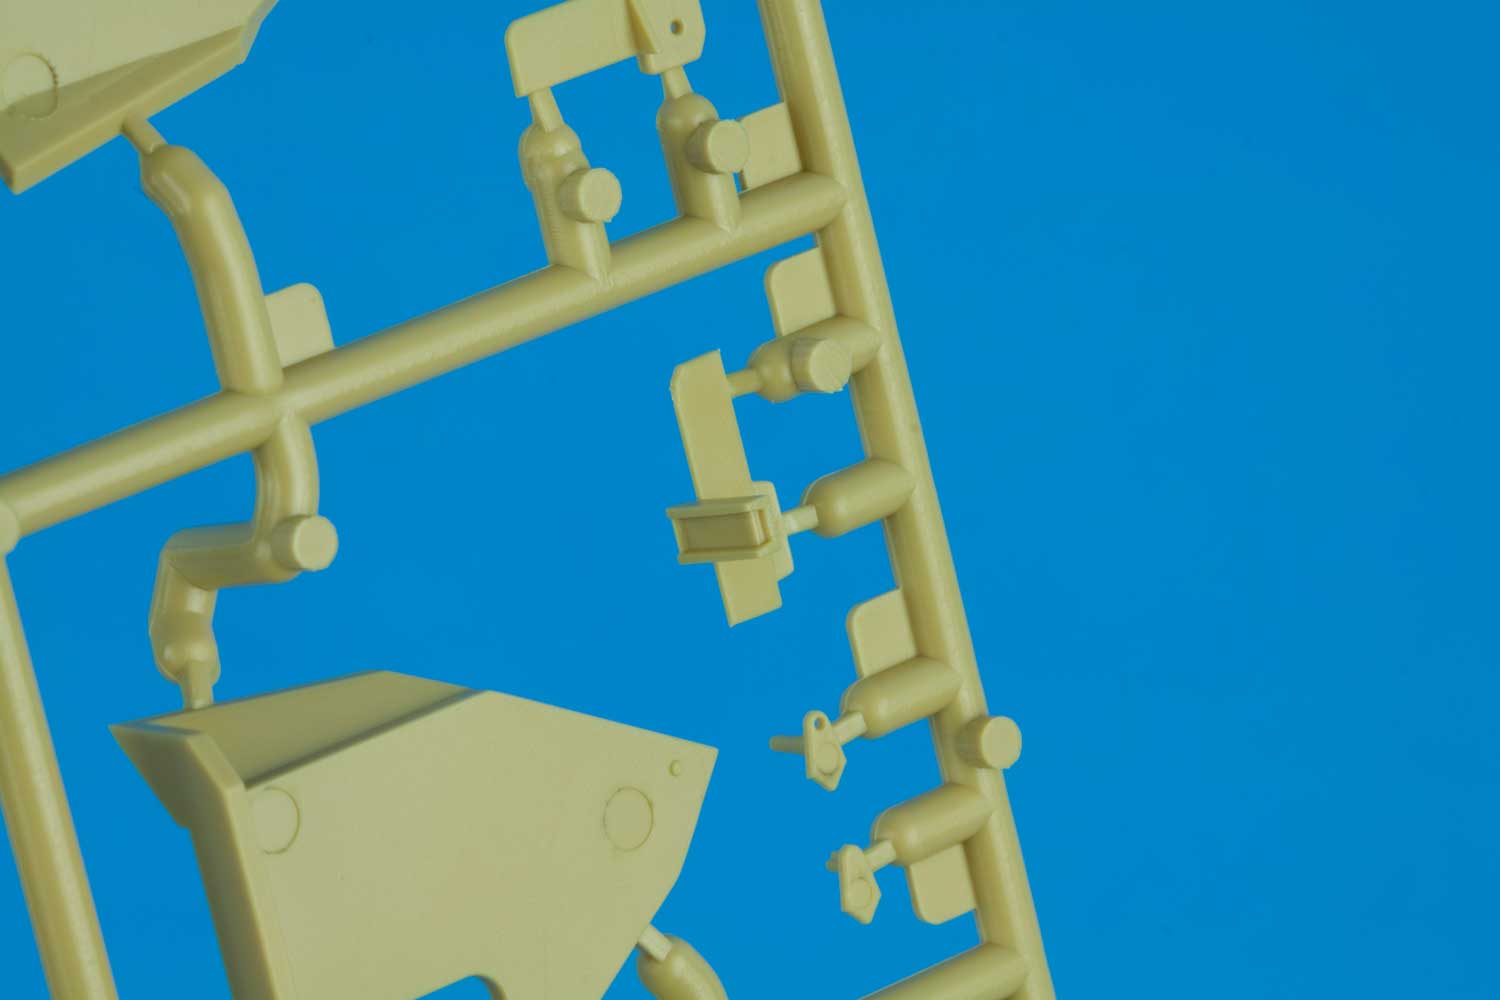
This isn't a huge deal though as a little work with a sharp knife would enhance these parts. It is also worth noting that this is the same approach taken by Takom on their C2 MEXAS kit. Perhaps improvement parts such as these represent an opportunity for the after-market?
The engineering implement power conduit bracket is absolutely exquisite! There is an ejector pin mark in the middle of the part but this looks easily removed with a needle file. This part will be hidden under the MEXAS glacis module, which is a real shame because it is so well done.
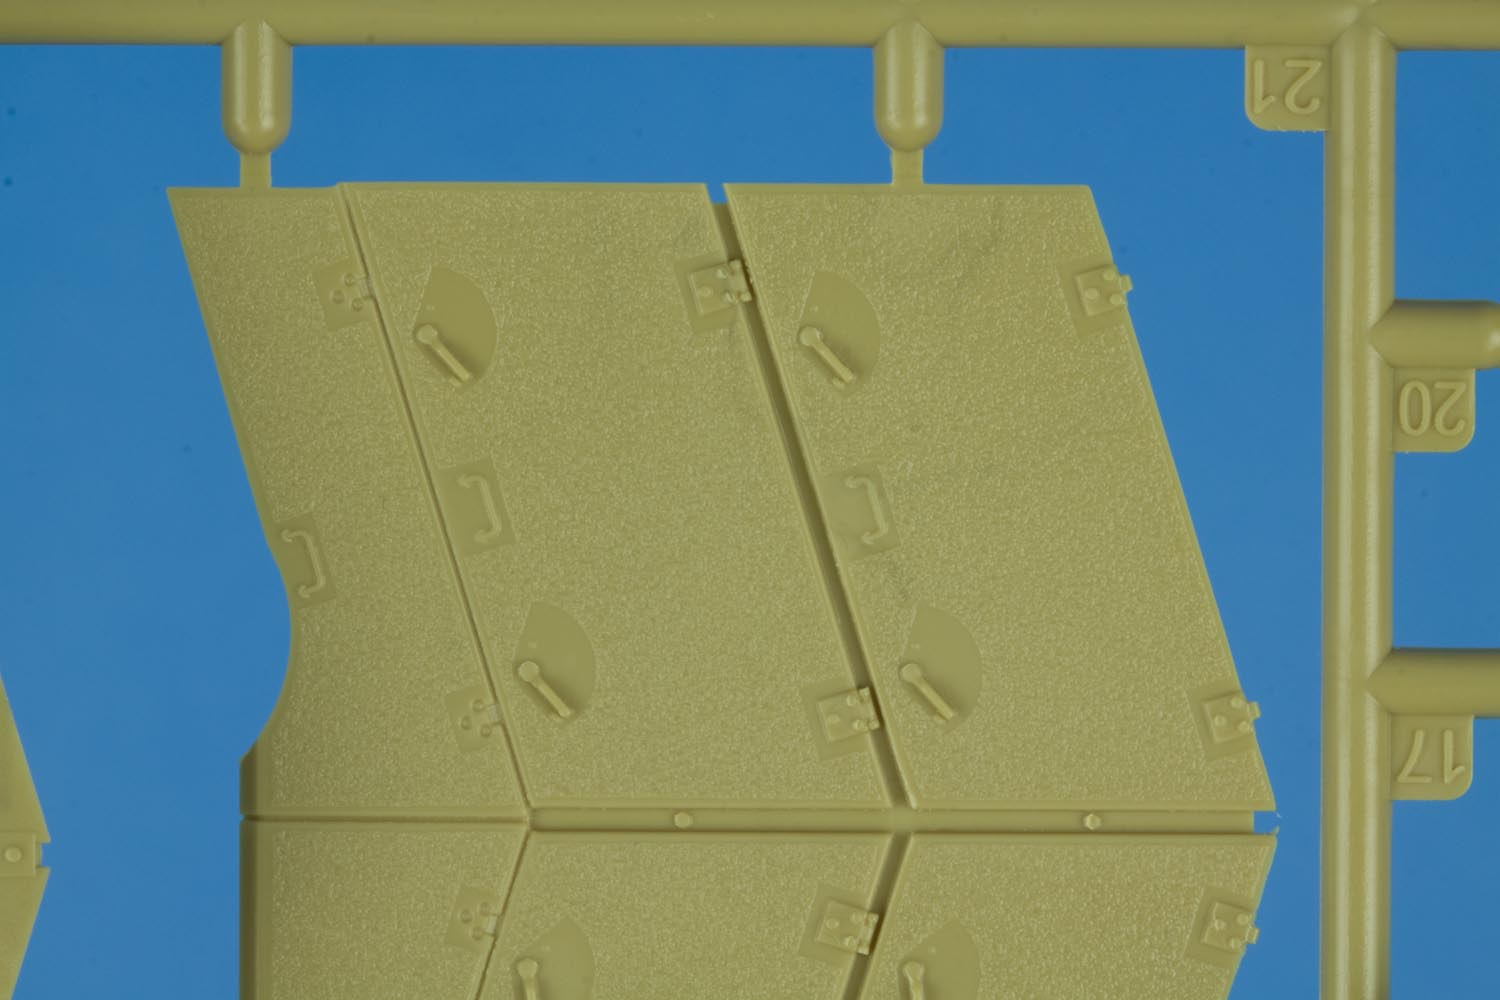
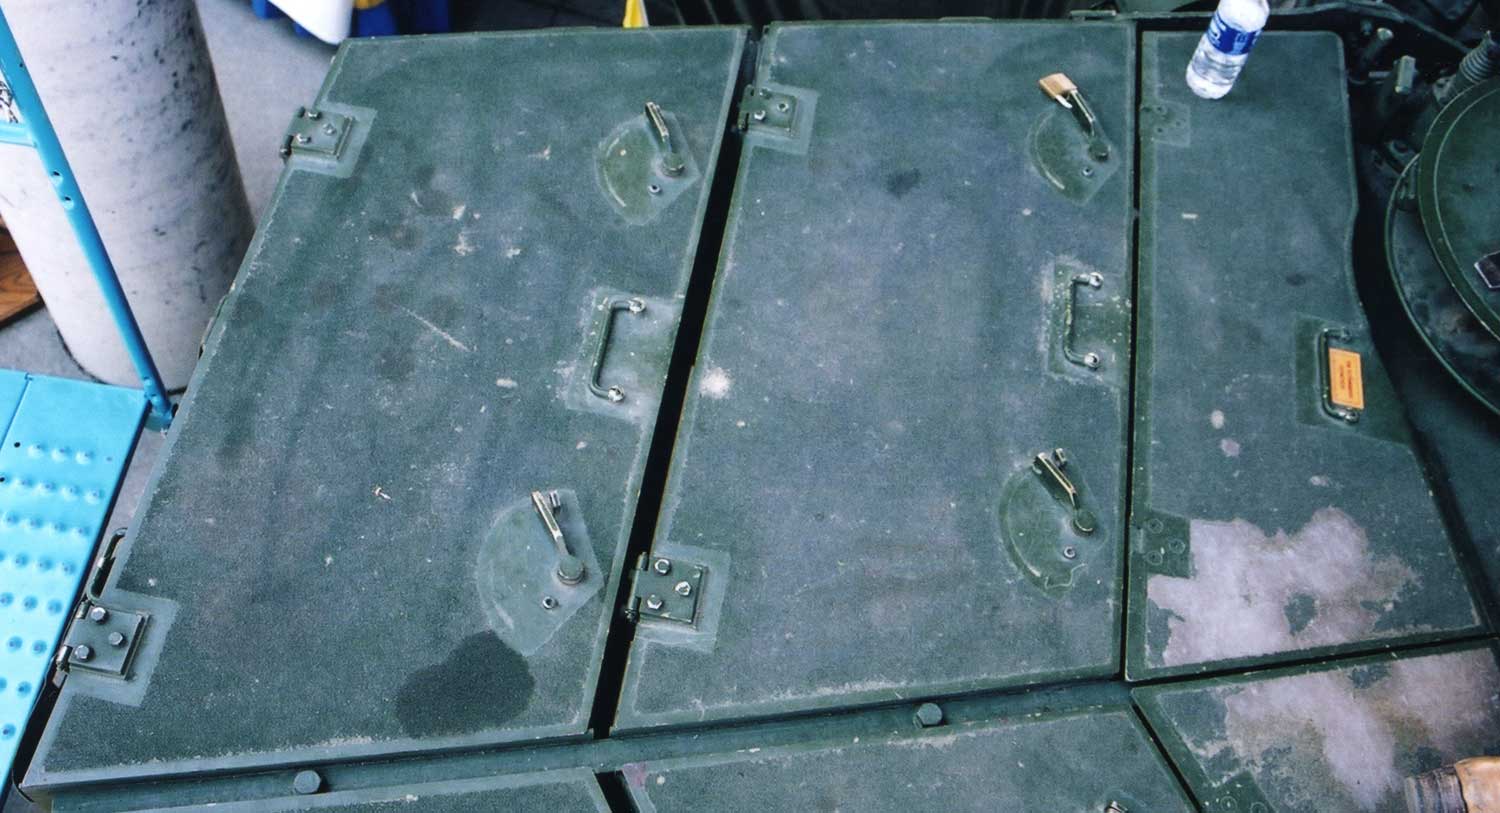
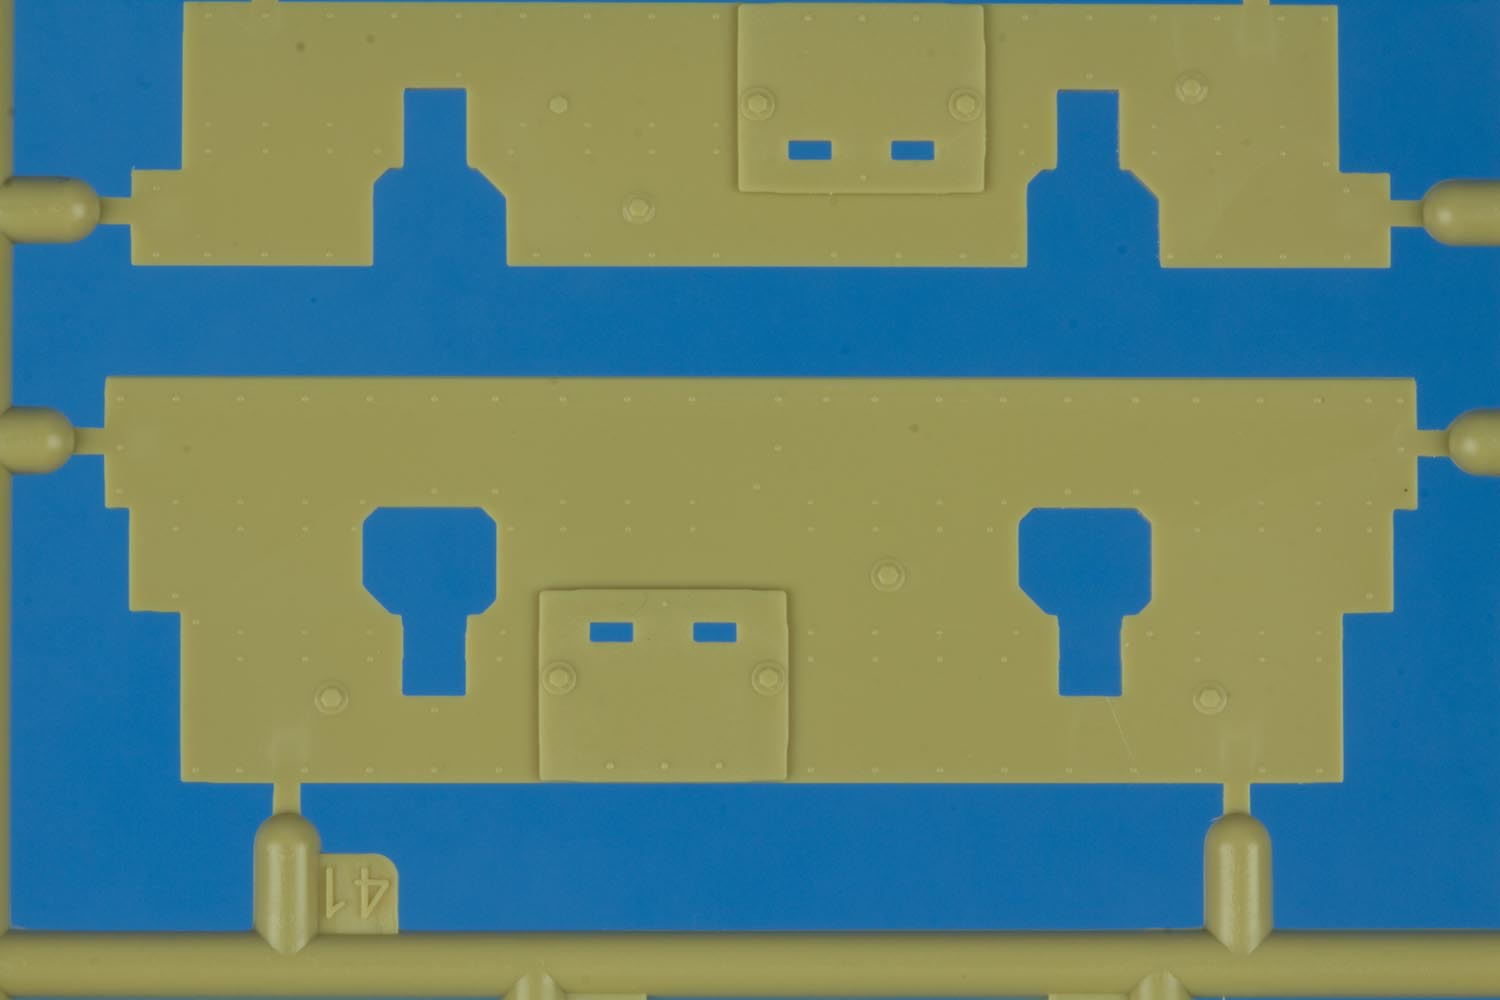
The side skirt modules have been provided in multiple pieces with the front two sections being separate from the rest of the side skirts blocks. On the operational vehicles, the front two sections were quickly damaged due to run-ins with jingle trucks and hard-as-concrete sun baked mud walls. Meng's decision to include these as separate parts allows the ambitious modeler to replace these with scratch-built damaged sections without performing major surgery on the rest of the side skirt modules. I see this as a really nice touch as this is exactly what I plan to do with my build!
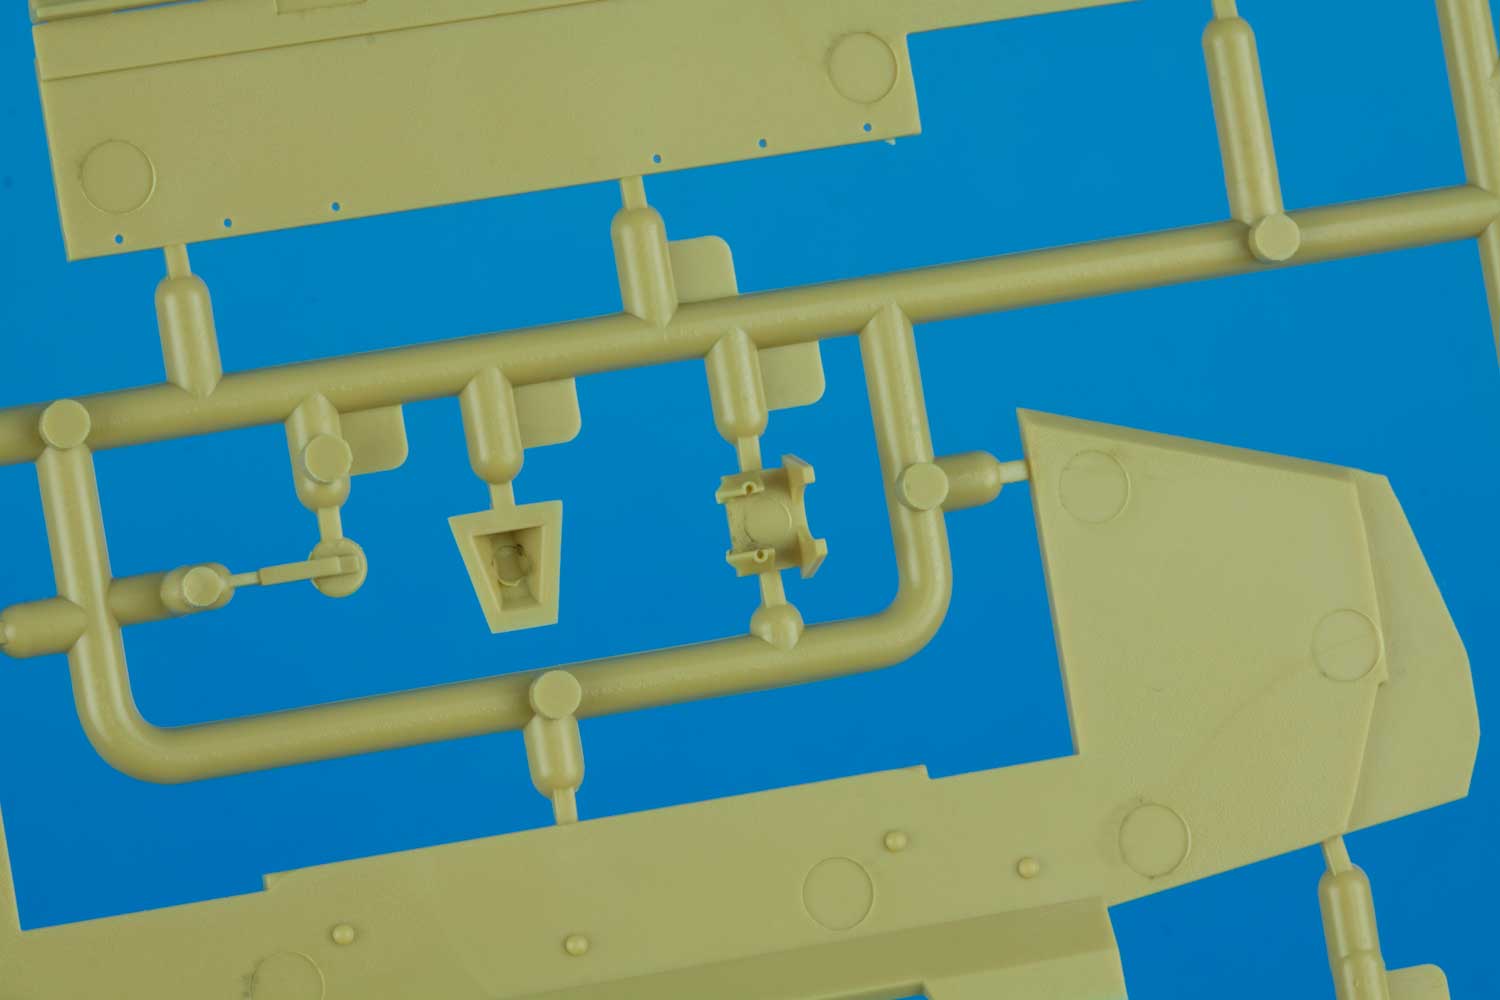
Etched parts are provided for the driver's periscope guards and the wiper housing (a uniquely Canadian modification originating with the C1). To be completely accurate a thin wire will need to be run from the right side of the wiper housing, running just forward of the lifting lug to disappear under the MEXAS armour. Note that the metal cable cover depicted in the photo below would not have been used with the MEXAS kit mounted.
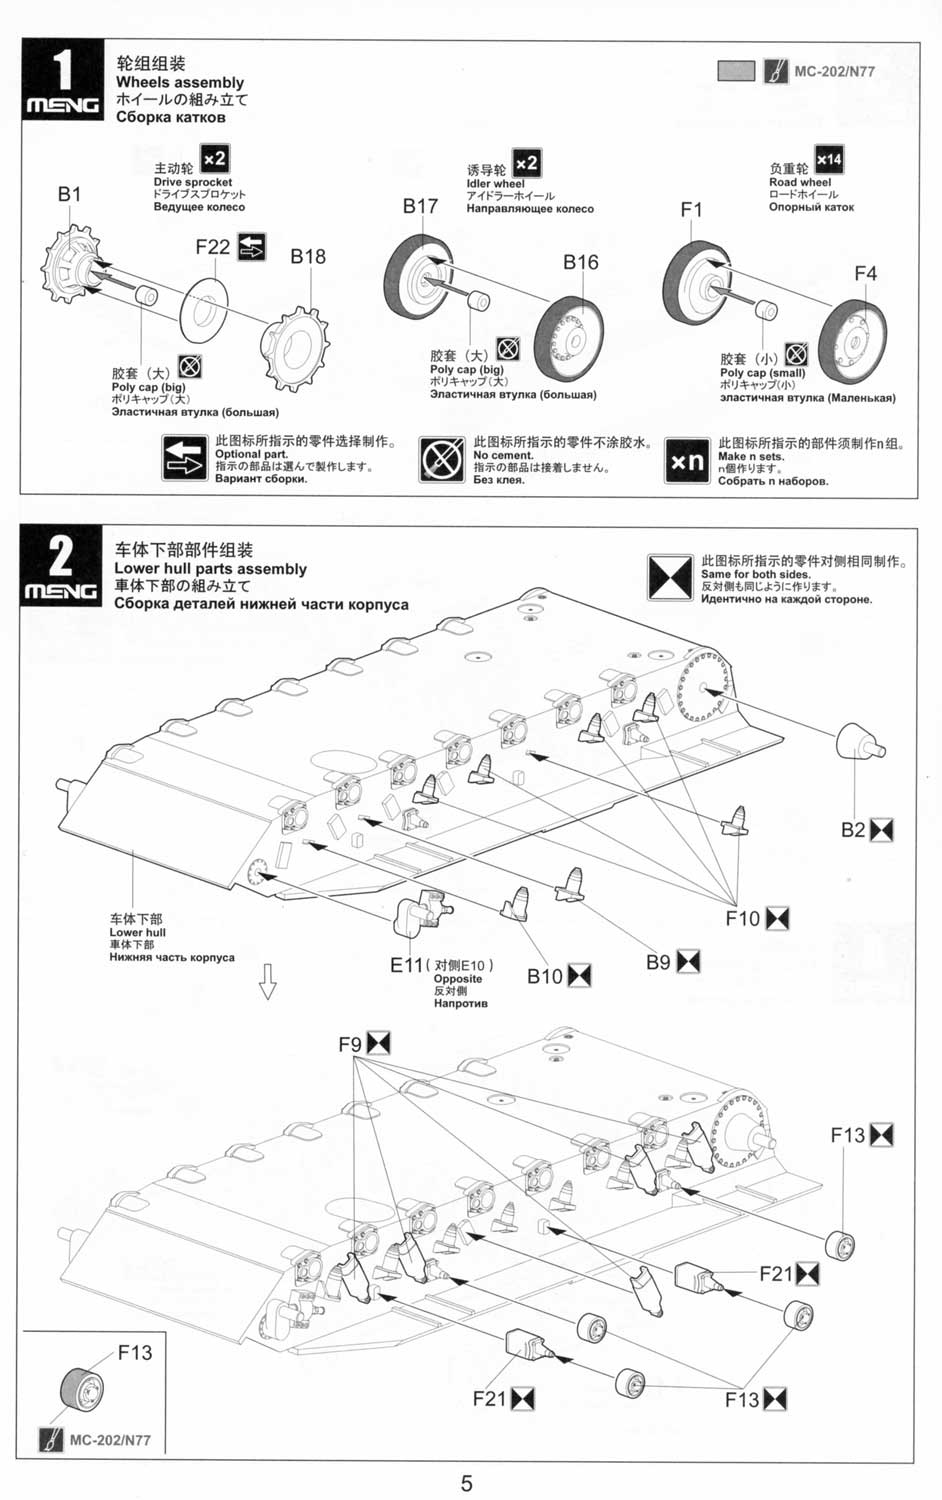
The road wheels look to be the same as those included with the 1A5. While they are very good and an improvement over those provided with the 1A3/4, they still use poly caps. Regarding those poly caps, my first though upon seeing them in the box was why?! Can we please all agree that poly caps for road wheels in armor kits is a concept which needs to die in a fire? Thankfully, Leopard Workshop comes to the rescue with several suitable replacement sets (LW001-1, LW002 and LW007-4).
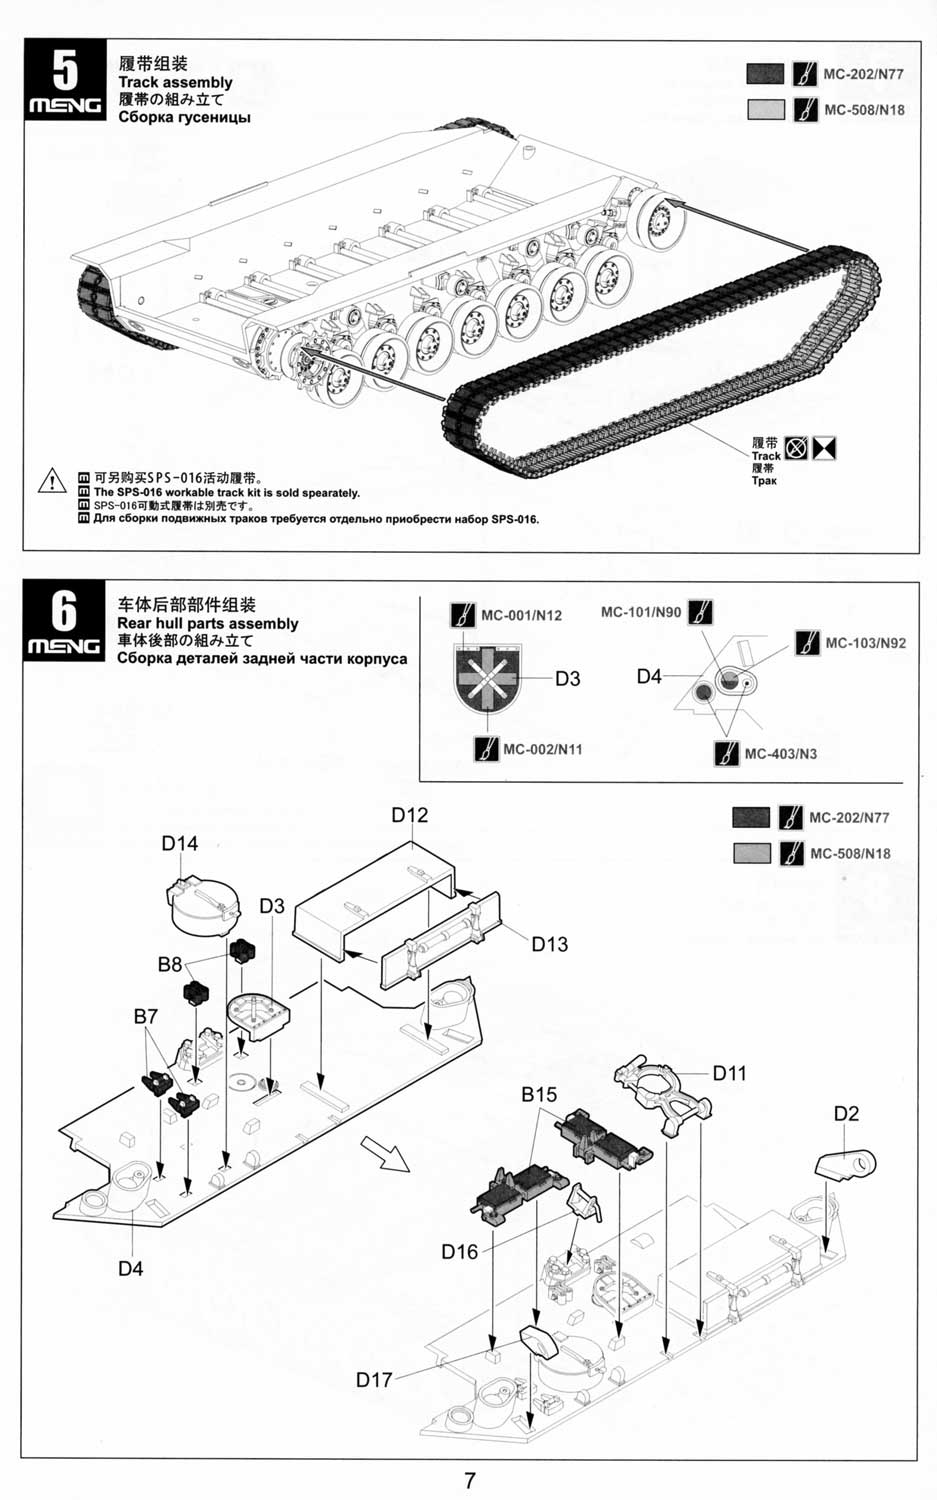
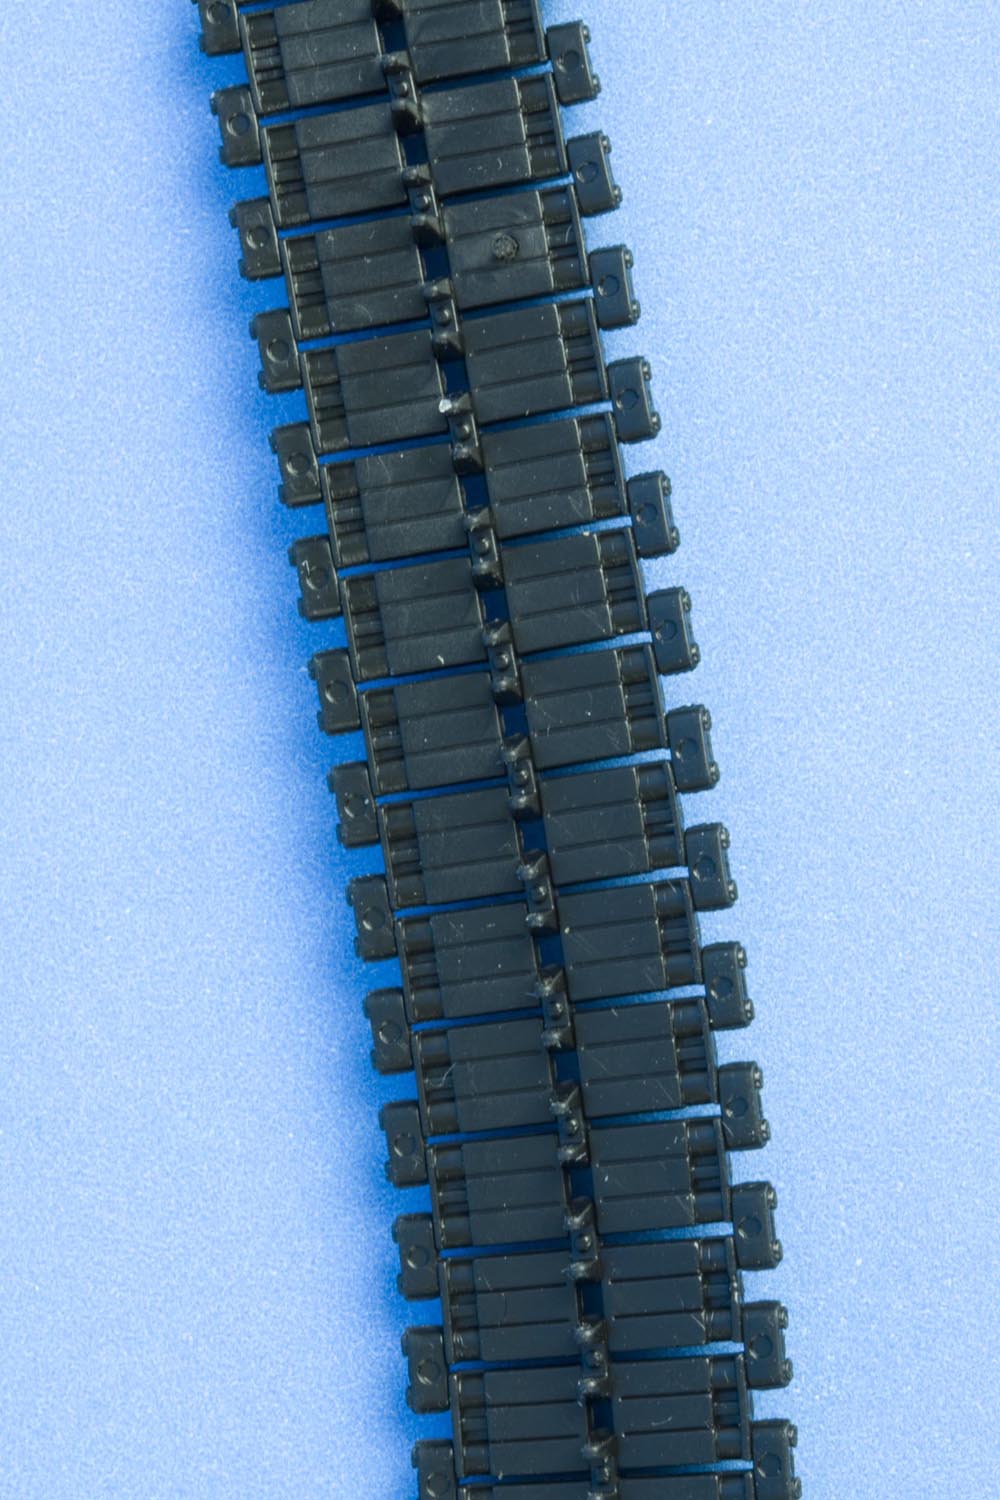
Curiously, the kit is supplied with one piece vinyl tracks instead of Meng's excellent D640A individual link track set. I am not sure if this decision was made to reduce the parts count of the kit or because the track runs are largely covered by the MEXAS side skirts. The choice is ultimately left to the builder as to which tracks will be used; the only limitation is the availability of the aforementioned D640A set or the depth of one's wallet!
The kit is supplied with a total of three different drive sprockets. Two are found on sprue B which originally appeared on the 1A3/4 and was again supplied with the 1A5. The third sprocket may be found on sprue F which also contains the road wheels and other suspension parts. The drive sprocket found on this sprue includes an optional deflection ring for the track guide teeth. Canadian C2s have been spotted using drive sprockets both with and without the track guide teeth ring in the middle. By providing the option for either style of drive sprocket, Meng have again provided the modeler with more choice to depict a specific vehicle (check your references). Thank you Meng!
For reference, below is a photo of a C2 drive sprocket without the guide ring.

The suspension arms have been improved from those found on previous Meng Leopards. The suspension arms are no longer straight from the torsion bar to the hub; the new ones have the gently swept profile exhibited by the real thing. These new re-worked arms also feature better detail on the bump stop nubs and the shock strut mounts. The arms themselves consist of two pieces; one attached to the torsion bars (to provide working suspension on the finished model) and a second back plate to add thickness and otherwise missing hub detail.
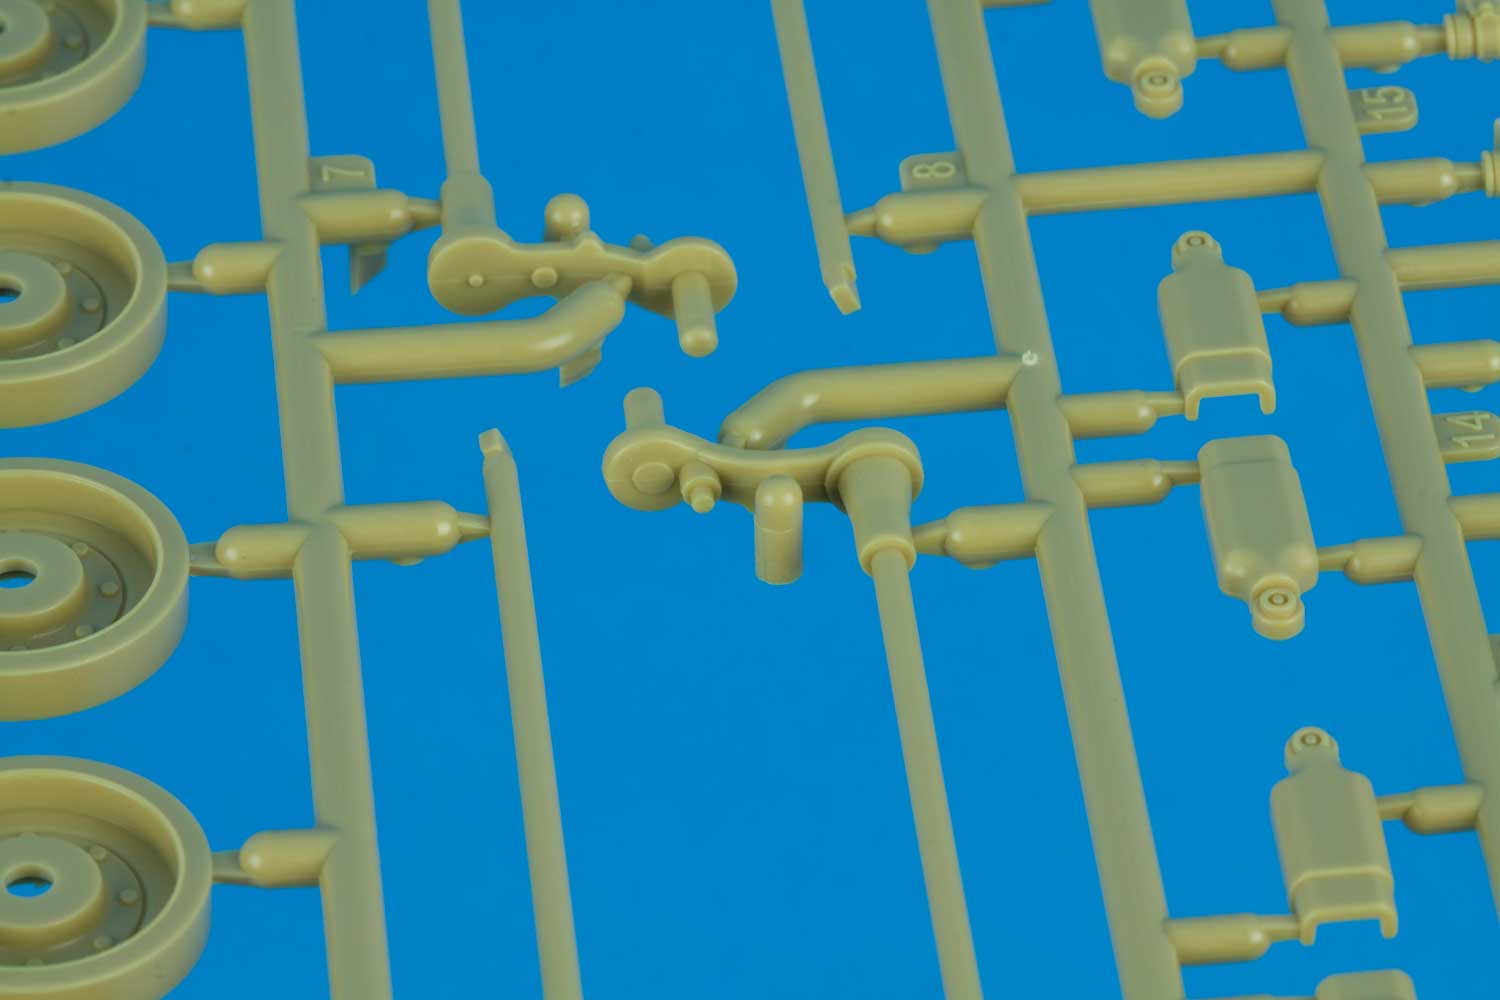
While the suspension arms are much improved, the Leopard Workshop offering (LW011) are still the most accurate version available. Mind you, not much of the suspension arms will be visible with the MEXAS modules in place so the kit parts are probably more than adequate.
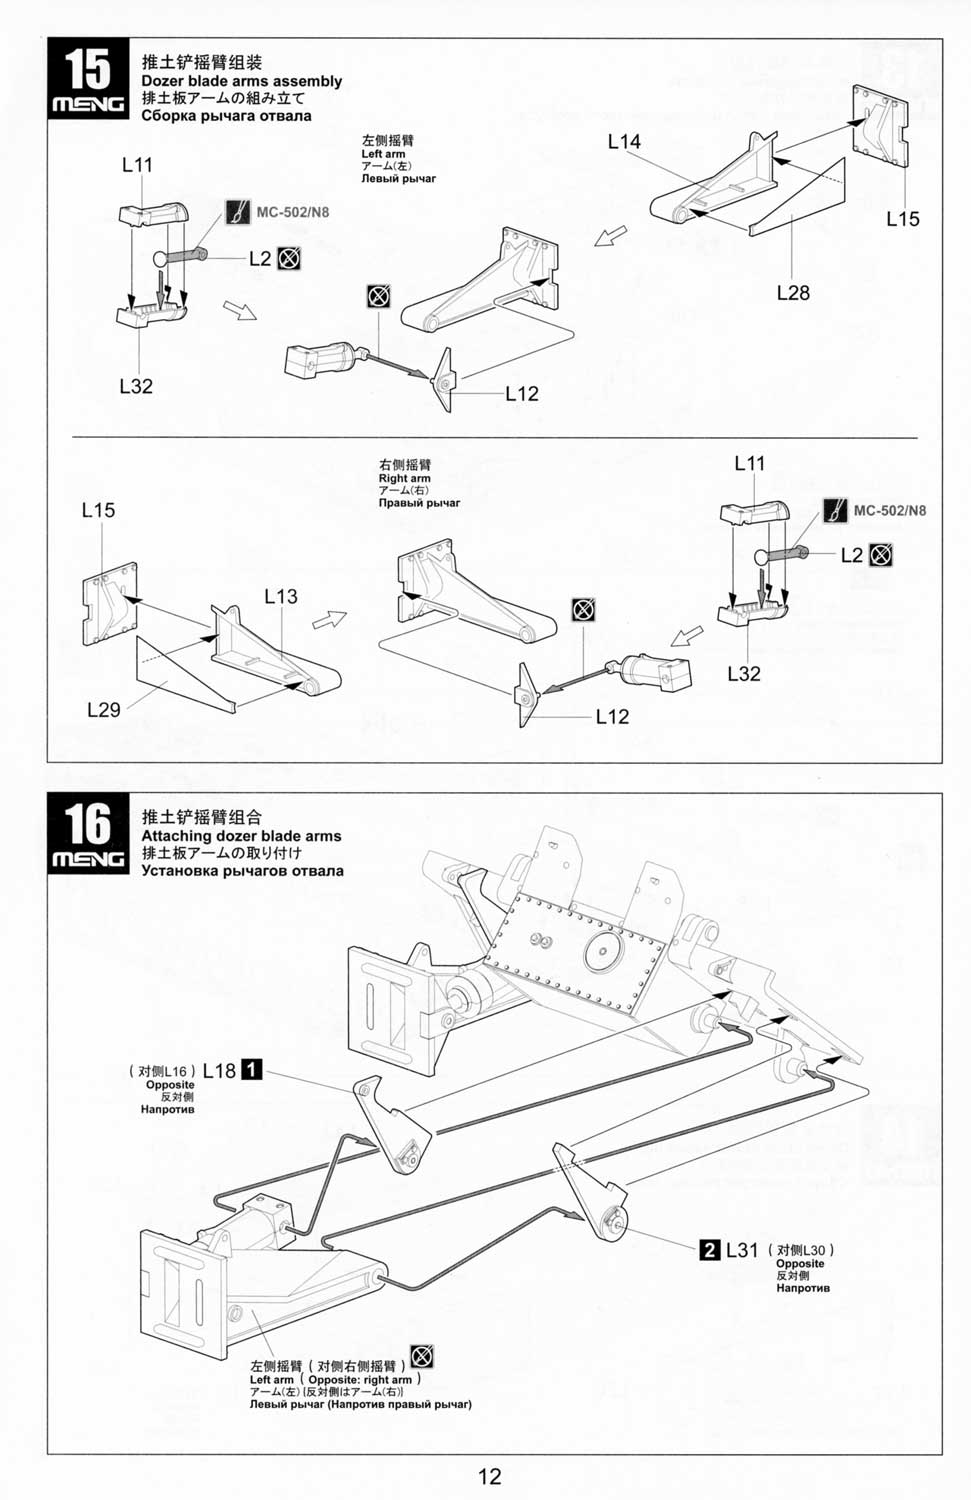
Having a dozer blade in plastic is to me one of the most exciting features of this kit. I wonder if Meng will include the dozer blade as a separate set? If not I imagine a lot of modelers will purchase this kit simply to obtain the dozer blade.
The dozer blade parts are all contained on sprue L. The blade is full articulated with moving hydraulic rams and blade arms. The detail on the parts compares very favorably with reference photos I have on hand.
The front of the hydraulic pump housing is well represented with all of the bolts and cover plates where they should be.
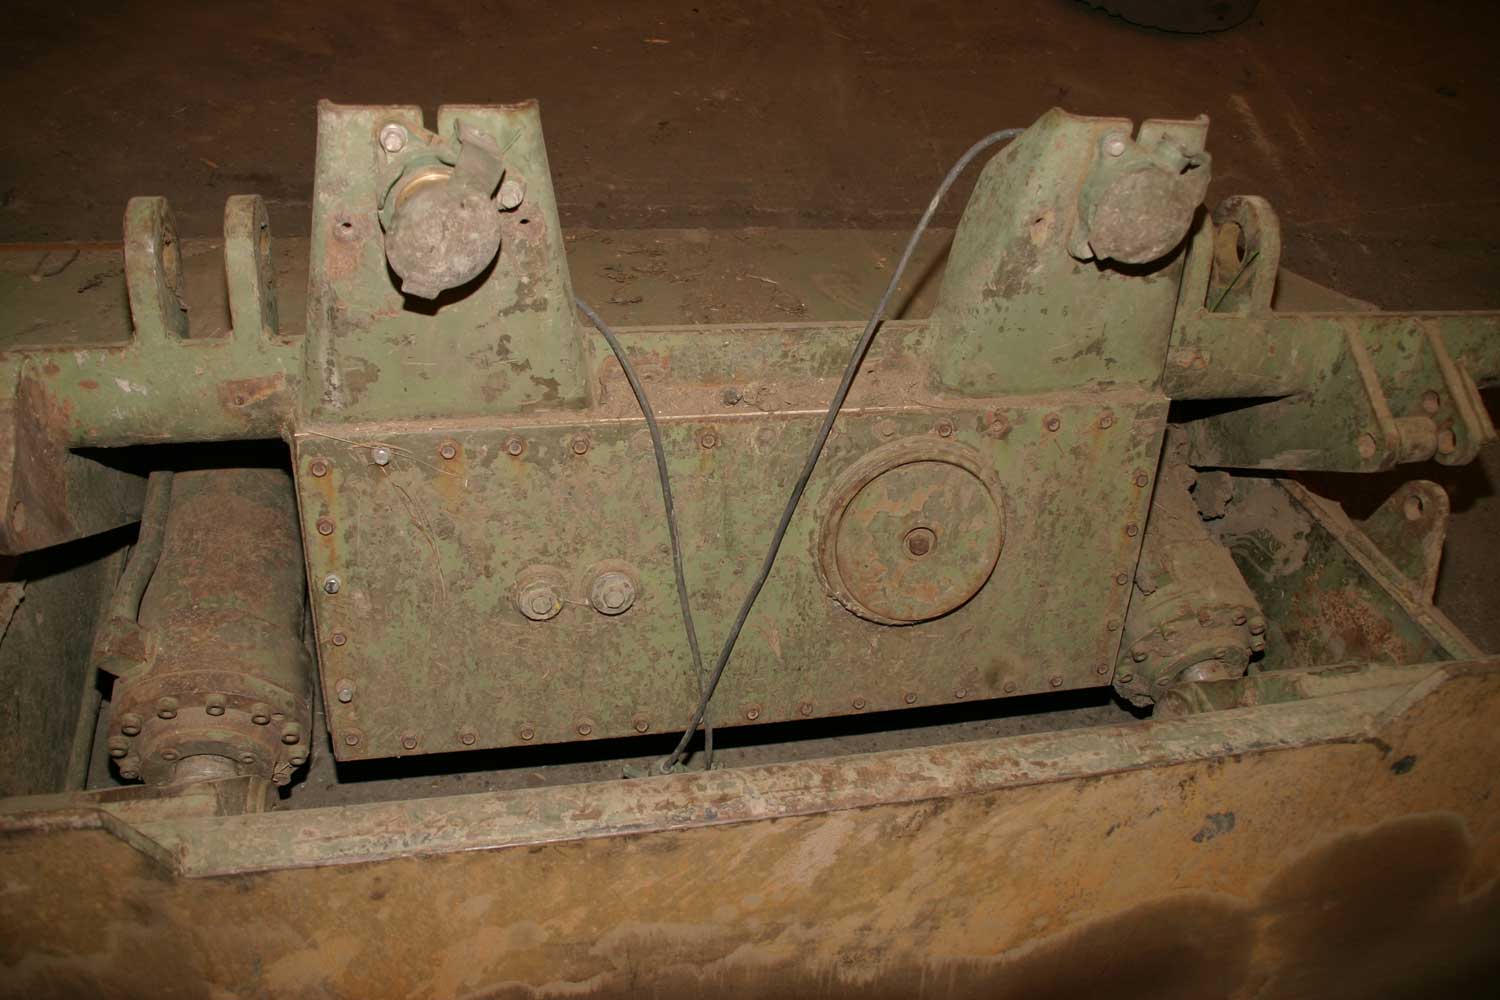
The blade scraping edge is a separate piece with the vibration attenuation holes being actual holes instead of dimples.
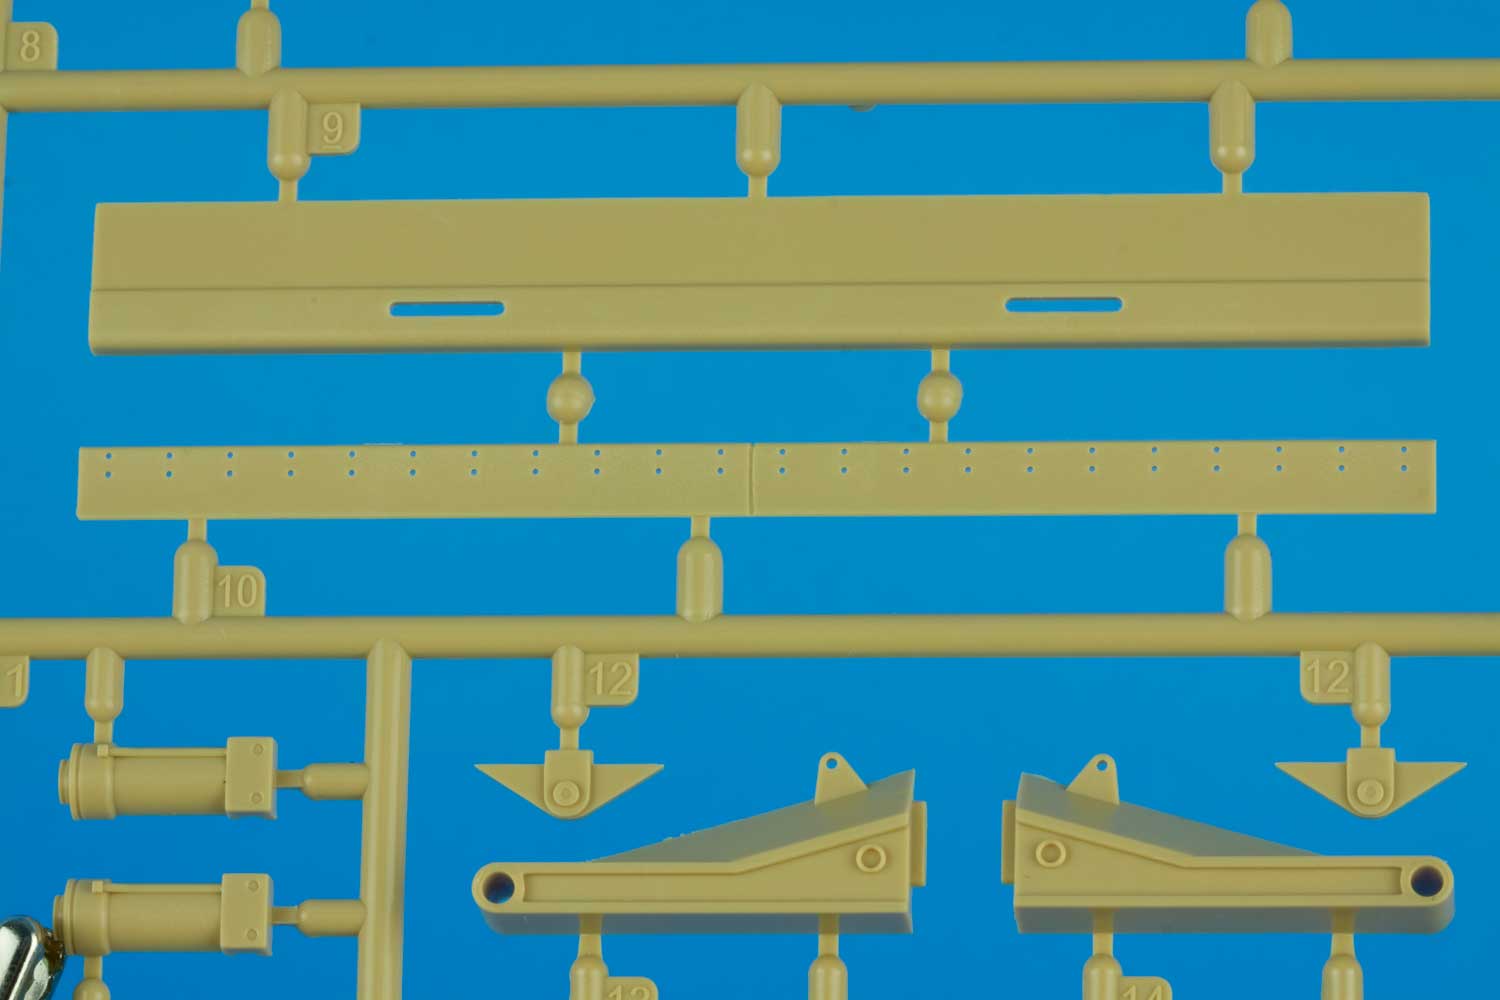

The cut-outs on the underside of the blade are represented by a separate piece.
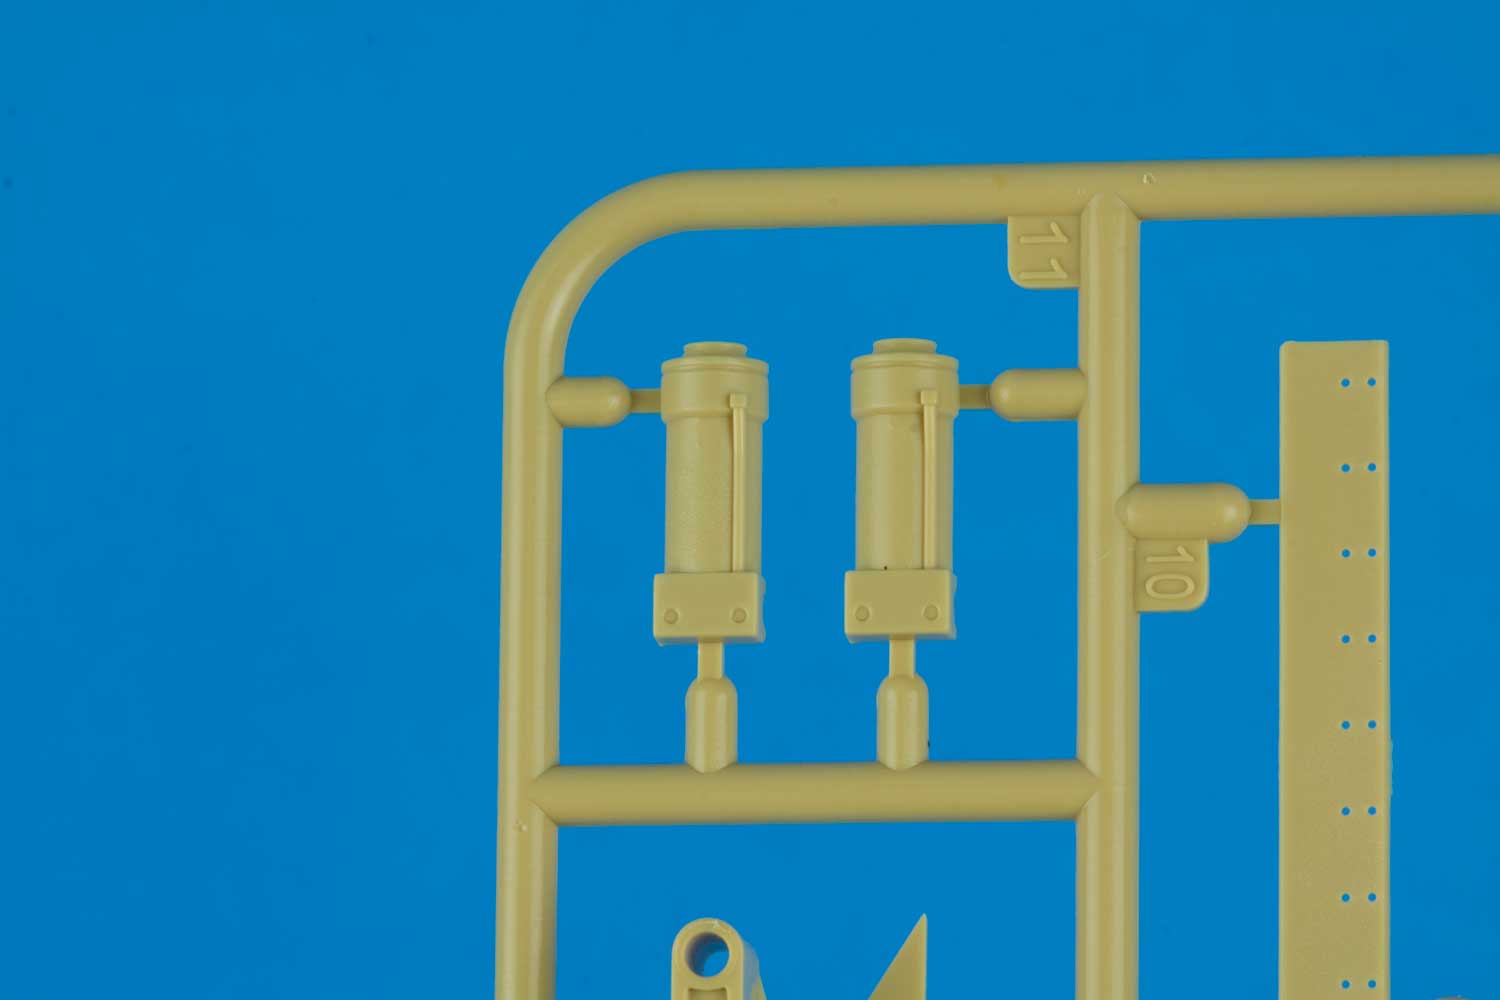
The hydraulic line is present on the side of the rams.
The arm mount points are nicely detailed with hexagonal bolt heads.
The very delicate headlight brush guards are included as well, albeit in two separate parts for each guard! I am quite frankly gob-smacked that Meng managed to pull this off with minimal flash and consistent thickness. Mind you, I think joining the two halves of the brush guards and hiding the join will be a real PITA; I am inclined to fashion my own parts from thin gauge brass rod.
All in all the dozer blade looks to be very well designed with all of the right details in the right places. This sub-assembly is truly a little gem!
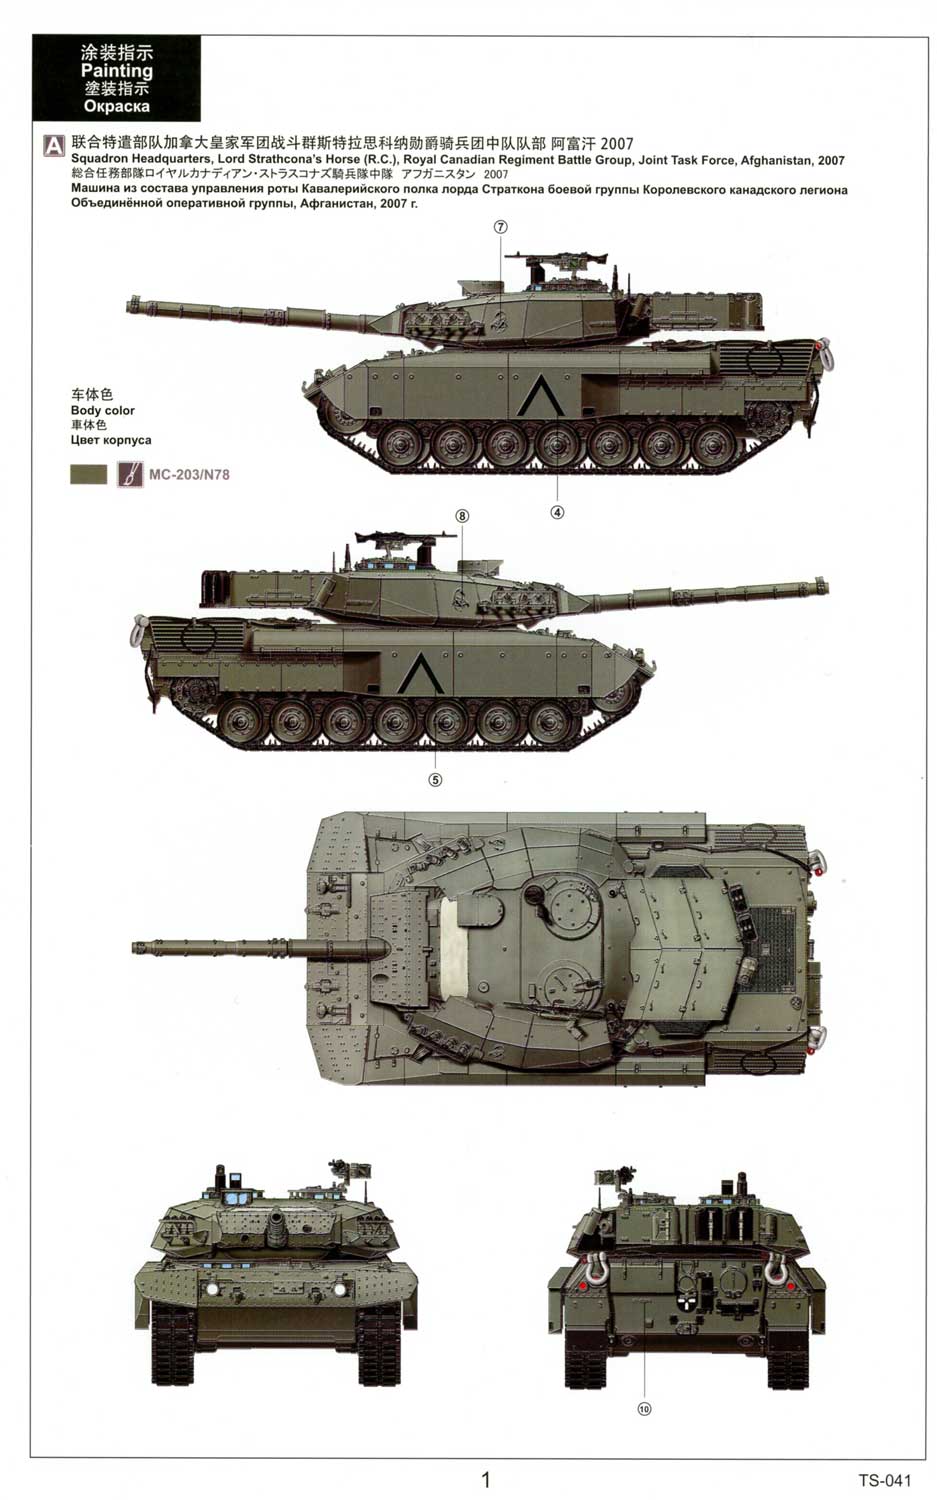
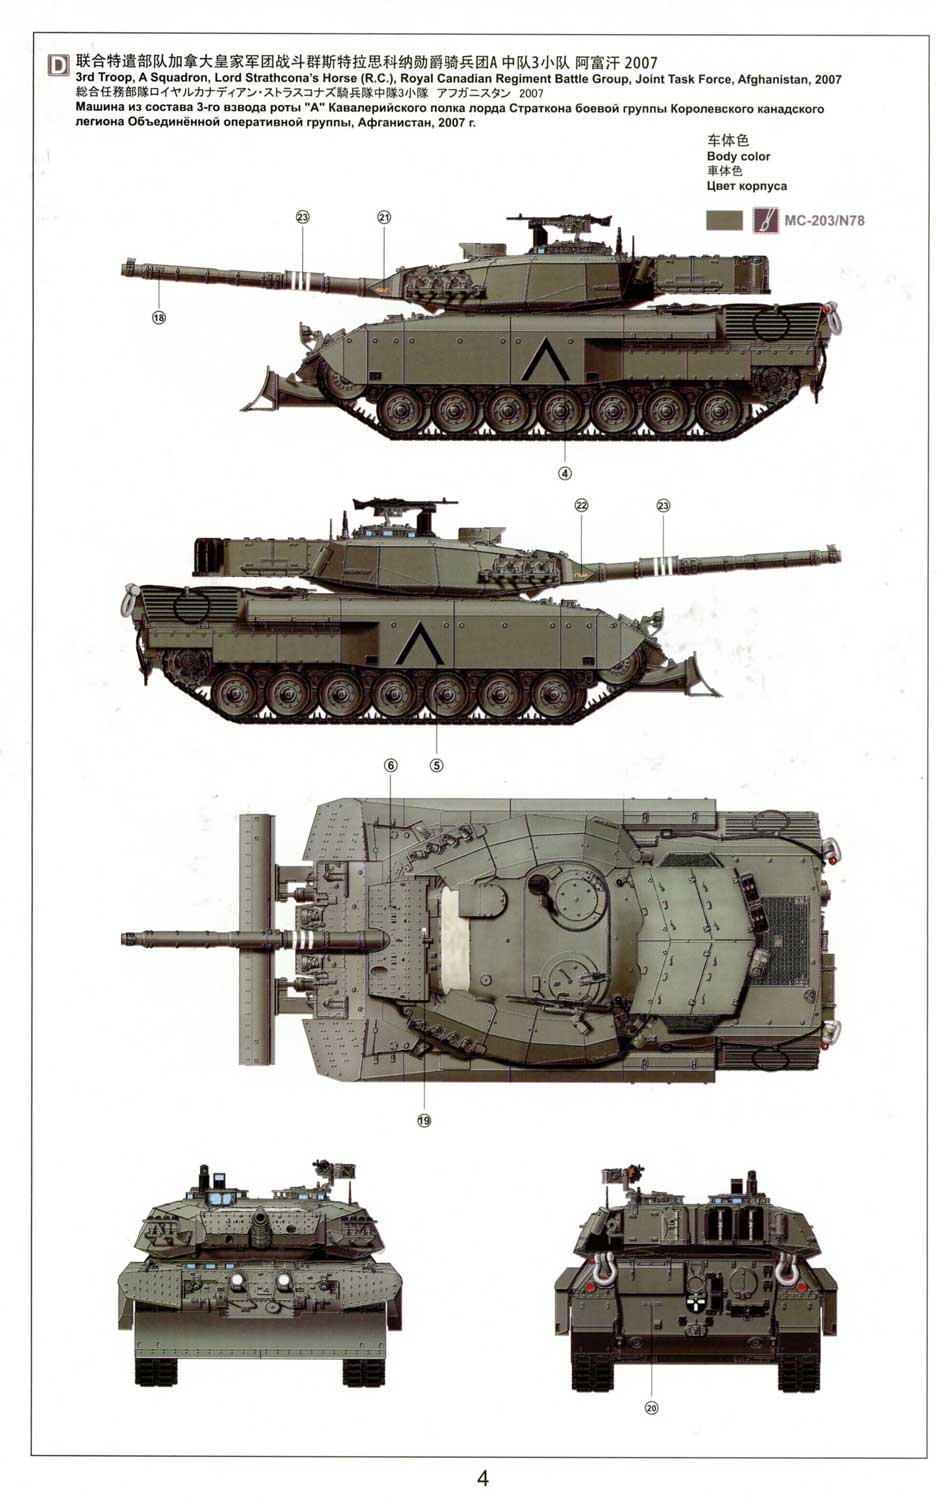
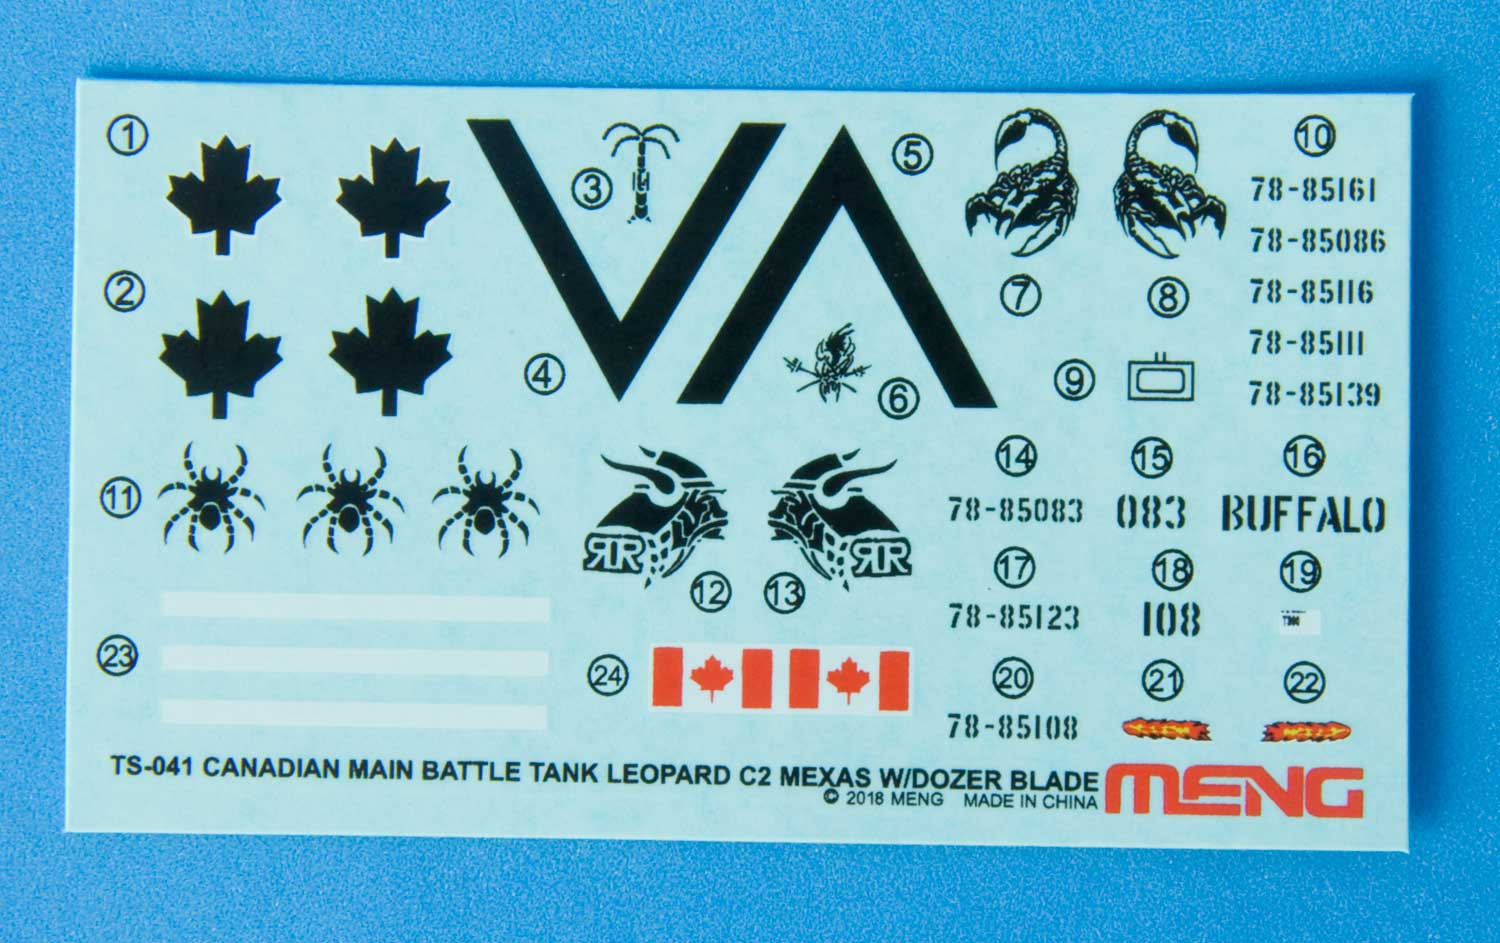
The decal sheet is very crisply printed, with no bleed through visible on any of the white backed decals. The sheet provides markings for four different vehicles crewed by members of A Squadron of the Lord Strathcona's Horse (Royal Canadians) Regiment in 2007. The time period for the markings coincides with the RCR Battle-group Roto on which Anthony Sewards crew commanded a Leopard C2. Given that Anthony provided a lot of reference material and guidance to aid in the development of this kit, the choice of markings is entirely appropriate.
I happen to know Anthony (shameless name dropping) and he has been very generous in providing me with his notes on vehicle markings and modifications during his operational tour in 2007. I believe these same notes are included in his C2 MEXAS Project reference disk set. Comparing the painting and decal instructions with Anthony's notes and photos, I can state that the markings supplied with this kit are almost completely accurate.
The first vehicle represented is one of the Squadron Headquarters vehicles. I say one of because the decal sheet provides all of the Squadron HQ vehicle CFR numbers ( 78-85161, 78-85086, 78-85116, 78-85111 and 78-85139). The Squadron HQ's mascot, a striking scorpion is included as is the inverted black chevron worn on the side skirts (all A Squadron vehicles carried the same chevron marking). CFR 78-85161 had 45s marked on the top of the gunner's sight cover with white duct tape. Although not marked on the paint/markings instructions, those could be replicated with the supplied white barrel ring markings (not used on any Squadron HQ vehicles).
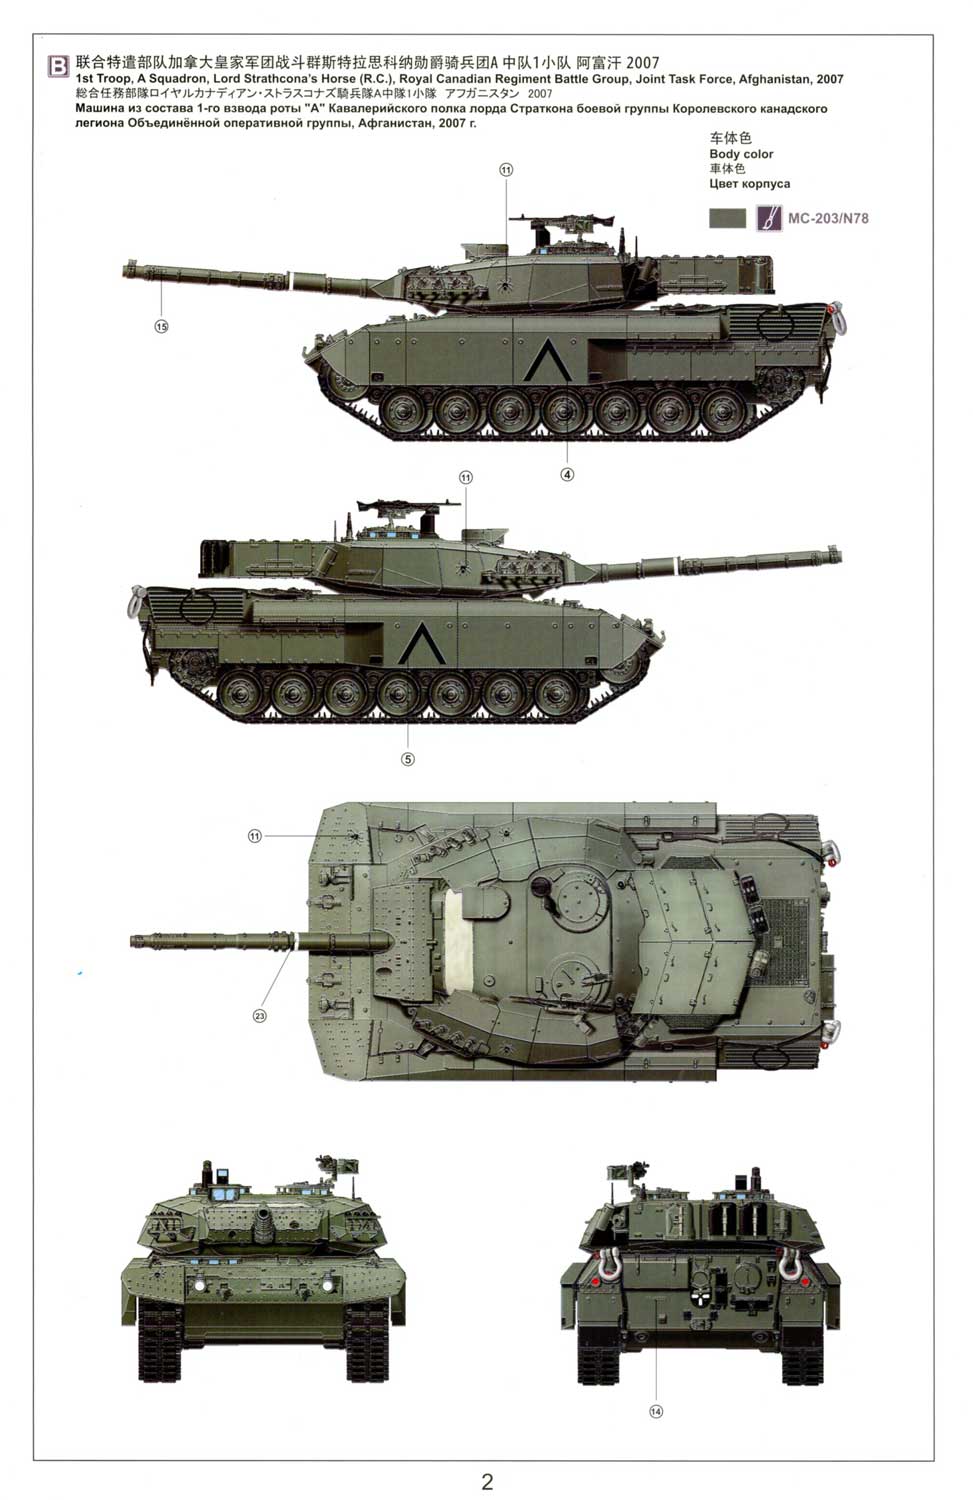
The second vehicle is the troop warrant officers tank for 1st troop A Squadron (call sign 11A). This vehicle wore registration number 78-85083 which is included on the decal sheet as is the 083 partial CFR which was present on the left side of the main gun's thermal cover. The troop mascot was the desert spider, three of which are provided on the decal sheet. Two of the spiders were applied to either side of the turret while one was applied to the driver's side front fender. It should be noted that this vehicle had field expedient dust covers attached to both front fenders. These dust covers were originally installed to all C2s during the previous roto by B Squadron of the LdSH (RC). The dust covers are not represented in the markings instructions nor are the parts supplied in this kit but they are available with the Real Models set RMA 35269. One of the supplied white bands would be applied around the front of the main gun's bore evacuator; the number of white stripes denotes which troop the vehicle is attached to. It should be noted that in 2007 this tank was fitted with the mine roller kit; this is not represented on the painting and markings instructions.
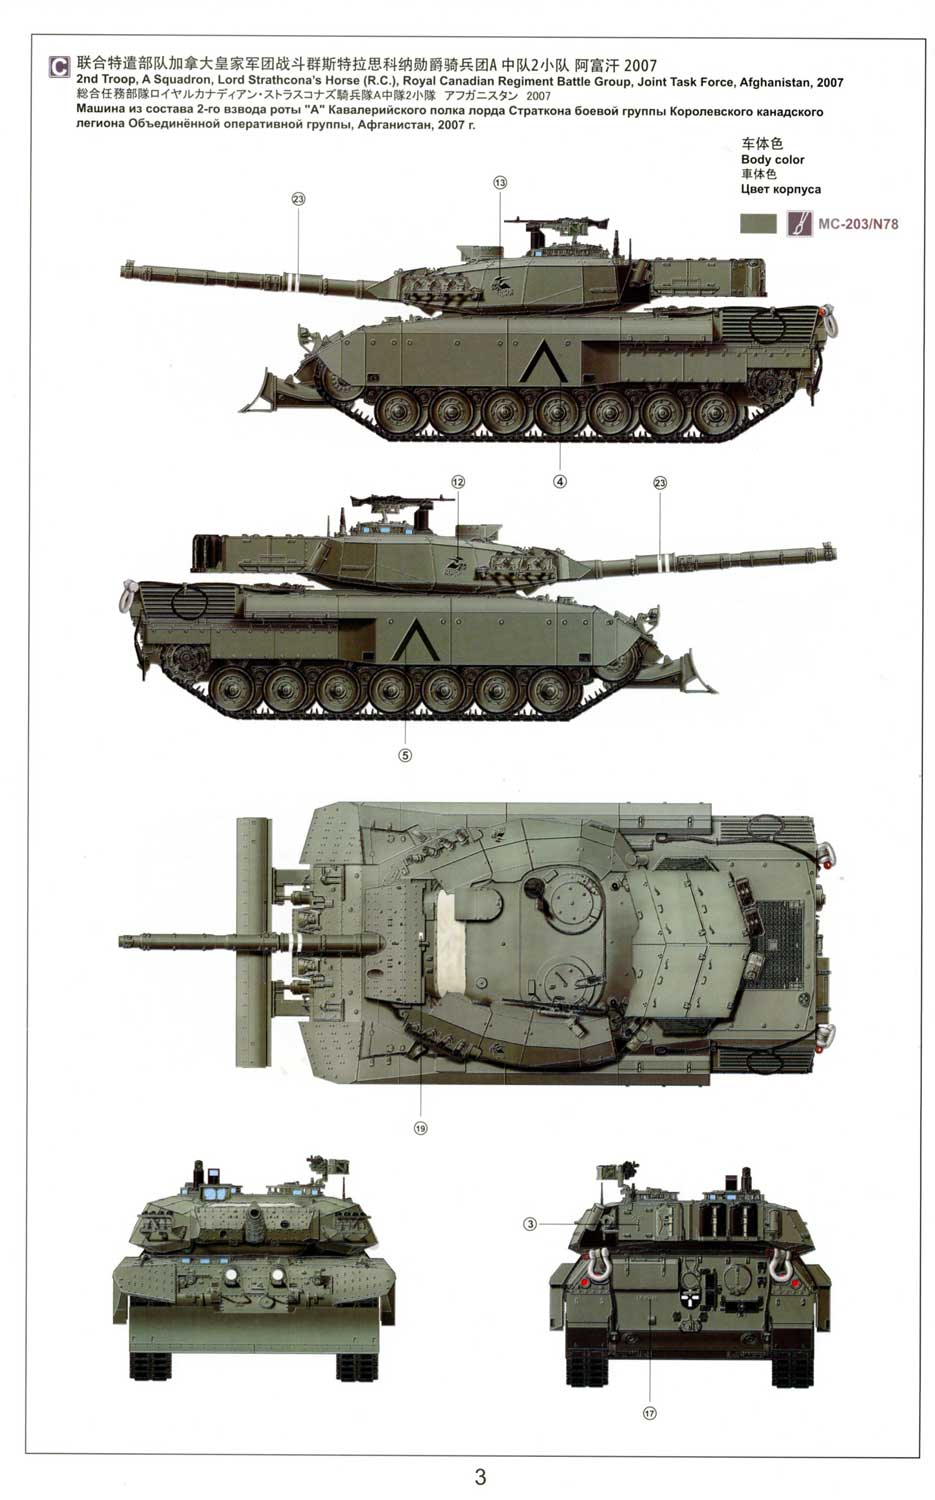
The third vehicle is the dozer or troop sergeant's tanks of 2nd troop A Squadron (call sign 12B). This vehicle was crew commanded by Anthony Sewards and wore the CFR of 78-85132 which is correctly supplied on the decals sheet. The troop mascot, a stylized viking is also included on the sheet as is the Africa Corps-esque palm tree which appeared on the the left rear of the turret bustle bin. As this vehicle was attached to 2nd troop, it wears two white rings around the front of the bore evacuator. One thing not made clear in the decals instructions is that the little Canadian flag (decal #24) should be applied to the lower part of the communications aerial on the commander's side of the vehicle. Anthony had this little flag affixed (with para-cord) to the vehicle he commanded for the entire length of his tour. The one marking missing from this vehicle is the I love Alberta beef bumper sticker Anthony applied to the tool box on the hull rear. This decal may be found in the Echelon Fine Detail set D356050.
The last set of markings is the dozer or troop sergeant's tank from 3rd troop A Squadron (call sign 13B). The correct CFR of 78-85108 is supplied on the decal sheet. A very distinctive component of this vehicle's markings would be the Hot Wheels stickers applied to either side of the mantlet MEXAS module. Being attached to 3rd troop this vehicle wore three white stripes around the front of the bore evacuator. This vehicle wore a partial CFR number '108' on the left side of the barrel's thermal sleeve. The instructions call for the Metallica dude (decal #6) to be applied to the right (driver's) side of the mantlet MEXAS module. Anthony's notes do not mention this but his reference disk contains one photo shot from far away which shows some sort of marking in that position.
Meng have a reputation for accurate and well engineered kits. This latest Leopard offering certainly lives up to this reputation. While some of the deficiencies of the 1A3/4 and 1A5 have been carried over to this kit, it is clear that a great deal of effort was expended to improve the accuracy of many of the parts, with the suspension arms being one example.
This model is full of little things which have left me extremely impressed. This would include the separate engine deck, the MEXAS turret module mounts, the dozer blade, the accurate C6 MG, the separate MEXAS side skirt sections and the fine anti-skid texture on the various turret parts. These features were so well done that it makes me forget about the aspects of the kit which weren't executed as well.
Does this kit represent the perfect Leopard 1 in plastic? No, but it is several steps closer to this goal and definitely the best injection molded Leopard 1available at this time (2019/01/21). I am quite comfortable recommending this kit to anyone wishing to build an accurate Leopard C2 MEXAS.
It is worth noting that Meng have already announced a resin thermal cover for use with this kit. Little is know about this update set at this time other than it will be cast resin and will be designed to work with this kit. Whether this thermal cover is accompanied by the turret bustle mounted crew chiller unit remains to be seen.
In closing I would like to thank Anthony Sewards for assisting with the production of this model. Anthony's efforts have given all of us a much better Leopard C2 MEXAS model.
© Leopard Club
![]() Contact us at leopardfibel@gmail.com
Contact us at leopardfibel@gmail.com