Translated from Modelling Magazine Modellversium.
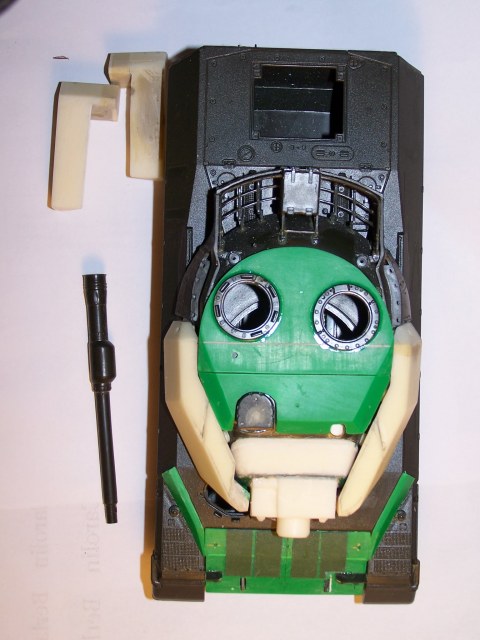
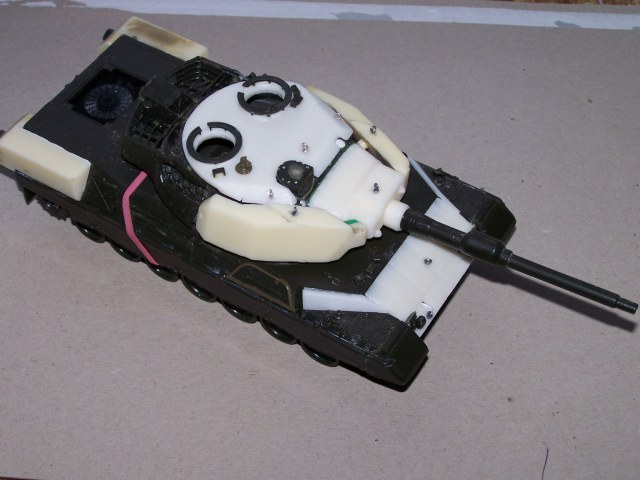
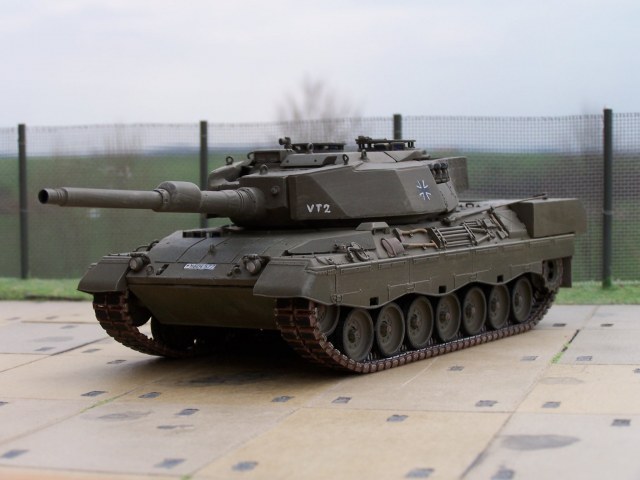
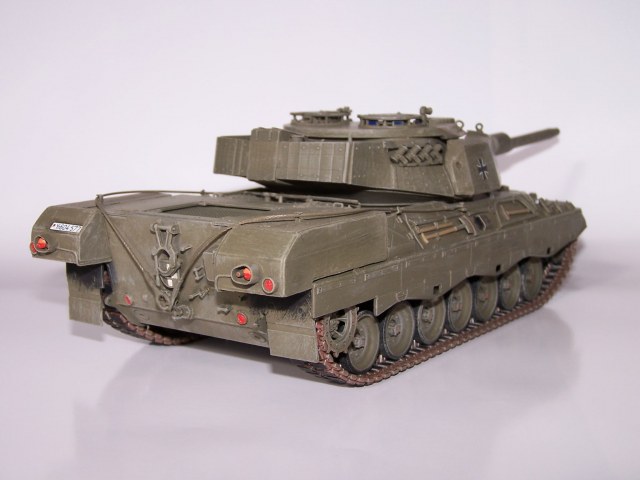
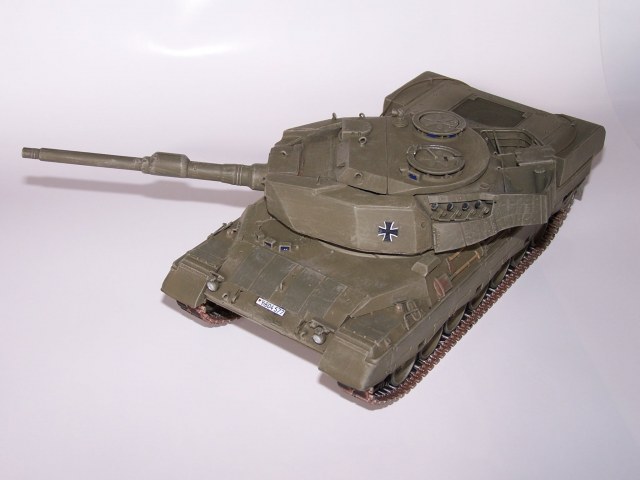
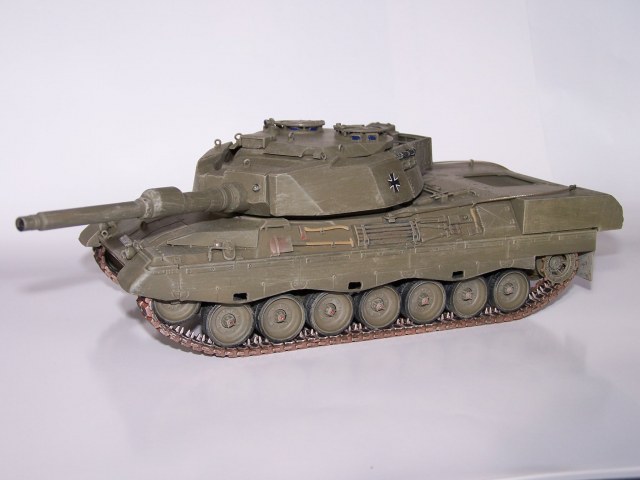
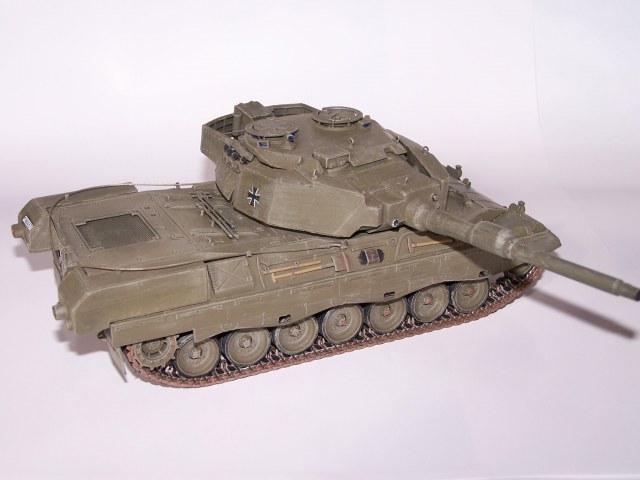
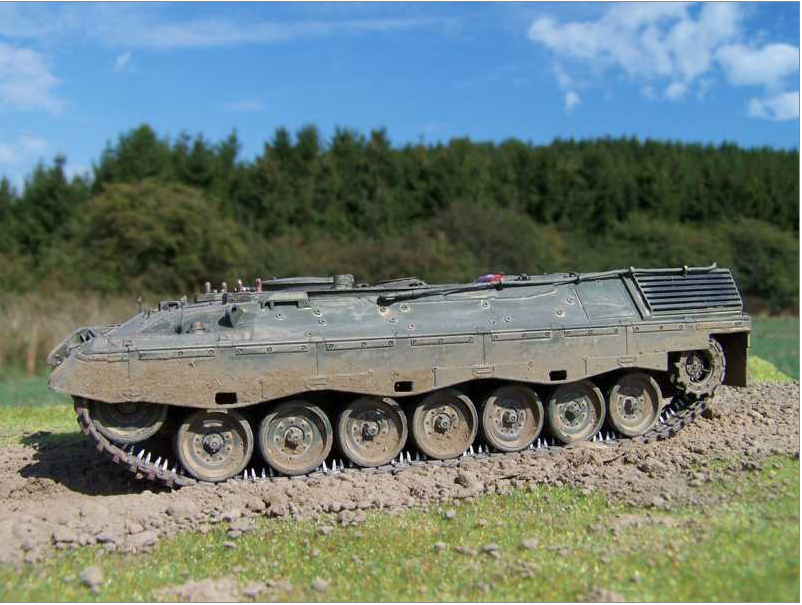
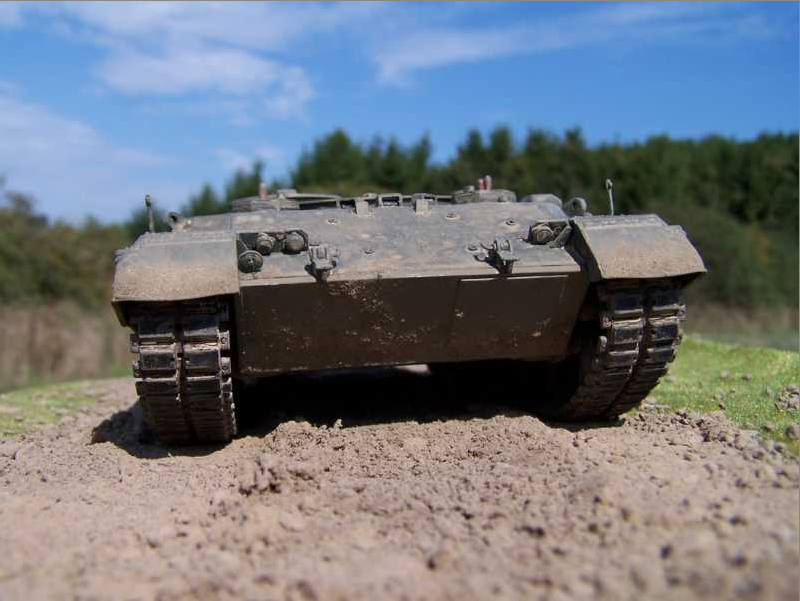
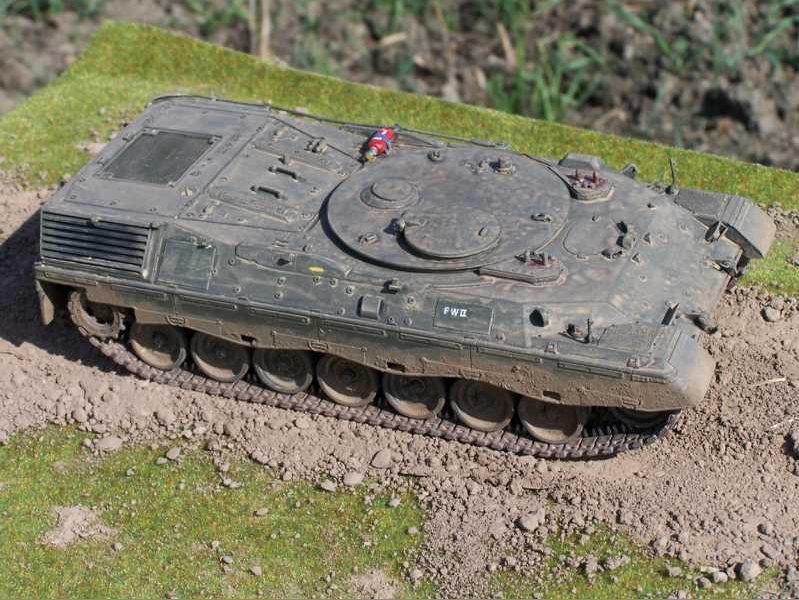
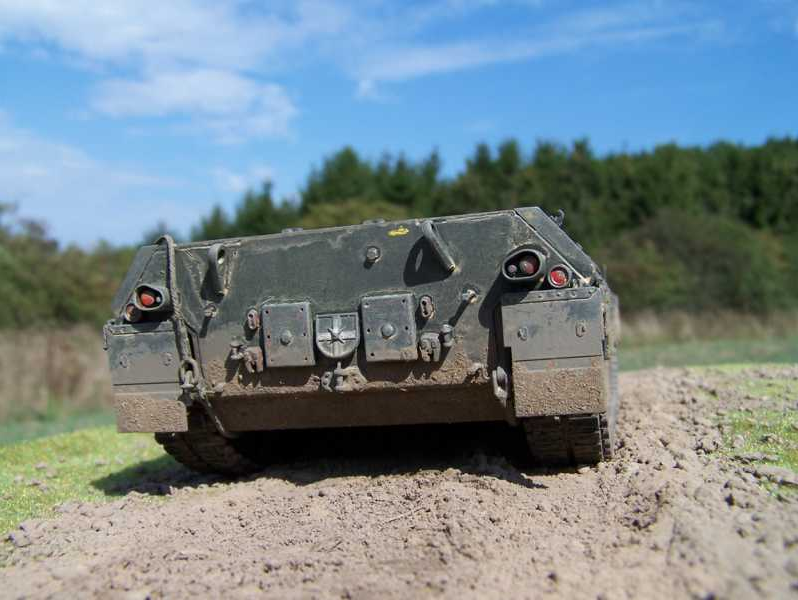
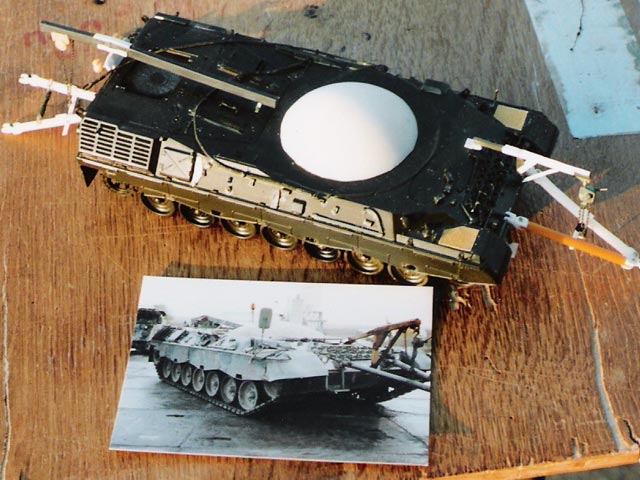
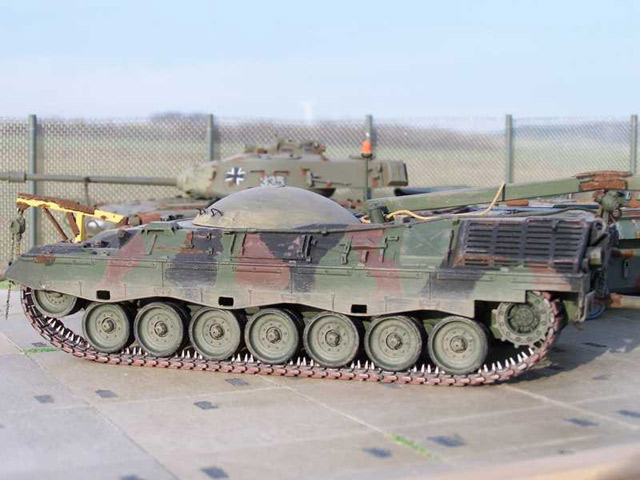
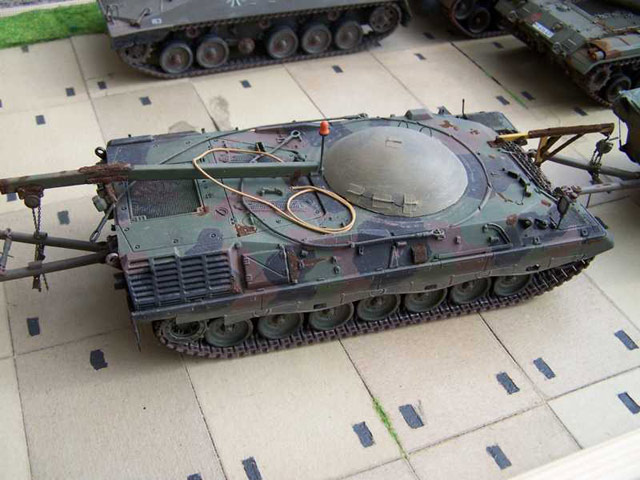
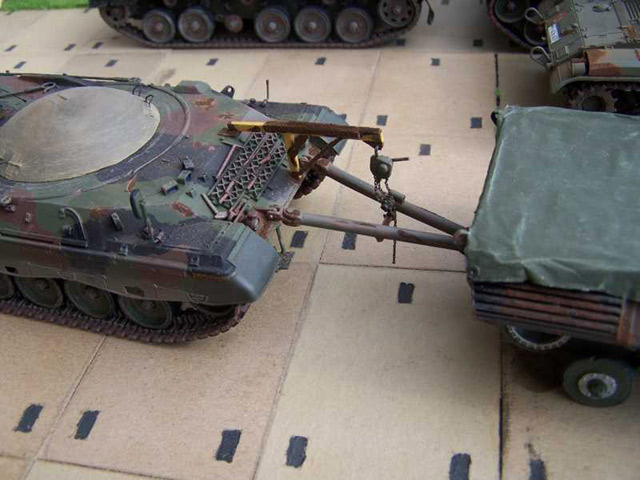
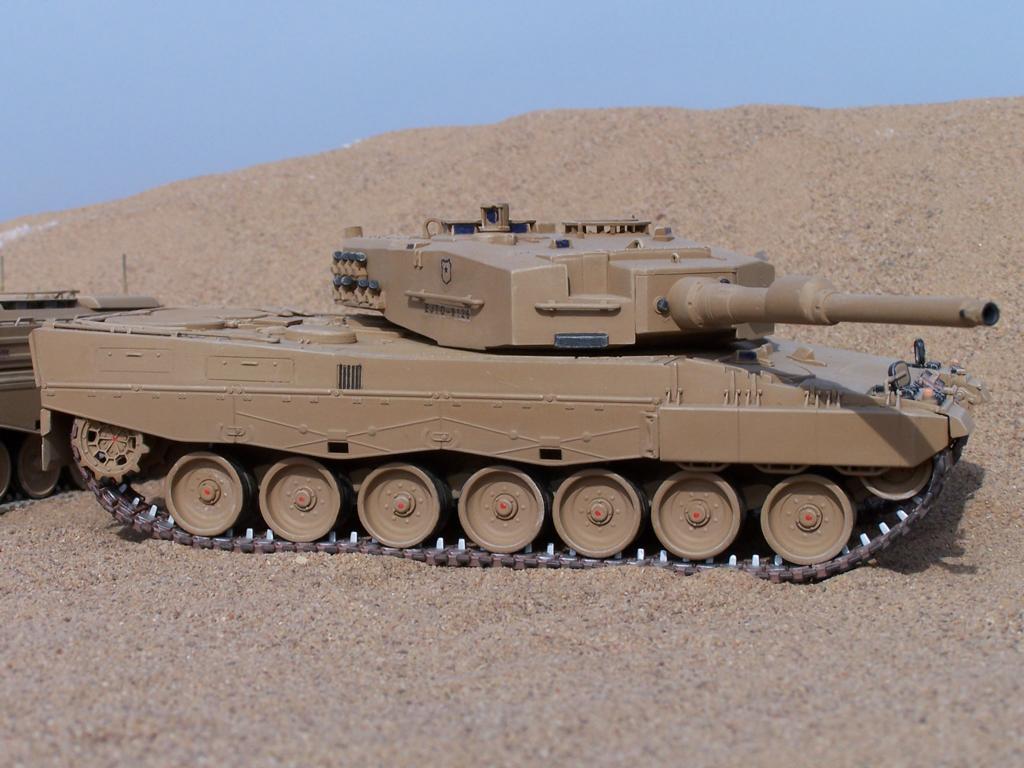
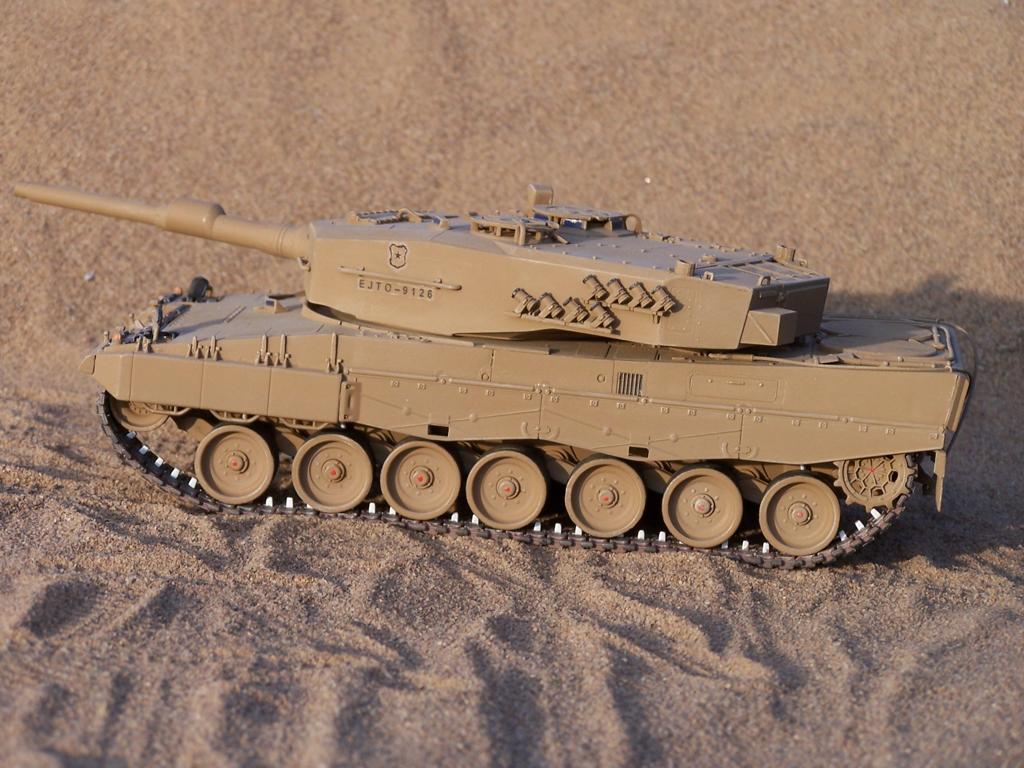
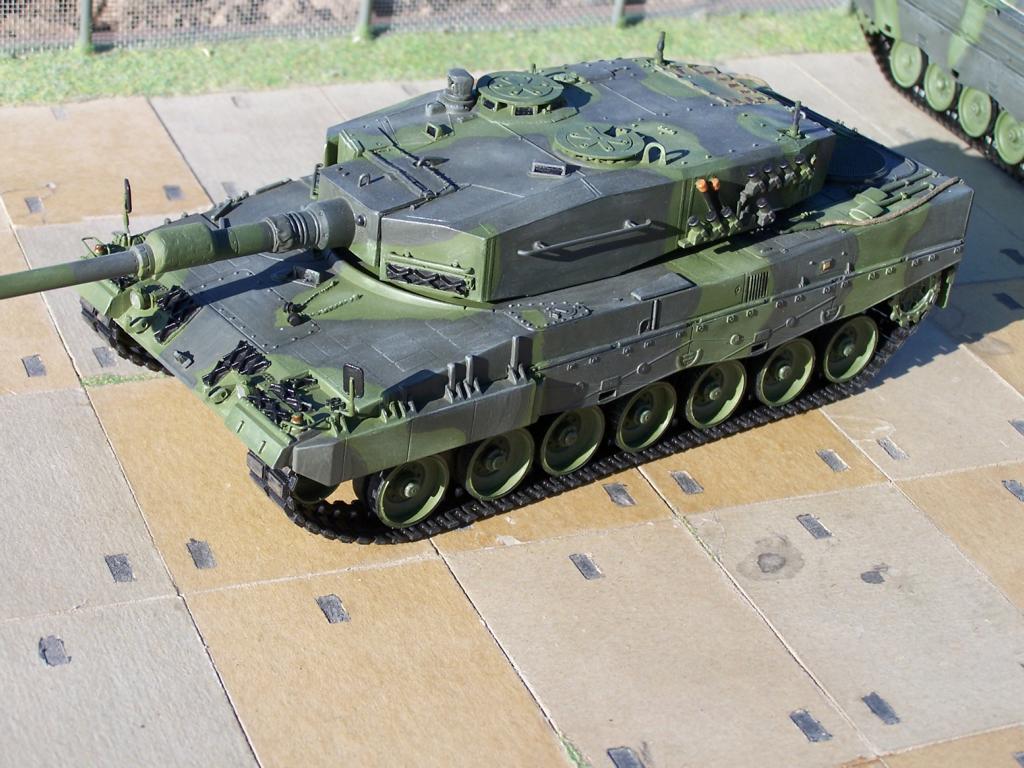
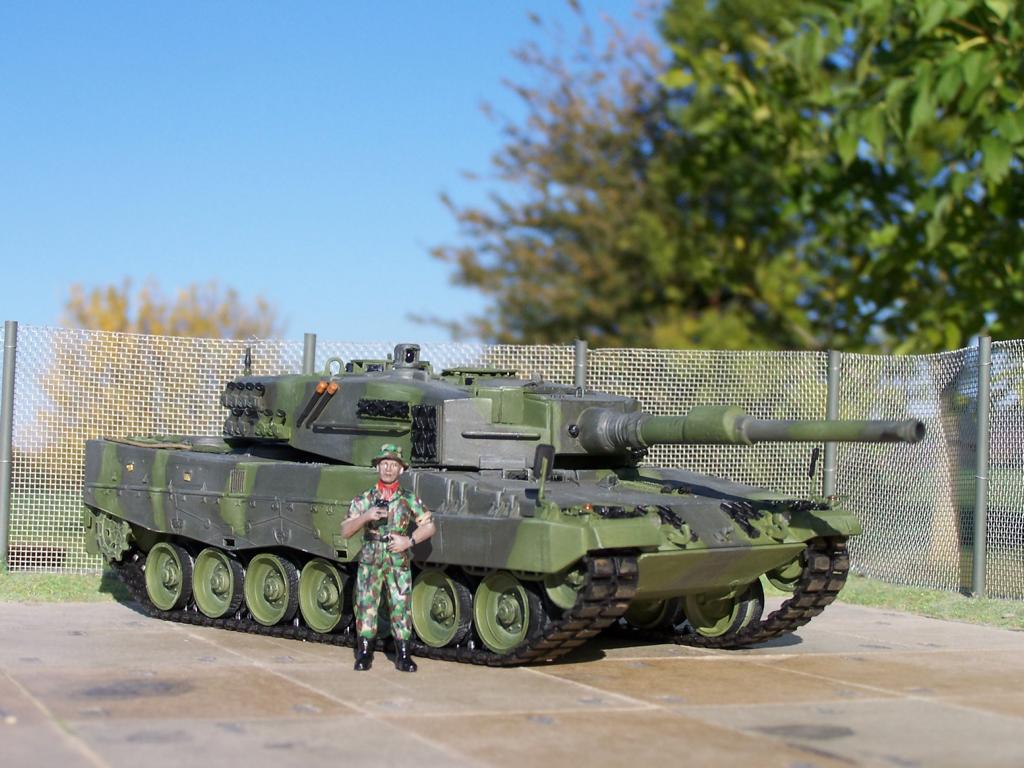
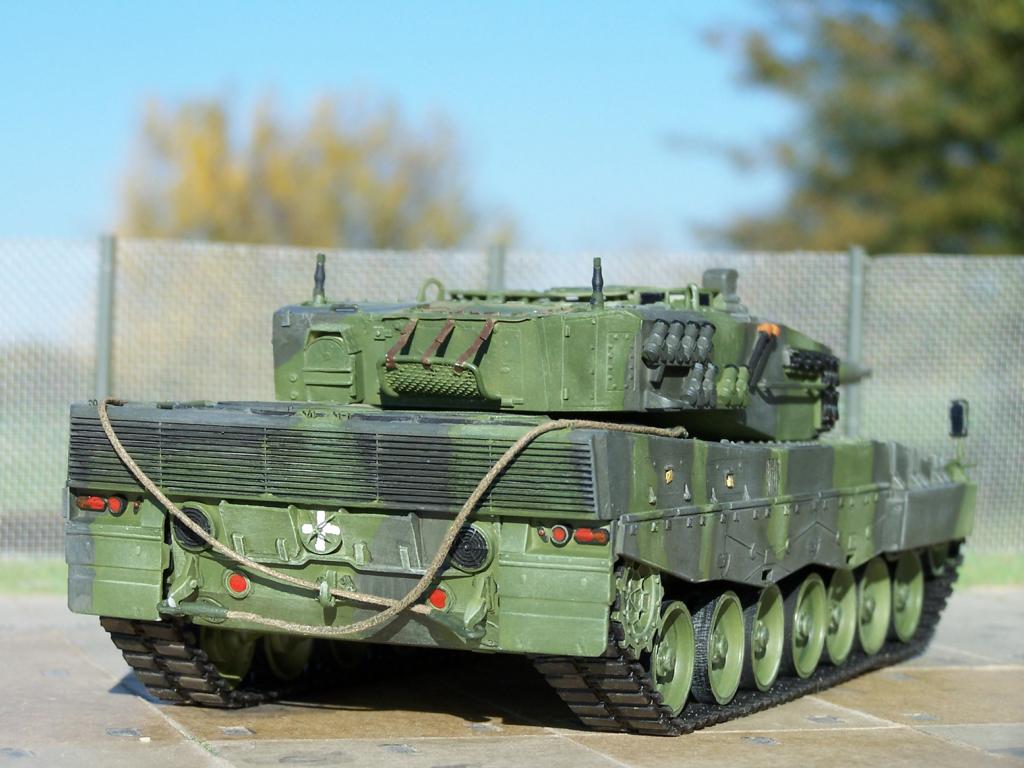
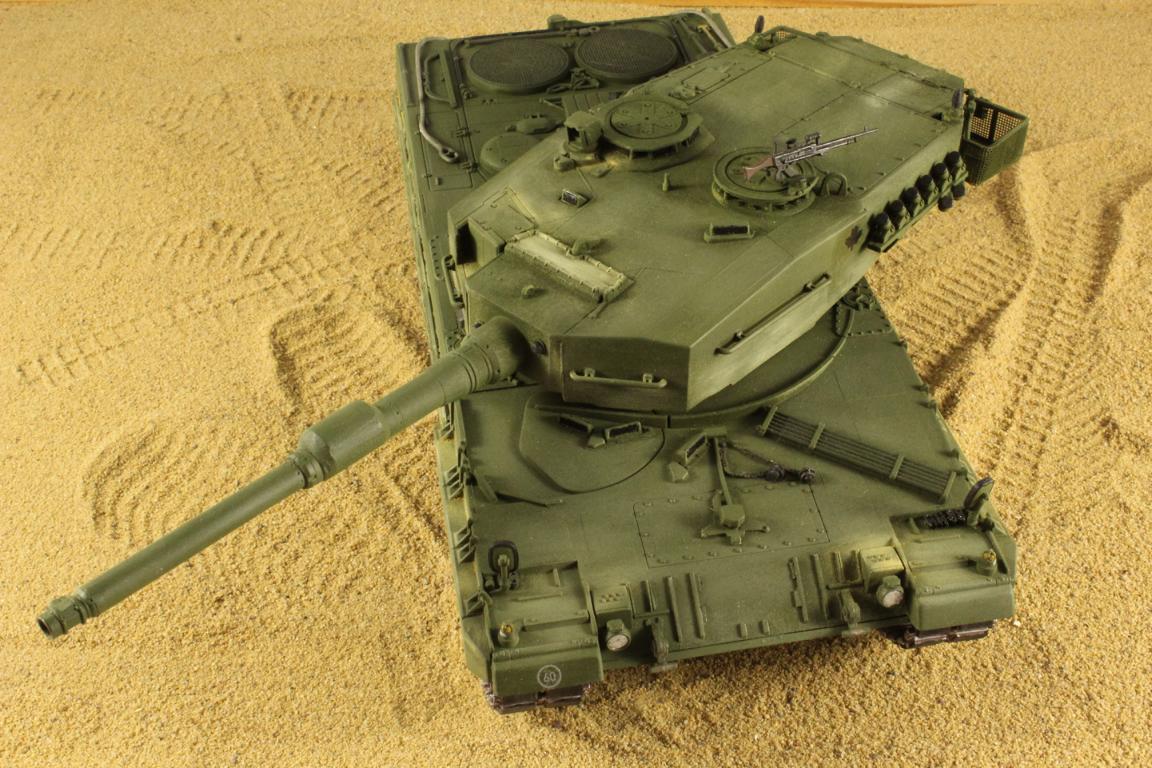
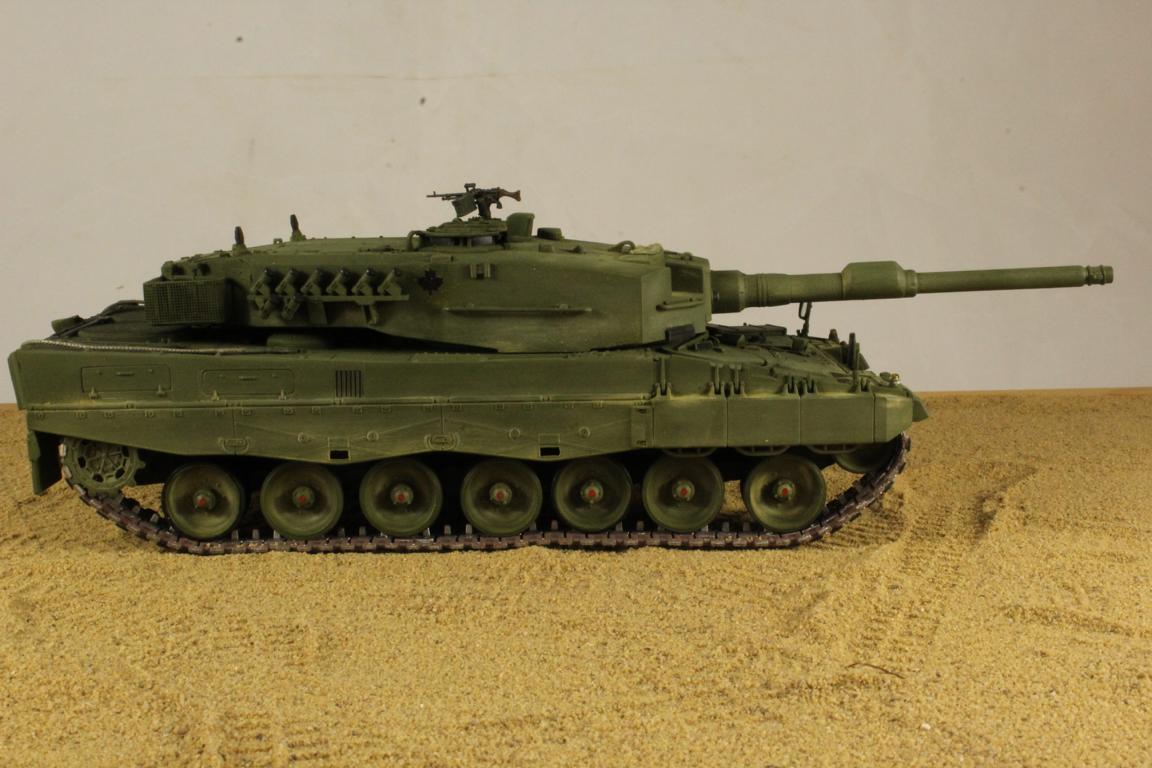
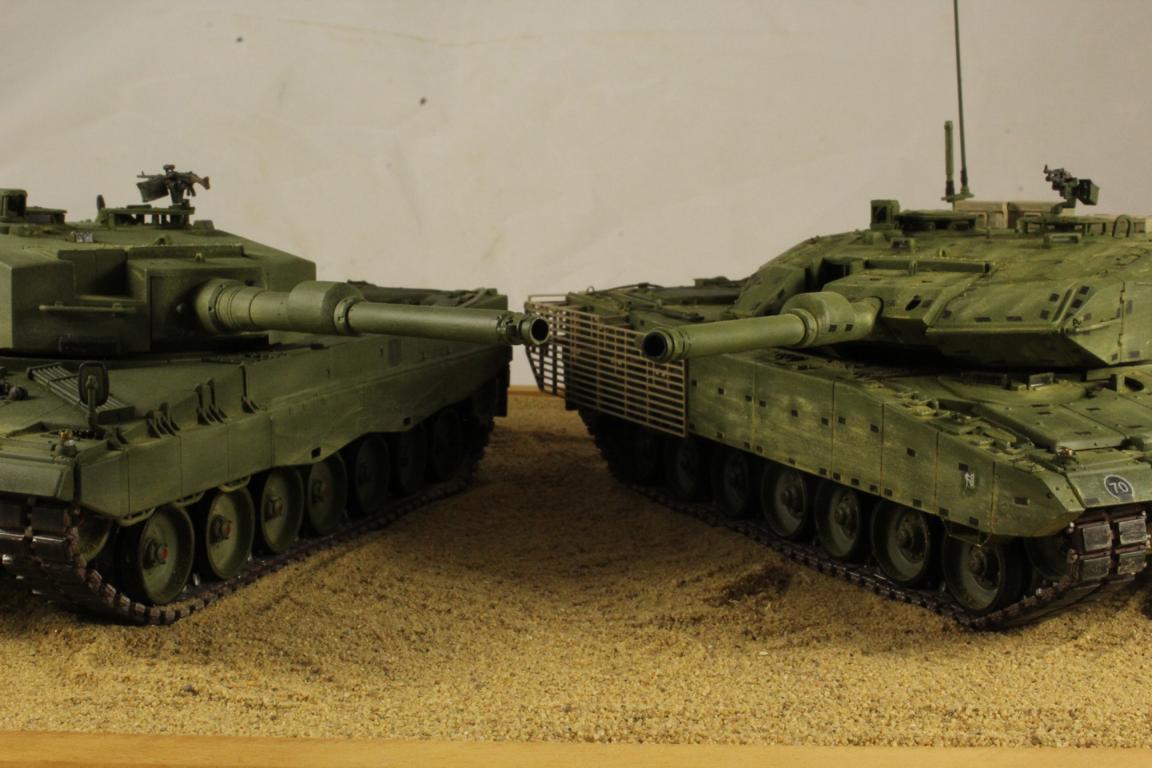
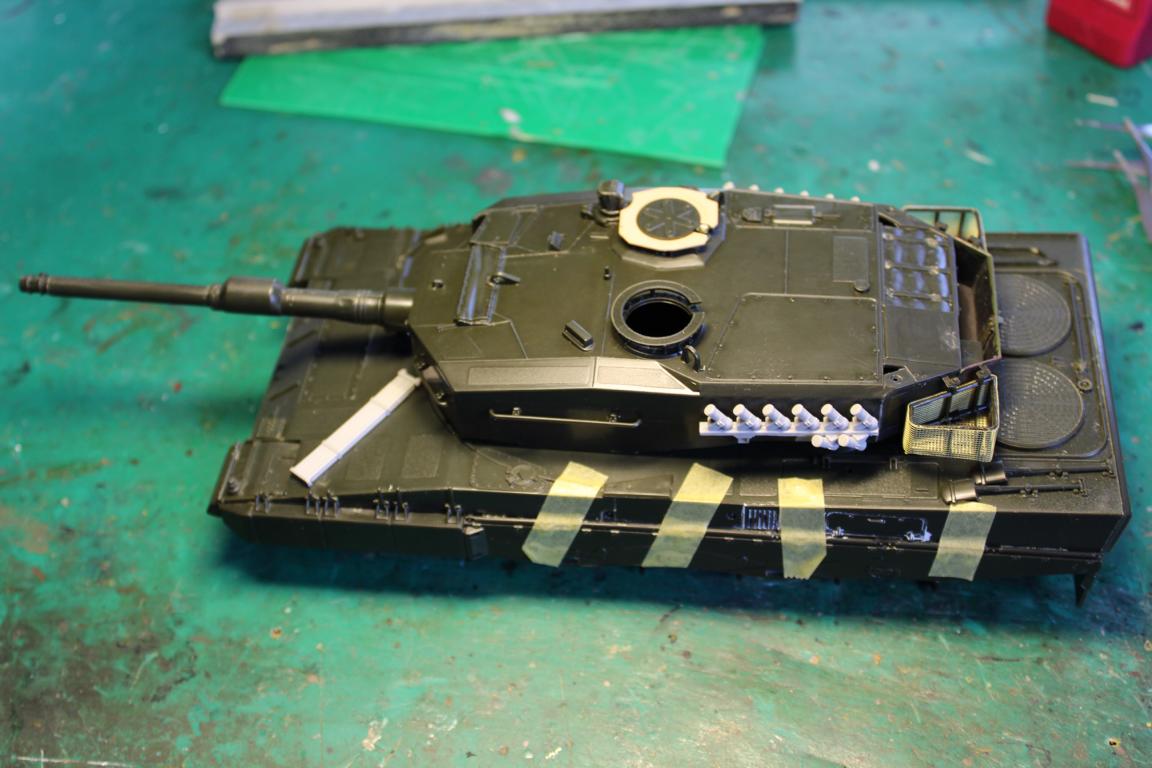
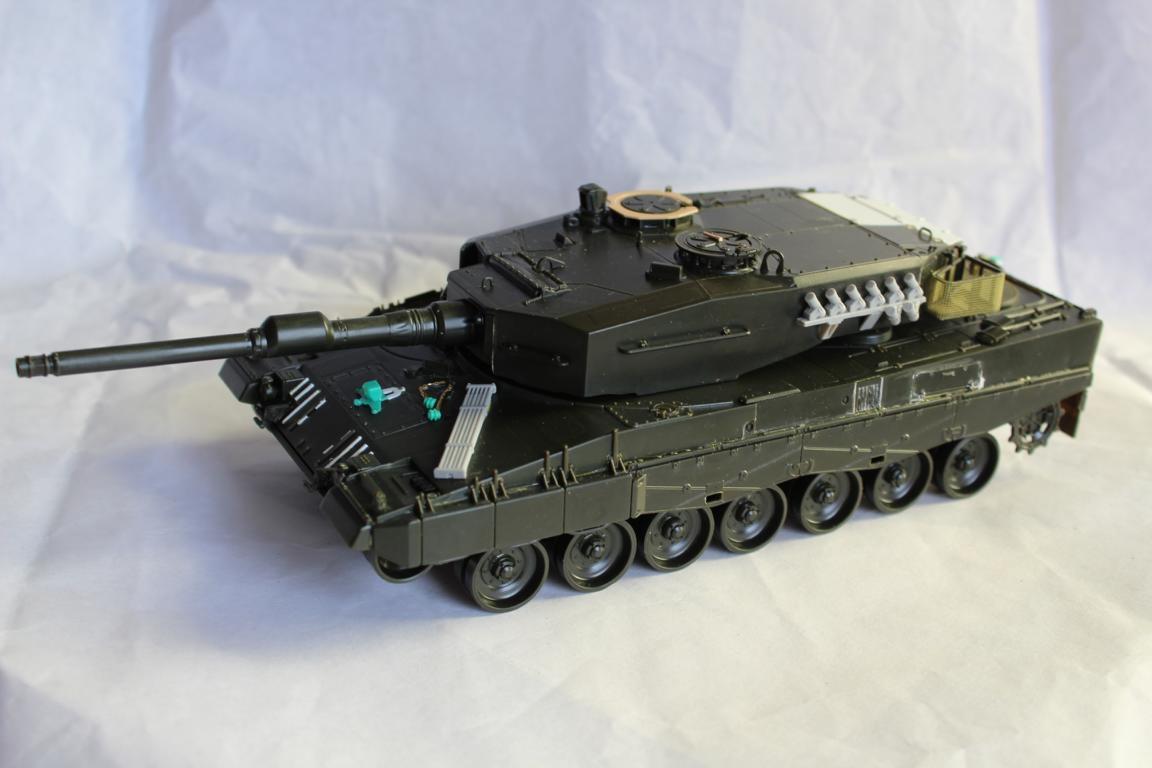
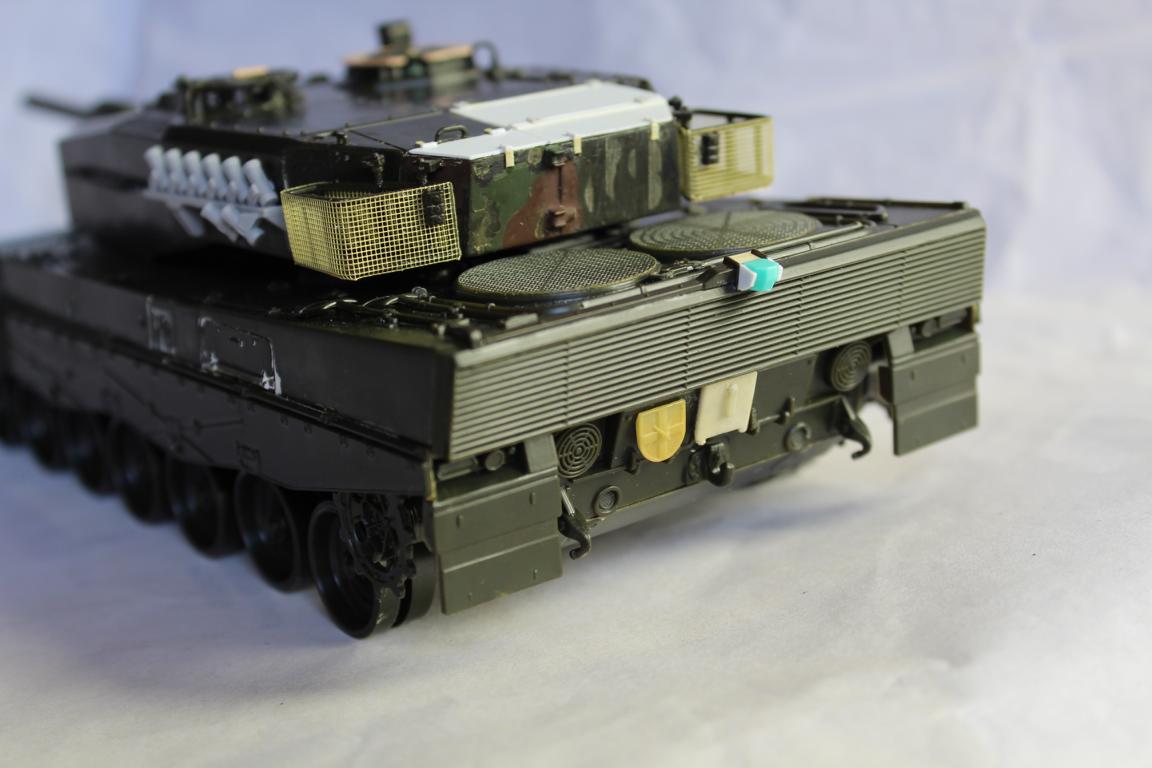
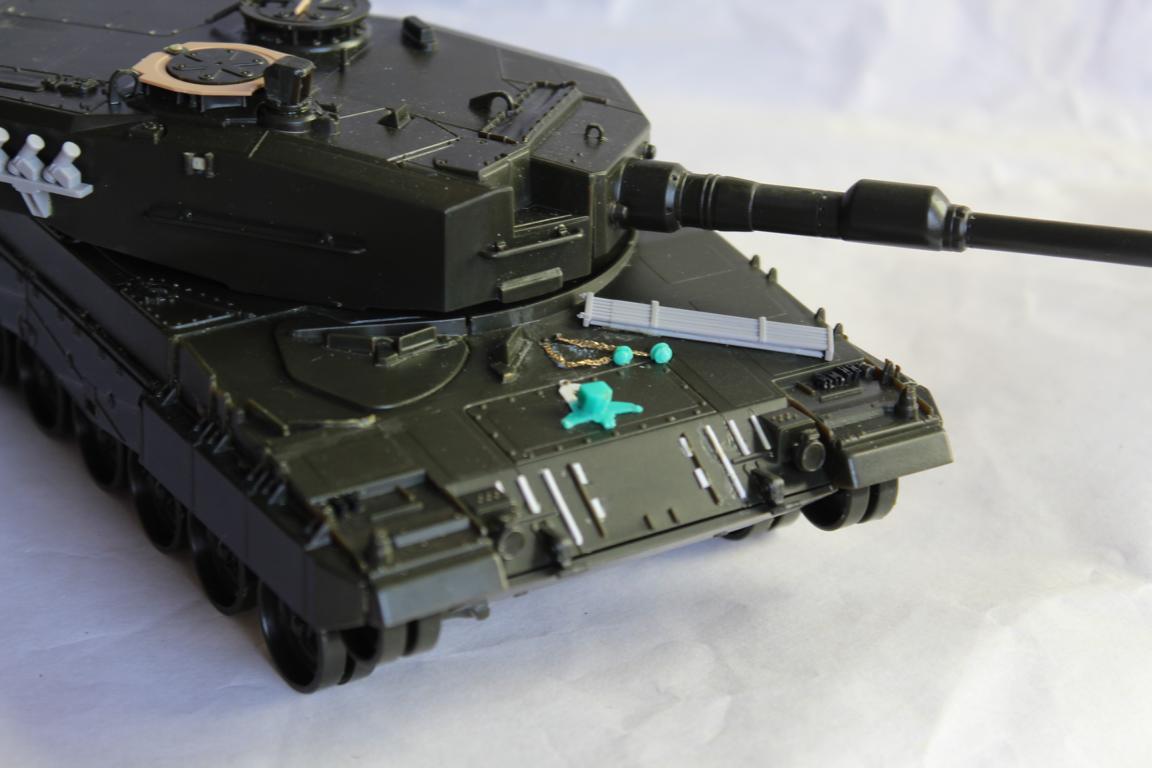
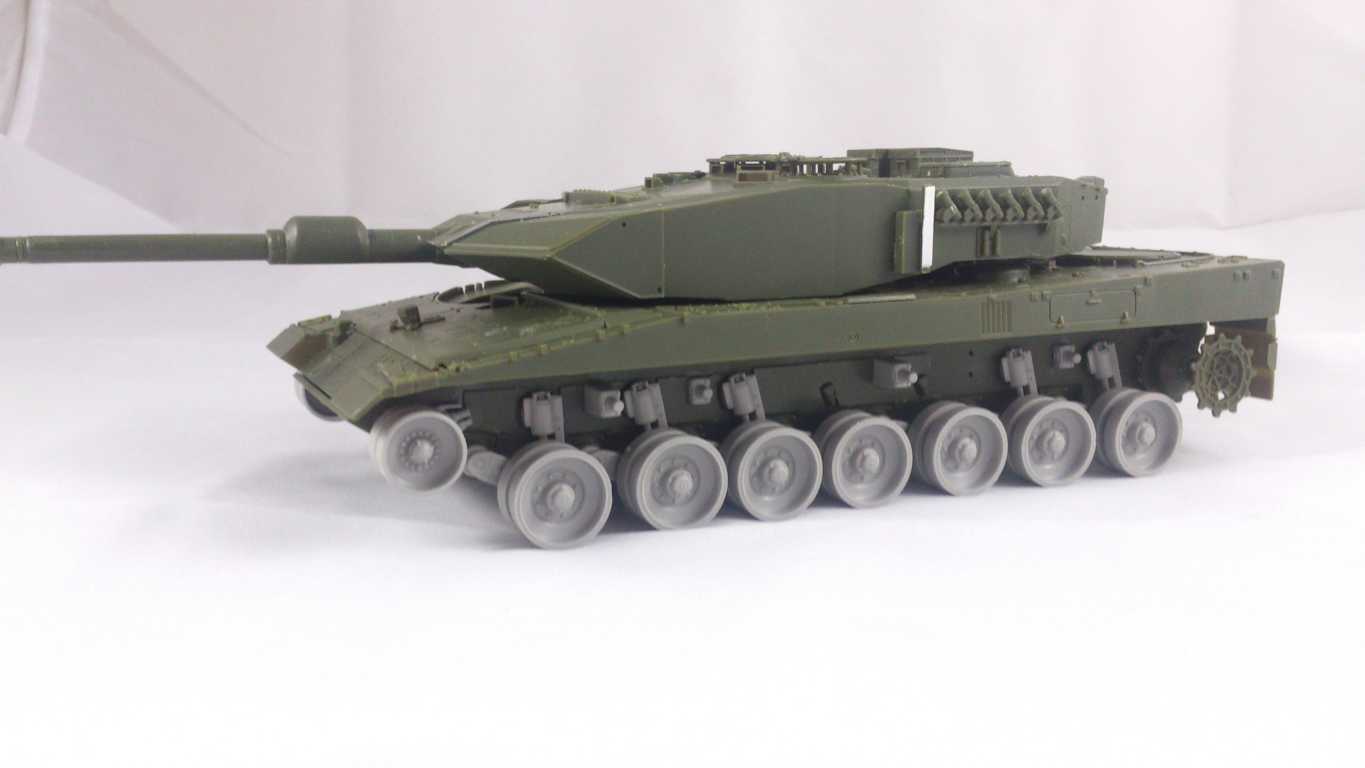
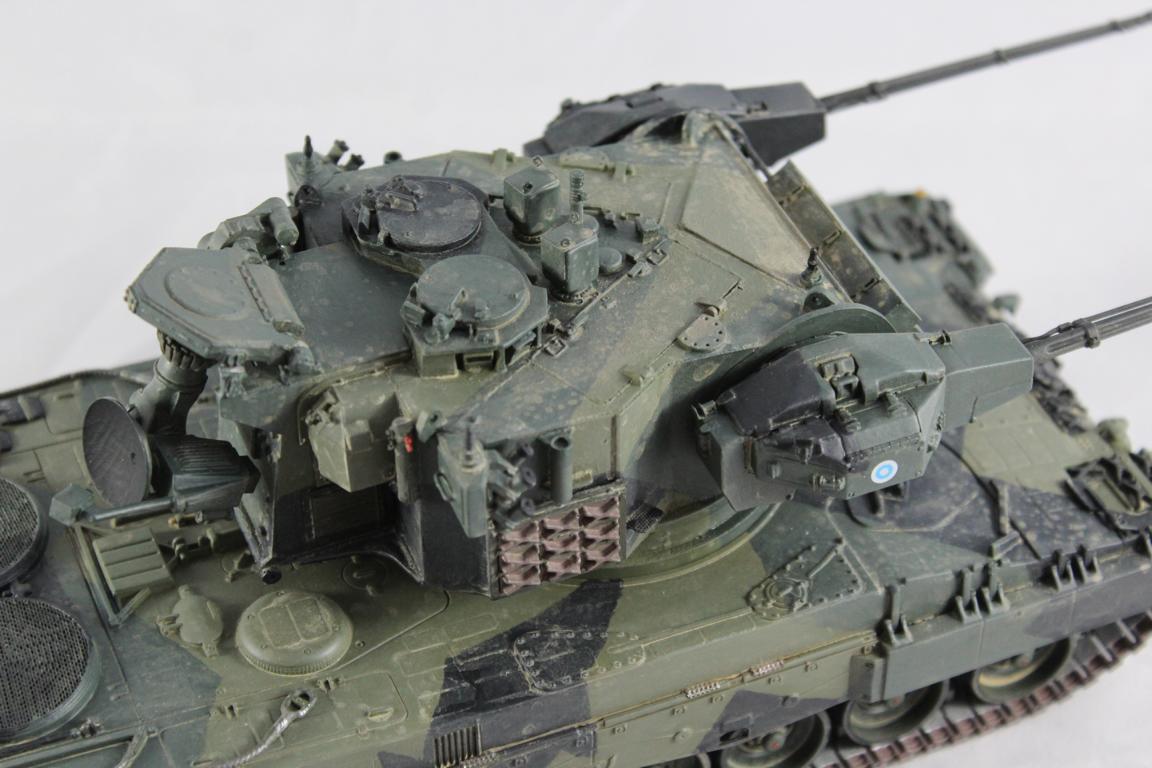
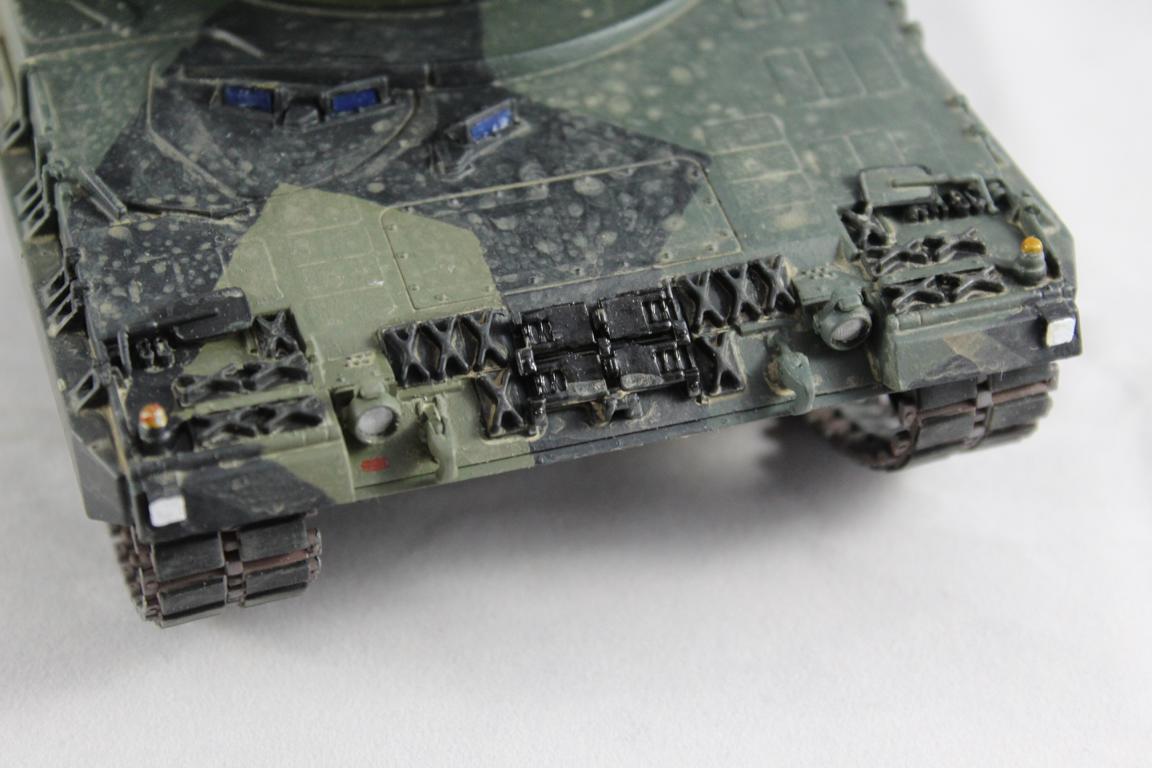
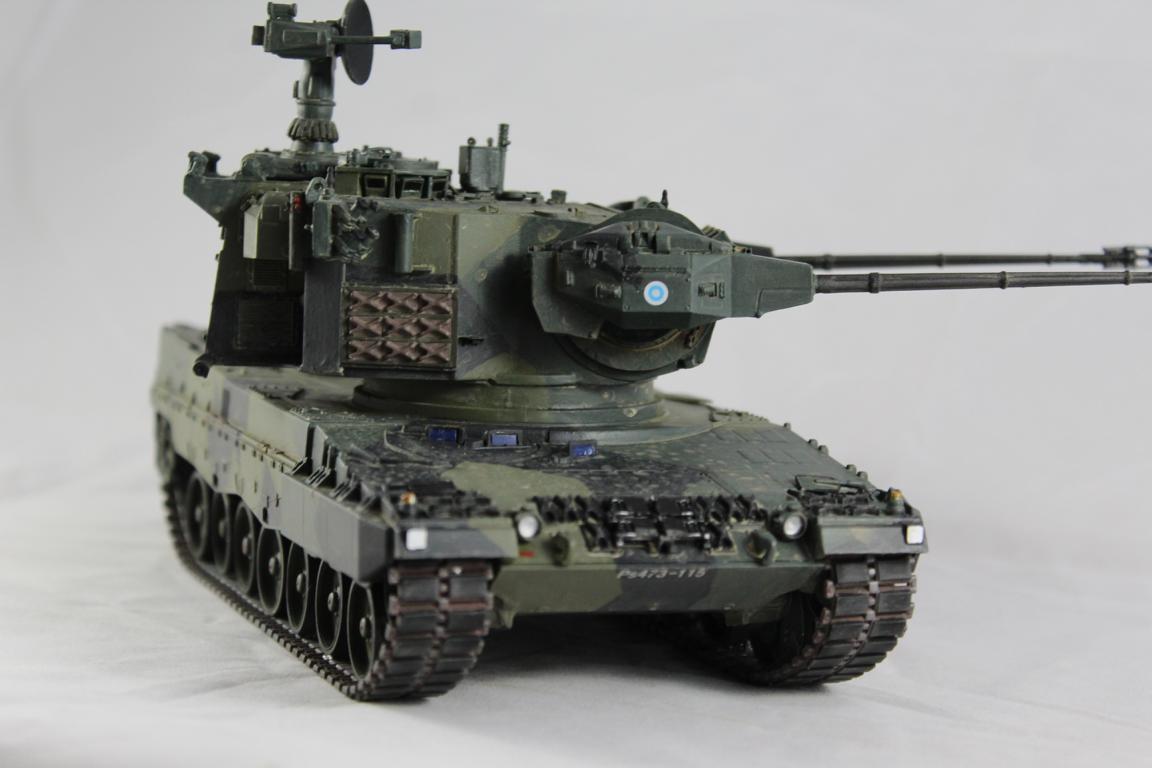
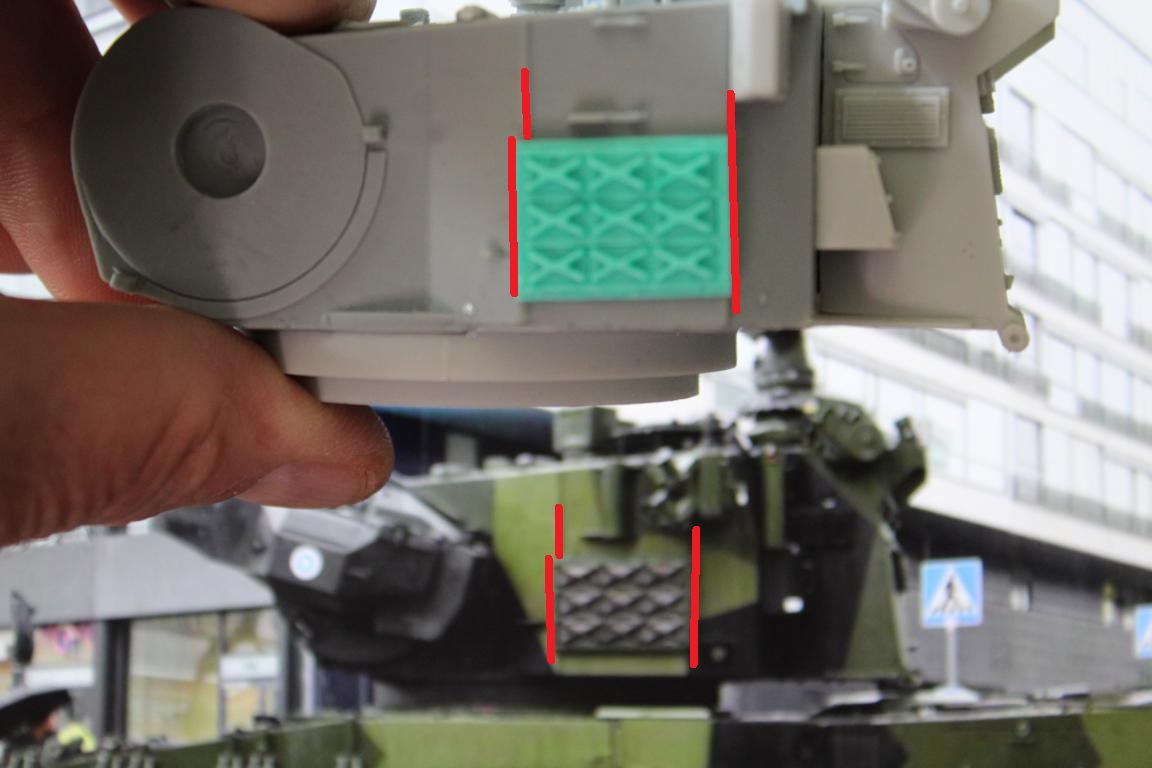
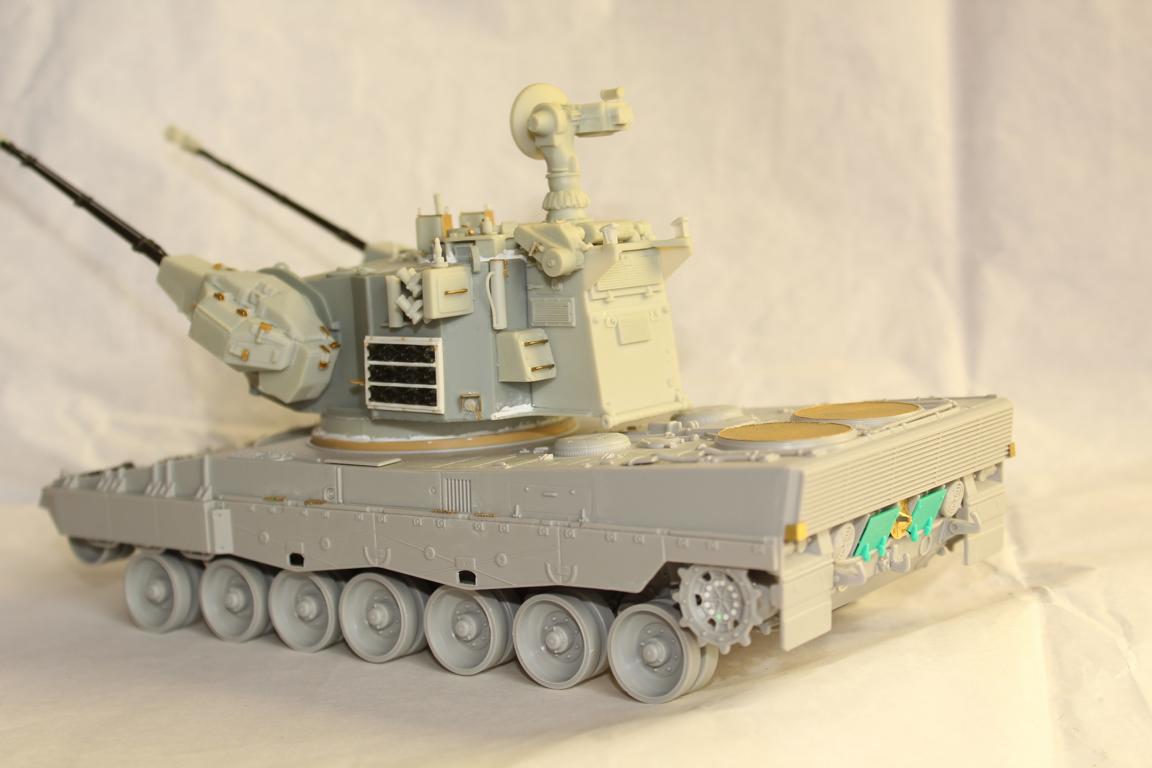
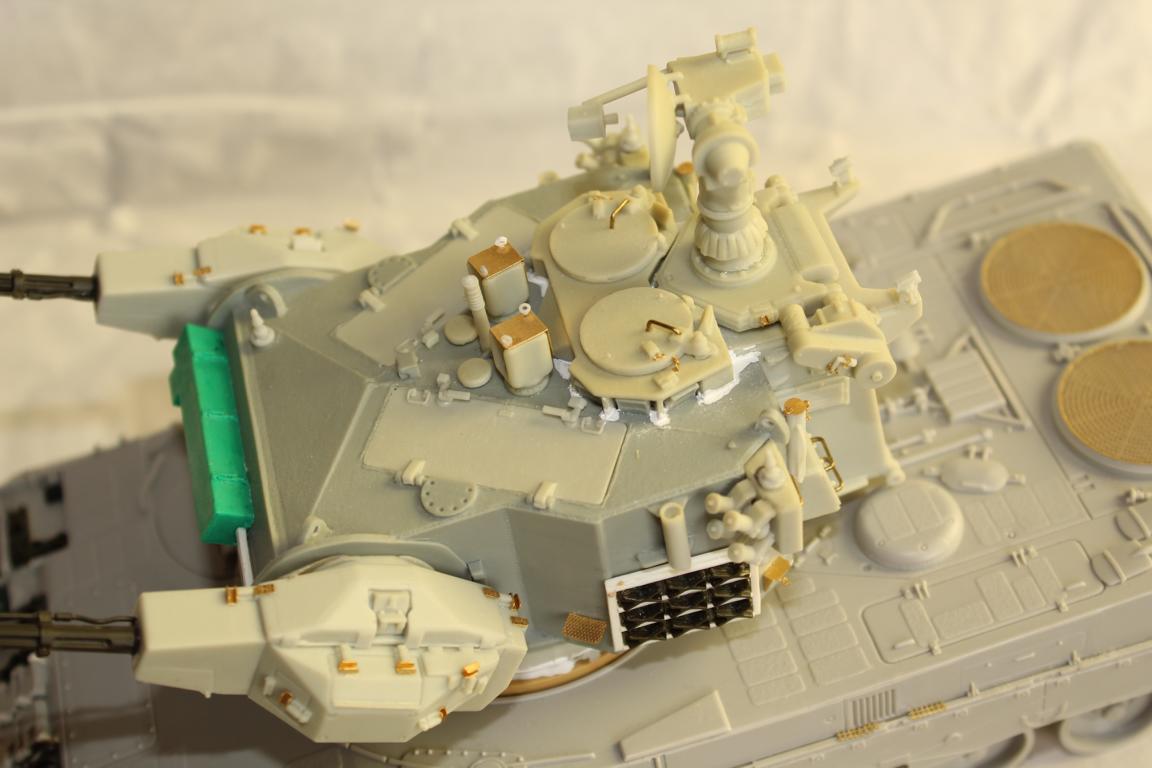
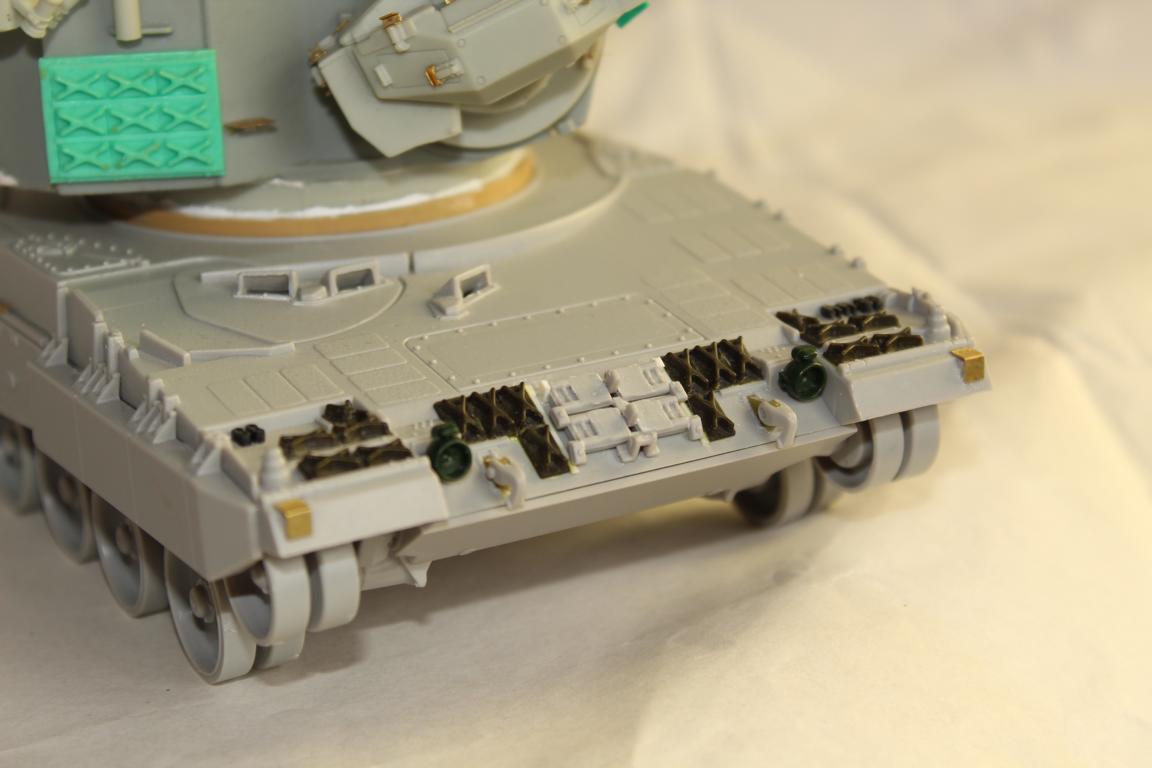
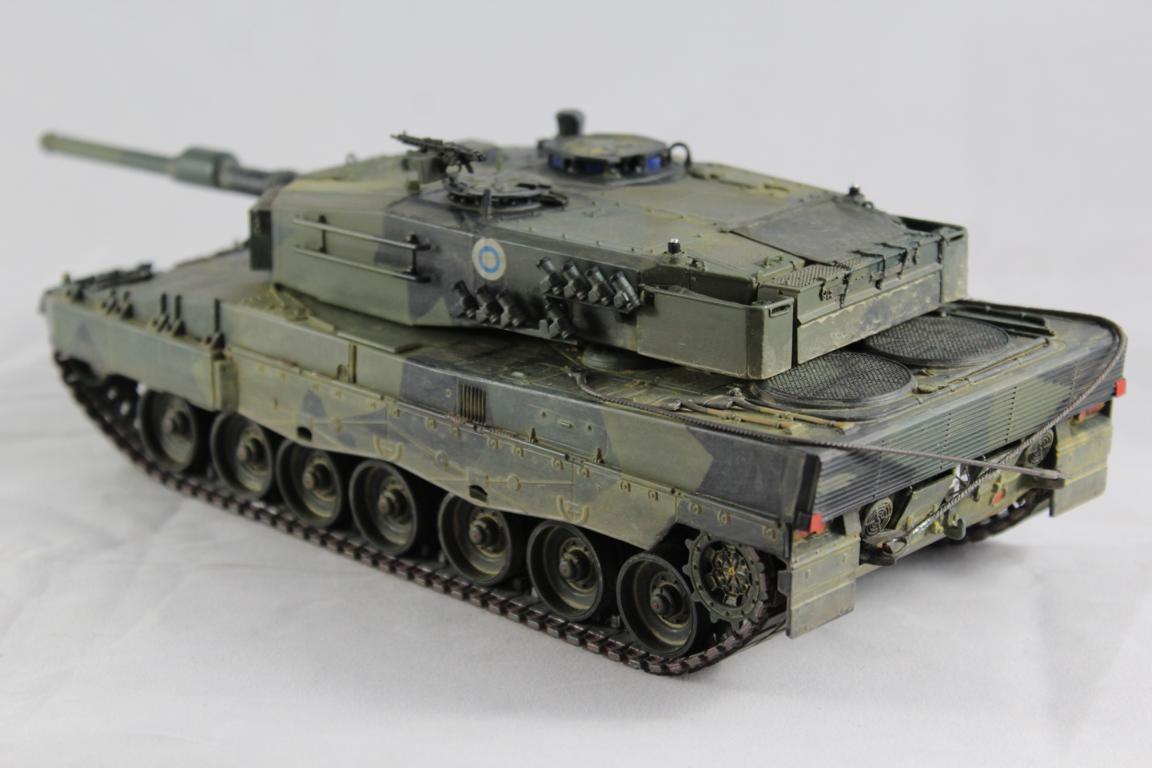
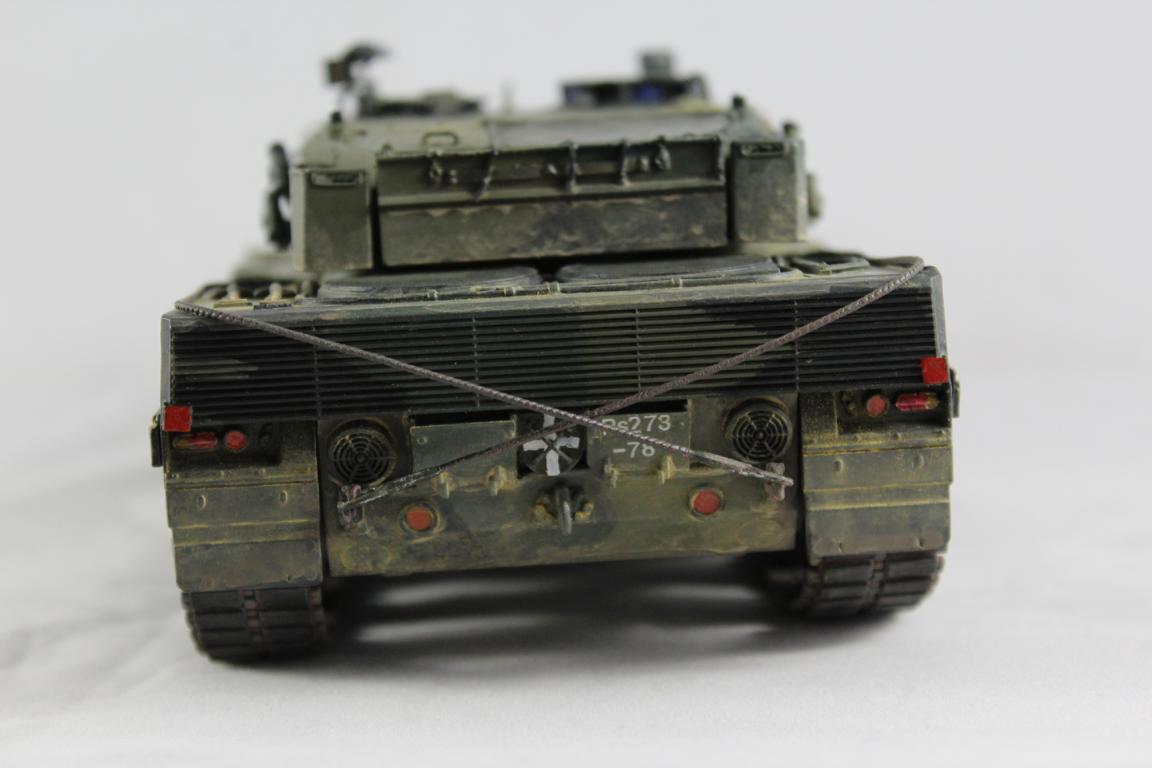
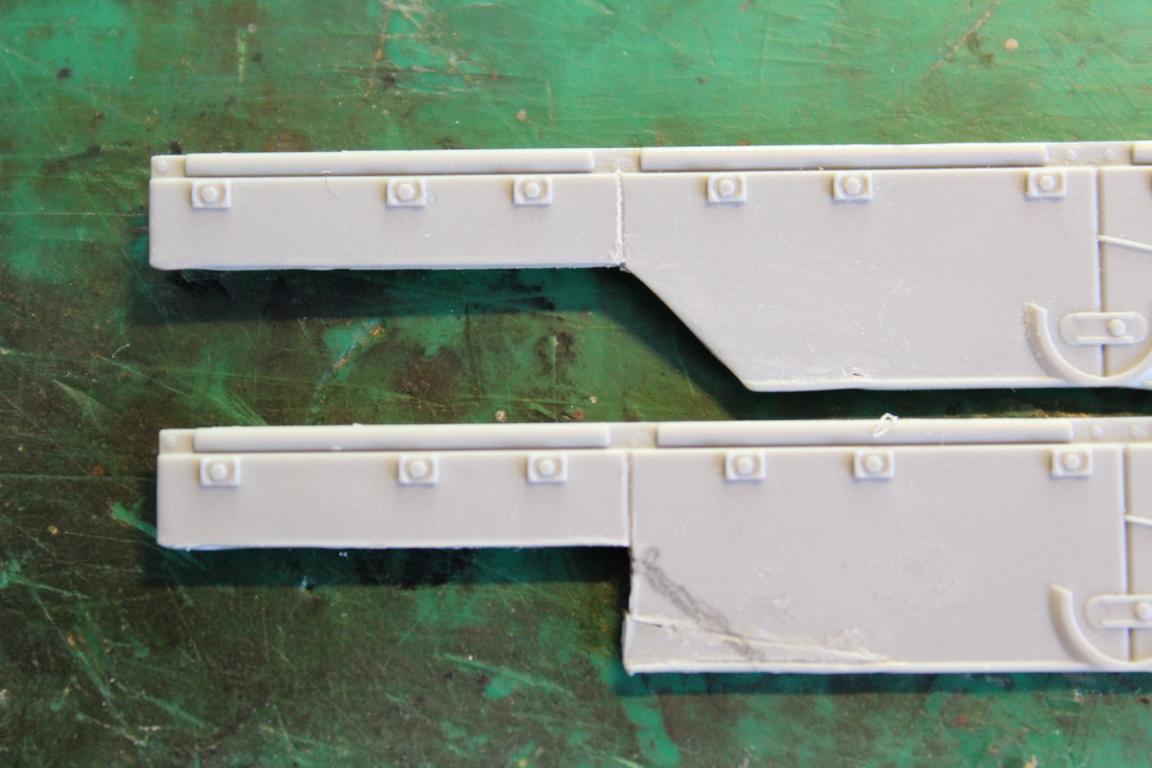
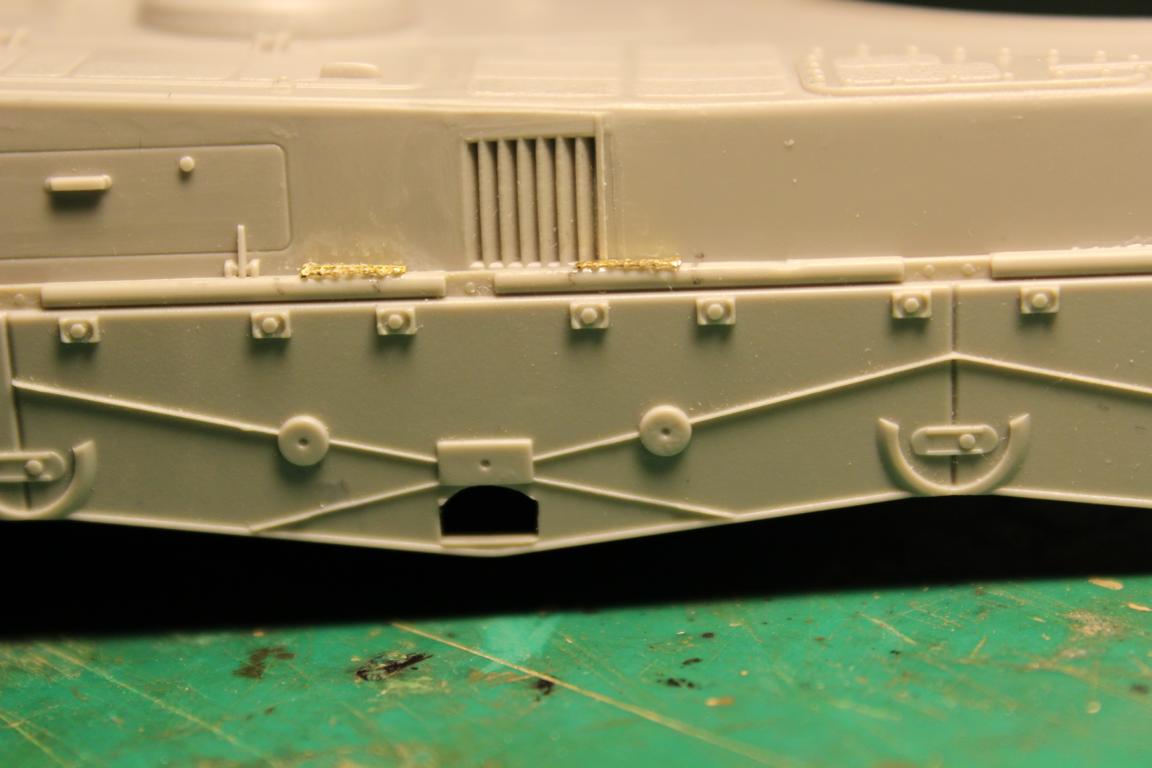
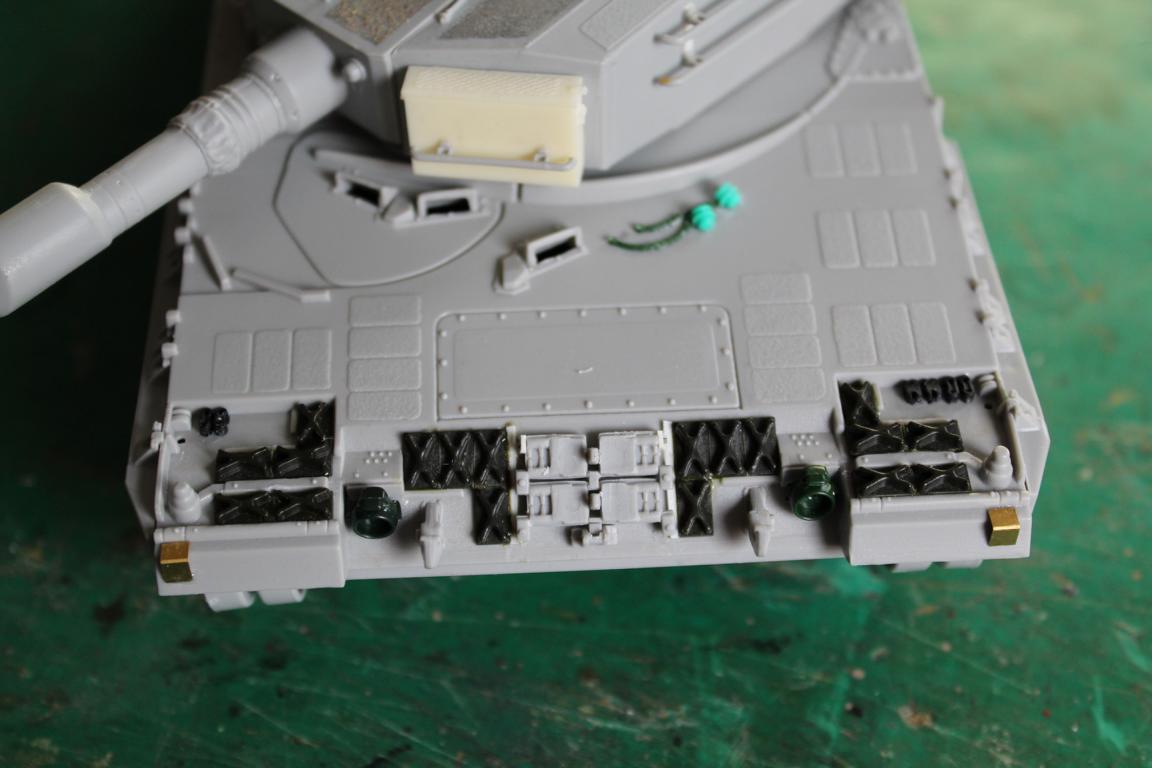
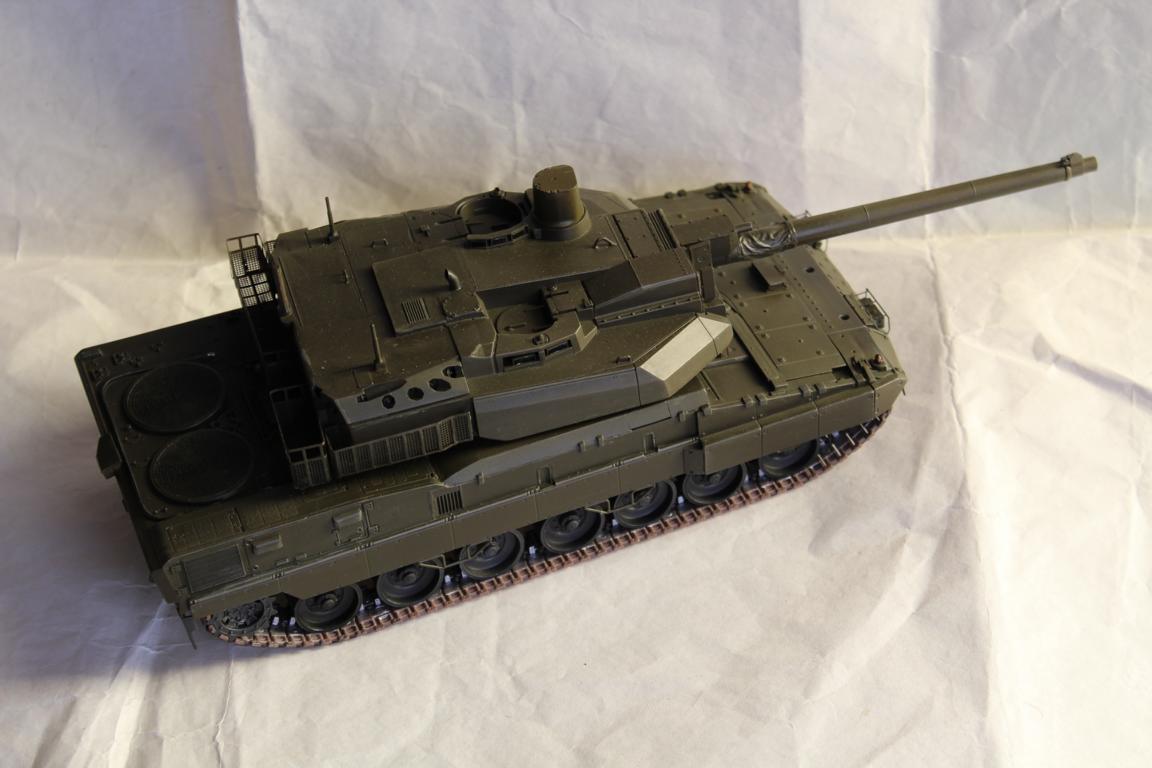
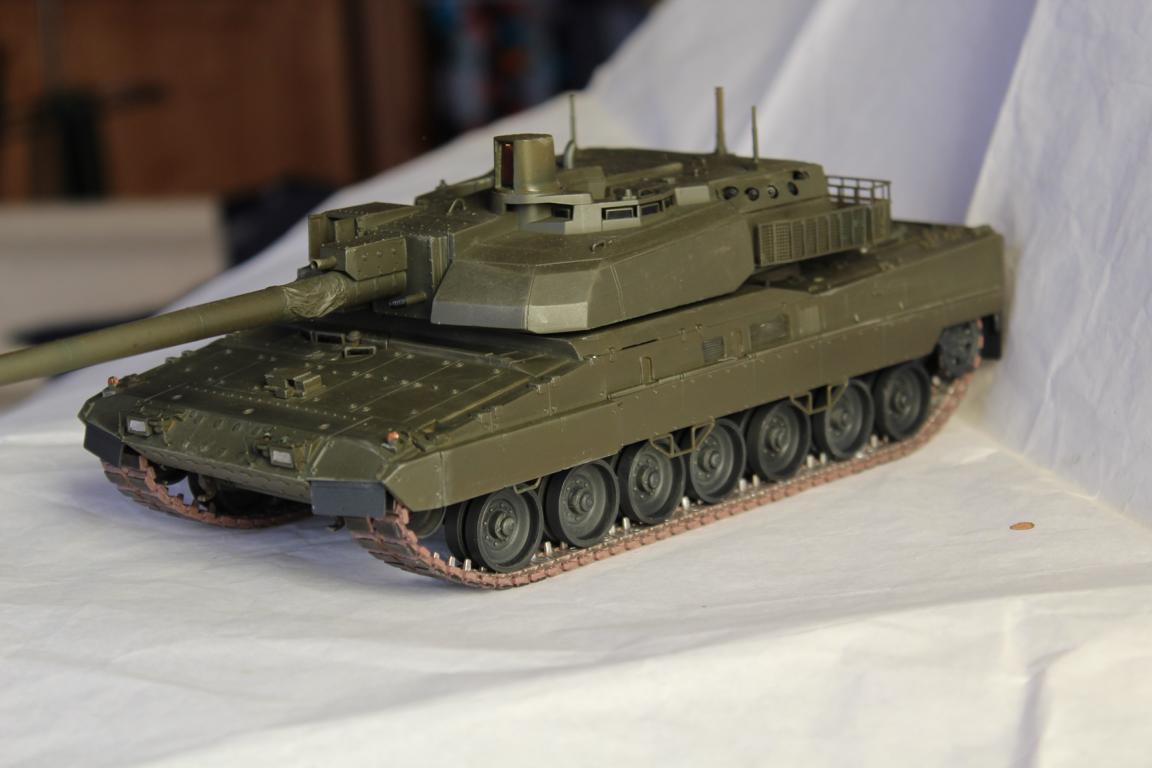
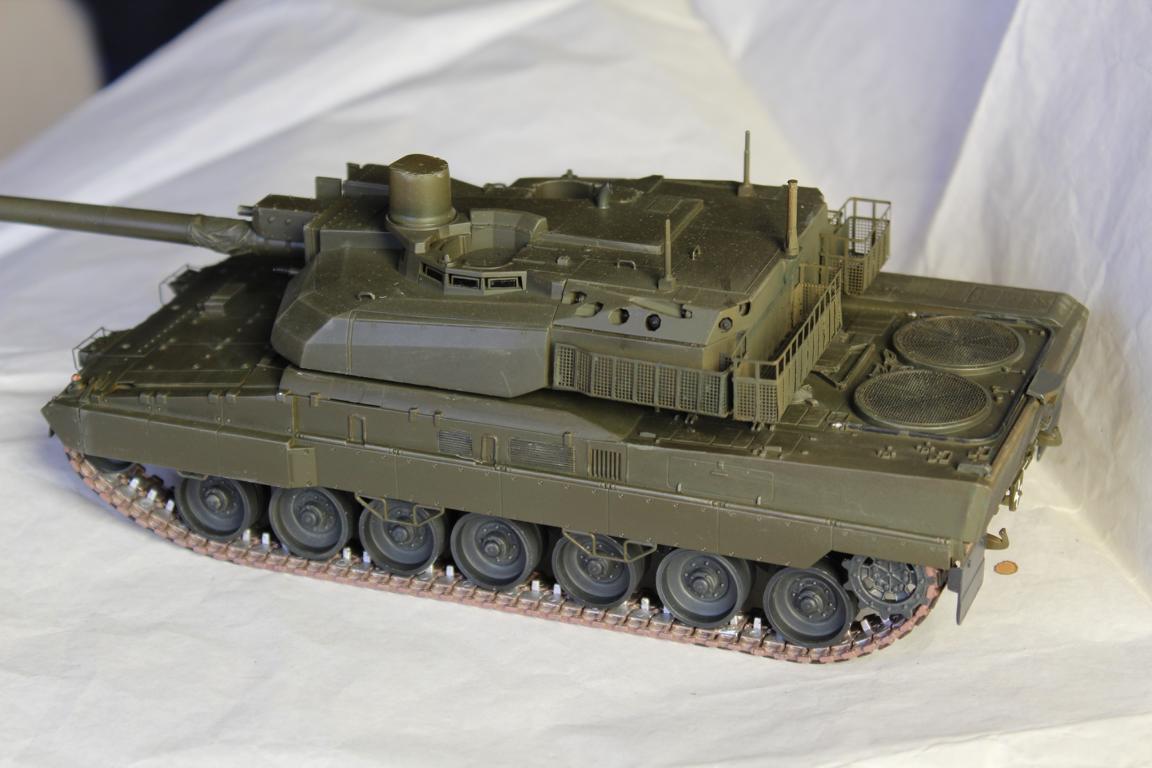
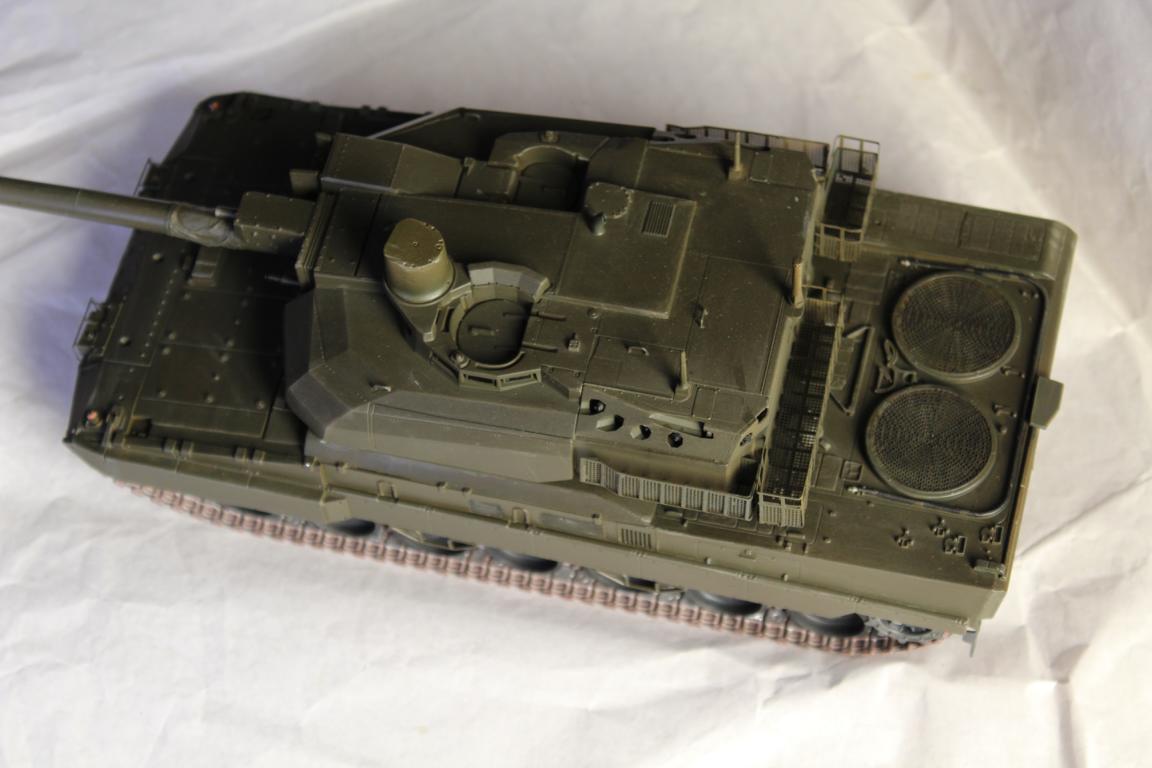
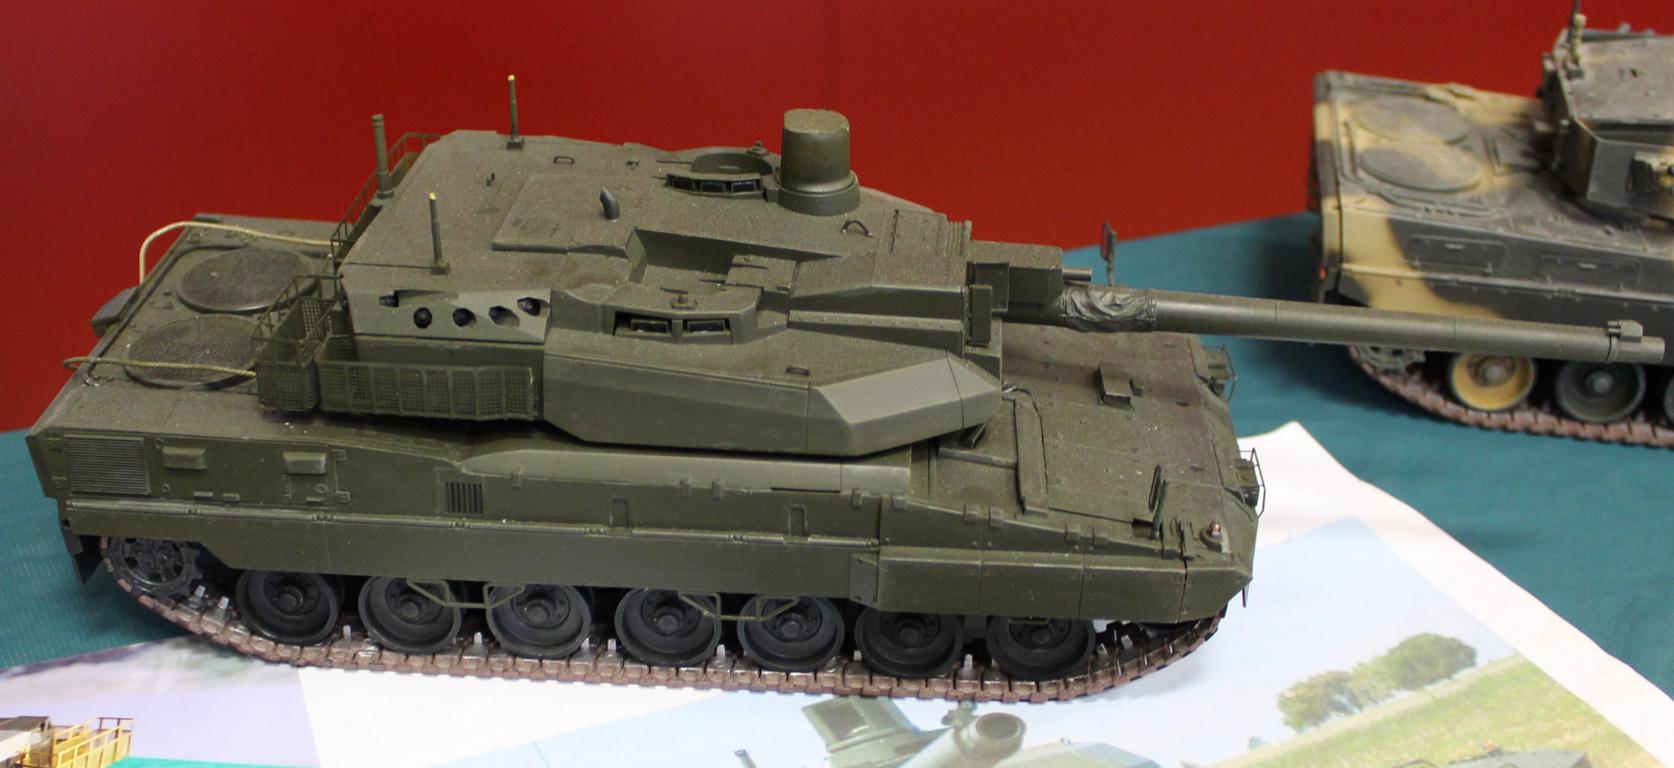
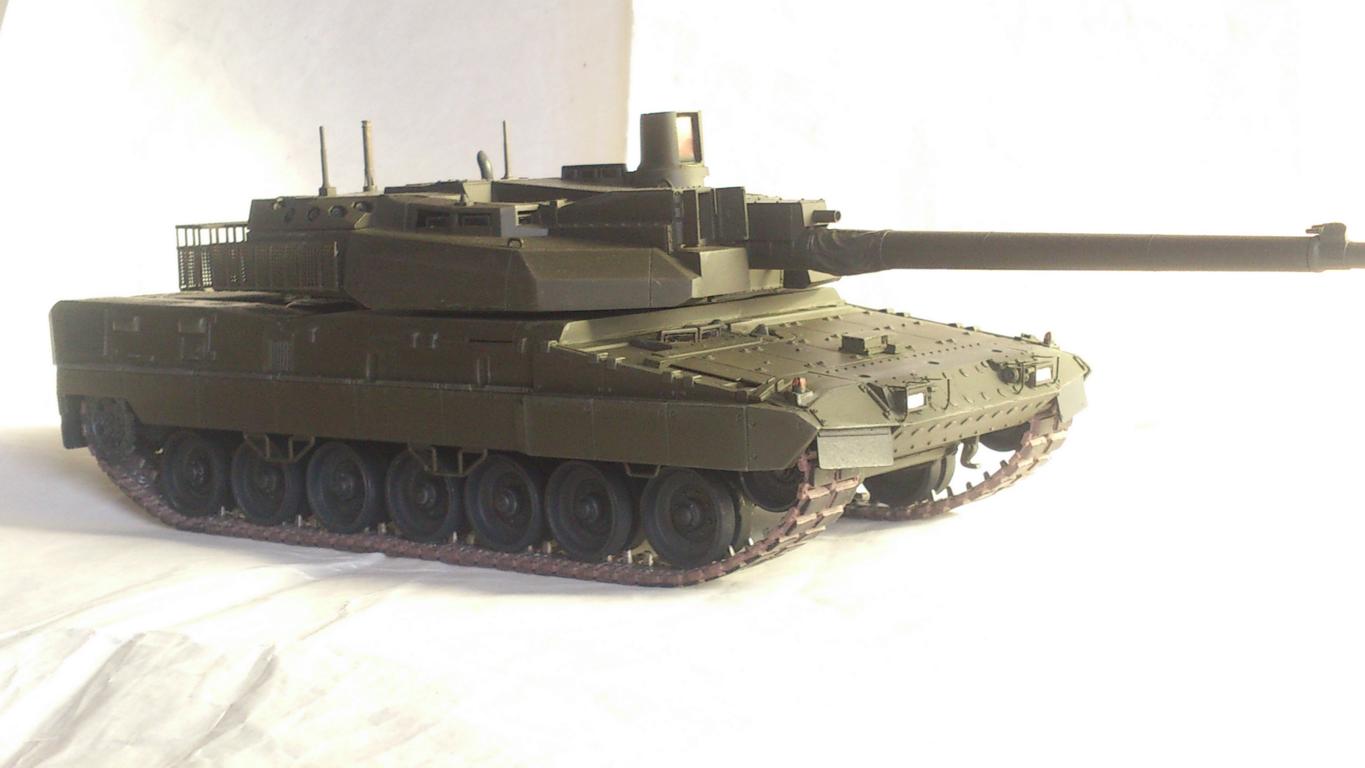
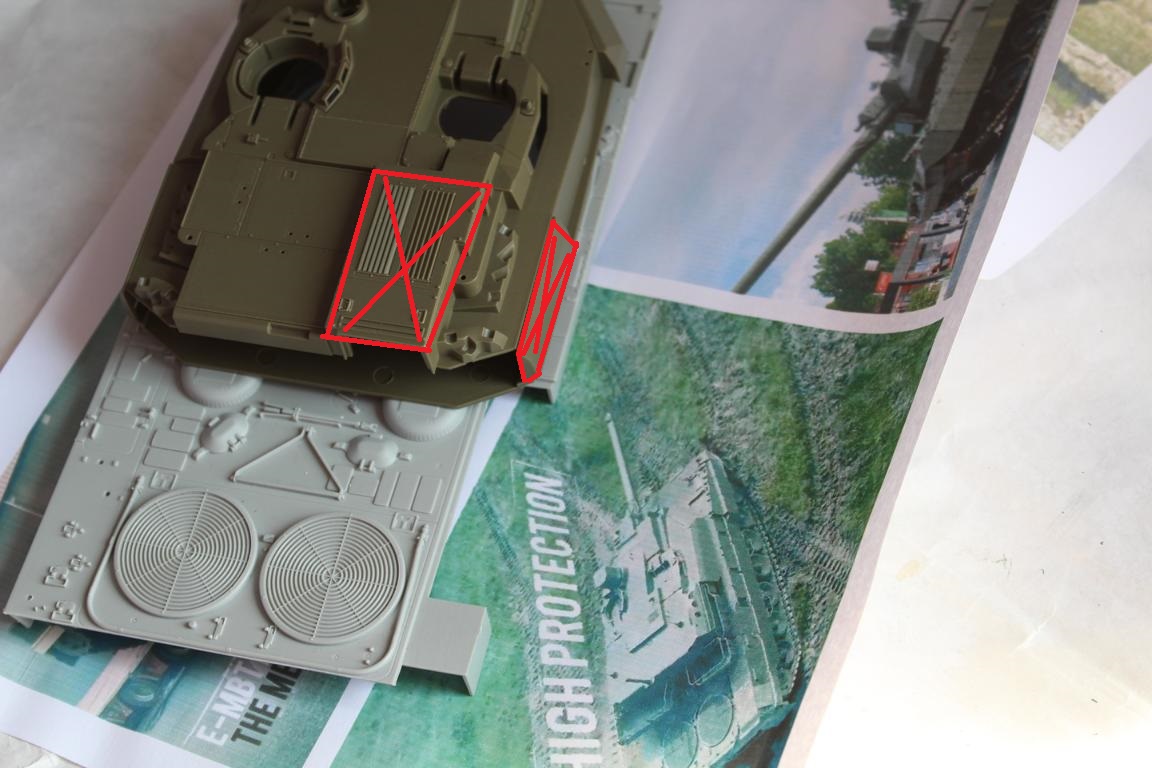
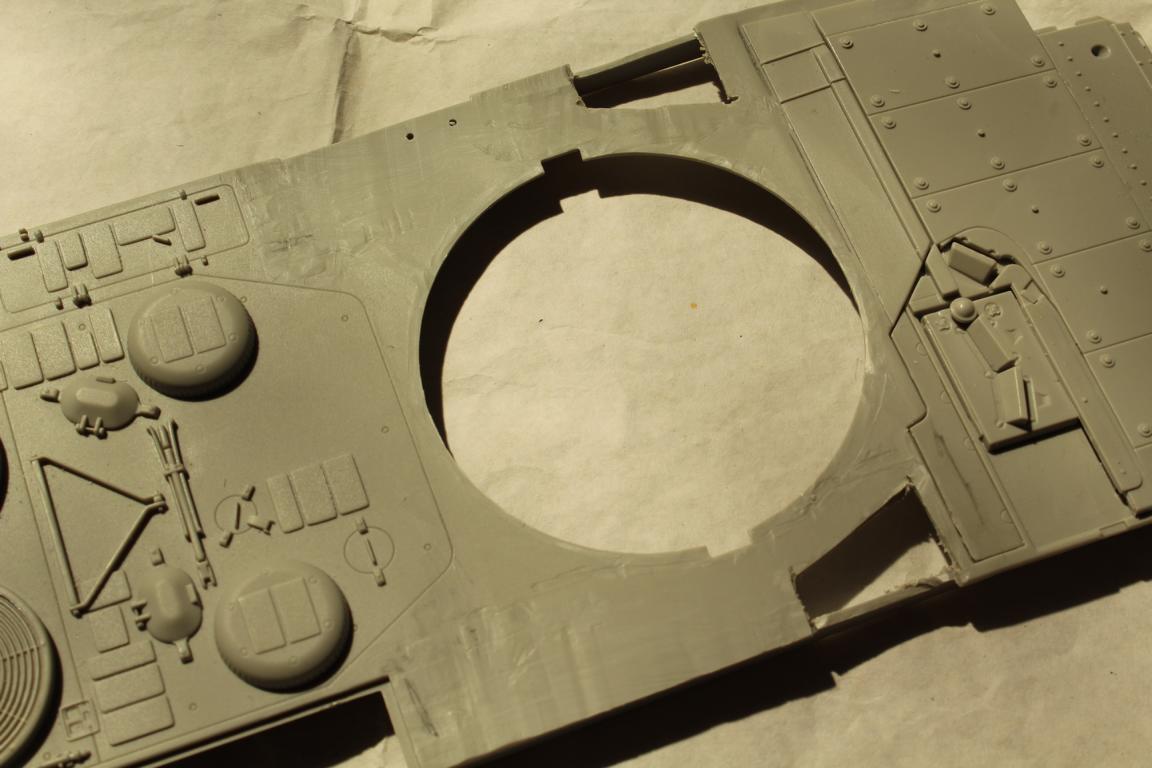
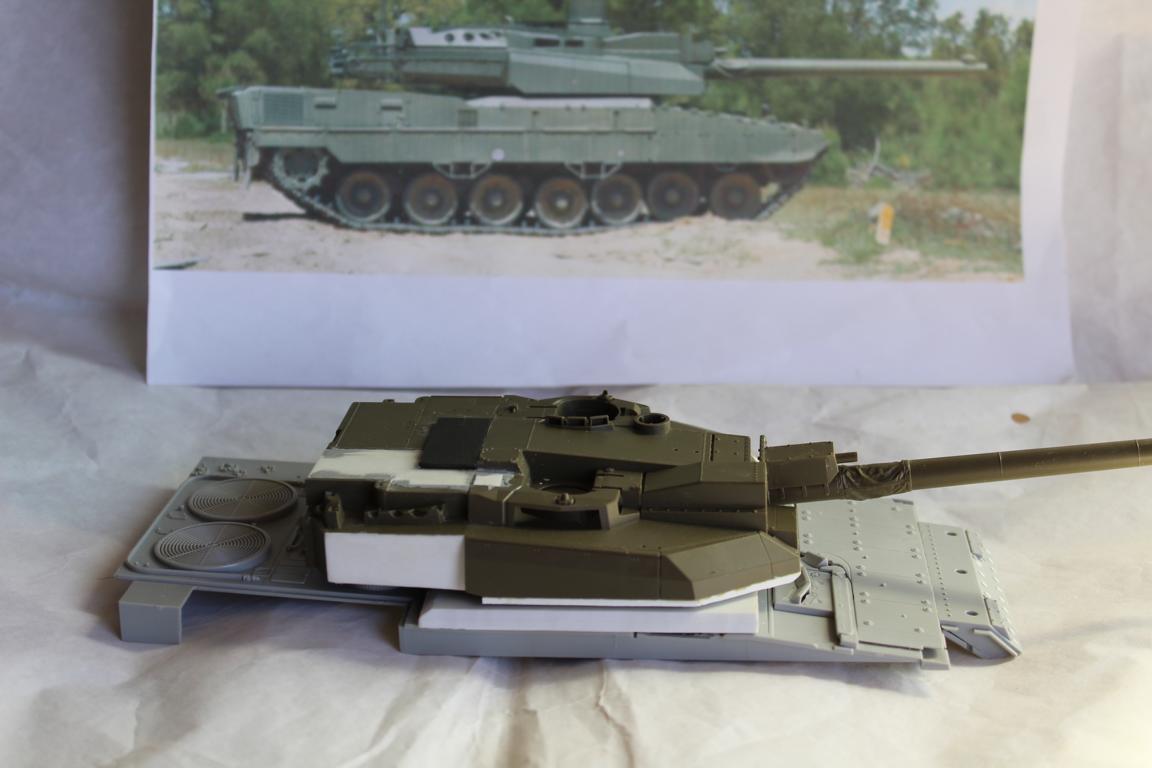
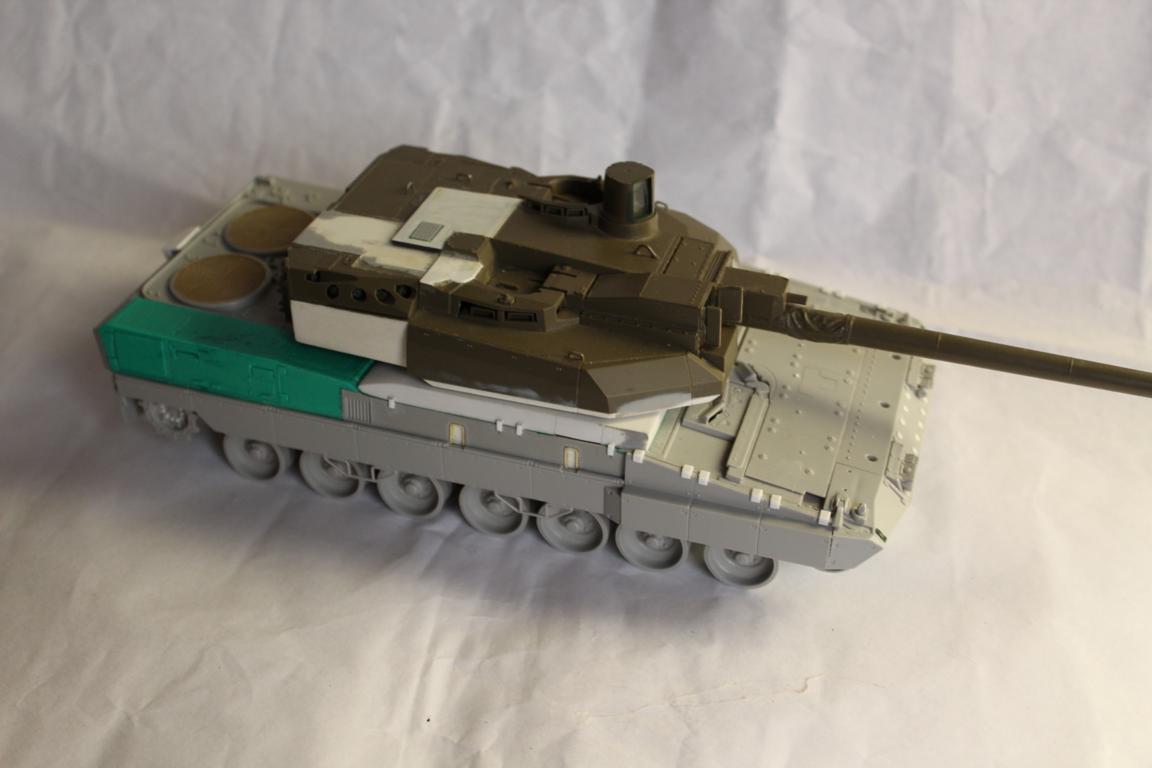
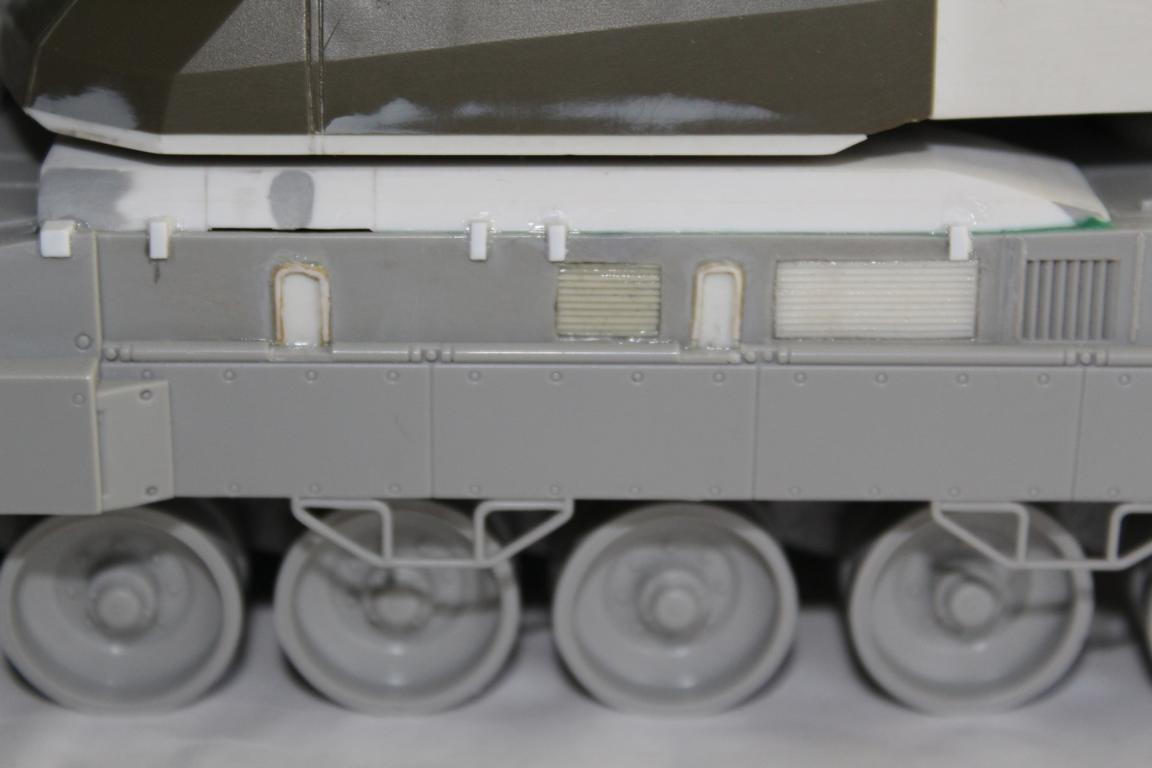
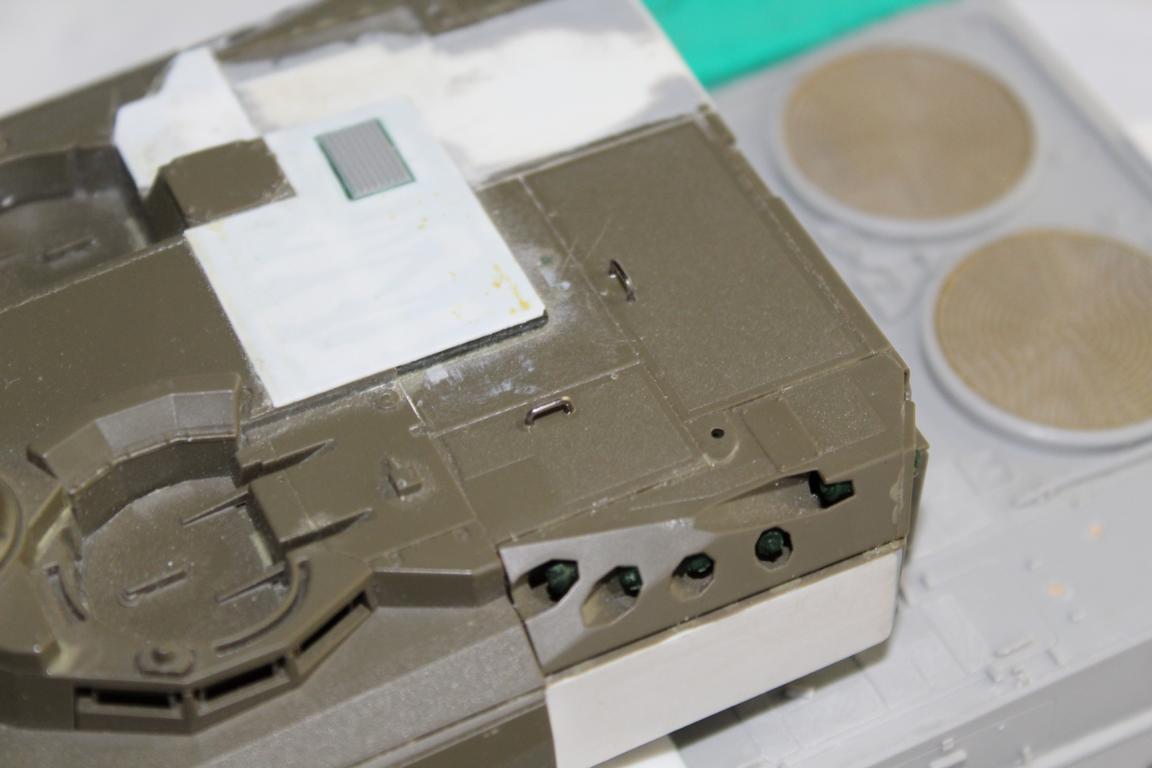
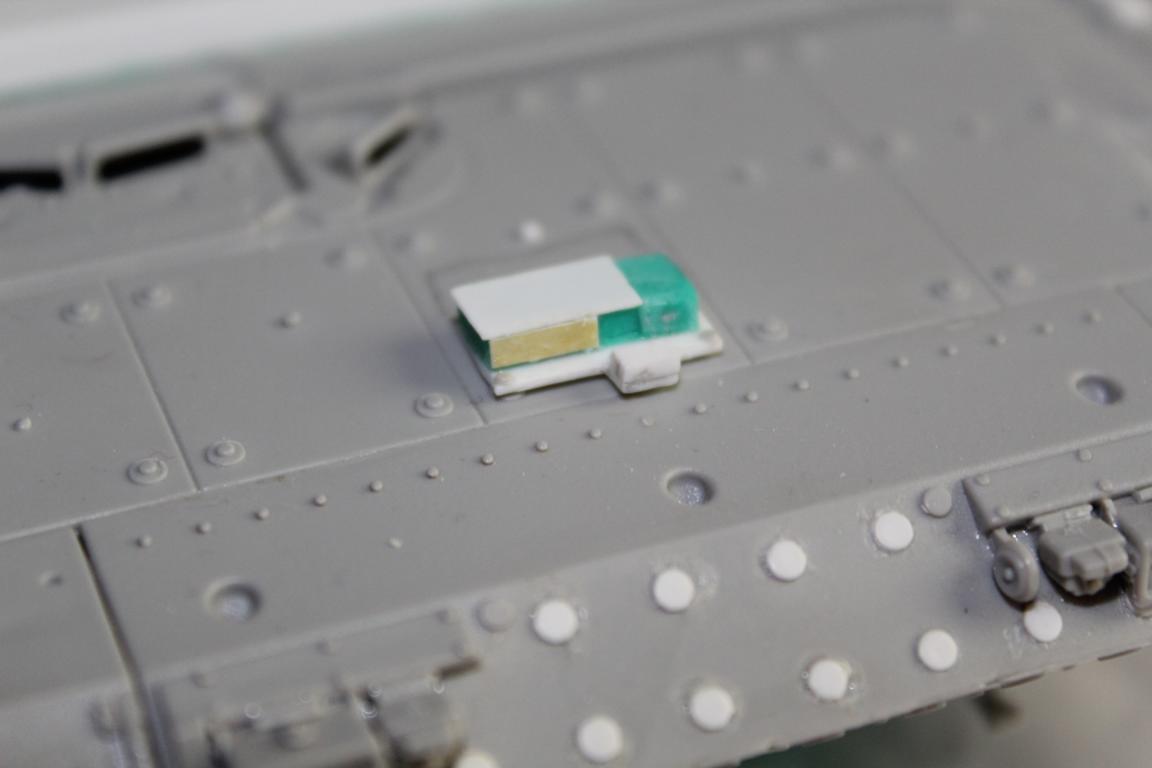
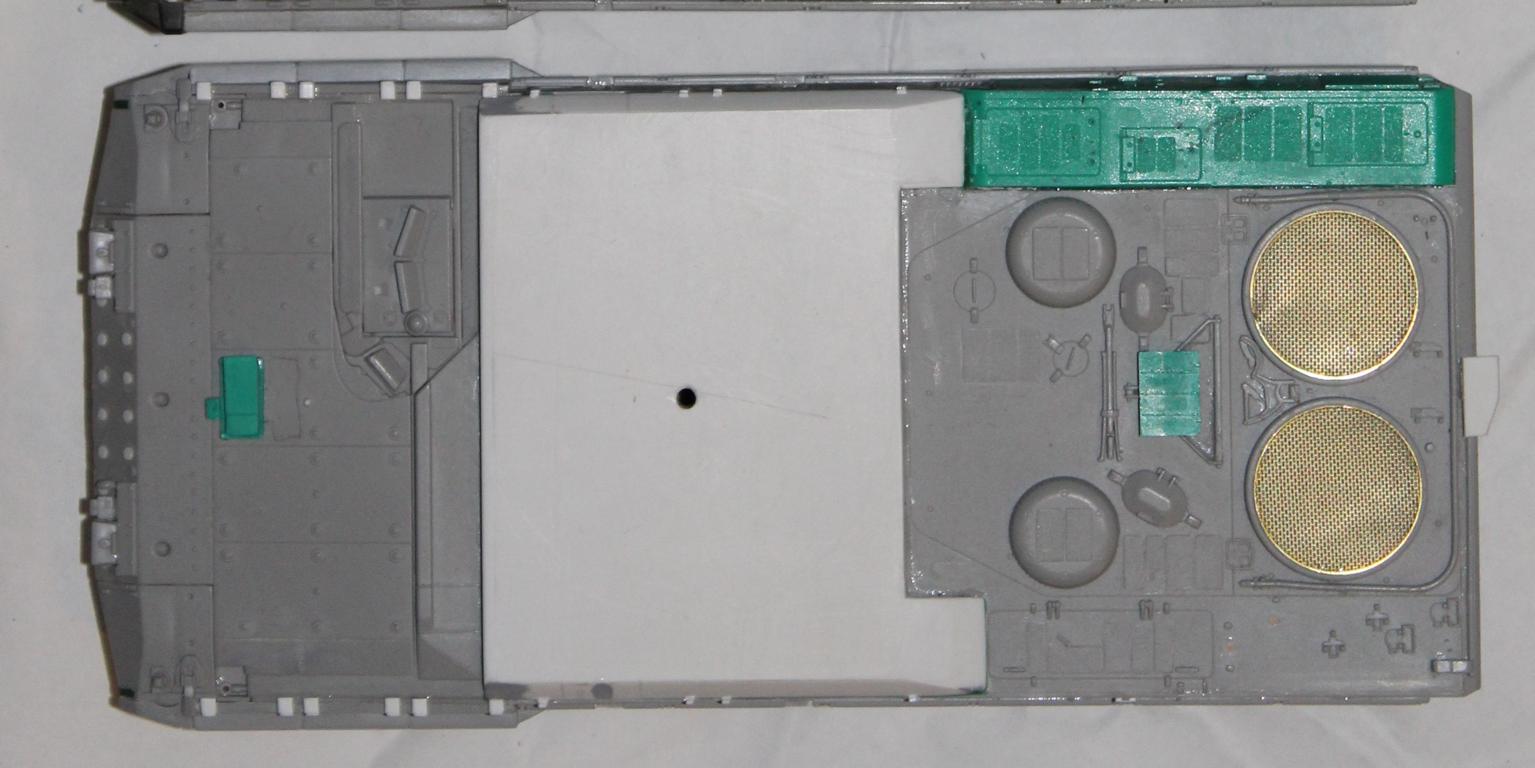
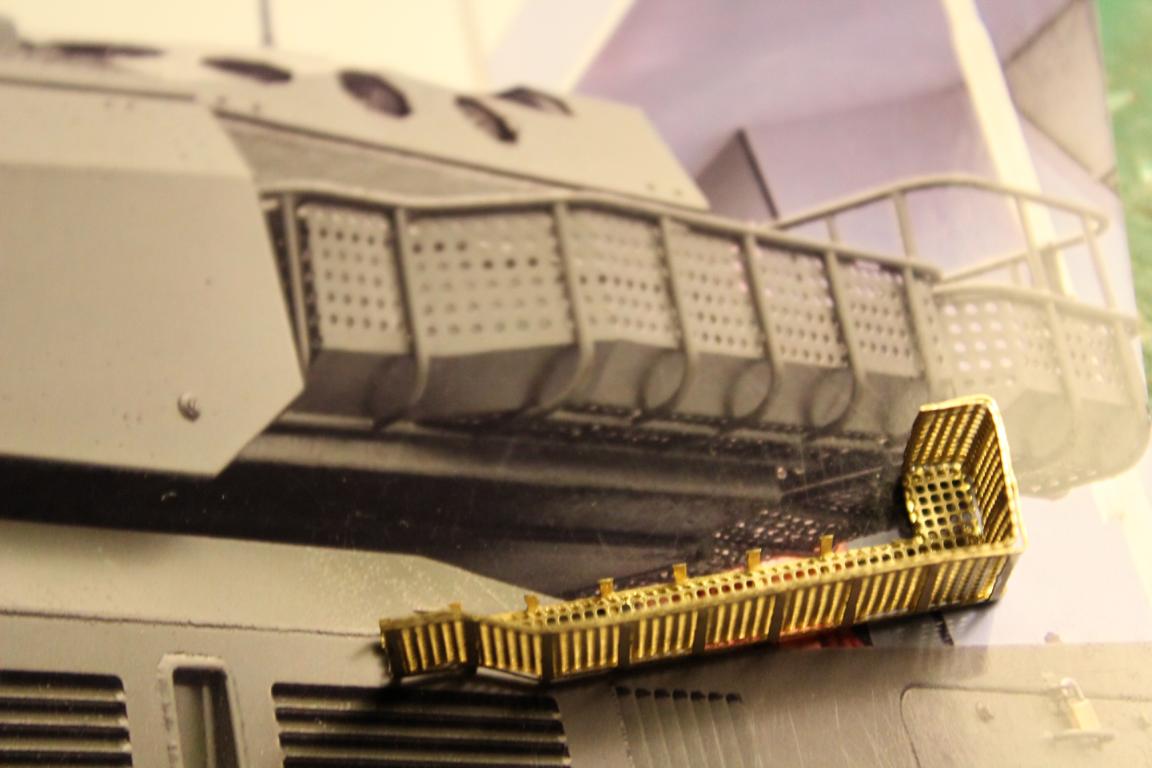
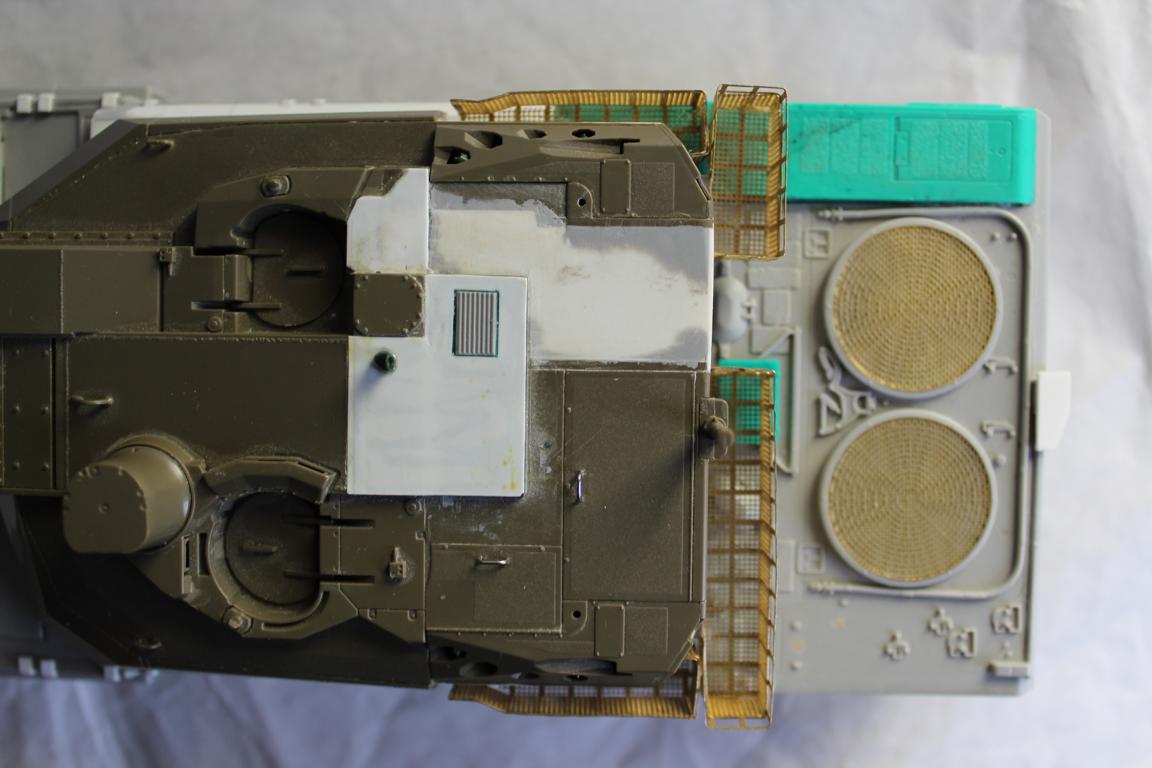
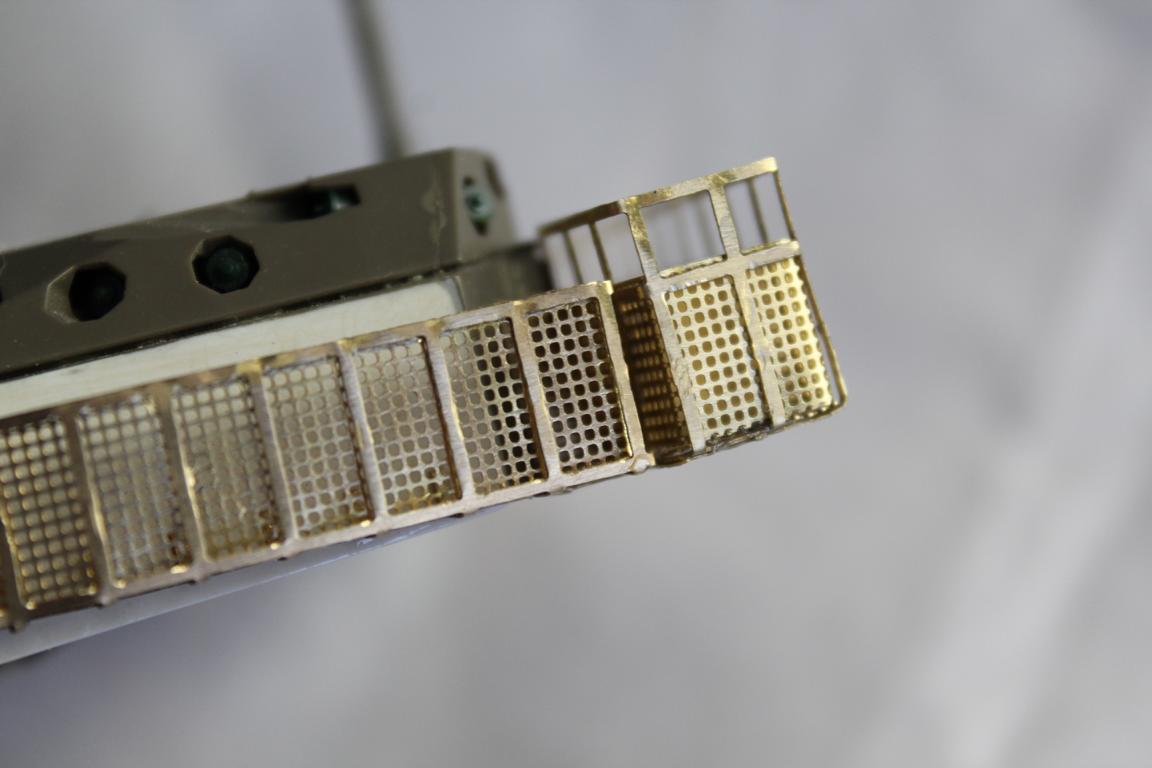
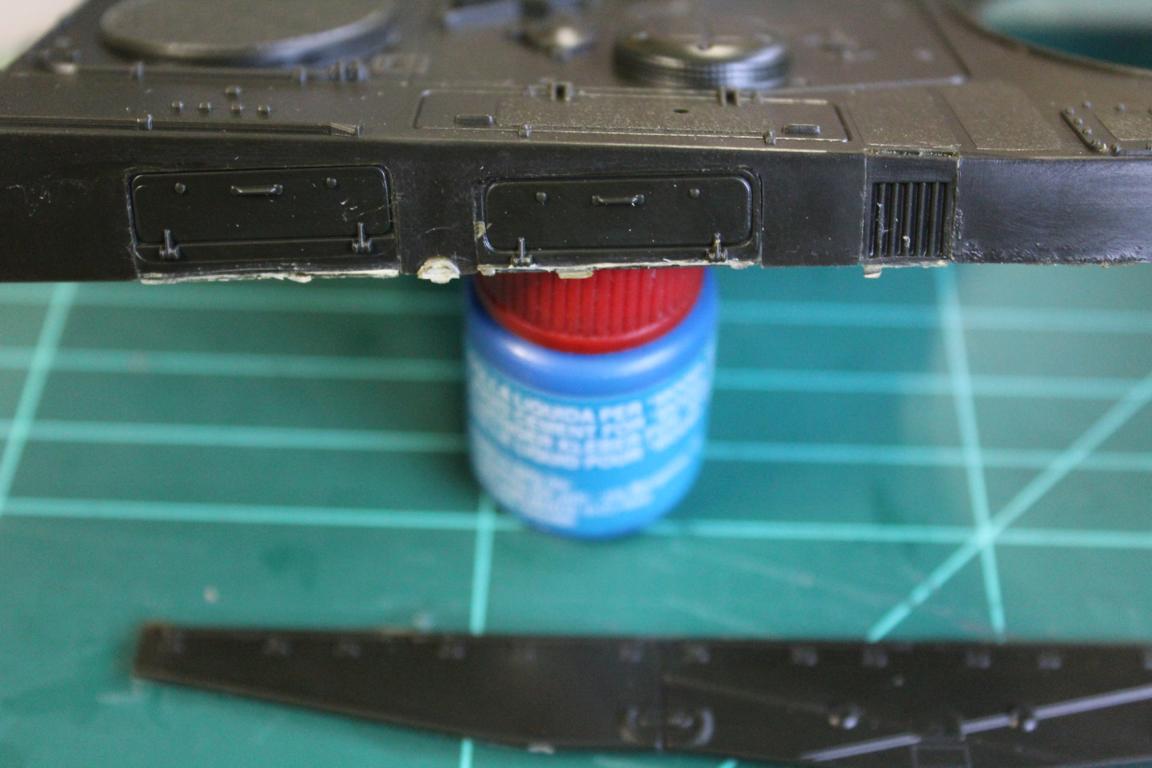
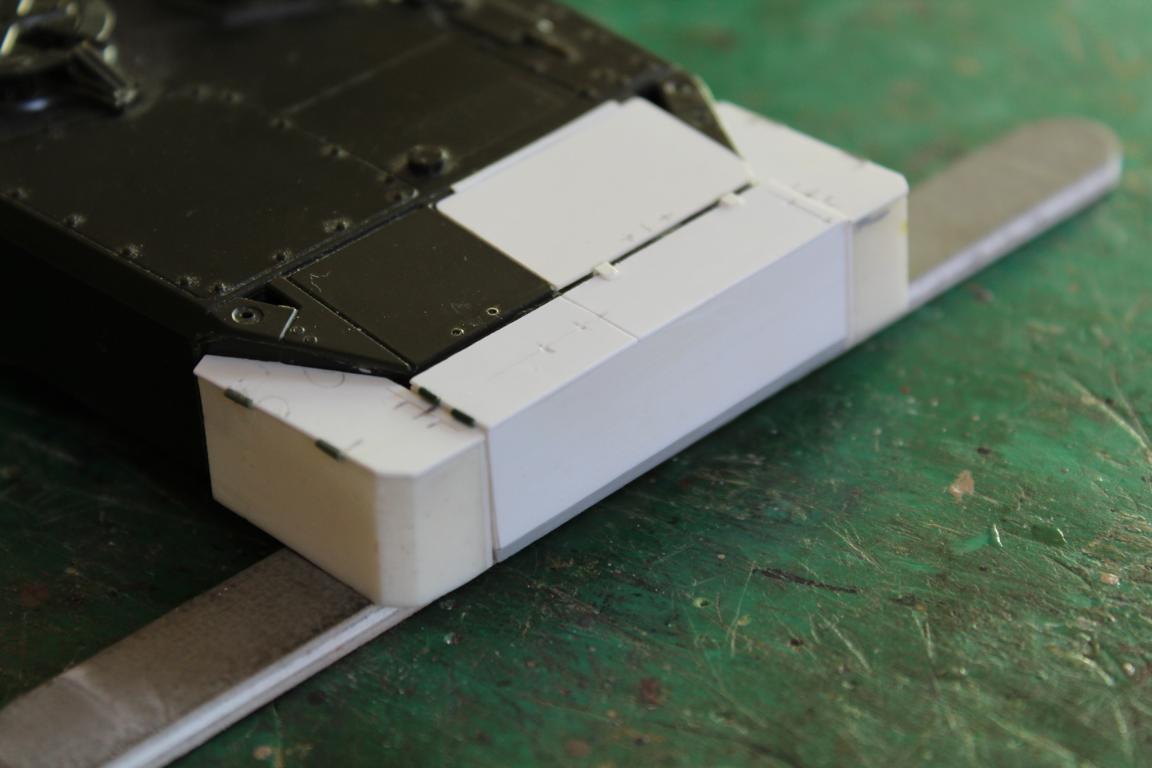
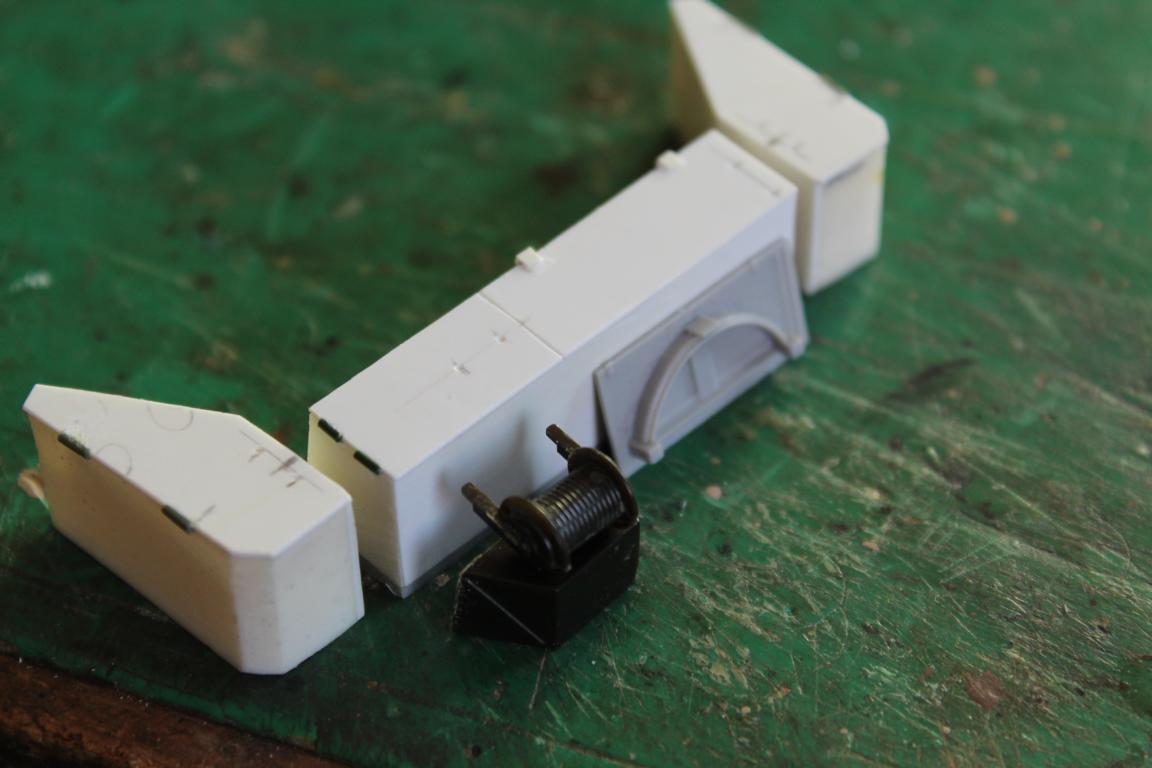
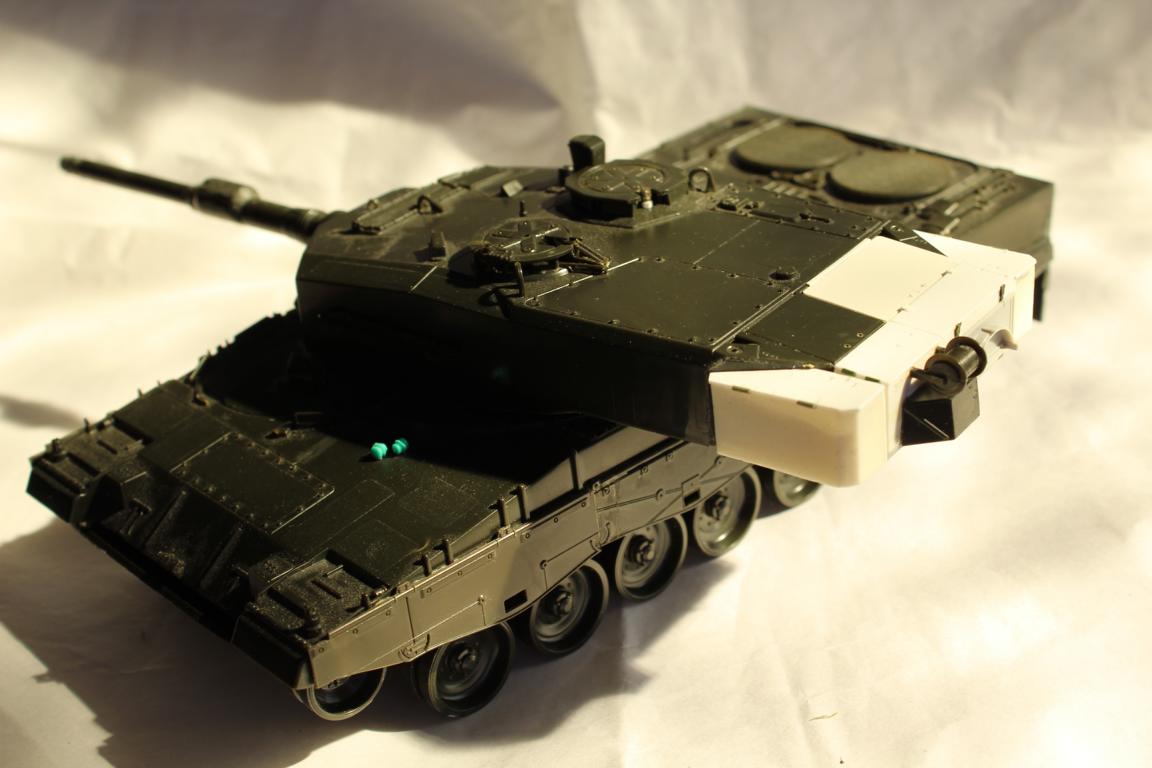
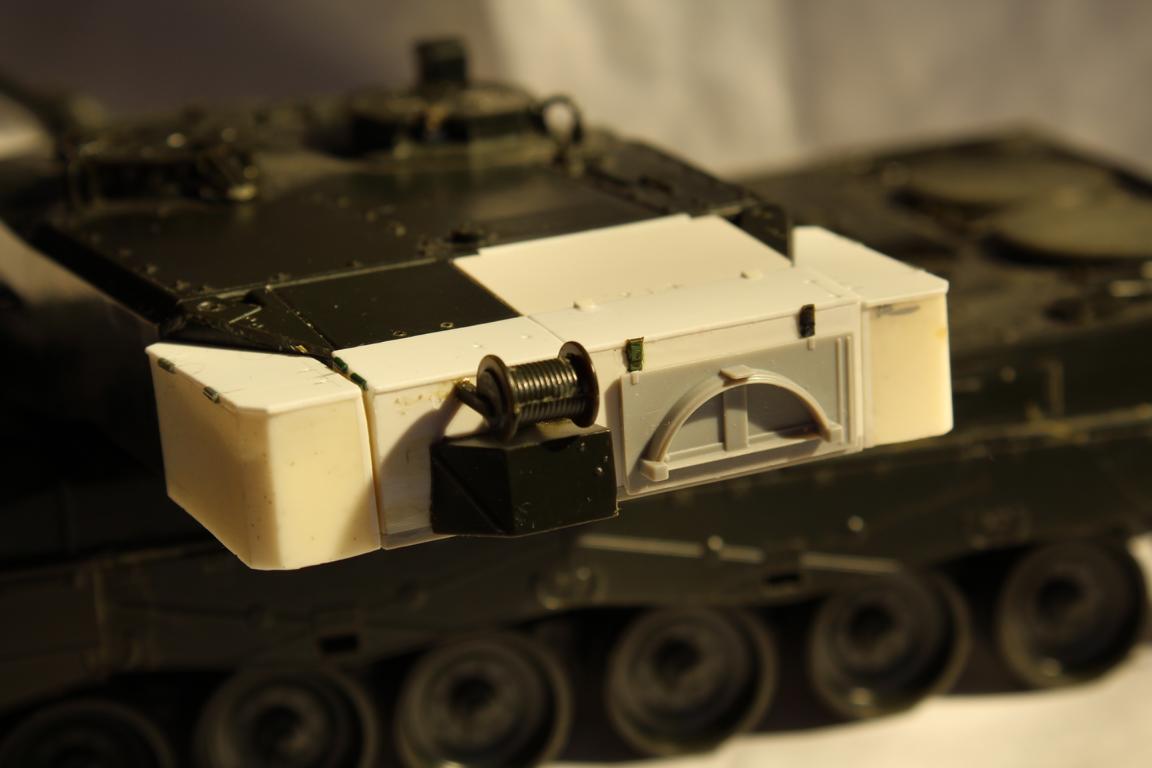
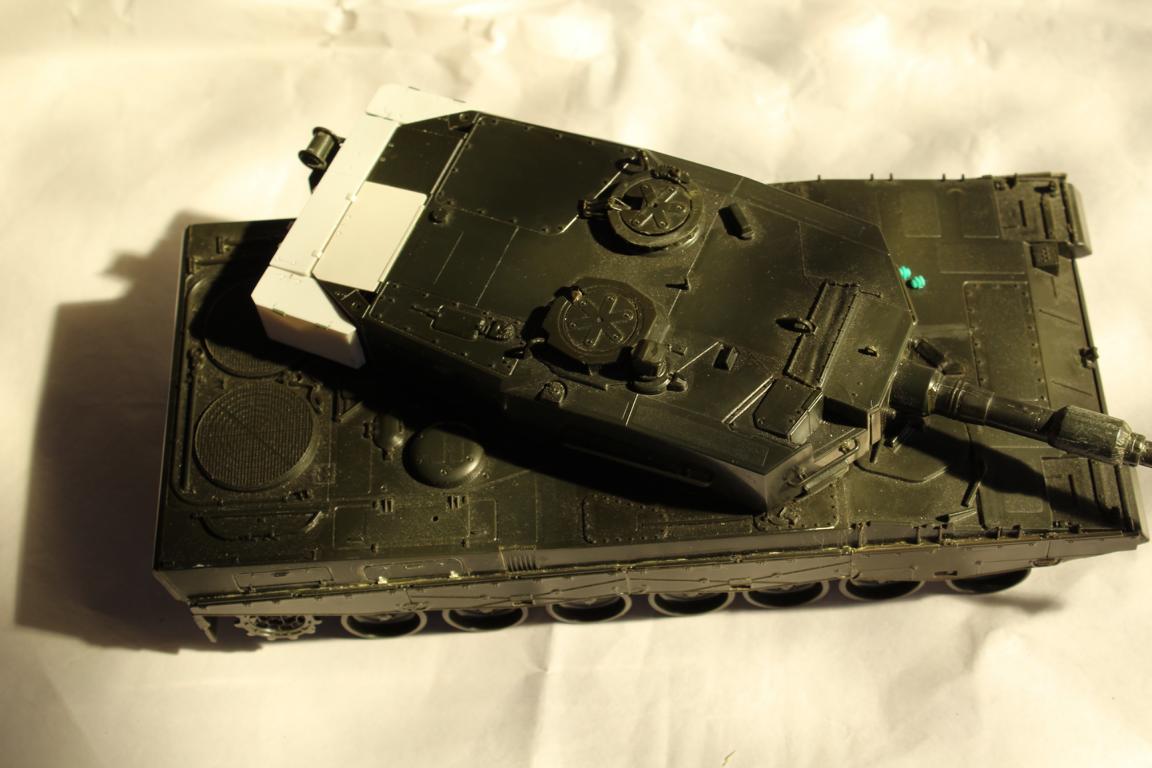
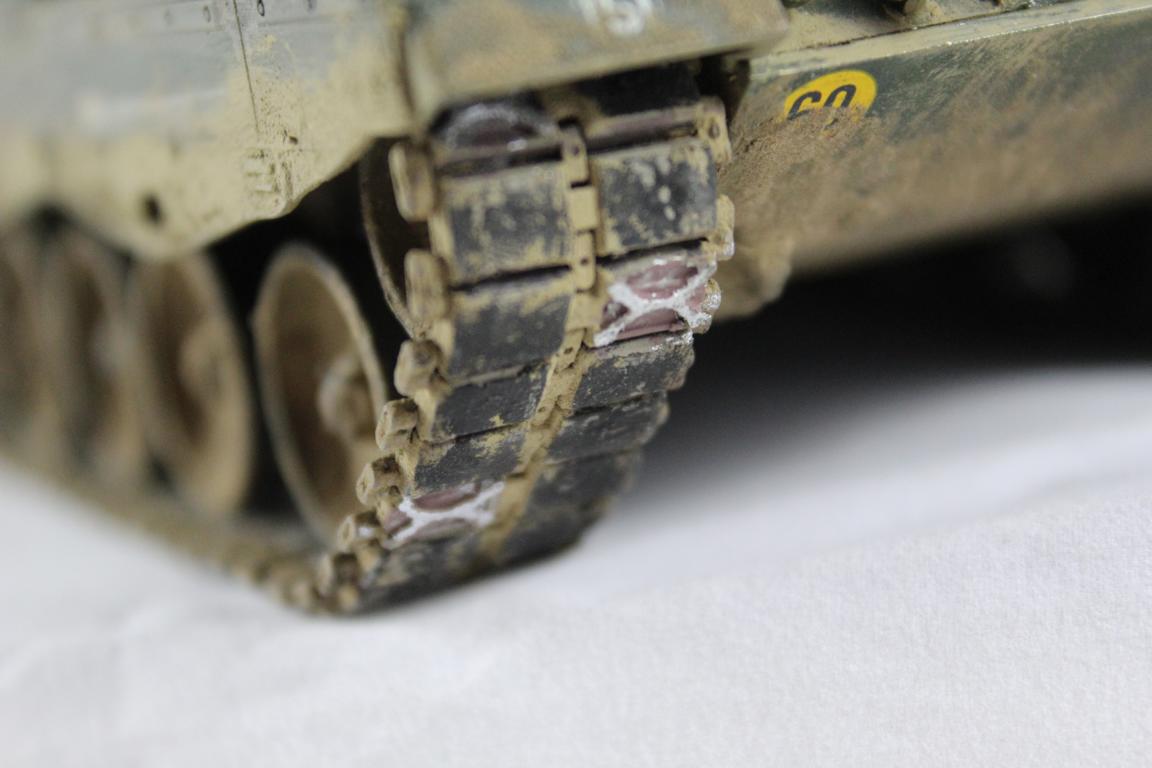
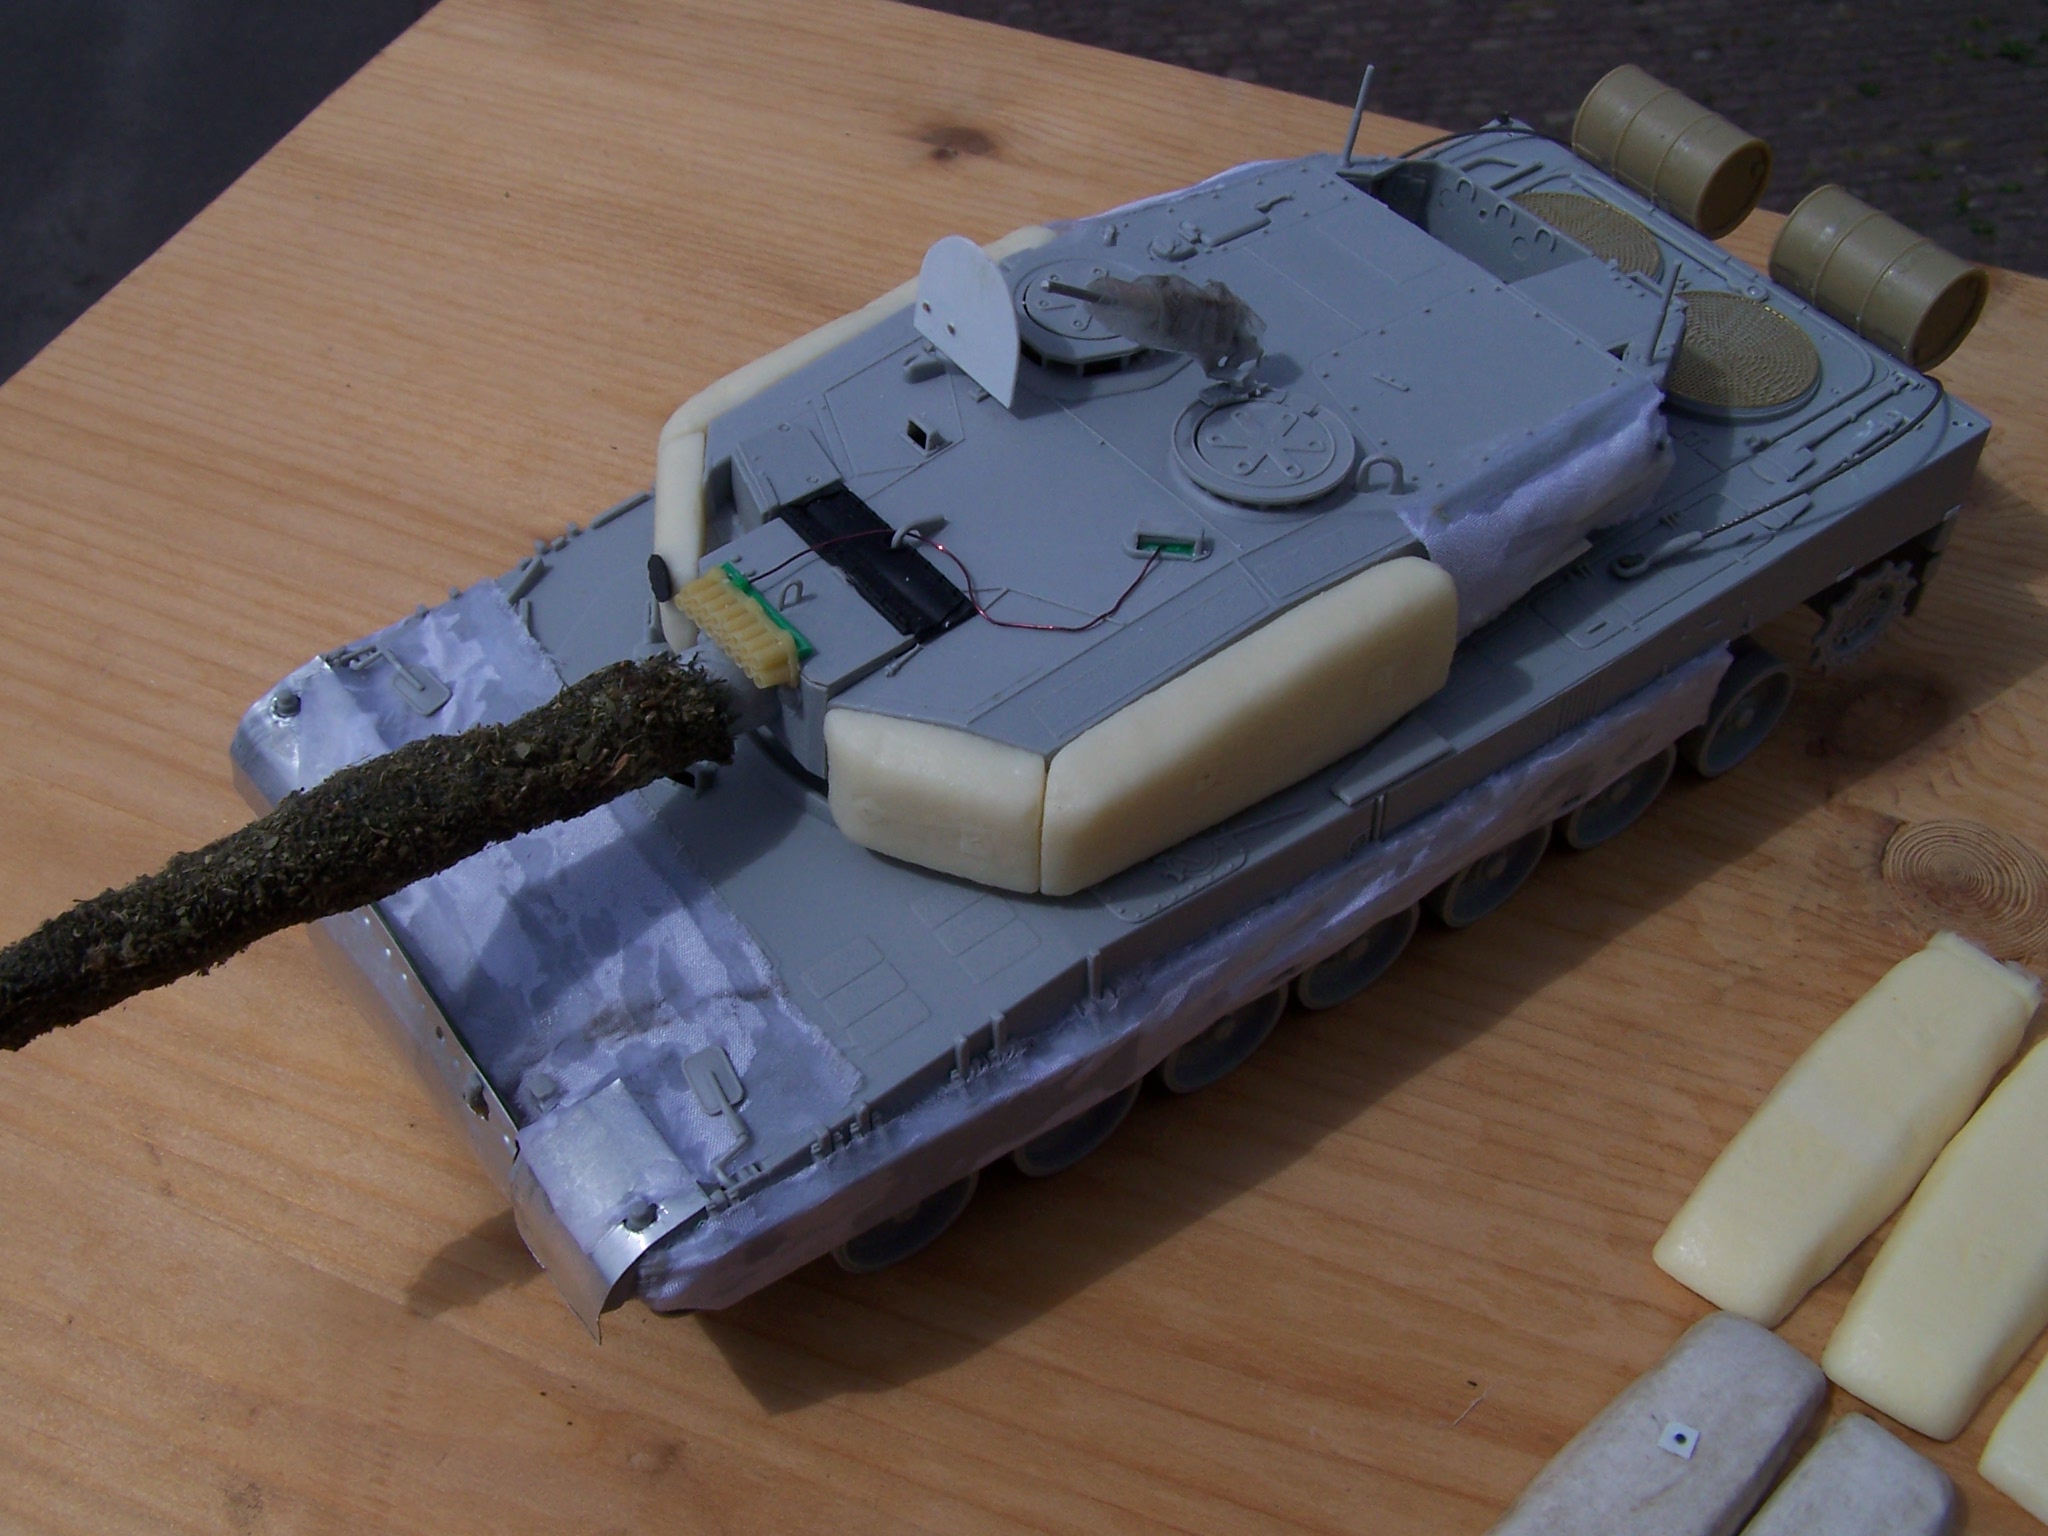
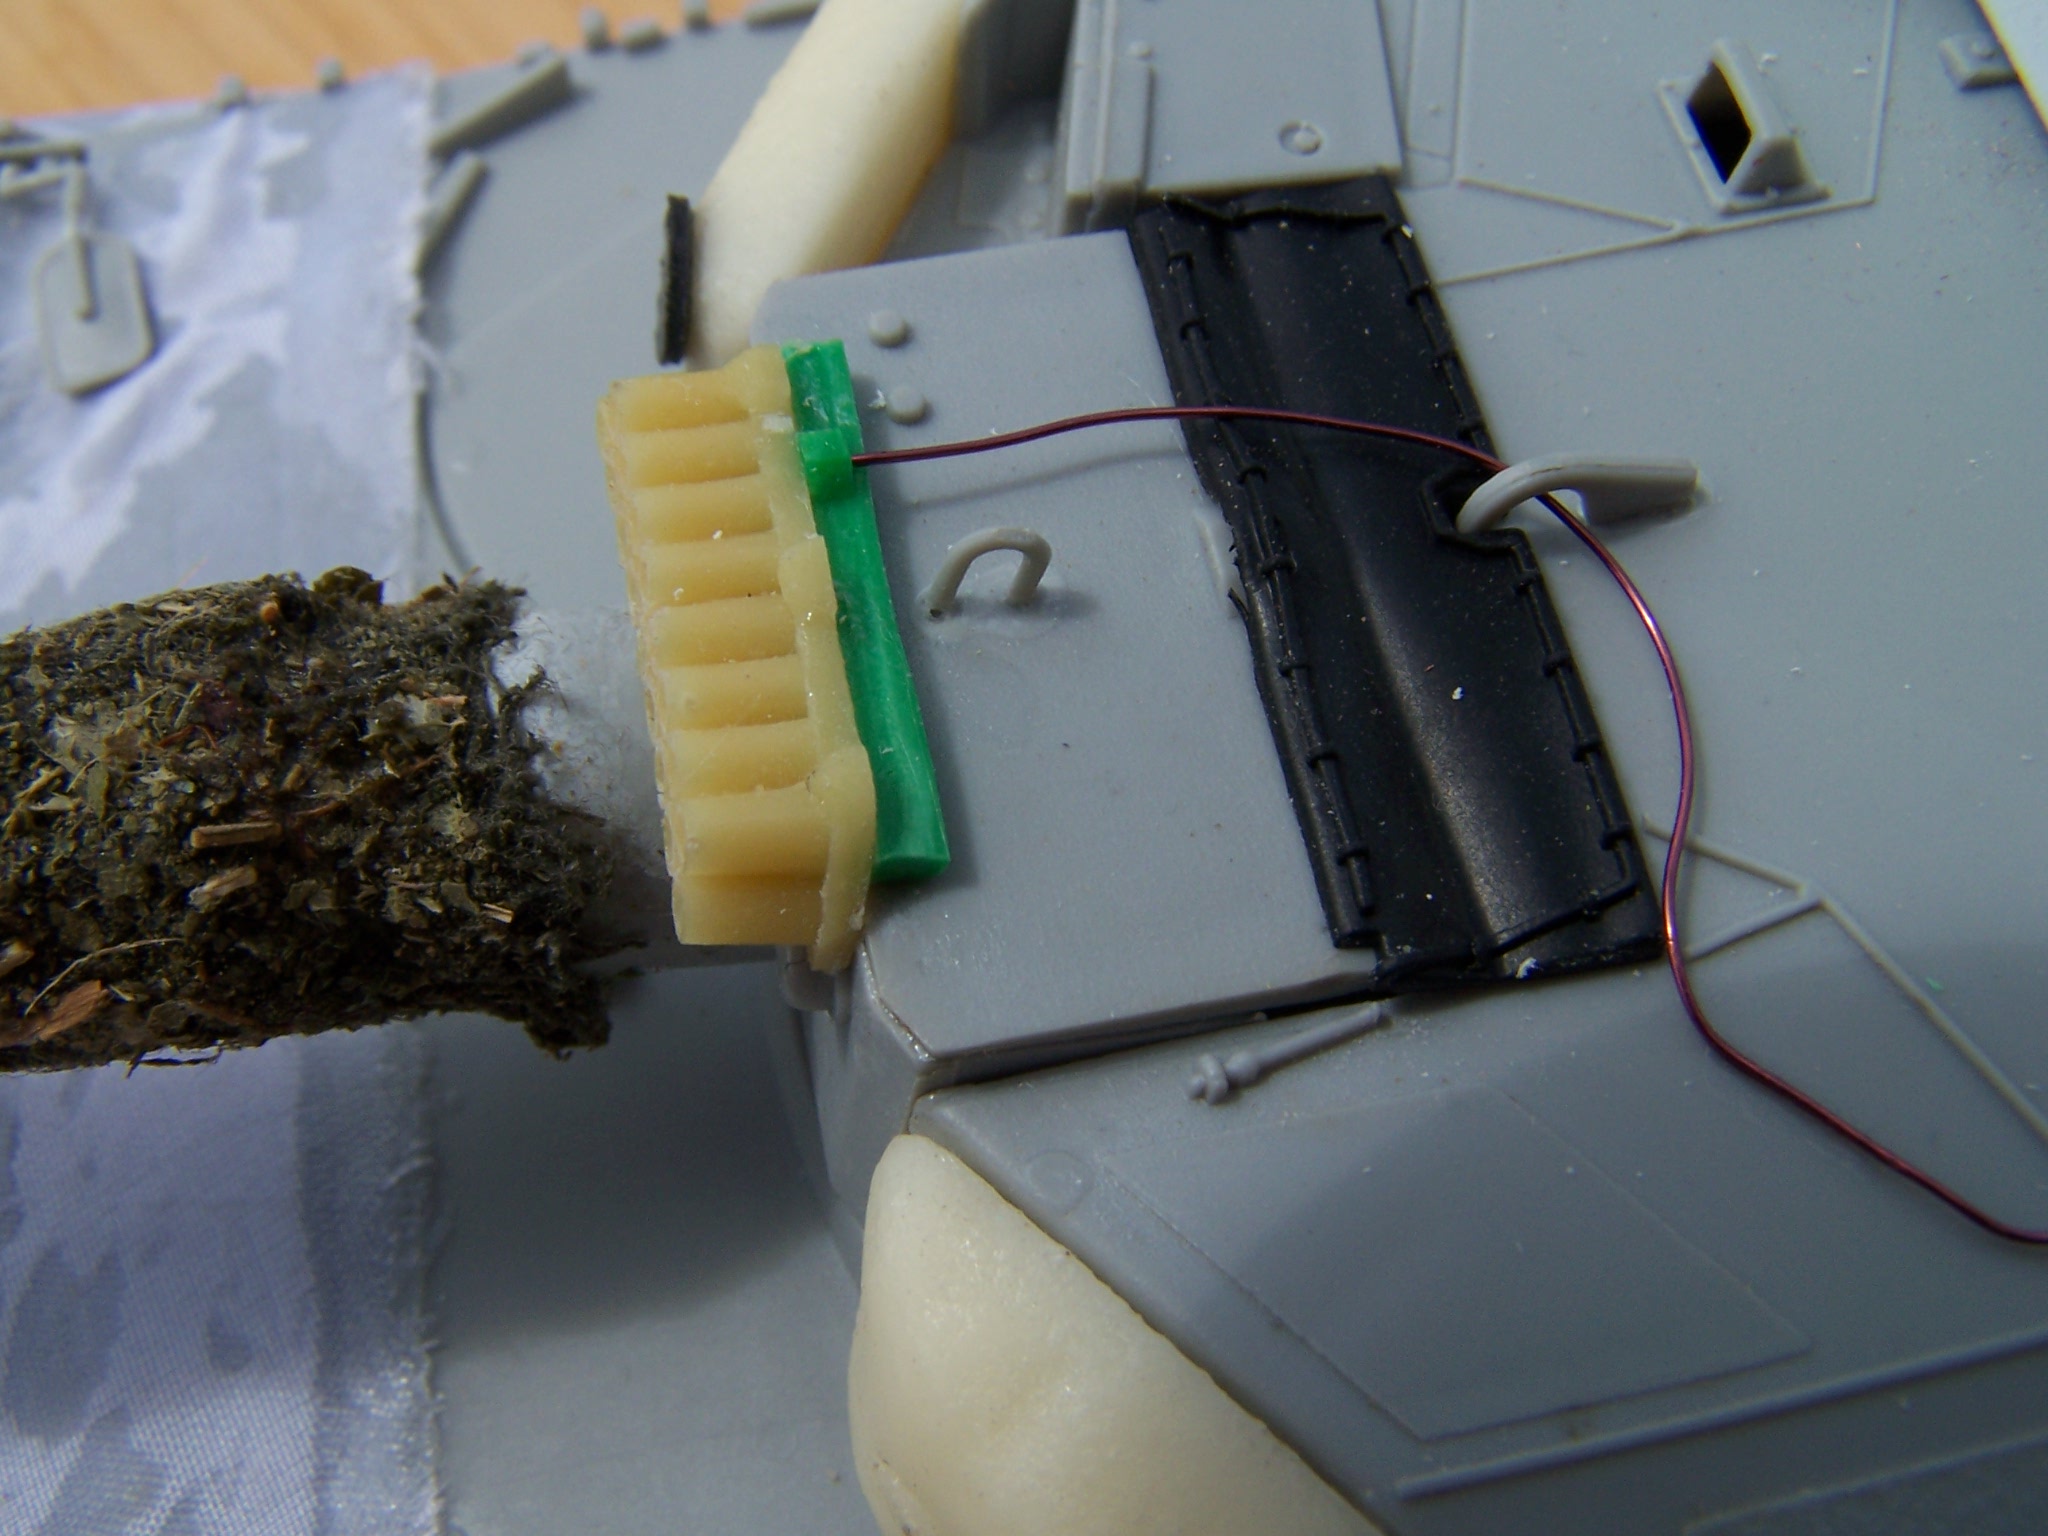
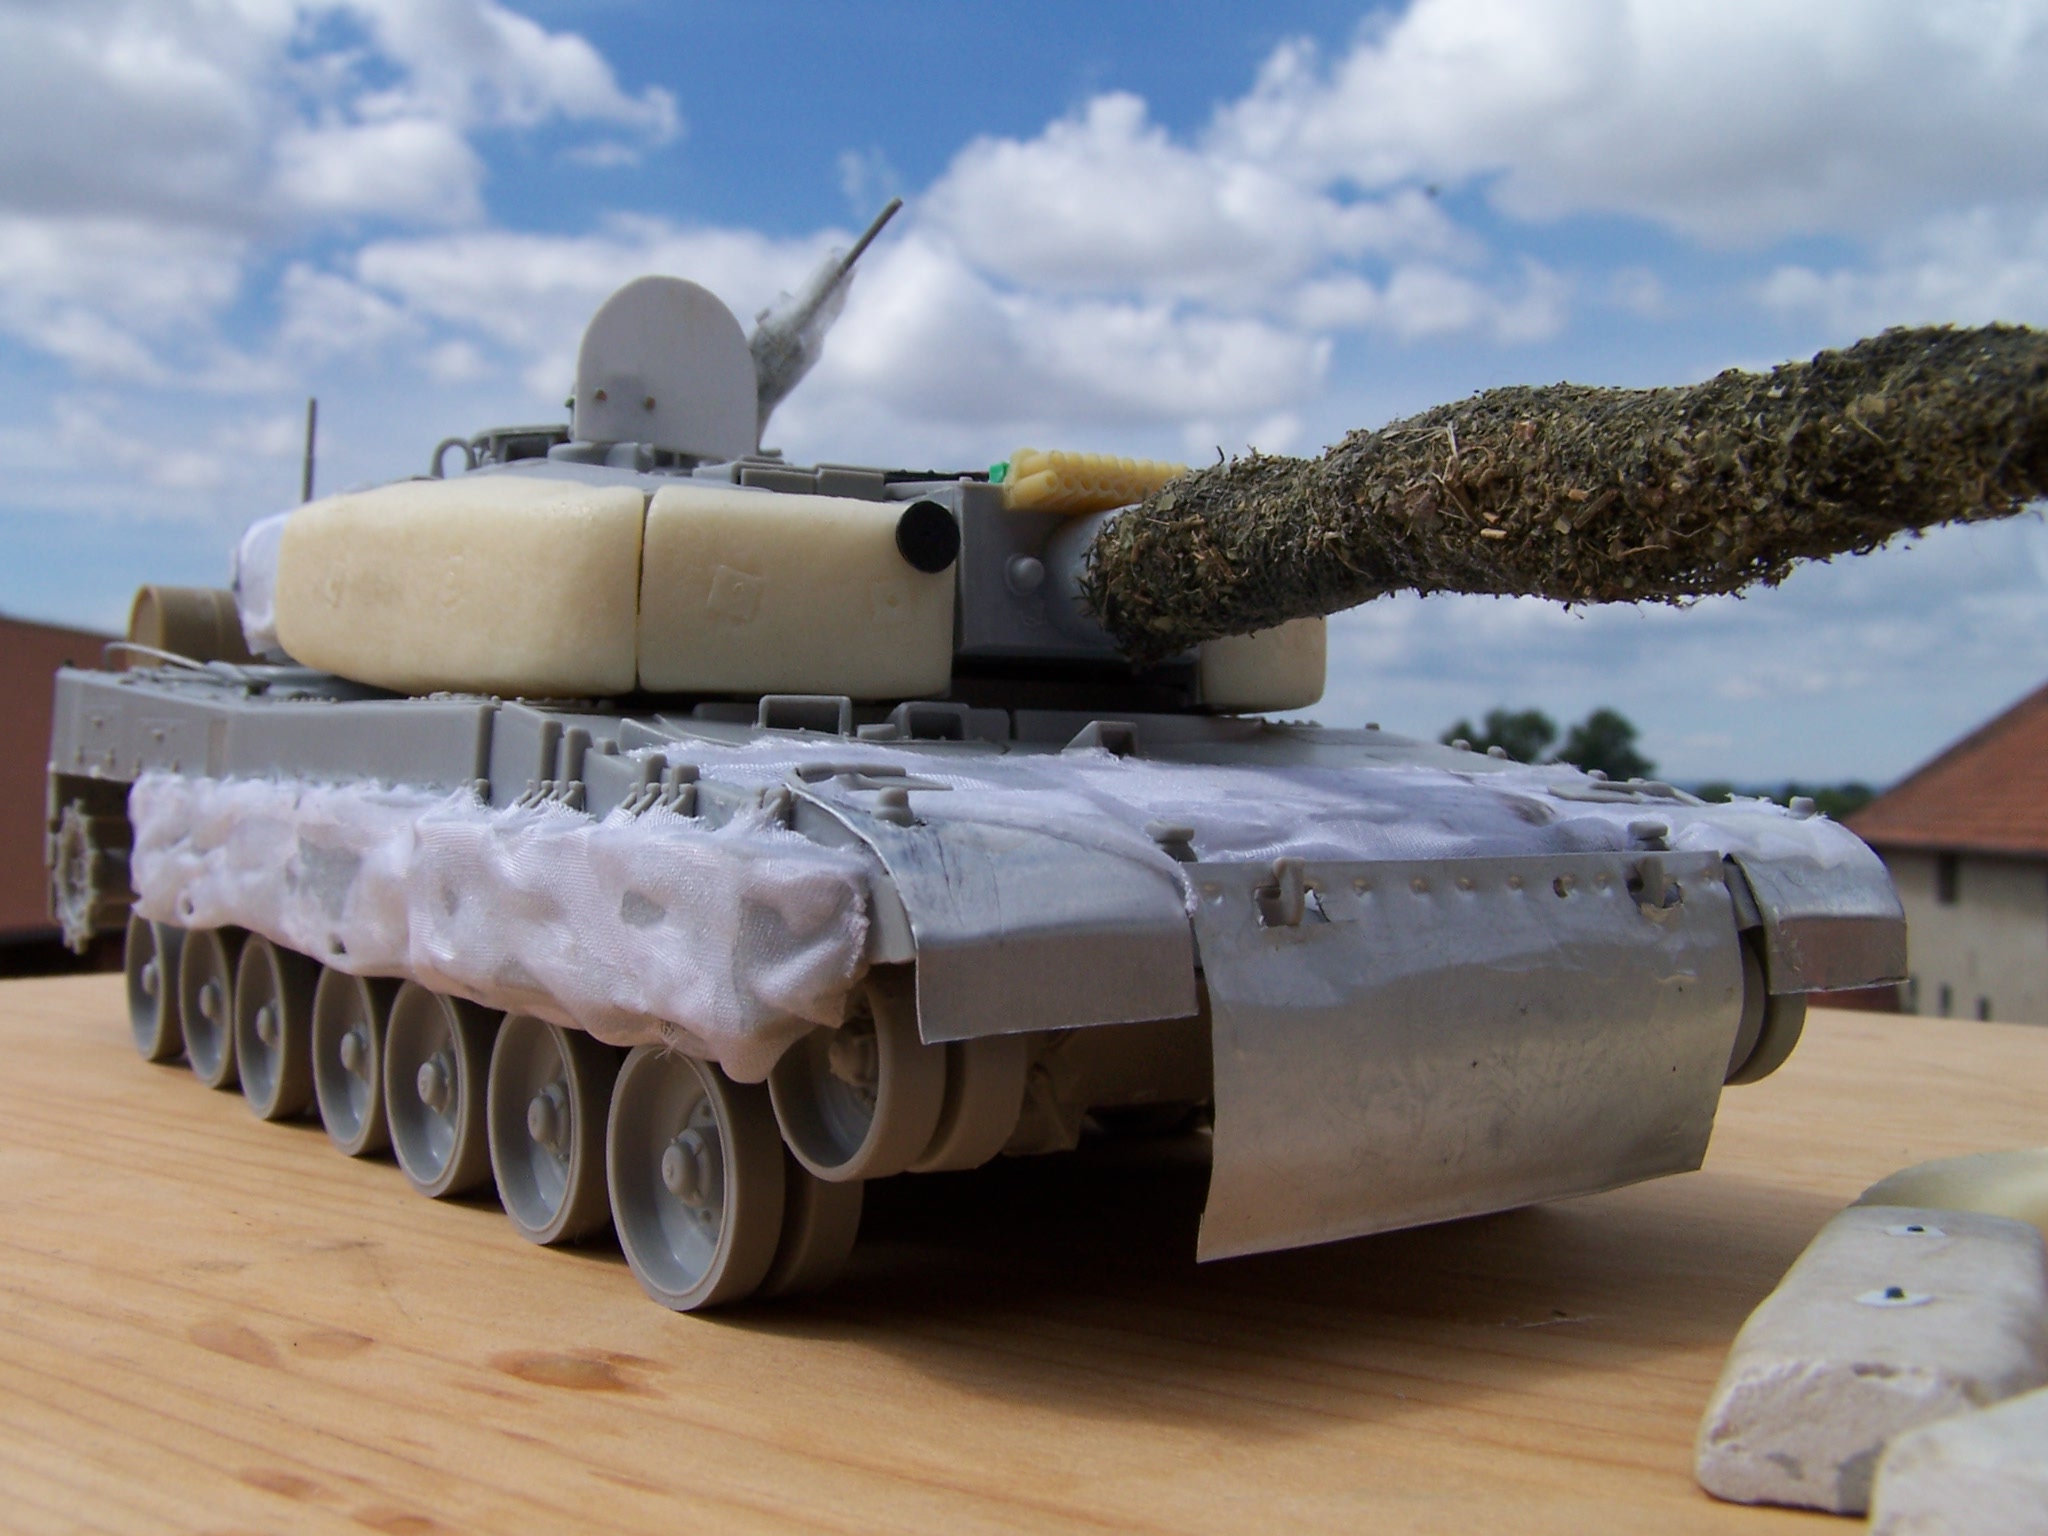
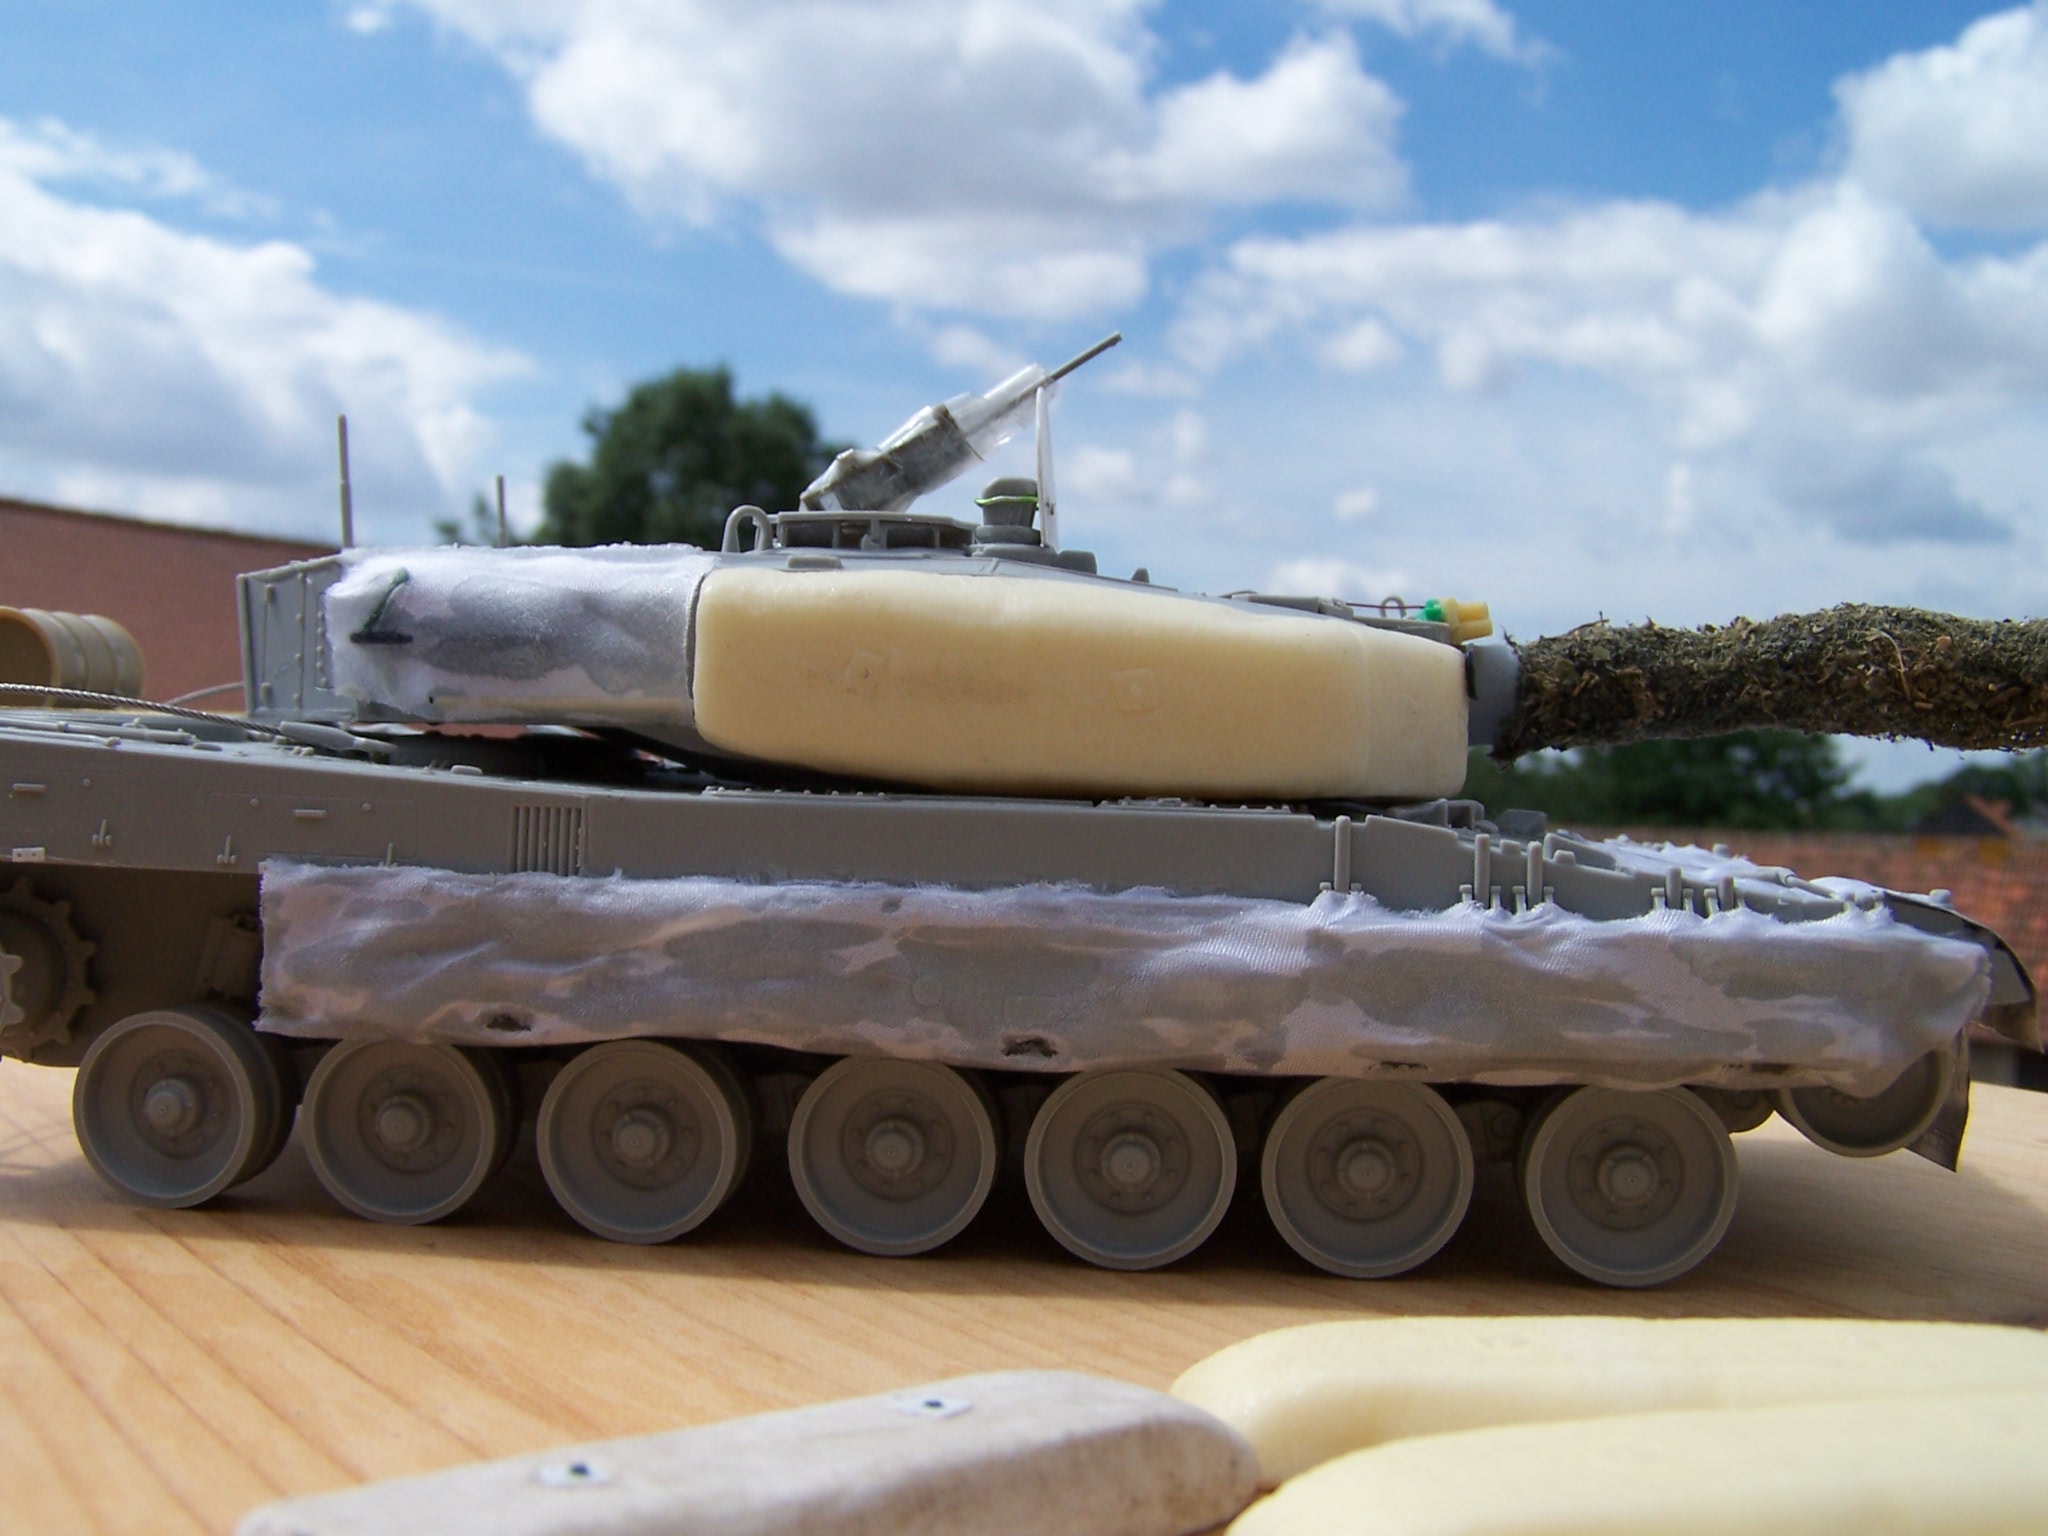
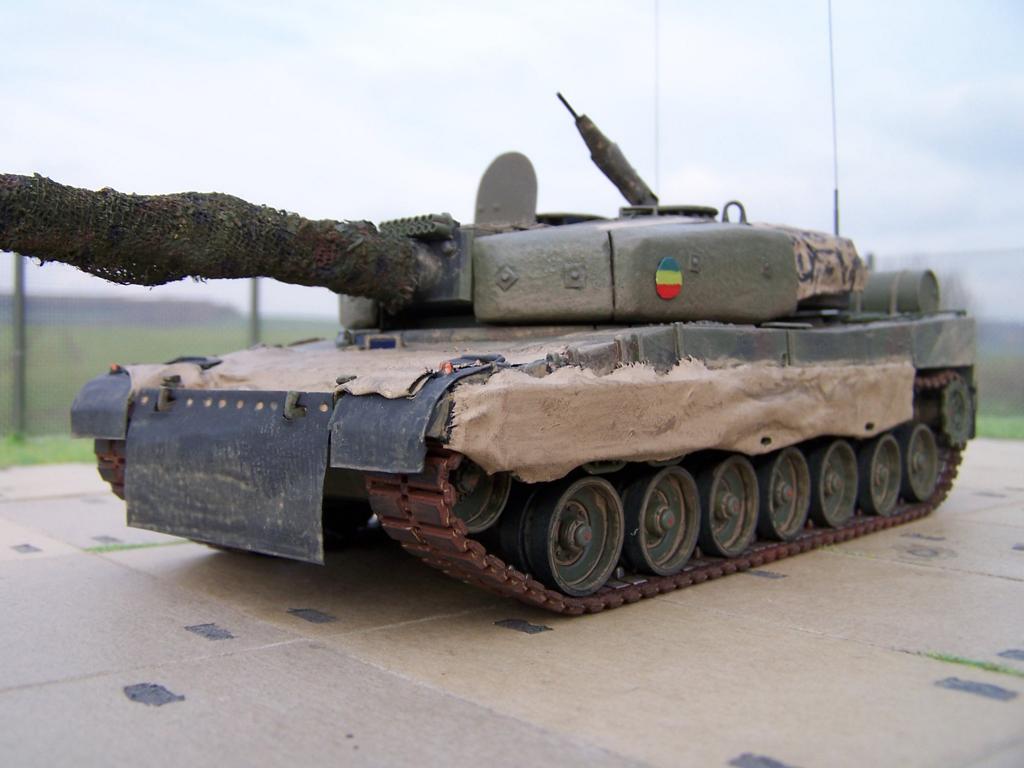
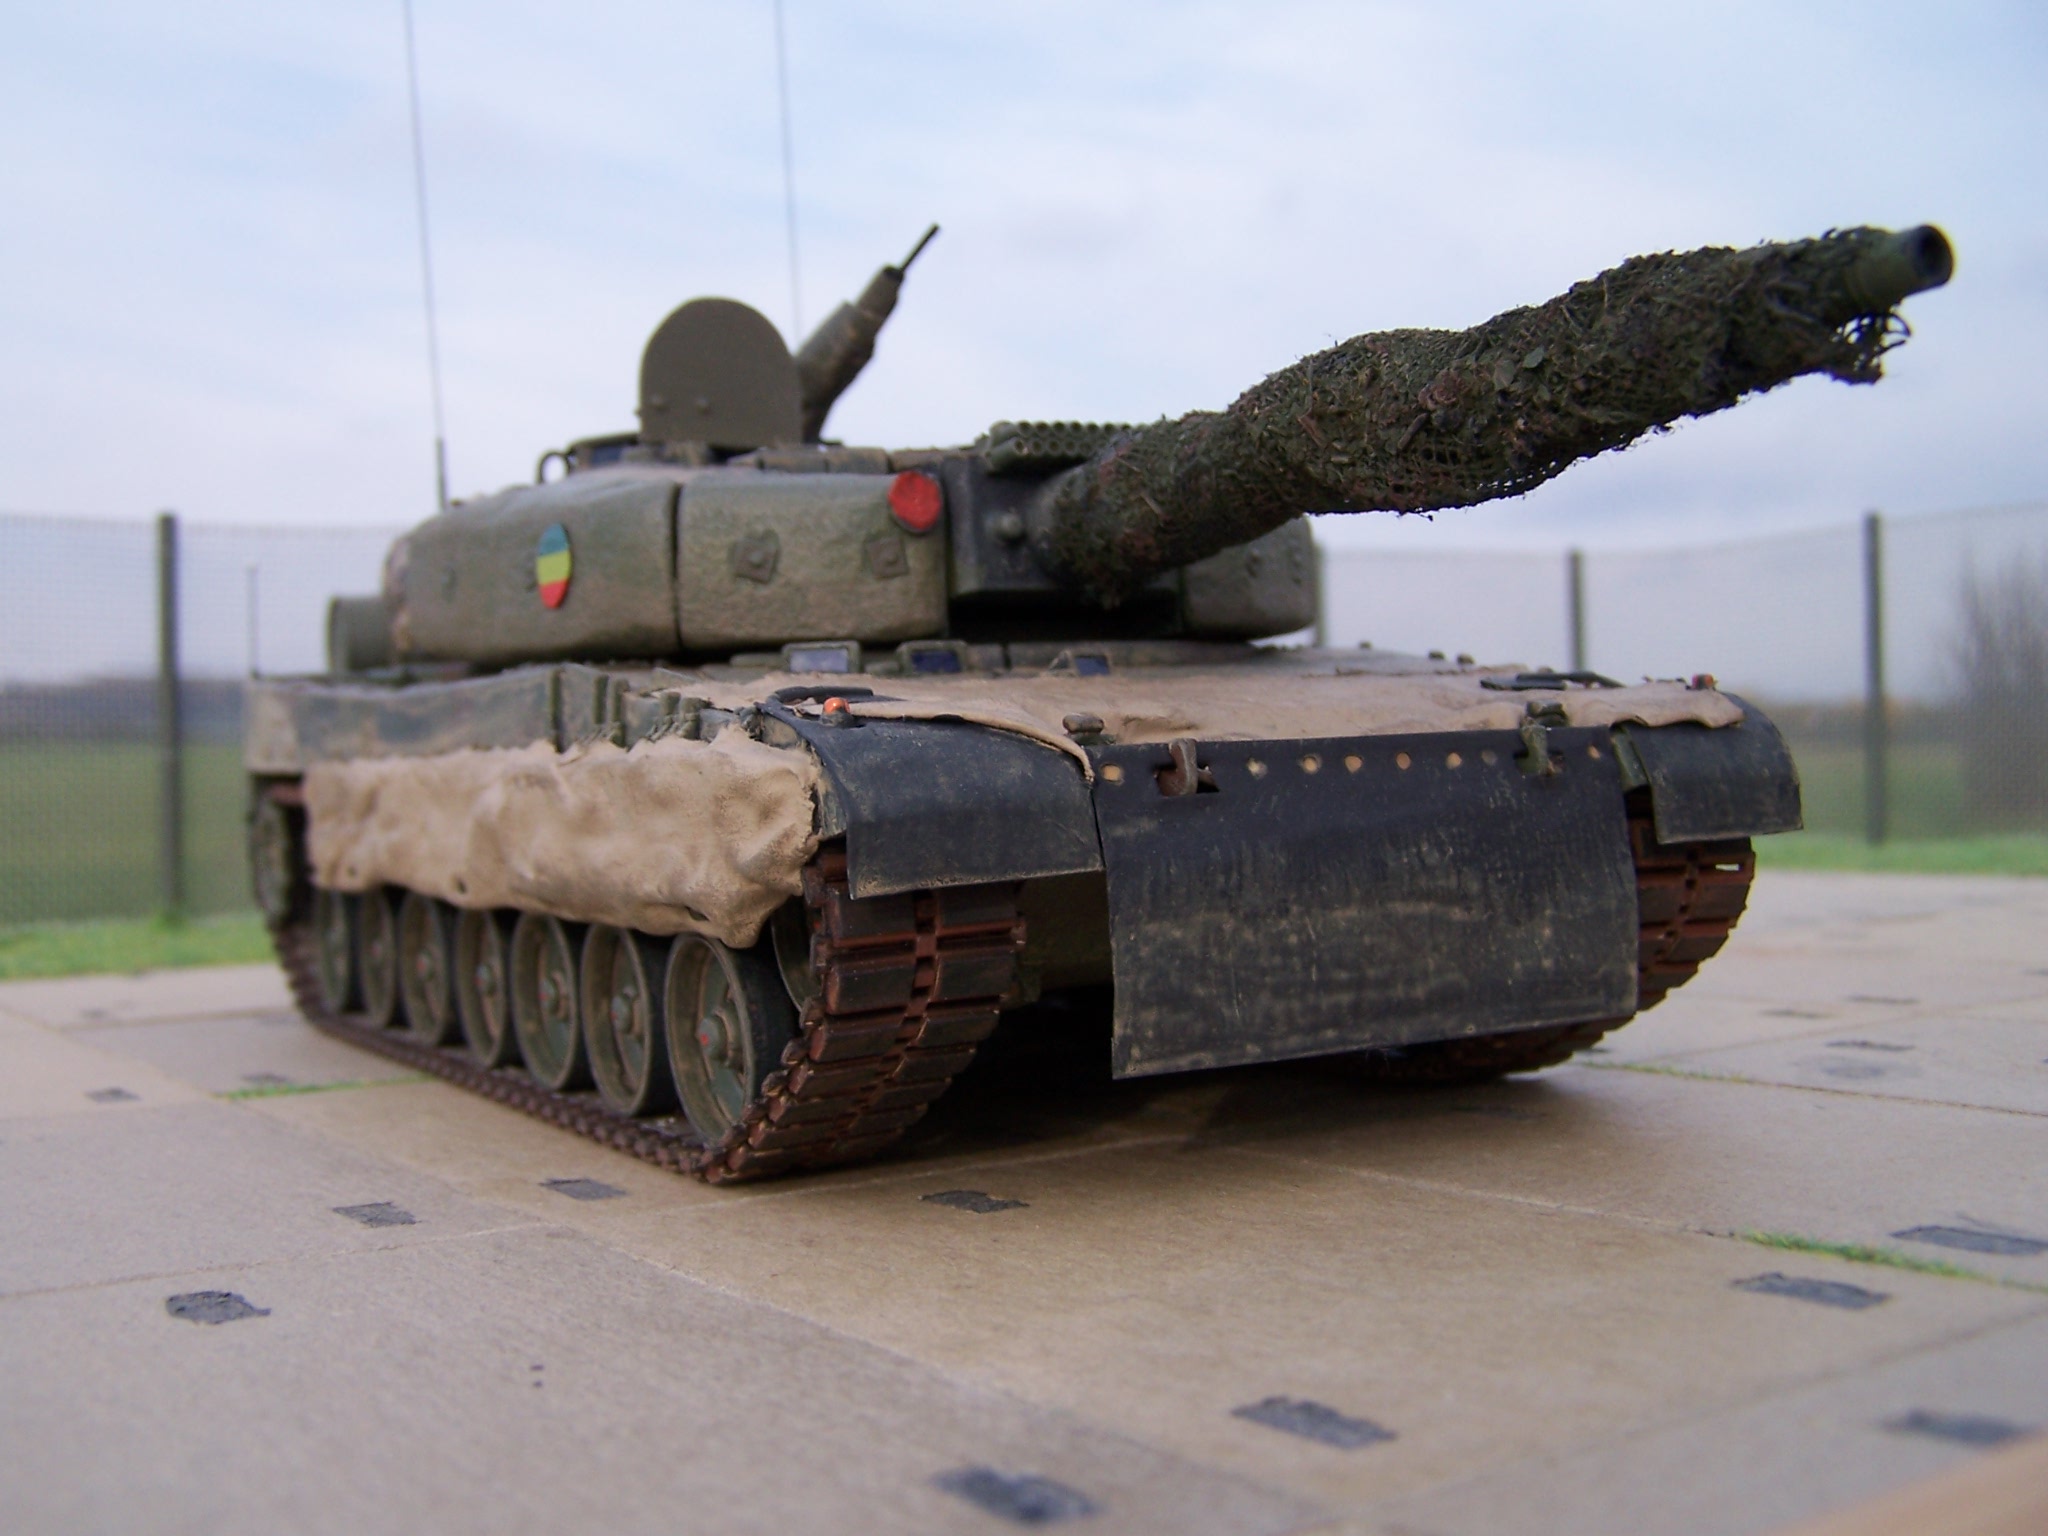
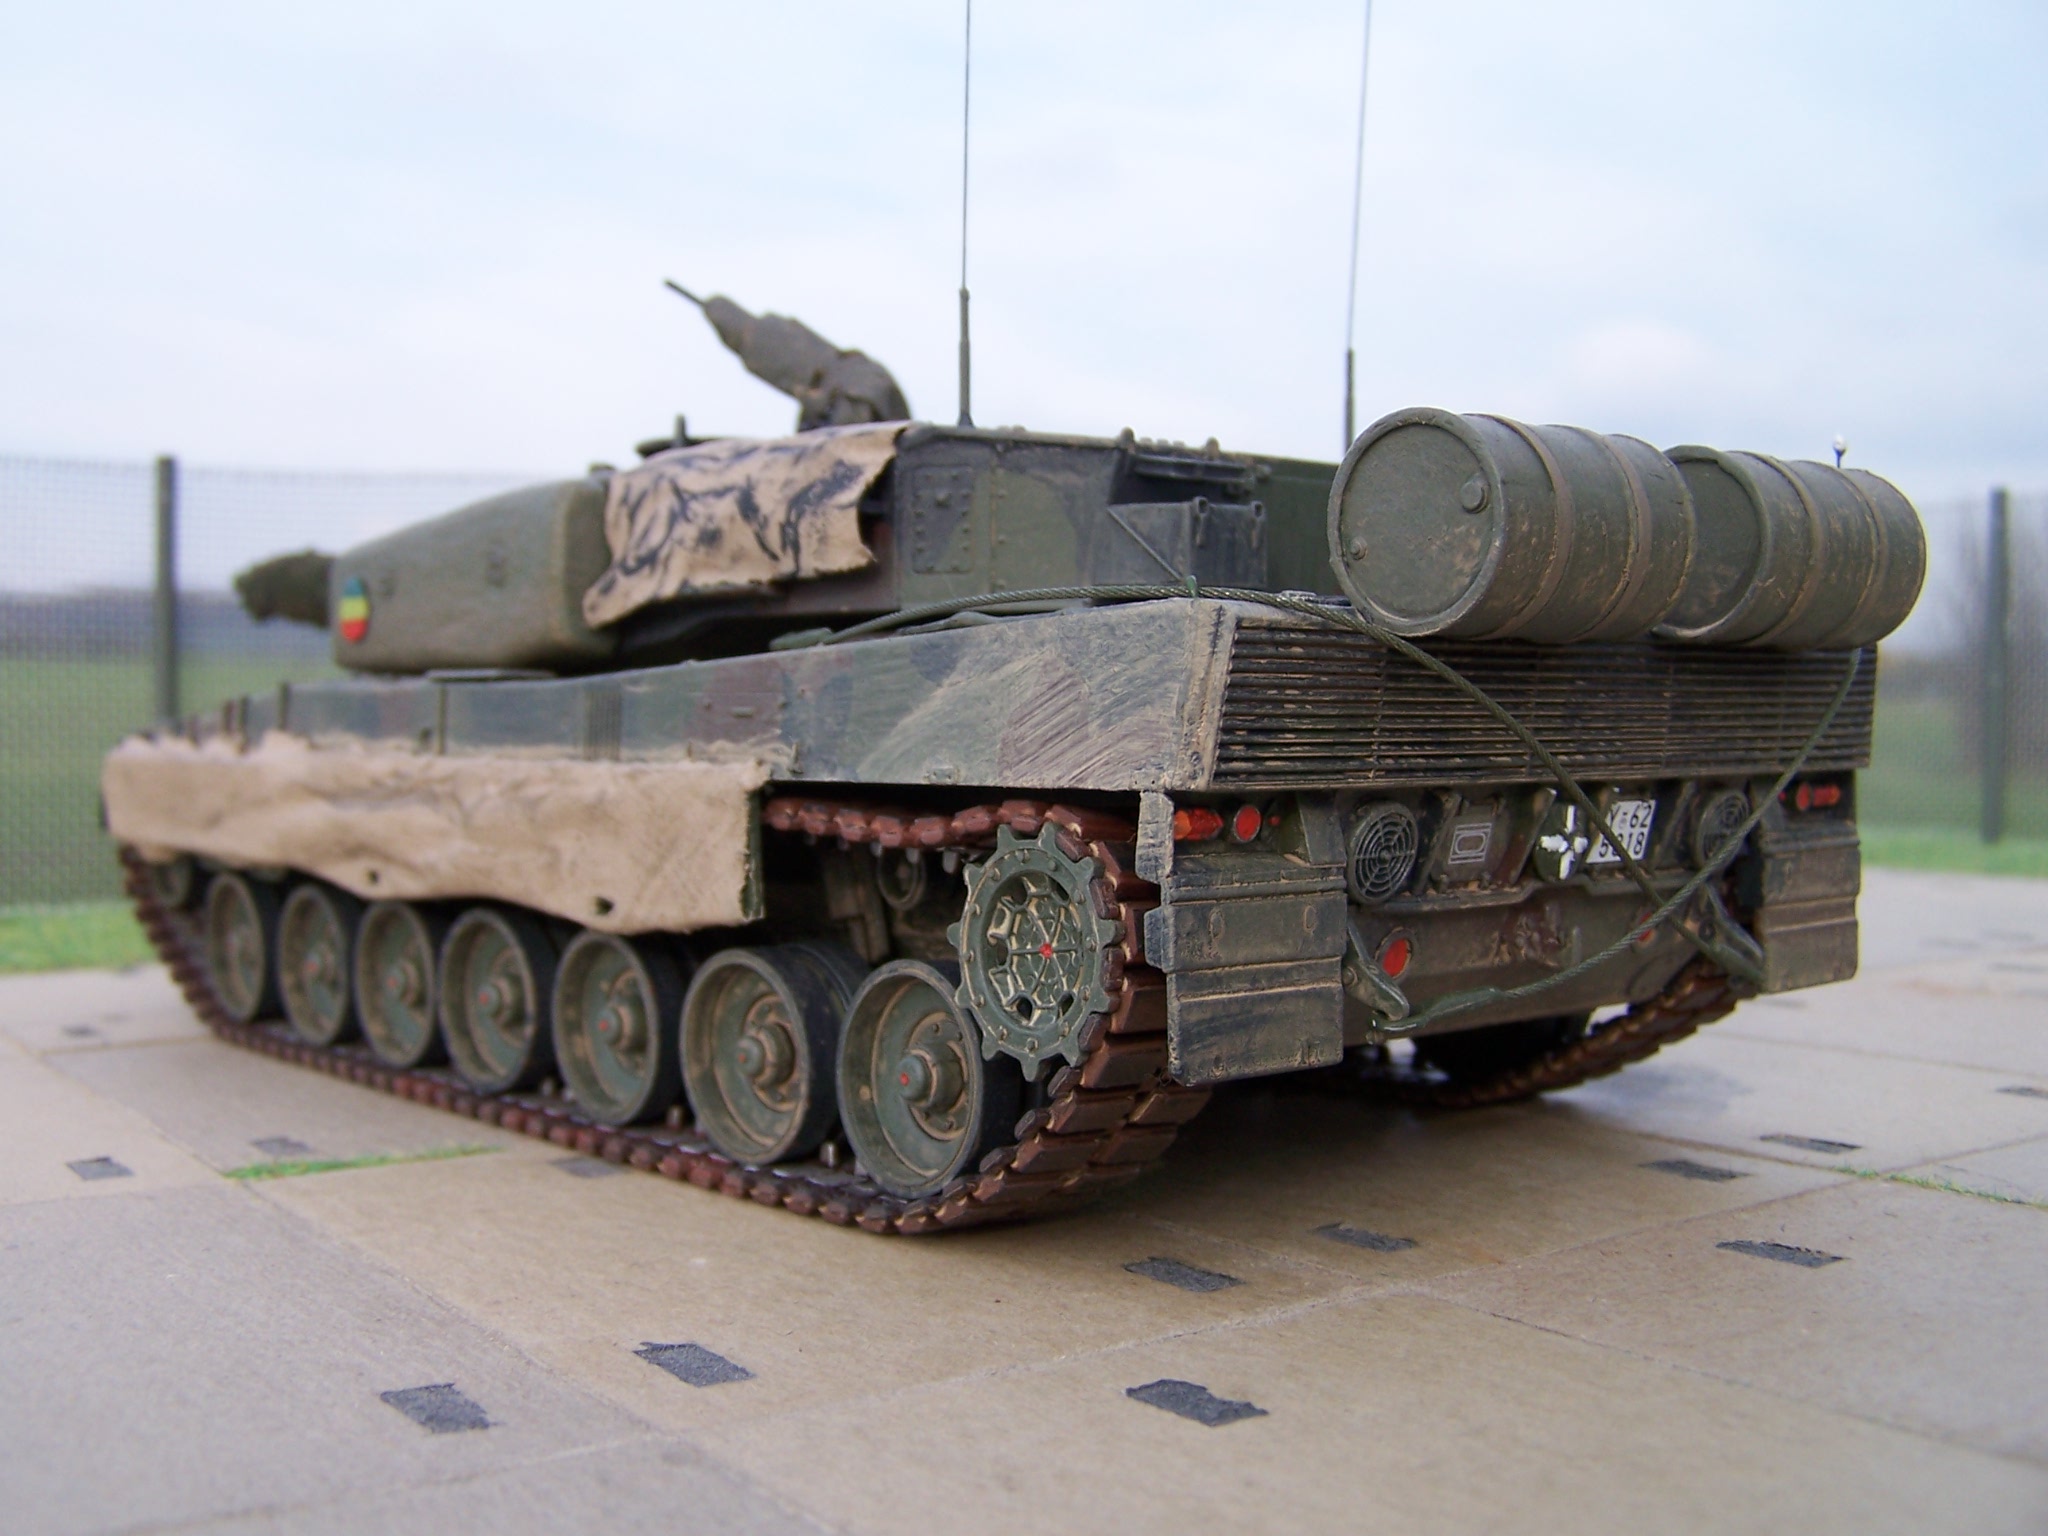
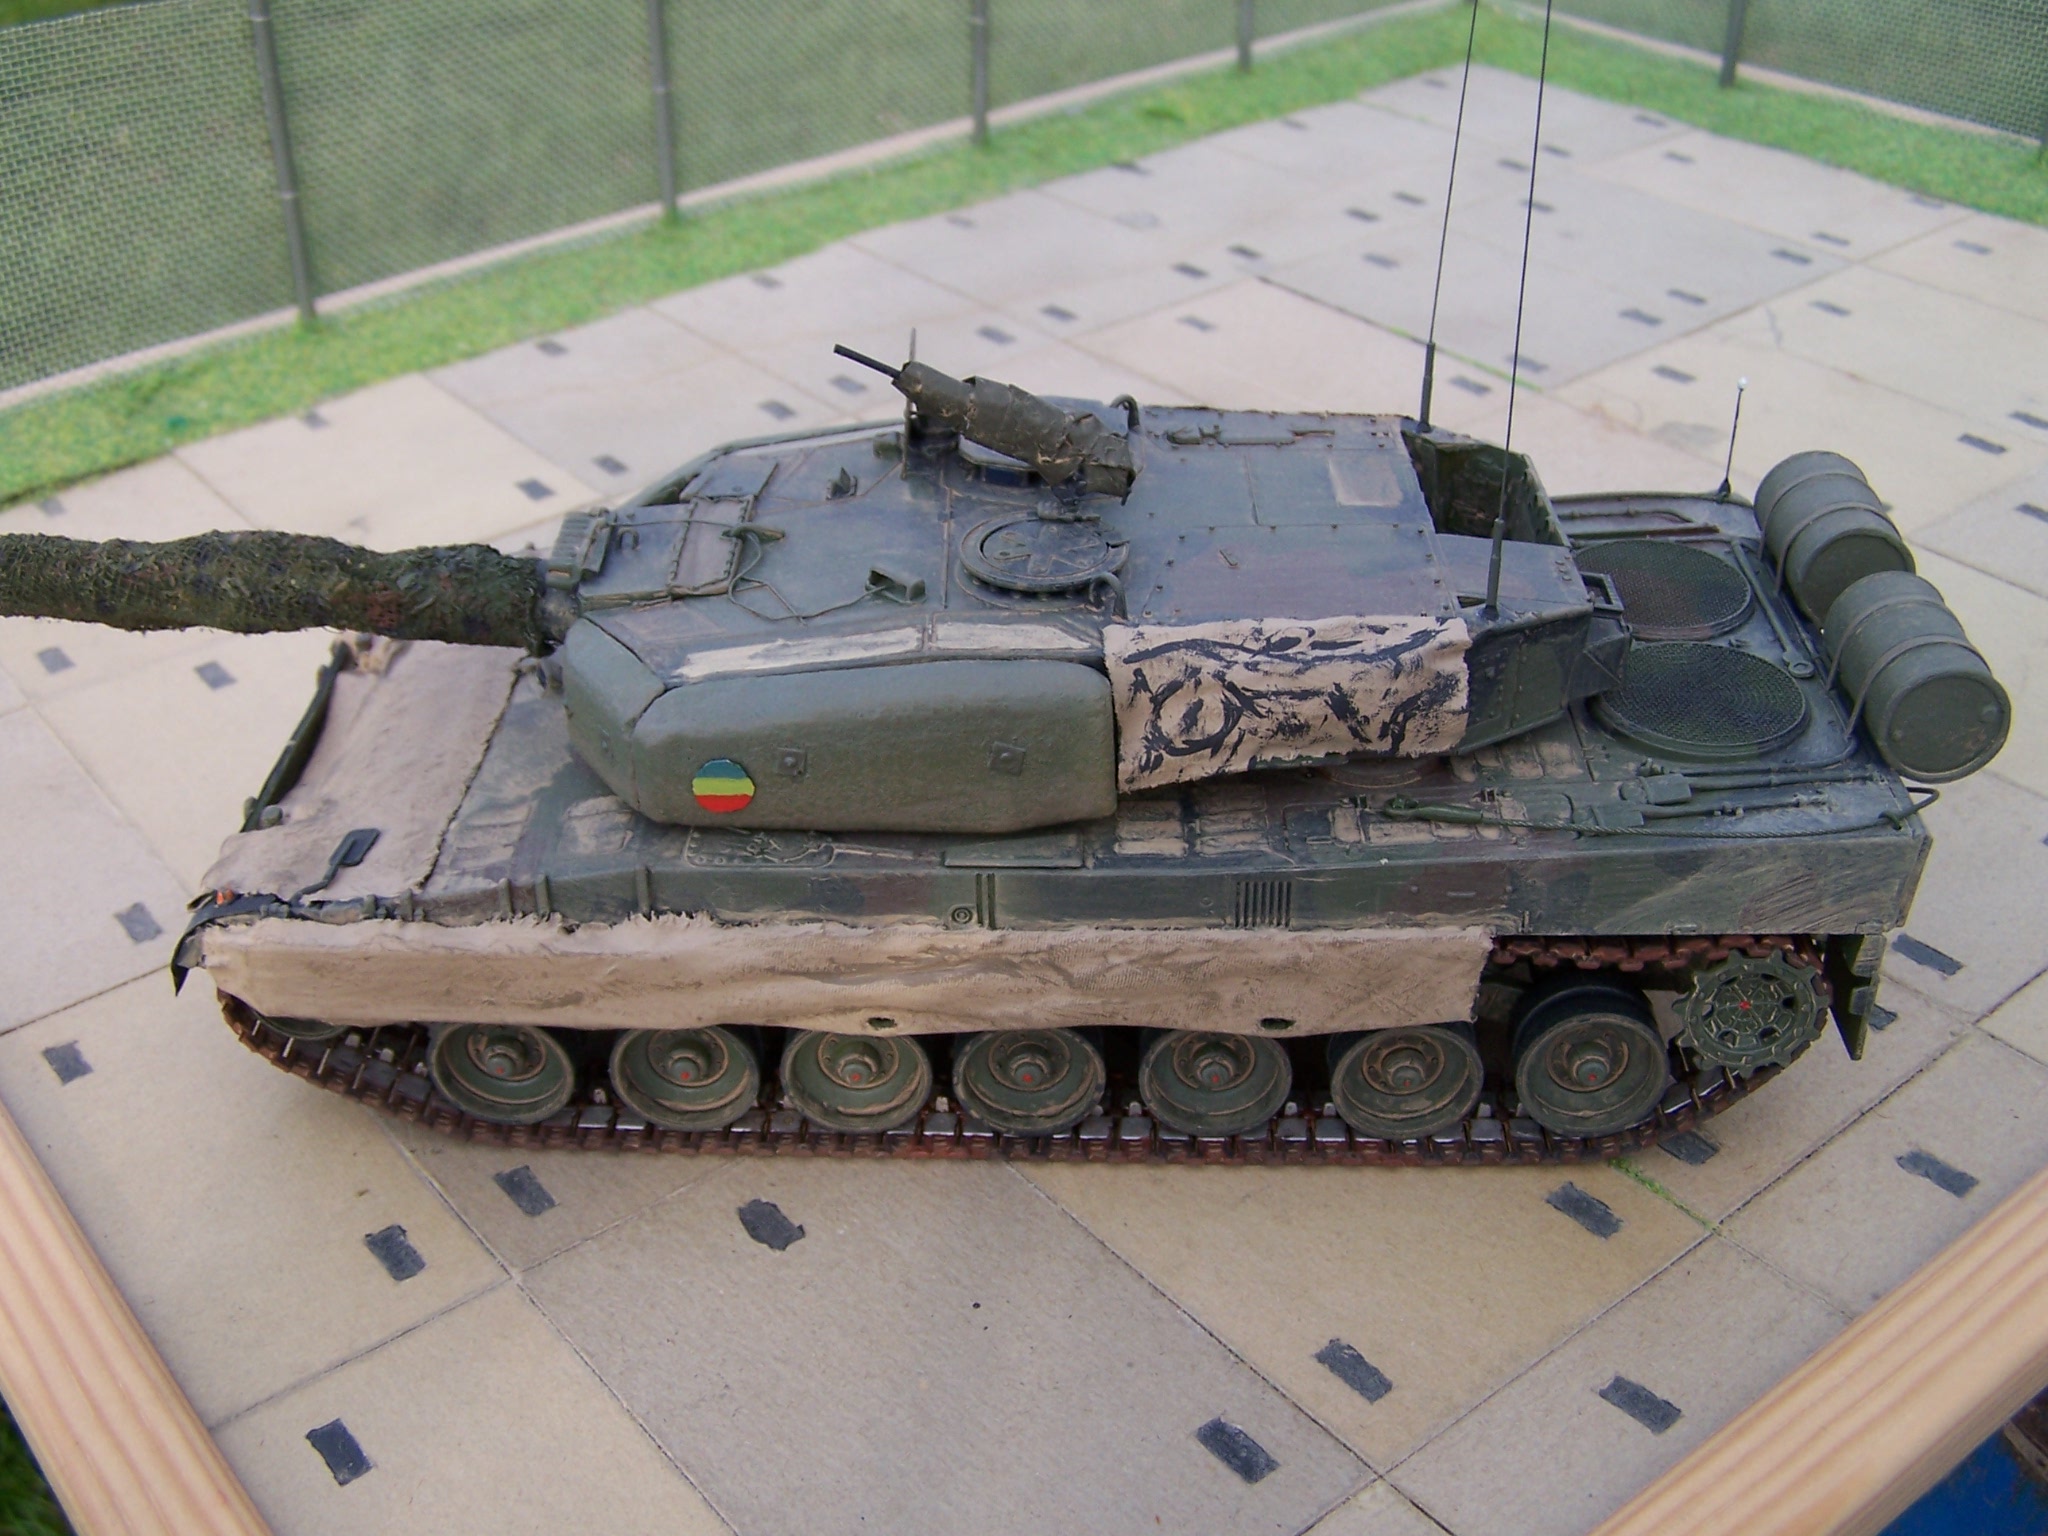
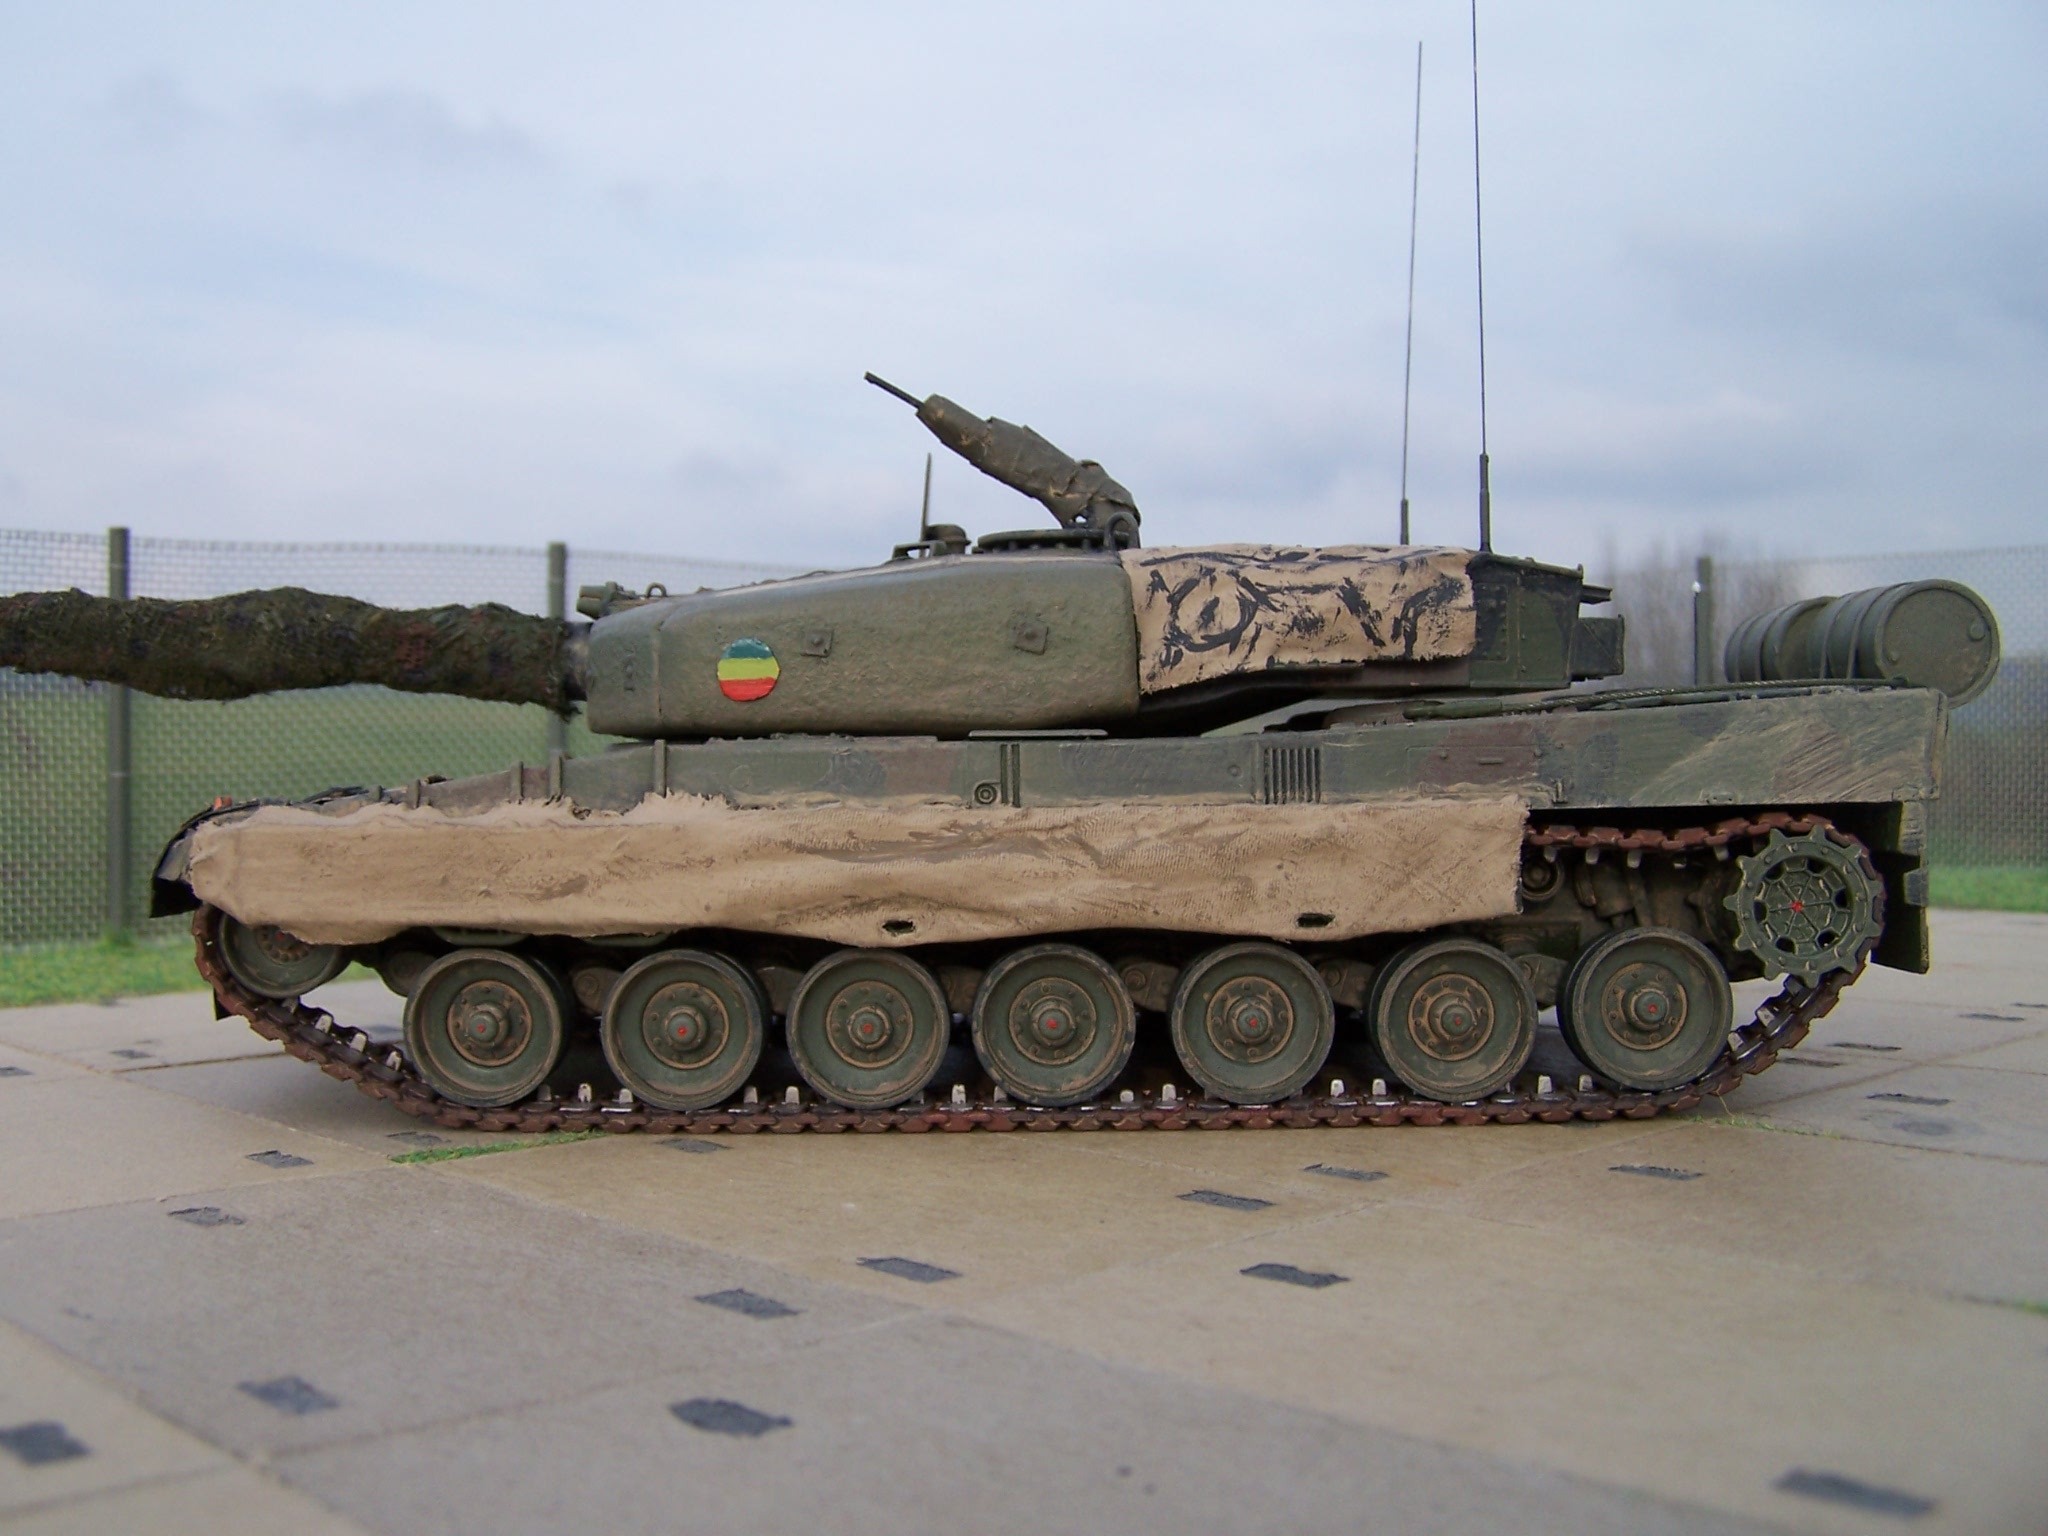
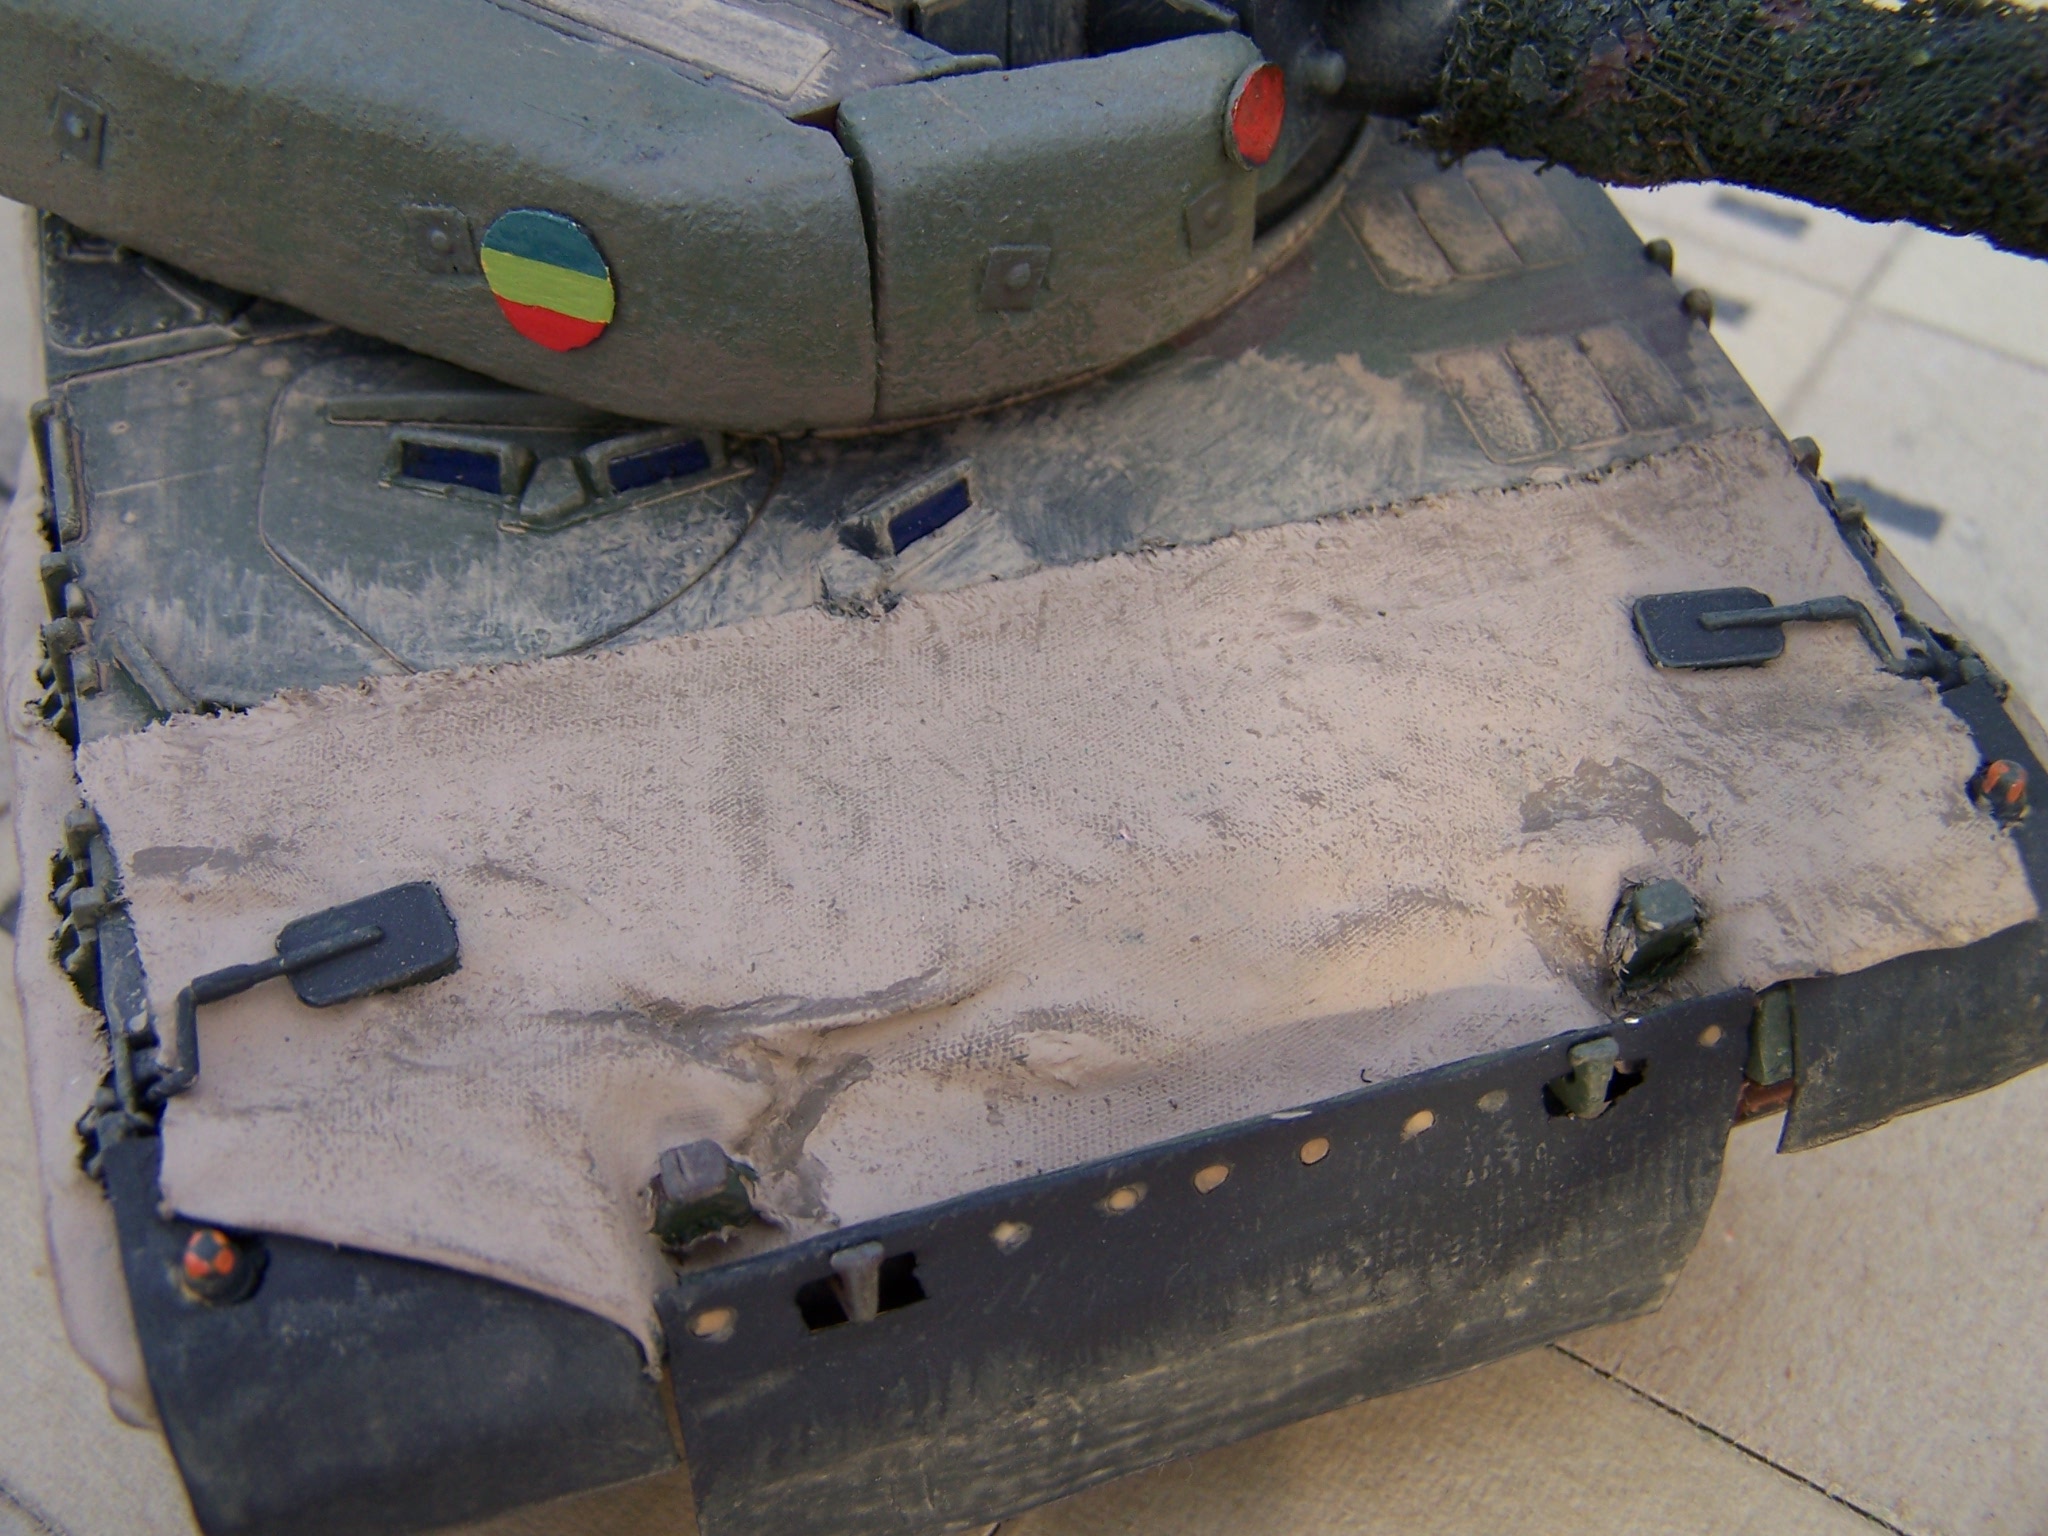
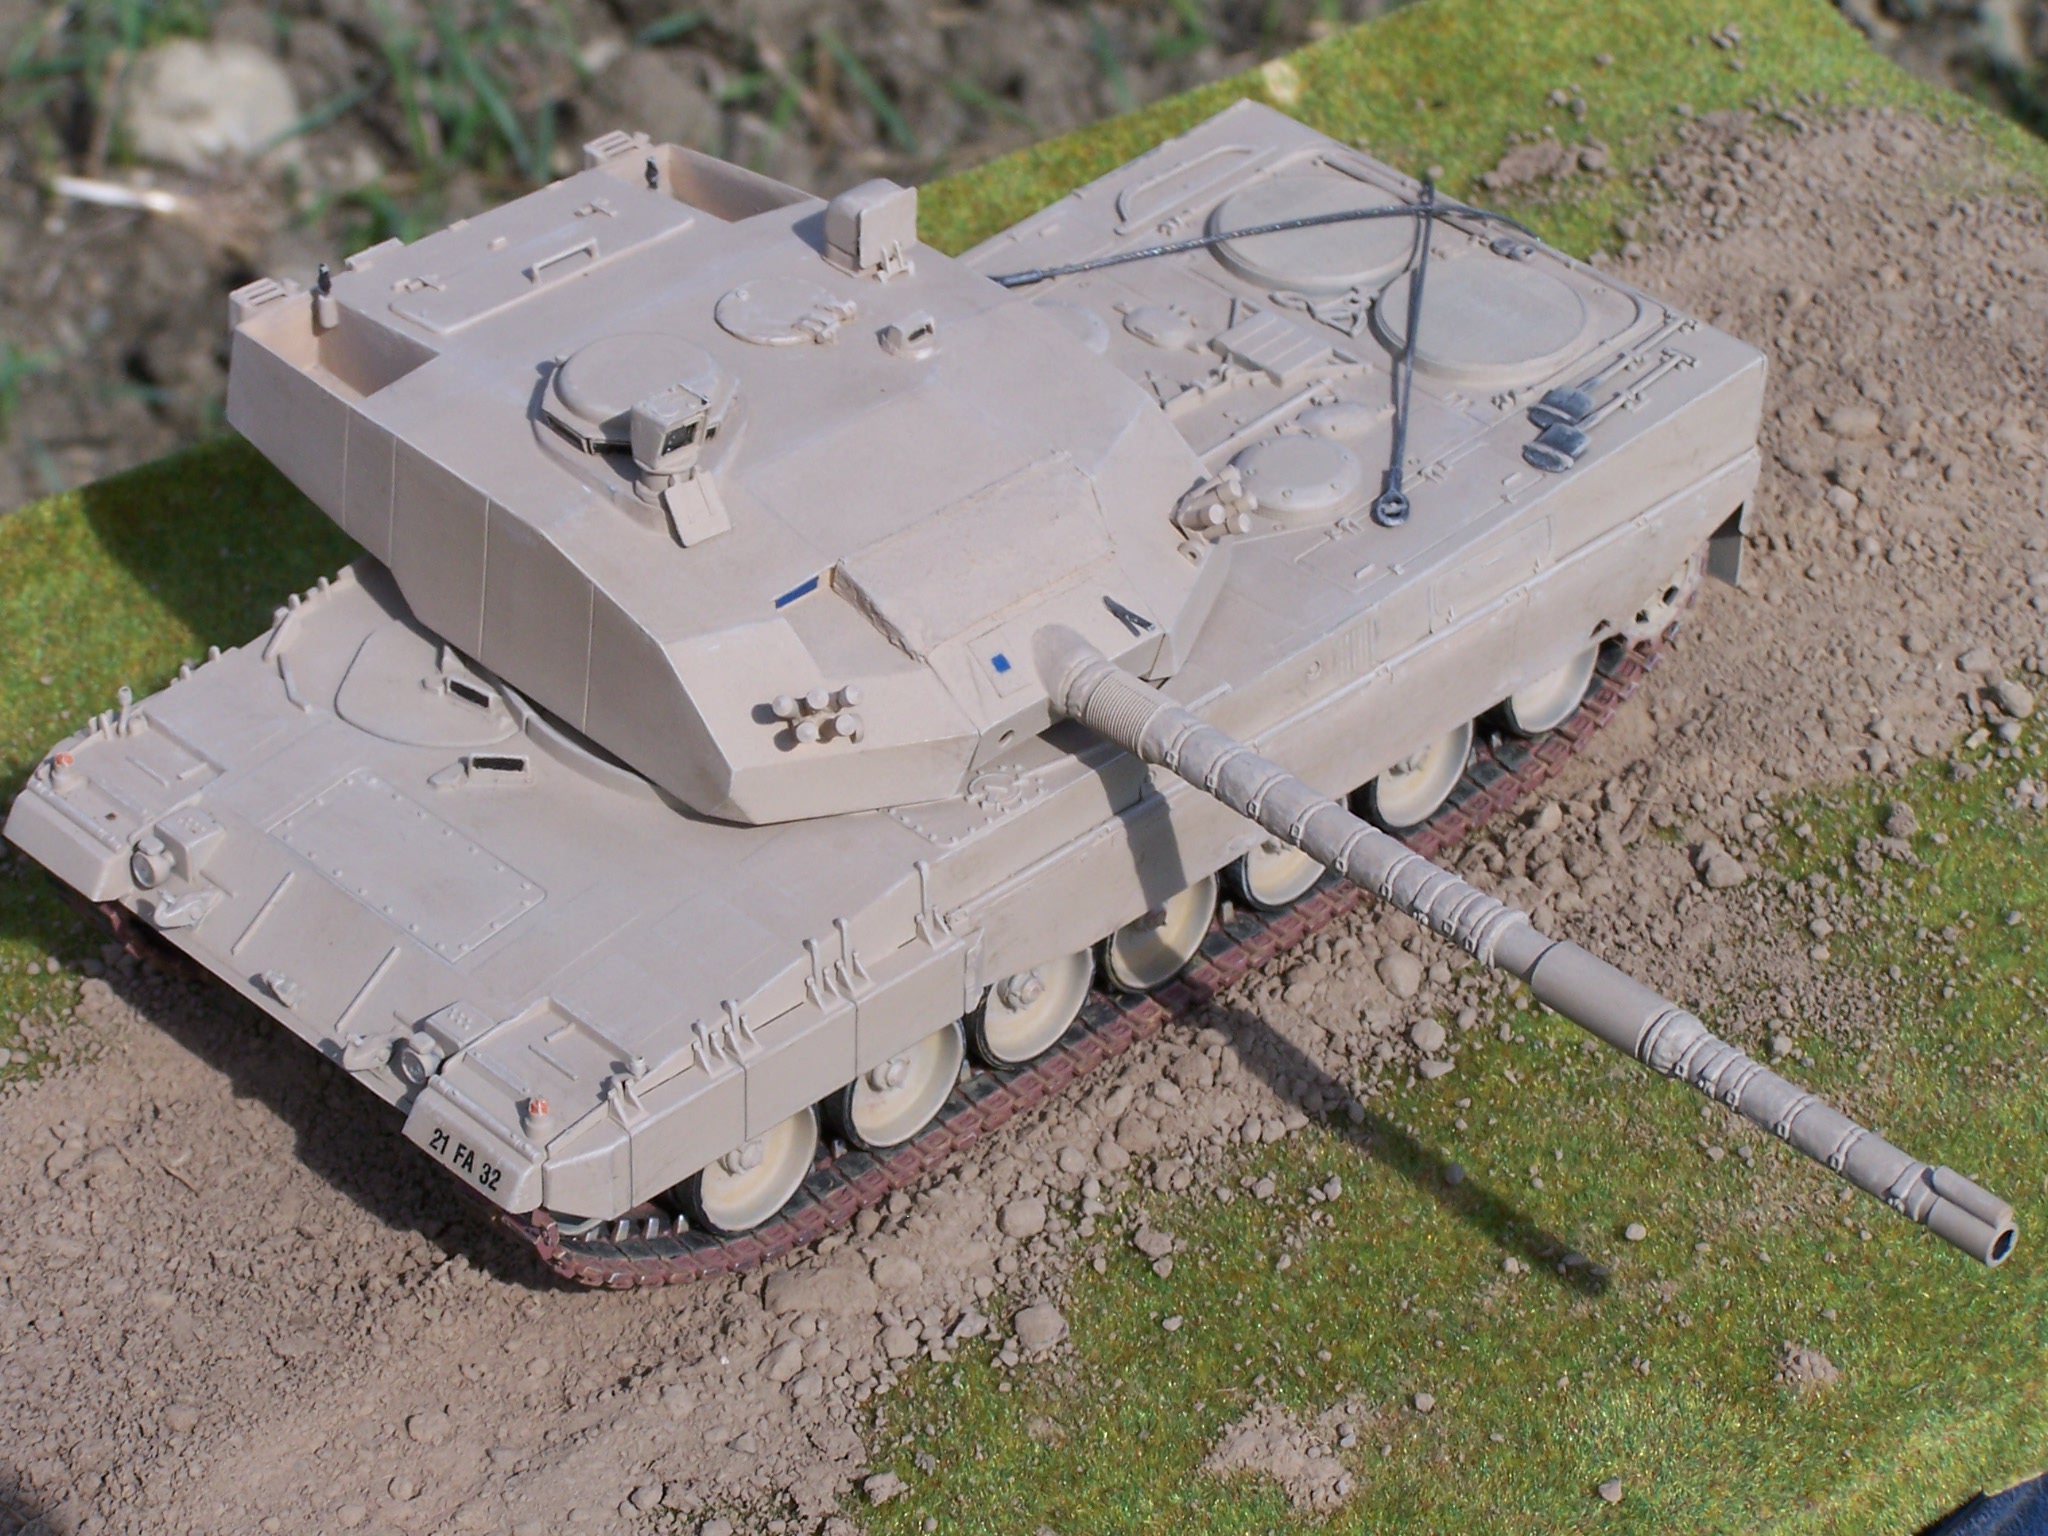
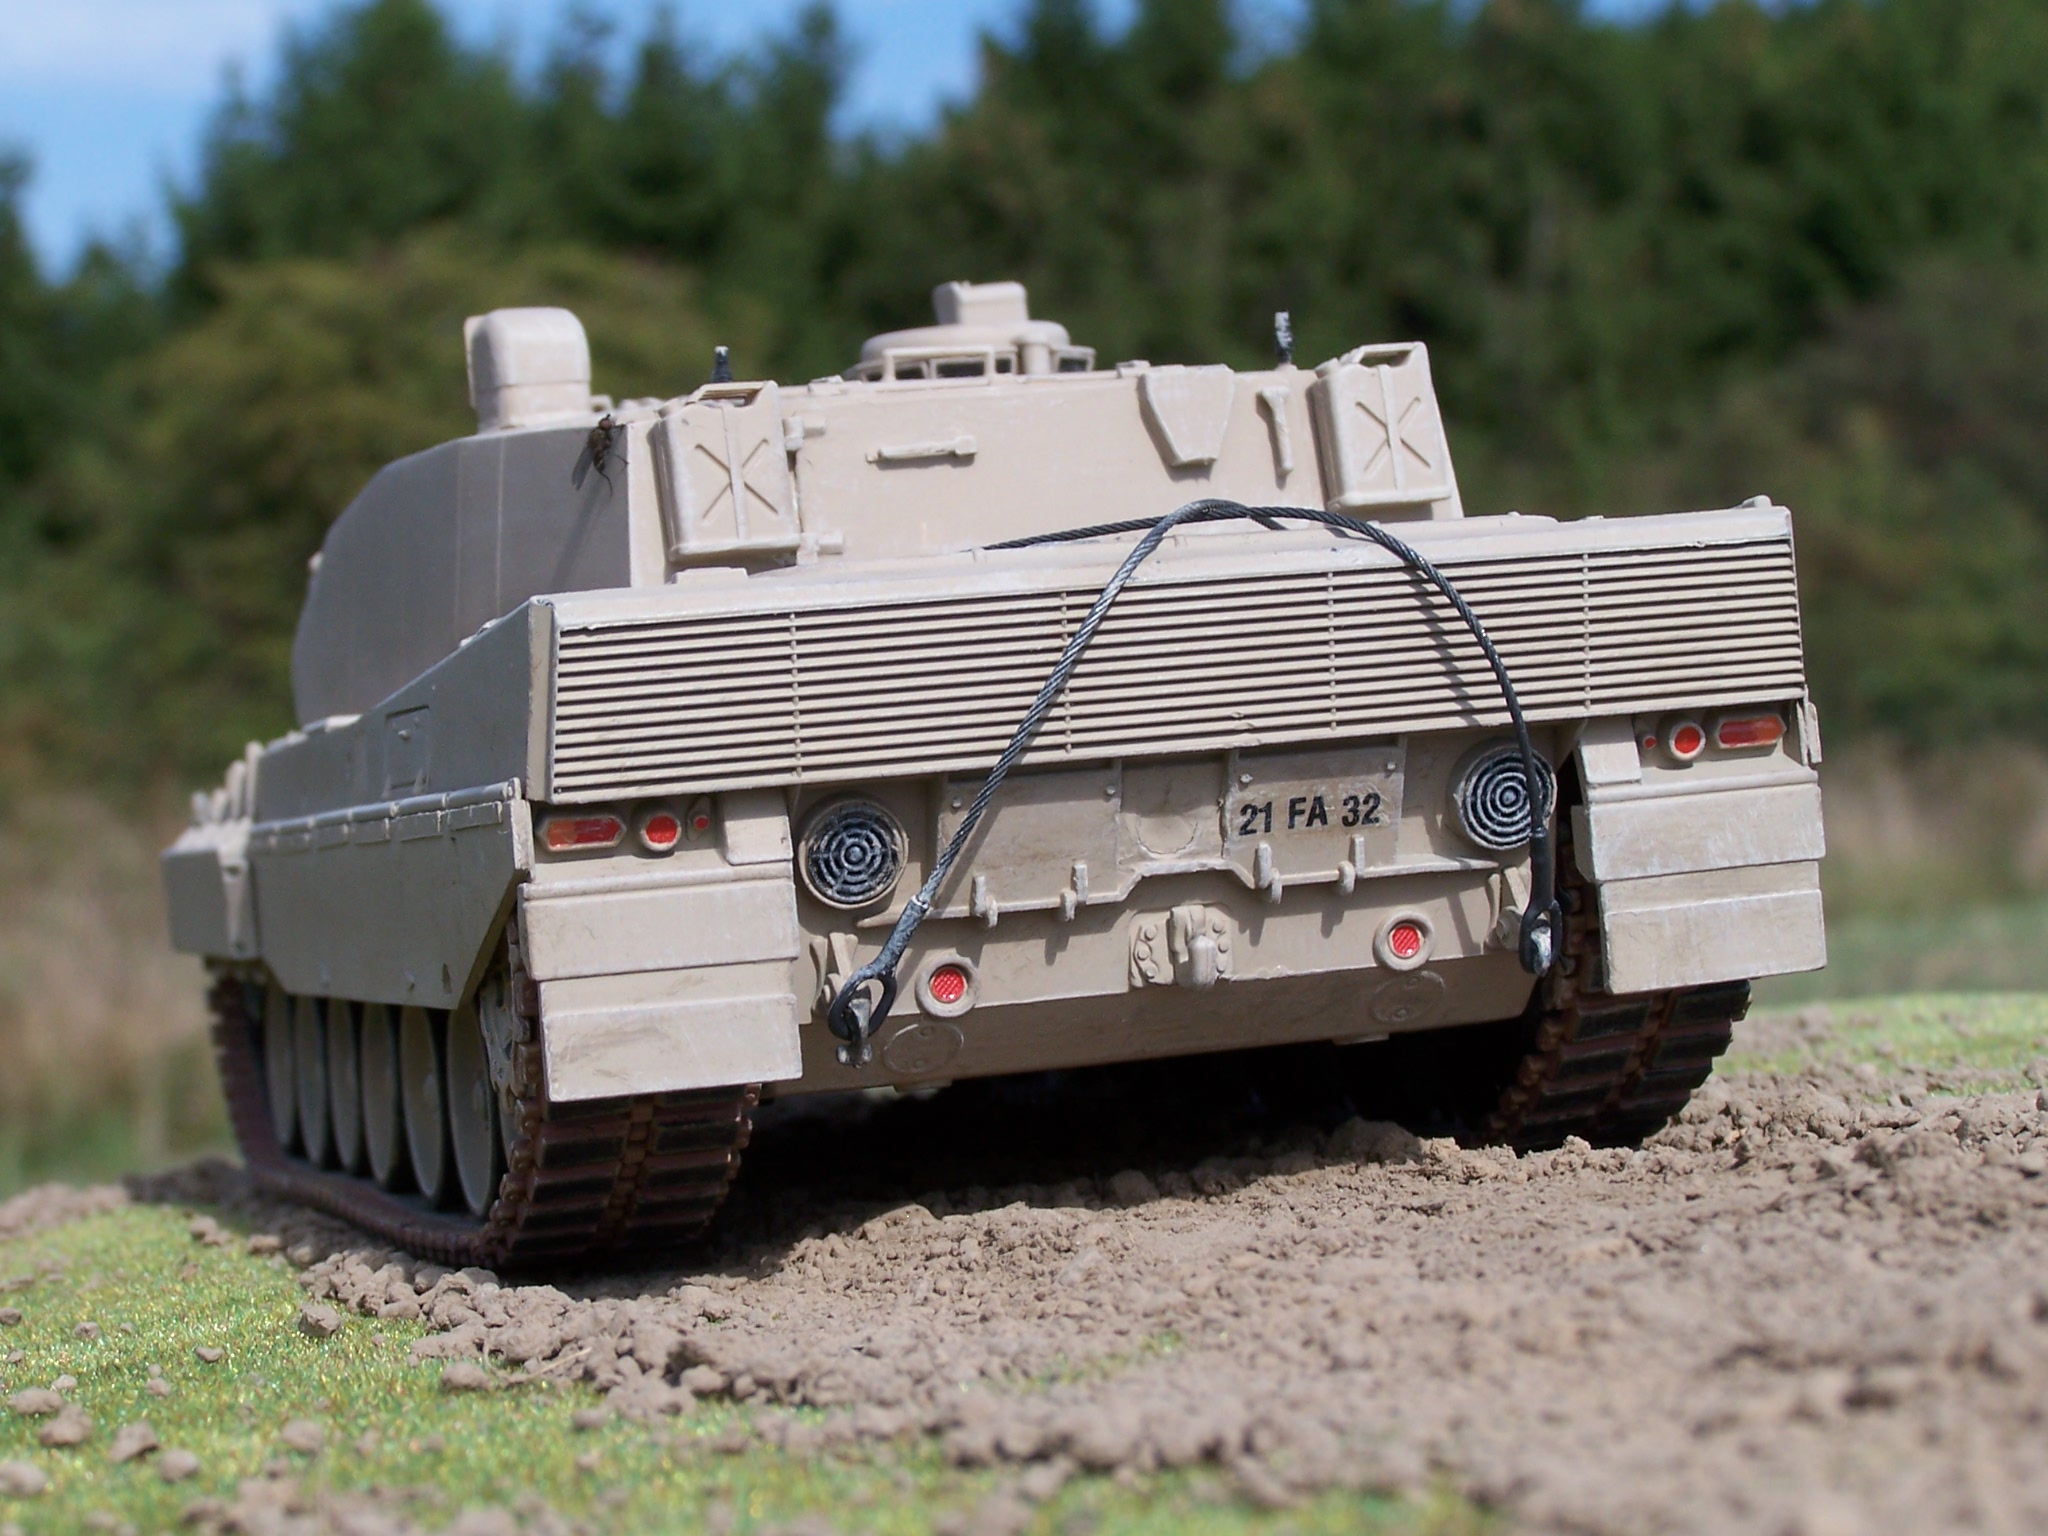
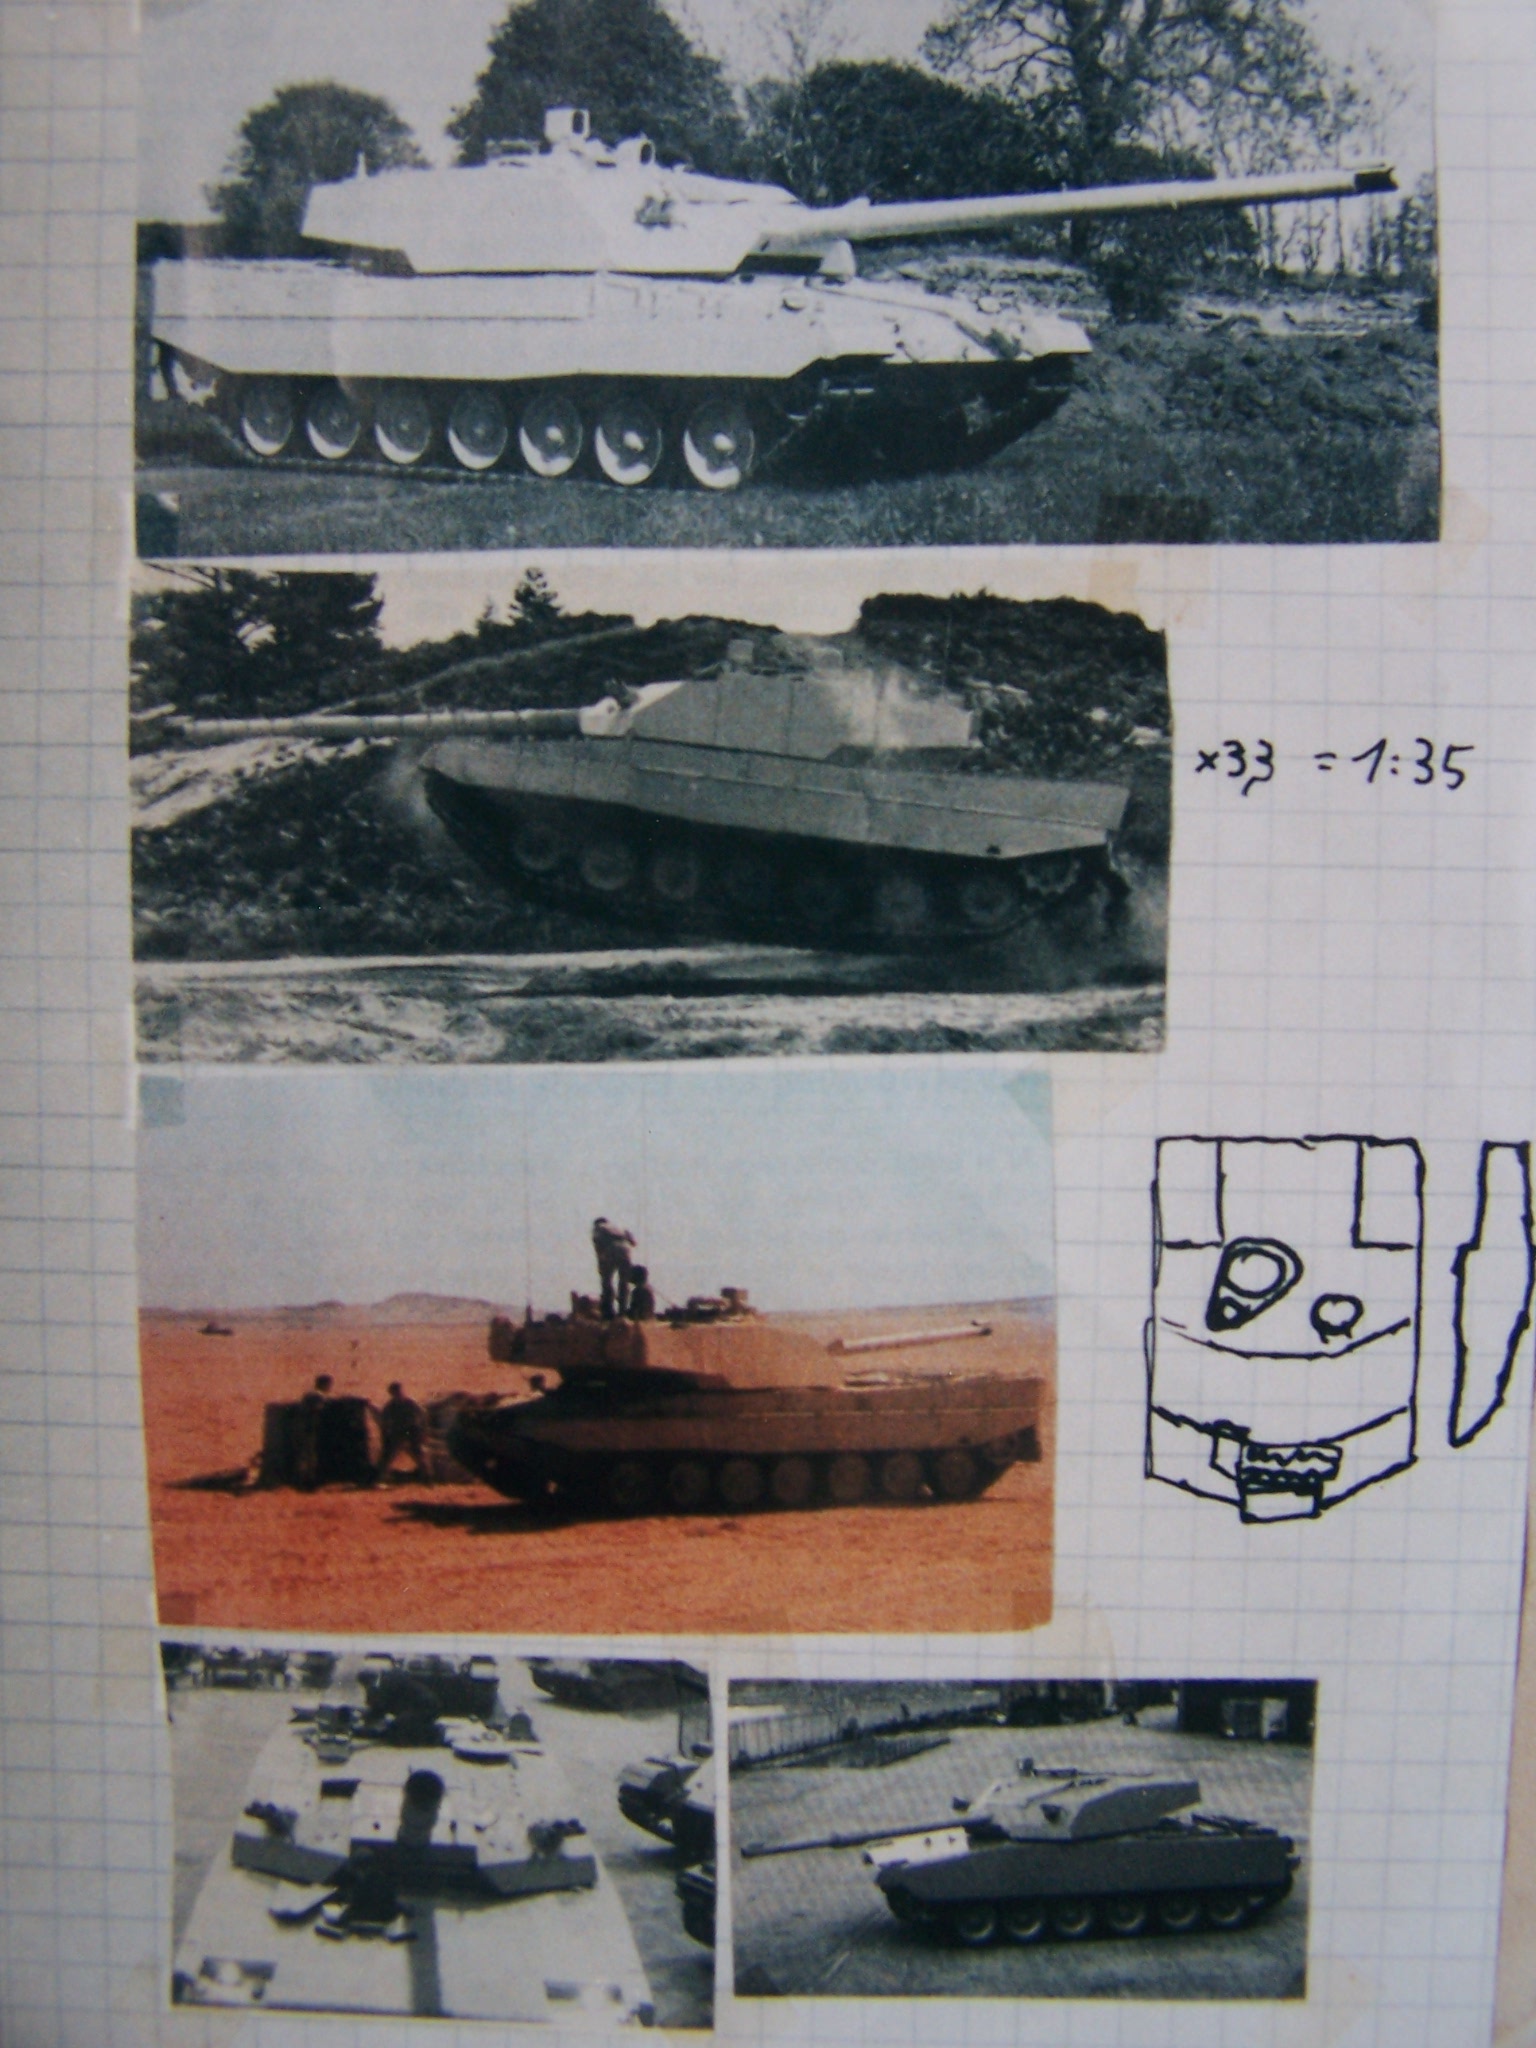
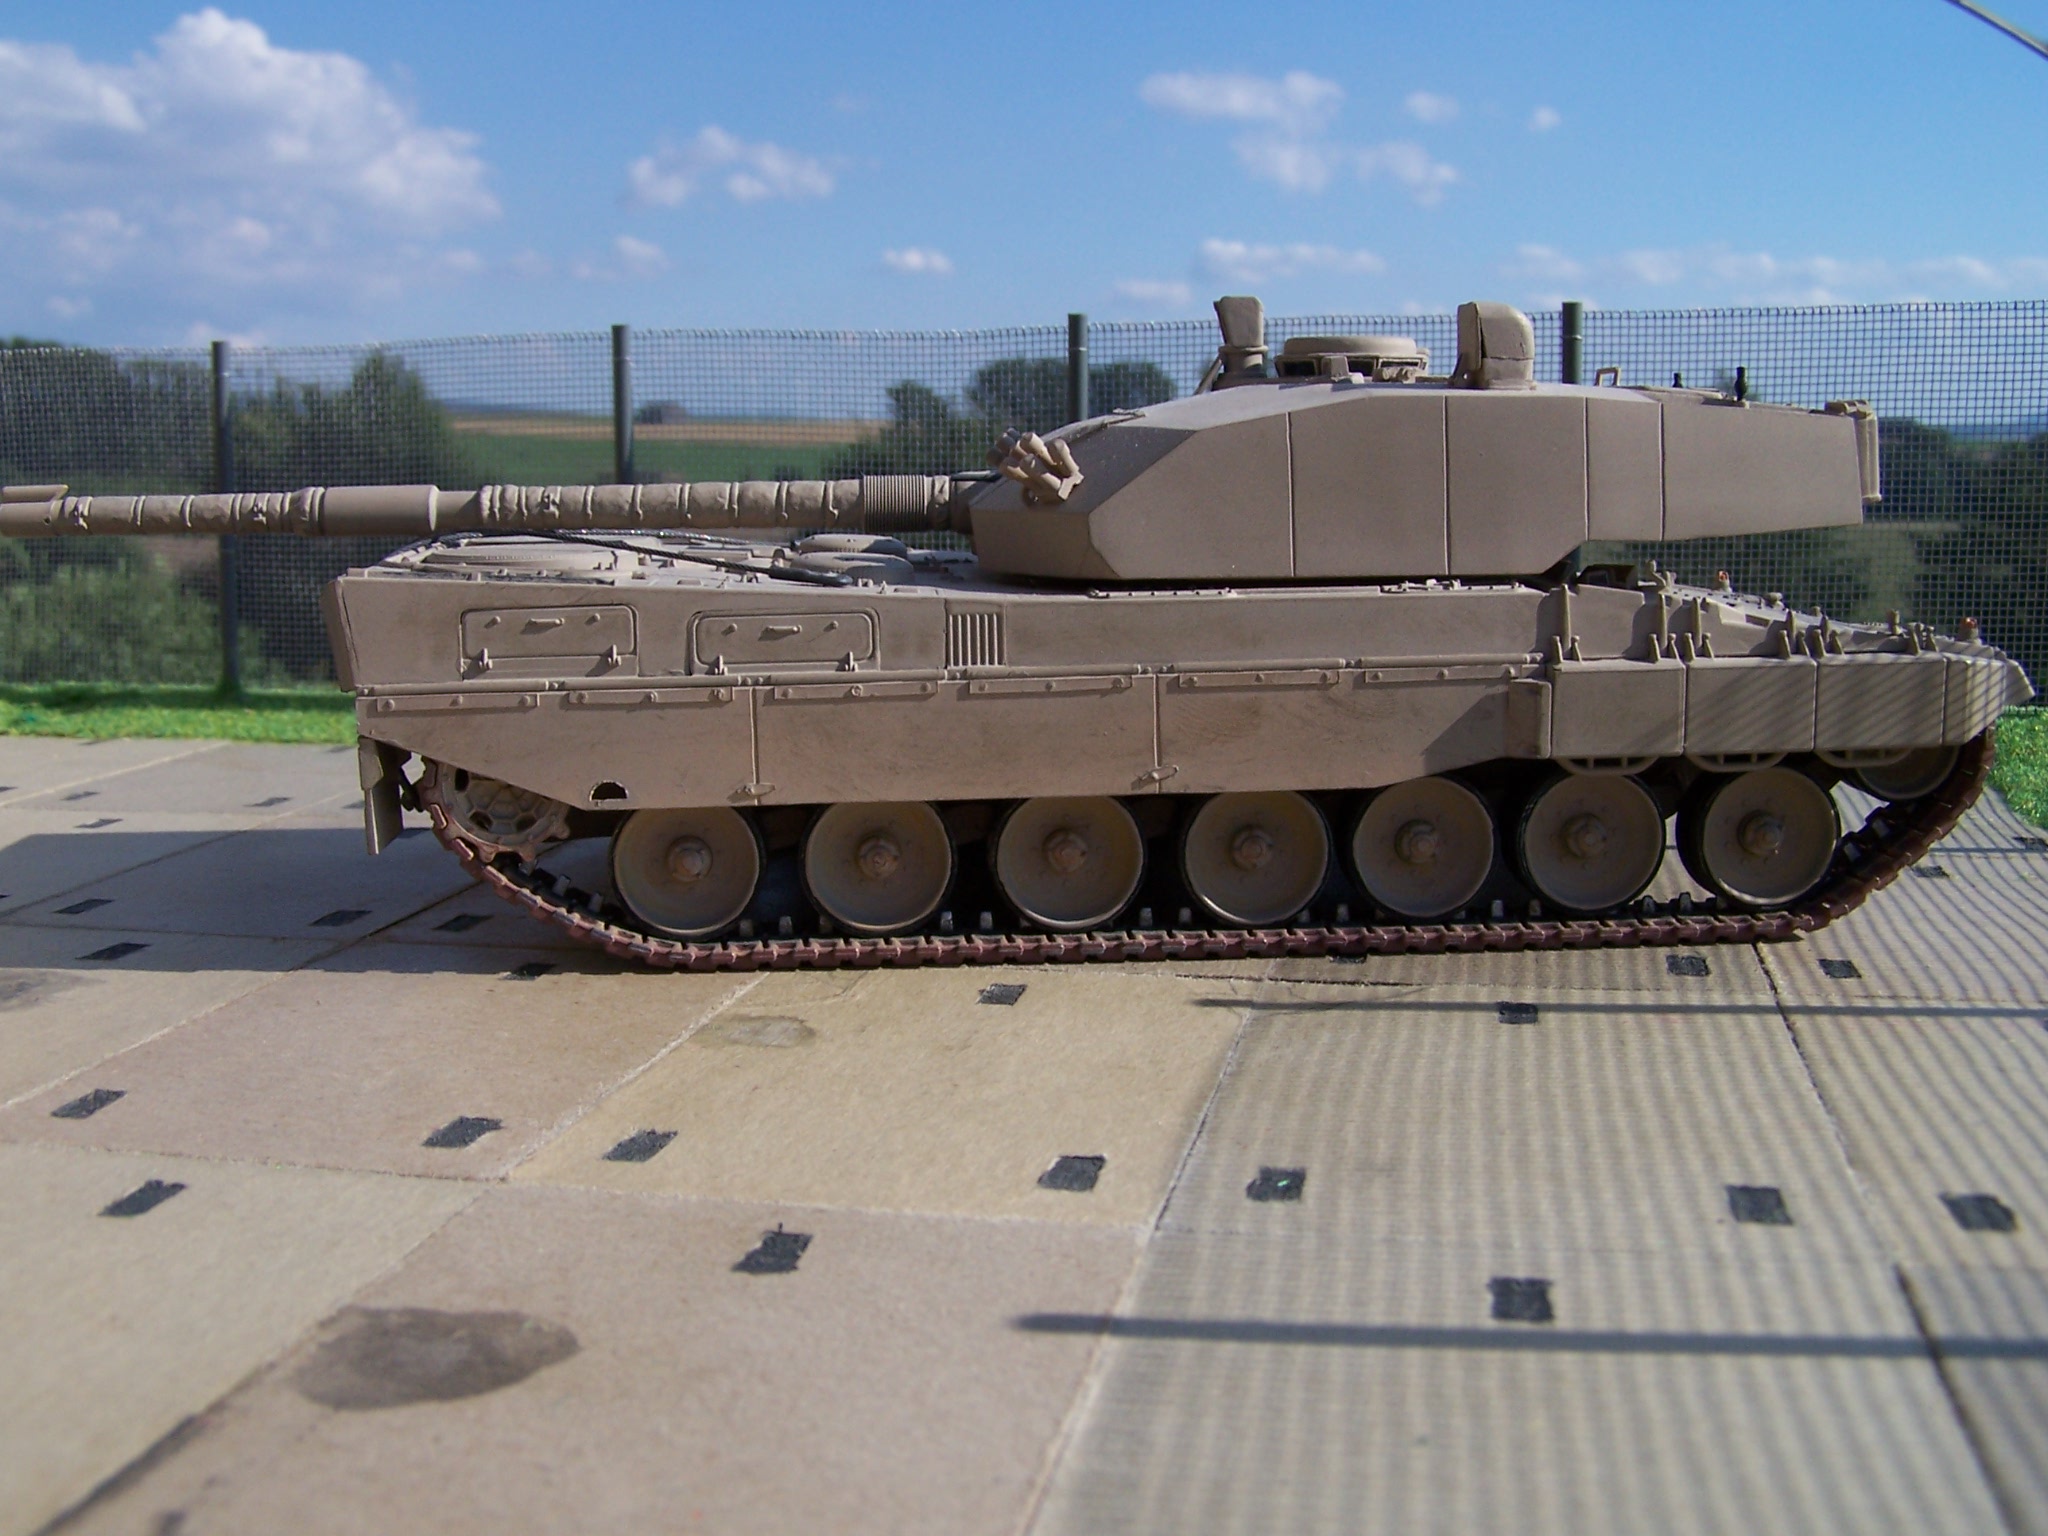
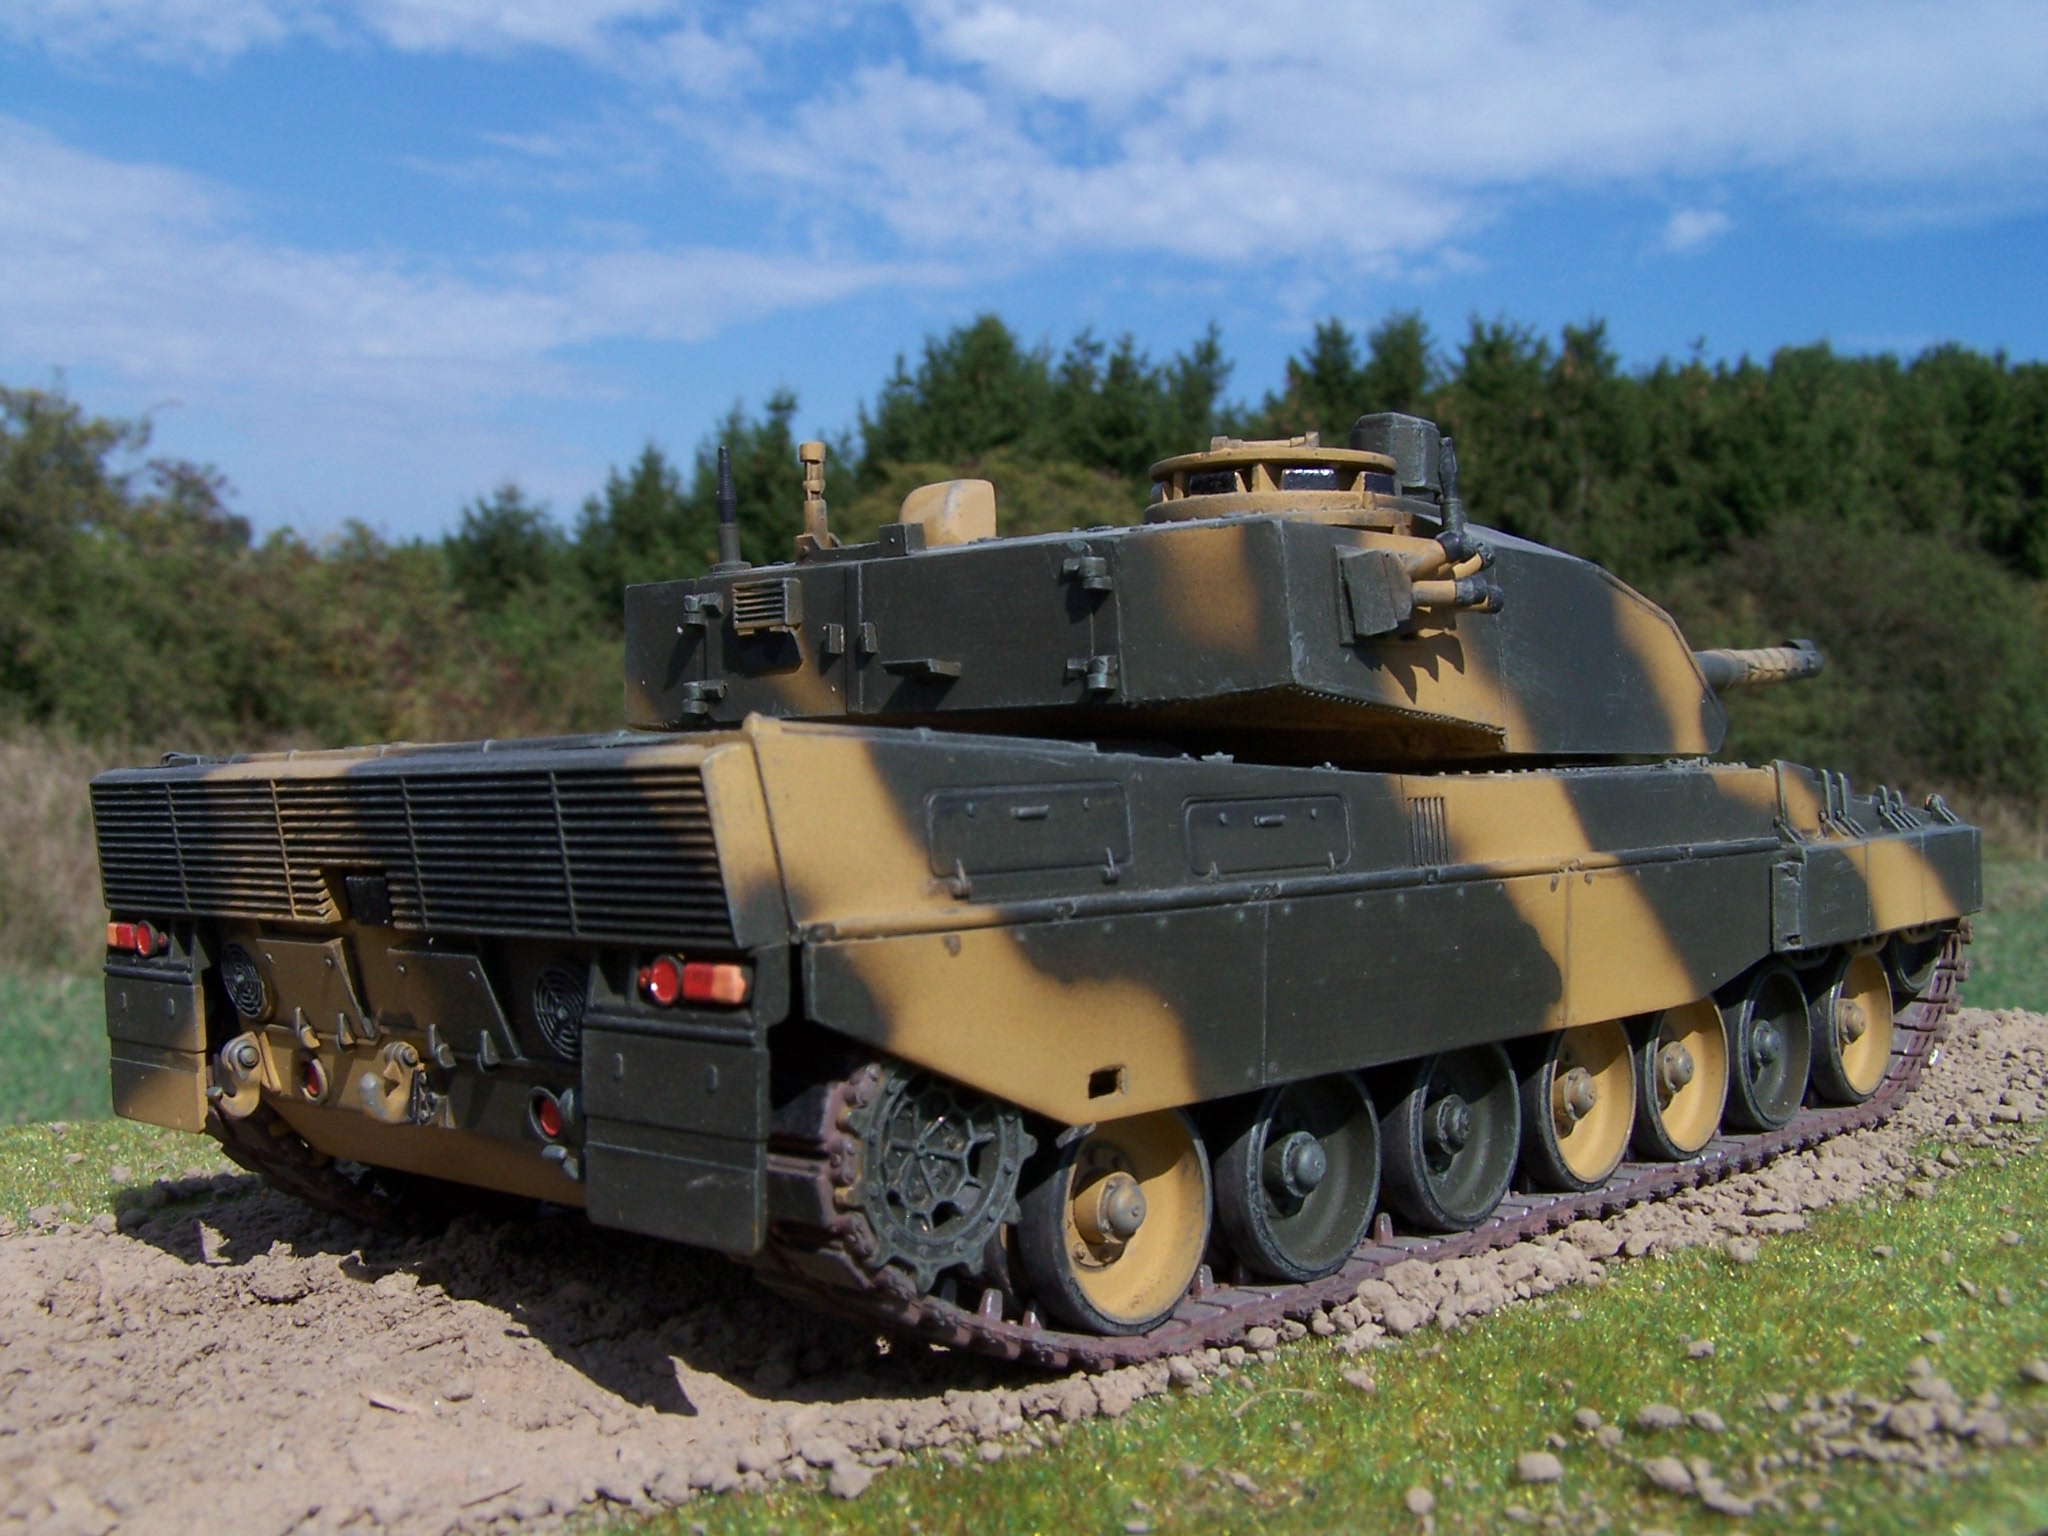
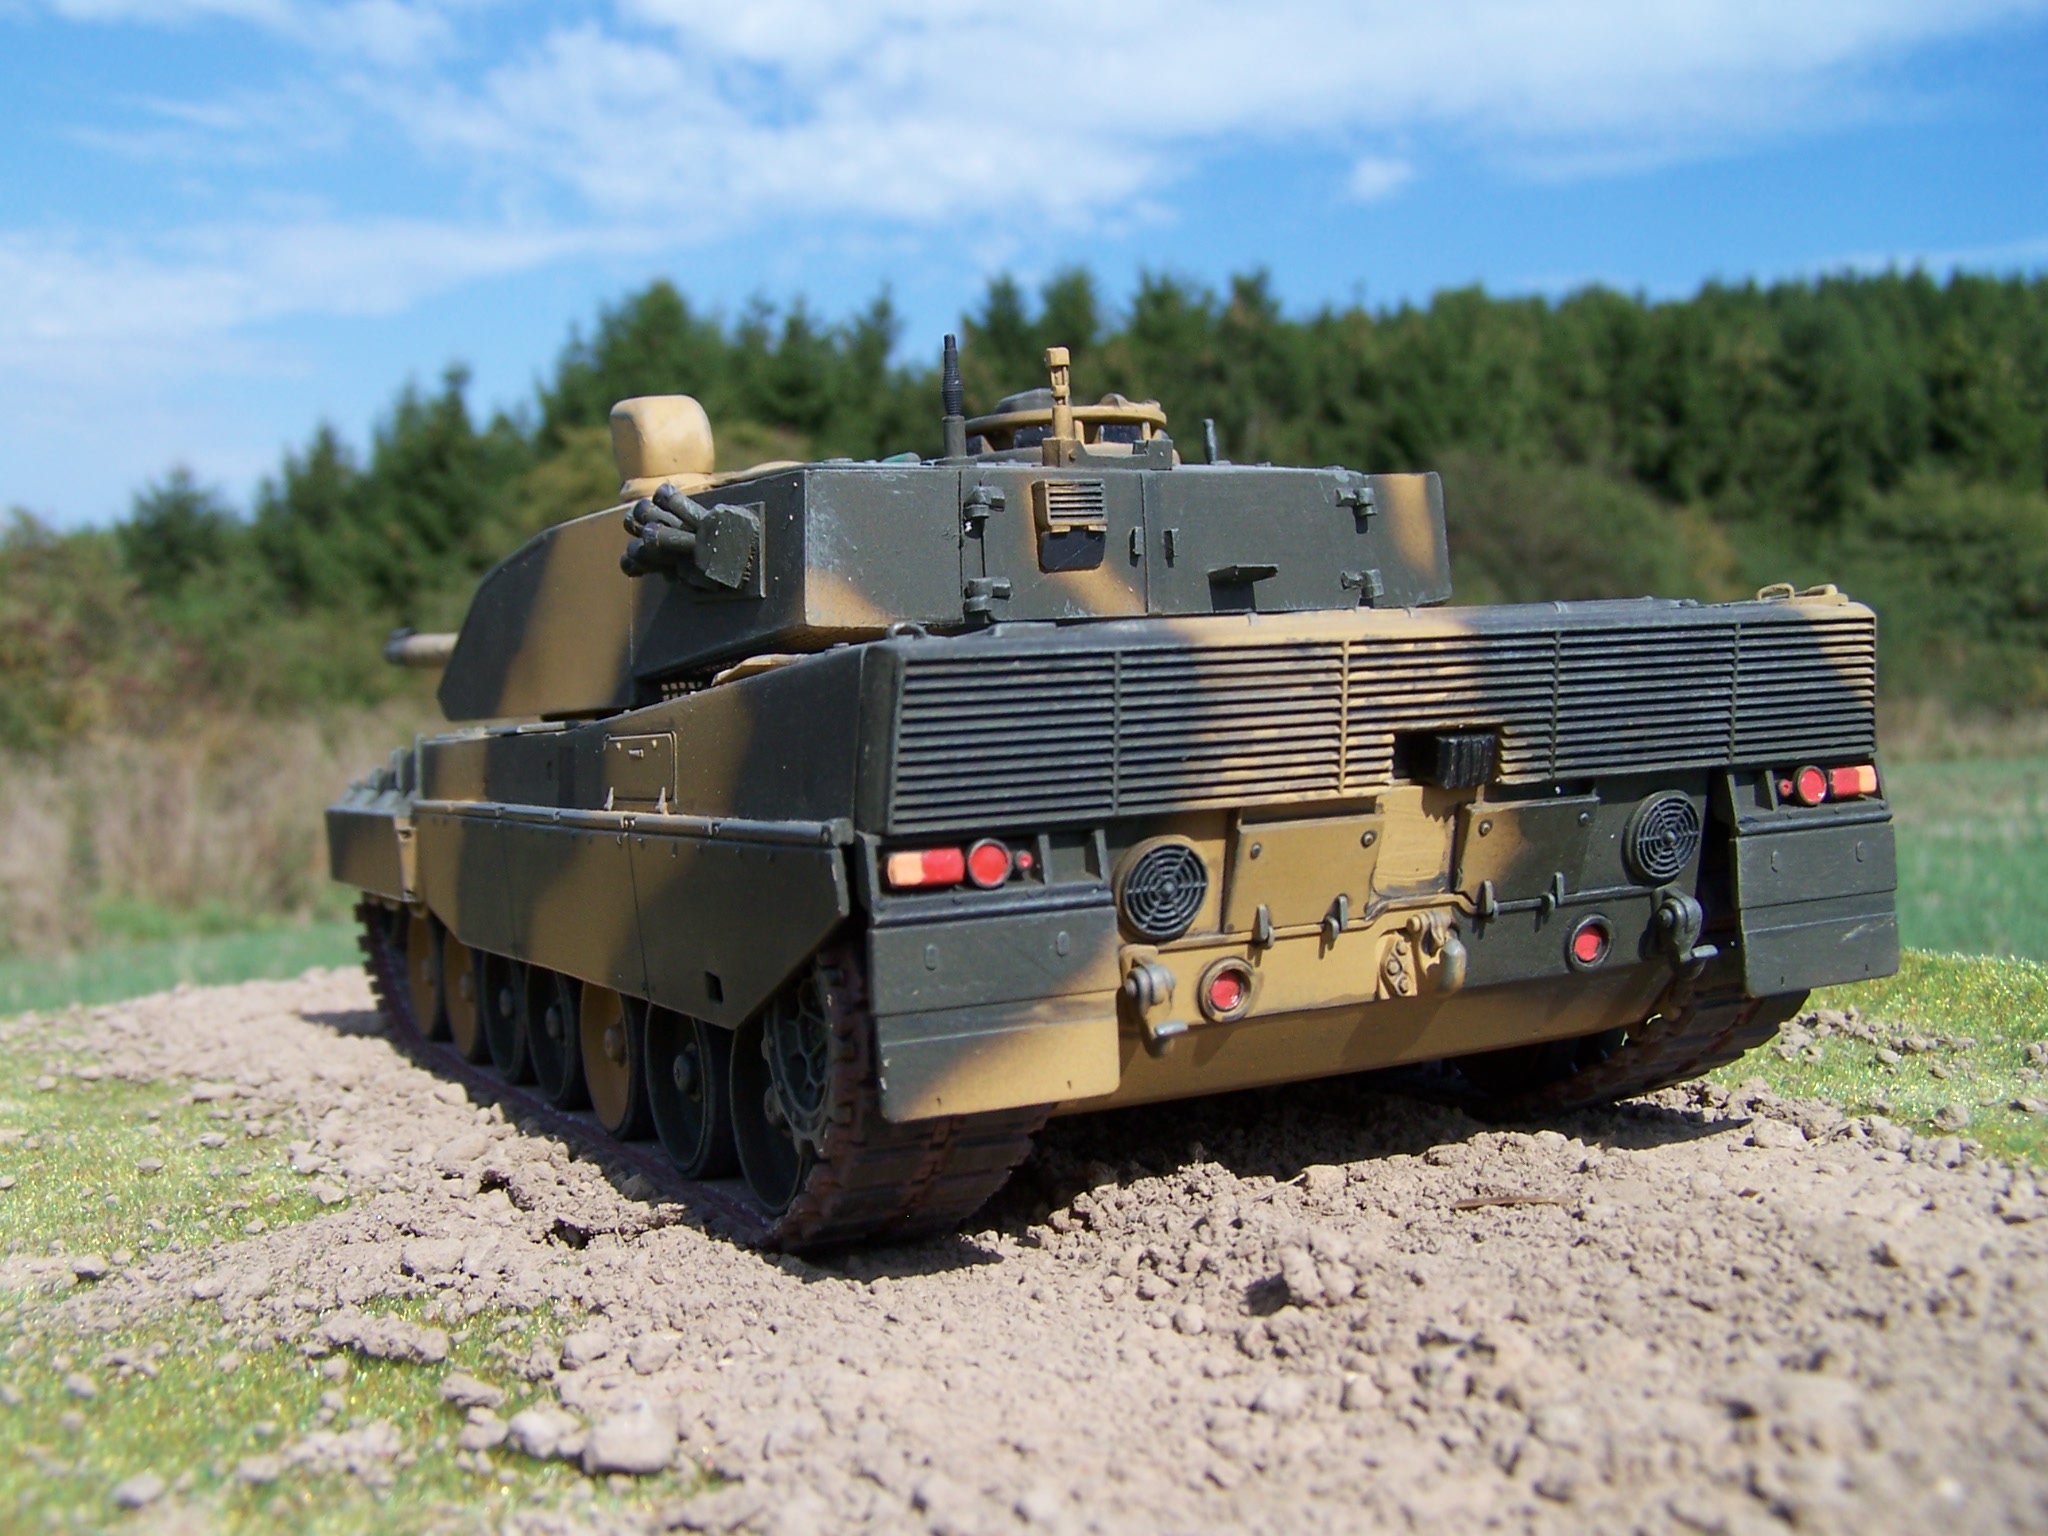
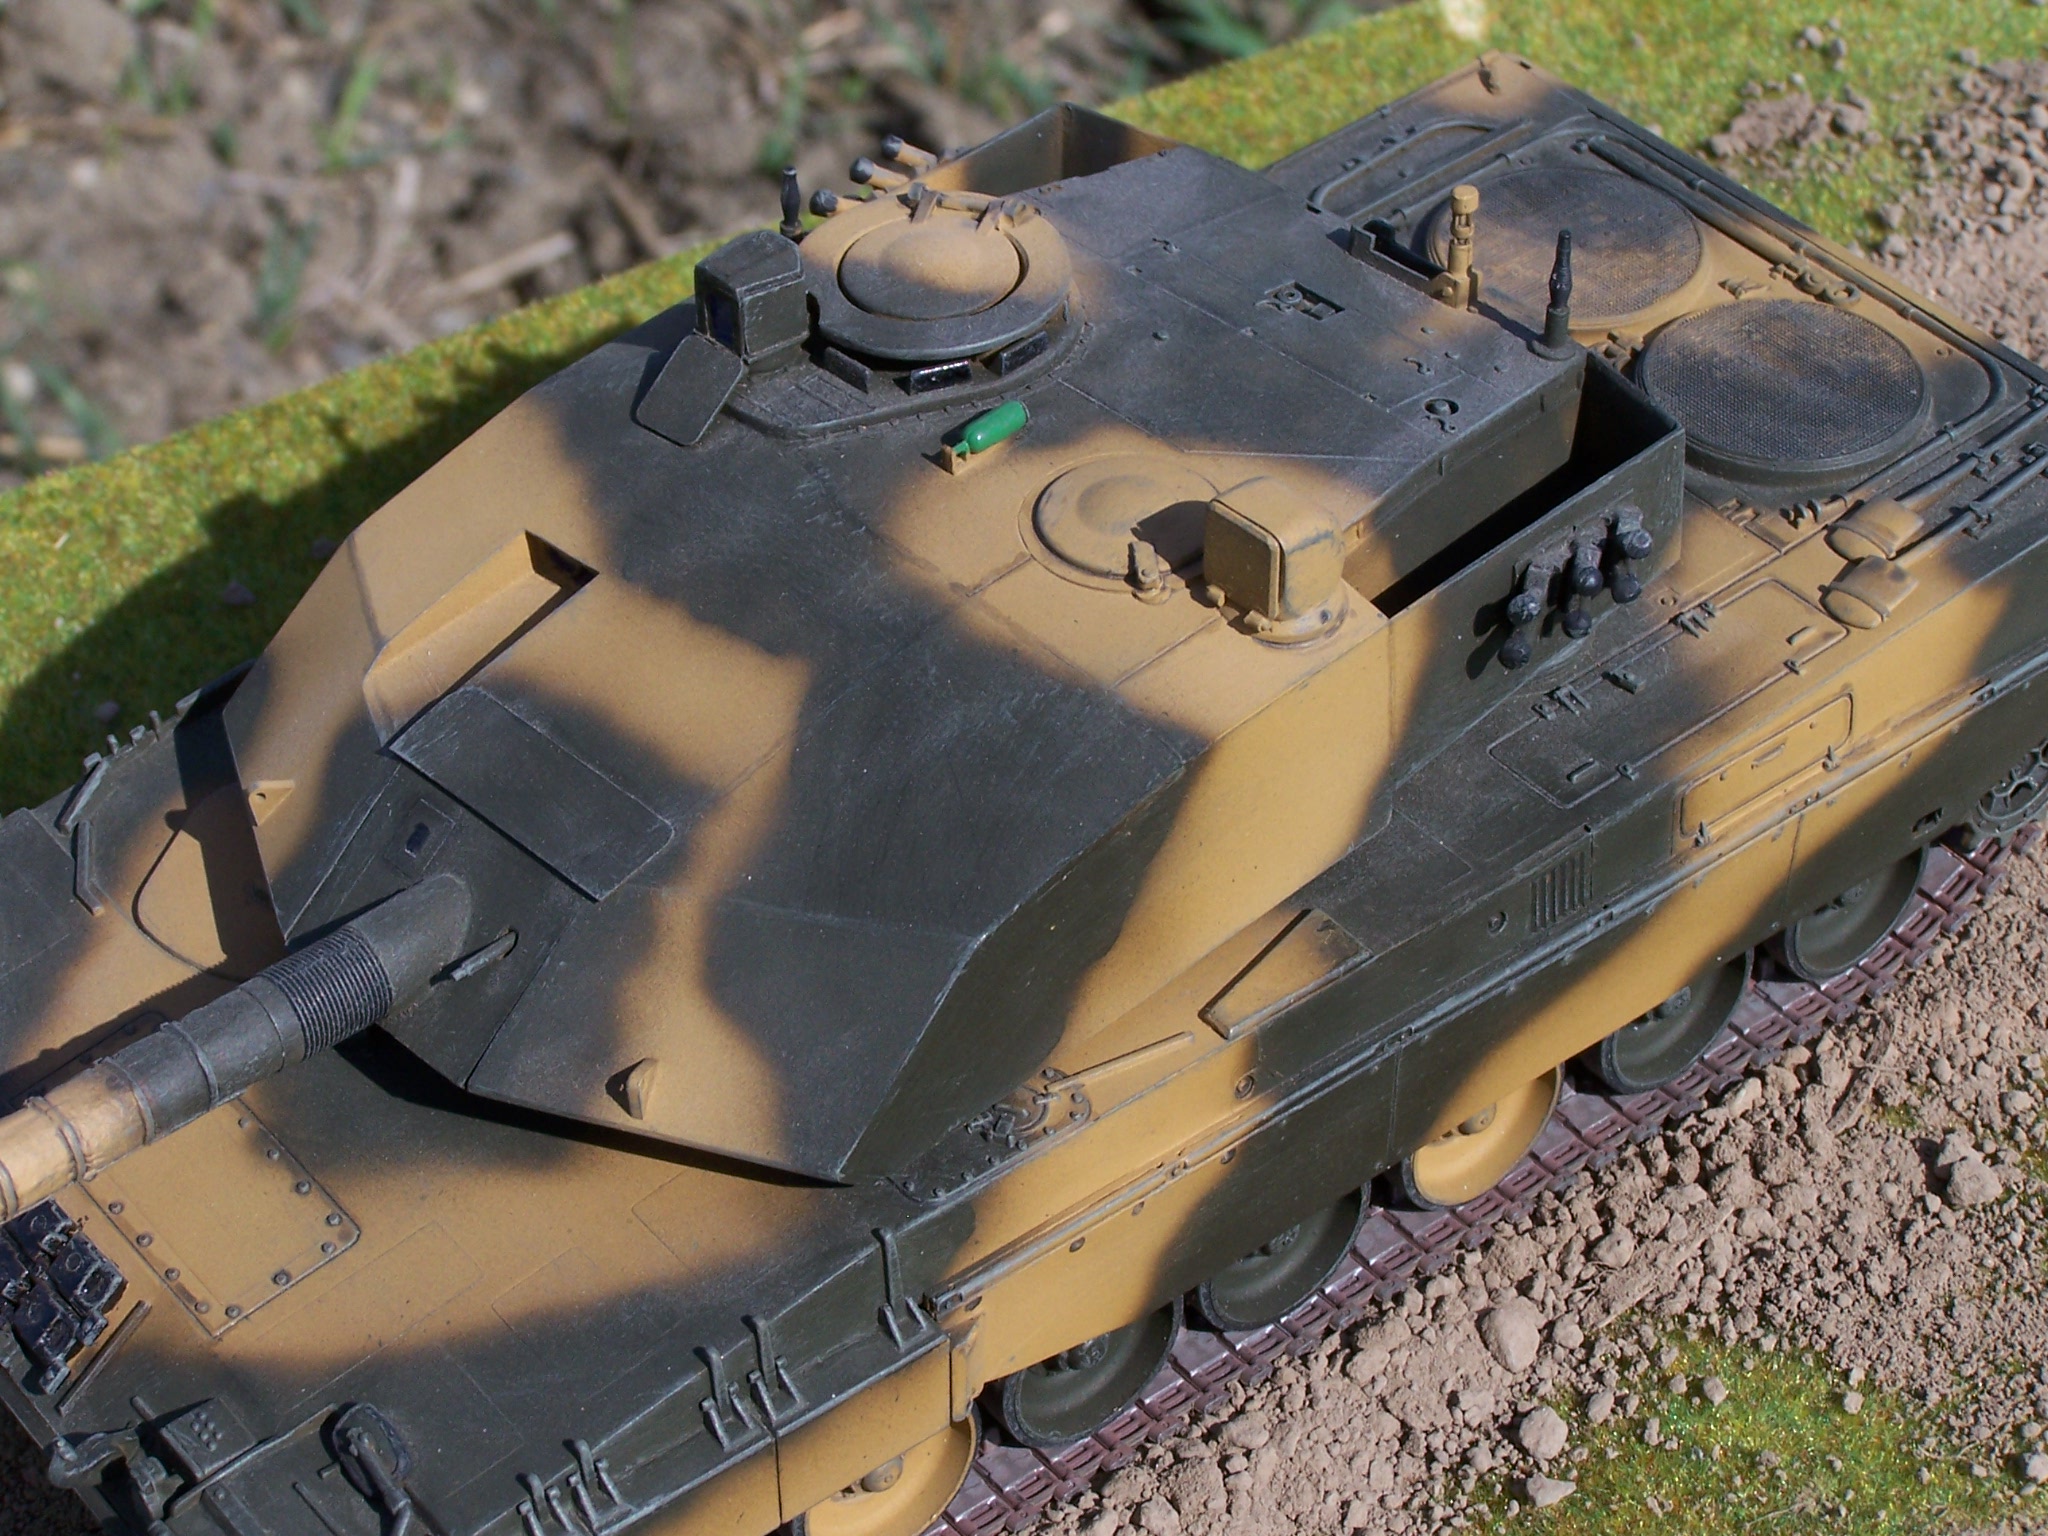
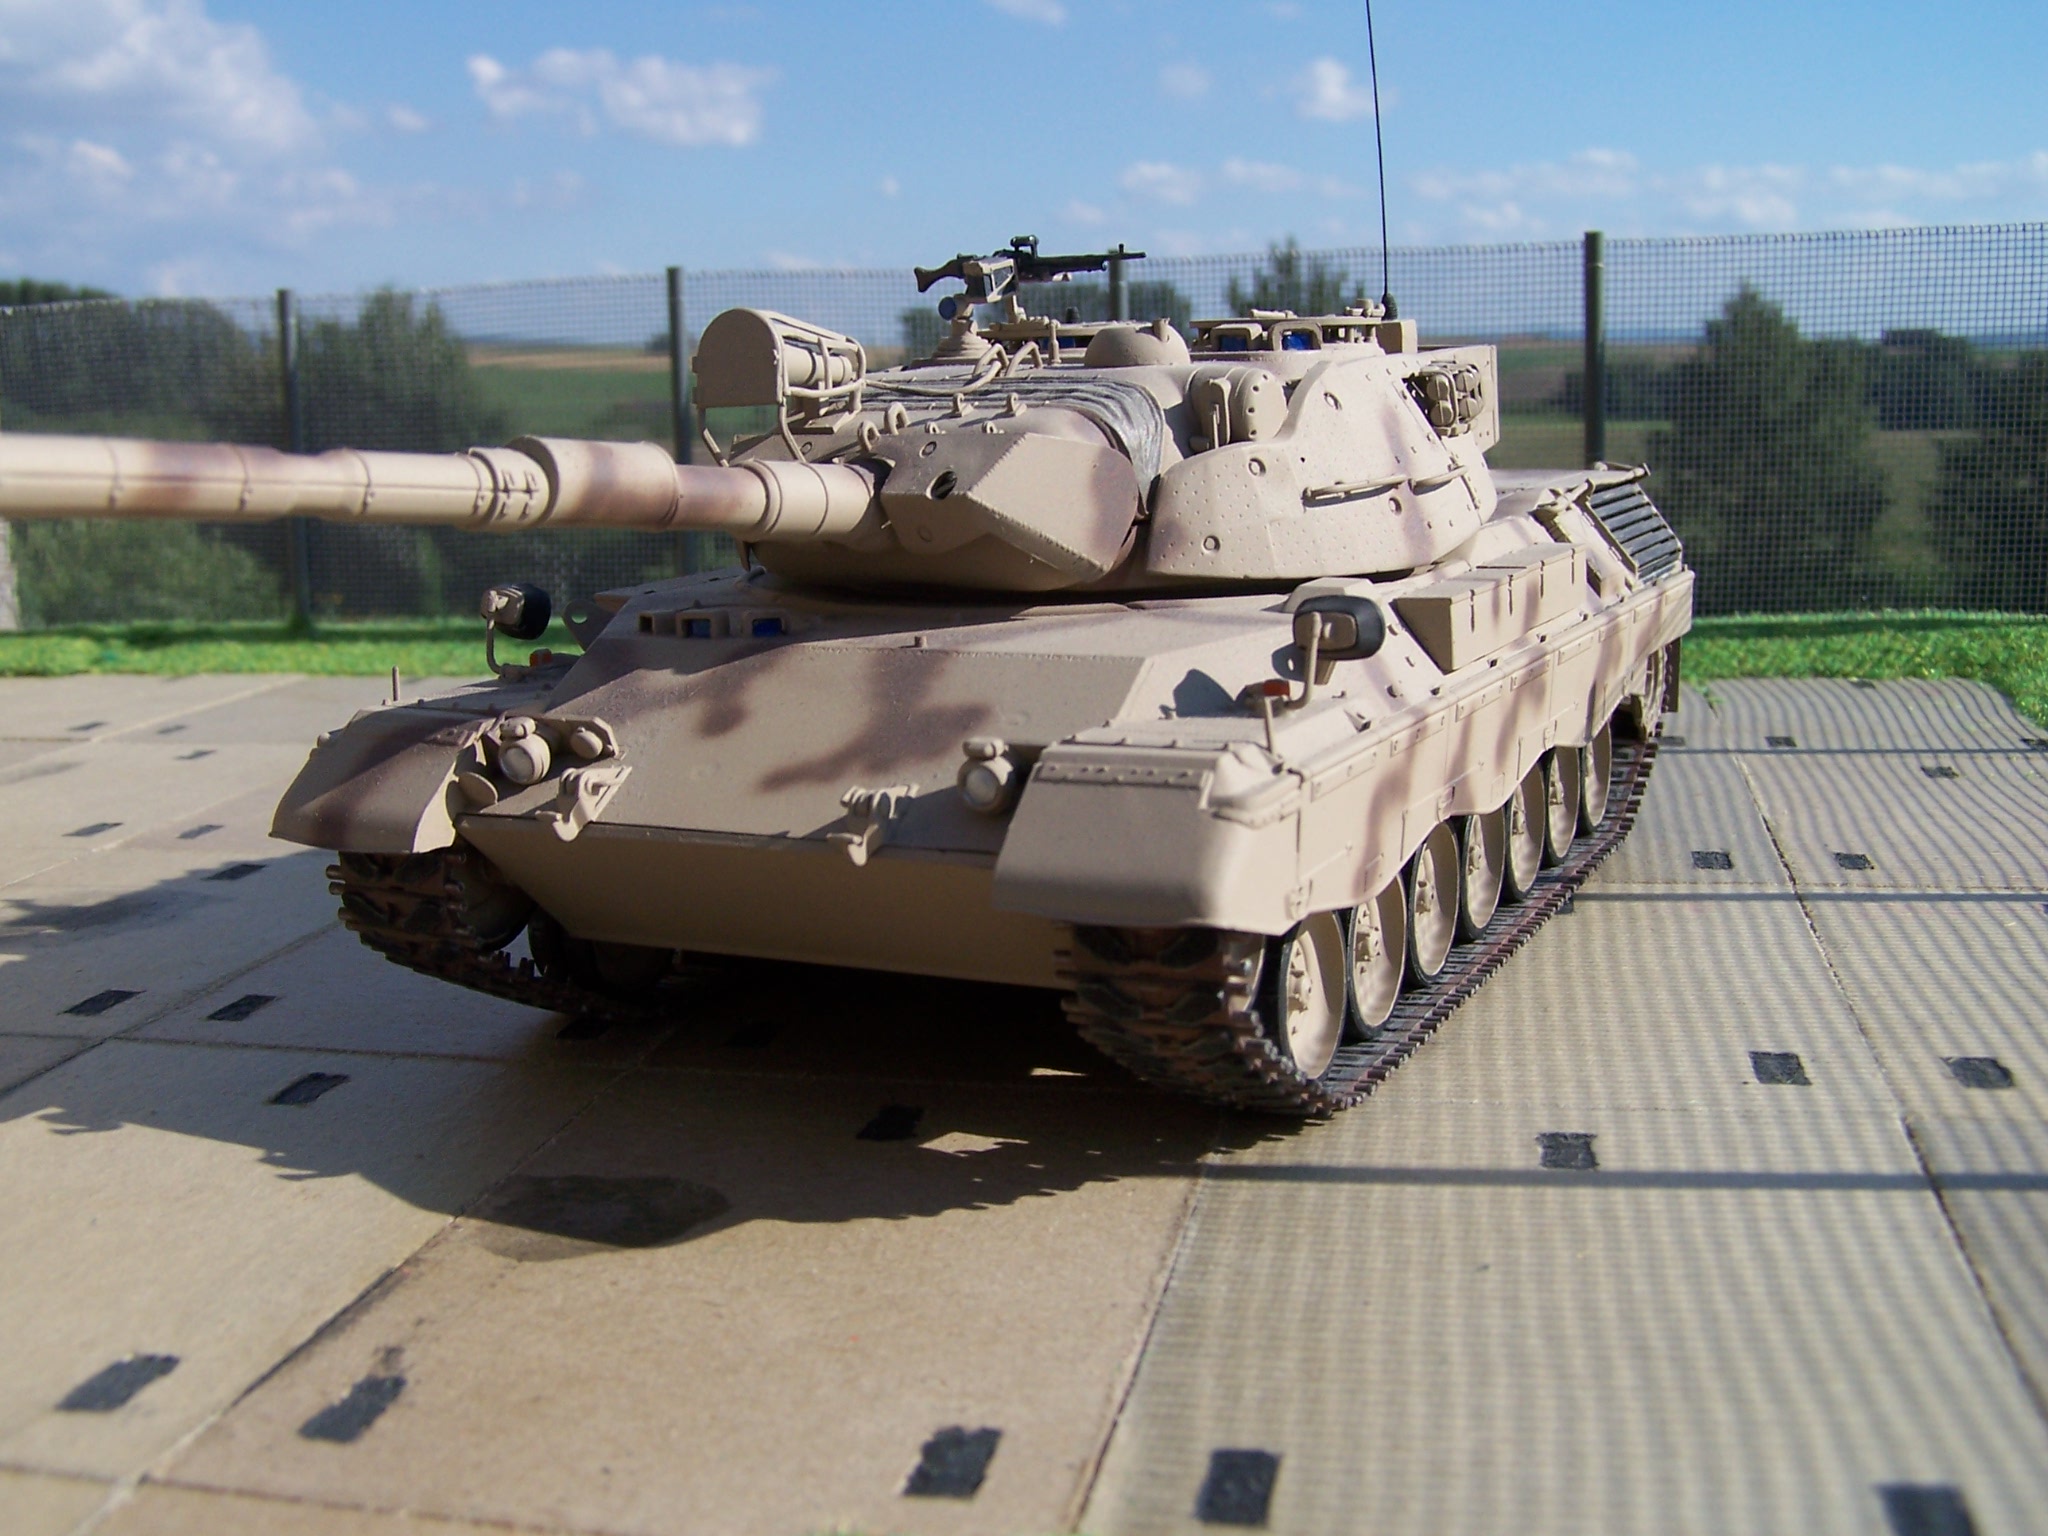
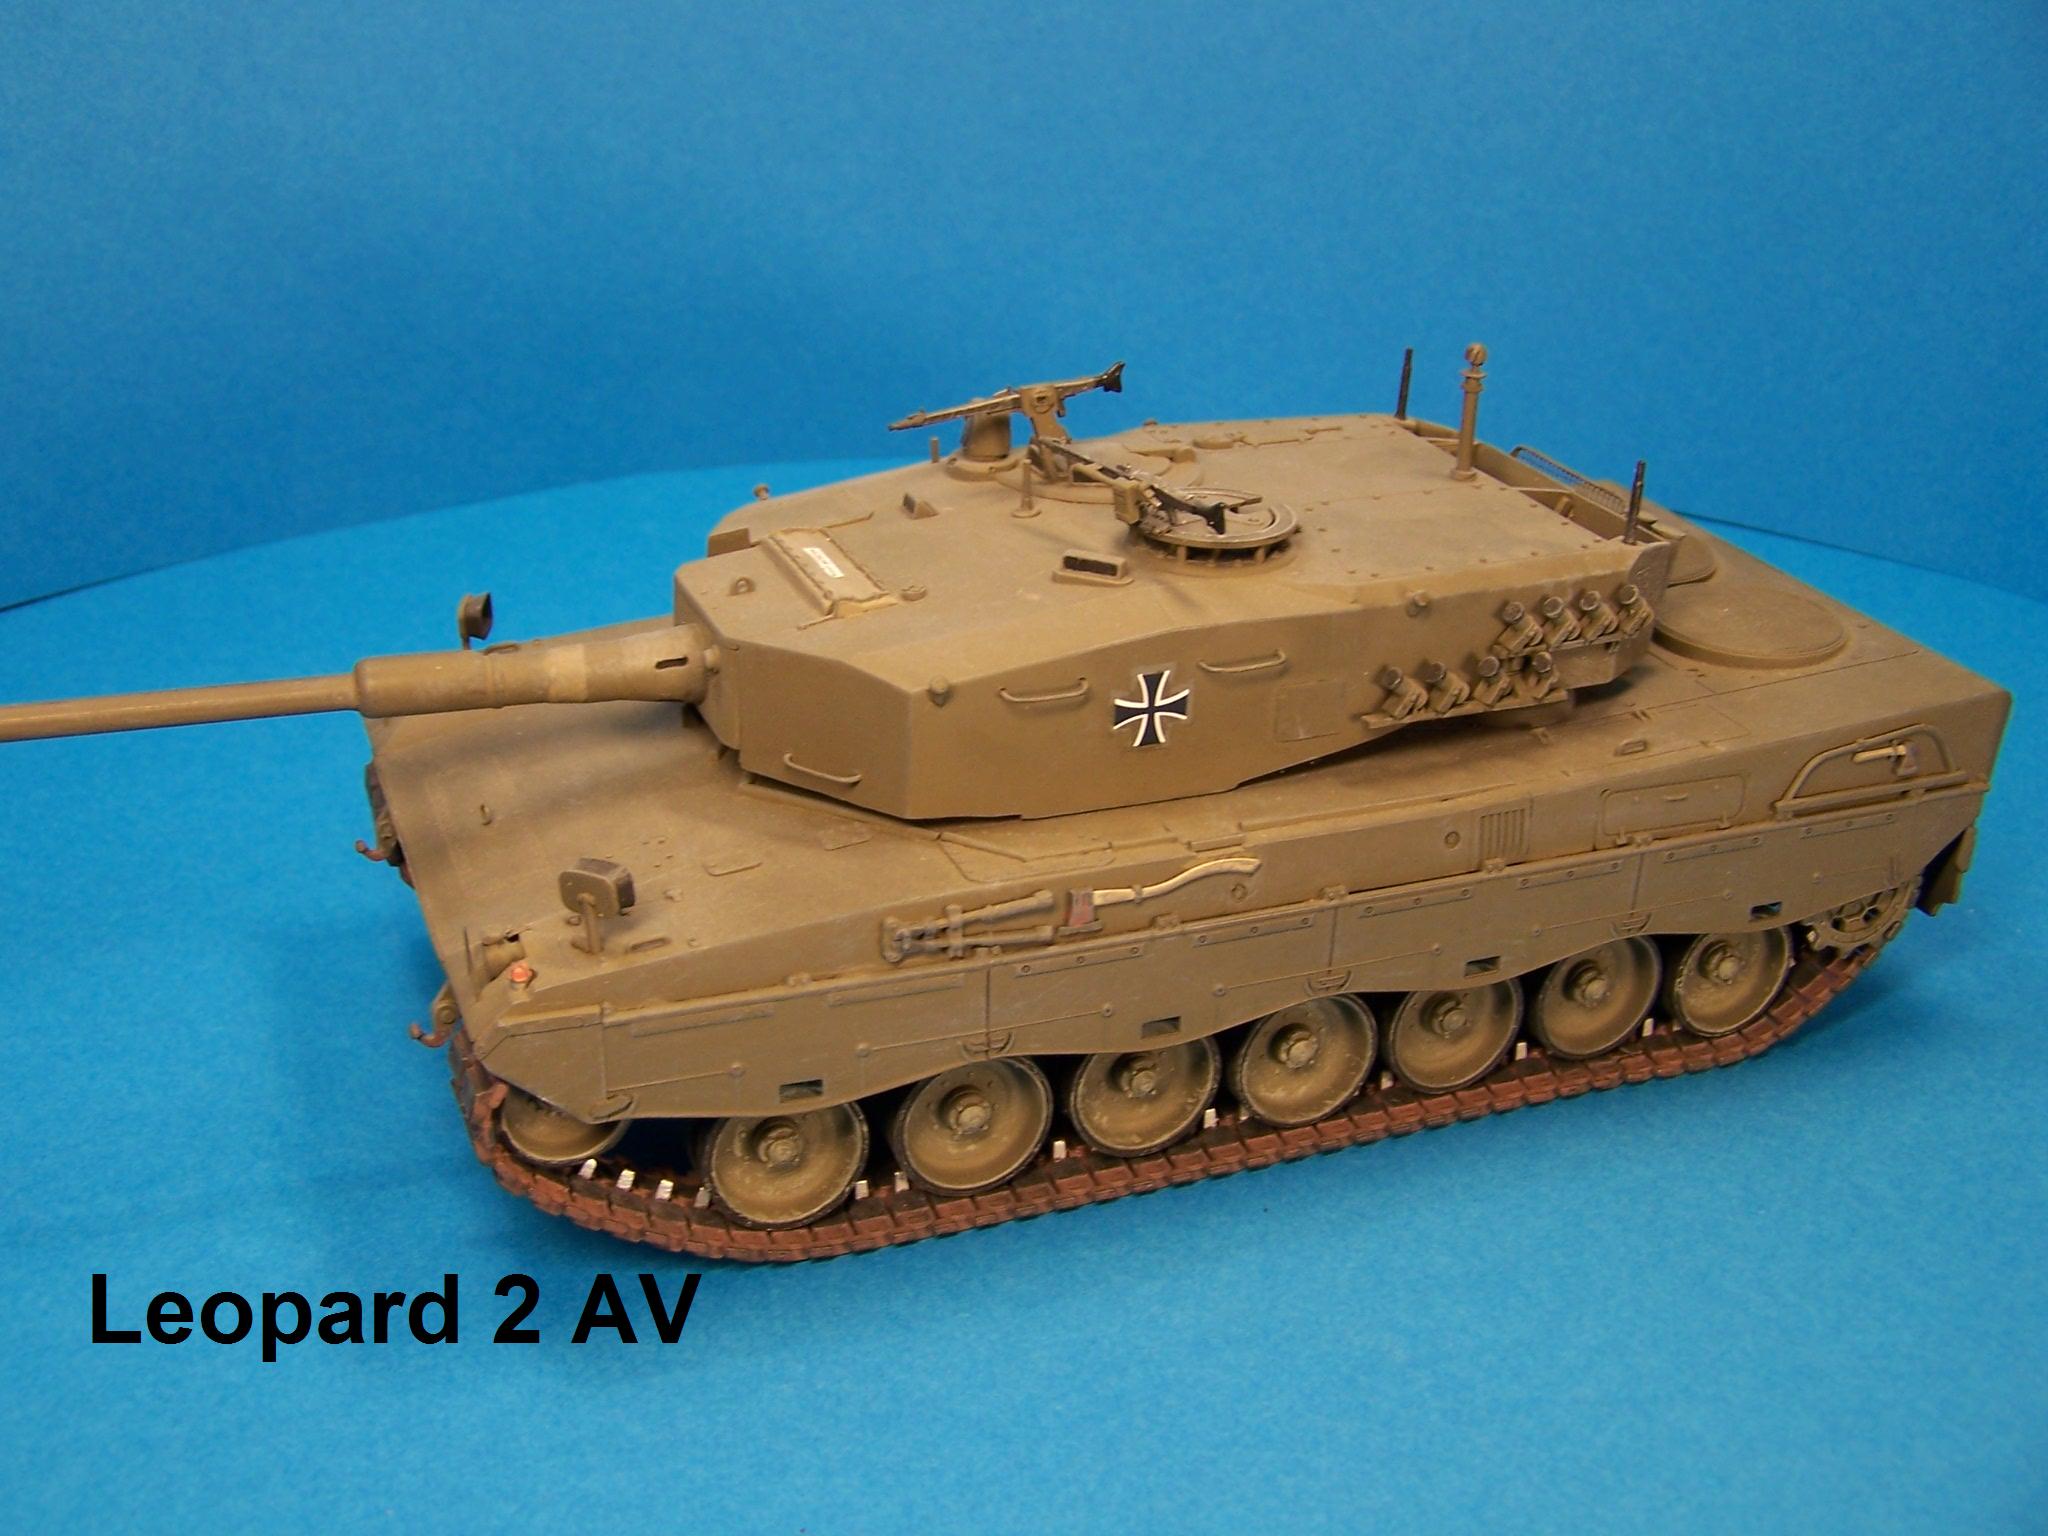
The Leopard 1A6 is a prototype from 1987 to allow Leopard 1 to be armed with a stronger weapon, as well as additional armor. There were apparently two prototypes, VT-2, and a VT-5, which both had the 120 mm gun and the side turret armor. The exhaust hoods of VT-2 were for infra-red suppression, since the hot exhaust gases were passed rearwards. I only had five photos to build my model from. As a result, I had to improvise, especially with the roof armour as I had no reference. I do not know whether there exists a vehicle and could be visited. (Editor - the turret exists at Unterluss)
The idea for the reconstruction I had in 1995 when I saw a picture of this tank in the then new book from Motorbuchverlag about the Leopard. For many years, the idea stayed because of the absence of further images. I used the Revell Leopard 1A5 as a base.
Showing the model in 2009 exhibitions, other hobbyists said they would like to build it once, so I went to the project and made resin casts.
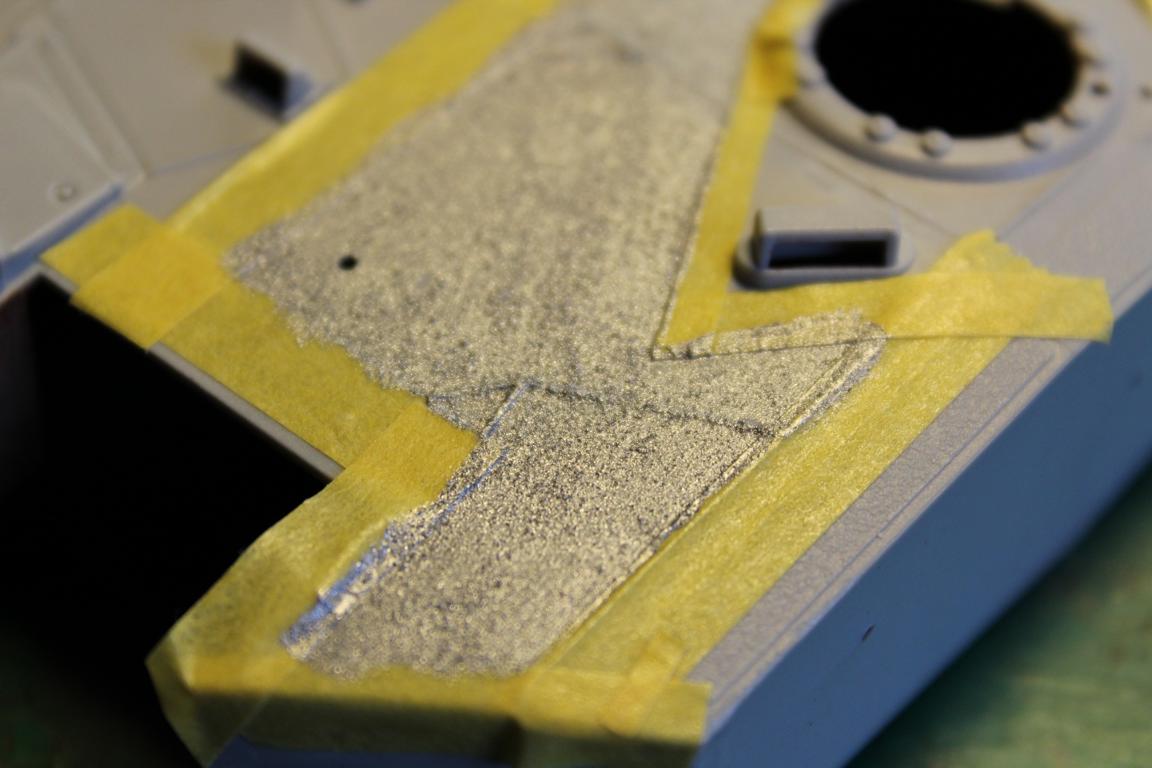
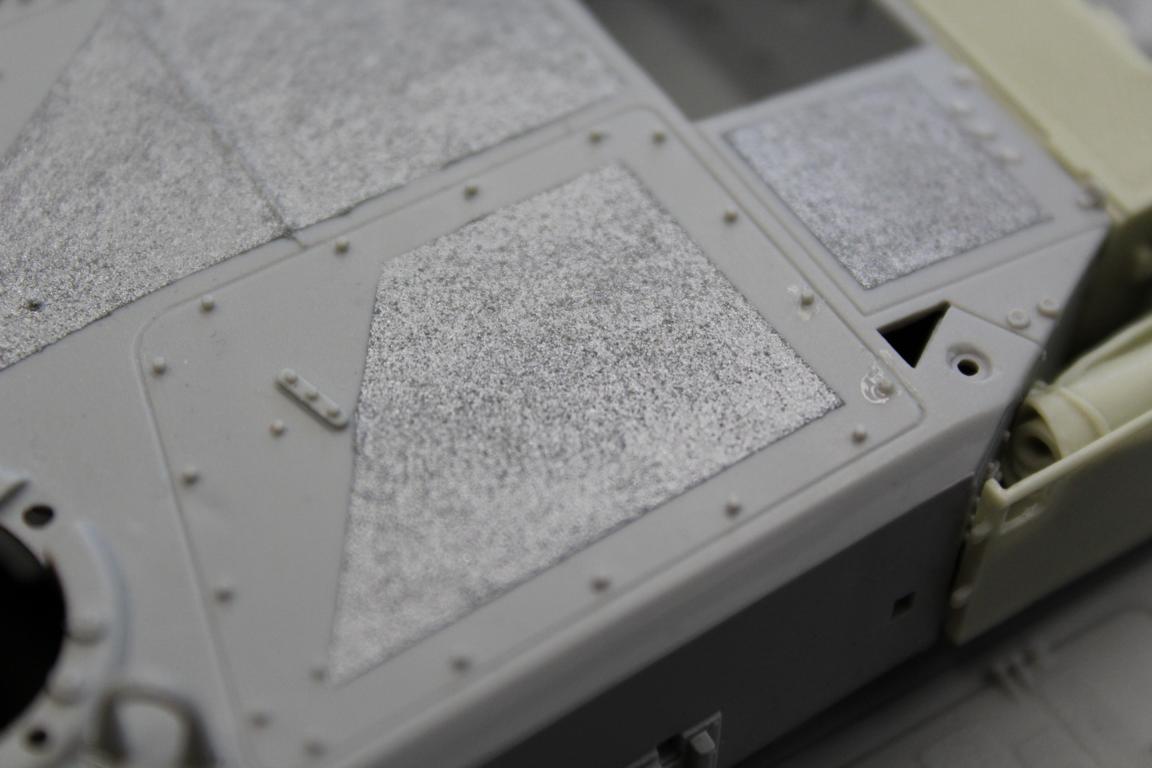
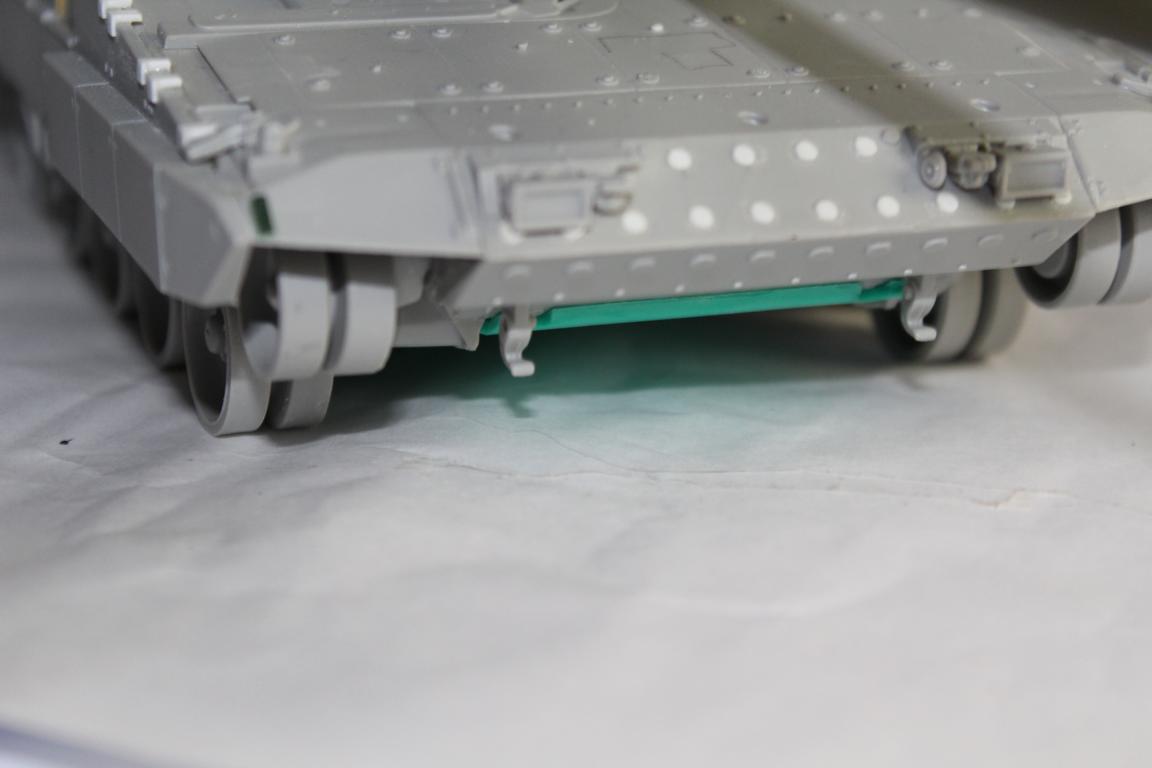
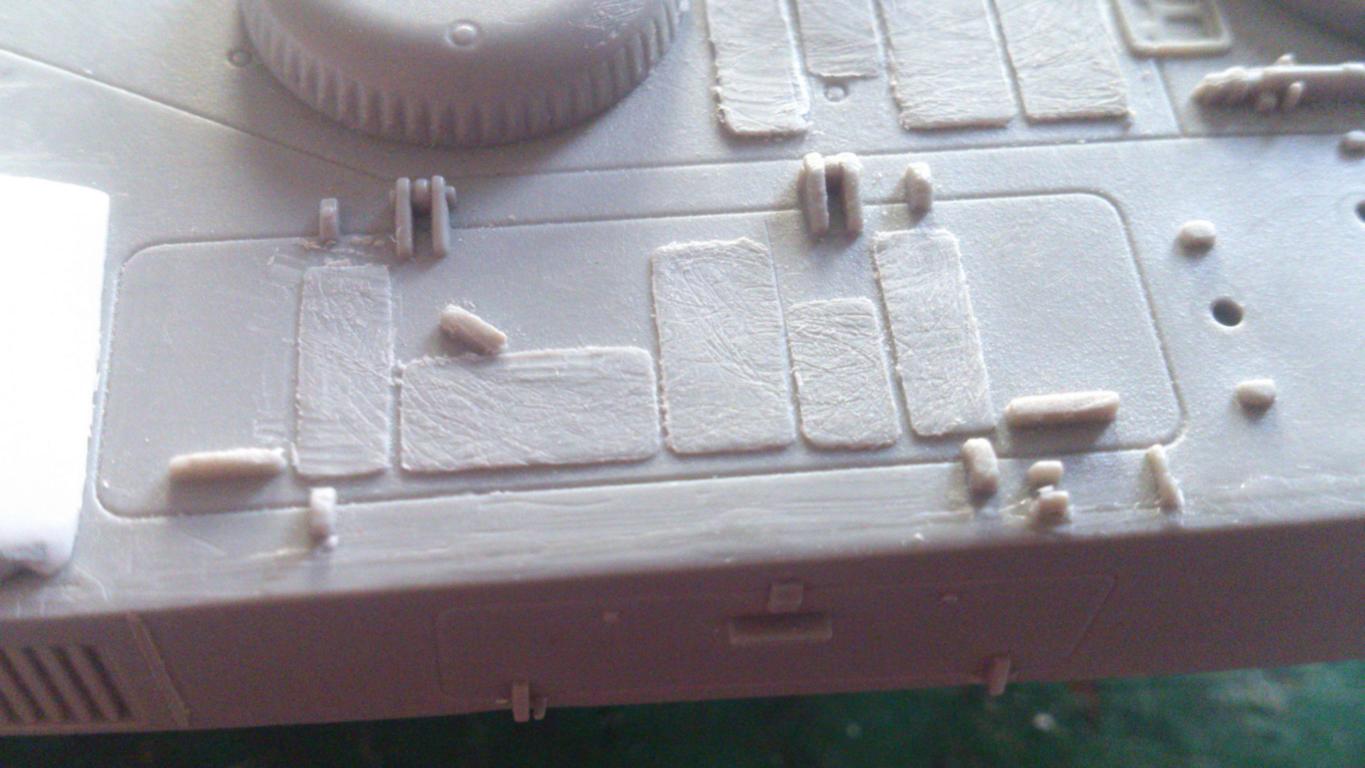
The building steps of this model are mostly identical to the basic kit. Some parts are simply omitted, for example, the gun mantlet, exhaust grilles and front part of the turret armour. Some things were cut out and used again like the hatch rings and periscopes and lights at the rear. The gun is from an Italeri Leopard 2. The painting was done with Revell 46 because of all this I see pictures of the tank from a solid color.
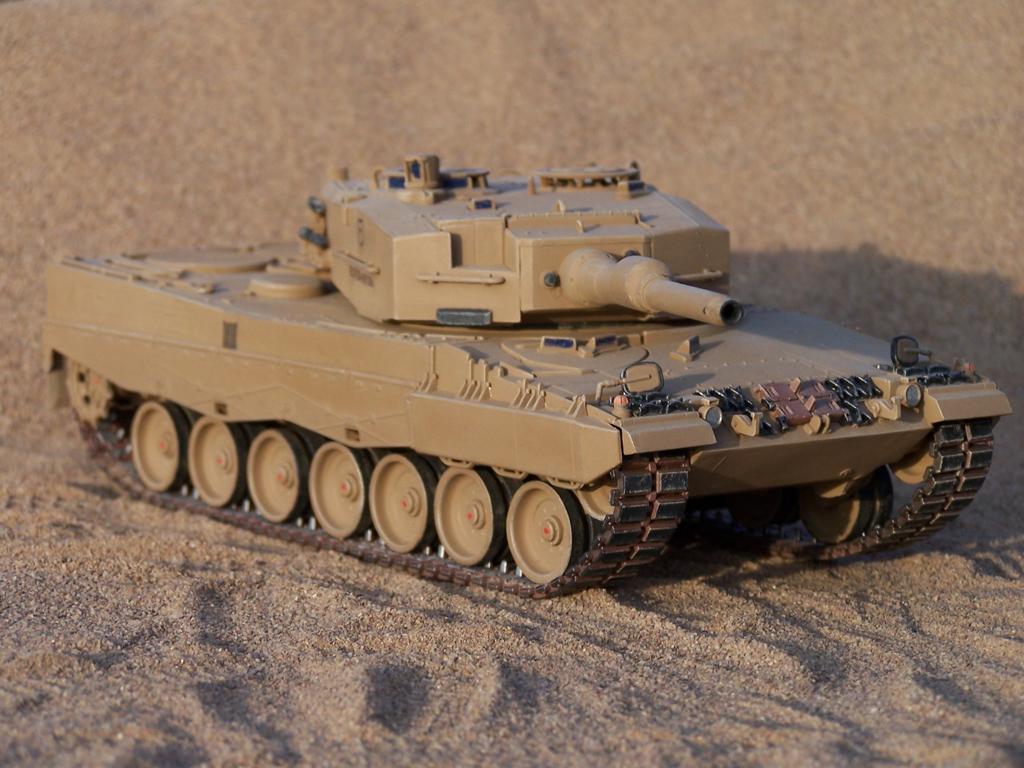
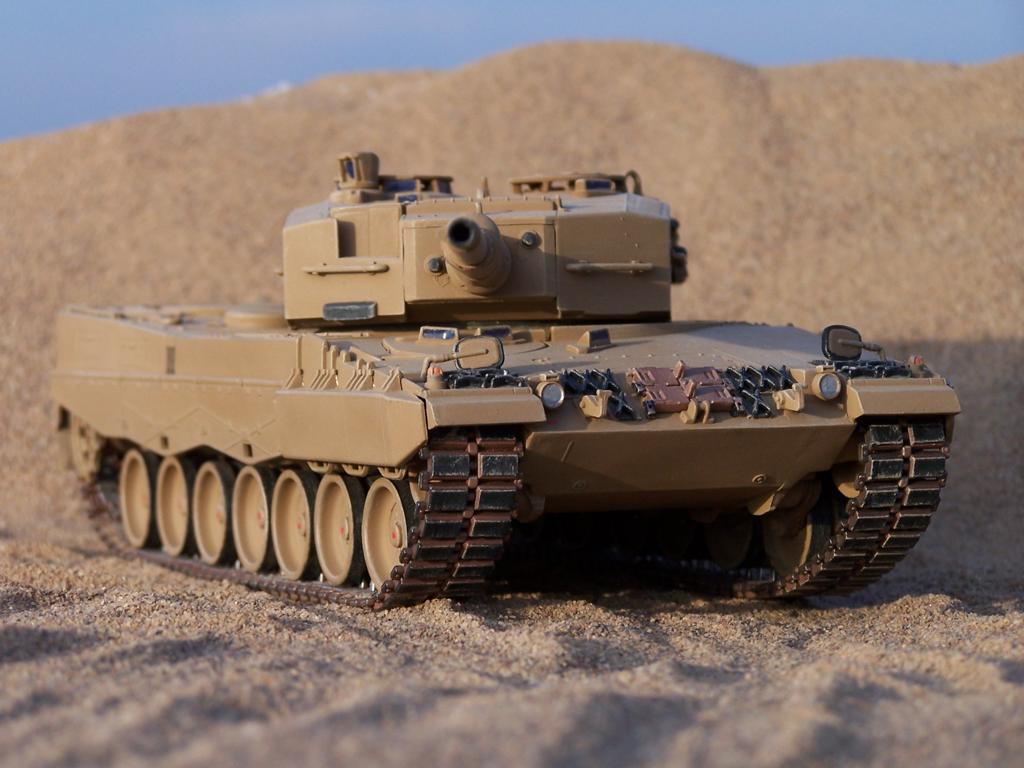
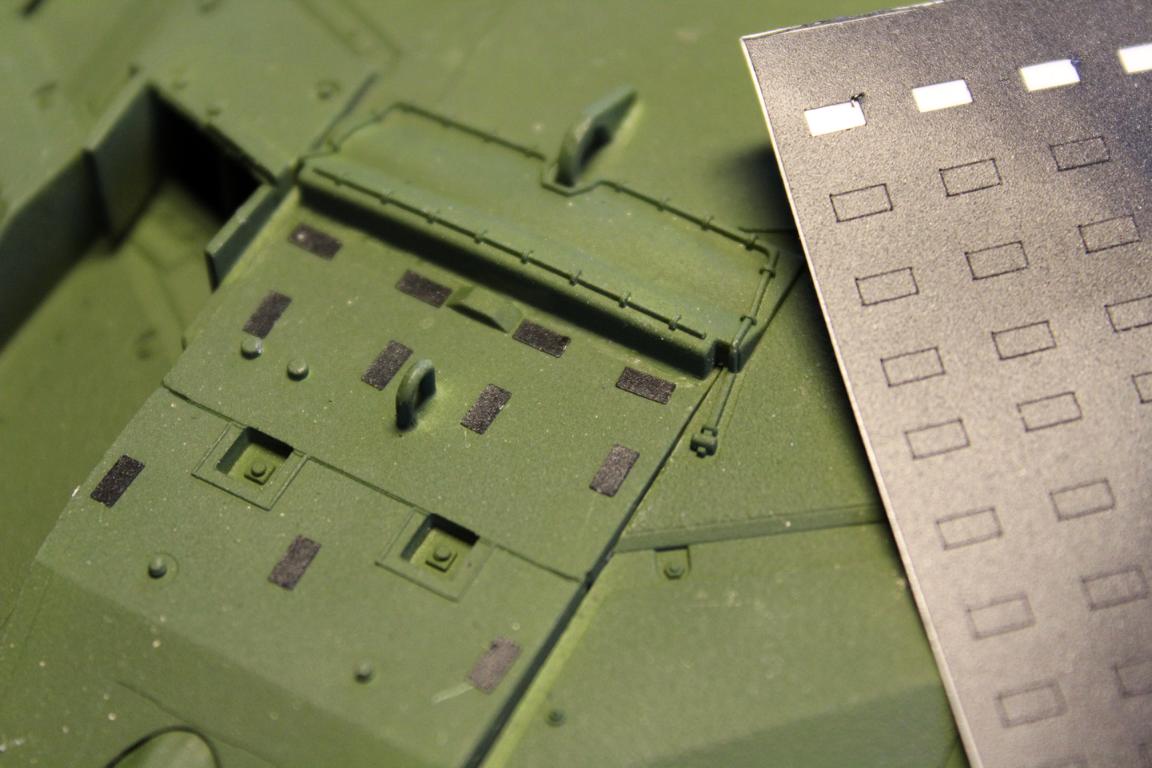
If you would like to build your own 1A6, resin parts were available from Diethelm for €13. However, the moulds have come to the end of their life and Diethelm is deciding whether to remake them or remaster the parts. We will let you know. Contact him at Berlage4@t-online.de.


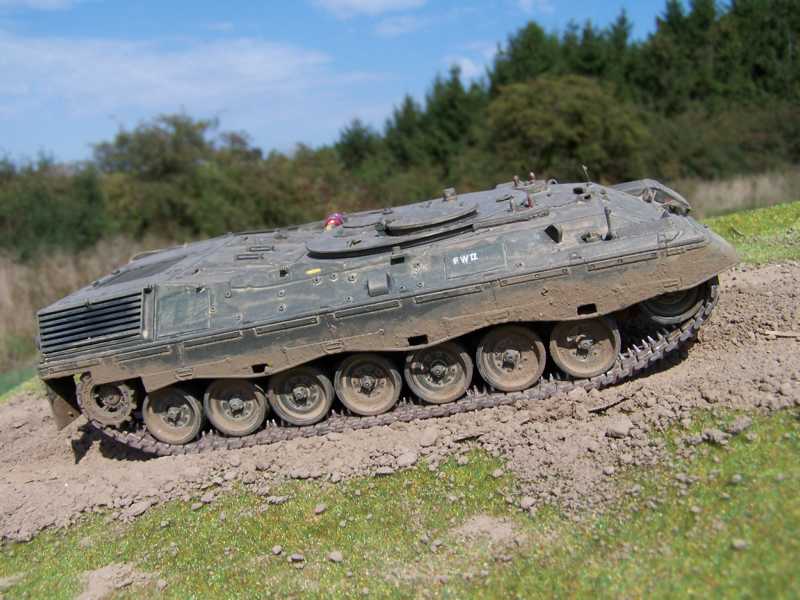
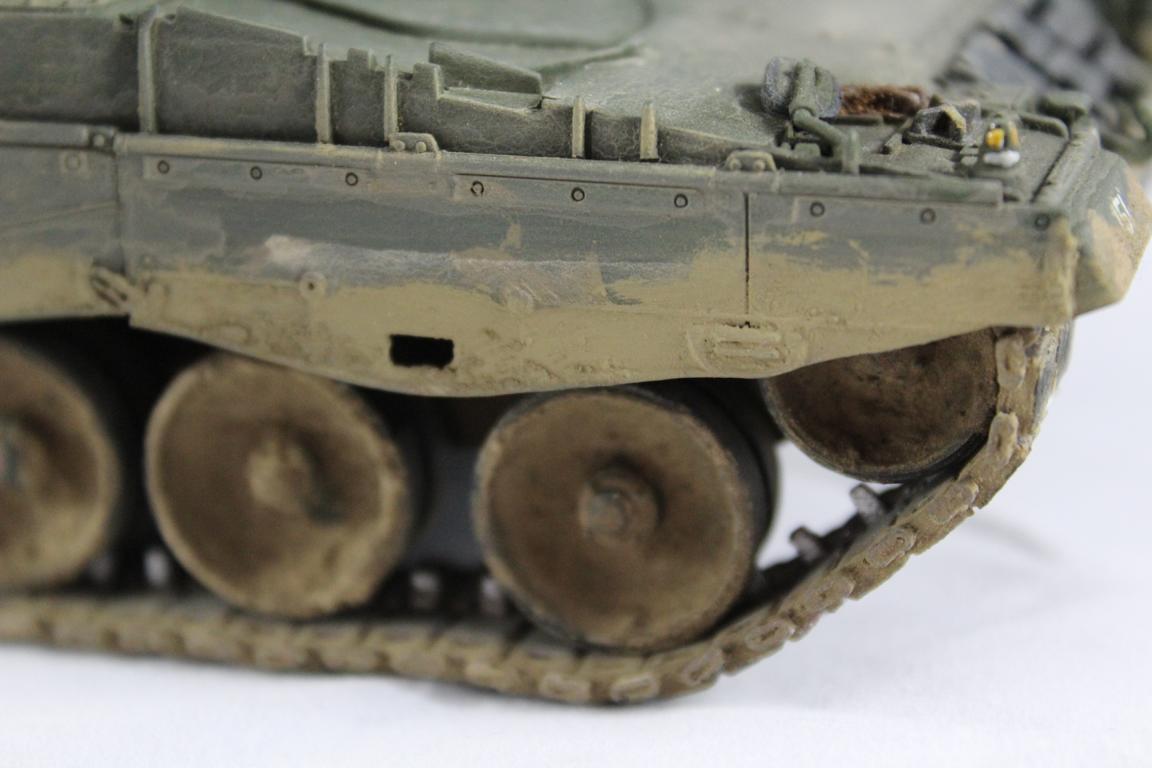
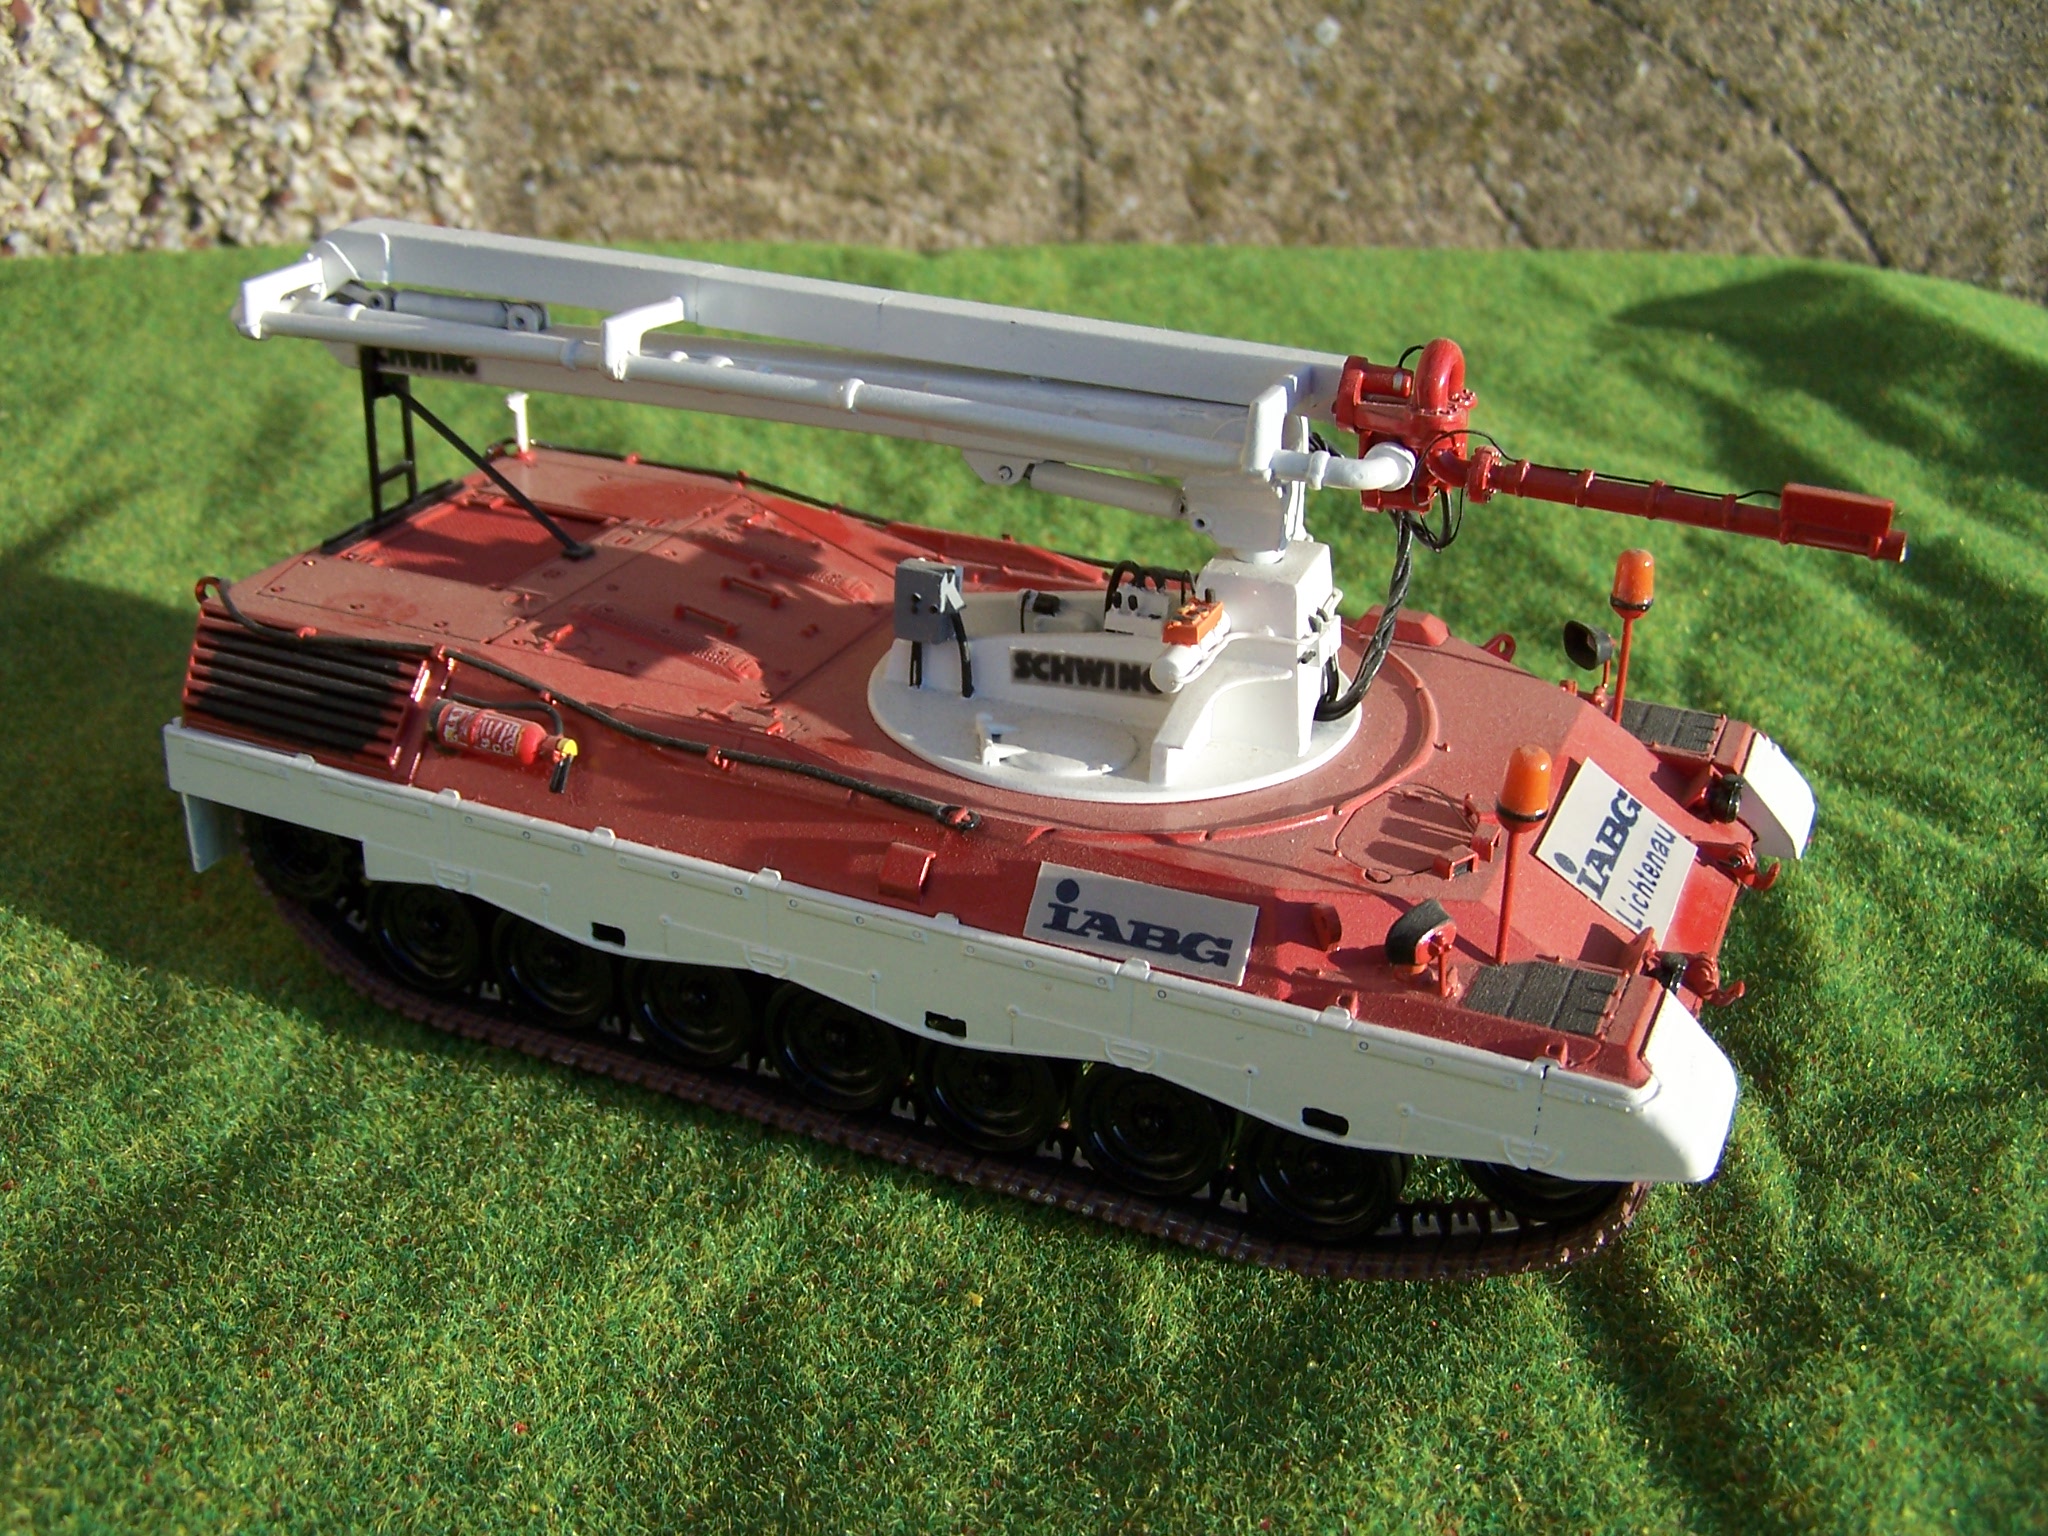
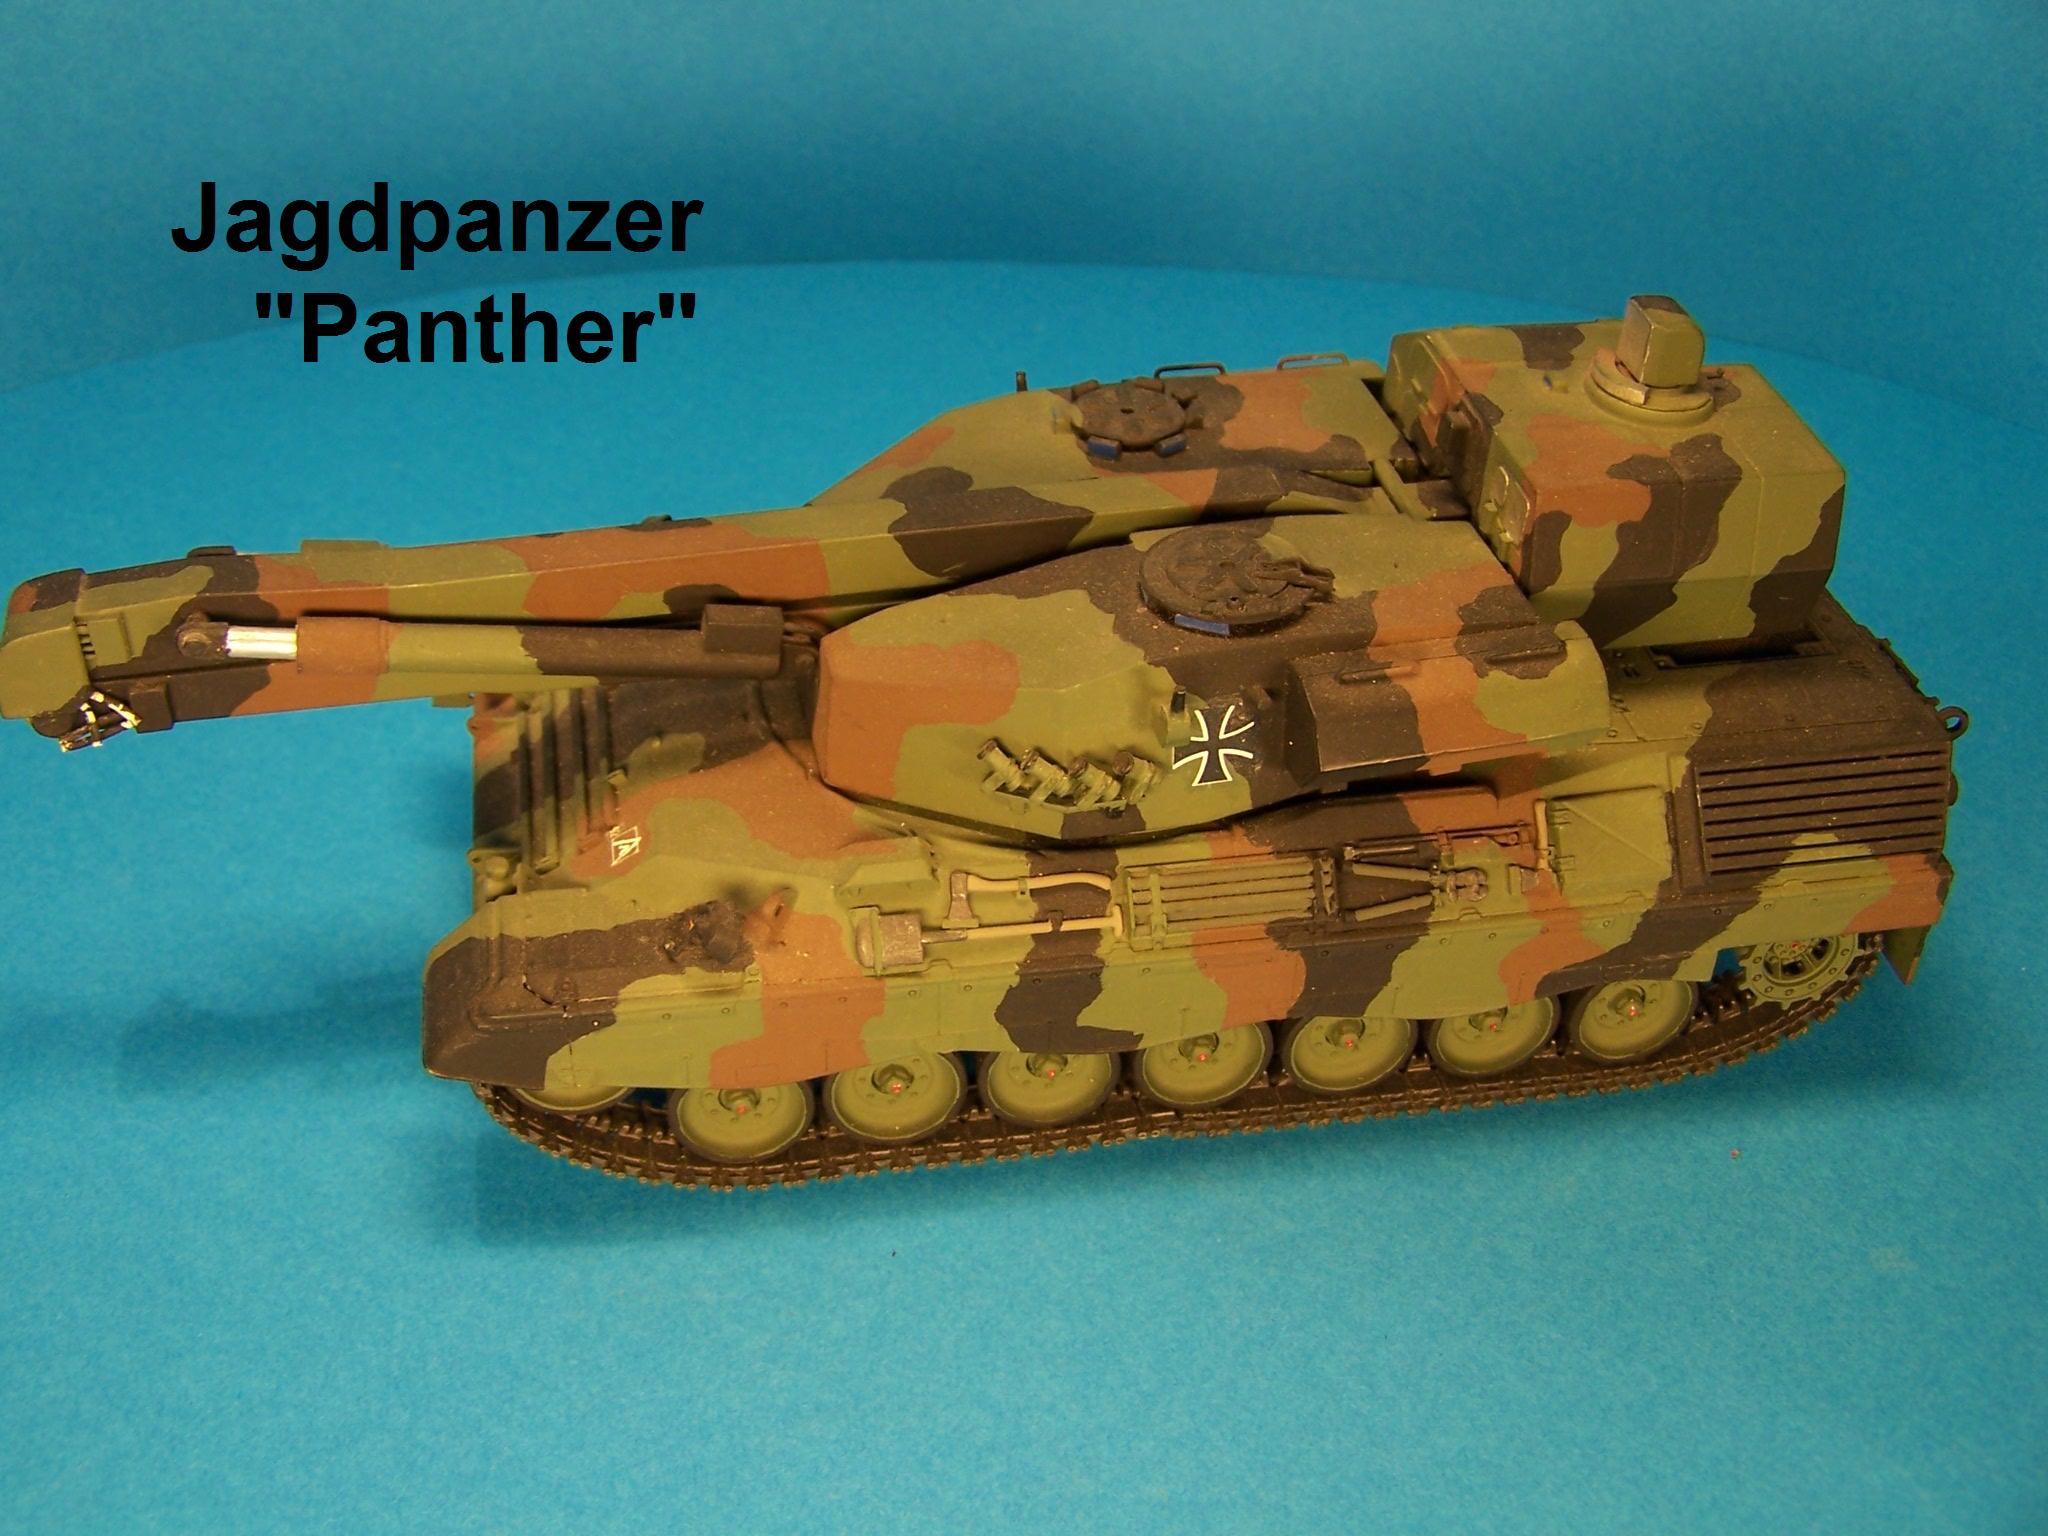
Apparently this Leopard 1 chassis was used in the development of the Swiss Brückenpanzer 68 bridge-laying tank. Developed by a company called SW Swiss Ordnance Enterprise Corporation in Thun. It is now operated by a private owner in Germany.
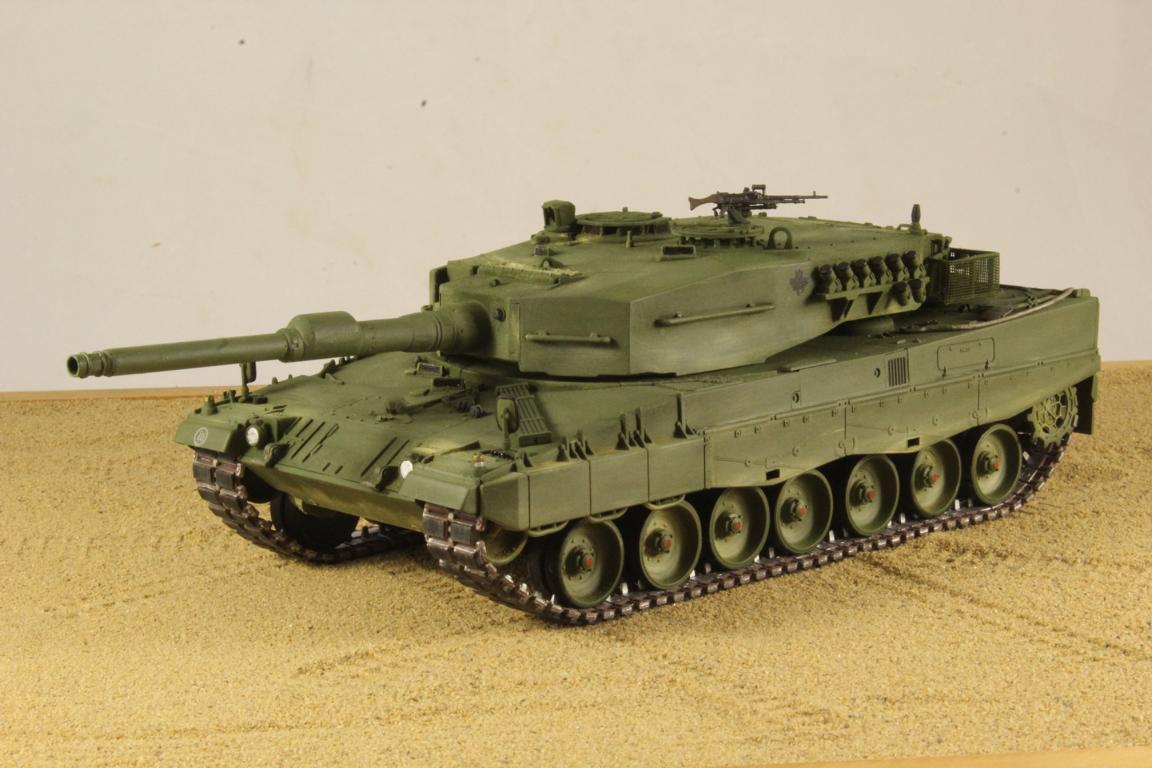
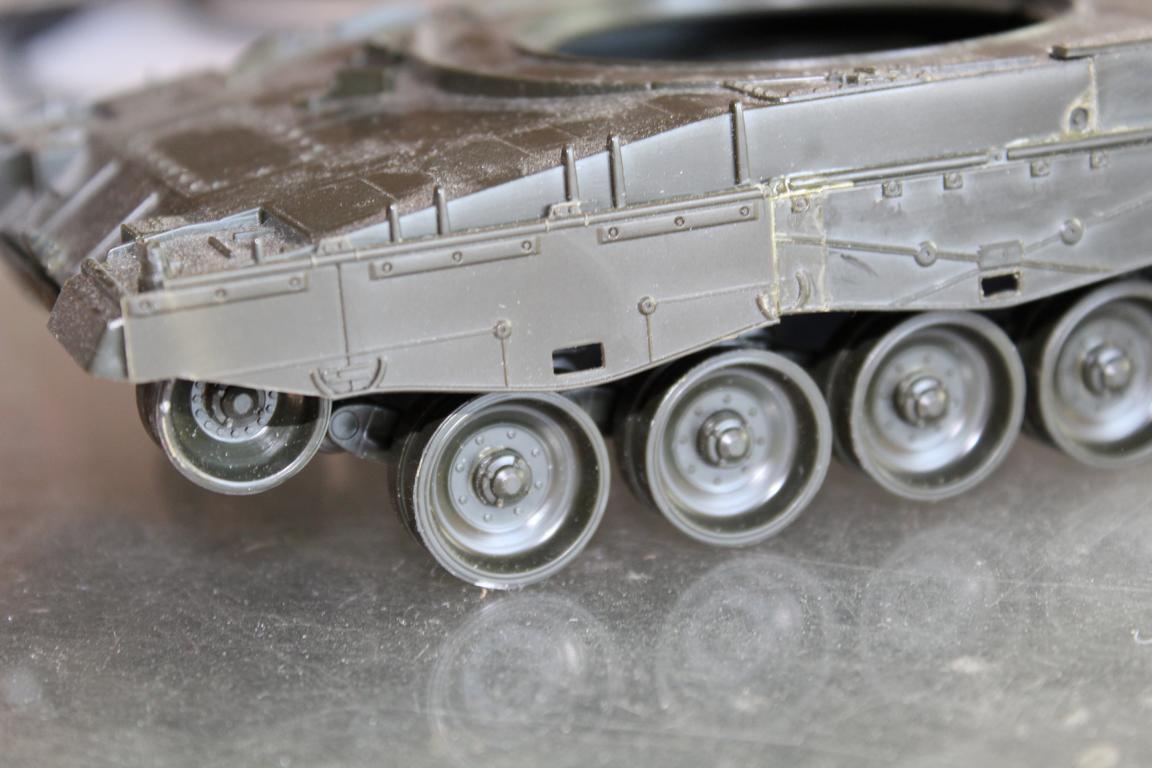
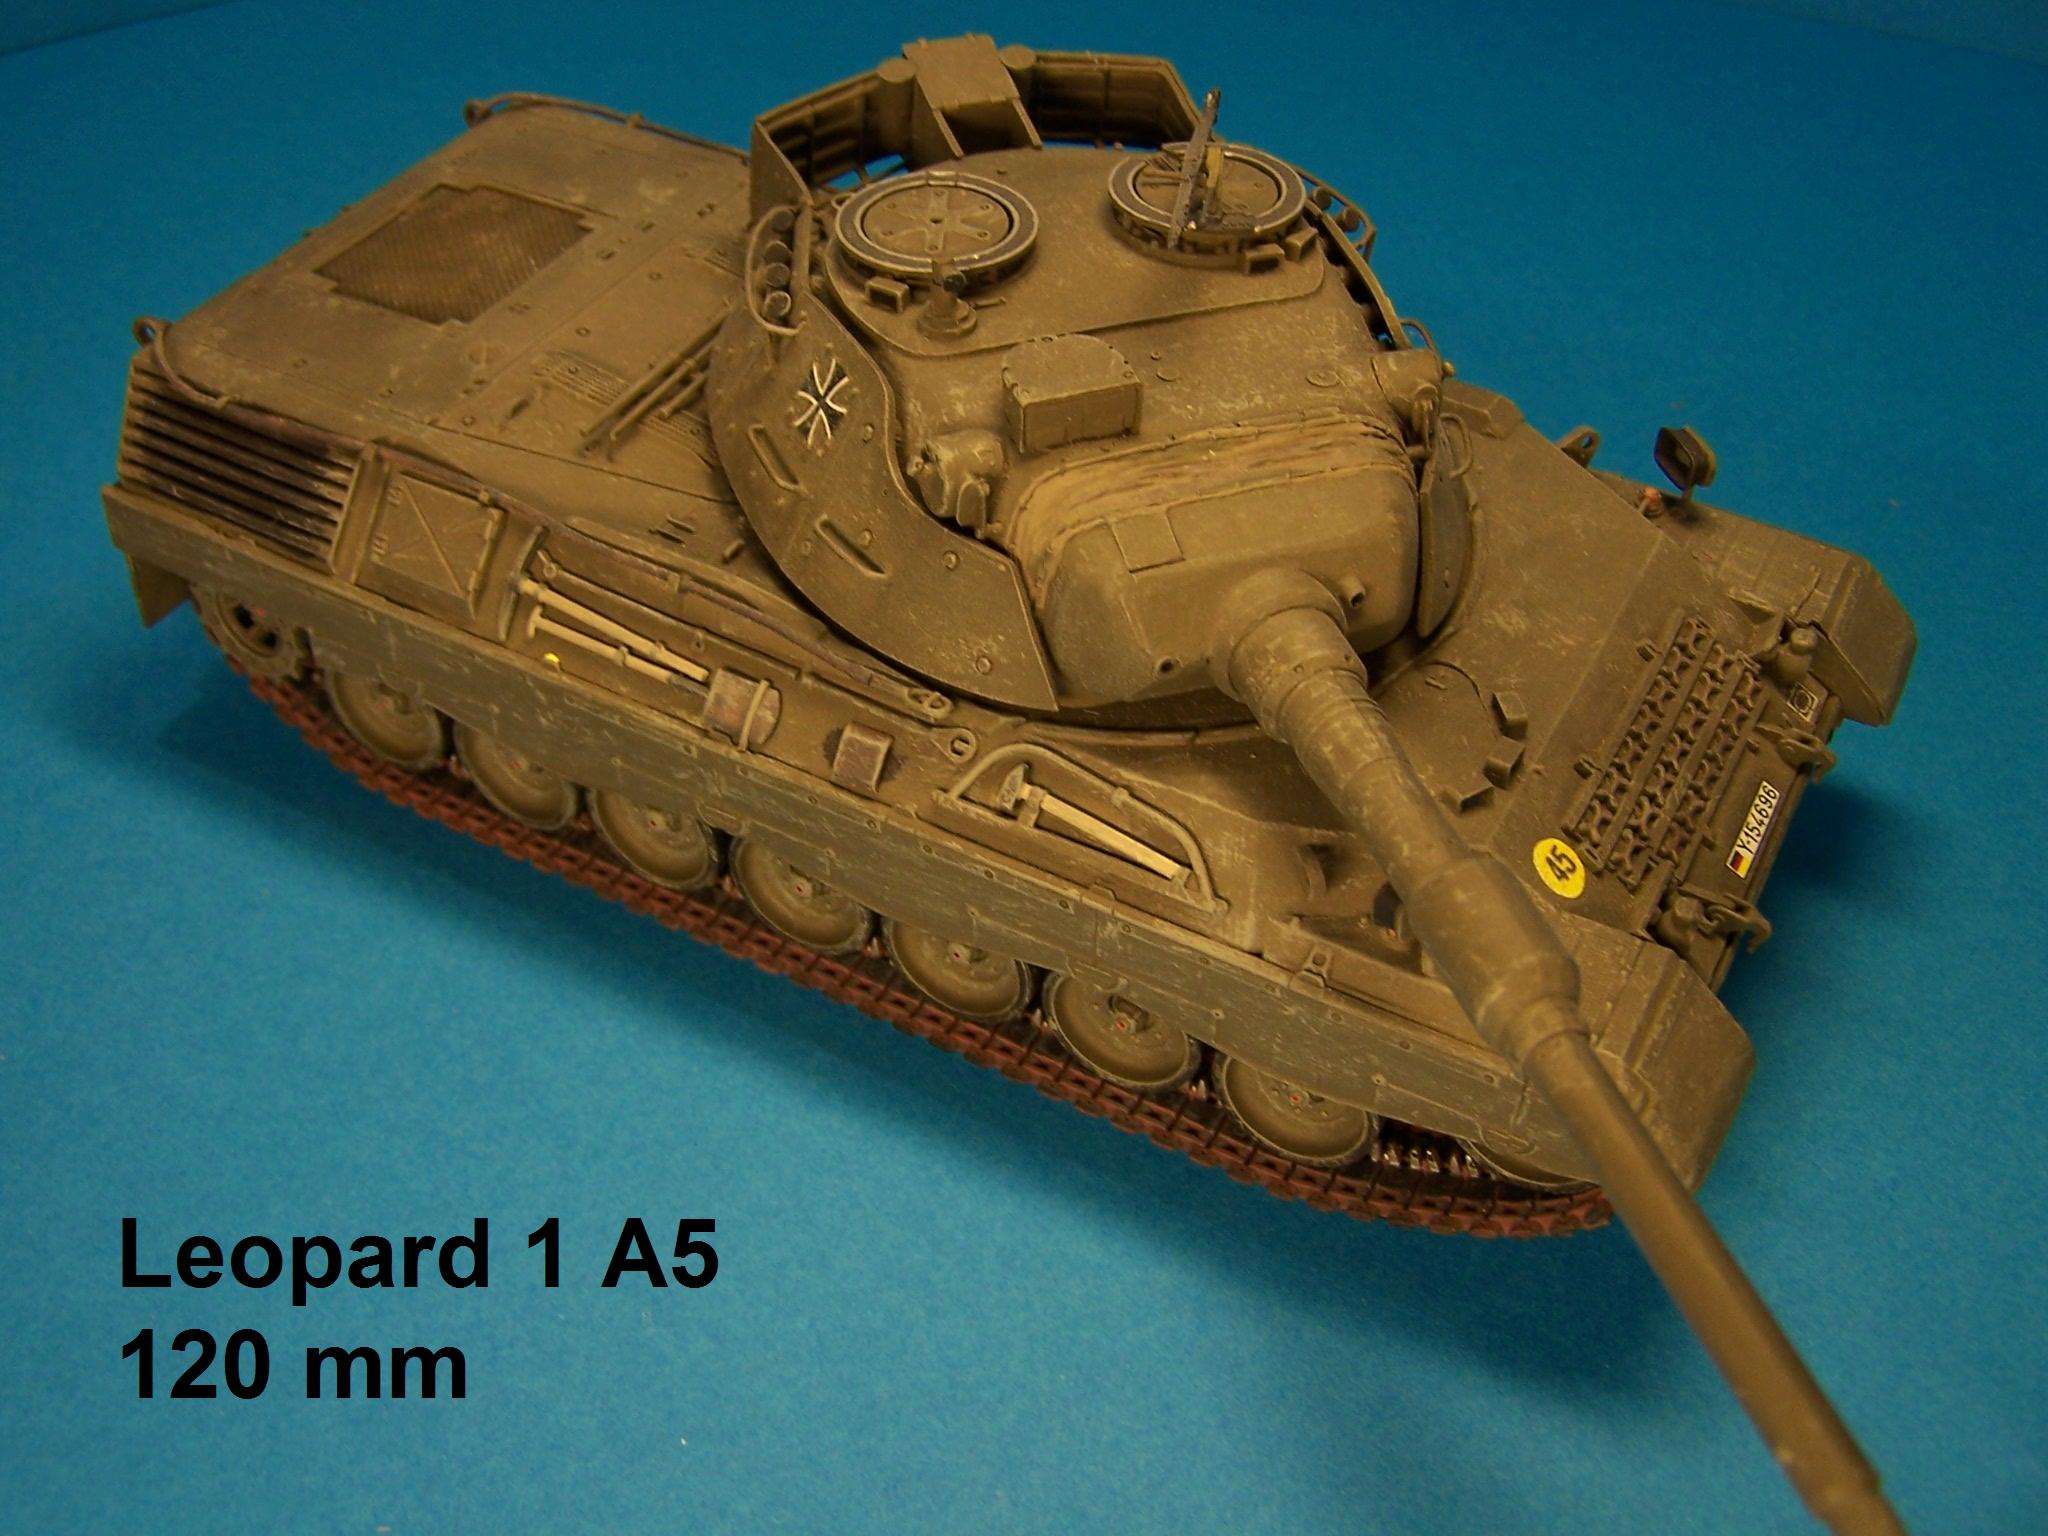
The model is based on the Revell Leopard 1A1.


Translated from Modelling Magazine Modellversium.
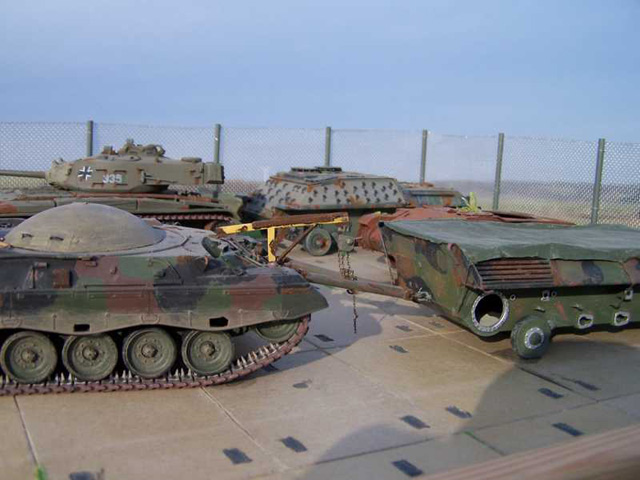
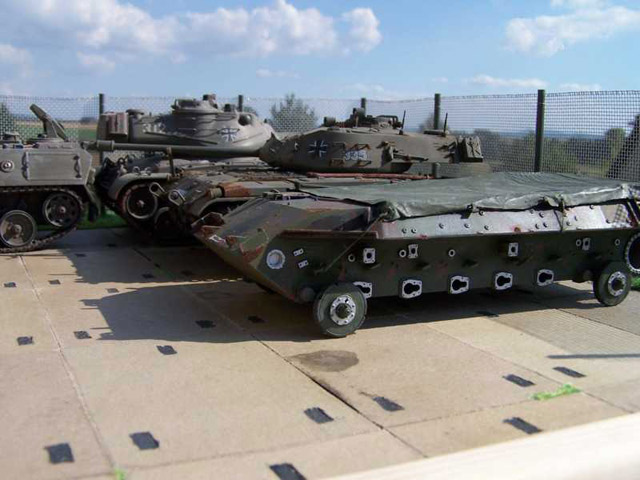
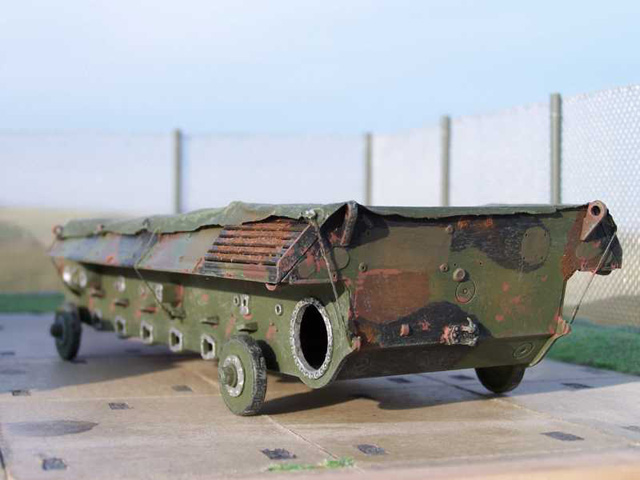
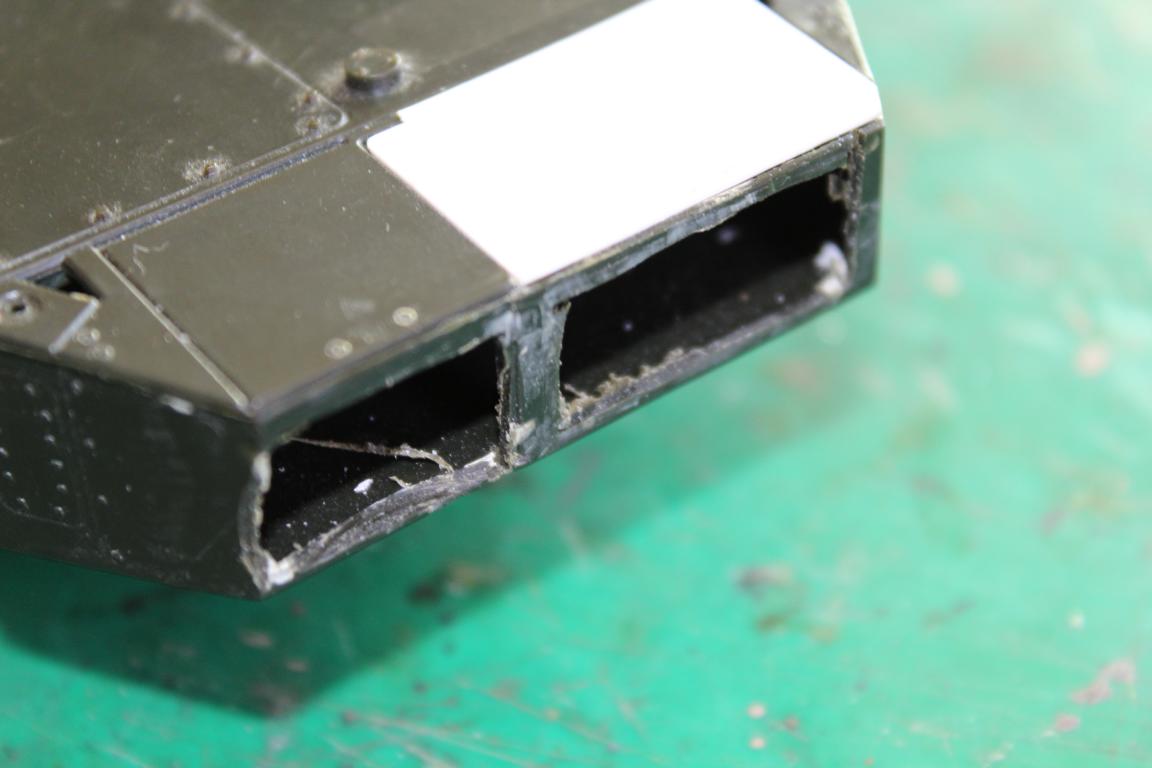
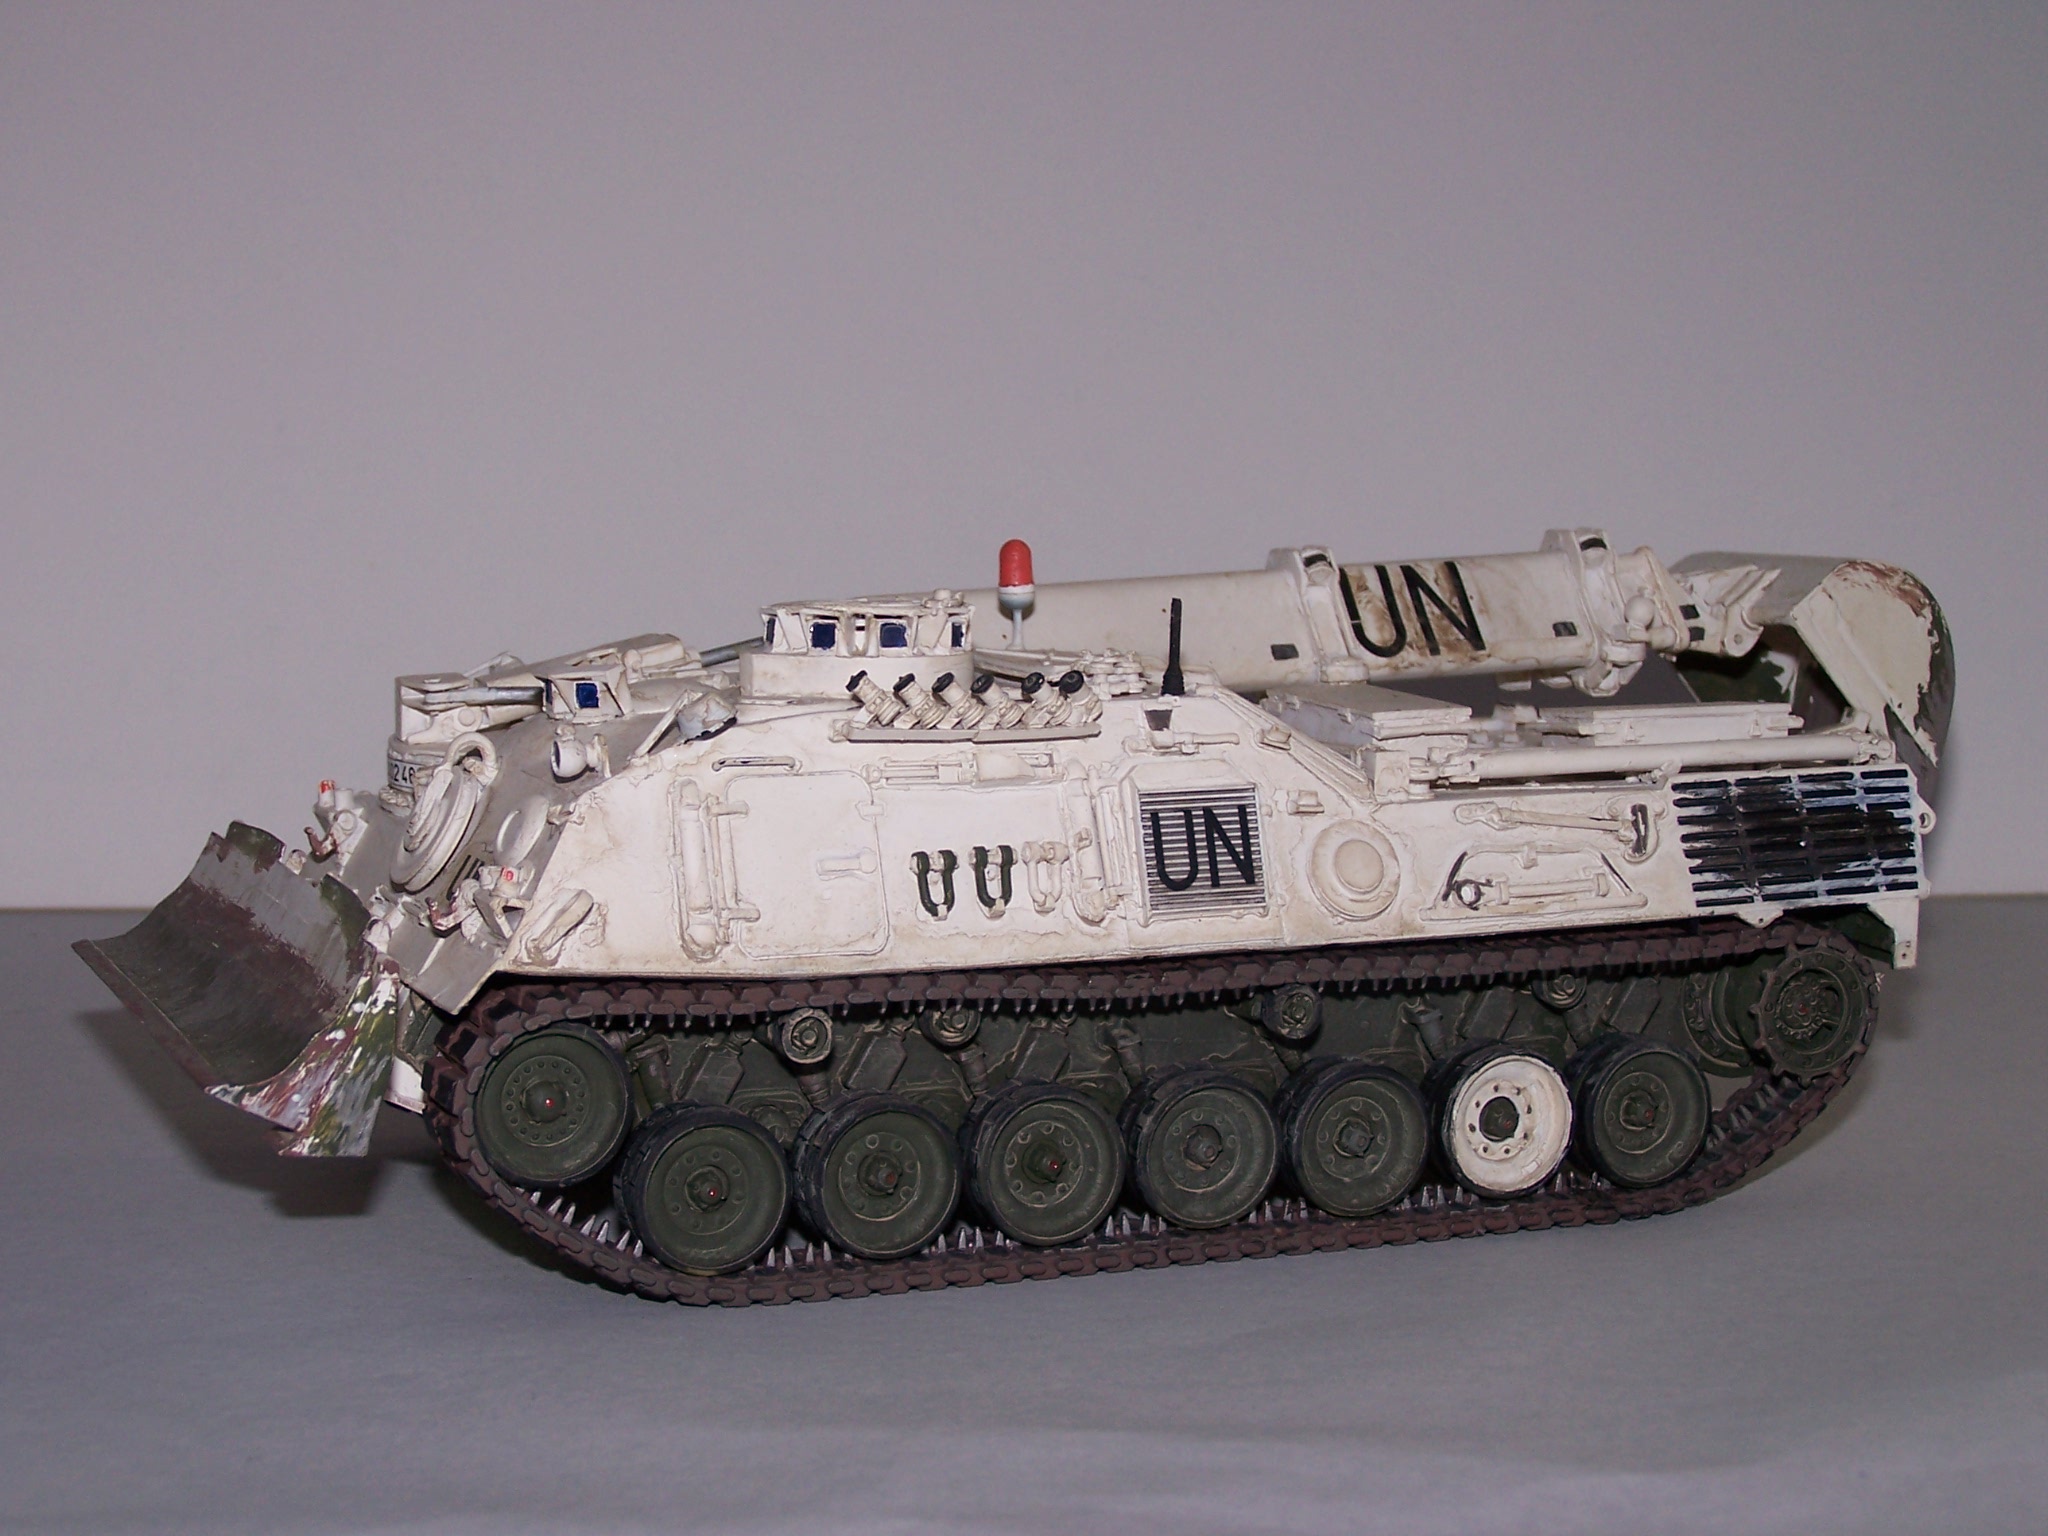
Life after retirement - a Leopard 1 tug used in a military scrapyard towing the hulk of a Leopard 1 hull.
The idea to build tank wrecks came after I had a report on TV about a German Panzer scrapping operation. The 'Leopard-tug' shown there appealed to me so much, because of its reverse engineering, that I had to visit the business. I took many pictures and built this faithfully, as usual based on the Revell Leopard 1A1 kit.
My first attempt was a wreck of a Leopard 1 tank hull. It is not easy to build only by omitting parts of a tank. If nothing is fitted, at least the holes for the bolts need to be there. Since I had no desire to detail the inside of the hull, I covered a tarp over it.
The old Tamiya M41 I built before I knew about the AFV Club Bundeswehr version. This should represent not scrap, but rather an old baby, which stood outside a museum or a 'gatekeeper' in front of the barracks.
The Heller AMX-13 I bought years ago because I needed the turret for another project. In this plan I wanted to overdo it and represent it as a shot-up hard target from a practice site. The diorama for him is not finished yet. It is in the junkyard and waits for restoration to the museum.

This is the Leopard 2A4 from Chile. The roll-out was on 14 November 2007 at Krauss-Maffei-Wegmann in Munich. I built the model after seeing photos about the delivery there.
It is the old ESCI model with turret and tracks from Italeri. The ESCI kit is not very well detailed. I build it in December 2007, before the Hobby Boss kit was on sale.


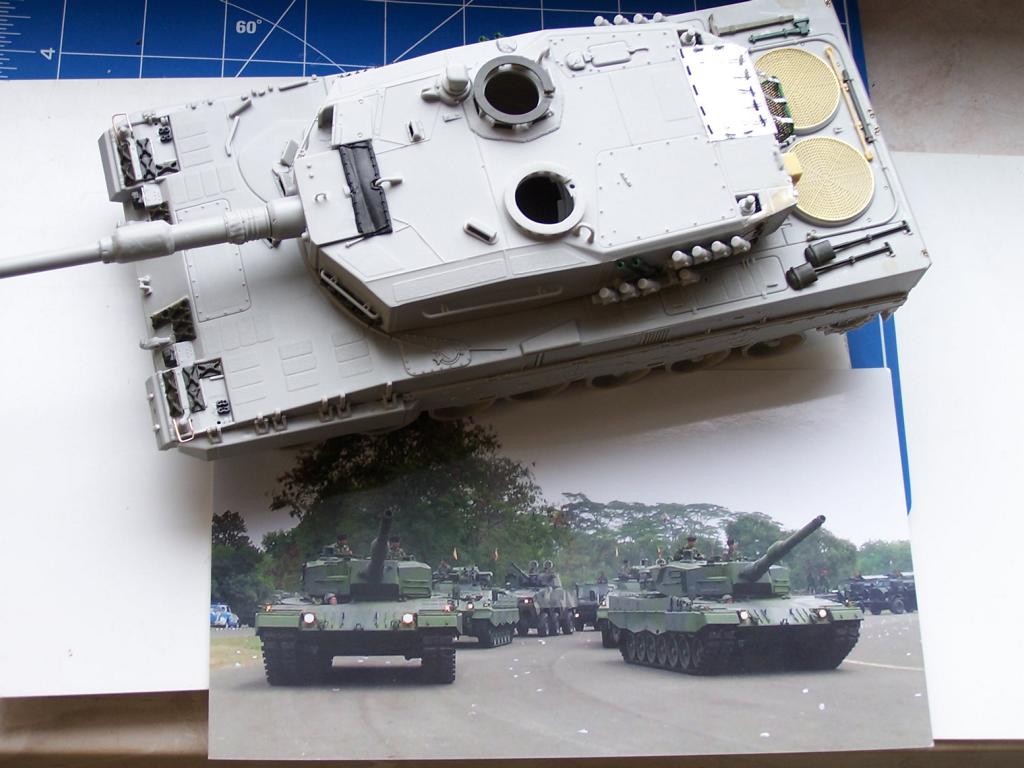
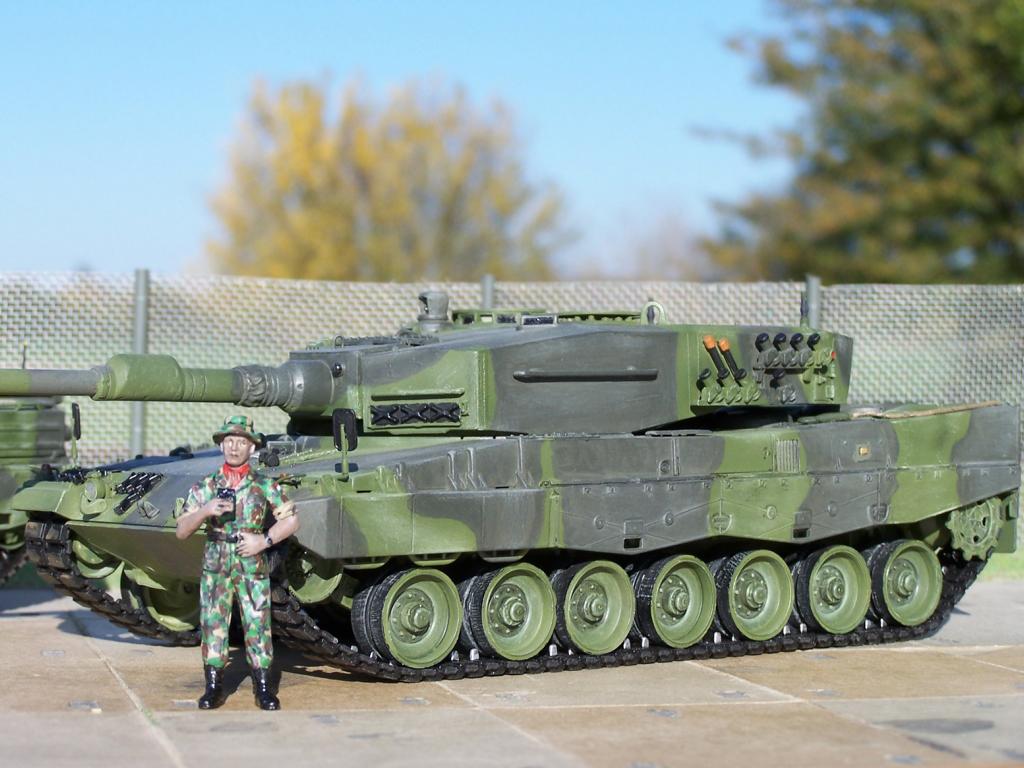
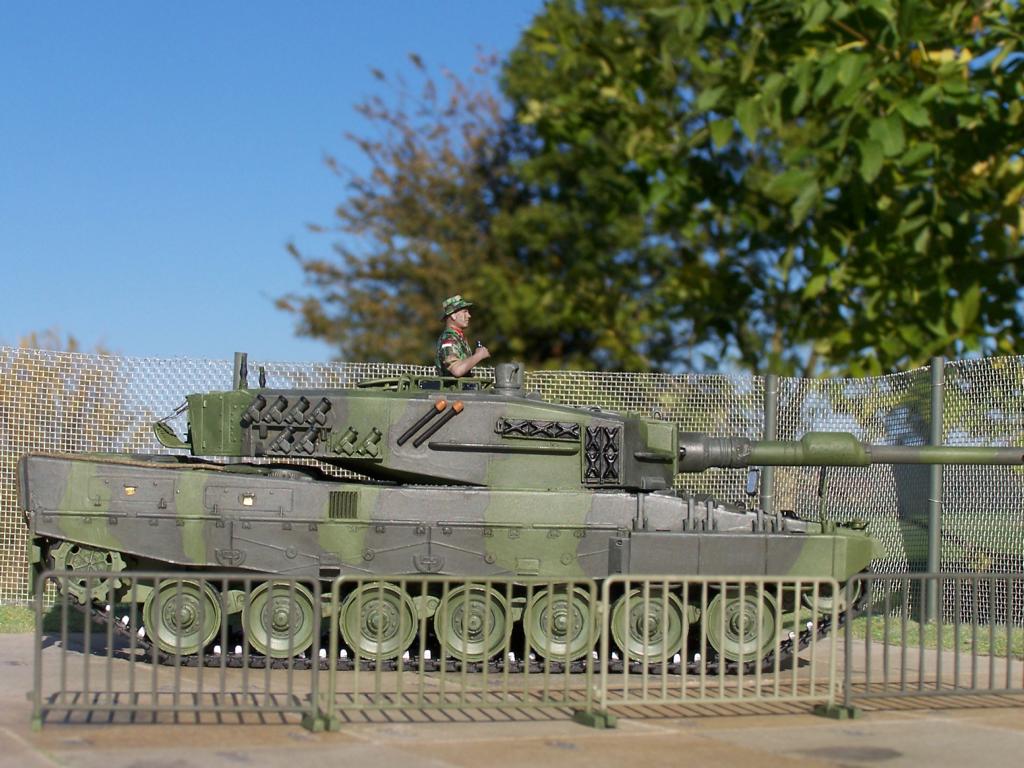
As one of the newest users of Leopard 2, Diethelm was inspired to make a model of Indonesia's new main battle tank.
Since September 2013 Indonesia has been equipped with old Leopard 2A4 and Marder. My model shows a vehicle that was shown on military parade at the beginning of October 2013. I found the camouflage pattern interesting. These leopards are Swiss licence-built Panzer 87s which are slightly different to the German Leopard 2A4.
The soldier is the commander from the old Revell Leopard 1 kit. I gave him a tropical hat. He has a mobile phone in his hand and wants to take a picture of his new vehicle.
I chose the name Leopard 2TNI because TNI is the abbreviation for the Indonesian Army. I used the Hobby Boss kit. The colour is Tamiya XF-67 and Revell 66.


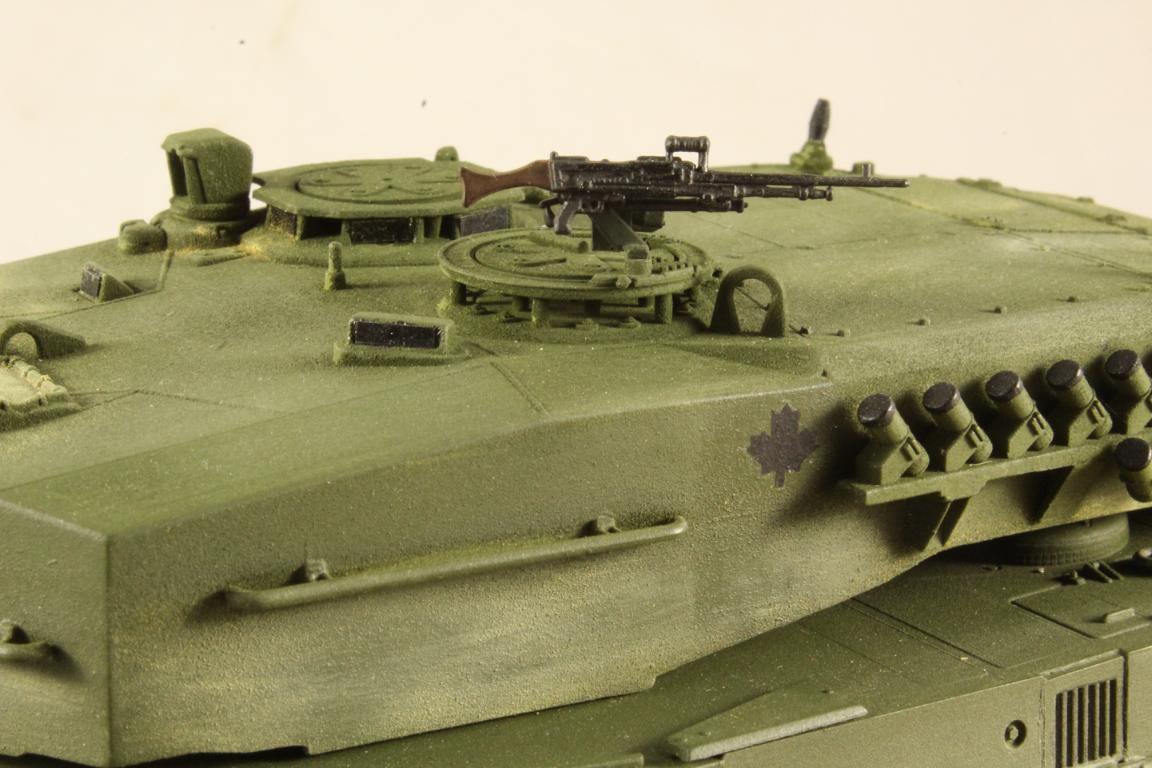
These Leopards are ex-Dutch. I could see from the pictures that only the old Italeri/Revell fits because it has the large anti-slip, such as the NL-Leo 2A4.
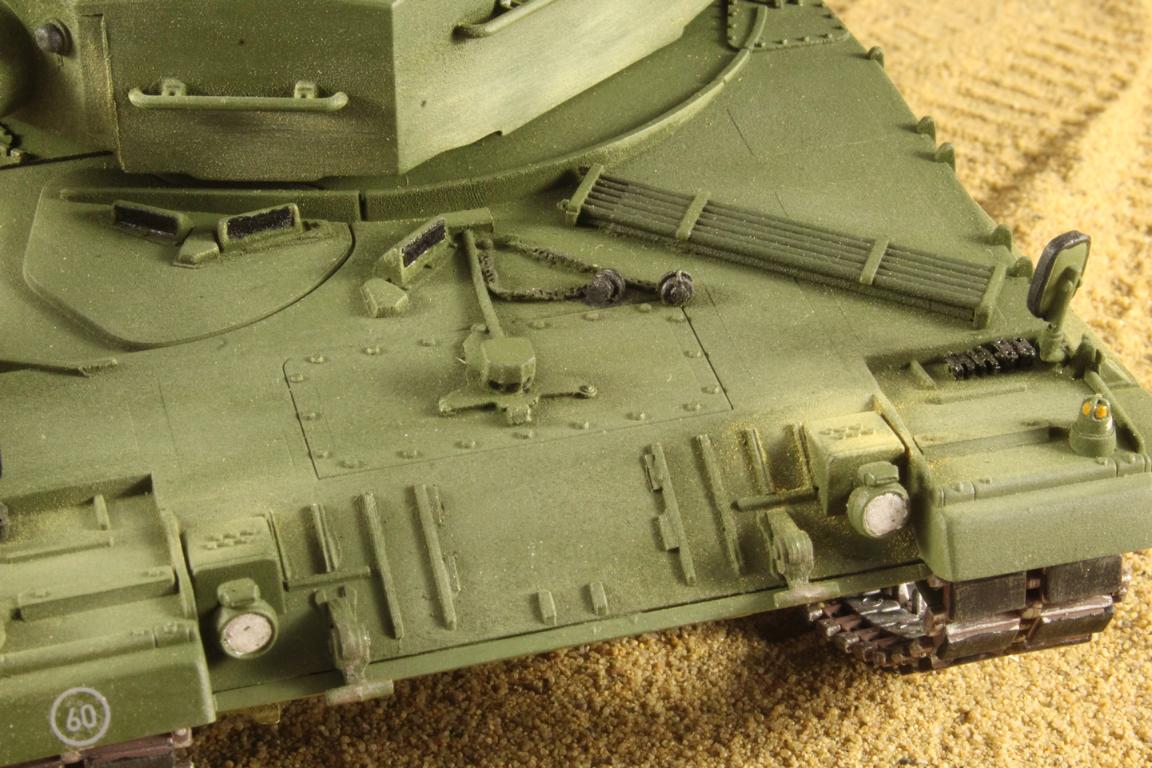
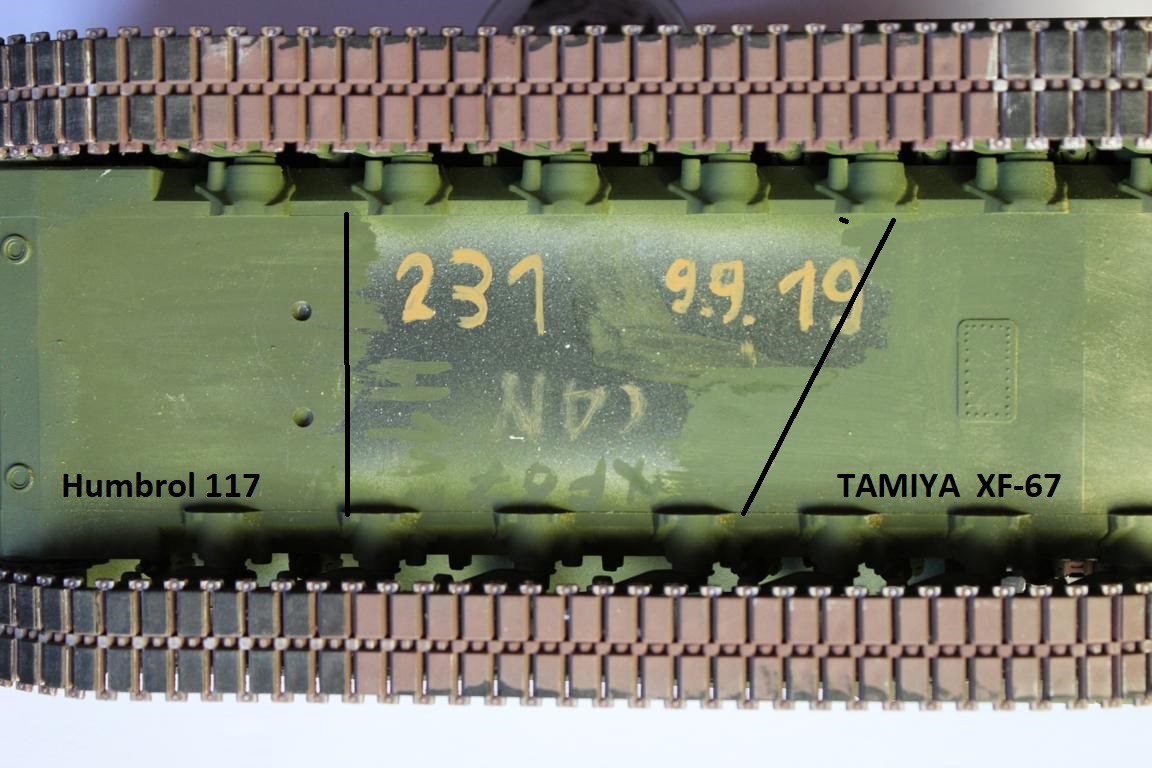
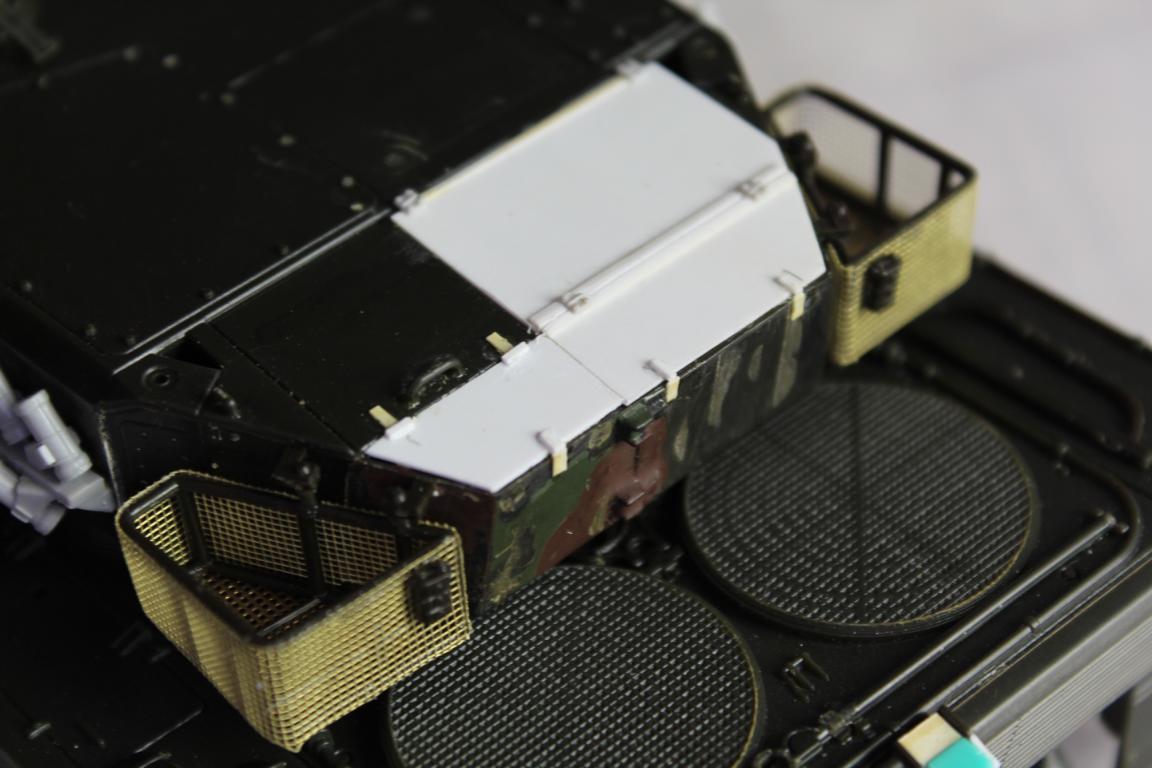
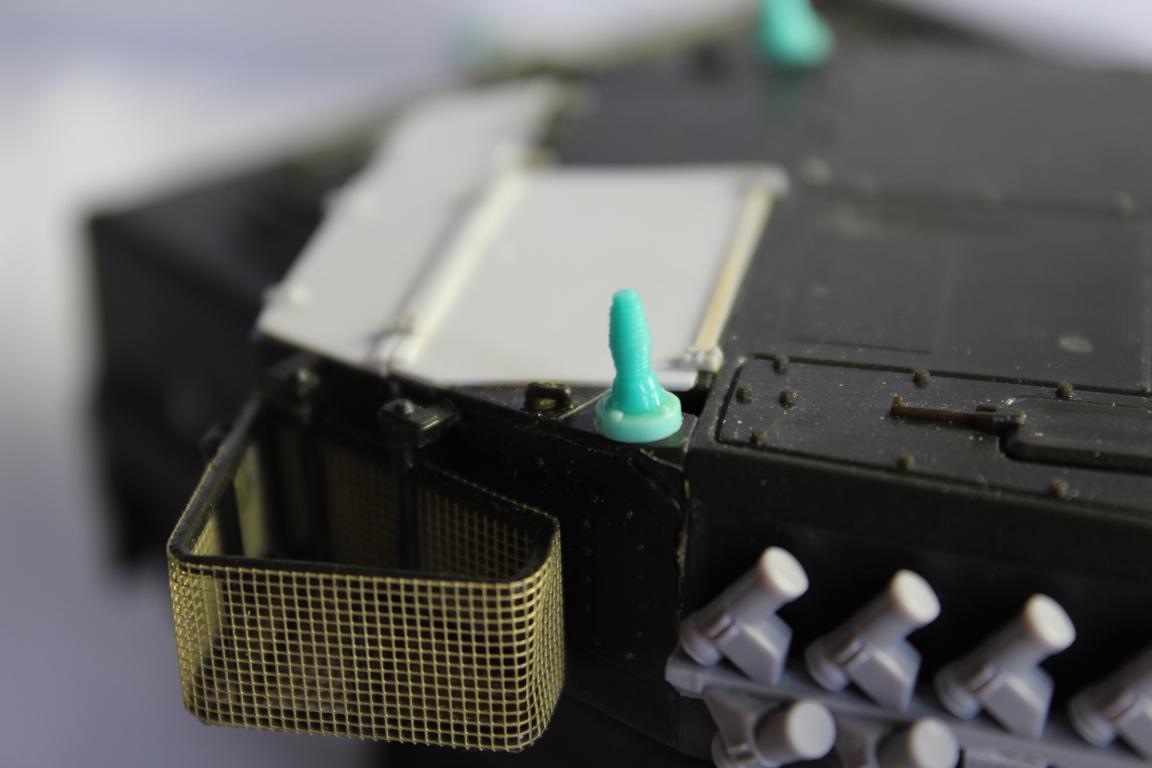
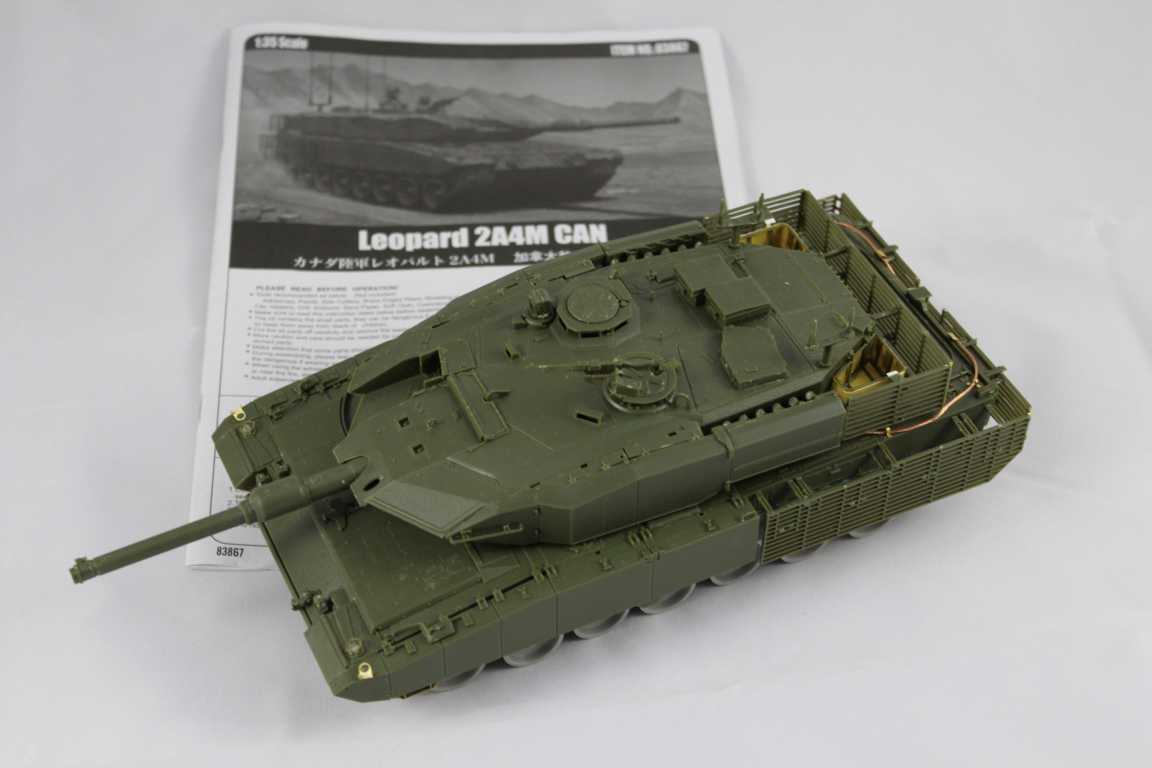
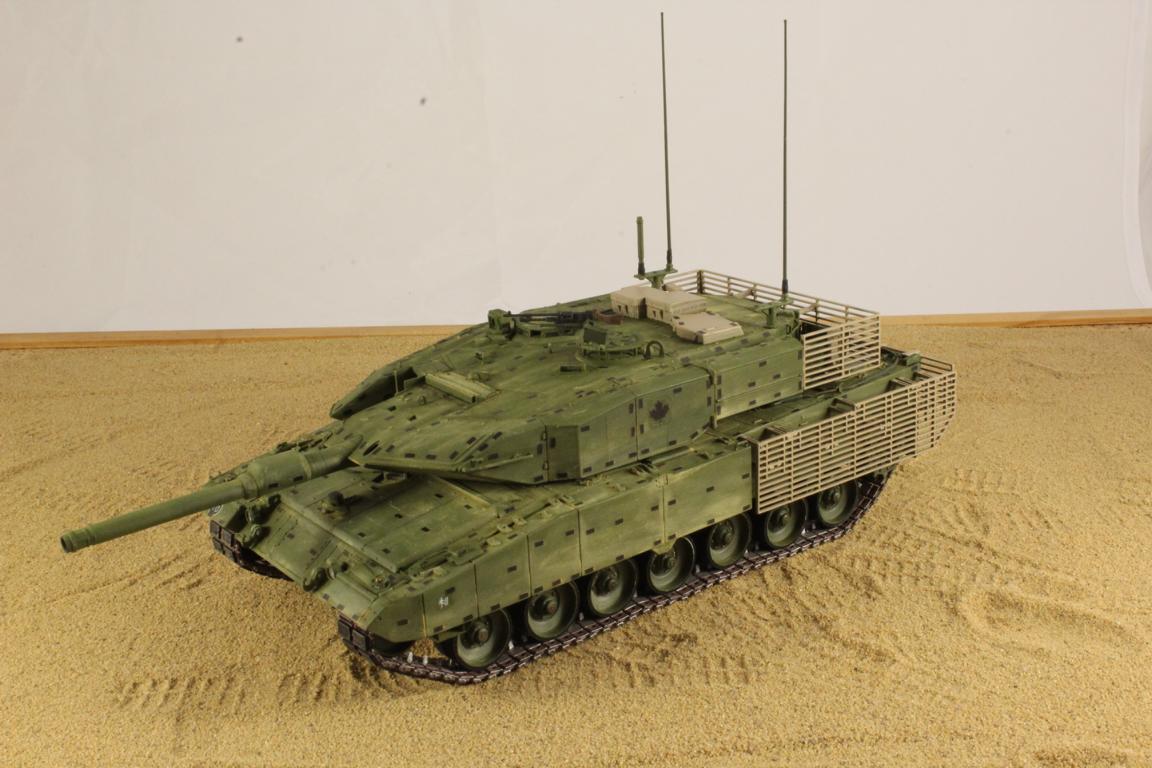
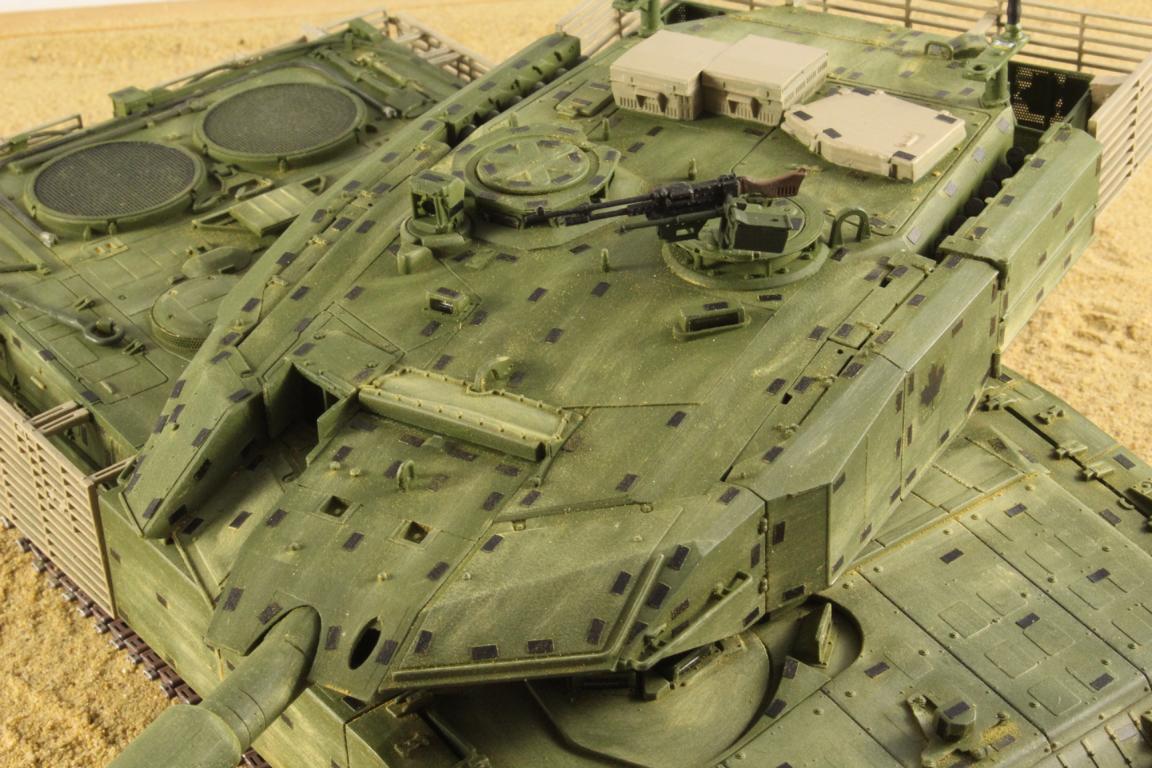
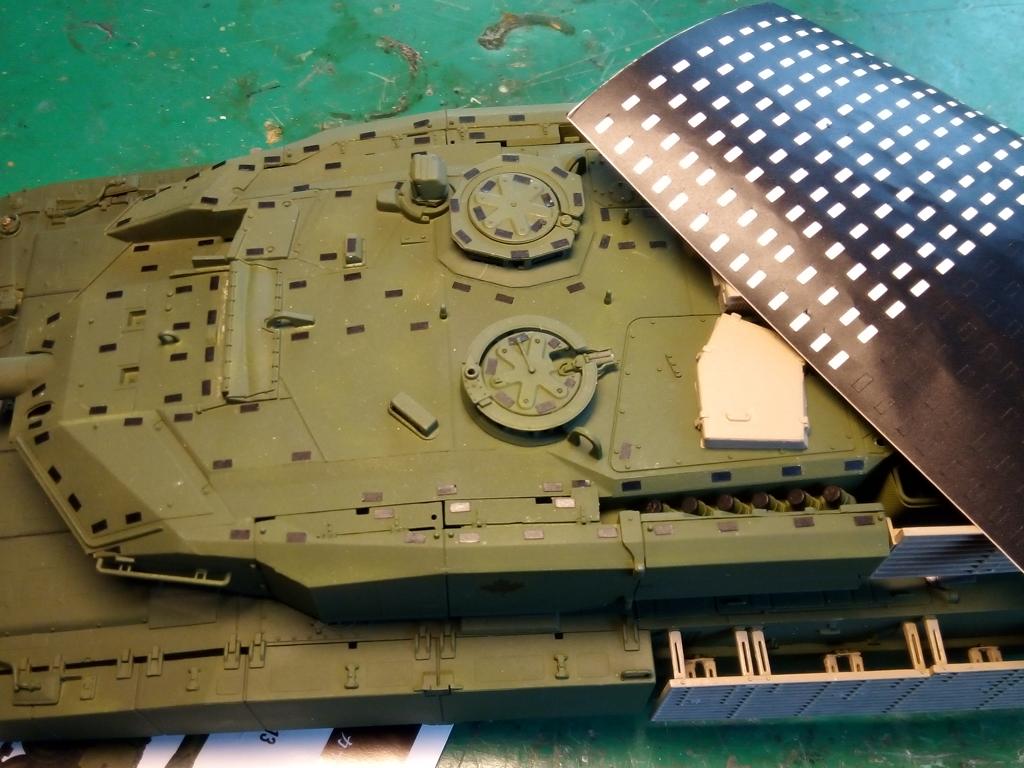
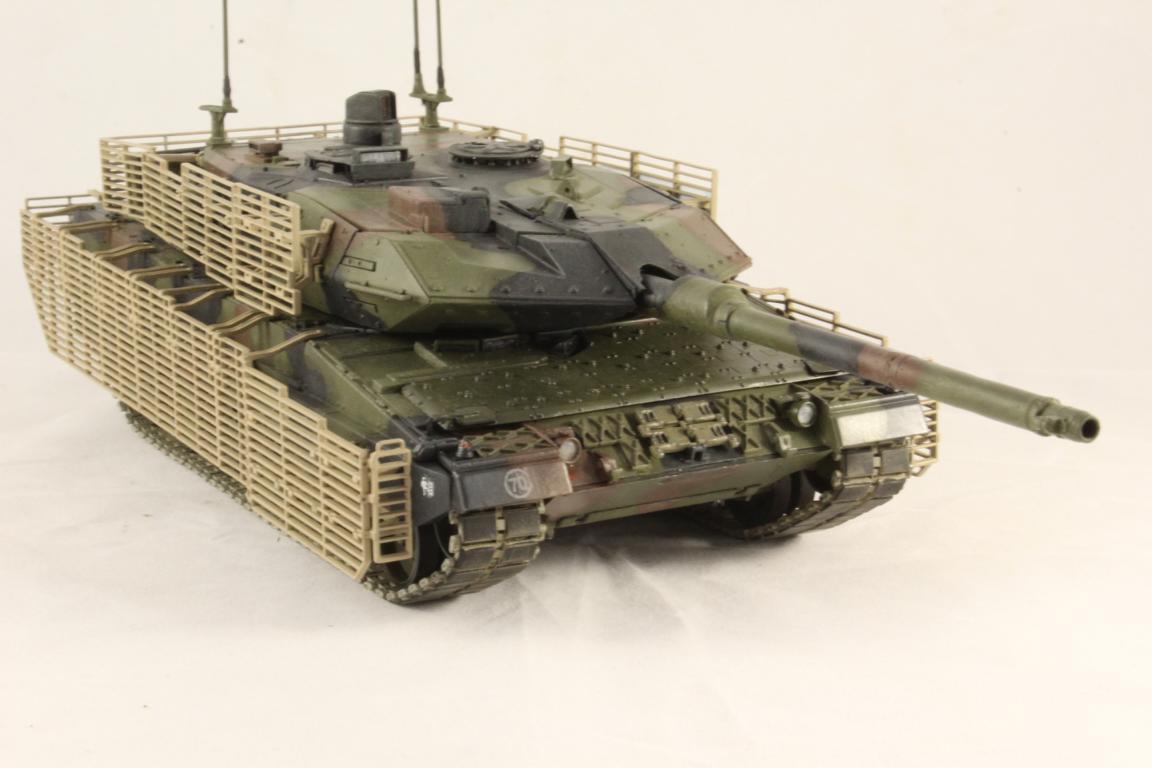
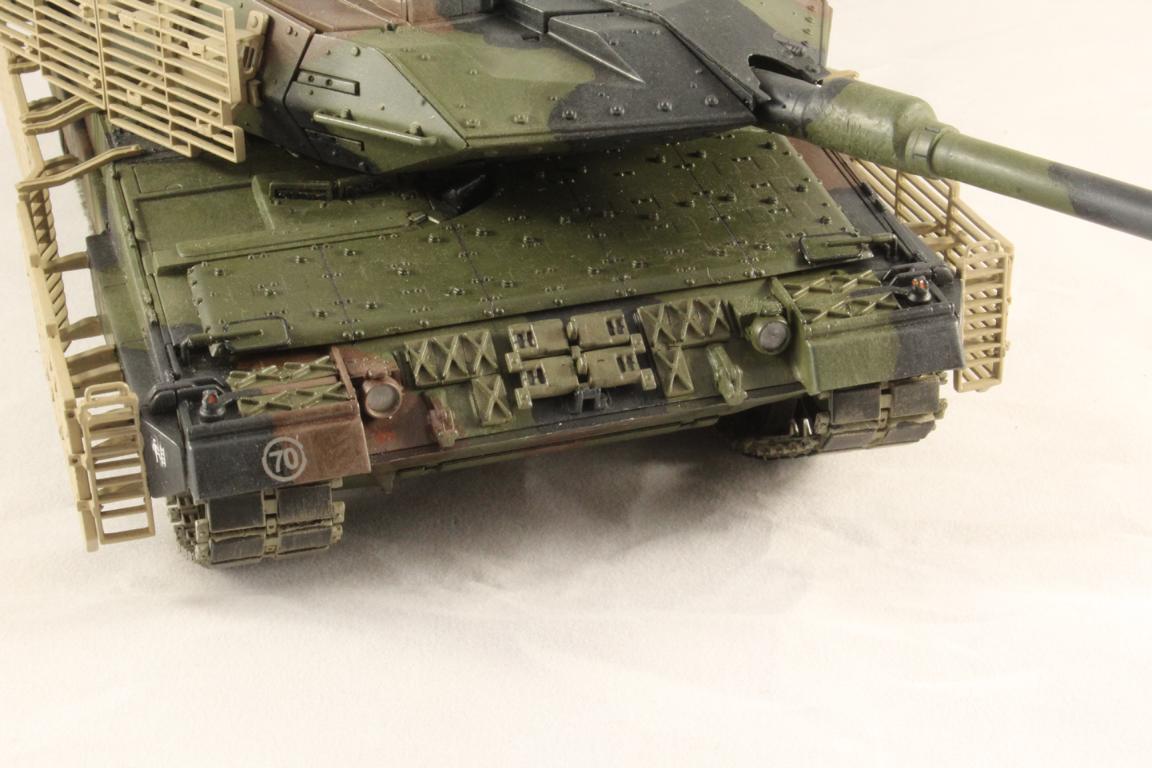
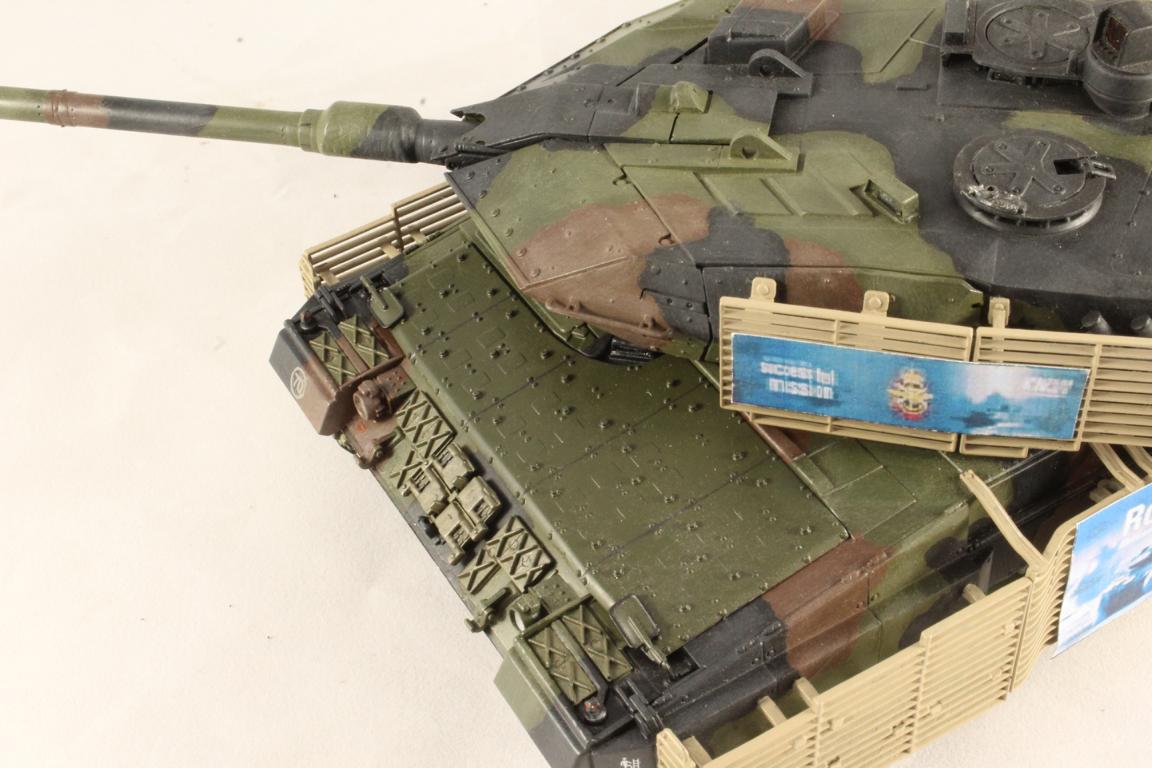
With a 35-year-old model, the detailing is not really a hit. The flaps cast on the sideskirts are particularly crude but now I have my system. Changes from NL to CAN: 6/2 smoke dischargers, iron bars on the front, longer turret with storage baskets like the A5/A6. Camera at the front and rear like the A4M. I had copy it in resin.
The colour is Tamiya XF67. It should be a suitable shade for Canada. The decals are a mix of remnants of other kits. Then dusted with Tamiya “Weathering Masters”.
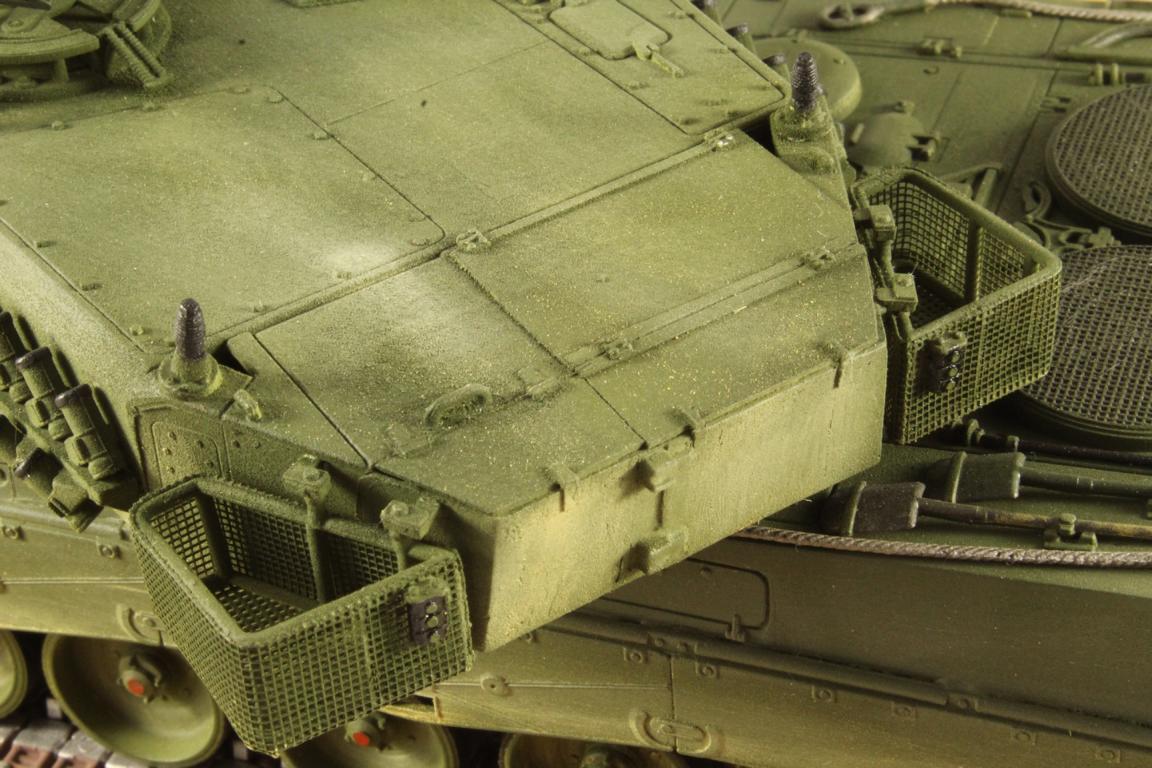


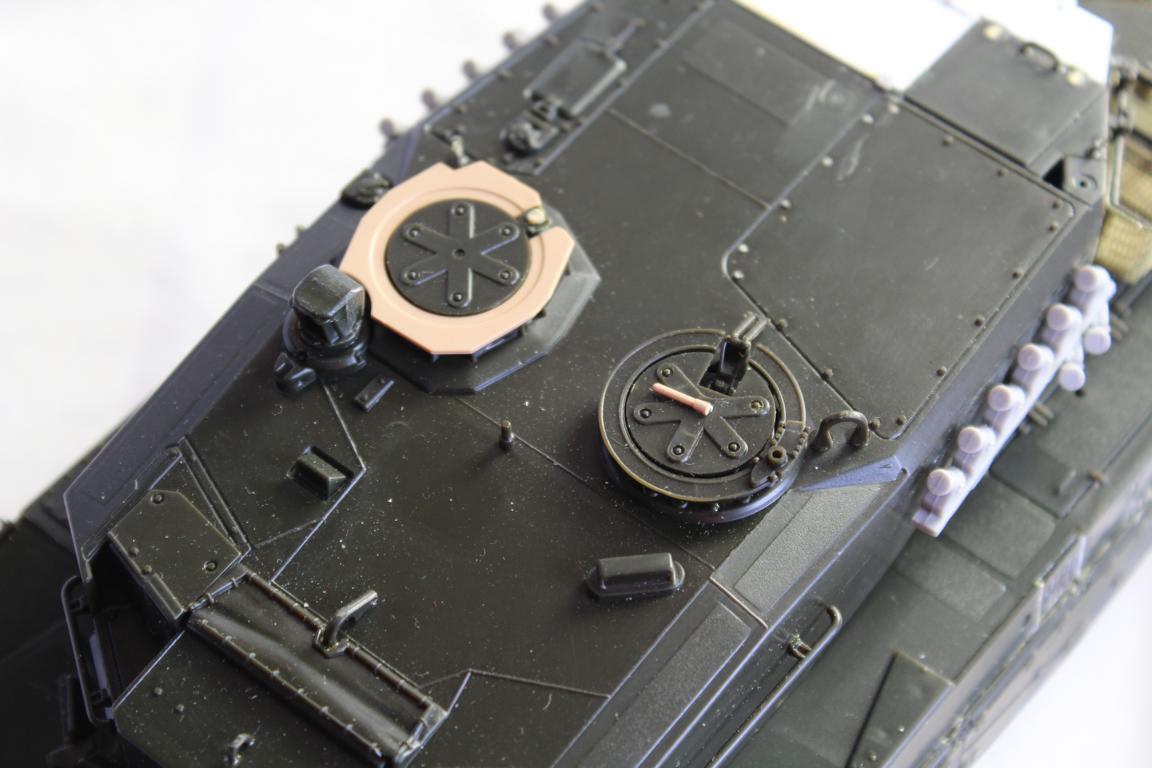

The kit is No.83867 from Hobbyboss in 1/35. The kit is pretty good and I built it with no changes. Only the antennas are from the 2A6M which I had spare. Since the chassis, in particular is identical to the old HBs, I mixed the parts.
The colour is Tamiya XF67. It should be a suitable shade for Canada. I used the velcro patches from Leopard Workshop. Looks better than the decals in the kit.
Then dusted with the Tamiya “Weathering Master”.
On the German website modellversium.de, I introduced it and compared it with other kits.

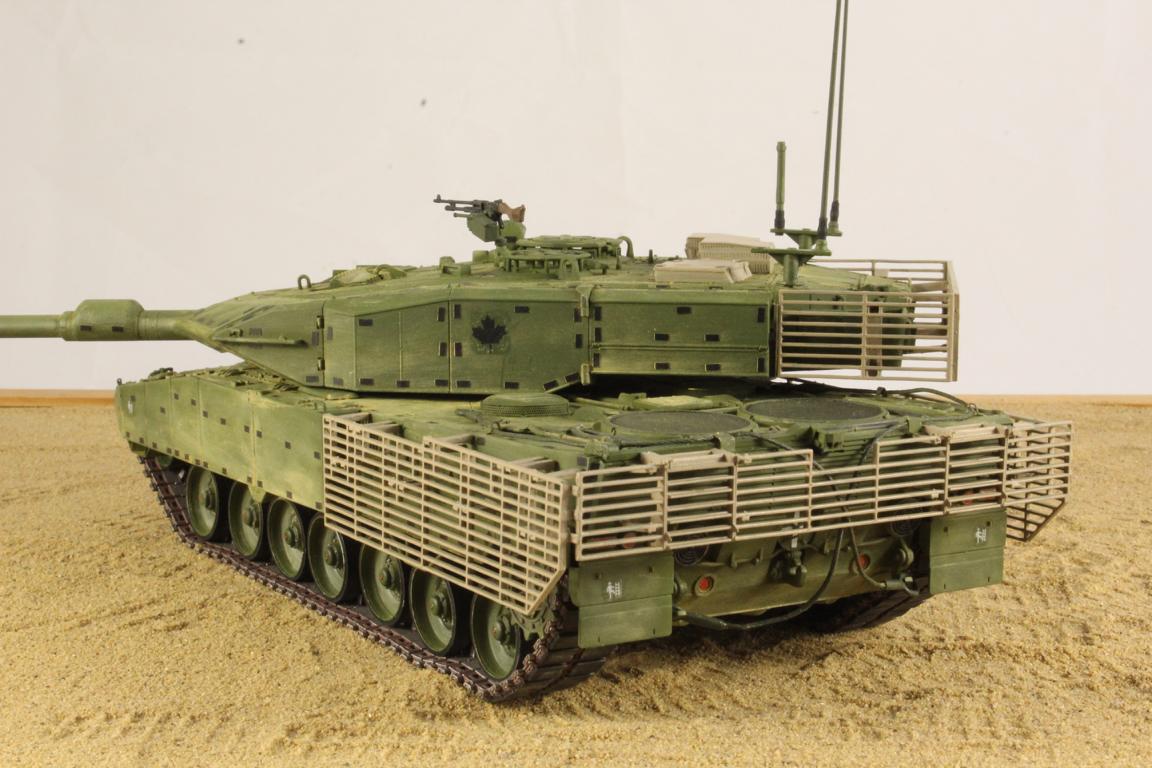

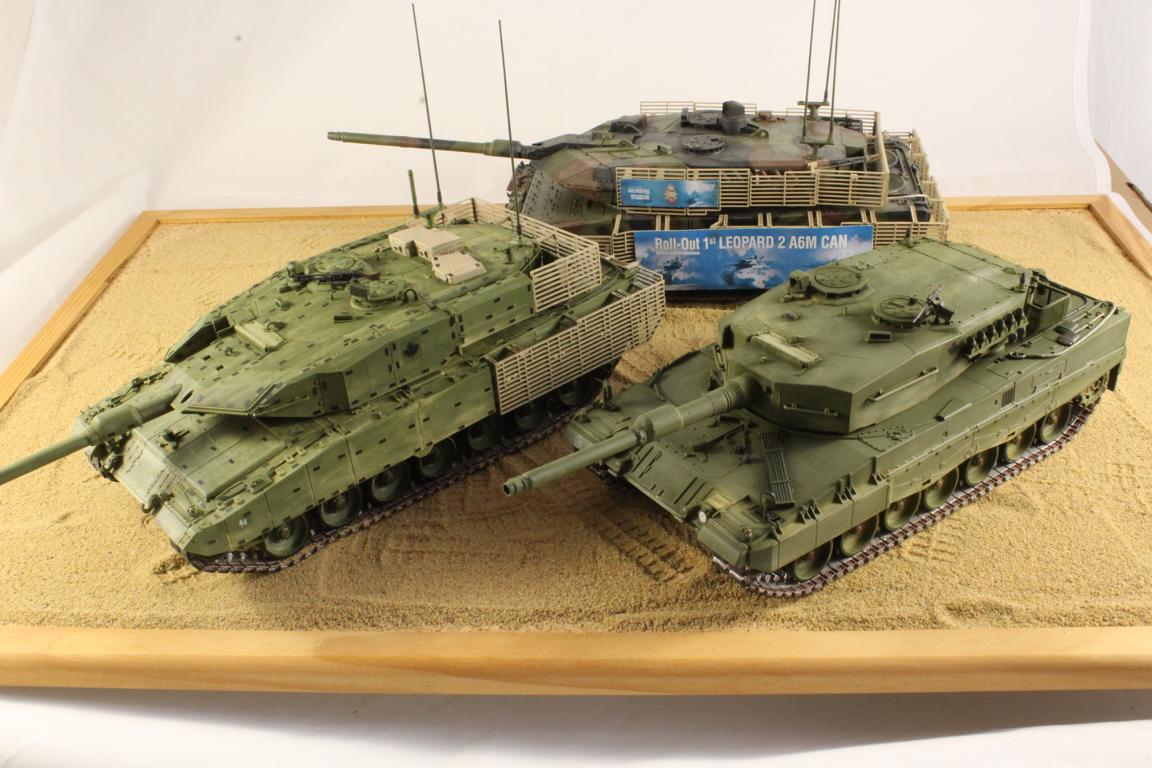
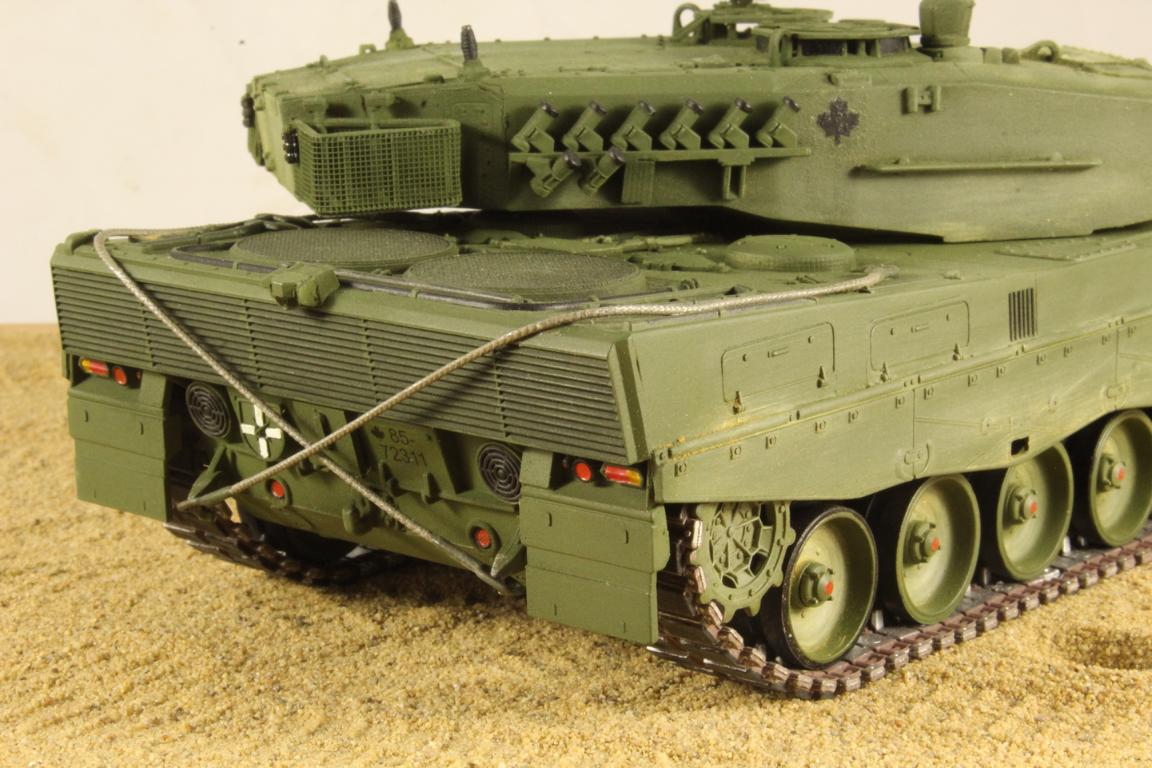
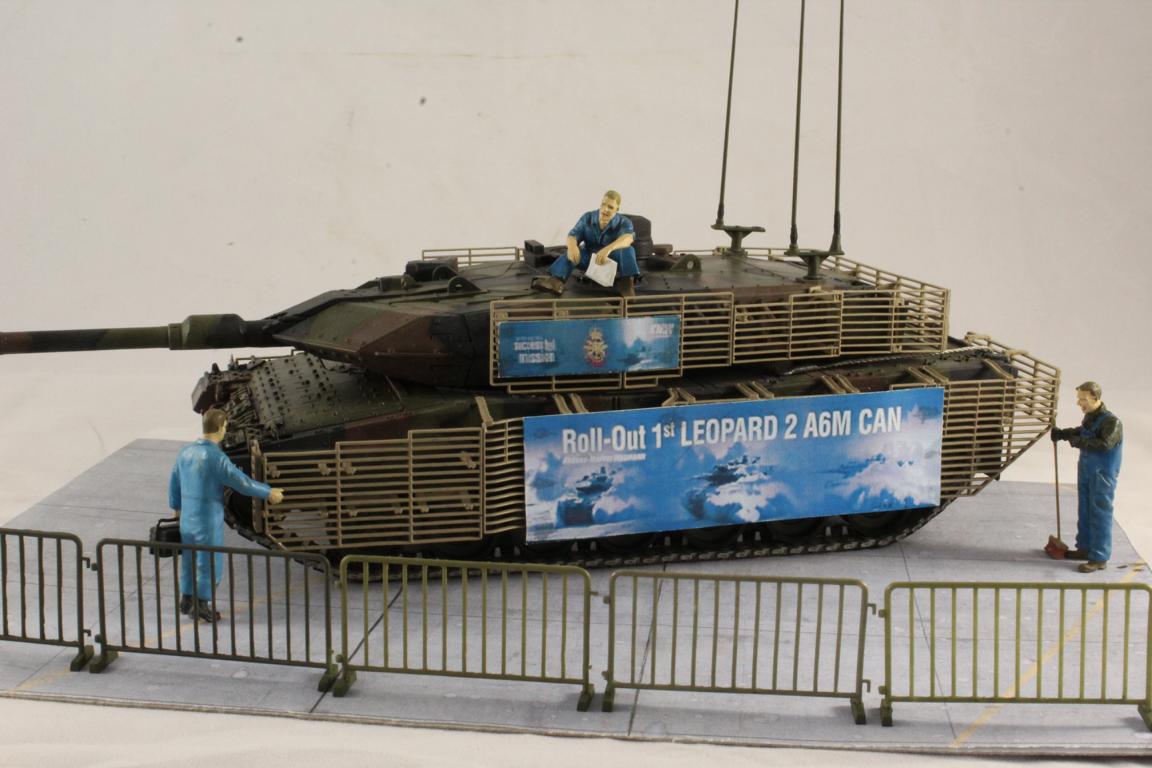
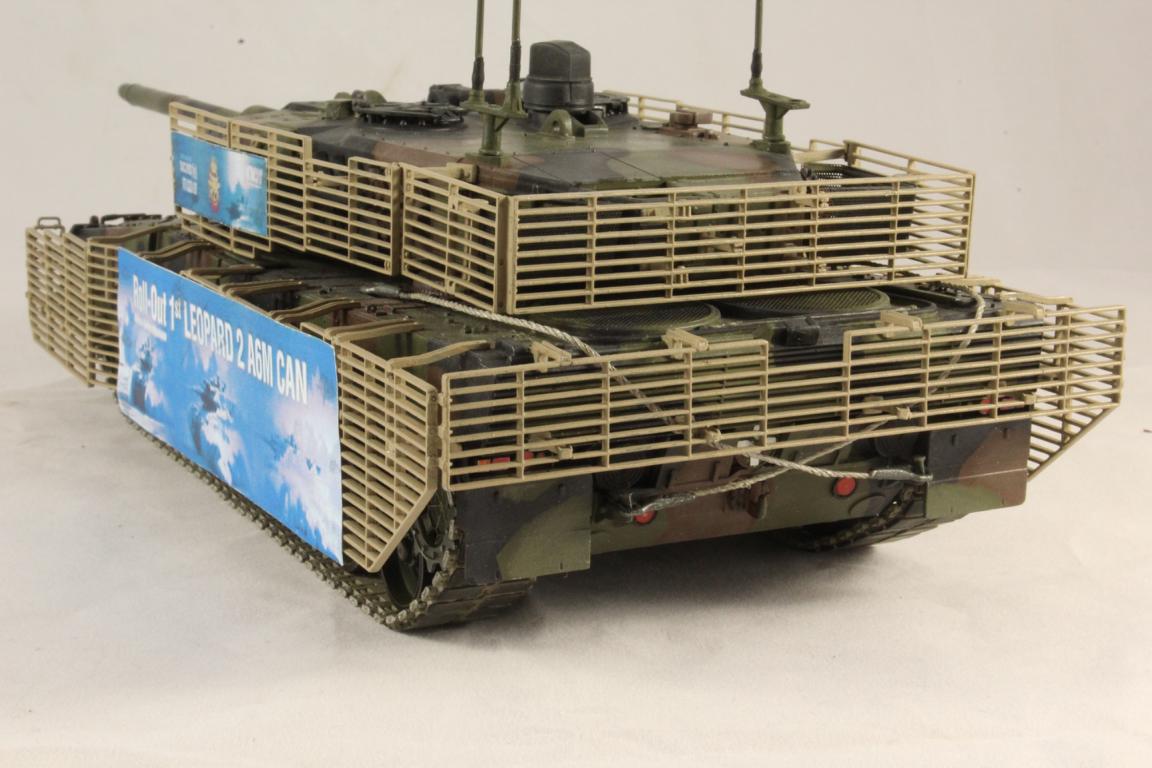
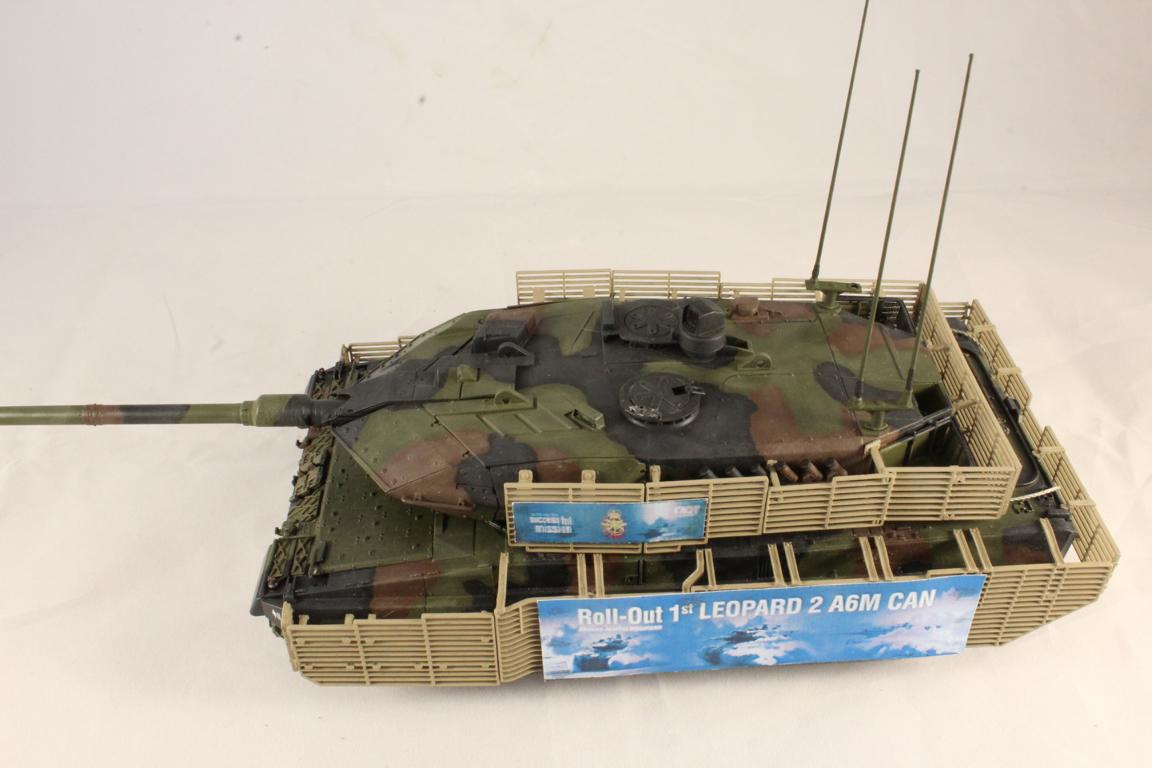
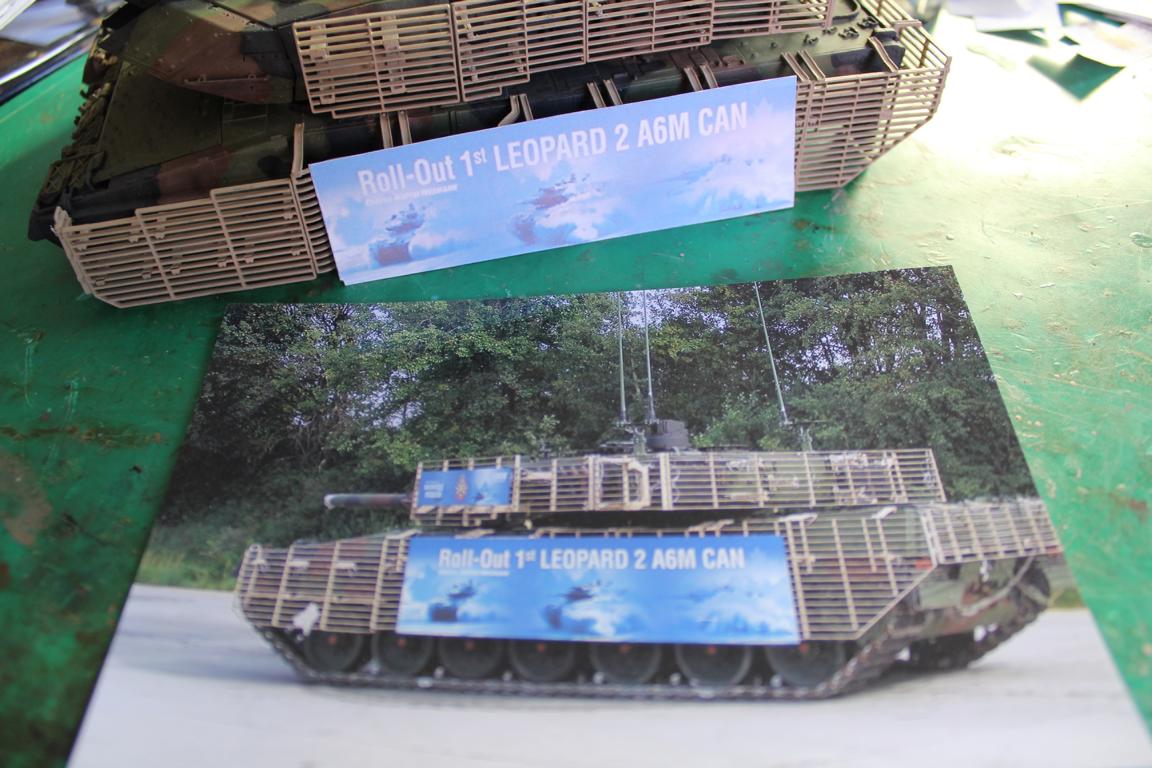
On 2 August 2007, the first Leopard 2A6M was handed over to Canada at KMW Munich. I found a picture of the roll-out ceremony very interesting - with the placard on the side.
This tank did not have the Canadian boxes on the roof yet. The track is from HKCW/Elite, which I had spare. It is the model from Hobbyboss. I had to change some things. The anti-slip panels were filed down to make thinner.
I used the Revell enamel colours, then drybrushed with lightened base colours.

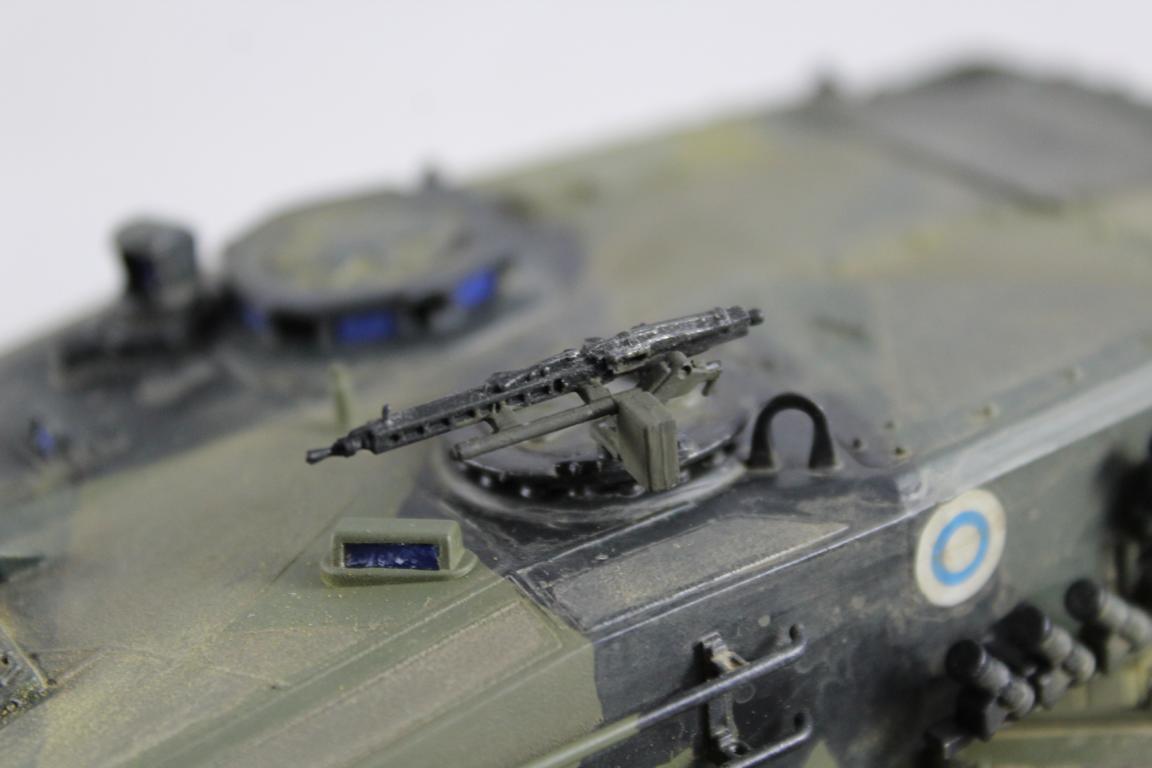
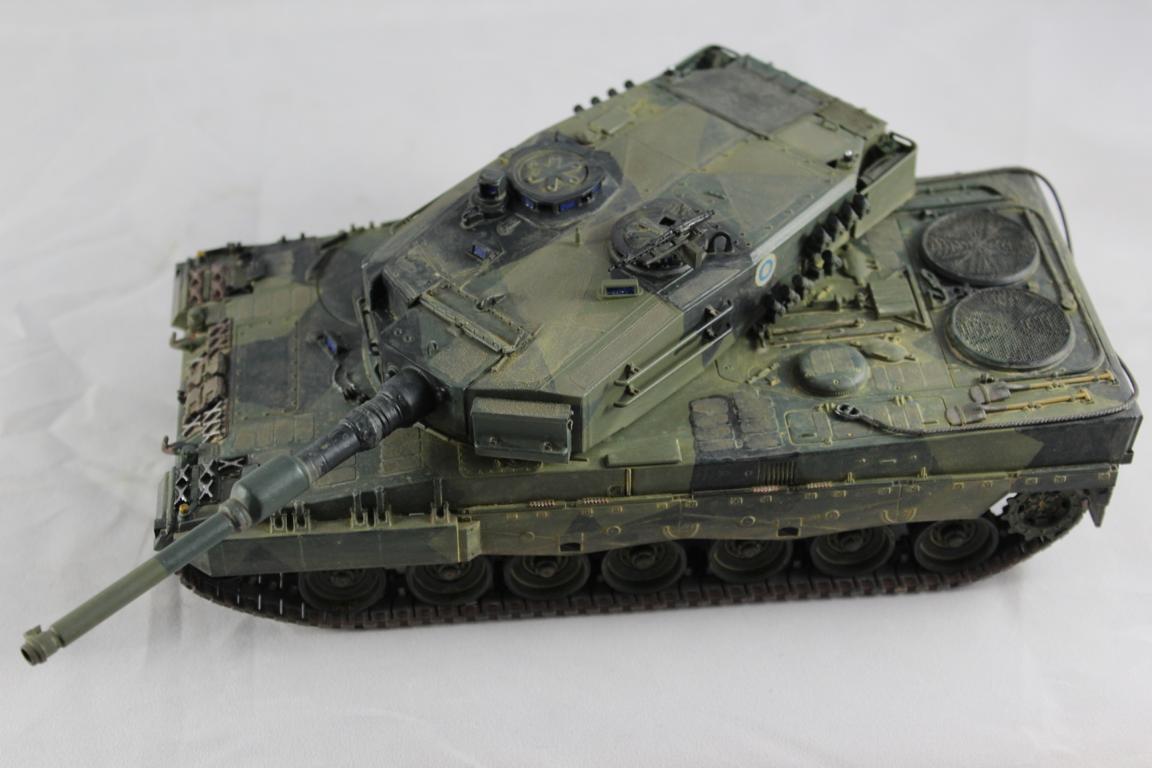
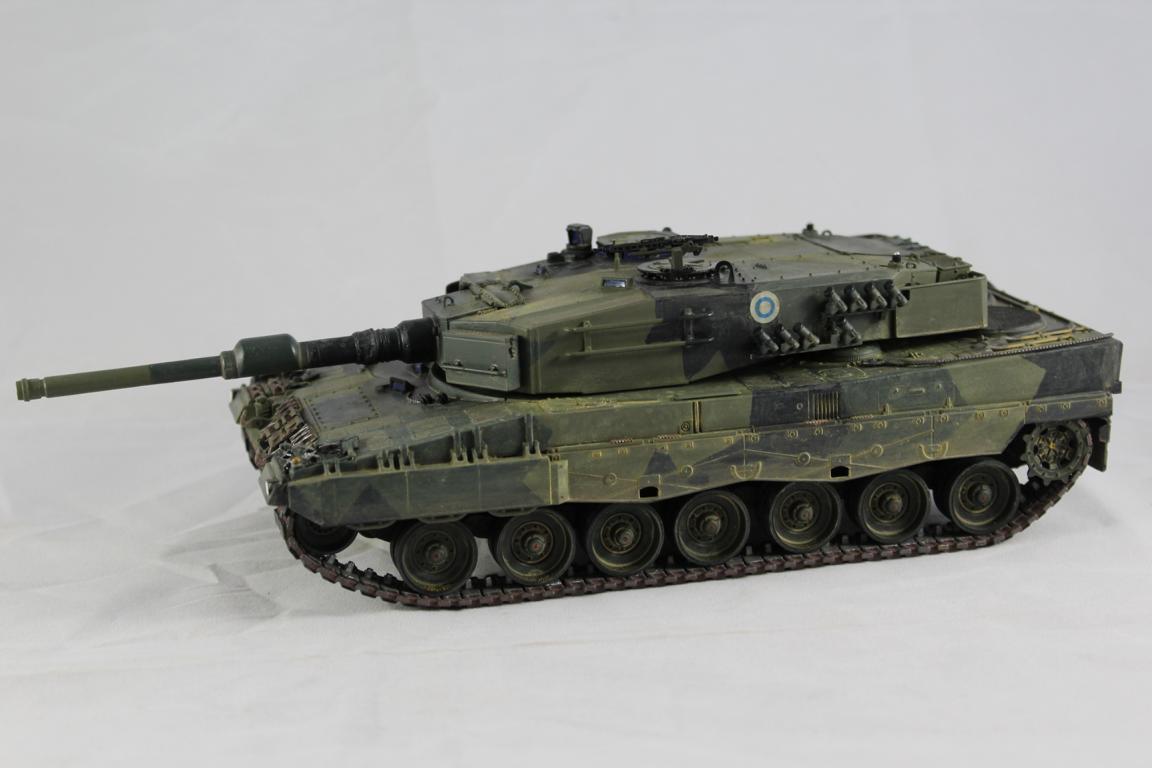
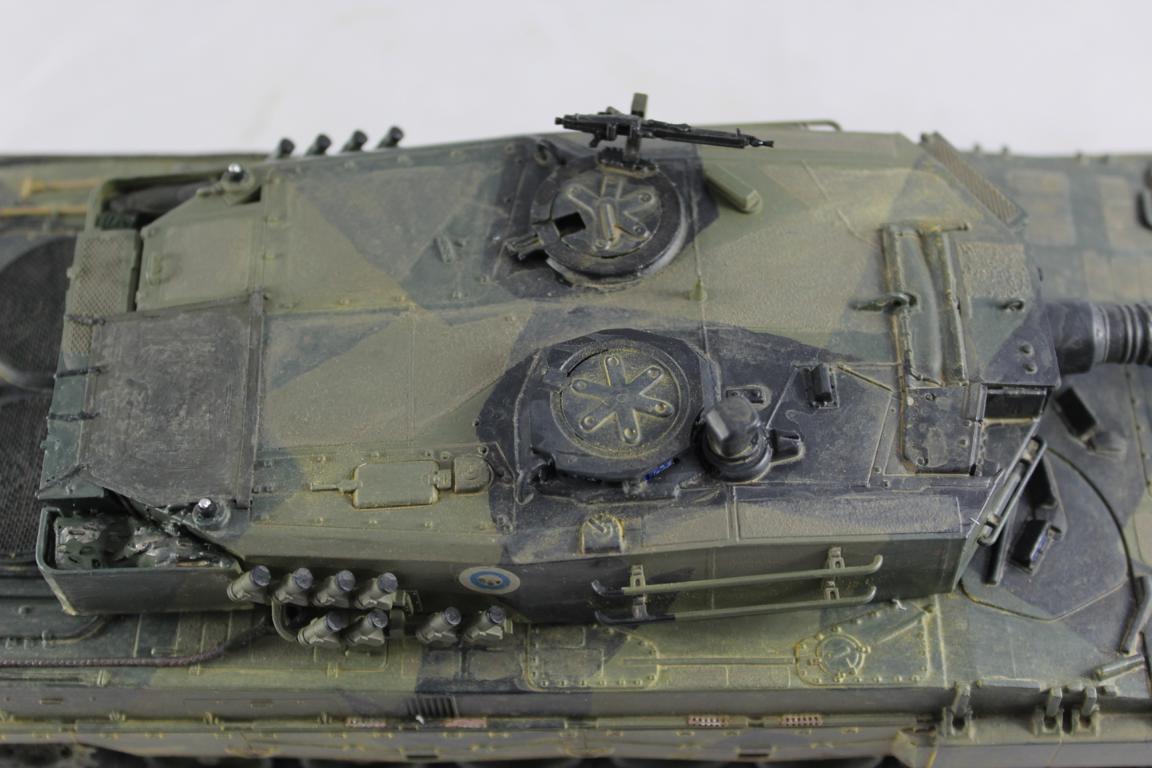
The base kit is the HobbyBoss Leopard 2A4 in 1/35 with some changes. I swapped the HobbyBoss track with the Italeri Track. The Marksman on the T-55 has some differences to the Marksman on the Leopard 2. The PSM (Perfect Scale Modellbau) is more accurate than the Takom Itpsv90. I got the PSM kit No35158 for a good price.
I made the camouflage with brush. Only the first 'Vaaleanvihreä' (name of the colour) was done with airbrush with HATAKA Colours. They can be the real modern Finnish colours.


The base kit is the Hobbyboss Leopard 2A4 with some changes. The kit is in 1/35. I swapped the HB Track for the Italeri track which is better detailed. The stowage boxes I took from the KMT Conversion kit. I changed the side skirts and other small parts myself. I also needed them for my Itpsv90.
I created the anti-slip on the roof with structure effect colour. I made the camouflage with brush. Only the first 'Vaaleanvihreä' (name of the colour) was done with airbrush. I used the HATAKA Colours. They can be the real modern Finnish colours. The Finnish cockade is from an old BMP kit, and the number plate from the PSM conversion.


This concept was presented at Eurosatory in 2018. The EMBT (European Main Battle Tank) was a German/French collaboration developed by KMW/Nexter (now KNDS). You could say a Leopard 2 with a Leclerc turret.
It was not just a mock-up because, in videos, the tank is mobile, the turret rotates and the gun was live fired in reality (15 months after concept talks). I found it interesting, so I started looking for the solution.
Leclerc turrets are available from Tamiya or Heller. I chose the better one from Tamiya which I bought as spare sprues.
Which Leopard 2? I still had left-overs from the Hobbyboss kit. Because of the frontal armour, I used their 2A5DK. However, this has no under-hull armour. However, I already had cast these for other projects from a few years ago.
The Leclerc turret has some changes to the Tamiya kit. The large storage baskets are striking. After a lot of searching, I bought PE grid material from Scale Link.
The Leopard hull was the bigger problem. The EMBT is based on the Leopard 2A7, so I had to rebuild it myself as I didn't want to sacrifice the MENG 2A7 hull for it. I cast the APU area (and other details from the 2A7) in resin to build into my EMBT hull. I also reduced the height of the rear hull non-slip panels which are far too high on the base kit. The tracks are from Italeri. Despite their age, they are more beautiful than those from Hobbyboss.
I wasn't entirely sure about the colour. The Eurosatory EMBT looks more like a dark green. It looks more like light green in pictures from the test area. I chose the darker NATO Olive, then dry-brushed with a lightened base colour.


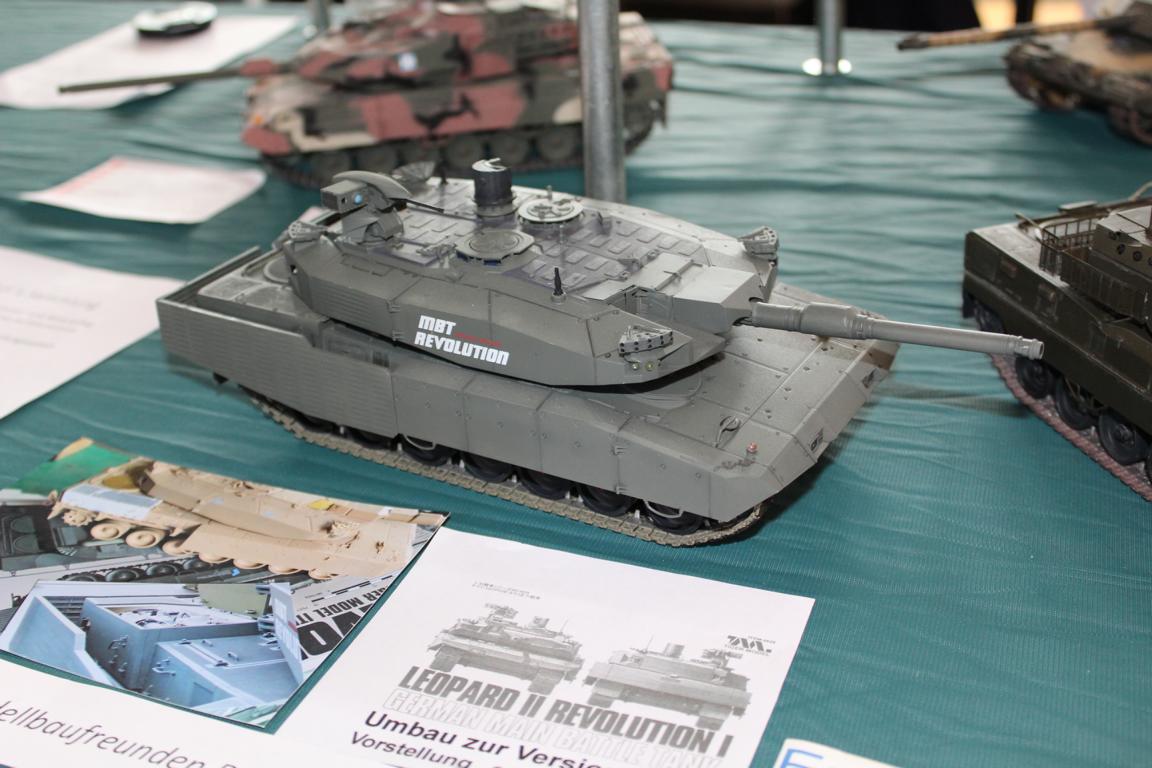
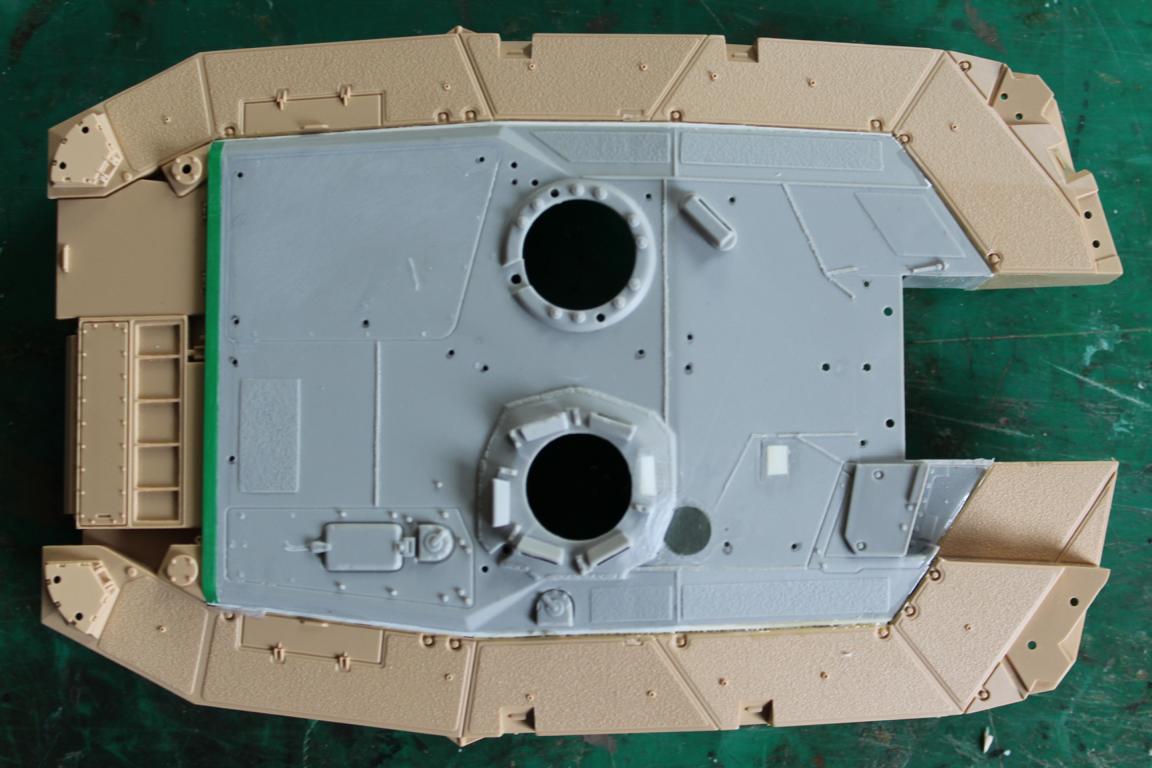
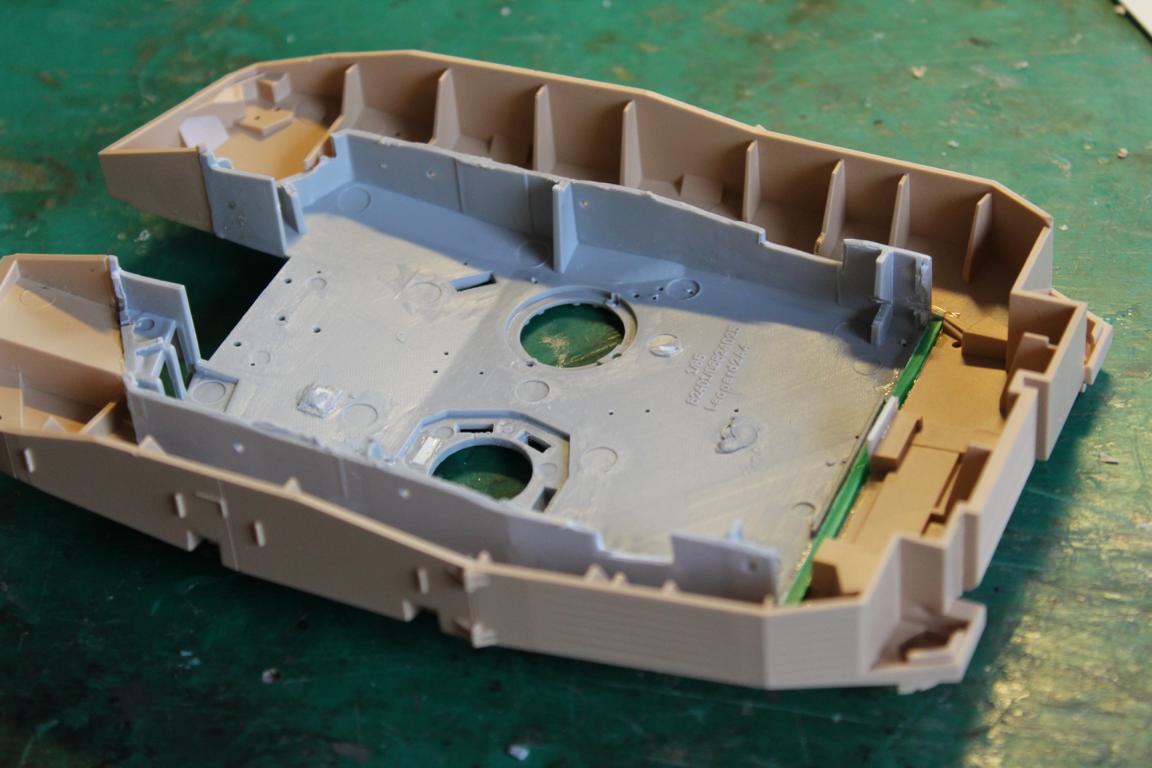
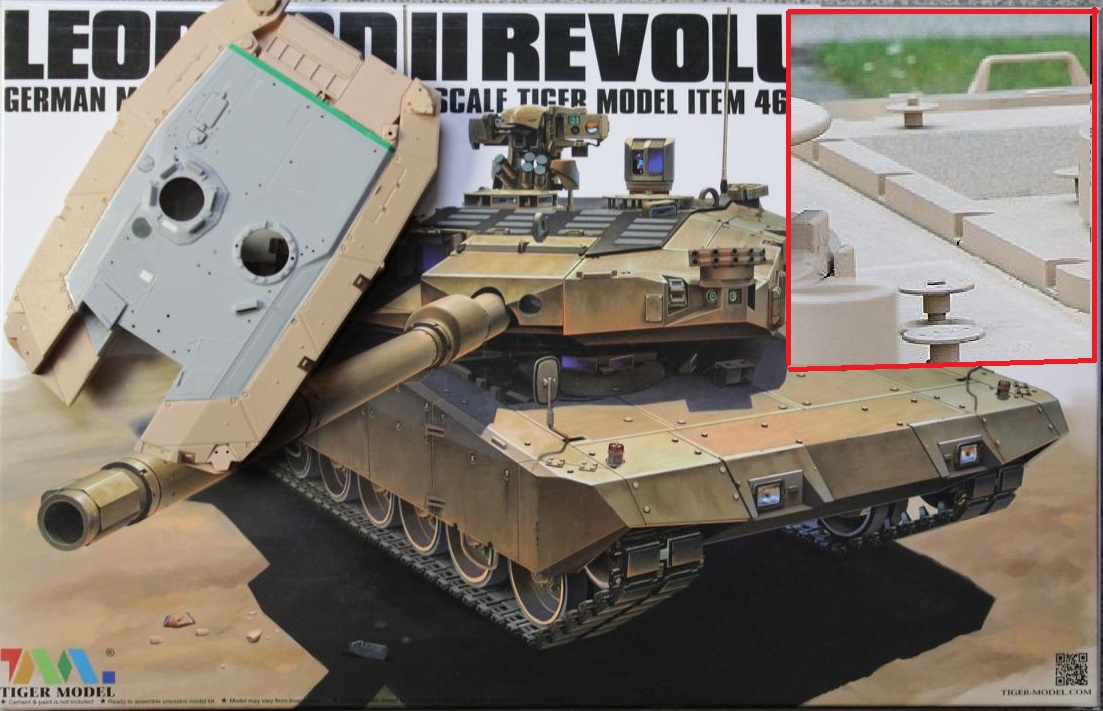
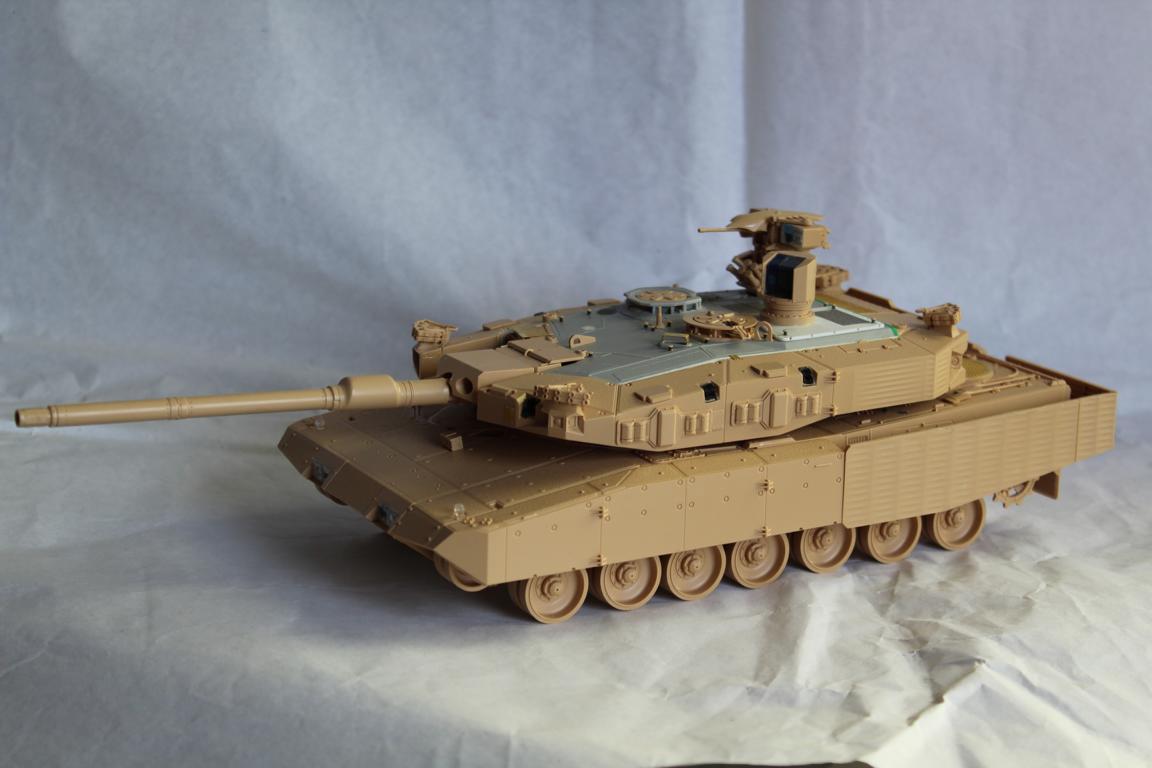
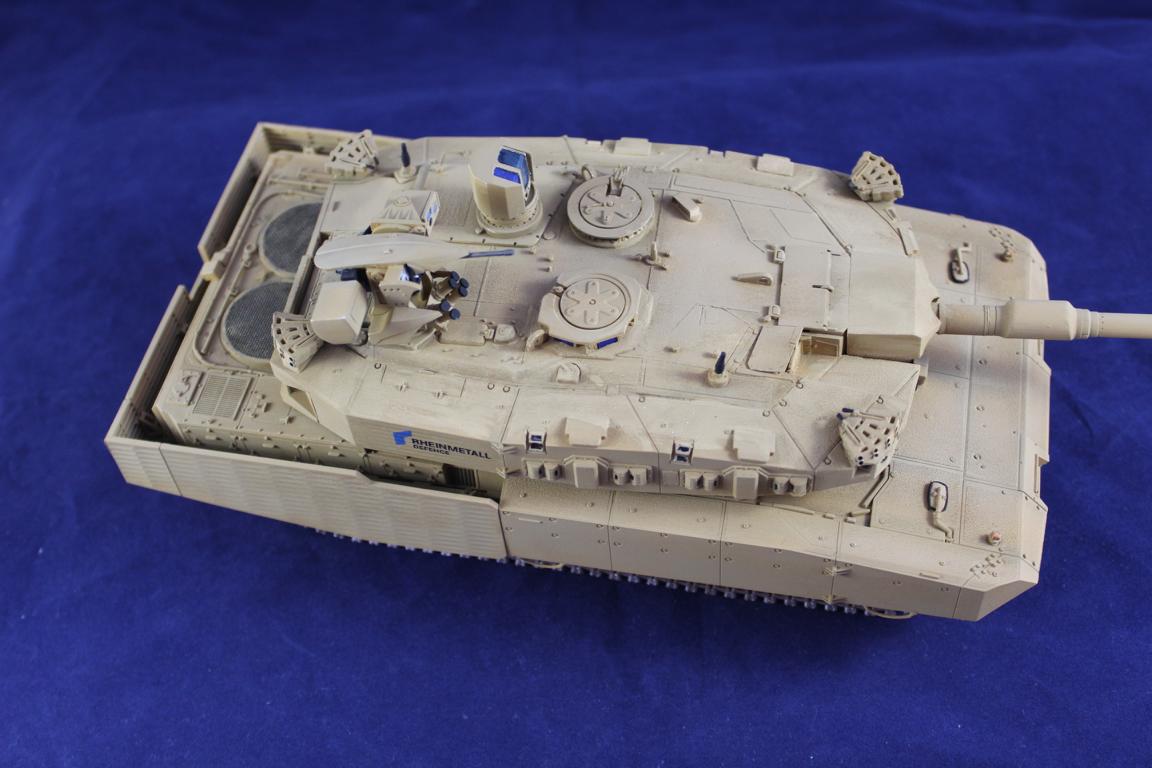
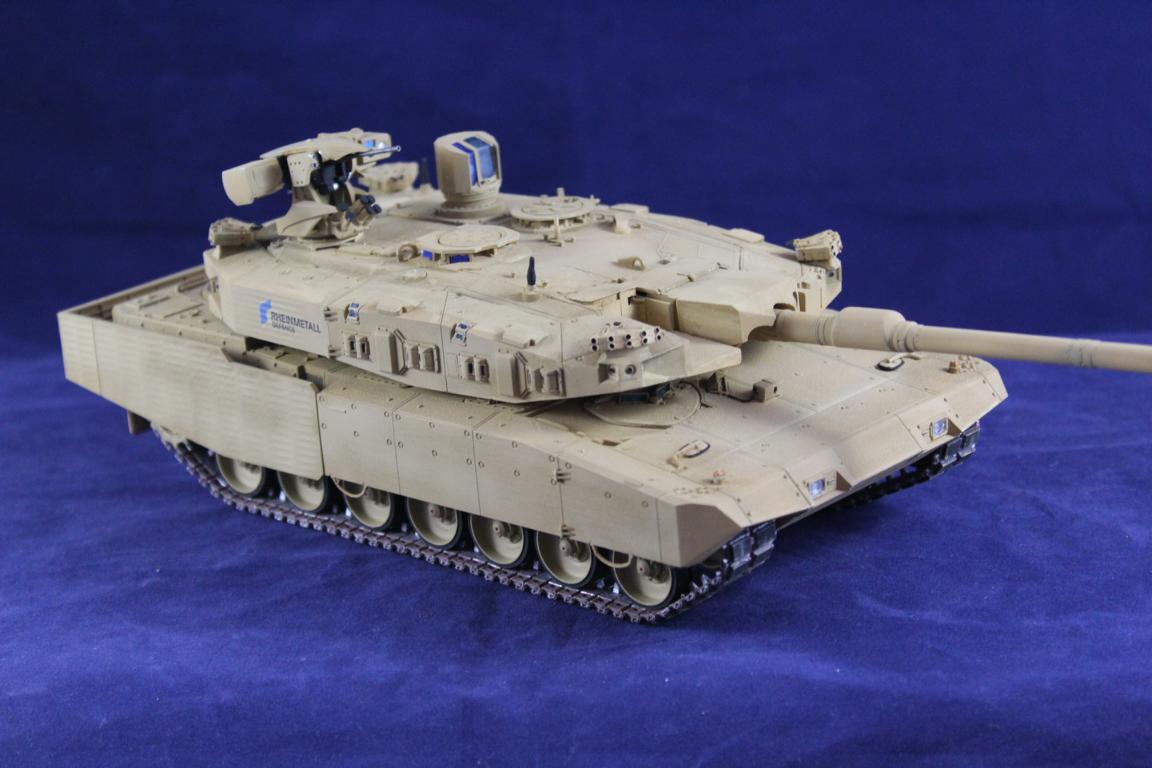
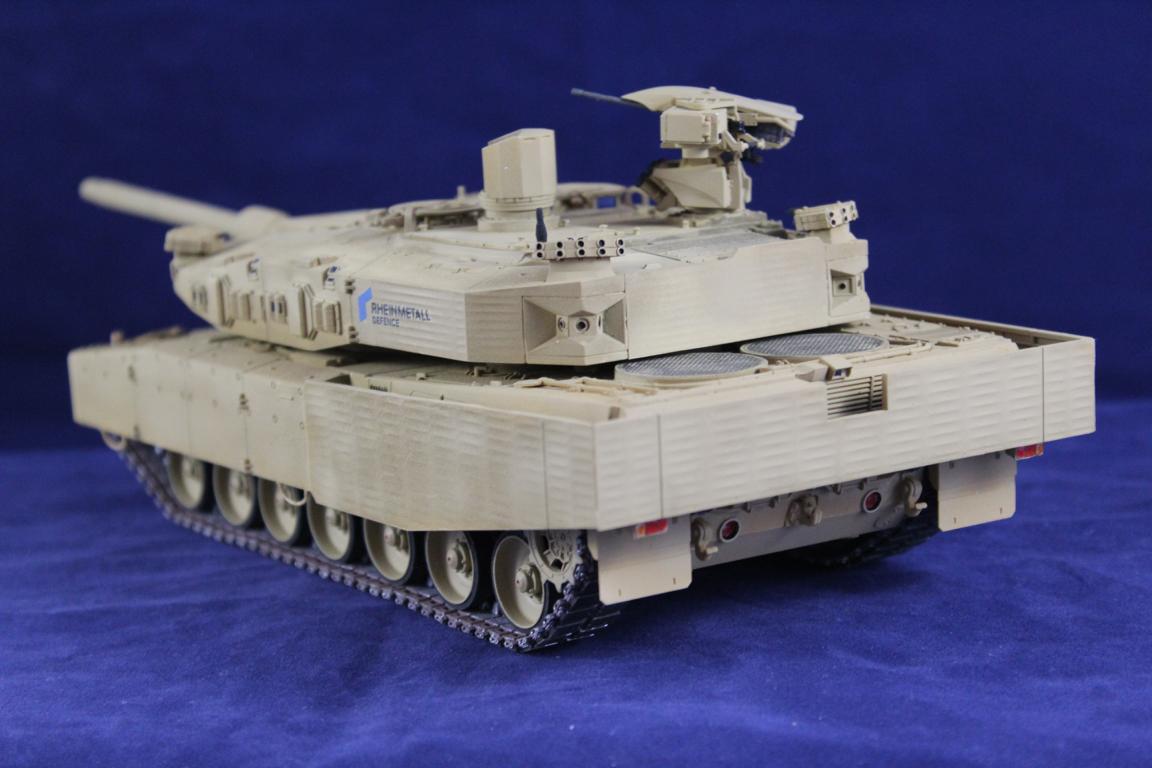
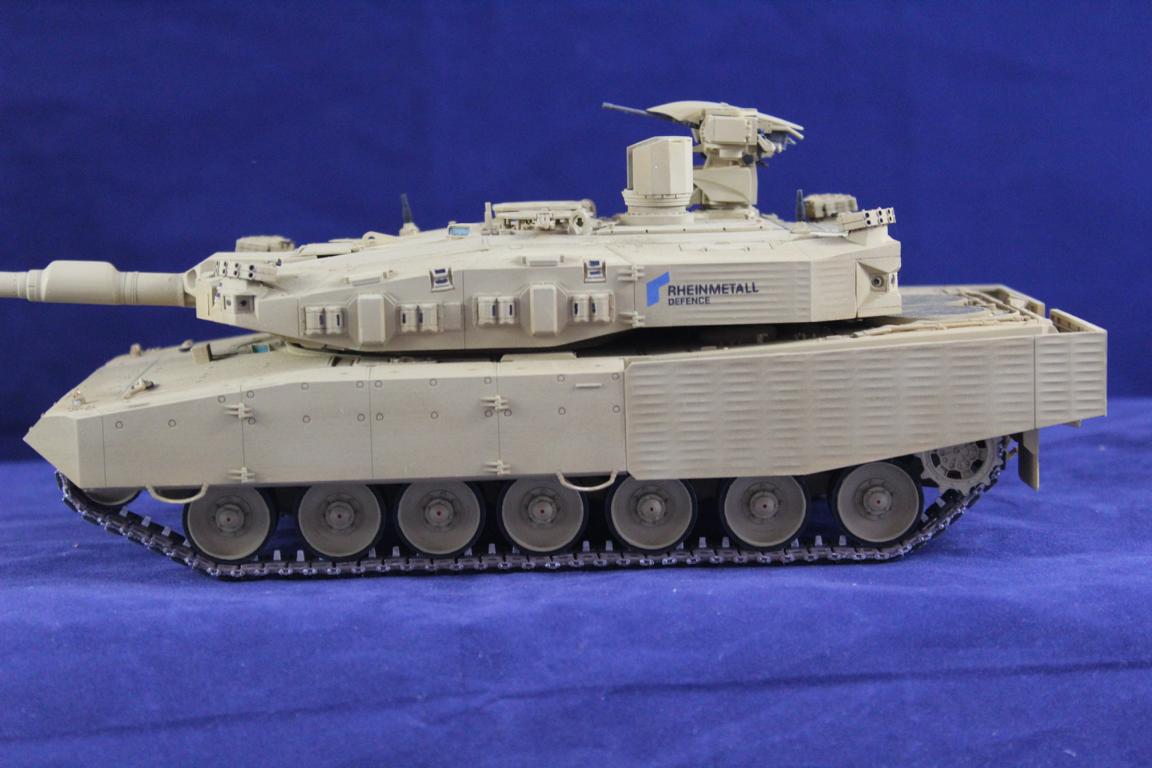
Revolution 1 was a concept tank developed by Rheinmetall to show the possibilities of upgrading the Leopard 2A4 to more modern standards. Revolution was never ordered but has formed the basis for many different up-armoured 2A4 adaptations for other countries.
It was shown in several configurations between 2010 and 2017. Please take a look at Michael’s review of the kit which explains the differences.
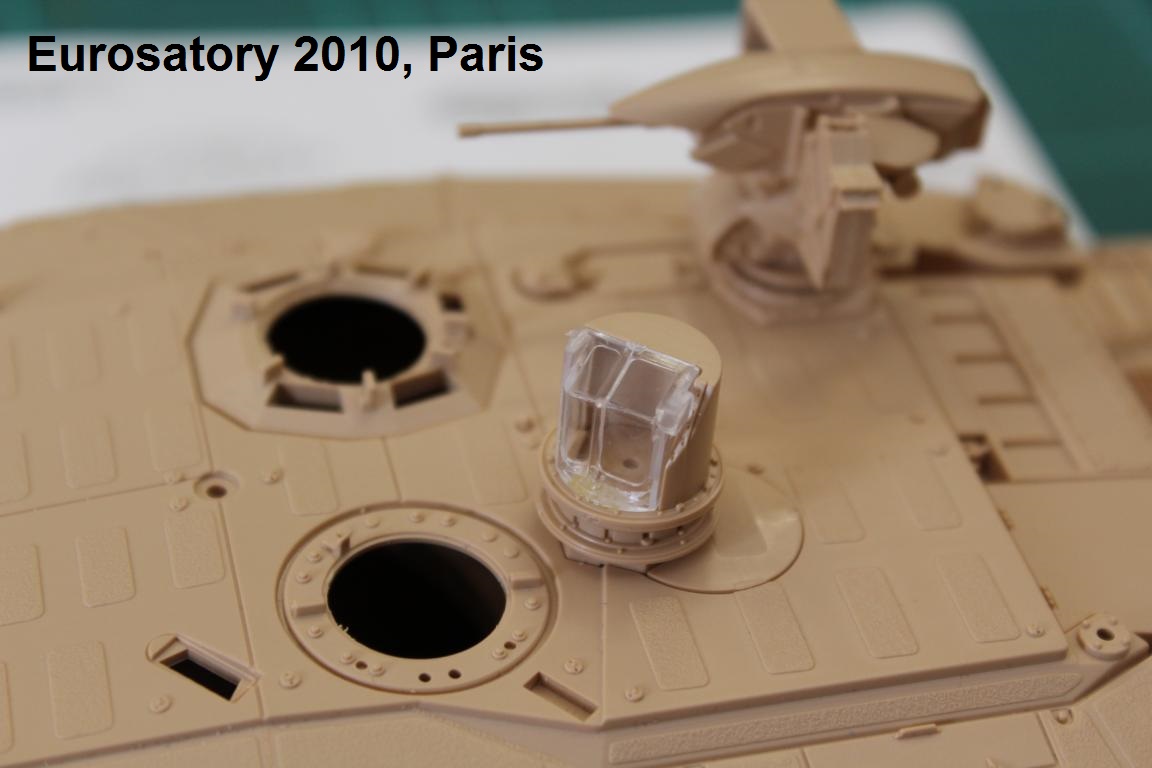
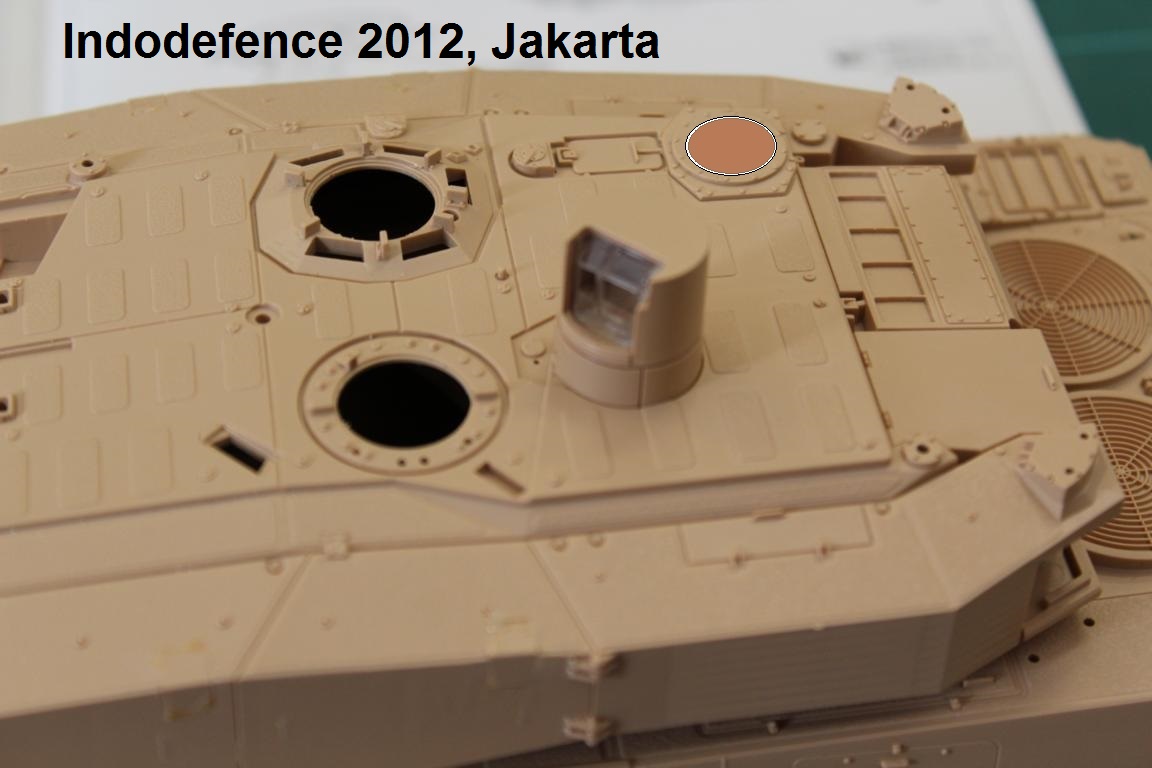
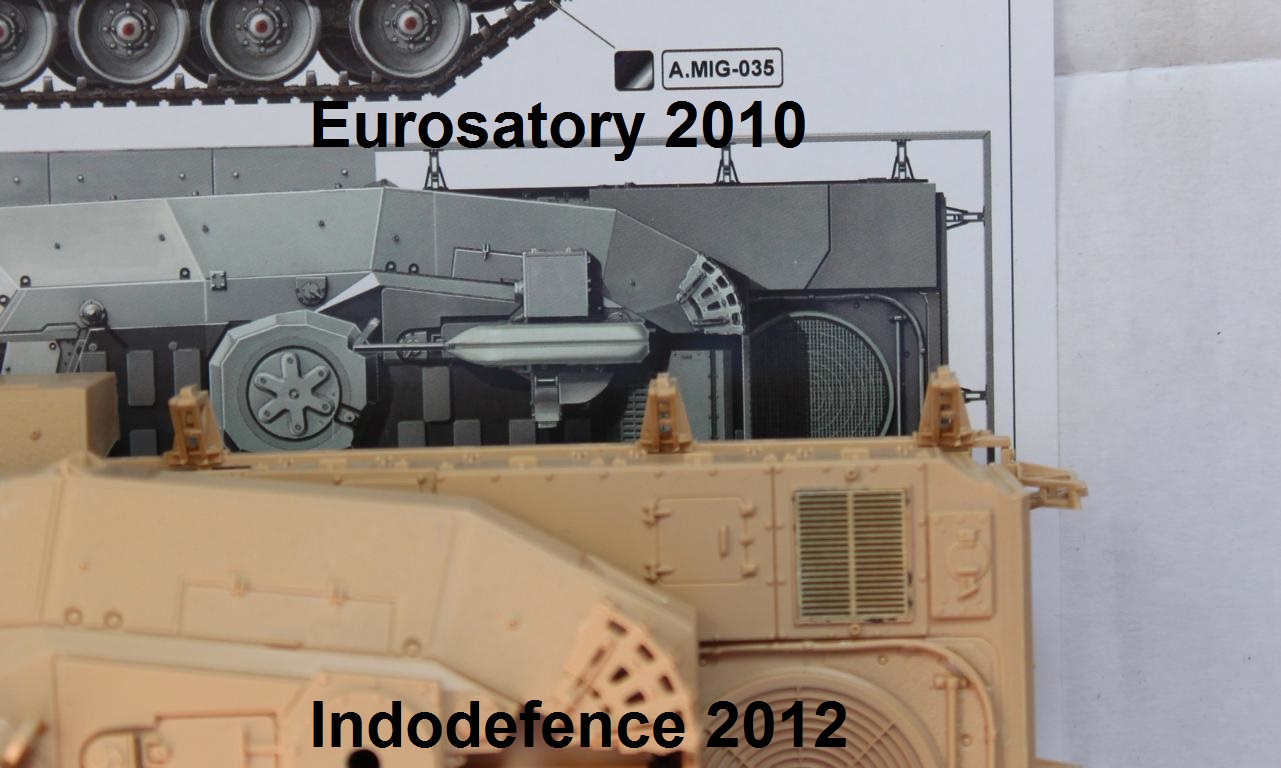
You can build two versions, and there is an option for a 'what-if' Bundeswehr version. This tank was shown for the first time at Eurosatory 2010. Later on, it was exhibited at the Indo Defence 2012 show – but there was no weapon-station mounted. In 2015, the tank was shown in sand colour.
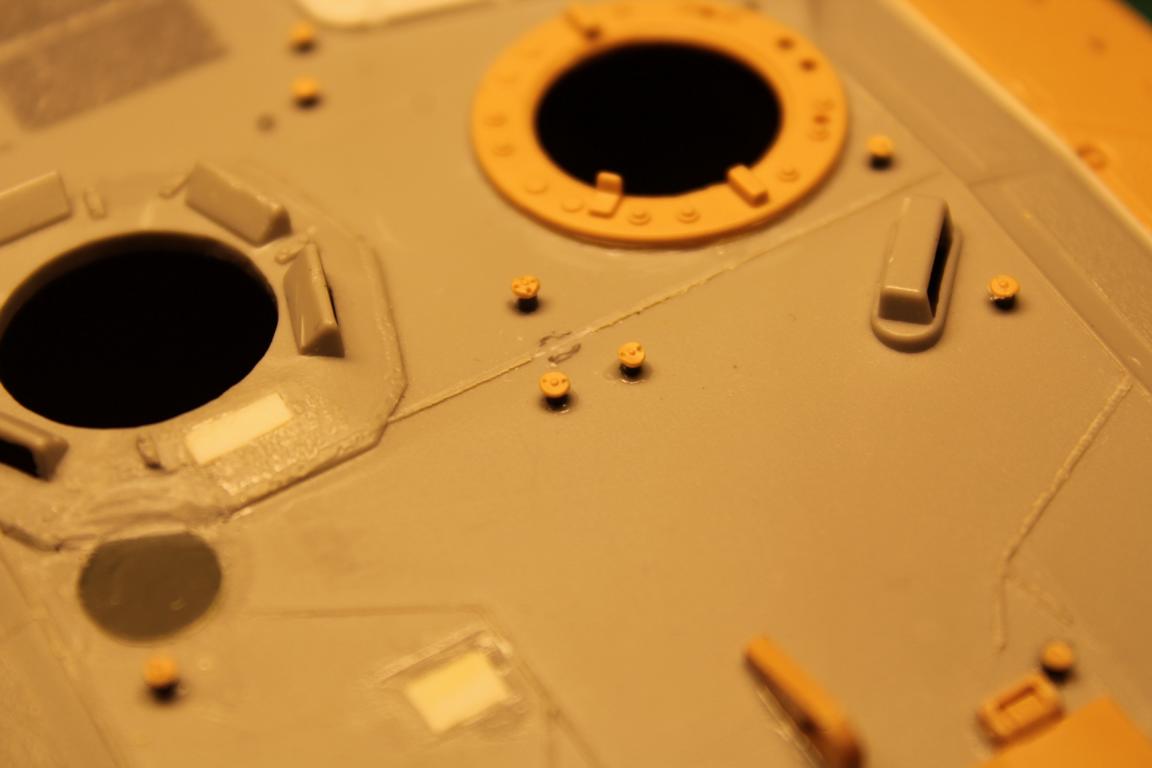
You can build this with the TM kit No.4628. However, Tiger Model made some mistakes. The box-art shows the vehicle from Eurosatory 2010. However, you can only accurately build the 2012 version from Indo Defence. The difference is in the auxiliary power unit. My favourite vehicle is that from the Eurosatory, so I converted the APU to be more accurate. There is another mistake in the kit – the covered slat armour on the left is a different shape to that on the right! All three versions have this so why did no-one notice this, Tiger Model?
The colour is Revell 66, then dry-brushed with lightened base colours.
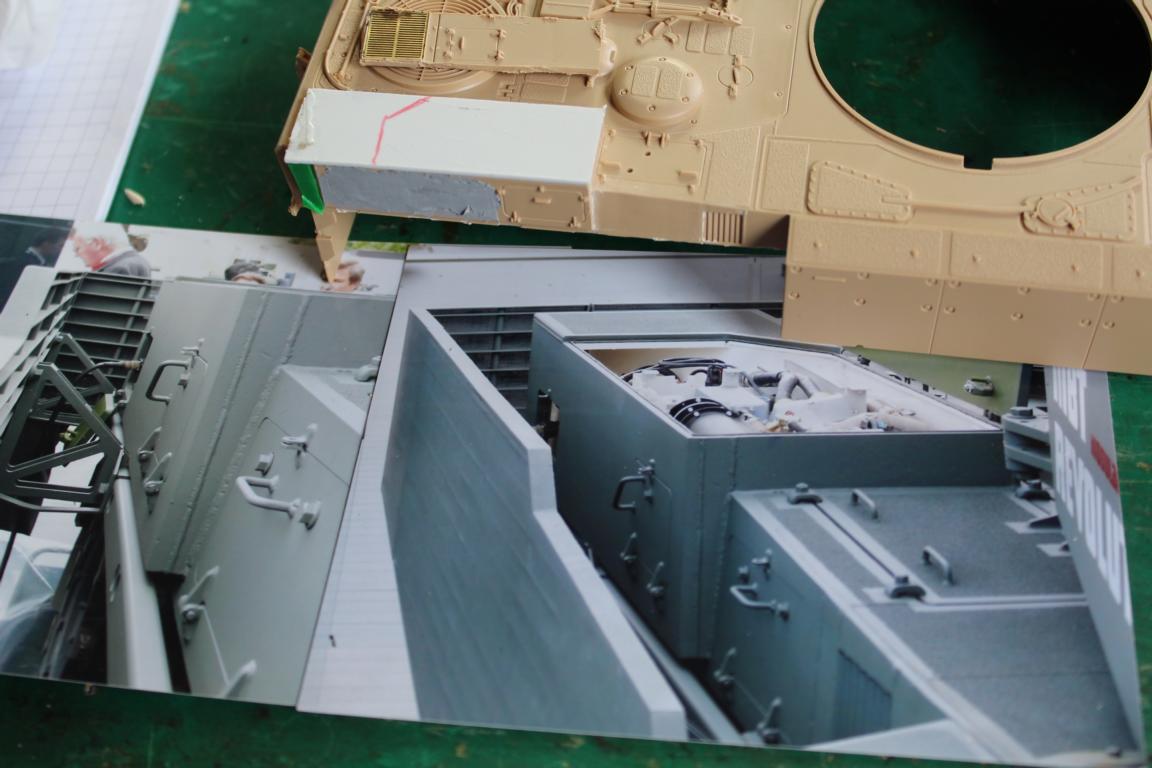


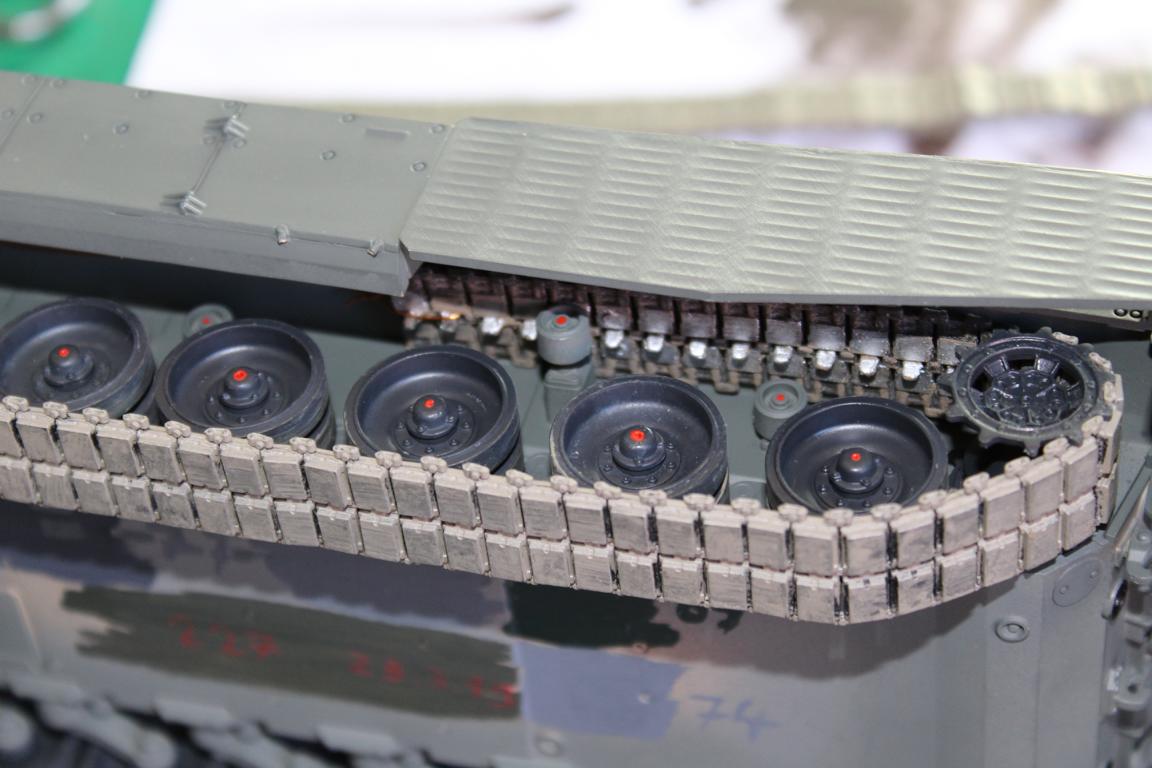
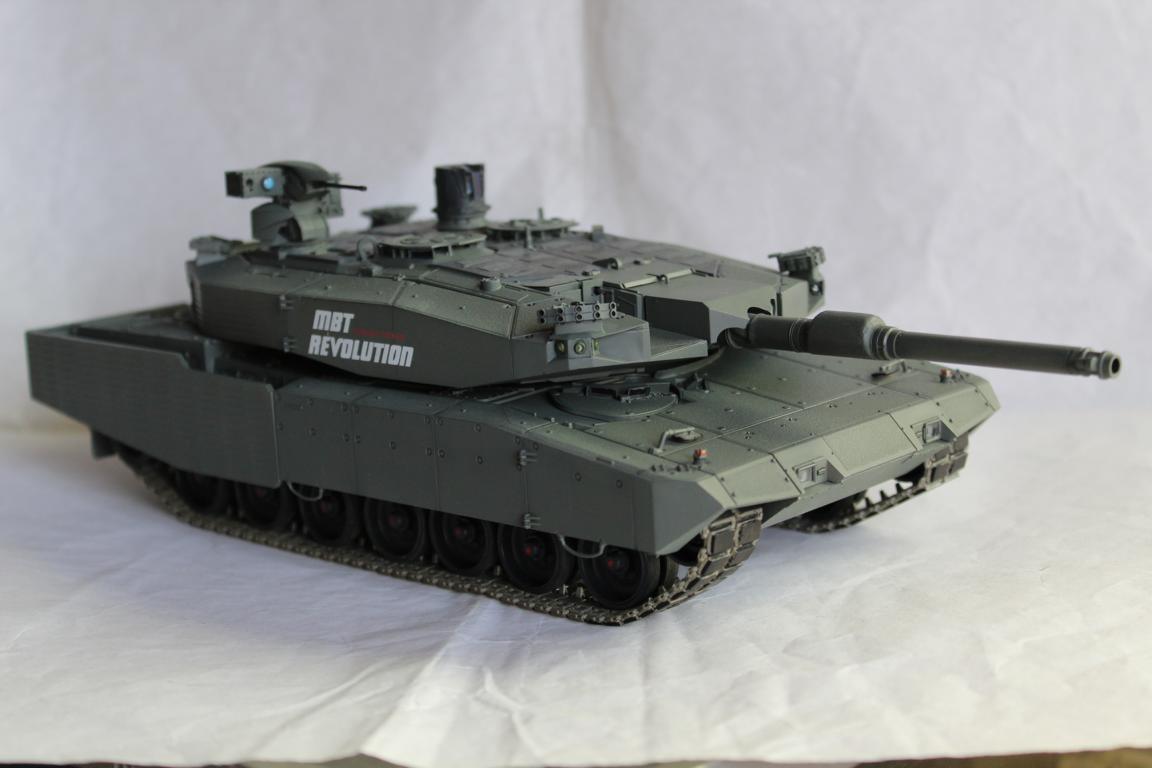

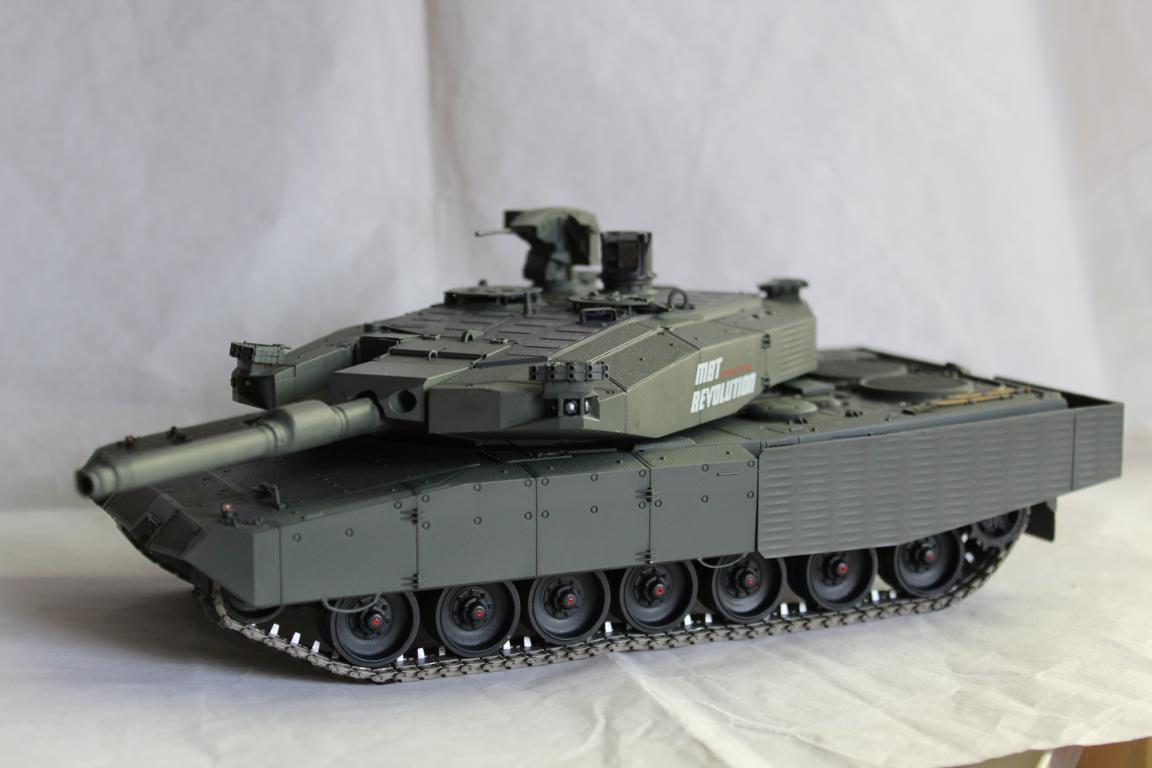
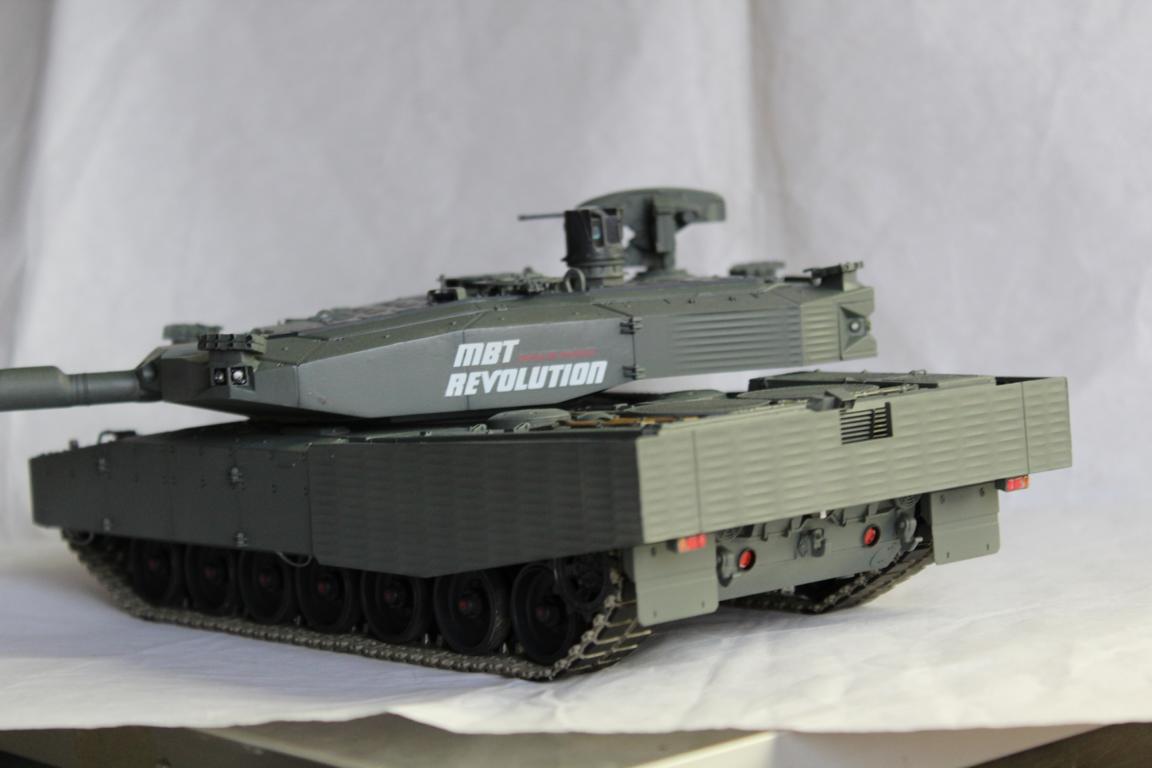
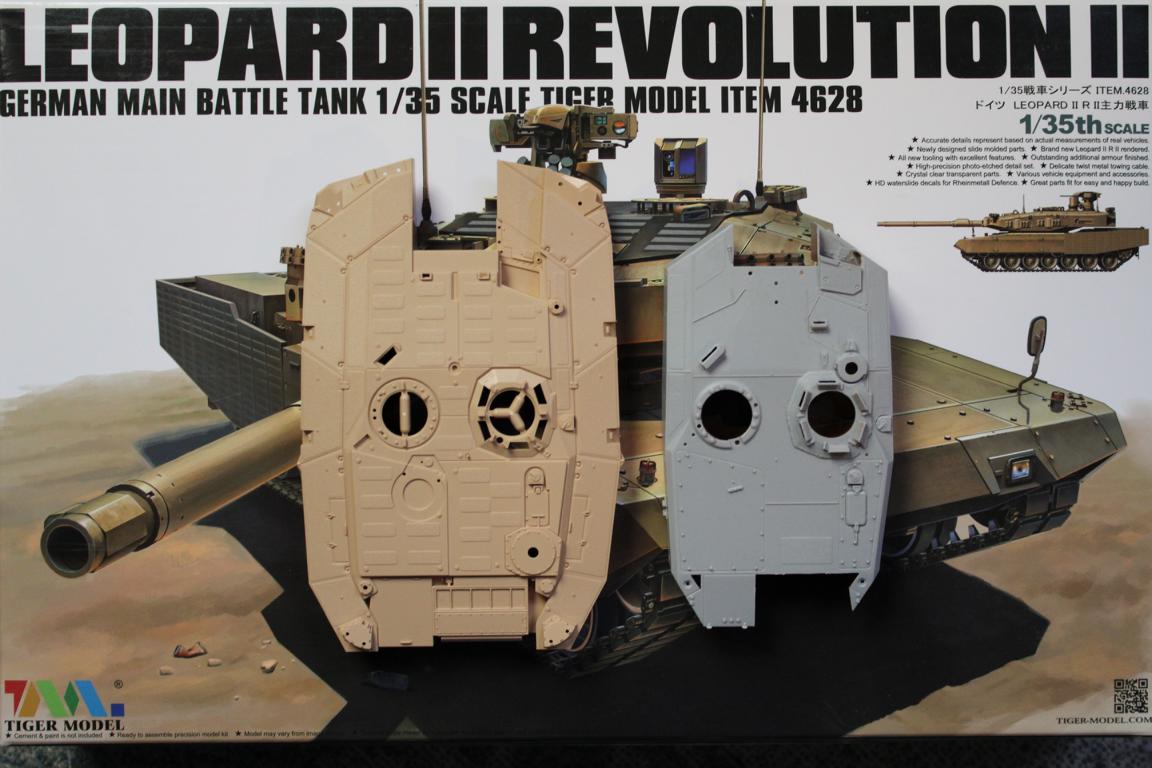
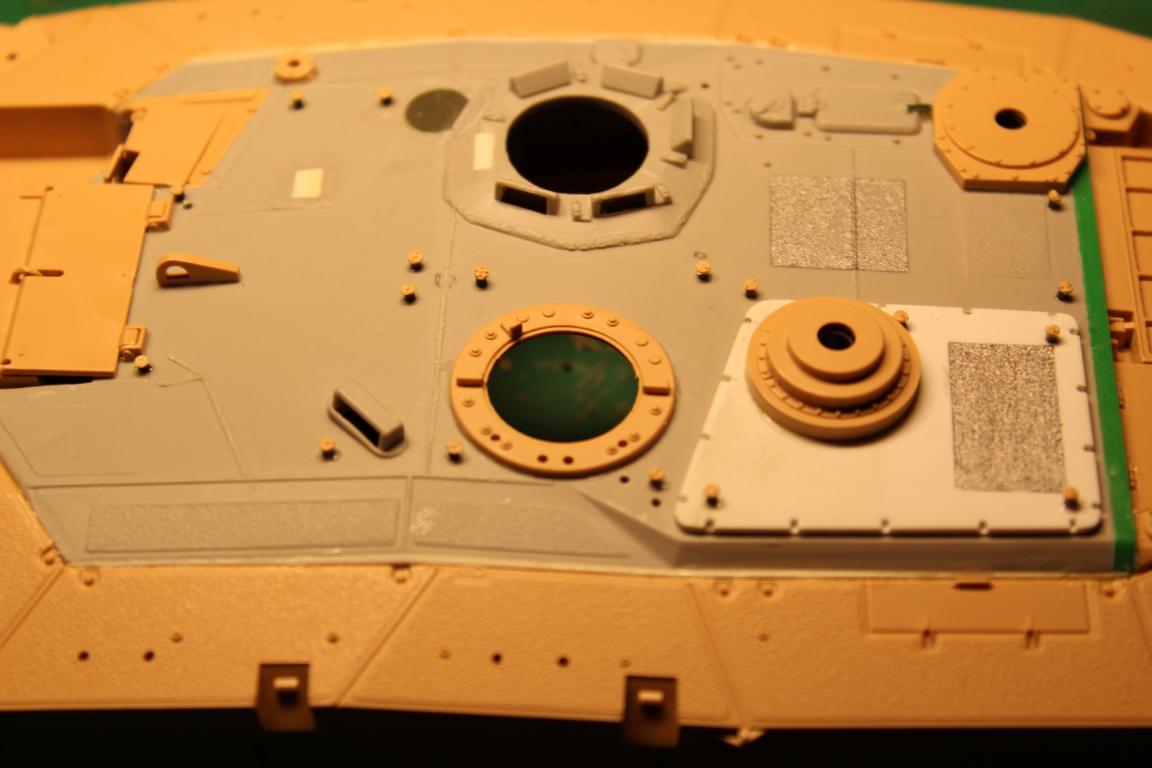
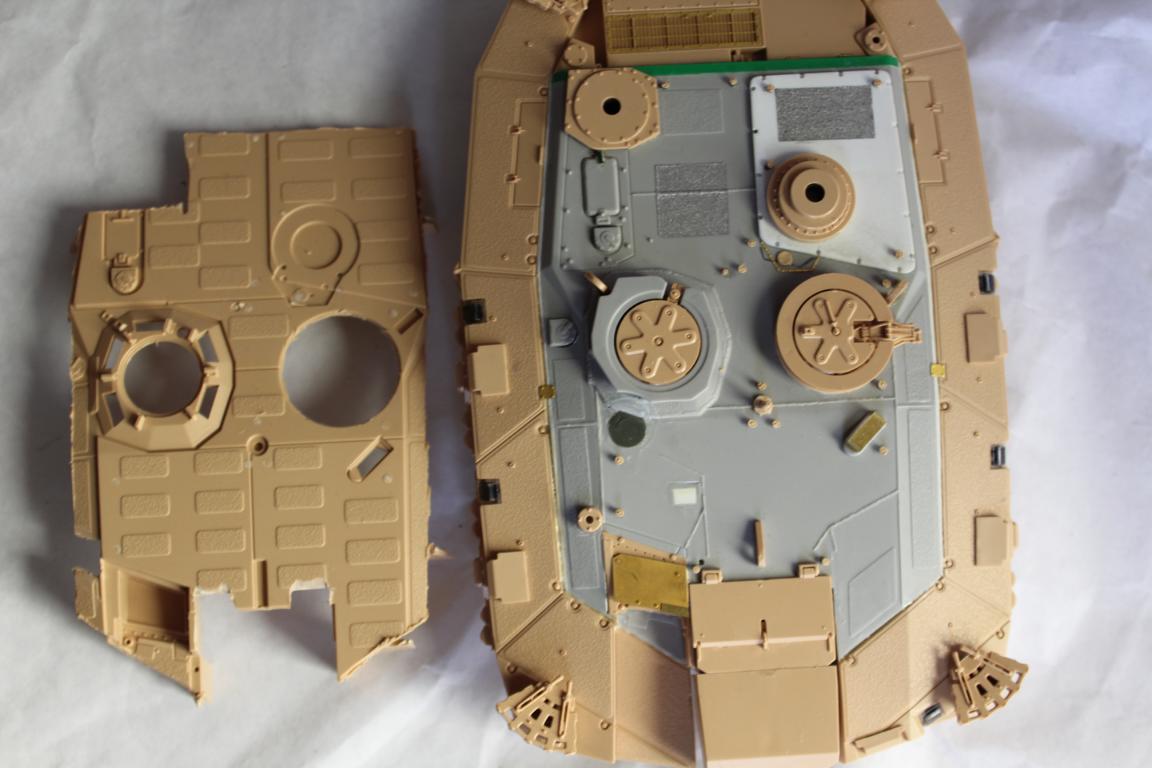
This Leopard 2 is an upgrade from the German manufacture, Rheinmetall. It was shown in several configurations between 2010 and 2017. This version was from 2015. This was a direct modification of the original Revolution 1, the main change being the L55 main gun.
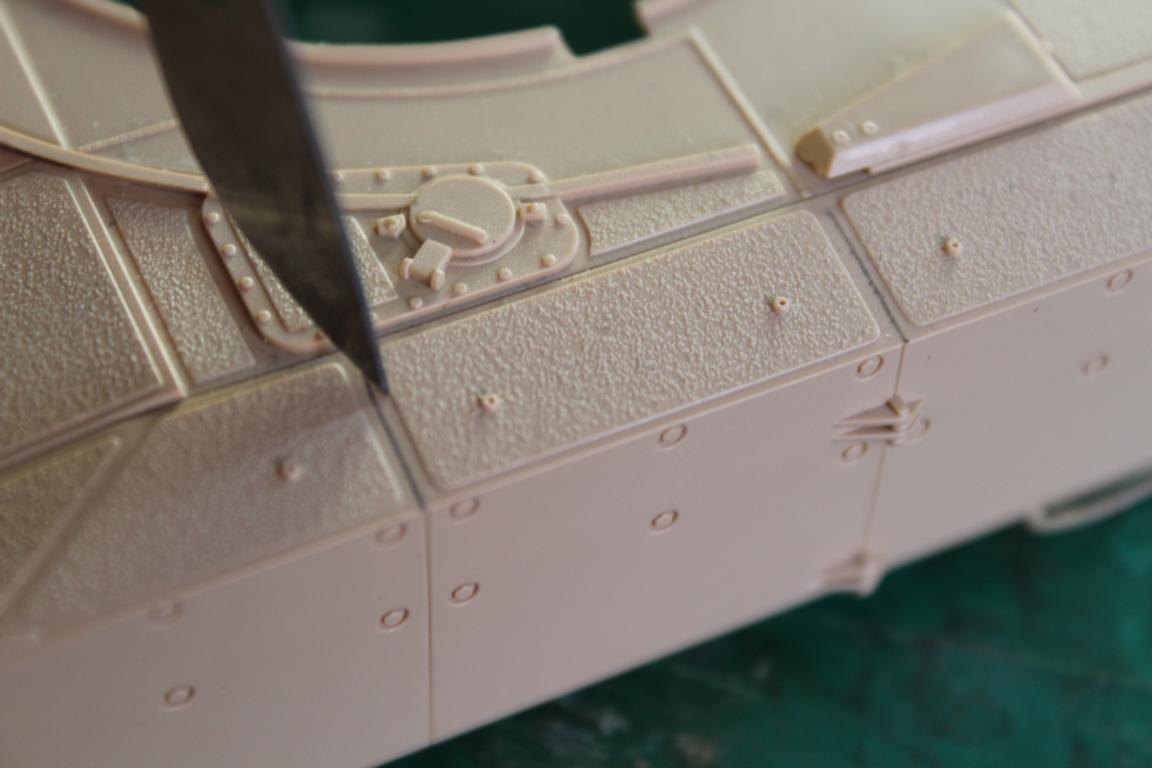
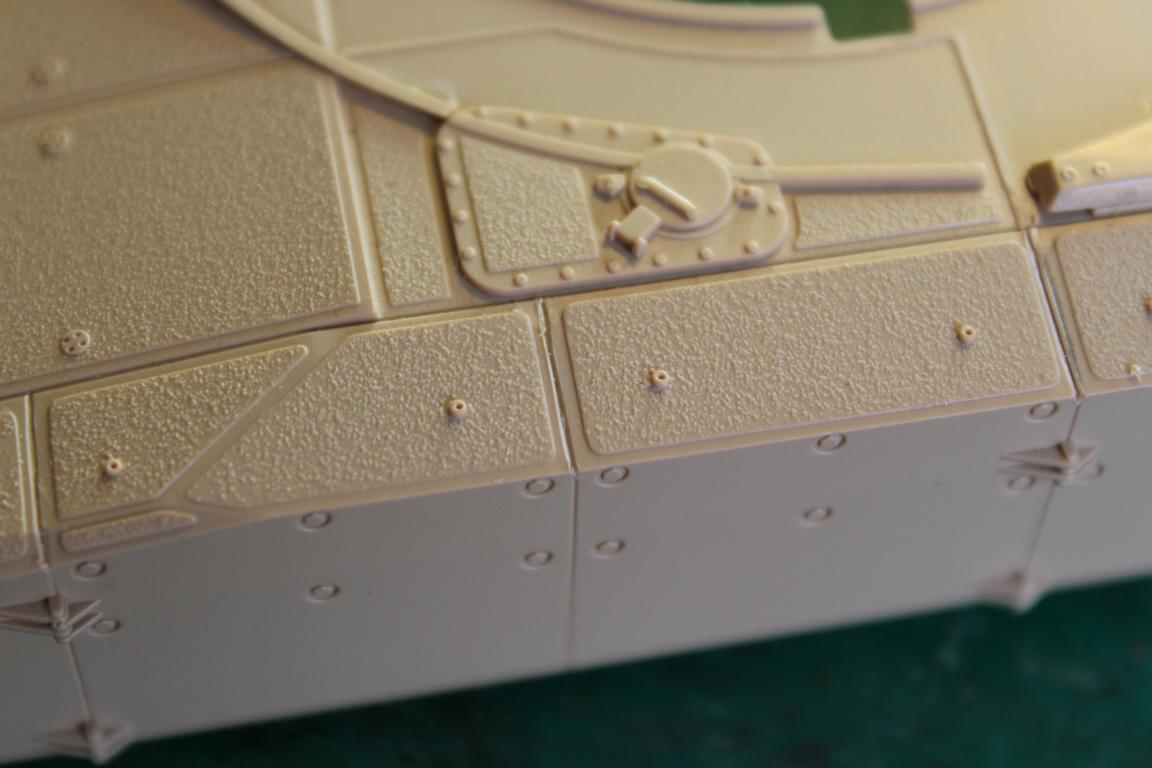
Actually, I didn't want to build this model. On the original pictures I saw that this version does not have the rubber matting on the roof which is included in the Tiger Models kit. This is because they have used their own Revolution 1 without doing the necessary research.
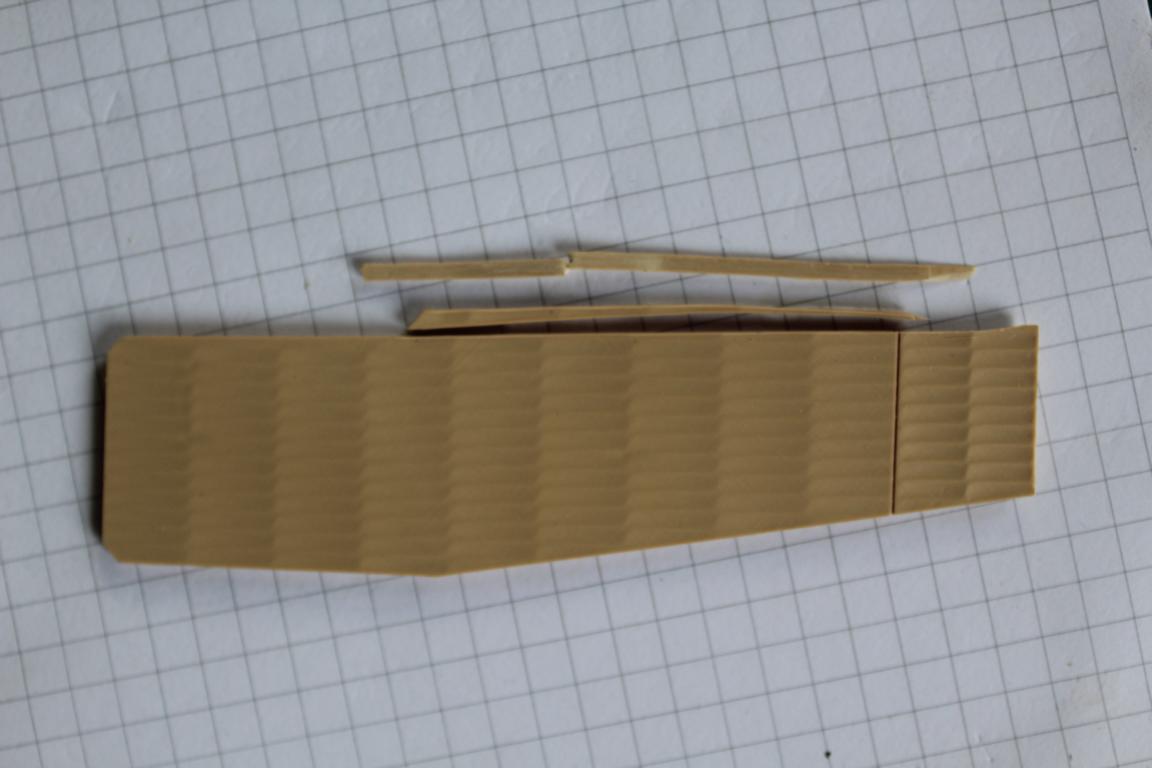
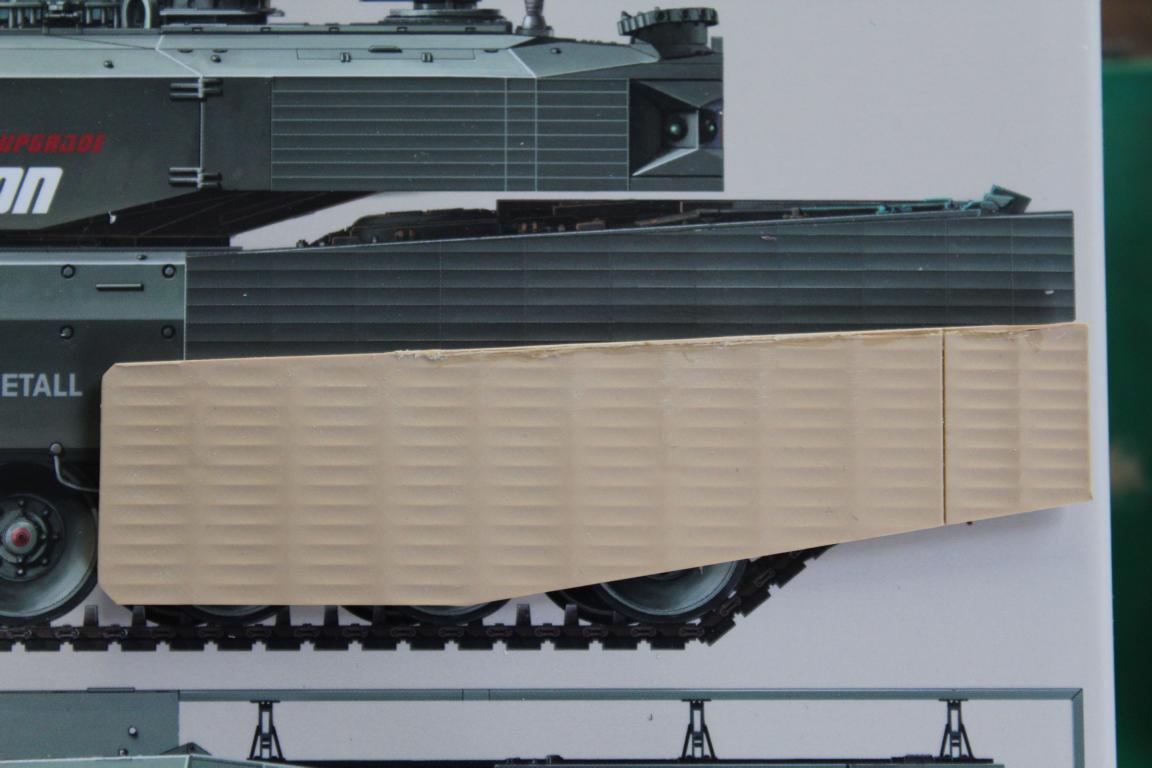
Then came the idea of replacing the roof, i.e. using the one from a 2A4. I took the risk and picked up the knife. Thankfully, it went together amazingly well. The other changes were minor. I cut the screw connections from the mat and cemented them on small pins. As with my Revolution 1, I converted the covered slat armour on the left-hand side.


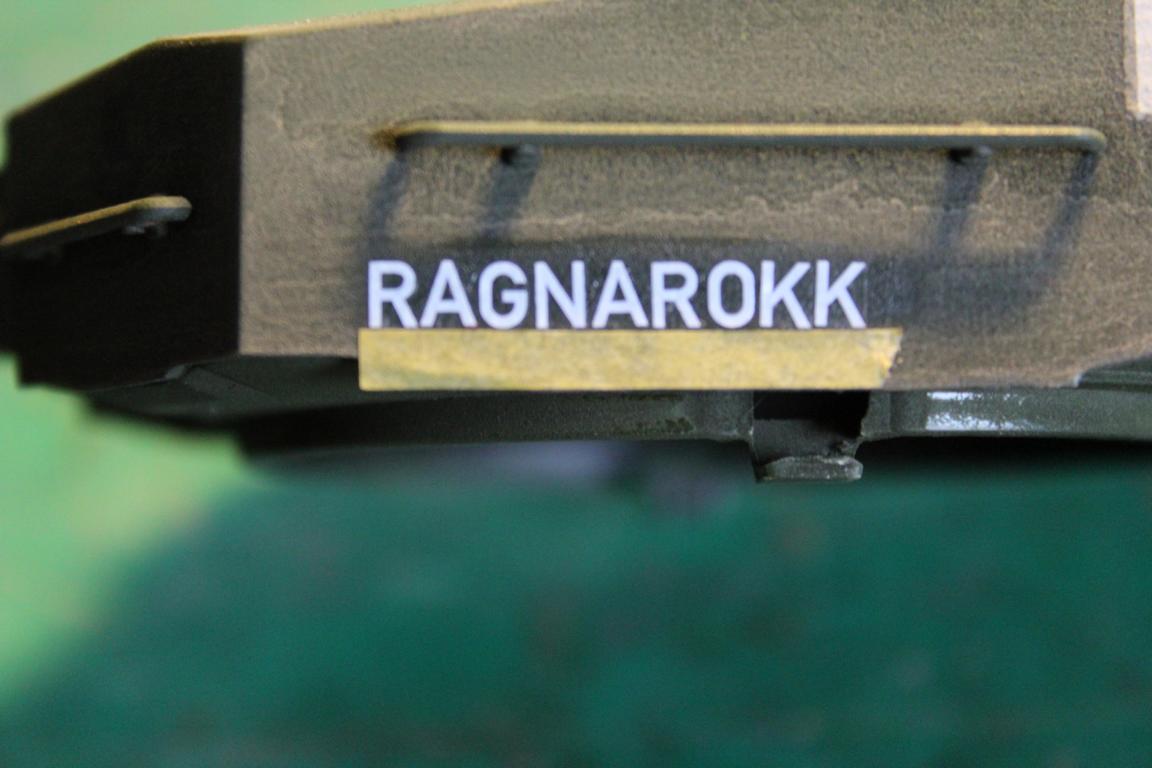
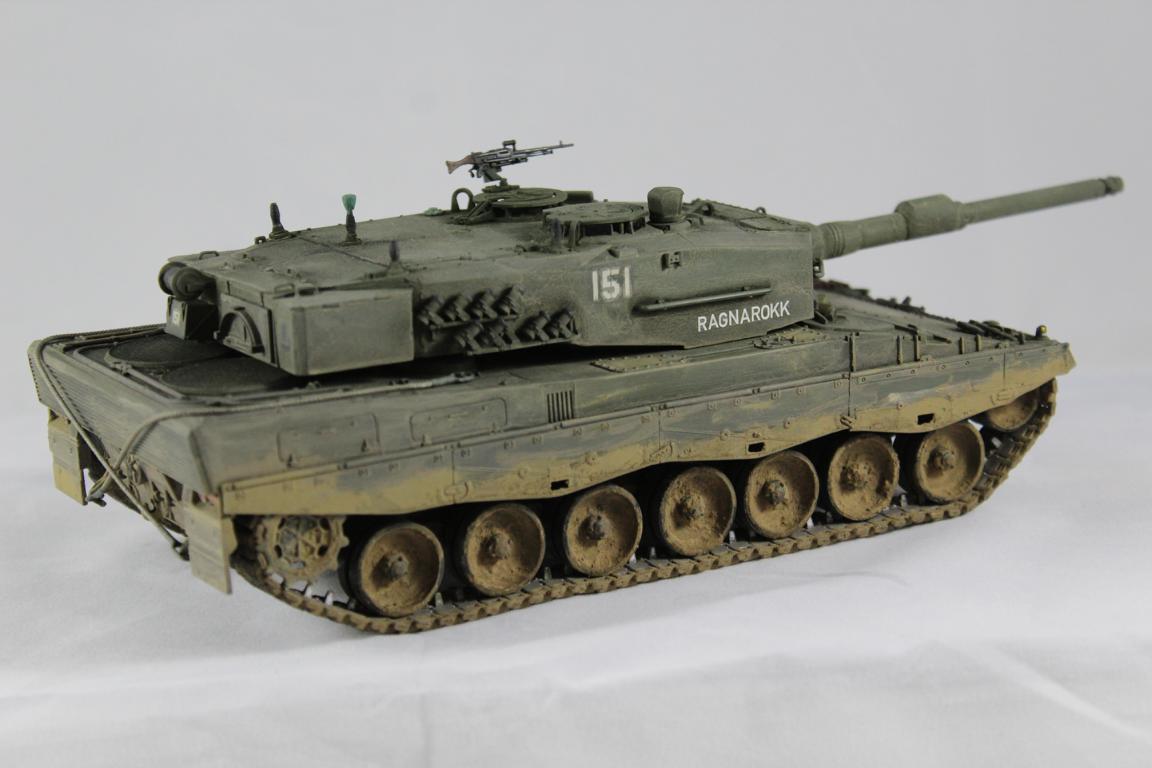
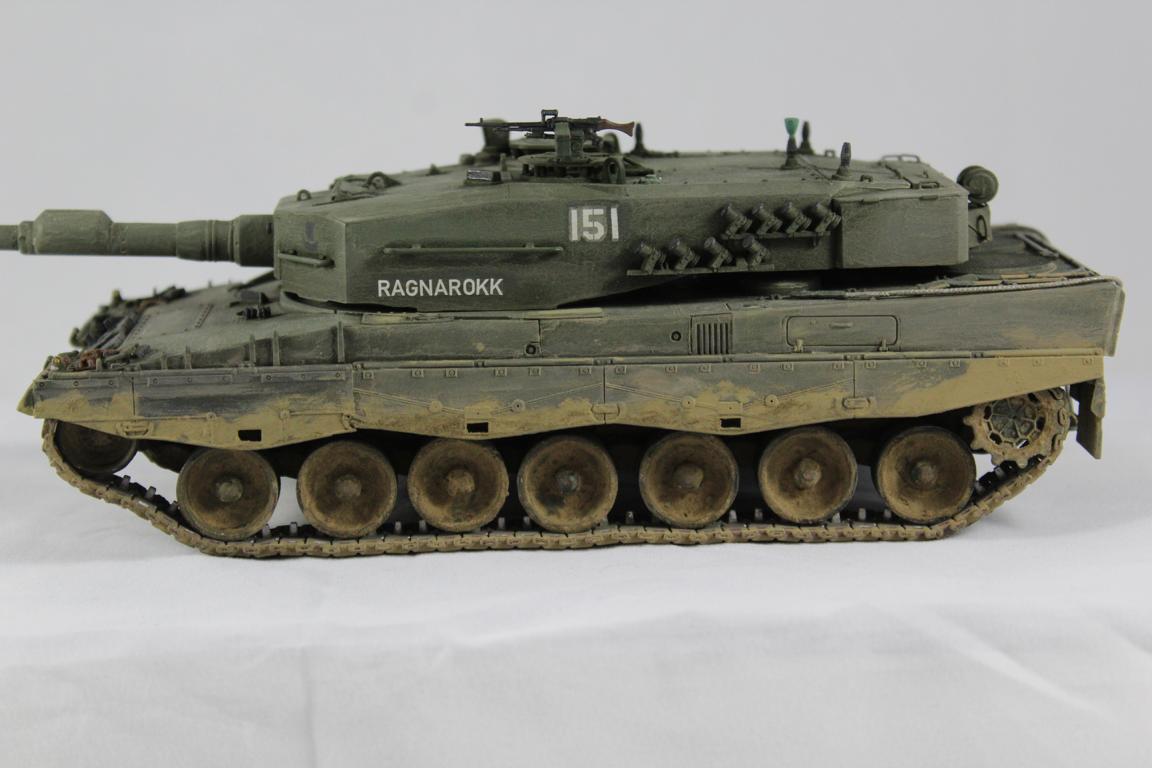
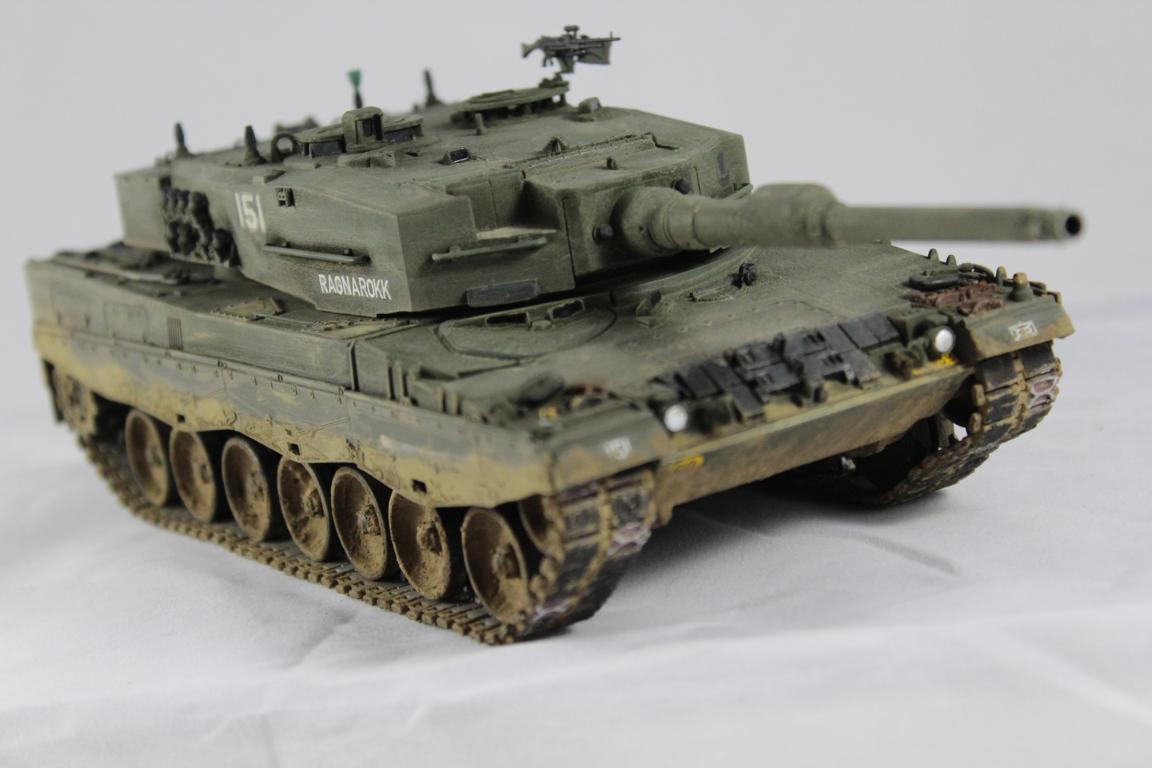
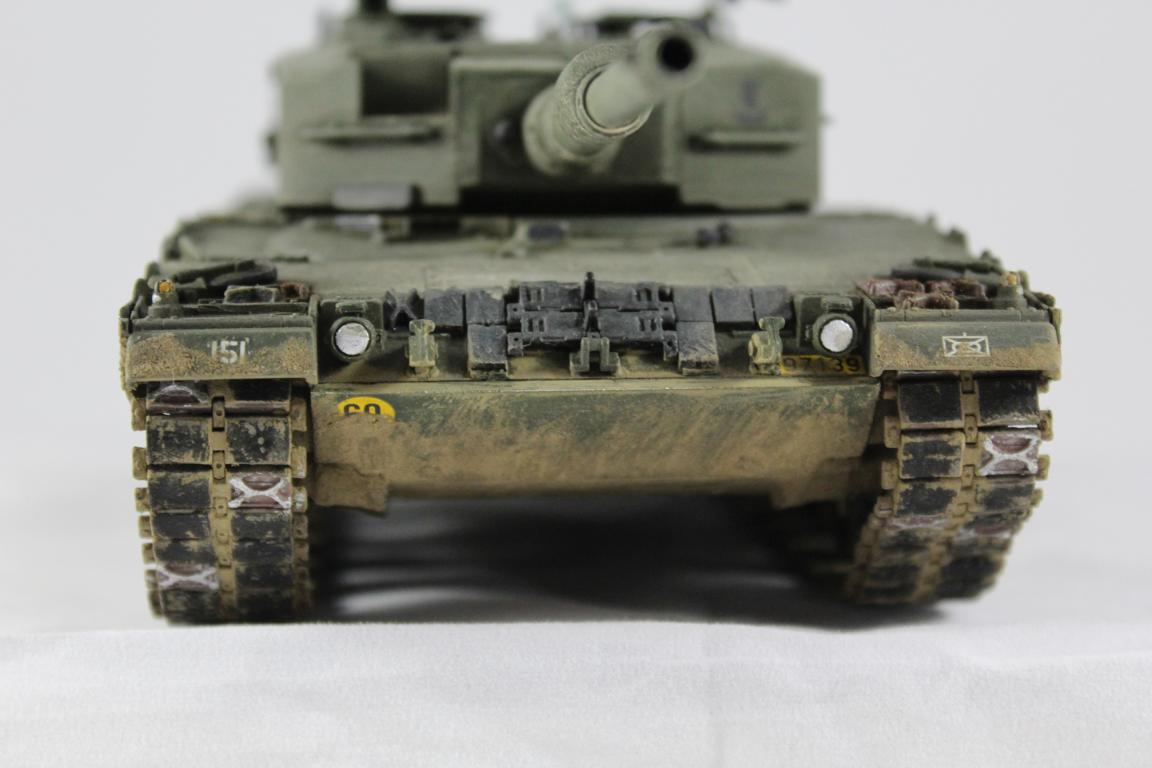
Frank Lobitz's book, Leopard 2-International, has helped me a lot as a template for my models. Especially so with this Norwegian Leopard 2. I found the photos with the front track skirts from the Leopard 1 interesting.
I also had Fahrzeug Profile No.90. The Leopards can also be seen here. As an alternative to my other models, I also made use of ice grousers, so I used the workable track from HKCW.
The kit is the old one from Italeri because this is the only one with the large anti-slip panels on the hull top. The real tanks are ex-NL. The old kit has some weaknesses. My solution for the hull side doors is to cut them from the side skirts, glue in place and clean up, re-attaching the skirts later.
Apart from the turret storage boxes, there were no major modifications. The boxes were originally open on the real tanks, but later on lids were added, as you can see in real pictures. There are ice grousers on the HKCW track, so the replaced sections go to the front and rear, only where they are visible.
Ice grousers = operation = dirty. I made my own mud out of dust and earth colour for this model. The configuration on this kit is not real. 'Ragnarokk' does exist, but not with number 151, and not with a lid on the boxes, but it has the light track skirts. I put the decals together from left-overs. 'Ragnarokk' is made up of individual letters from a TL-Decals set.


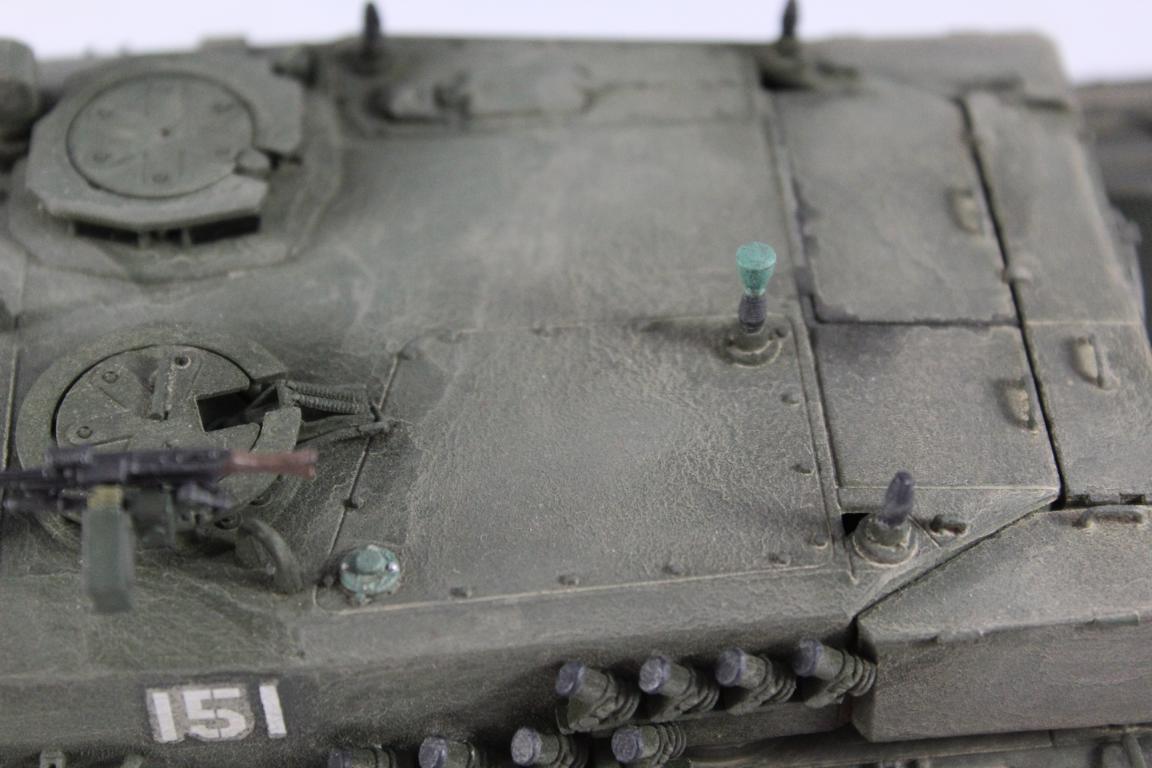
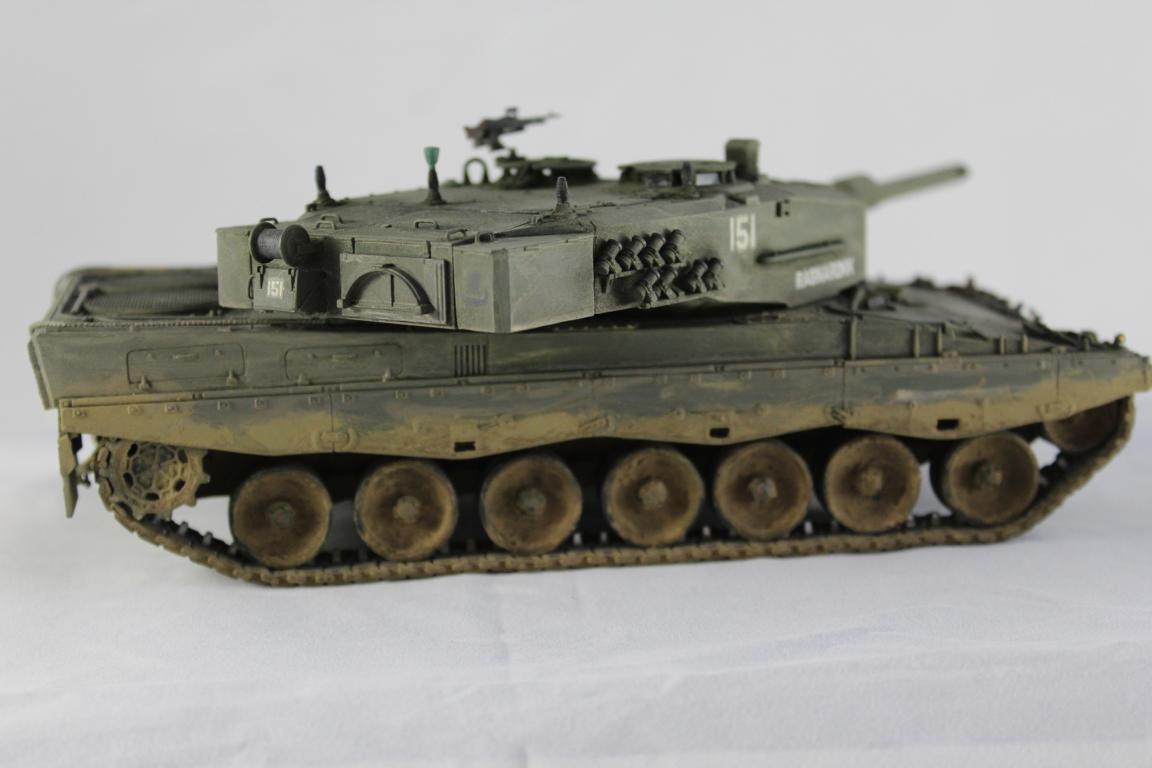
This is a tank of the ILÜ-demonstration team at the Panzertruppenschule in Munster, Germany in June 2008. They exercise a military conflict between the fictitious states Seeland and Wettina. The Leopard is intended to look like a T-80 of the opposing Seeland troops.
Around the turret is not an add-on armour – it is only a dummy. The barrels at the rear are fastened only temporarily and they are empty. Frank Lobitz's book Leopard 2 Bundeswehr helped me a lot as a template for this model. However, I didn't have the book until this model was finished, so I saw that the turret was shorter. I built it from an original picture from a friend.
It is the Hobbyboss 2A4 kit. The turret parts are self-built and copied in resin. I painted the fabric covering in sand colour, which comes very close to the jute (canvas) colour. I built it in 2008.


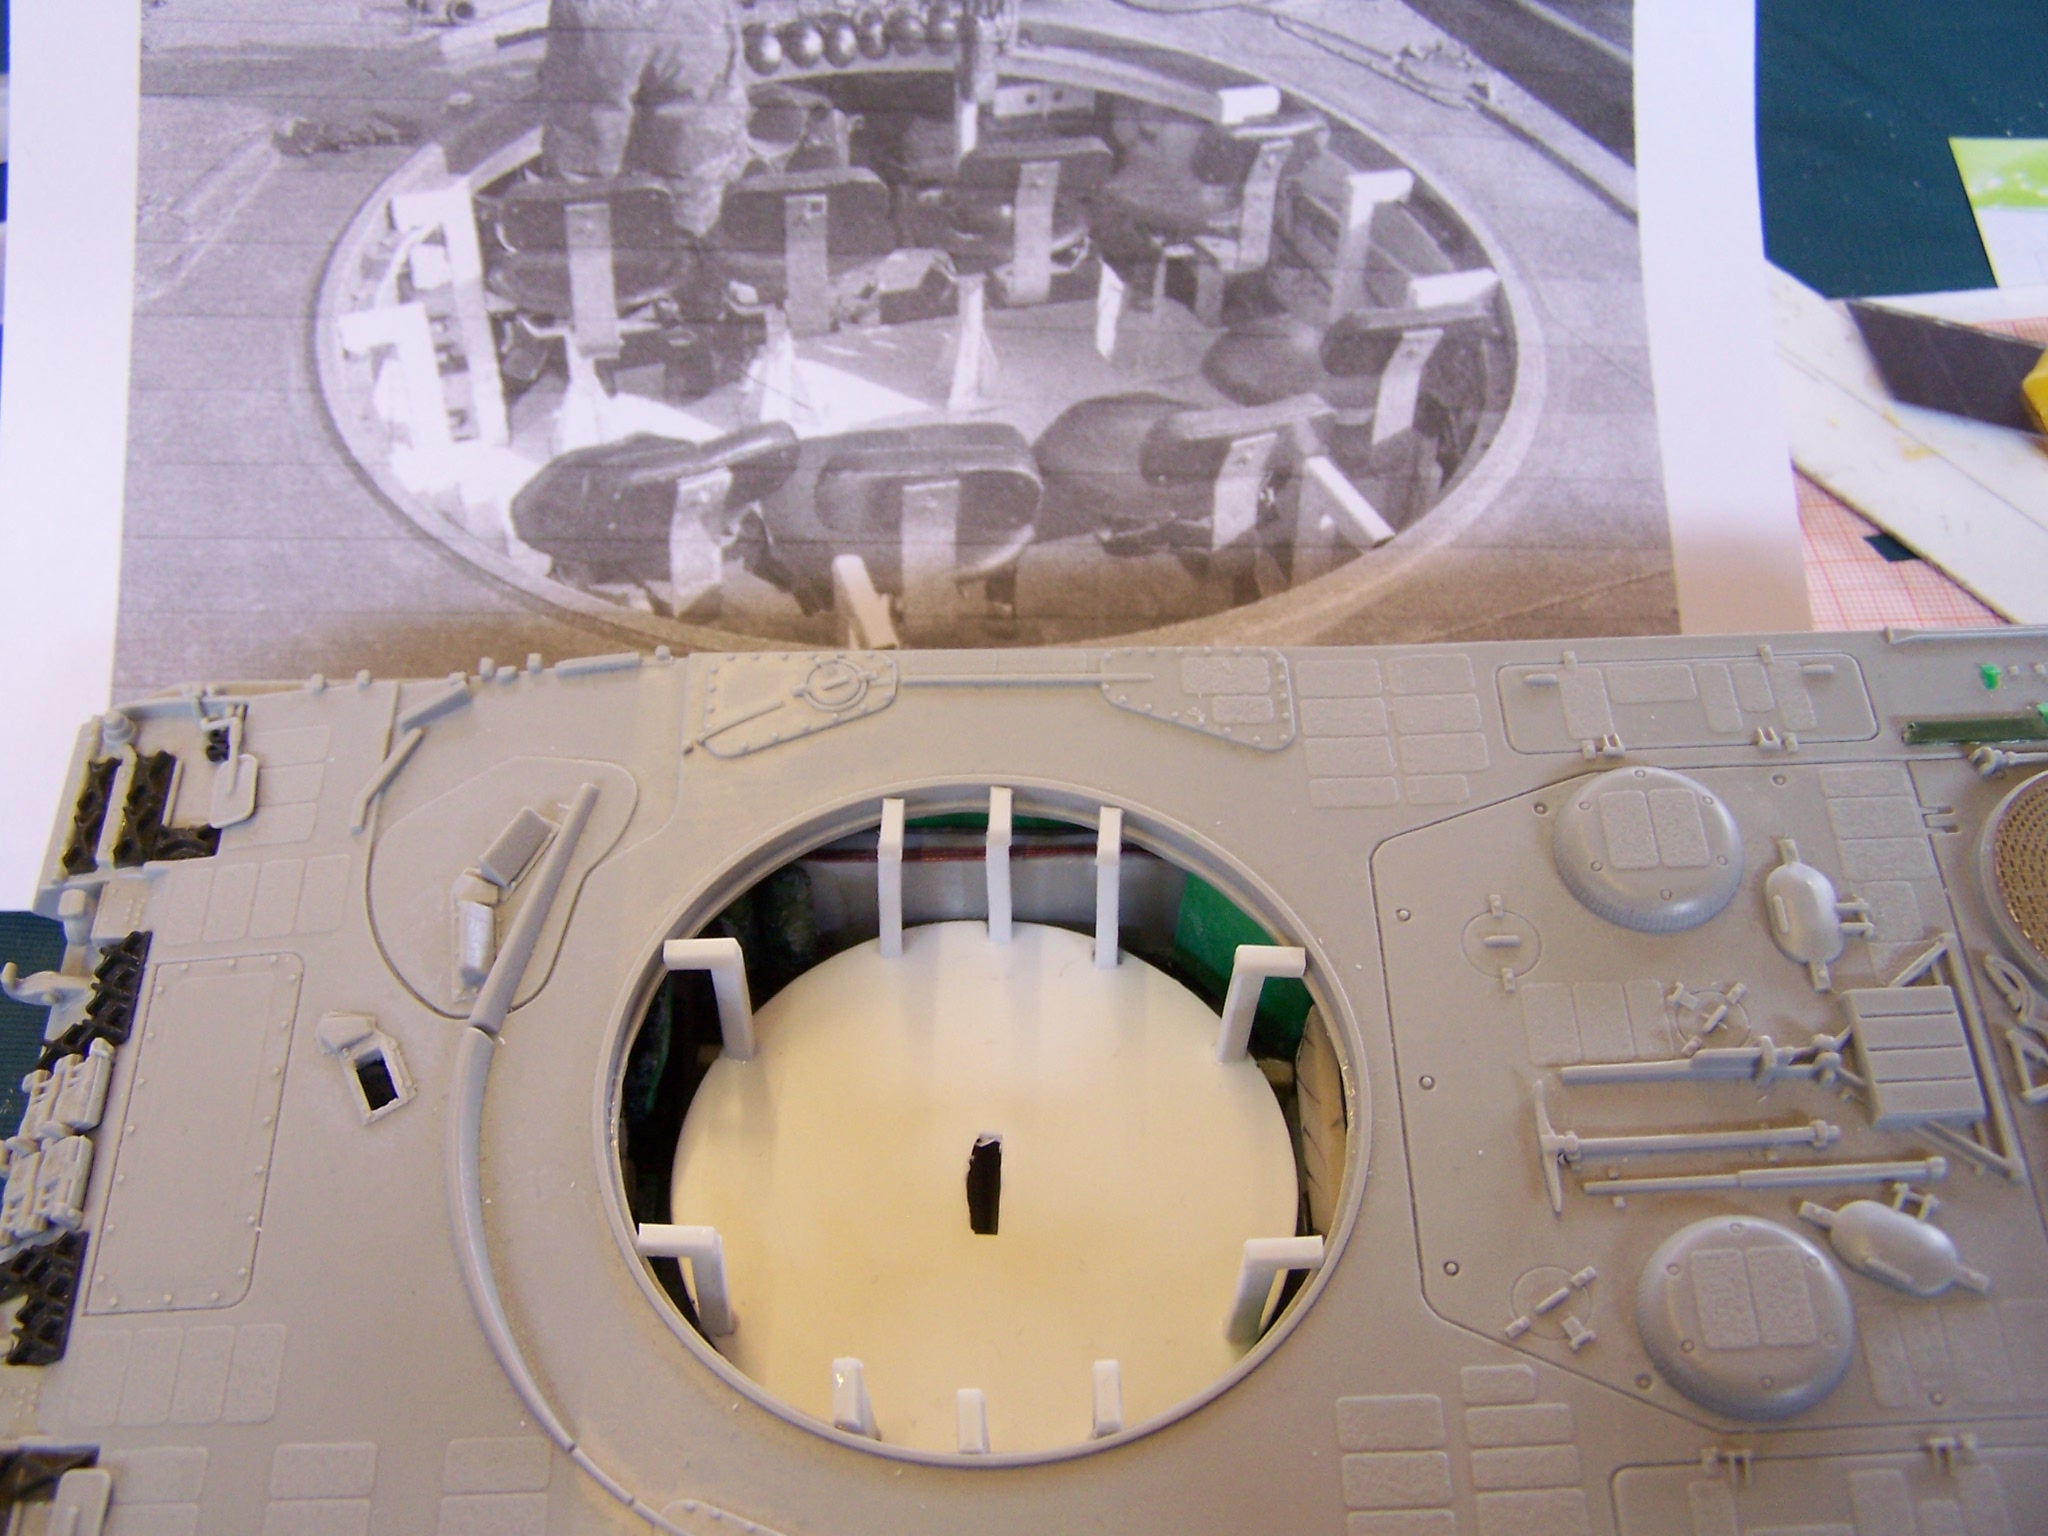
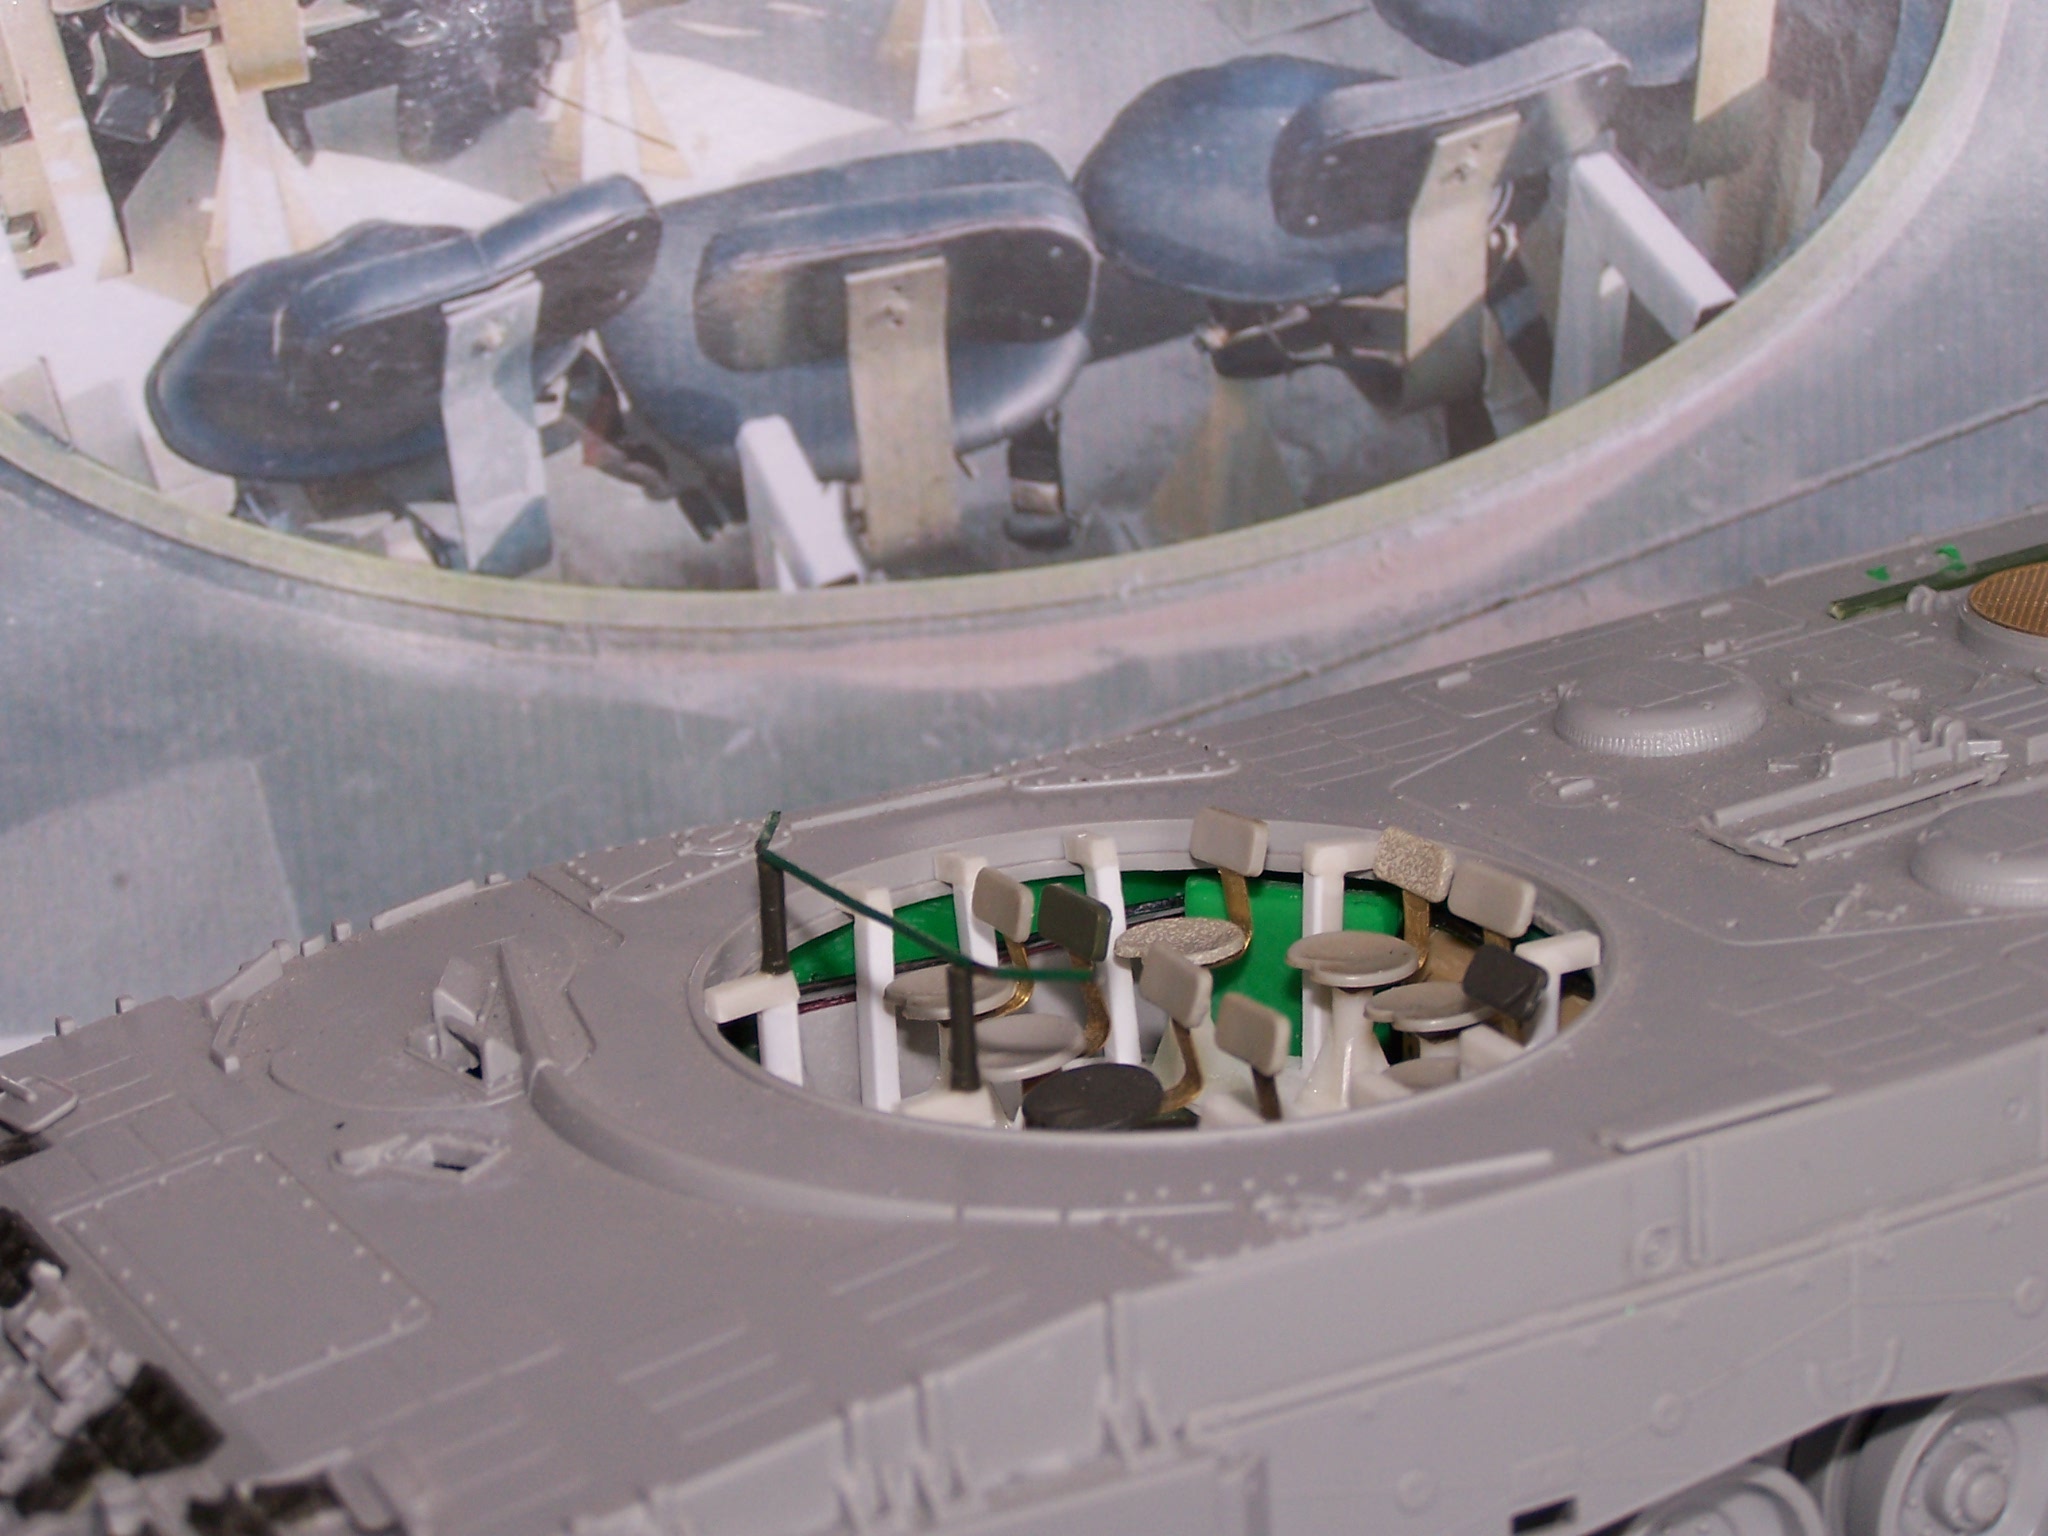
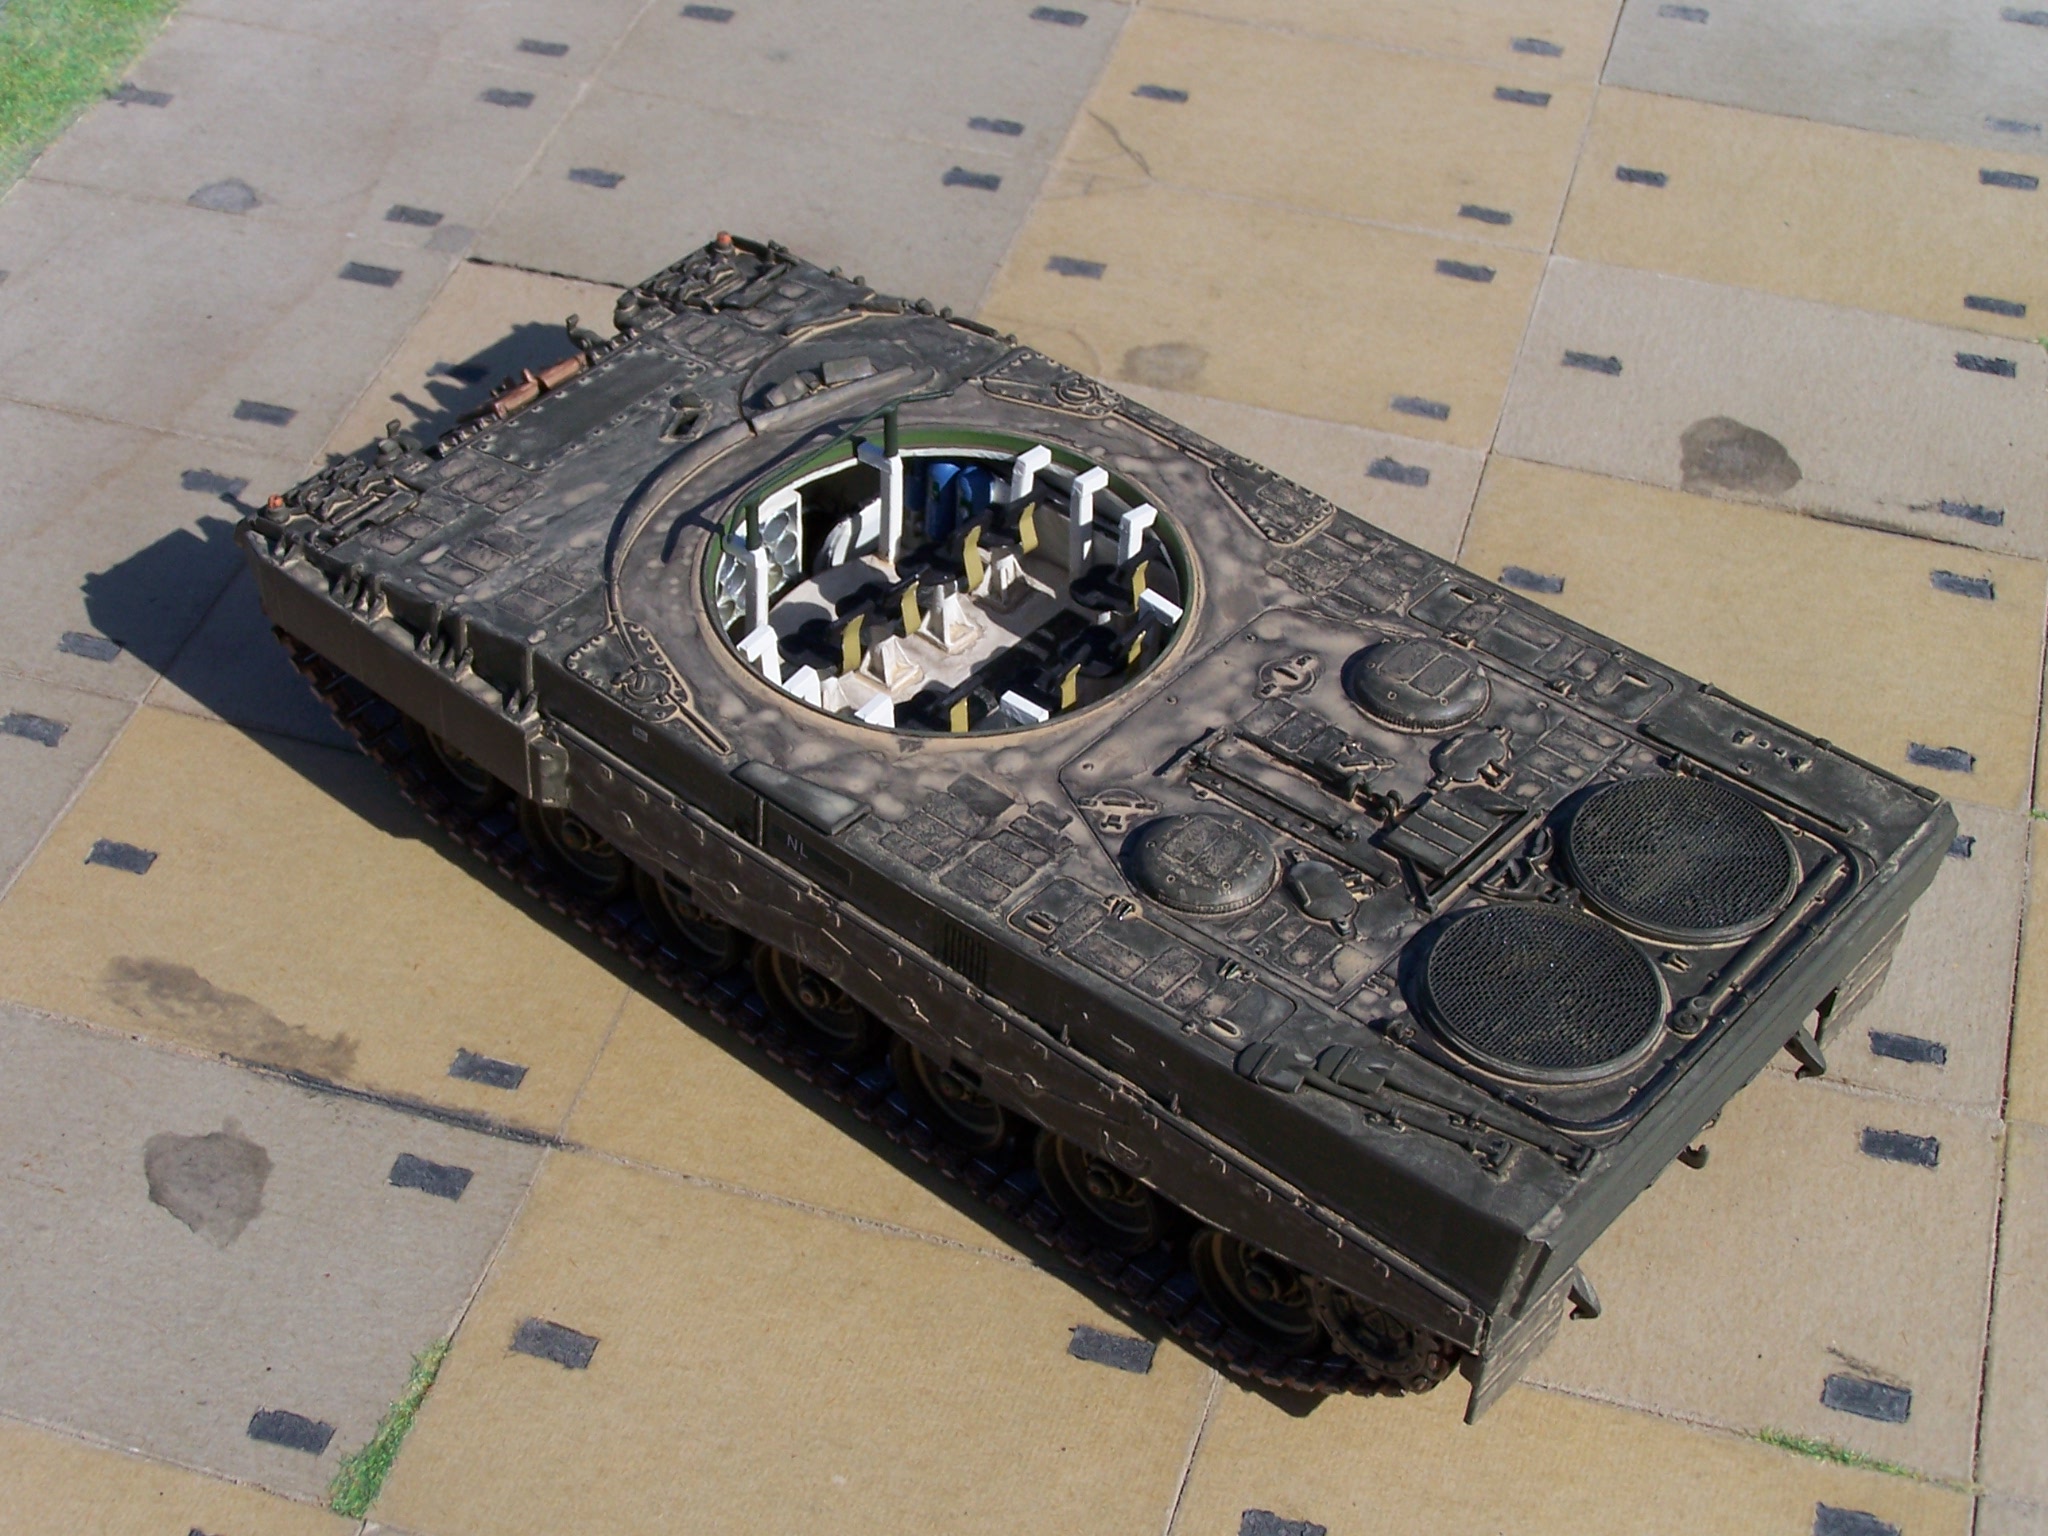
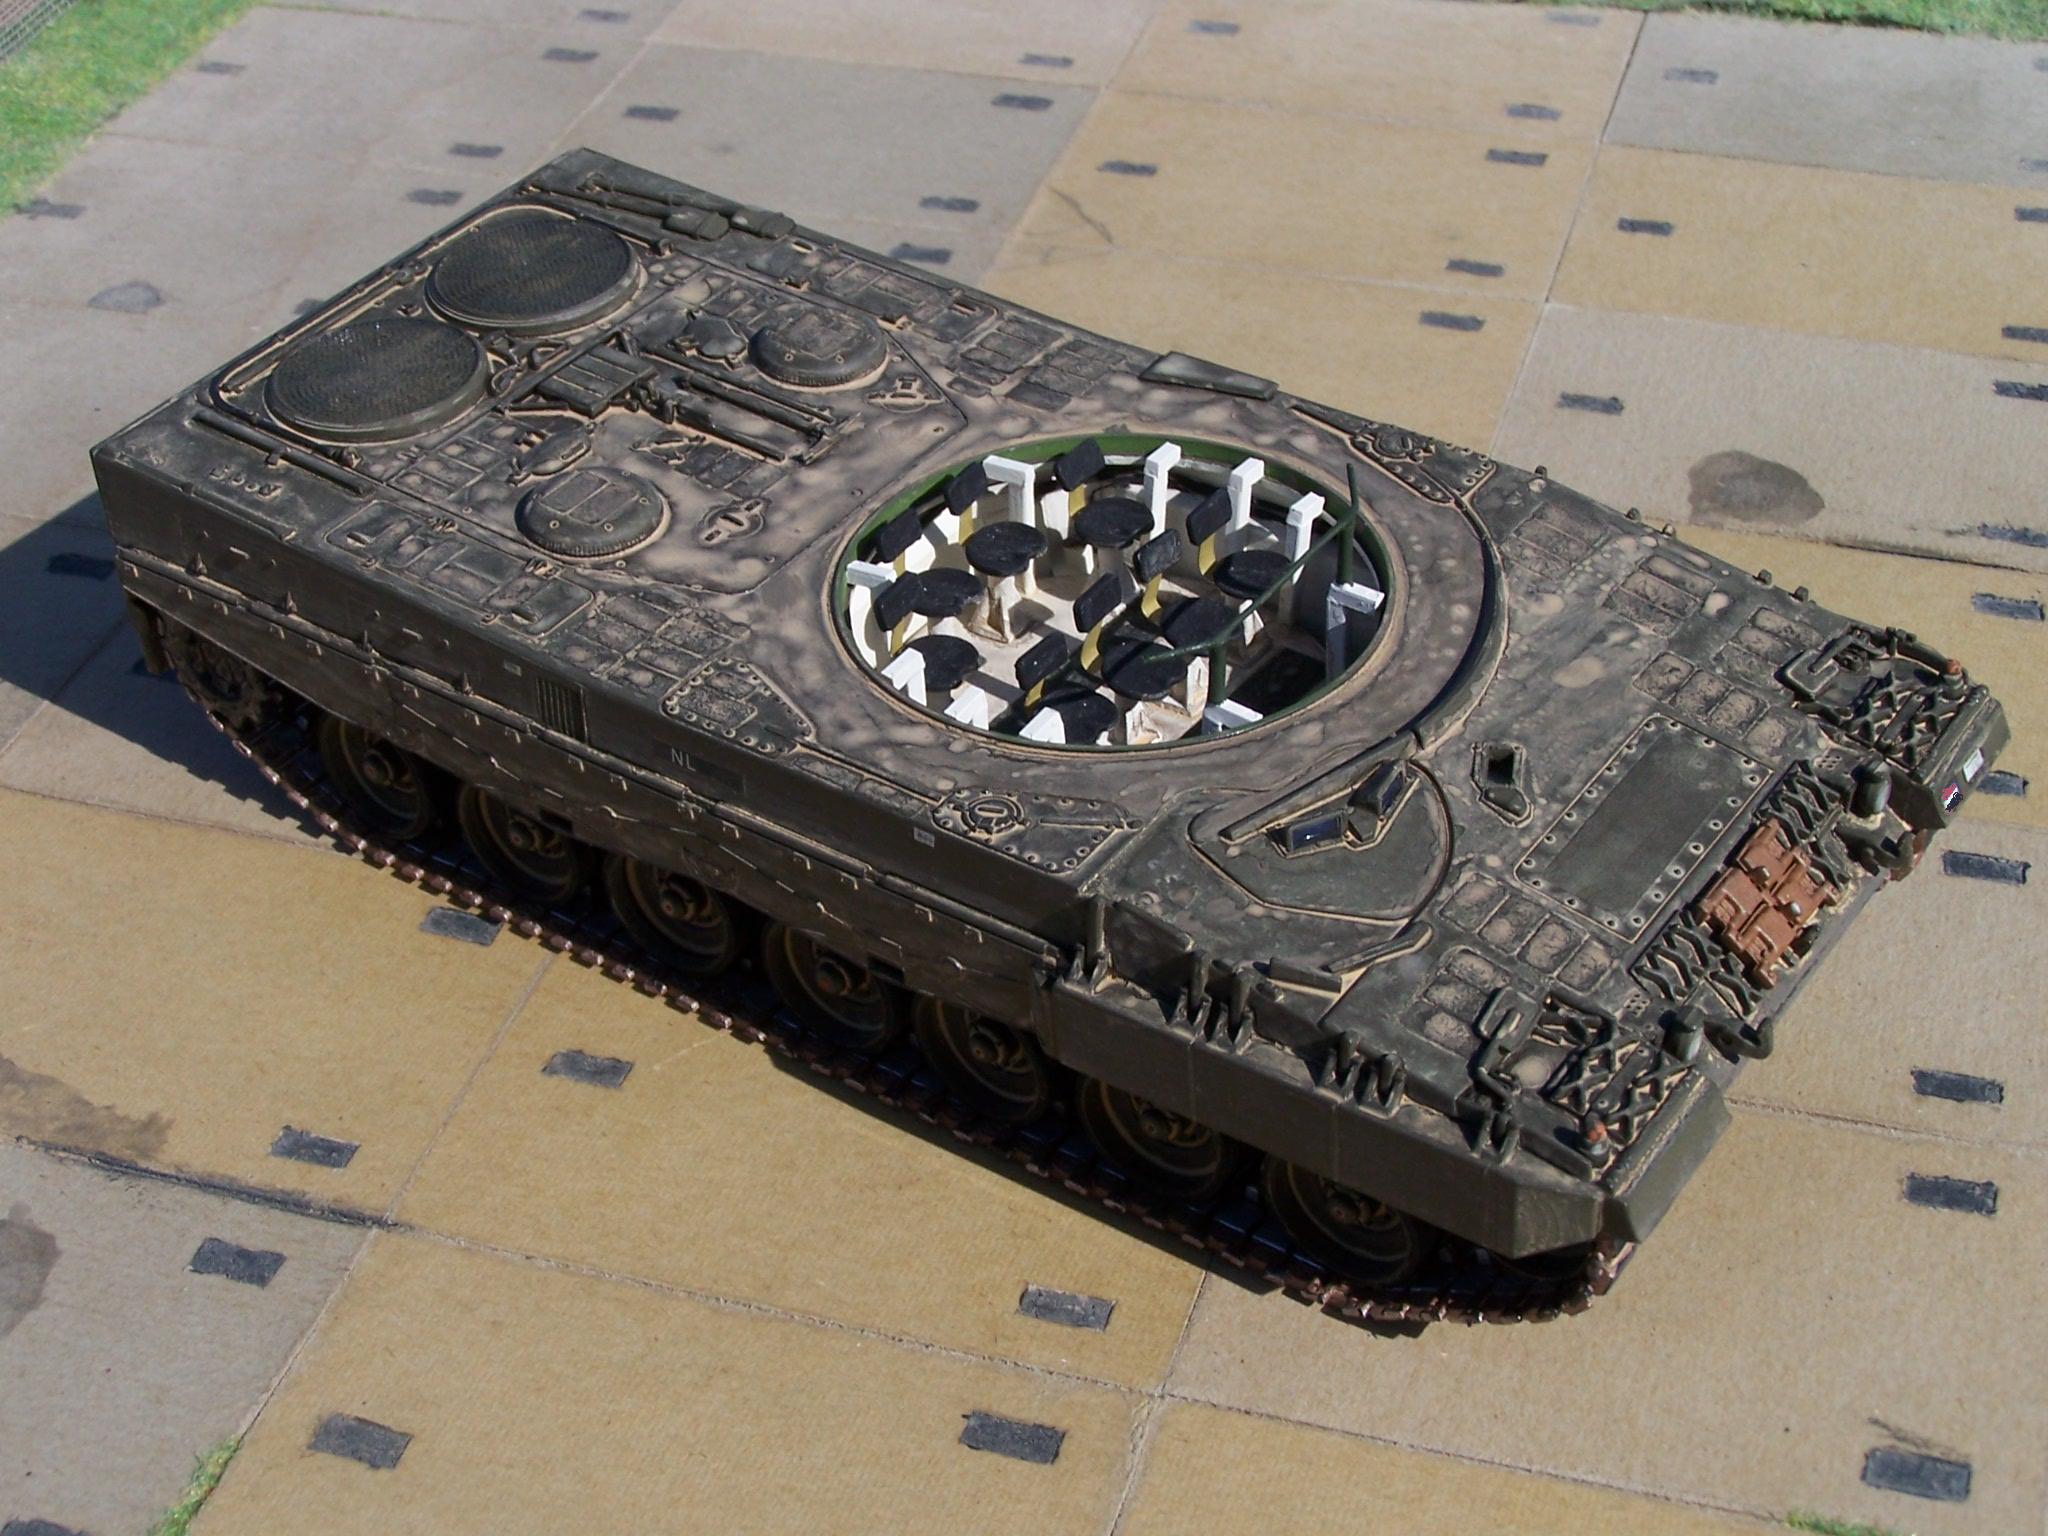
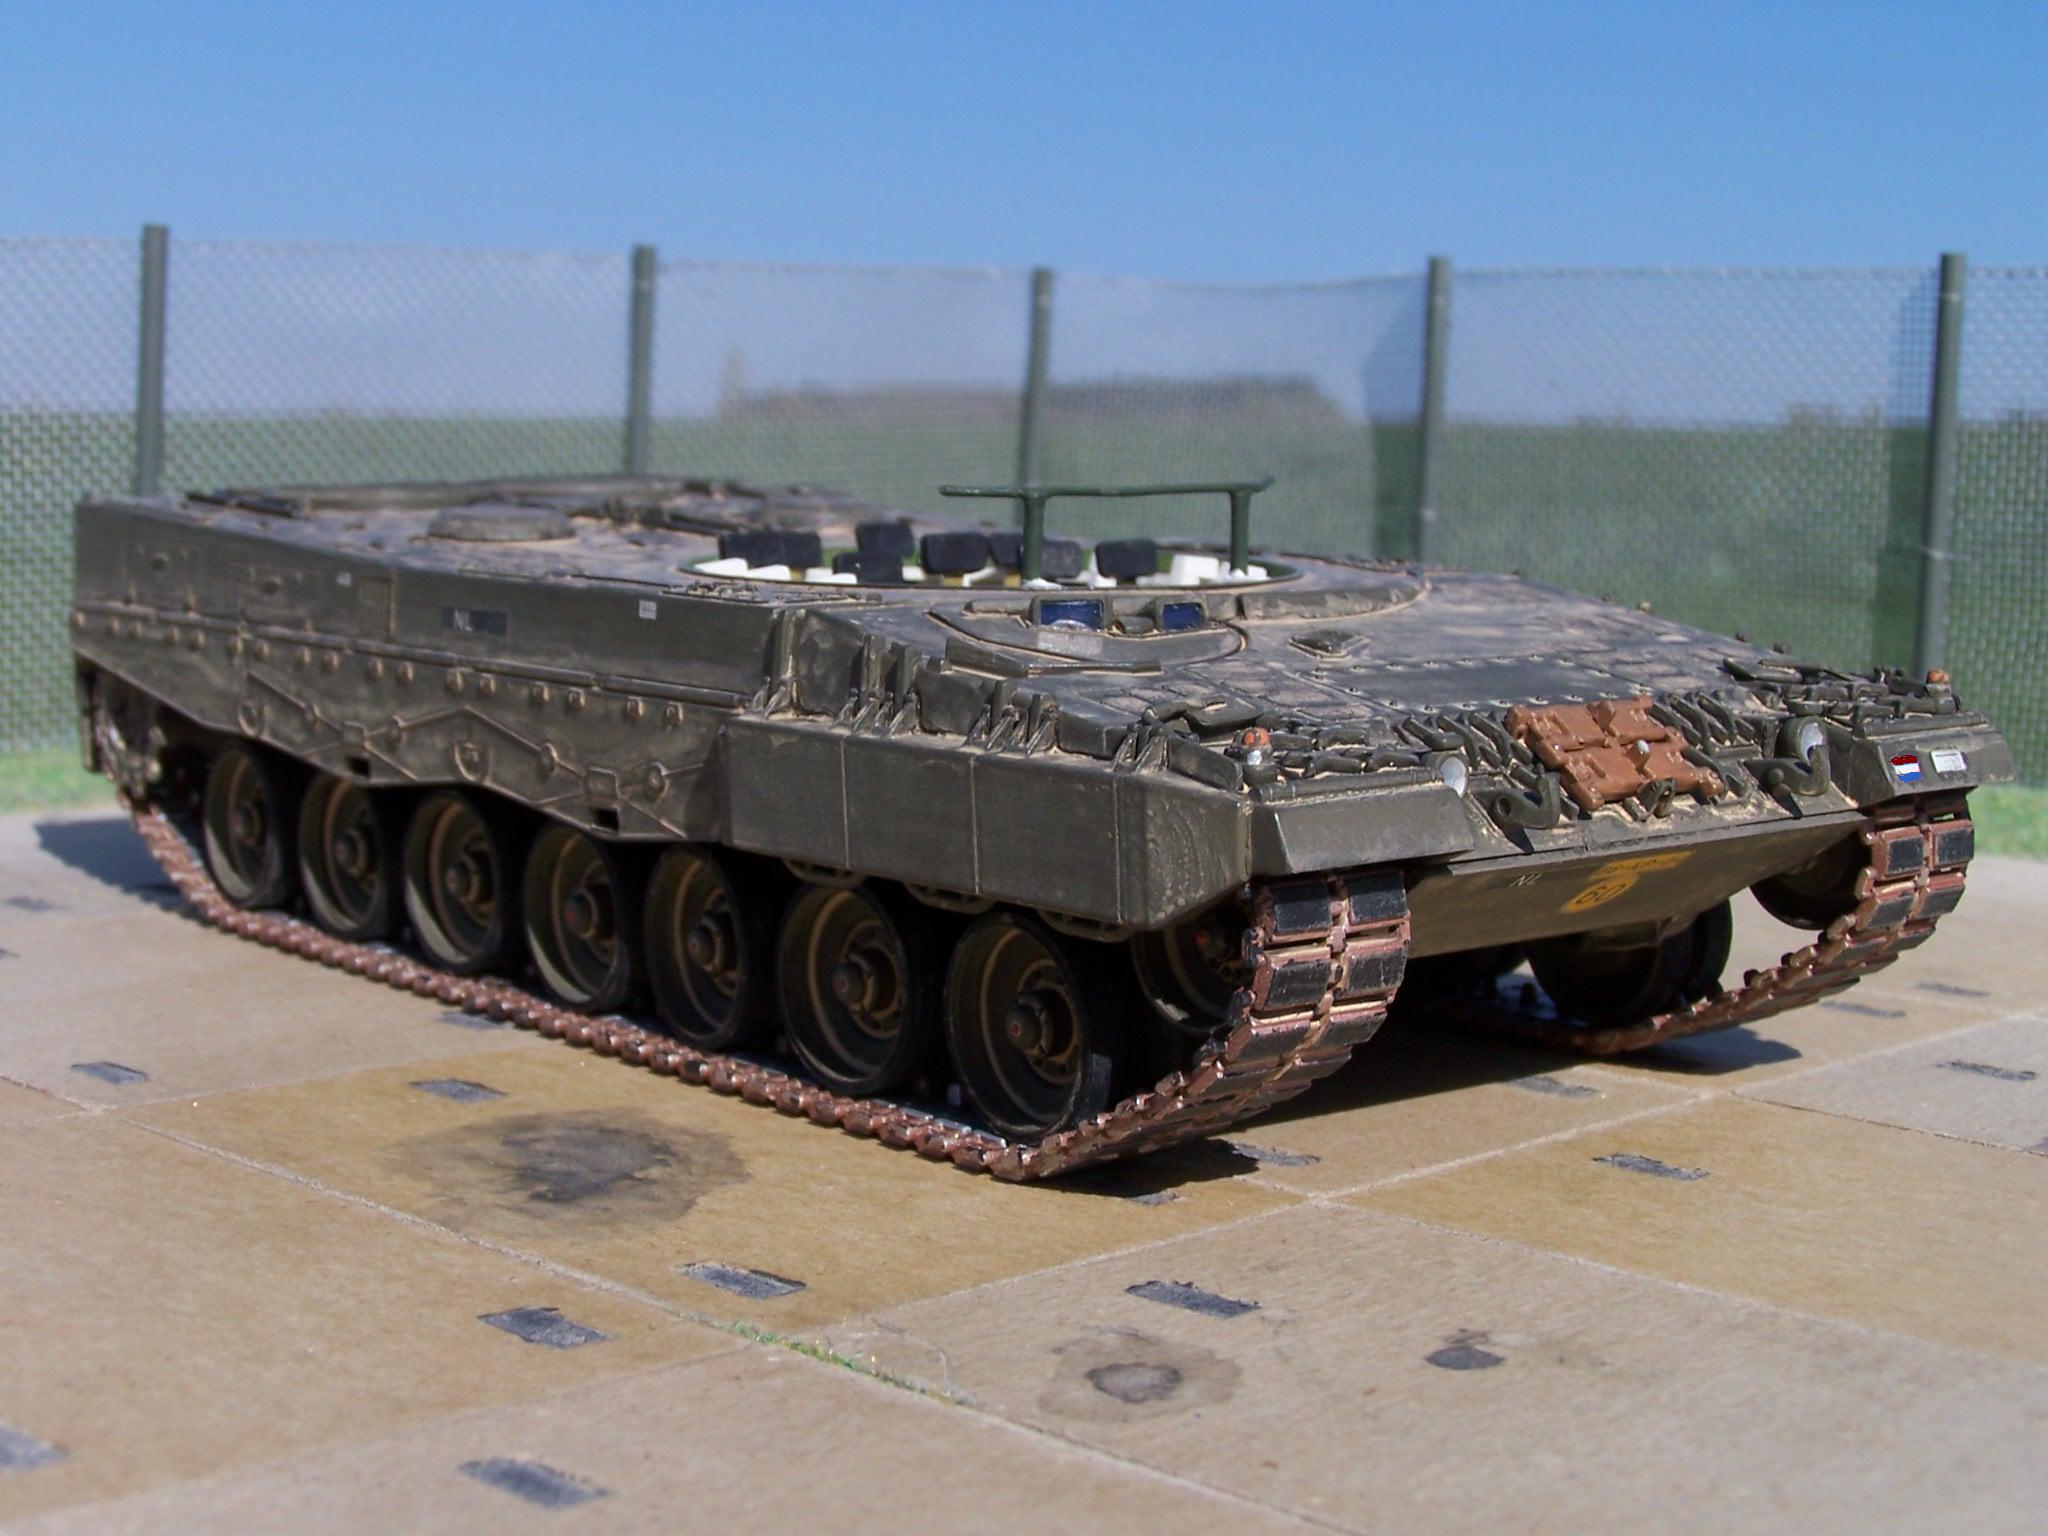
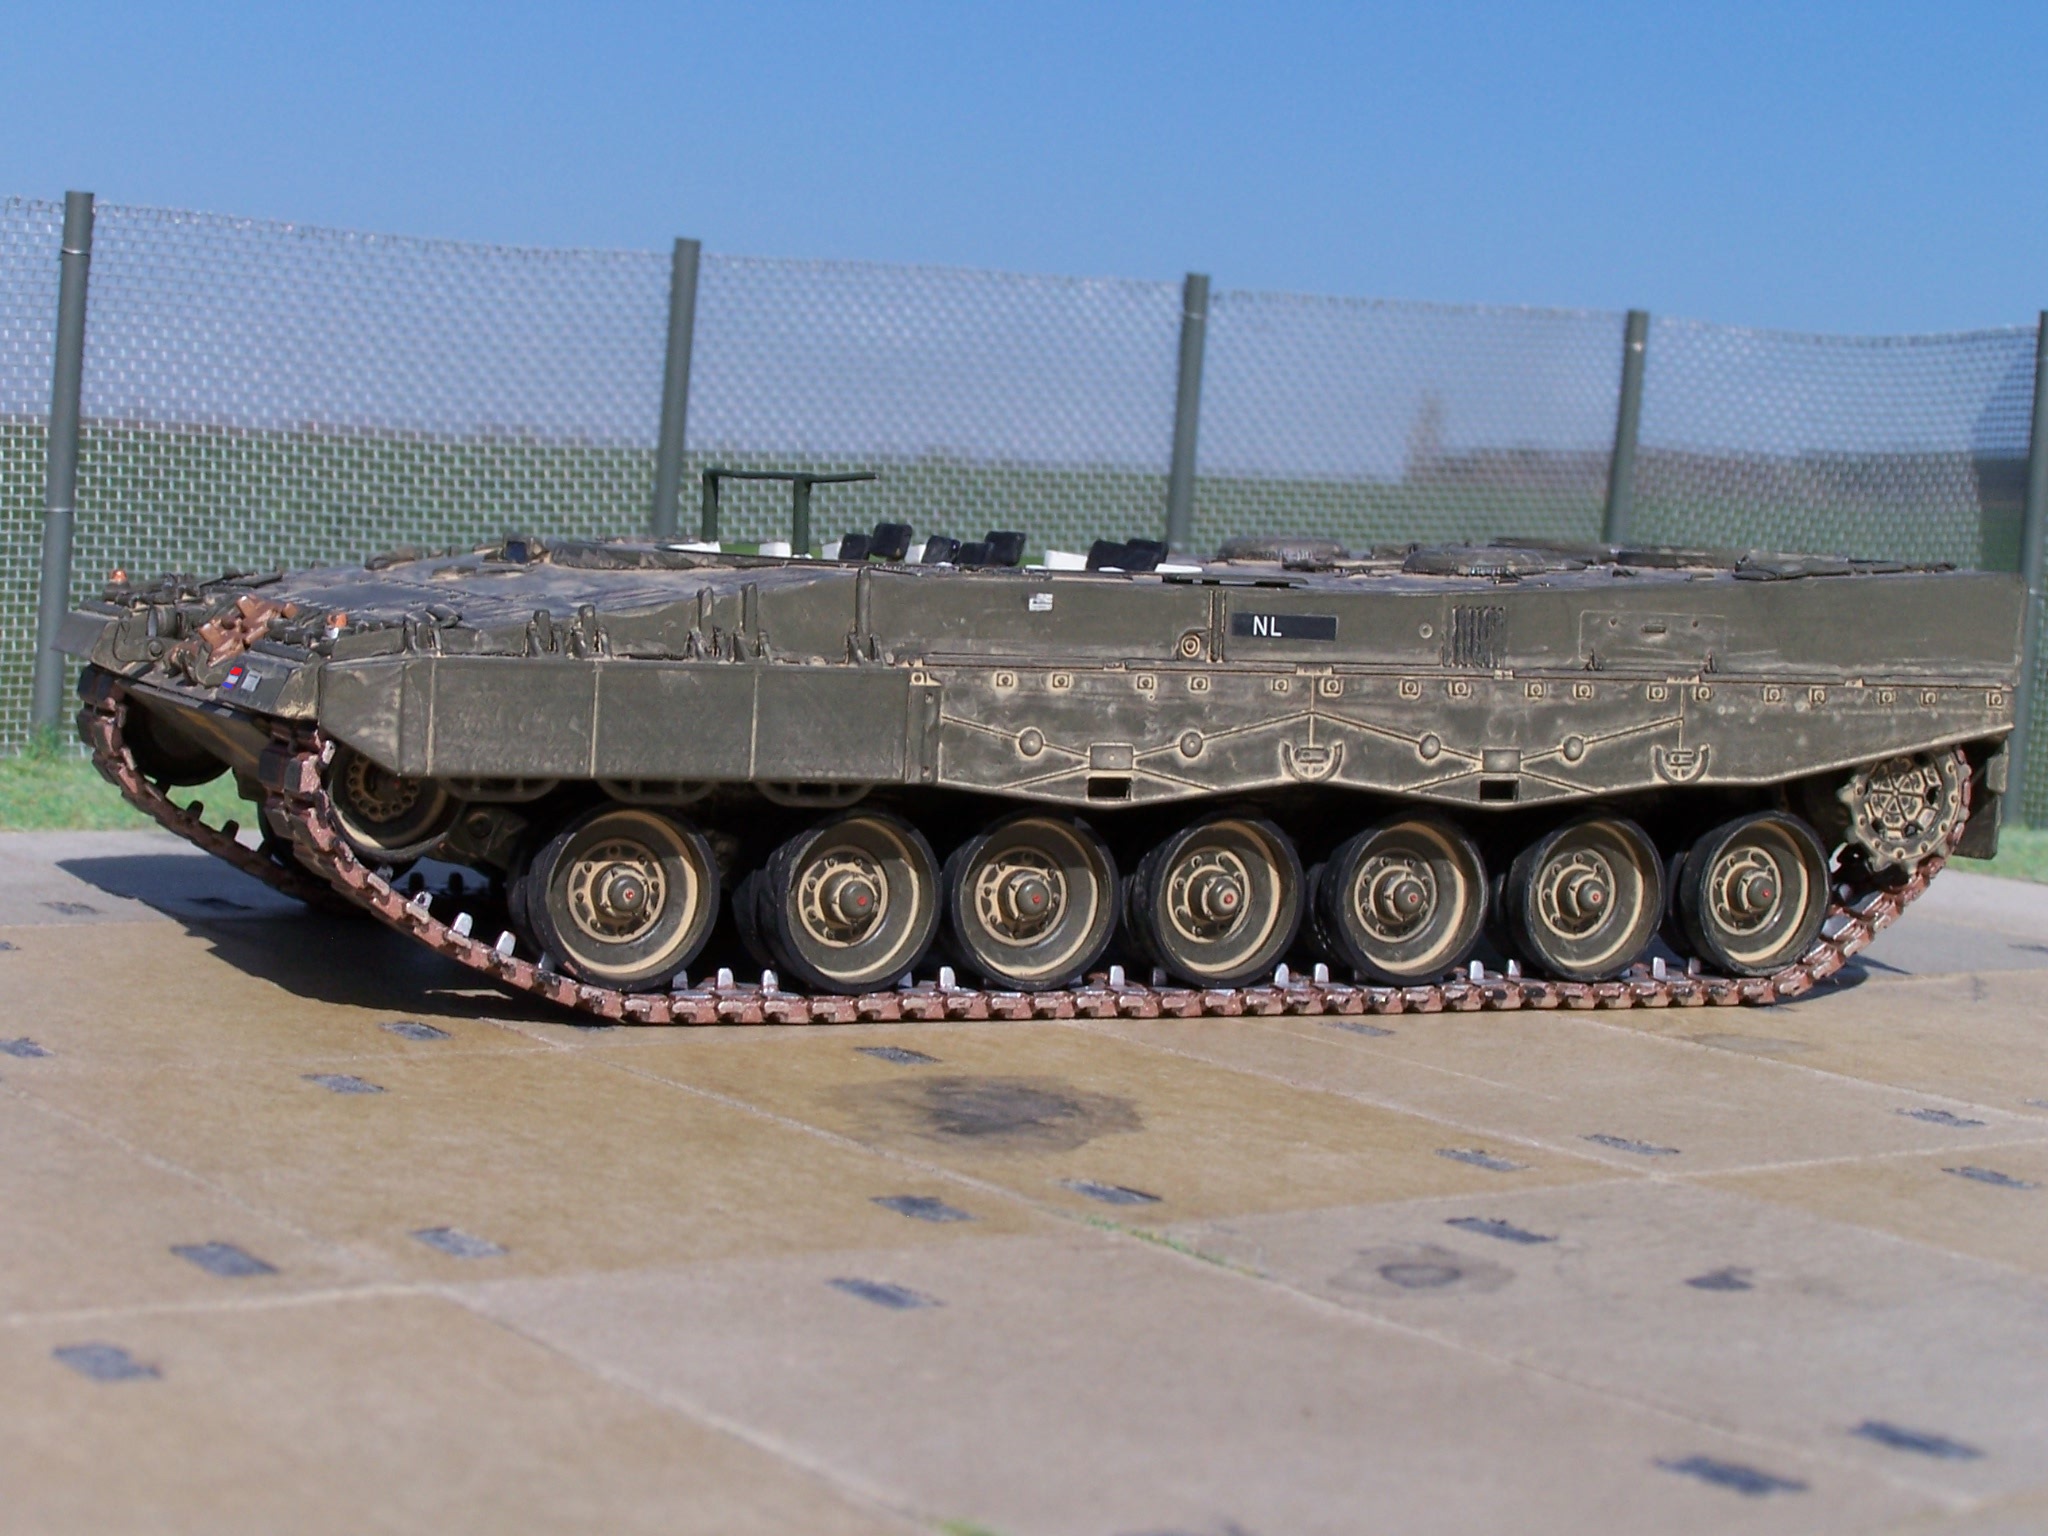
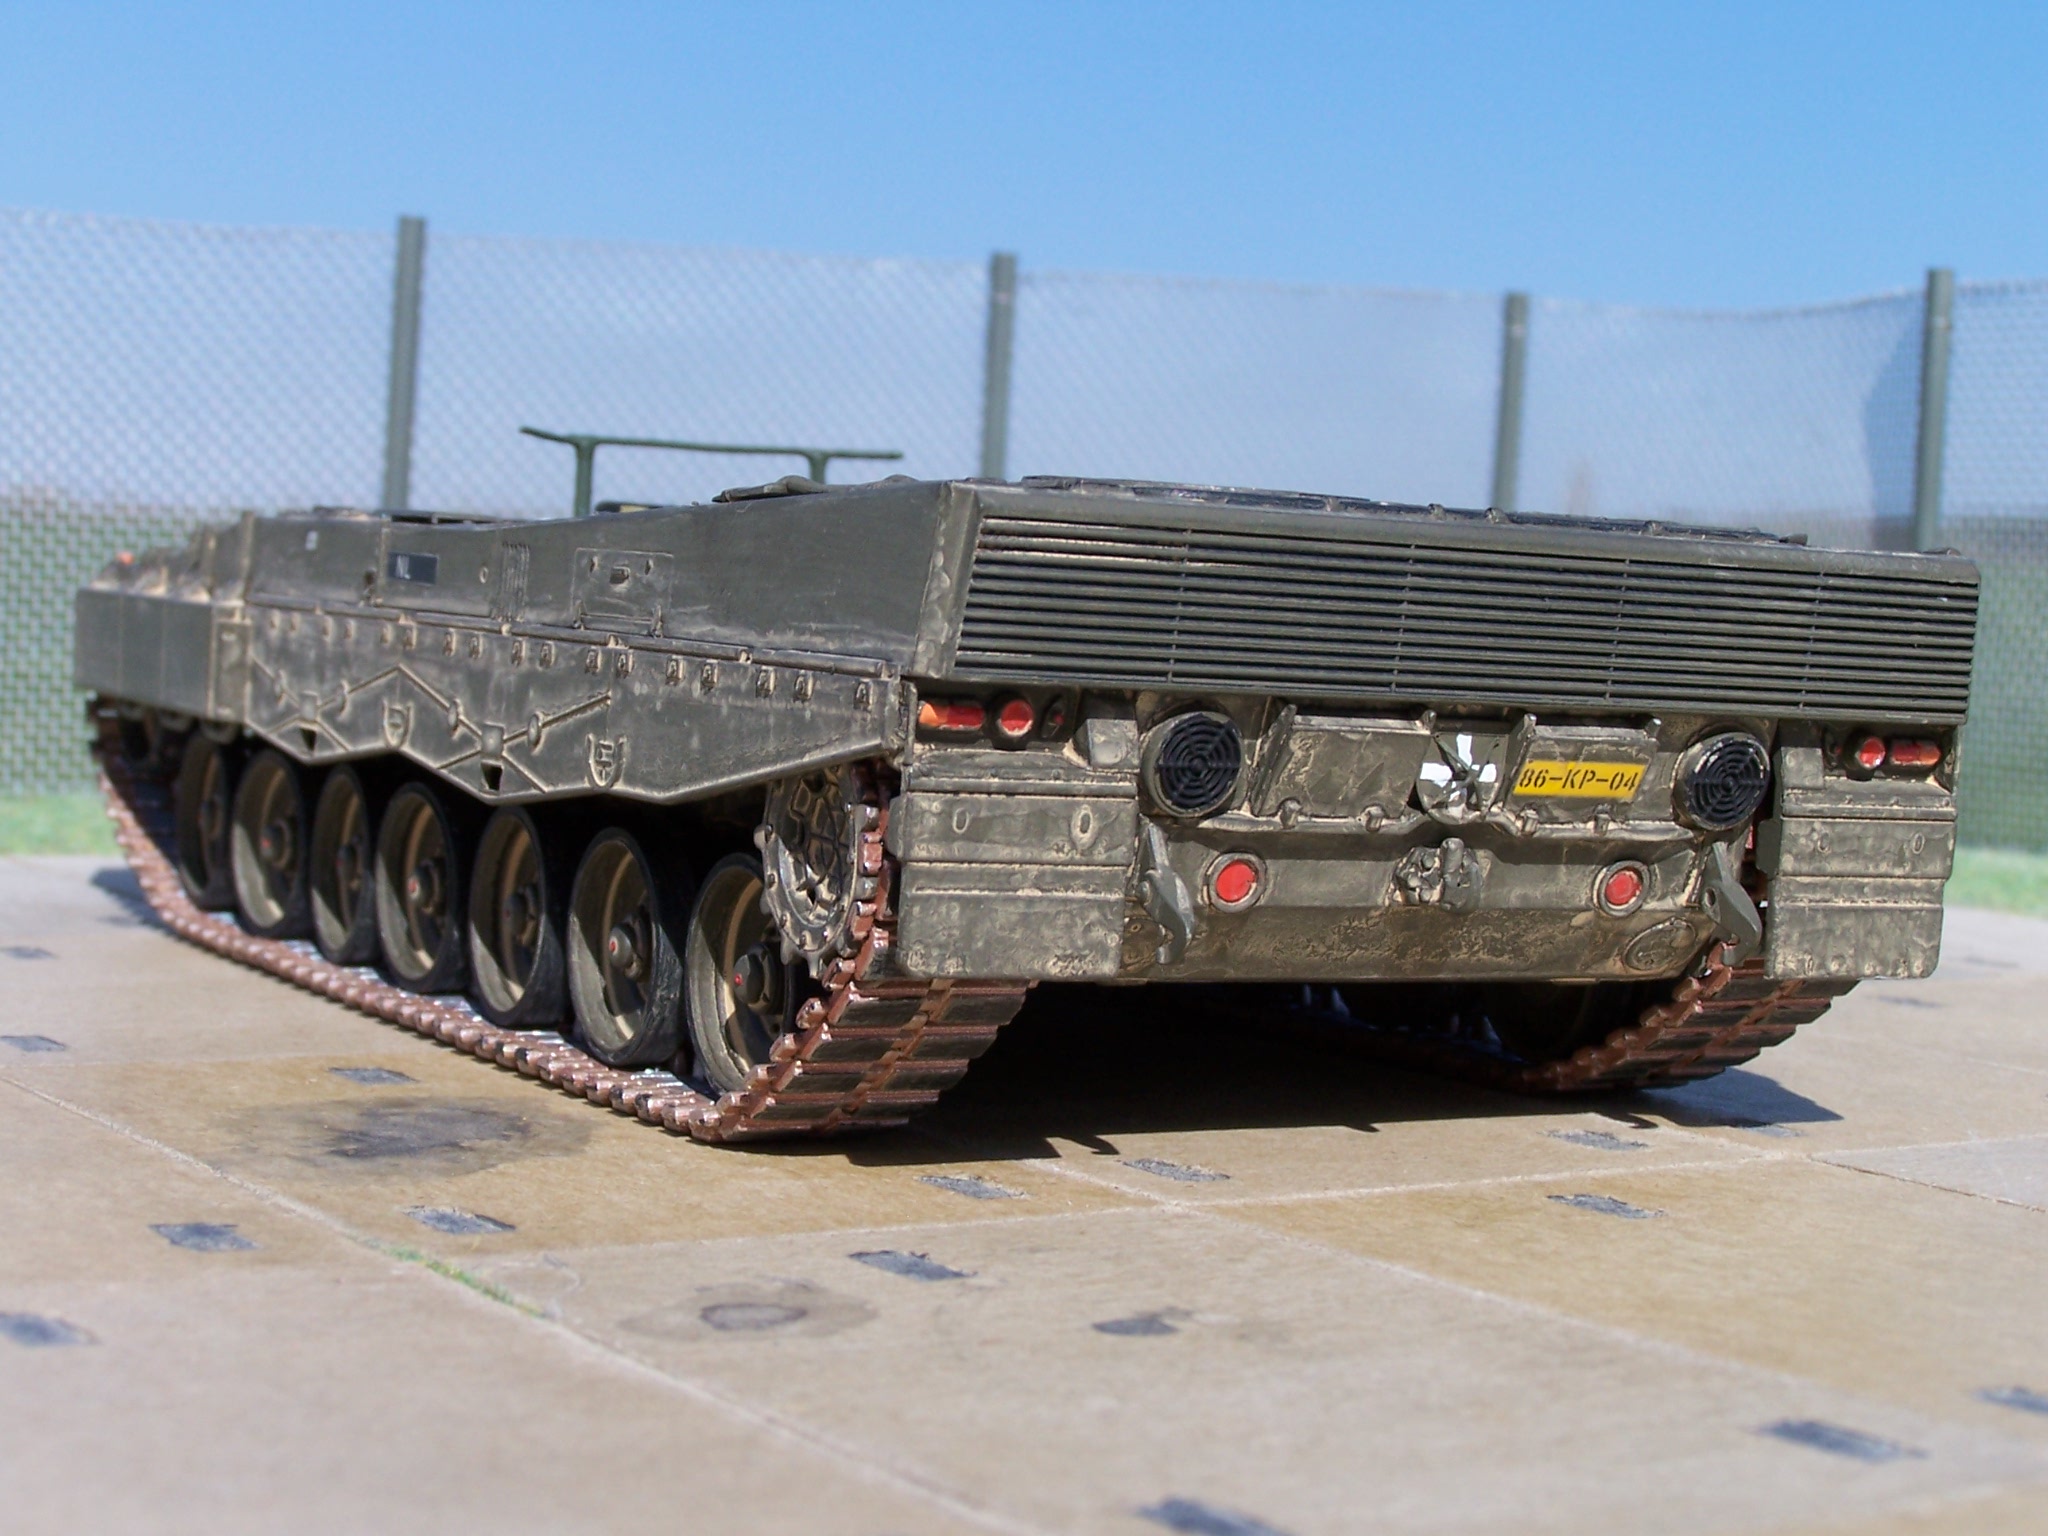
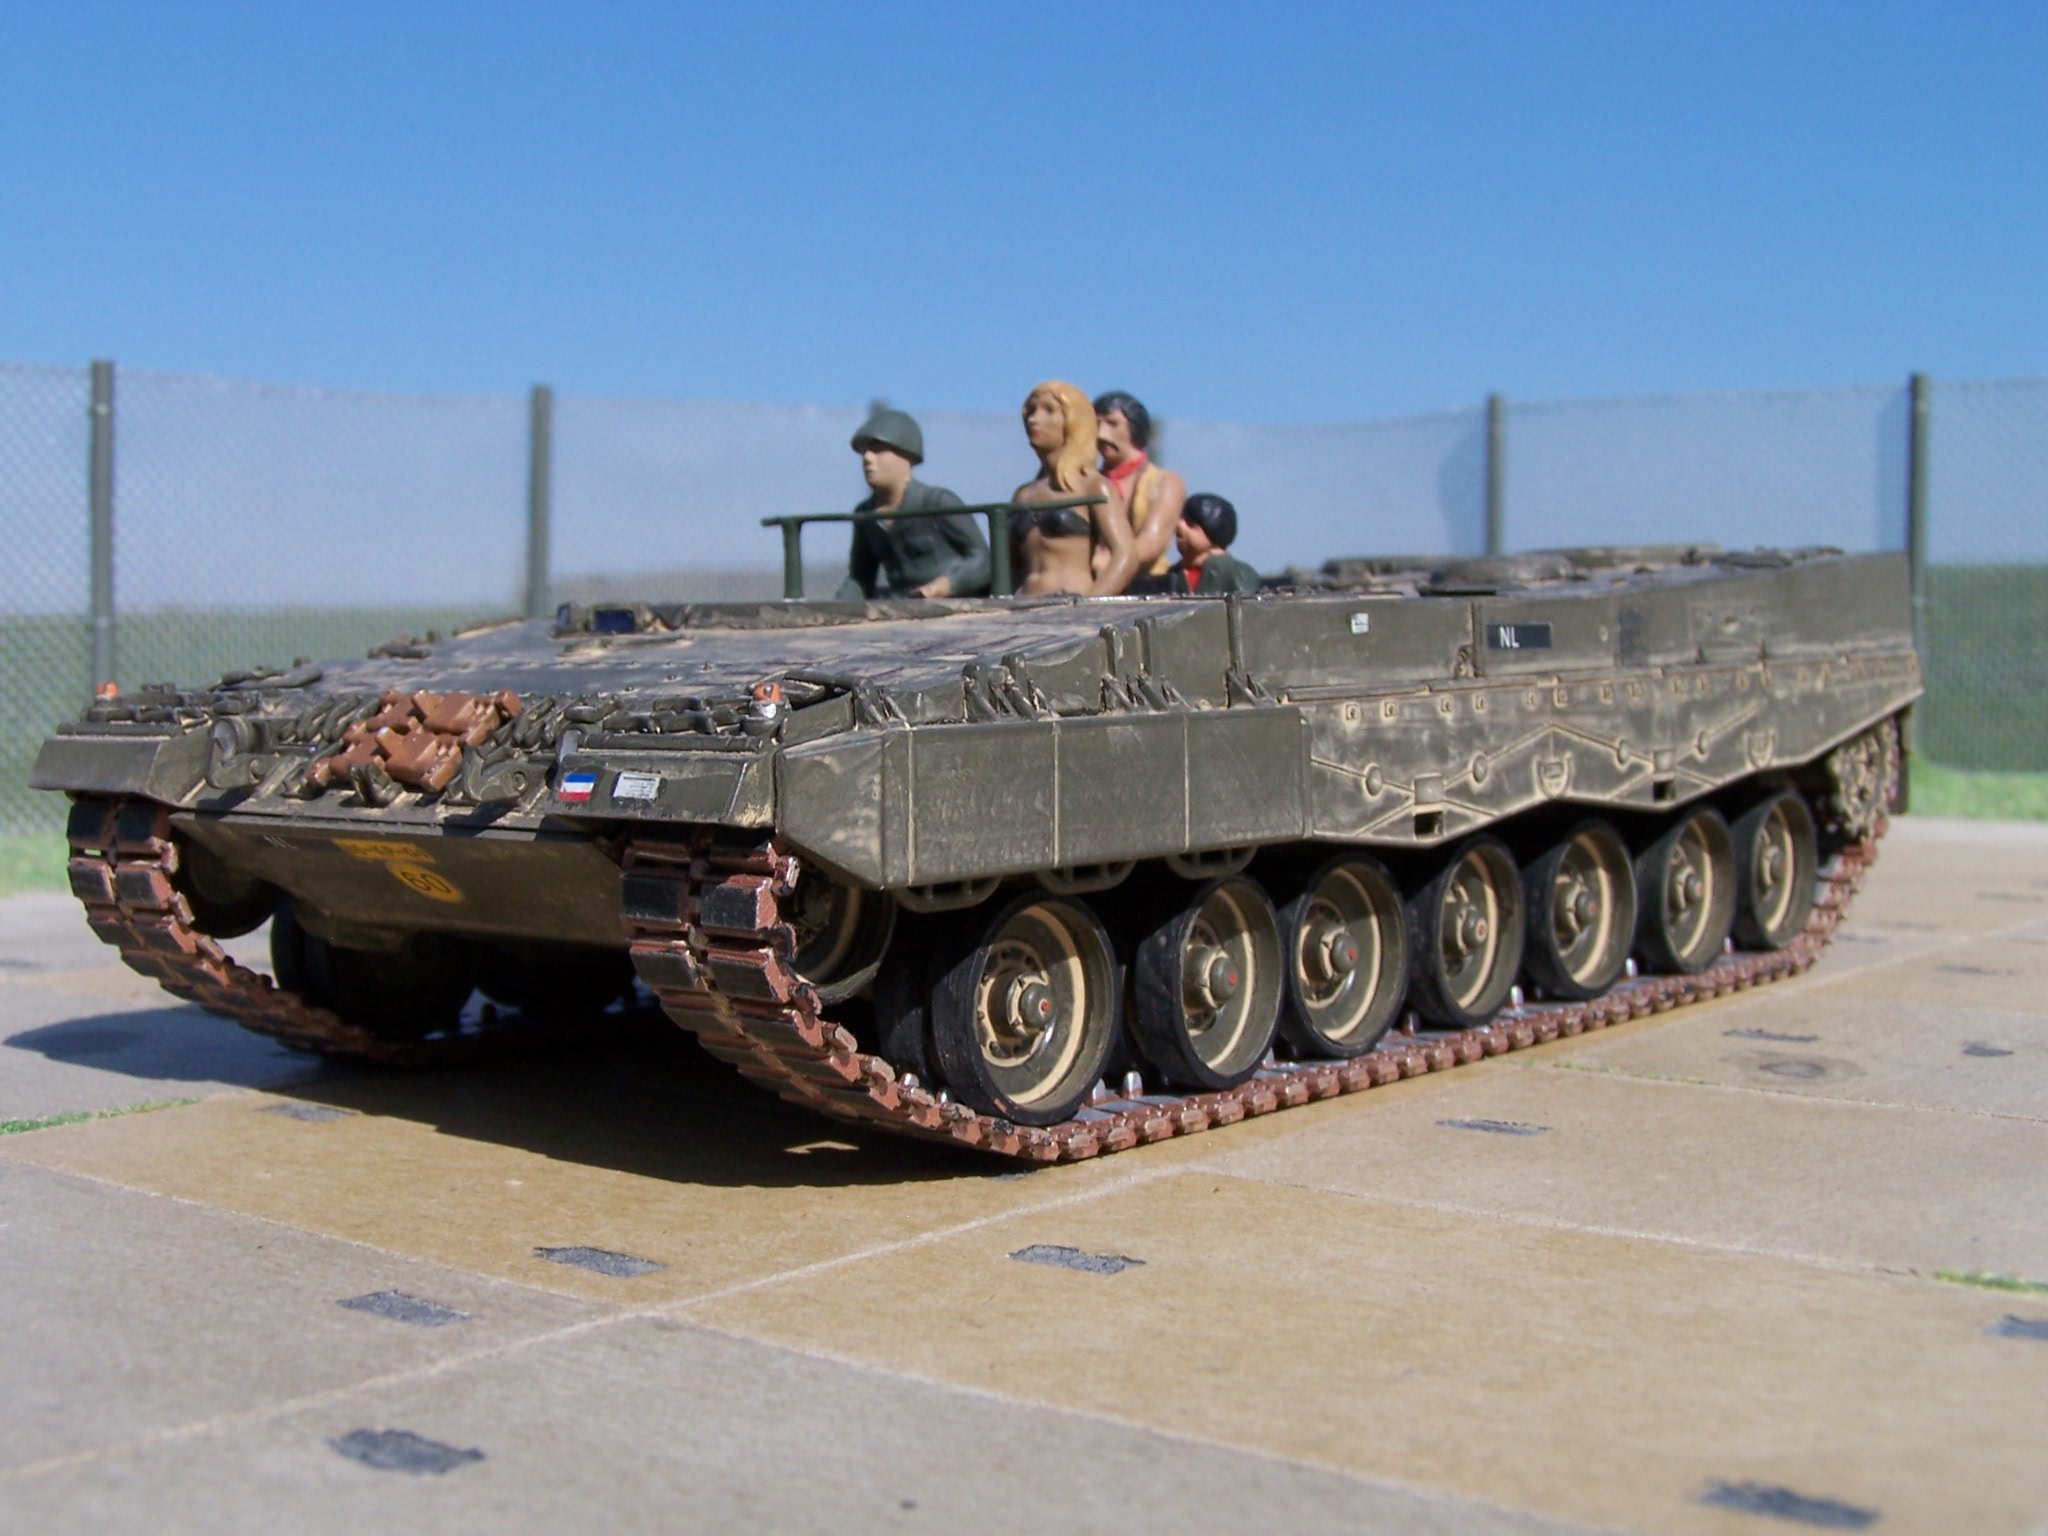
Why do tanks always have to have a cannon? In any case, this Dutch "battle tank" looks extraordinary! I know him as a "demo tank" or "tank demonstrator". The purpose seems to be to drive visitors through the area at the "open days". At least I know pictures of this vehicle from such events.
The hull is unchanged from the Leopard 2A4. I used the kit from Hobbyboss. I built it without knowing that the NL have the large anti-slip. It would have been better for the Italeri.
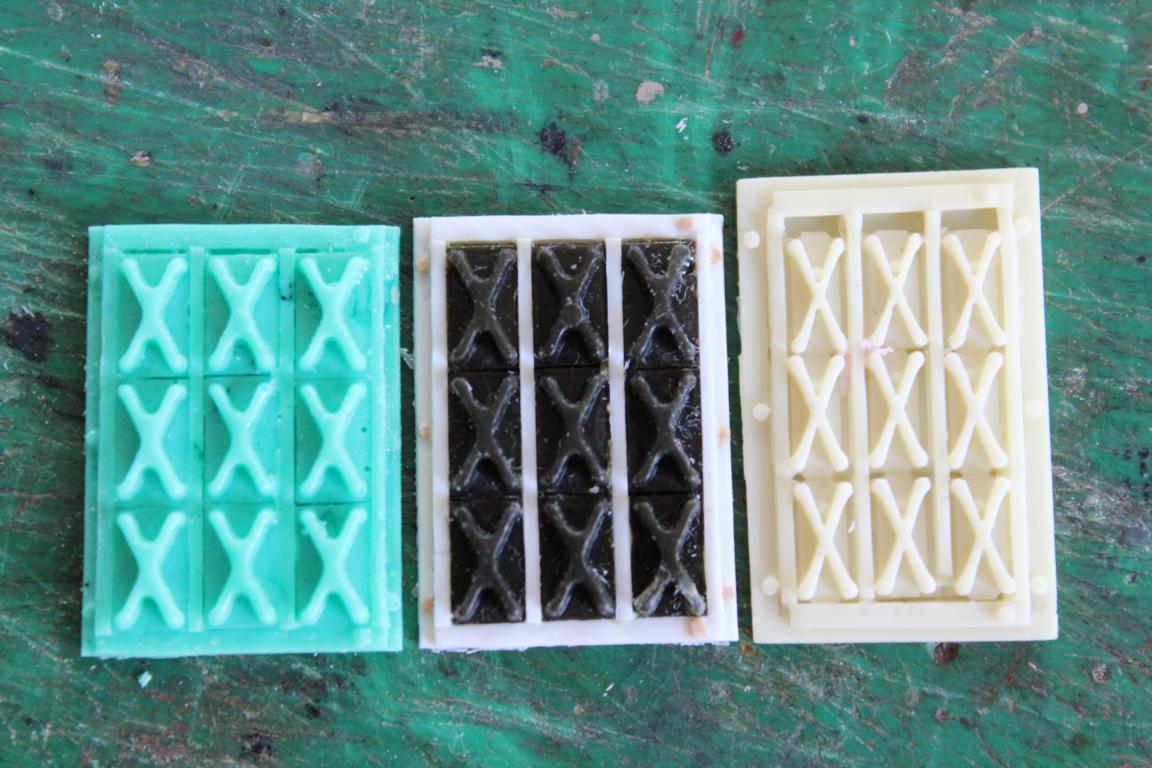
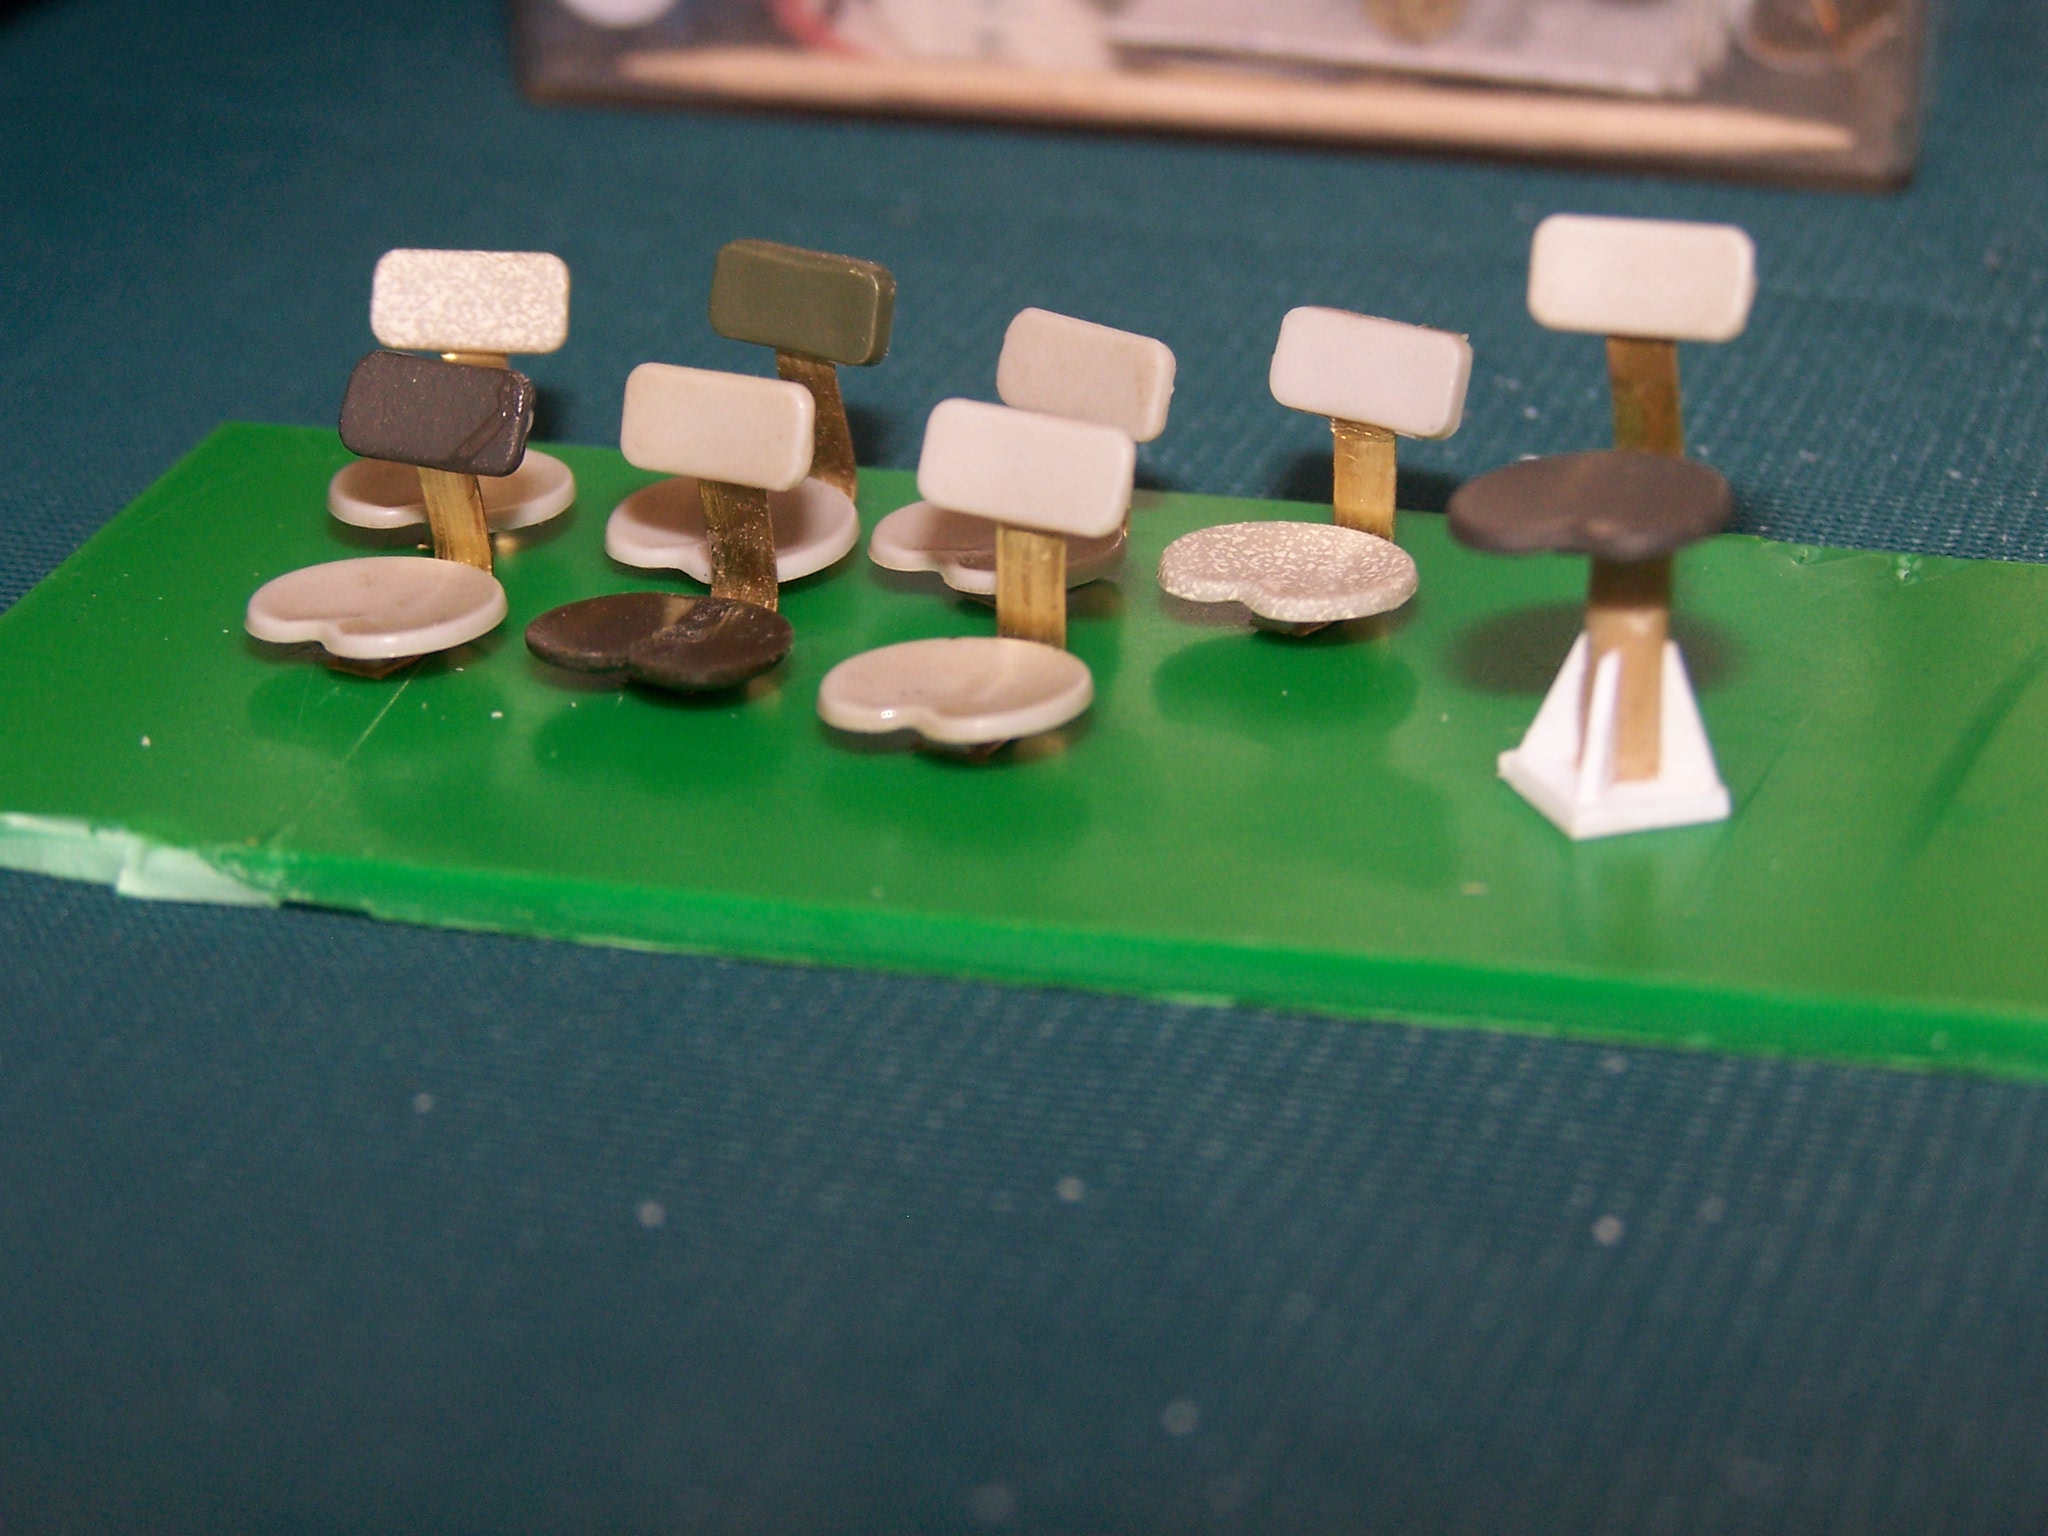
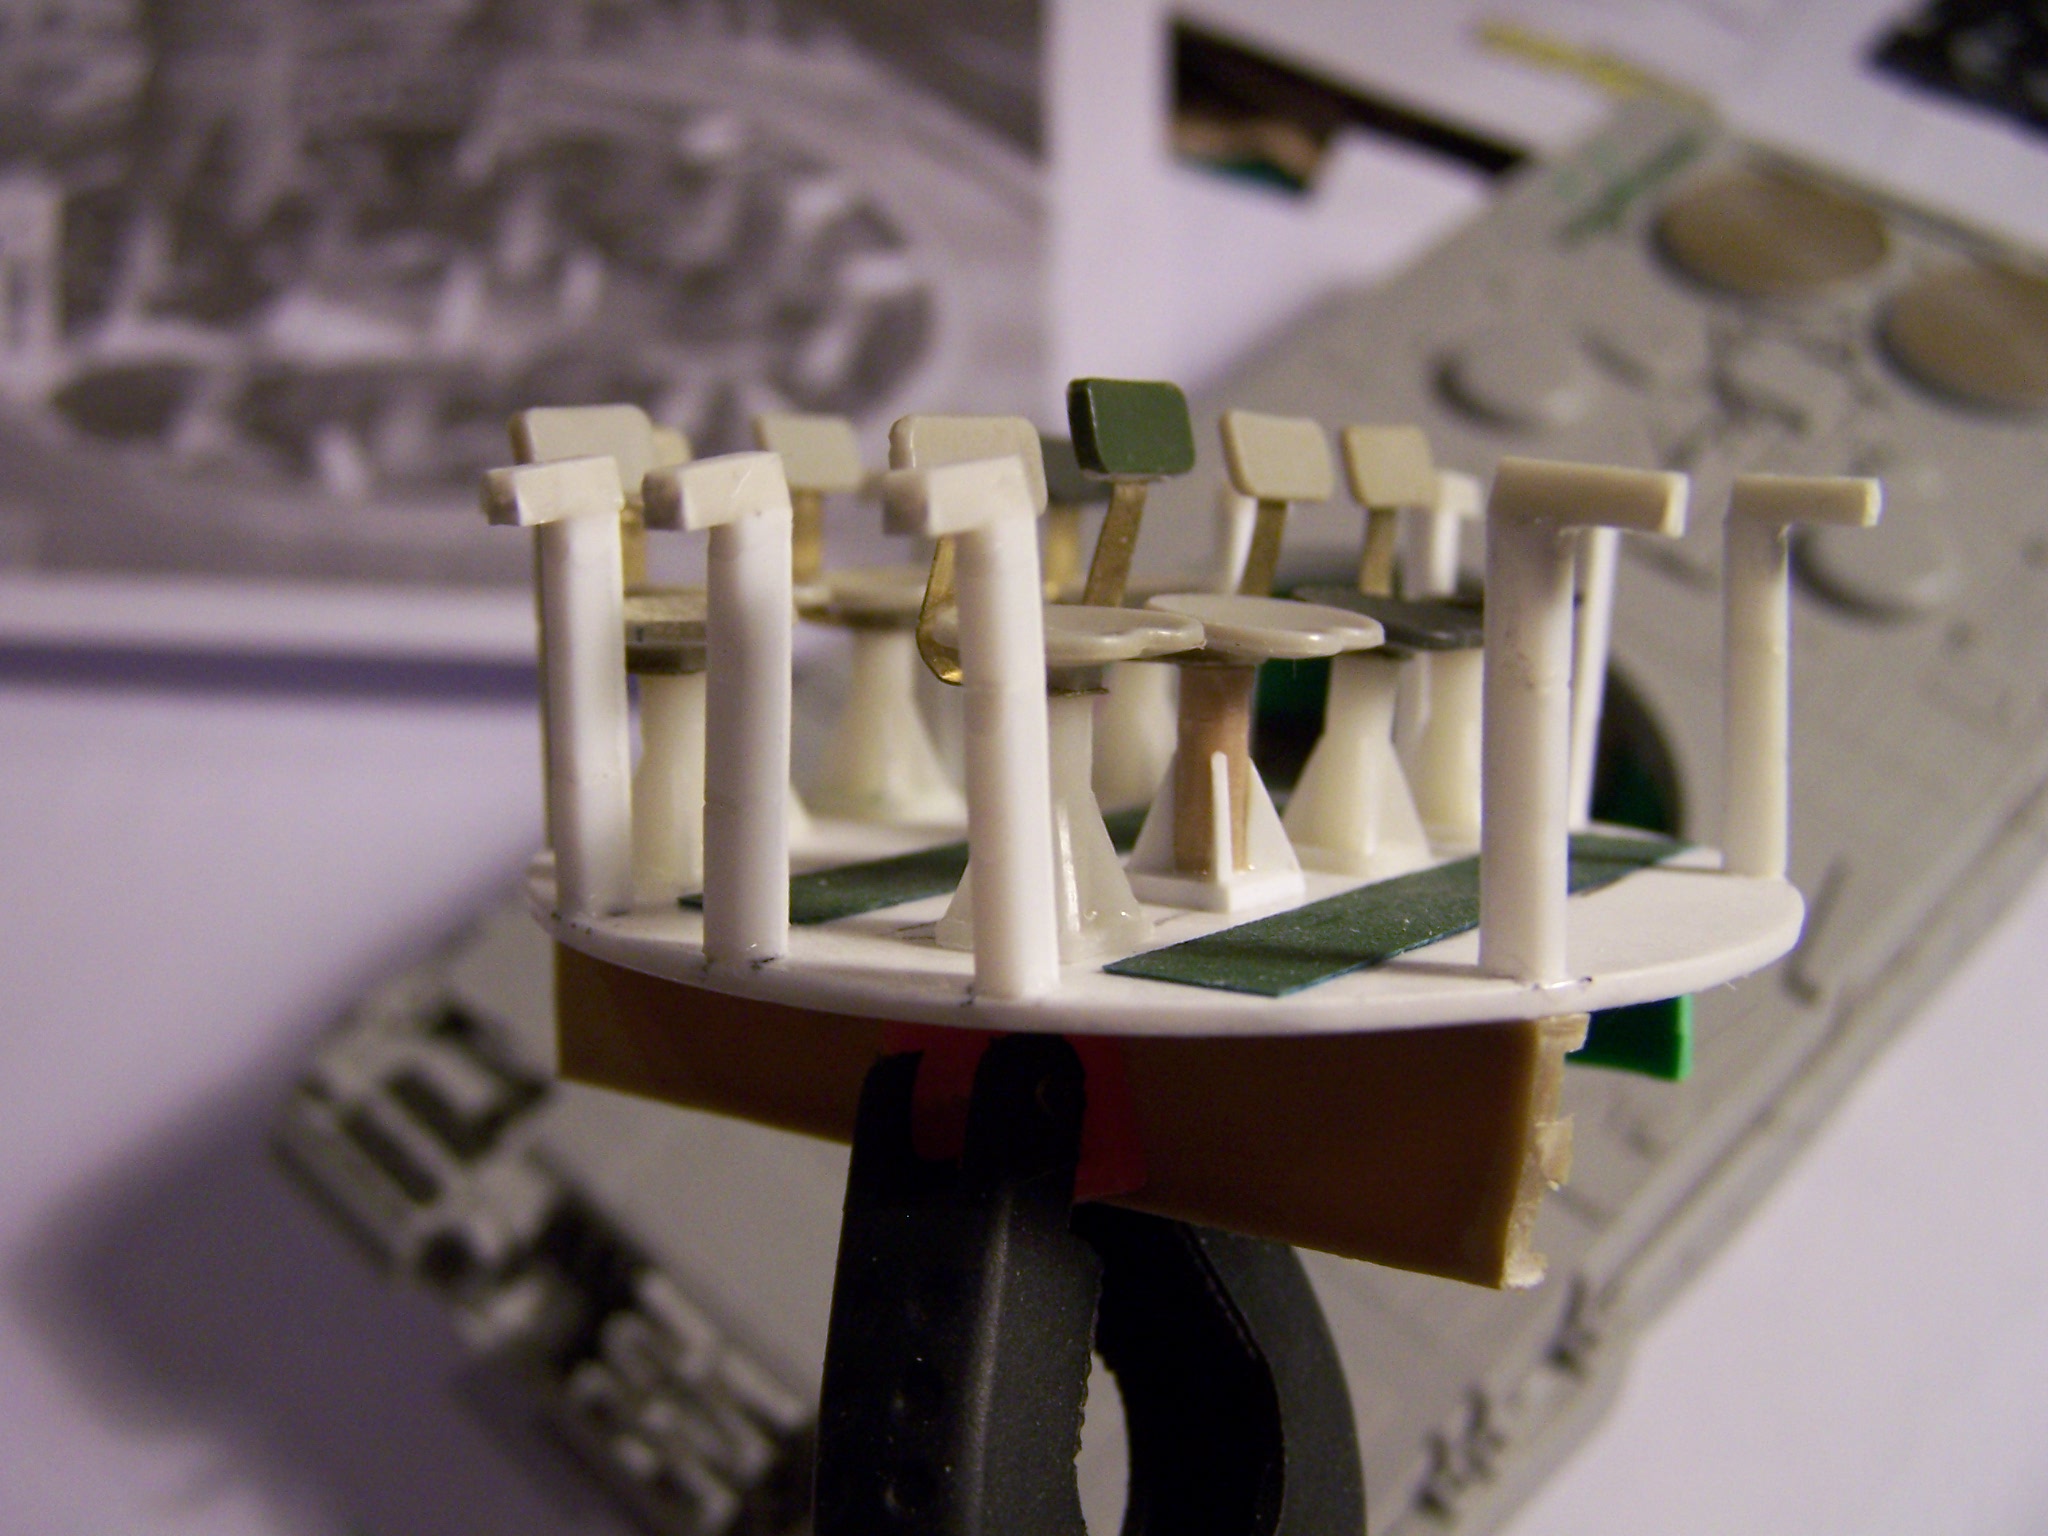
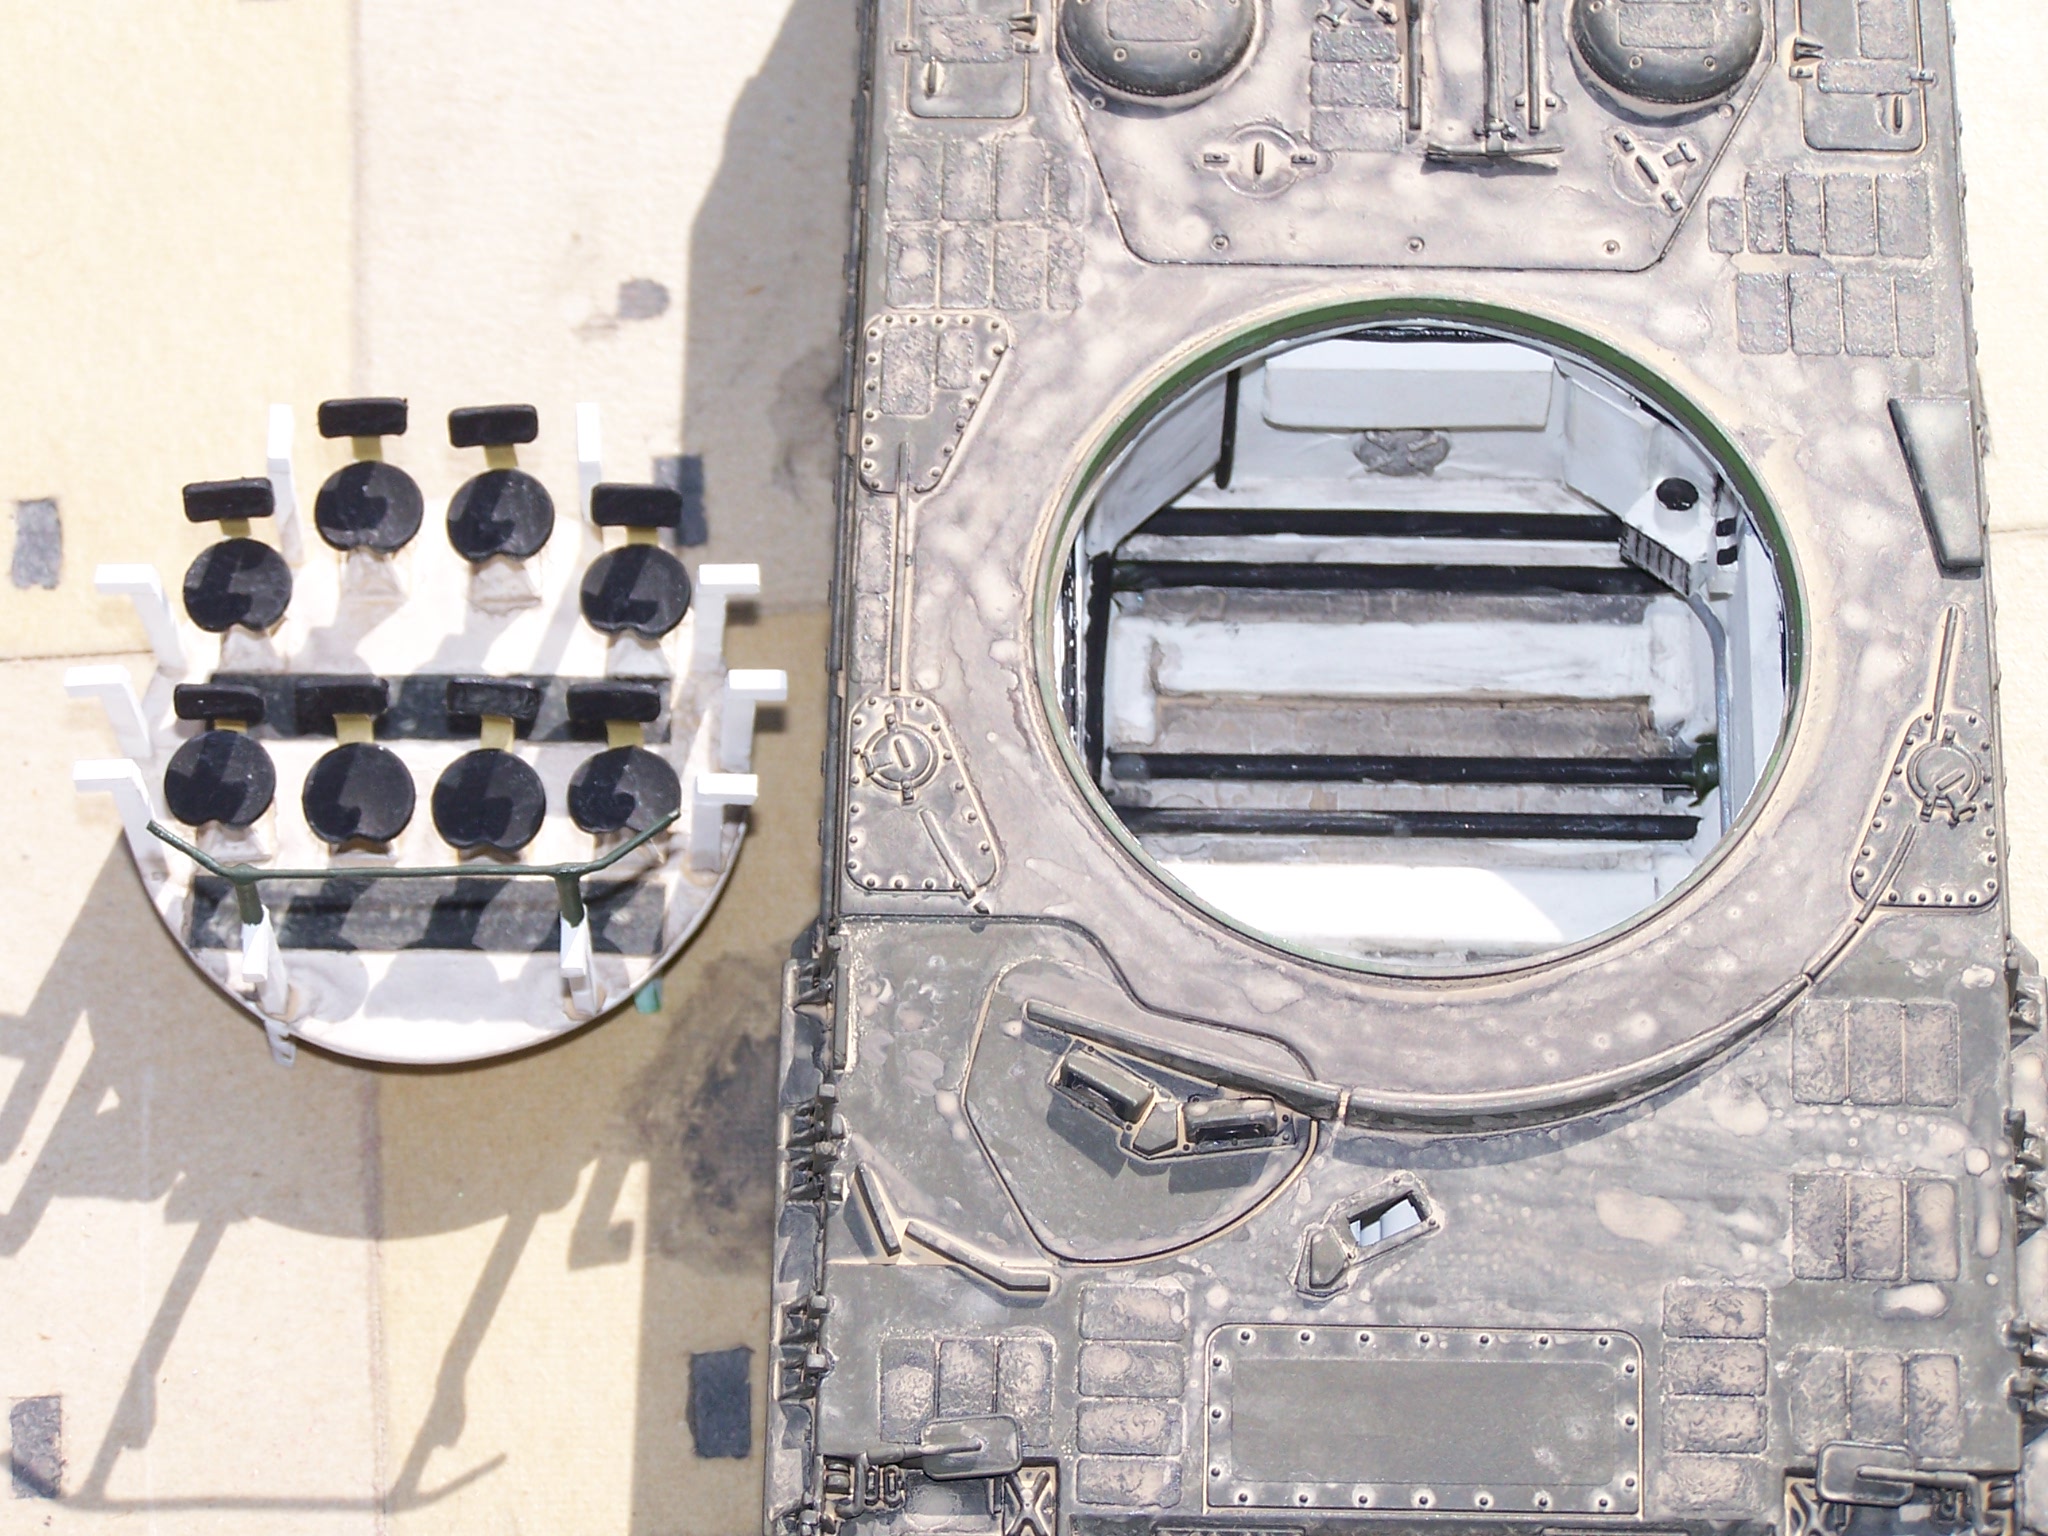
I only worked on the turret ring. The interior design, which could be seen when the turret was pulled, was a major effort. But since not much can be seen because of the seating, I did not go into exact details. The creation of the 10 brackets with which the seating platform hangs in the turntable was a nerve-racking job. The seats are made from several M113s that I got from a friend. I scratched one for the seat consoles and copy eight of them with resin. I bent the backrests out of metal strips.
The paint is in Revell 46 and Revell Aqua-Color 87 thin with water for the dirt (on some original pictures it looked more like a layer of dust). The decals are from the leftover, although the license plate is not original. I build him in 2010.


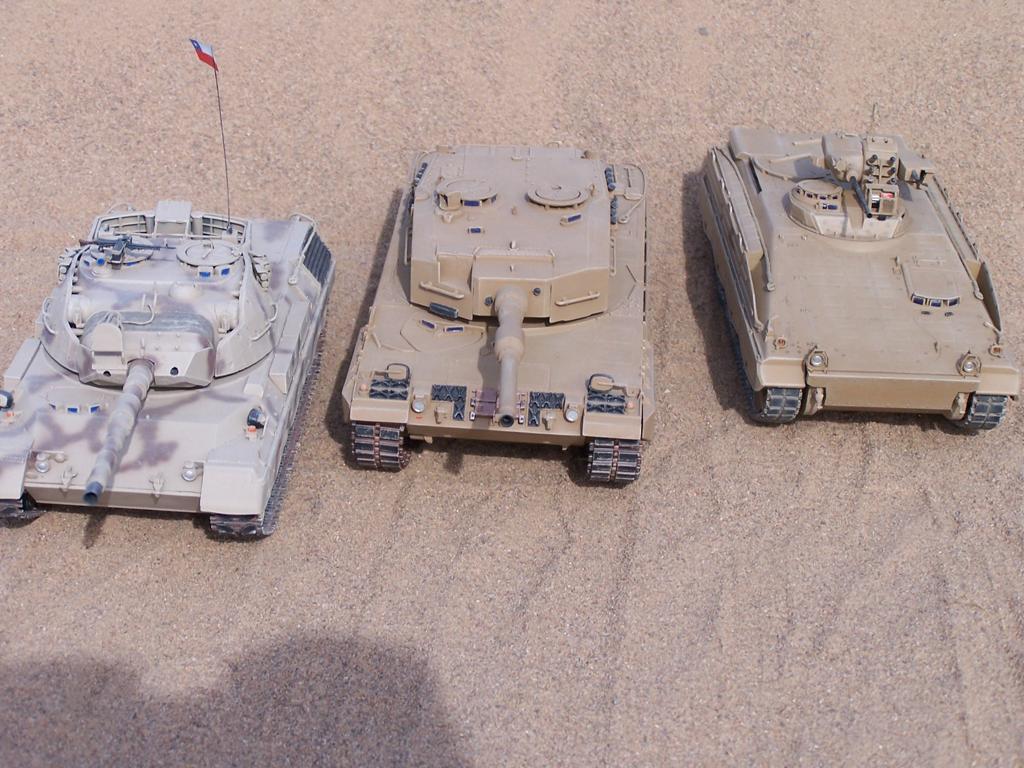
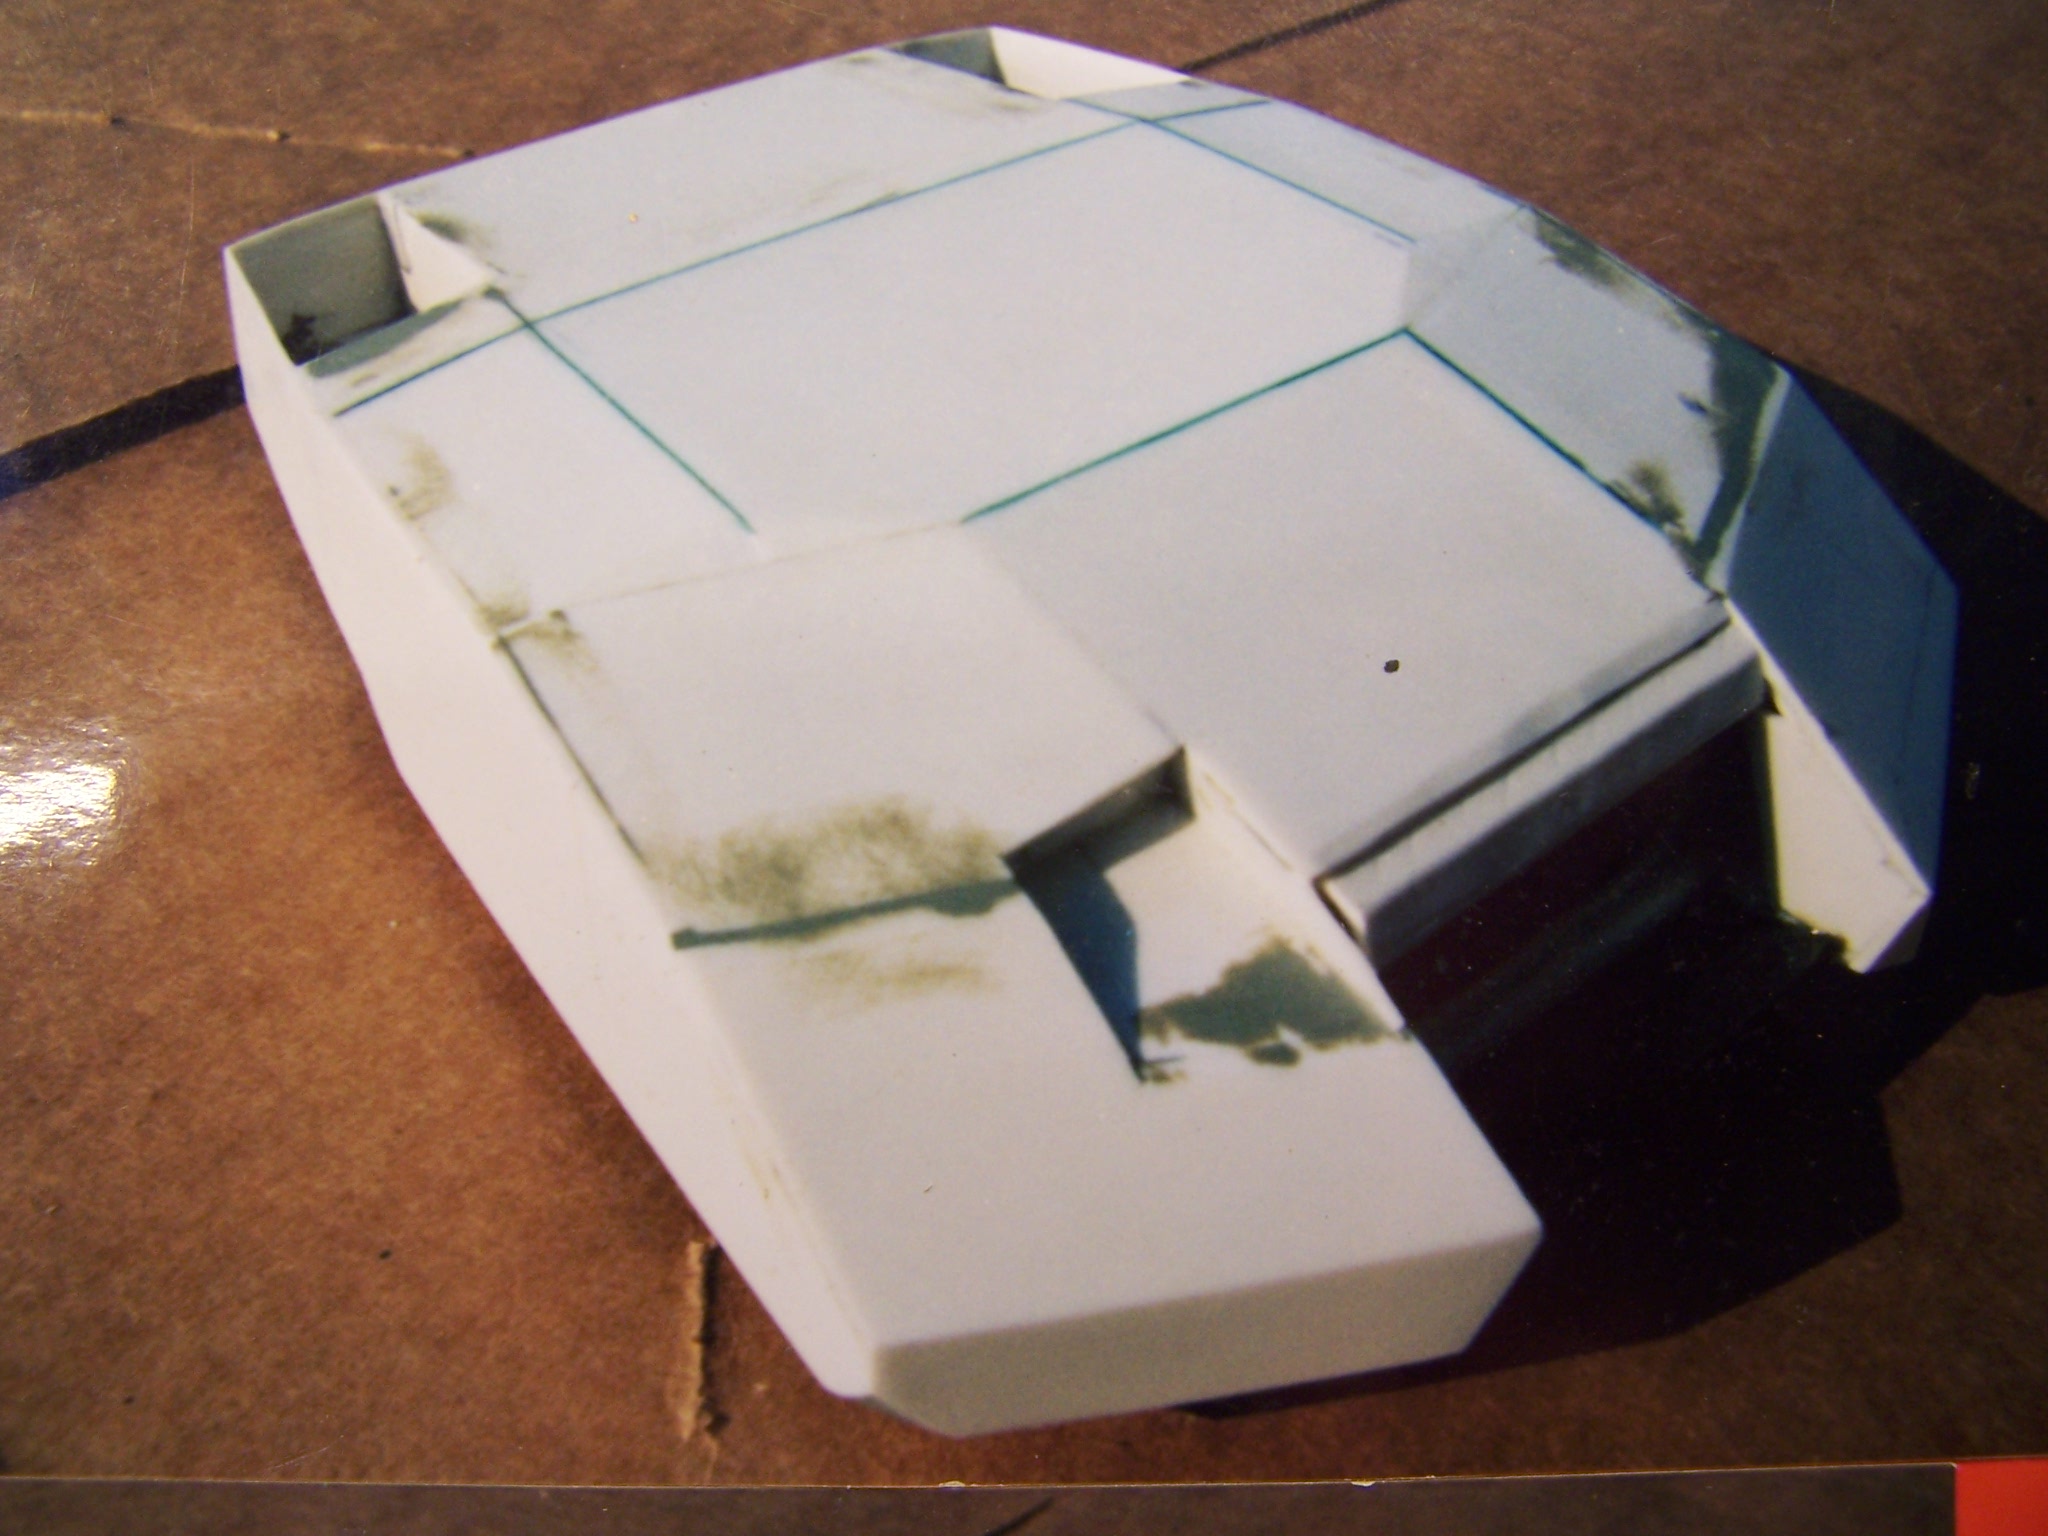
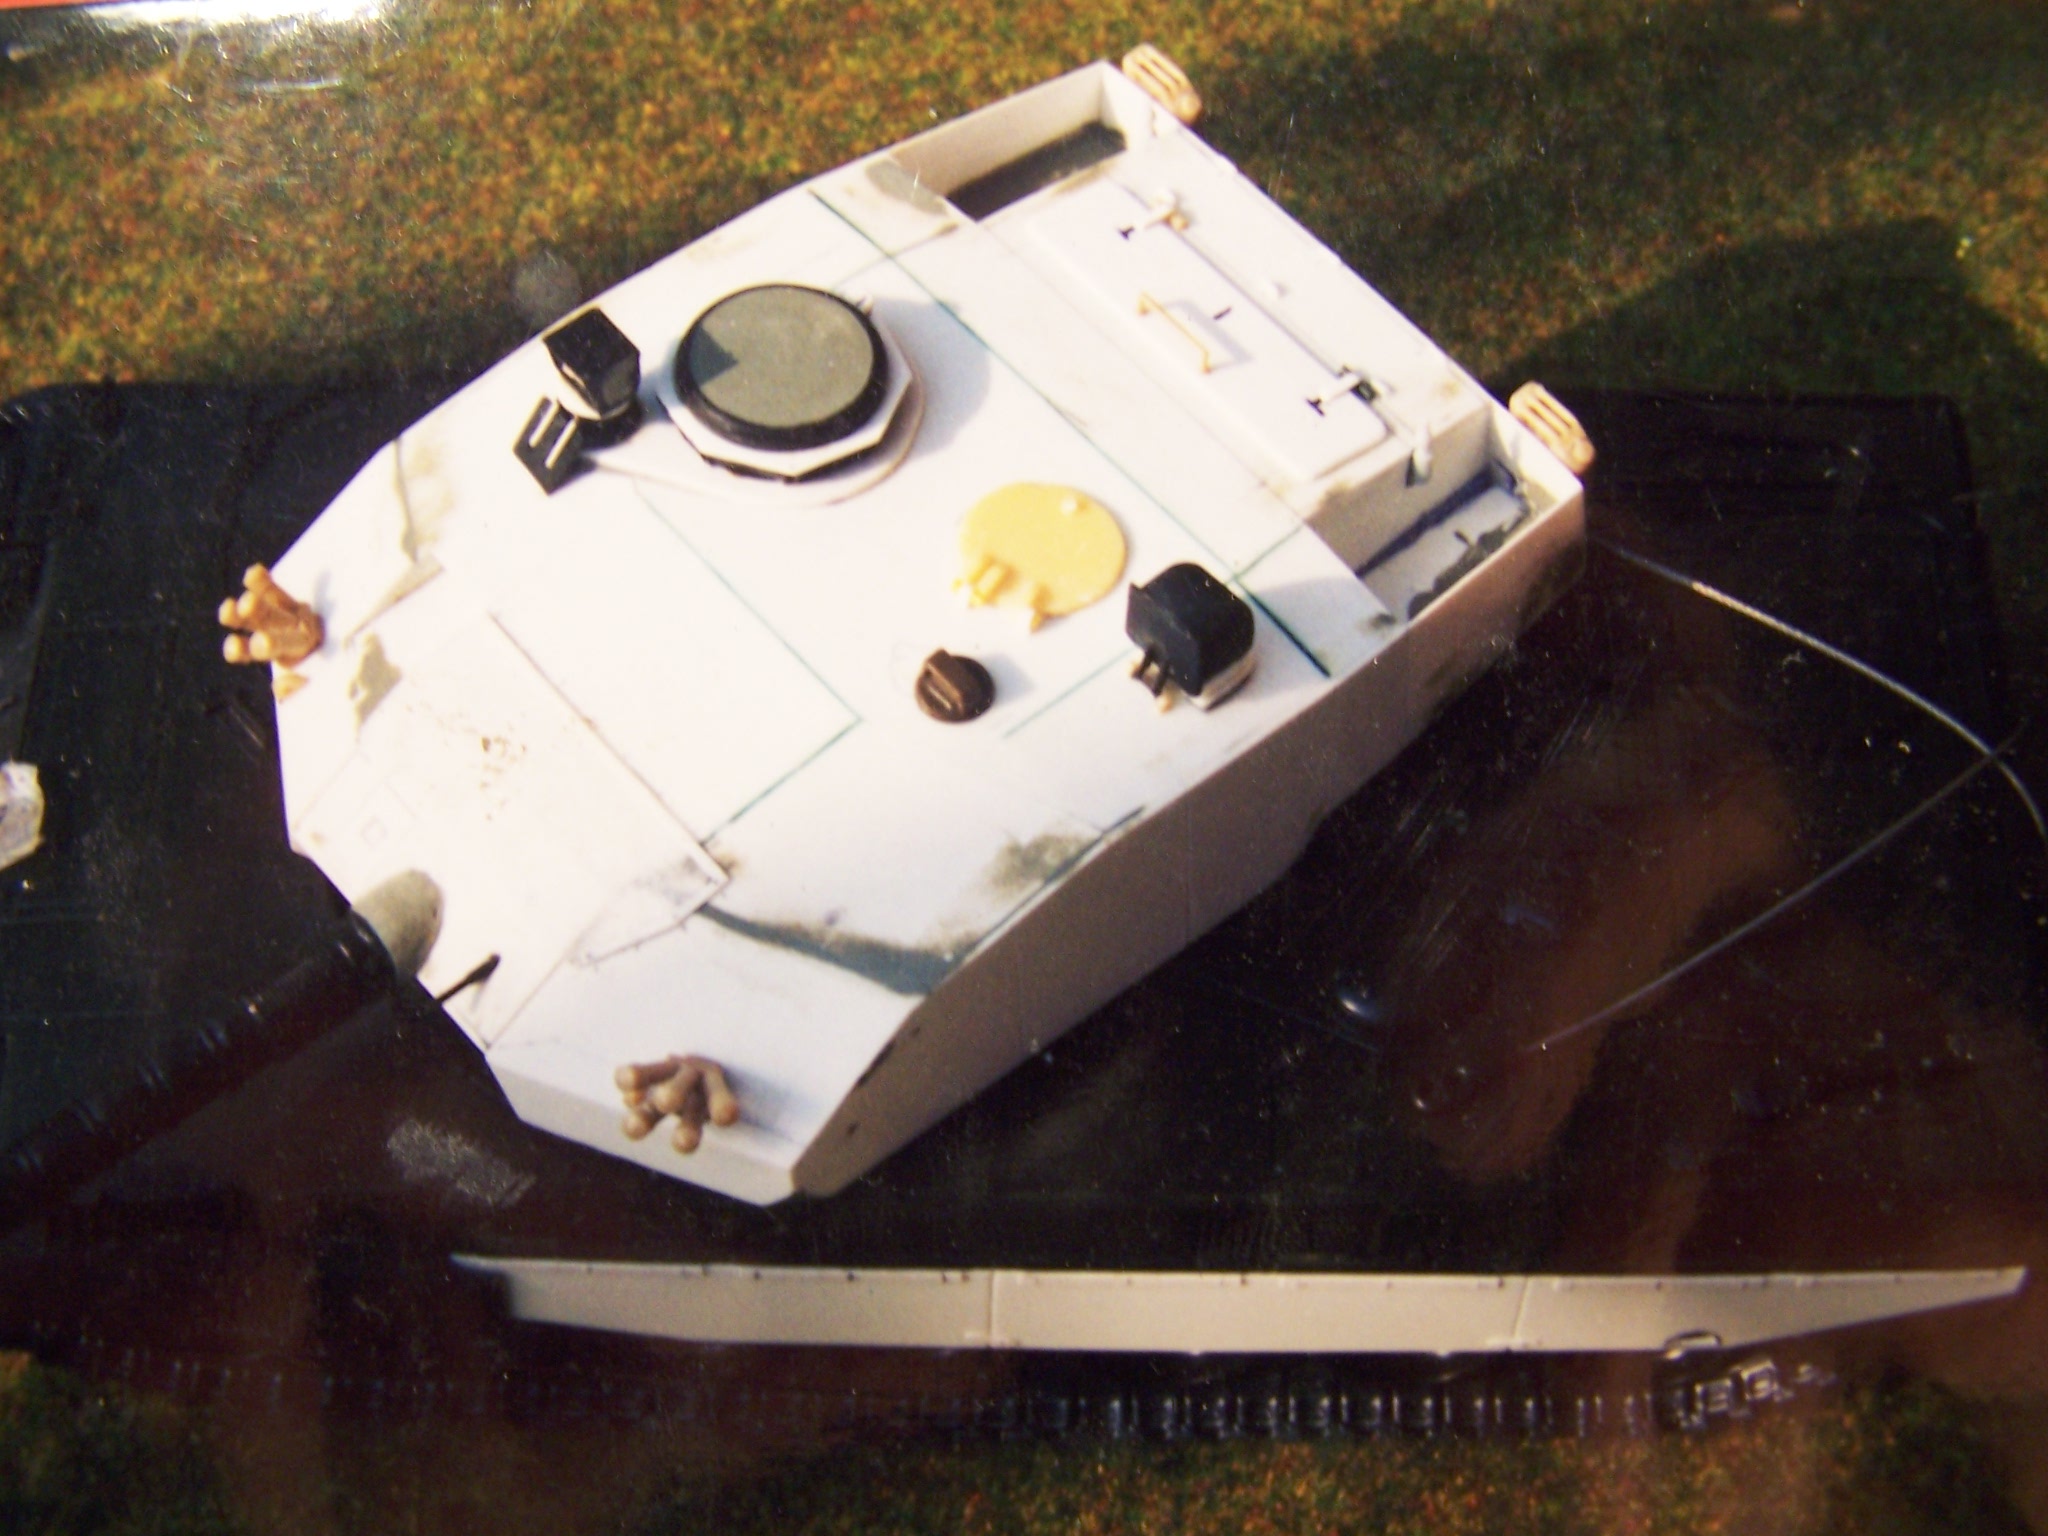
Hello, now British!!
This is a British prototype from 1986. Vickers combined the hull of a Leopard 2 with a new, British-designed turret. The turret look like that from the Vickers Vailant.
The turret was scratch-built with parts from a Tamiya Challenger 1 kit. The chassis is the old Italeri 2A4 kit. I build it in 1995.
Original photos? At the time I didn't have the internet – only some photos from military magazines. With these pictures I made my own drawing.
The colour is Revell 89.


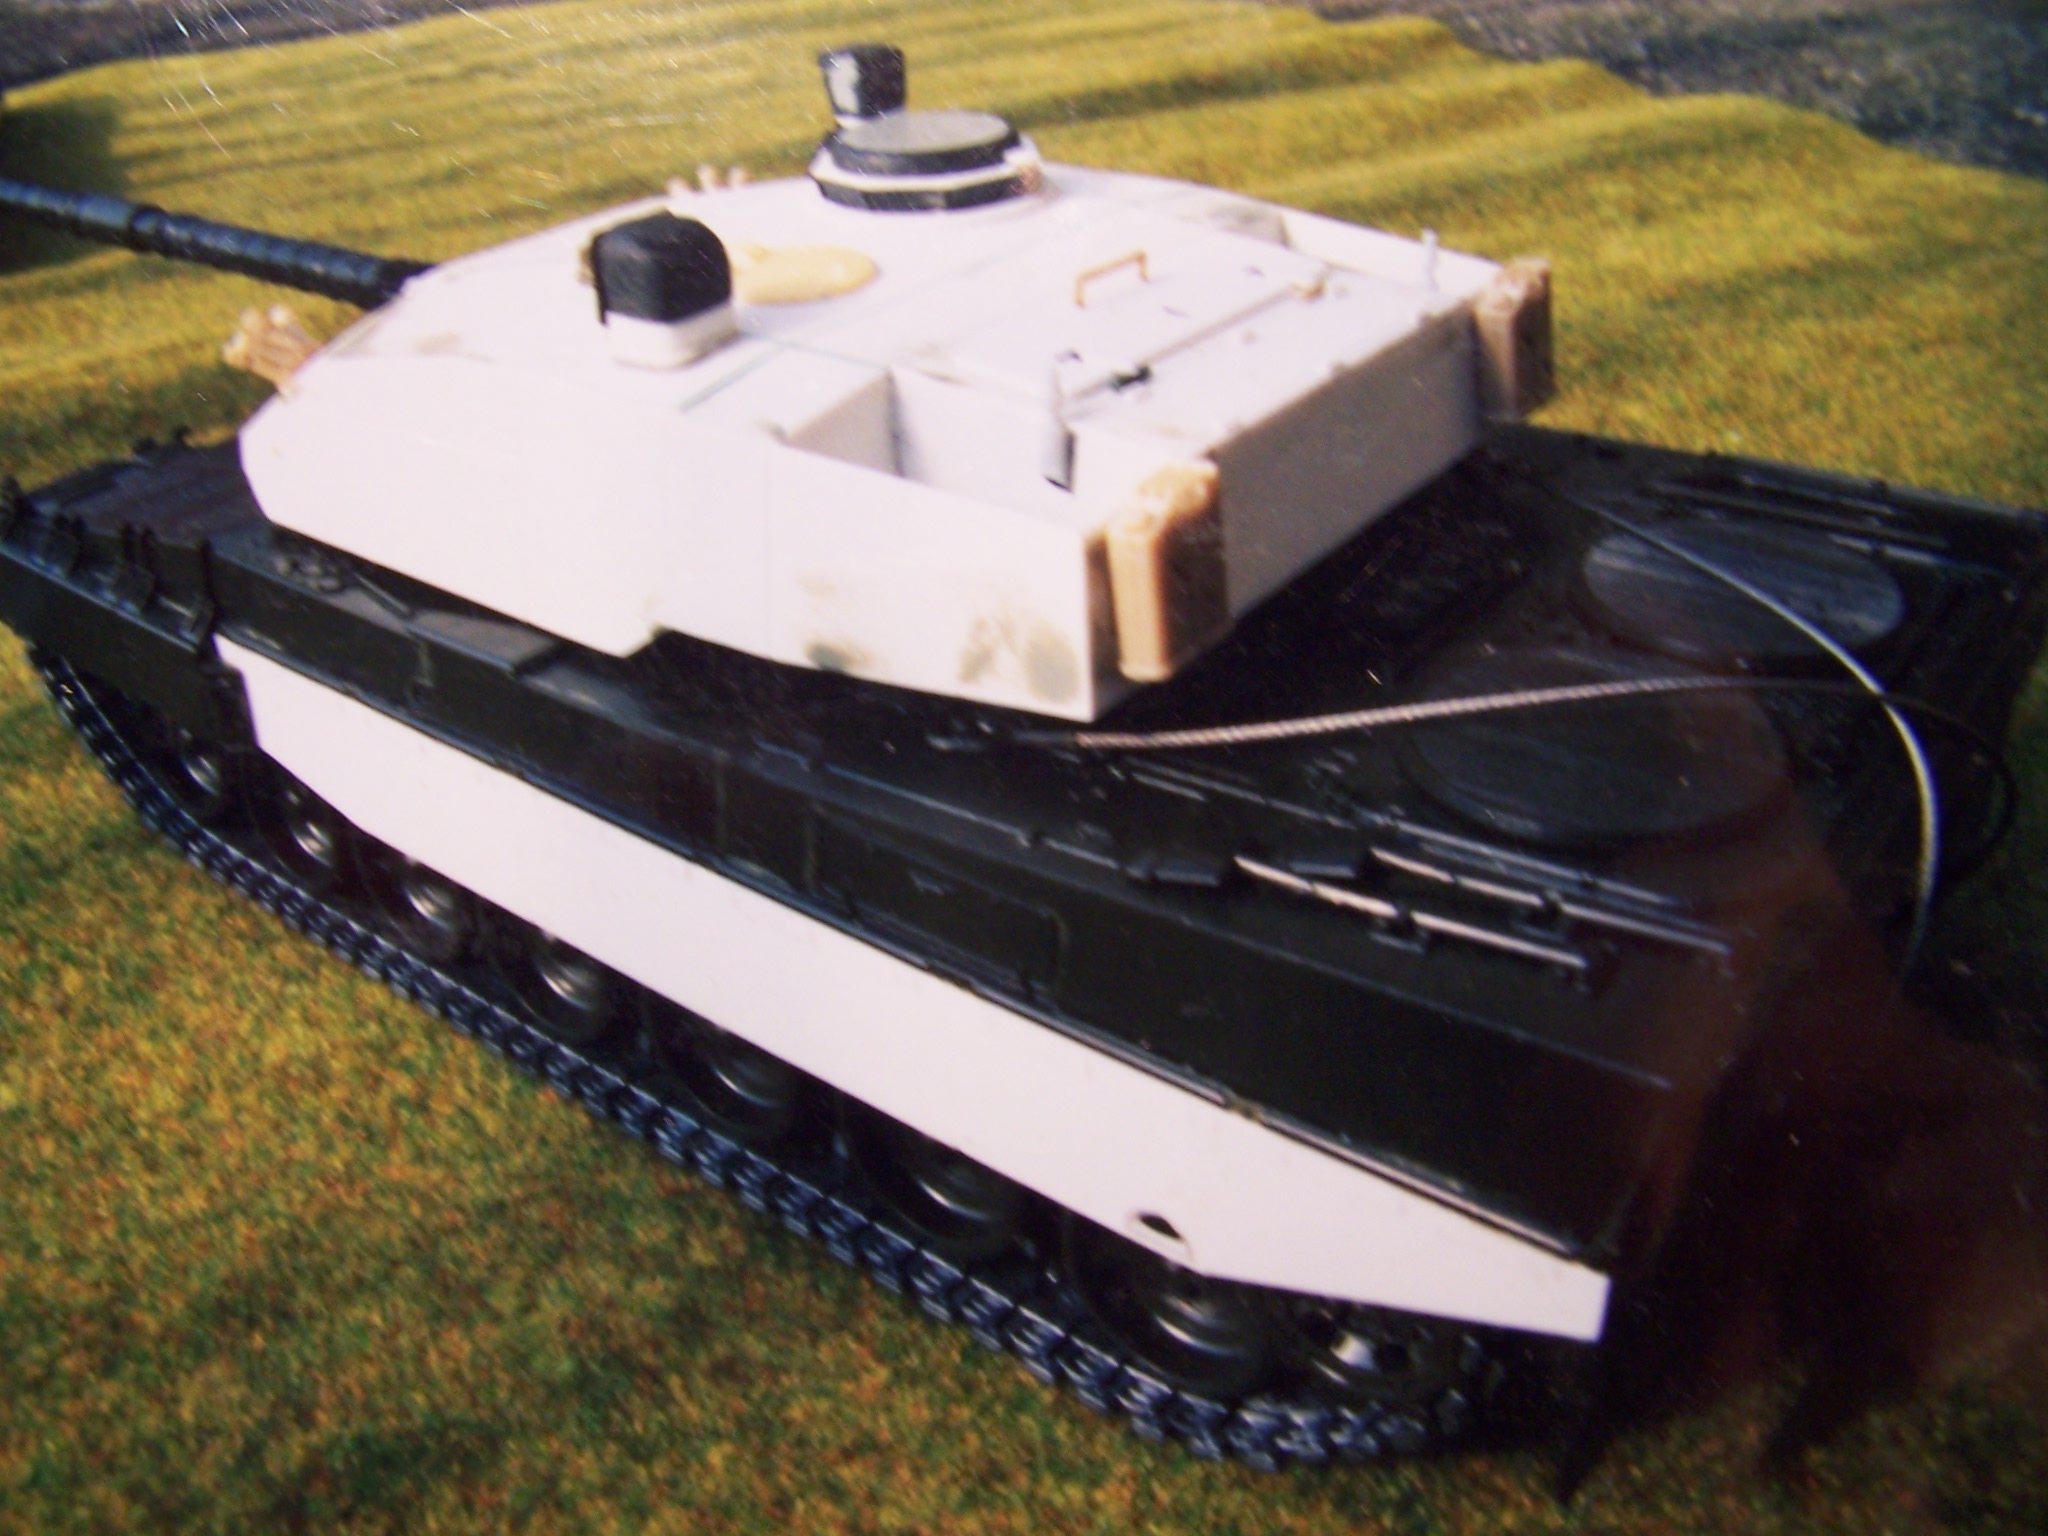
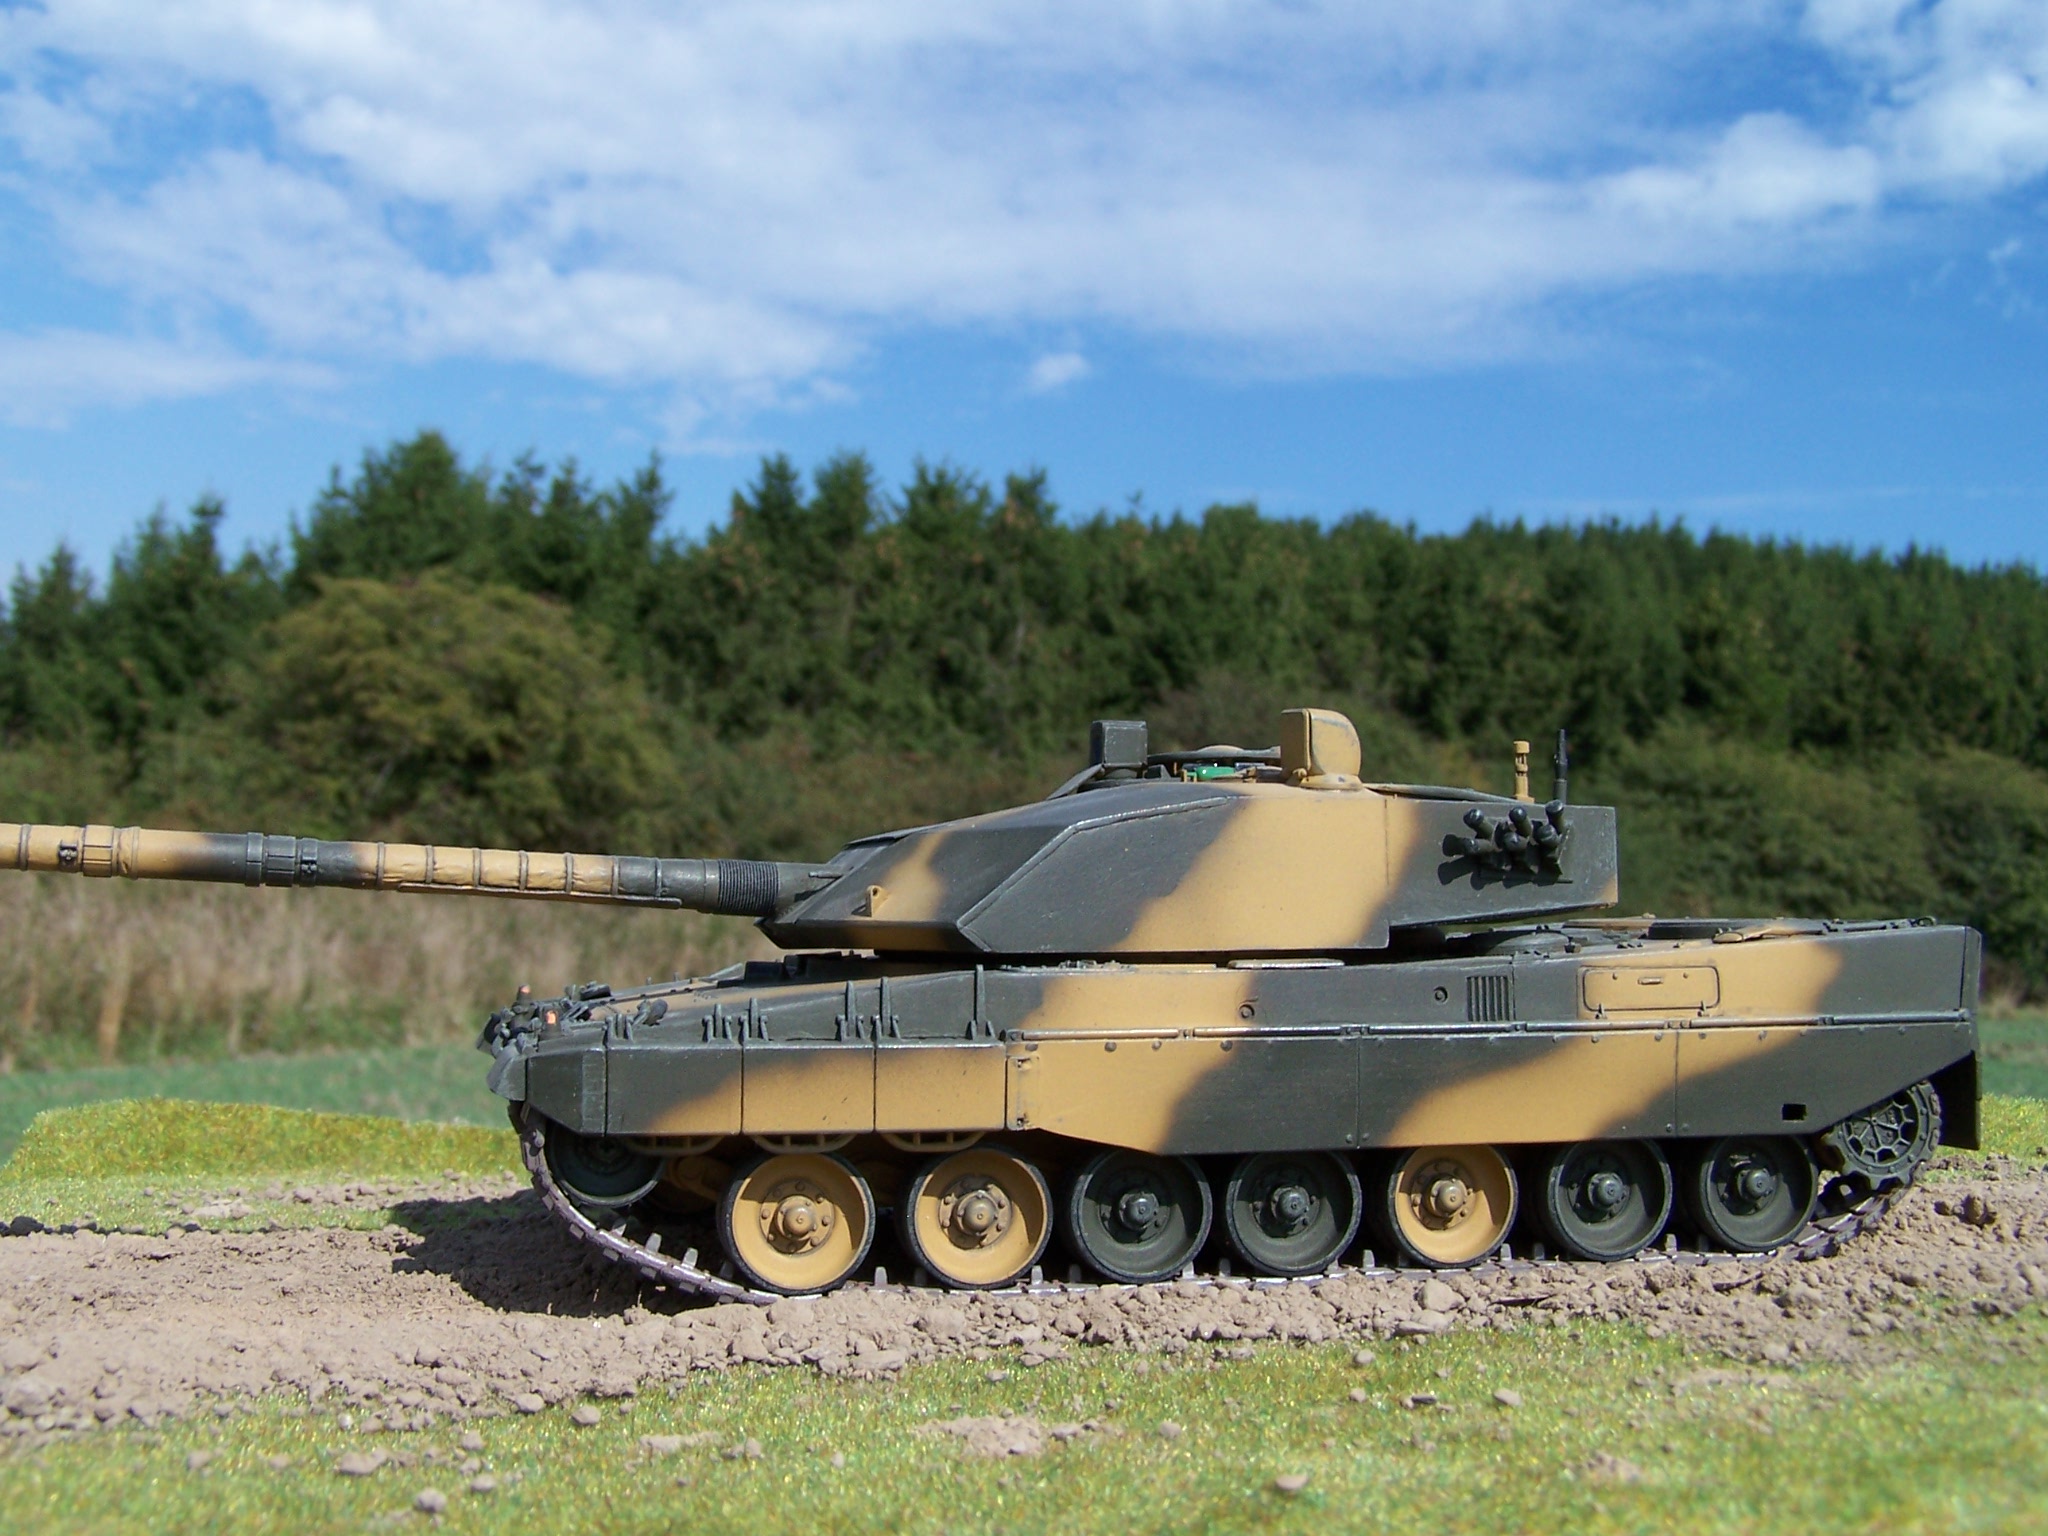
Now another Brit
A British prototype from 1988. A Leopard 2A4 with a turret that looks like a Challenger 1.
I had fun and made it radio-controlled. The base is Tamiya´s Leopard 2A5. The R/C-engineering and the chassis is from the Tamiya Leopard kit.
The Italeri upper hull fitted well onto the Tamiya chassis. The turret was scratched with parts from a Challenger 1 kit. I finished this R/C-model in 2007. The camouflage is with Tamiya XF59 + 62.


© Leopard Club
![]() Contact us at leopardfibel@gmail.com
Contact us at leopardfibel@gmail.com